
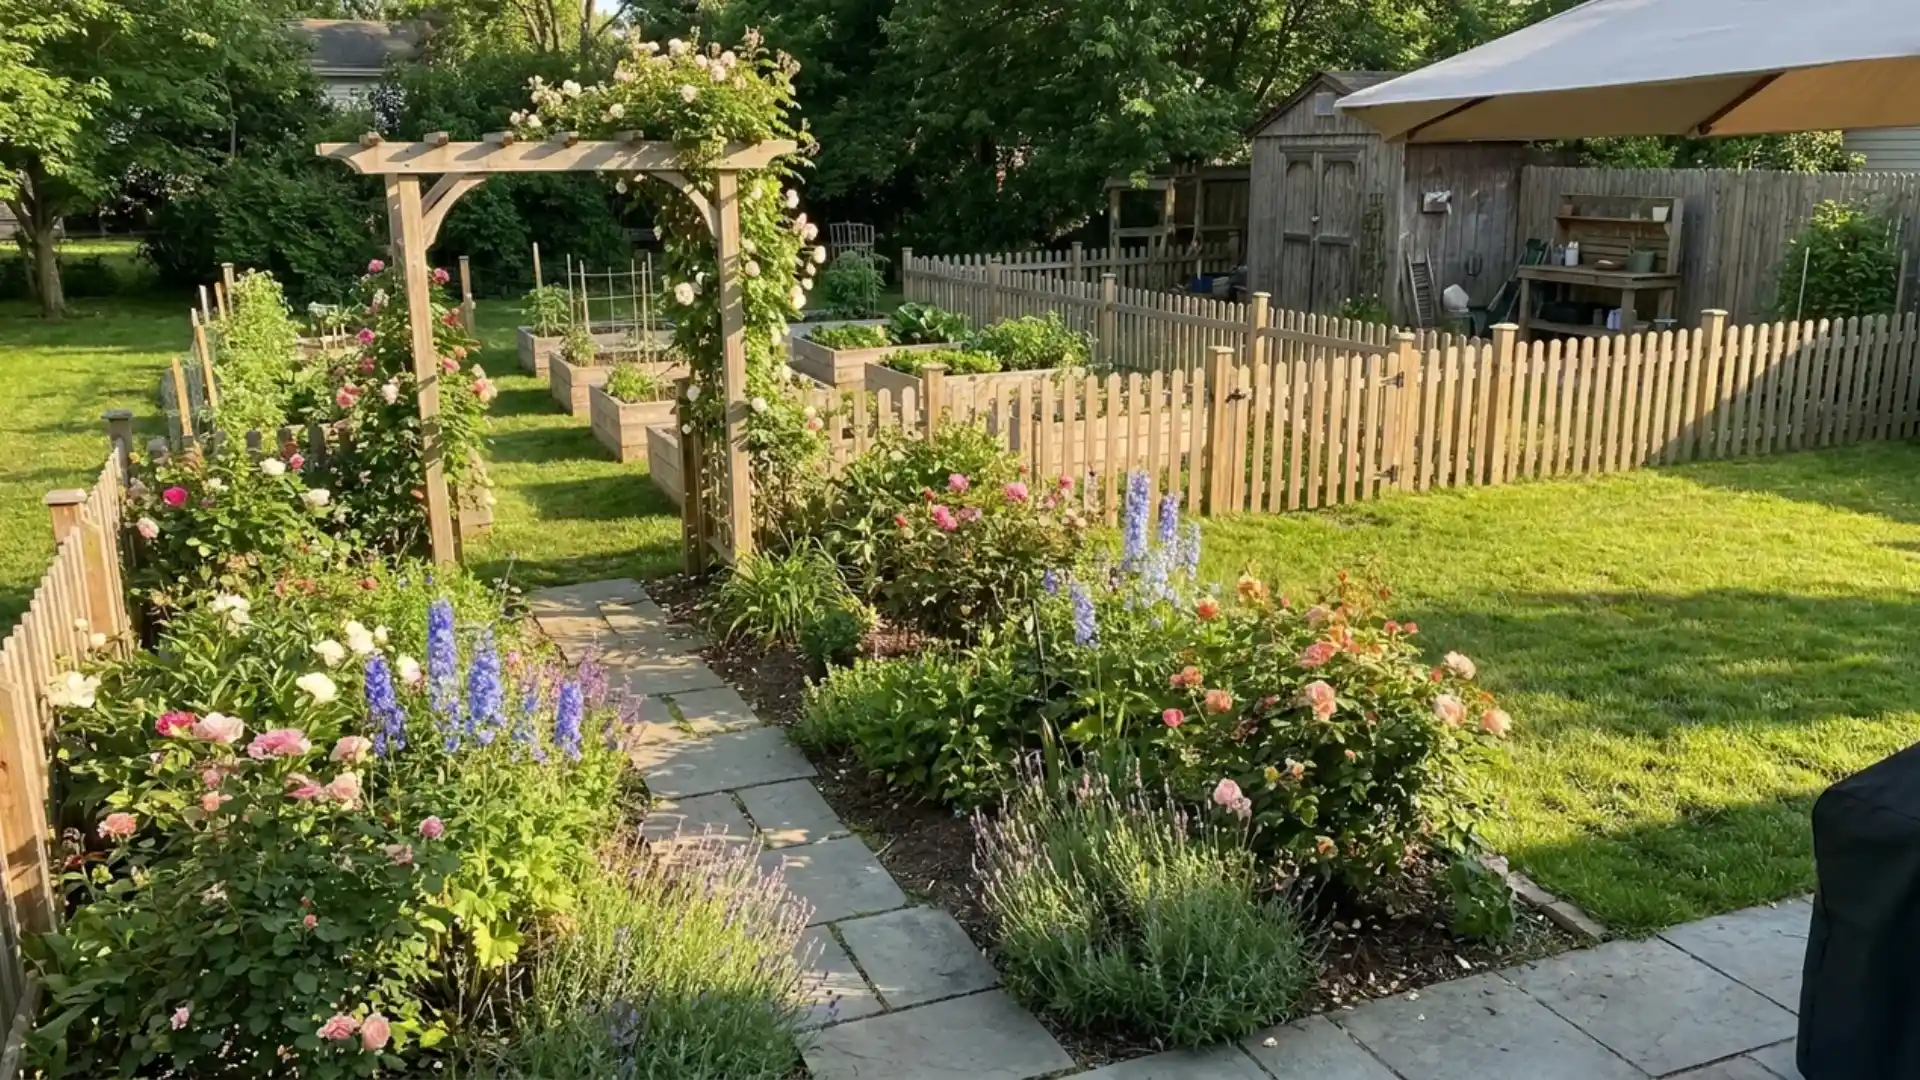
A store-bought planter or trellis can cost more than the materials needed to build several of your own.
These DIY garden ideas use scrap wood, old ladders, pallets, and other basic materials to build planters, trellises, pathways, seating, lighting, and storage for a fraction of the retail price.
Each project lists the tools needed, the time it takes, and the skill level required, so you can pick one that fits your weekend and your budget.
I have built several of these in my own yard, and picked the rest for how well they hold up outdoors over a full season.
How to Choose the Right DIY Garden Project?
With a list this long, a quick filter before picking up a tool saves a redo later. A few checks narrow it down fast:
- Start with the Problem You are Solving: Poor soil, limited planting space, cluttered tools, erosion, no privacy, or not enough seating each points toward a different project.
- Match the Project to Your Space: Ground-level beds, vertical planters, fence-mounted trellises, patio builds, and freestanding structures each suit a different yard layout.
- Check Materials and Tools Before Starting: Most projects call for basic supplies like lumber, galvanized hardware, landscape fabric, gravel, pavers, wire mesh, containers, or outdoor-rated finishes.
- Plan for Drainage and Weather Exposure: This matters most for planters, paths, wood builds, and anything holding standing water.
- Choose Materials Rated for Outdoor Use: Rot-resistant lumber and outdoor-rated finishes hold up far longer than assuming any reclaimed wood or scrap material will do the job.
In my experience, skipping that drainage check is the most common reason a planter project fails within the first year. Working through these points before you start saves time, no matter which project ends up on the list.
DIY Garden Ideas Worth Building
Each project below lists the tools, materials, and time needed to build it. Pick one that matches your skill level and get started:
1. Build a Ladder Flower Stand
- Tools and materials needed: Old wooden ladder, sandpaper, paint or stain, small planters
- Time required: Under one hour
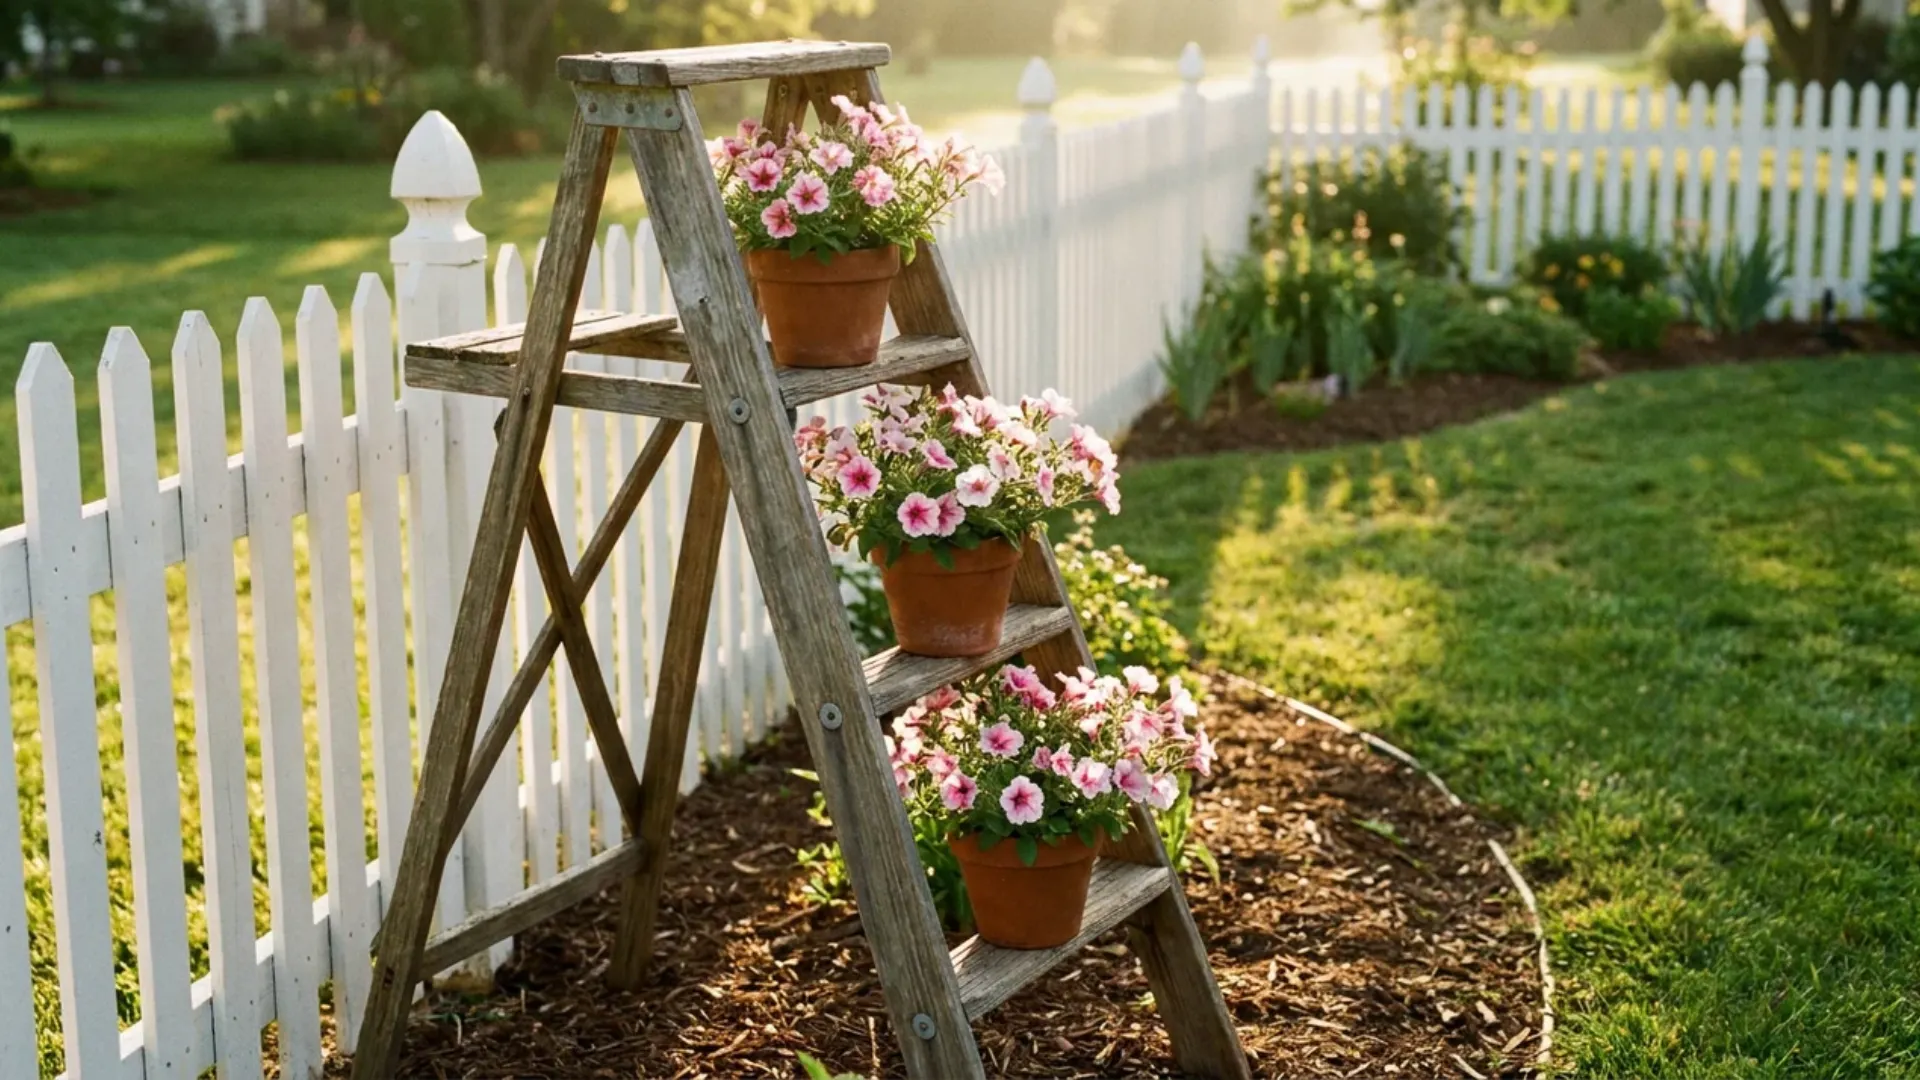
An old wooden ladder makes an easy flower stand. Sand any rough spots, then paint or stain it to match the yard’s palette.
Lean it against a wall or fence, and rest small potted plants on each rung.
Stagger pot sizes to add visual interest and keep taller plants from blocking shorter ones. This works well on porches, patios, or narrow side yards.
2. Make a Wooden Toolbox Planter
- Tools and materials needed: Old wooden toolbox, drill, exterior sealant, potting soil
- Time required: Approximately 1 to 2 hours
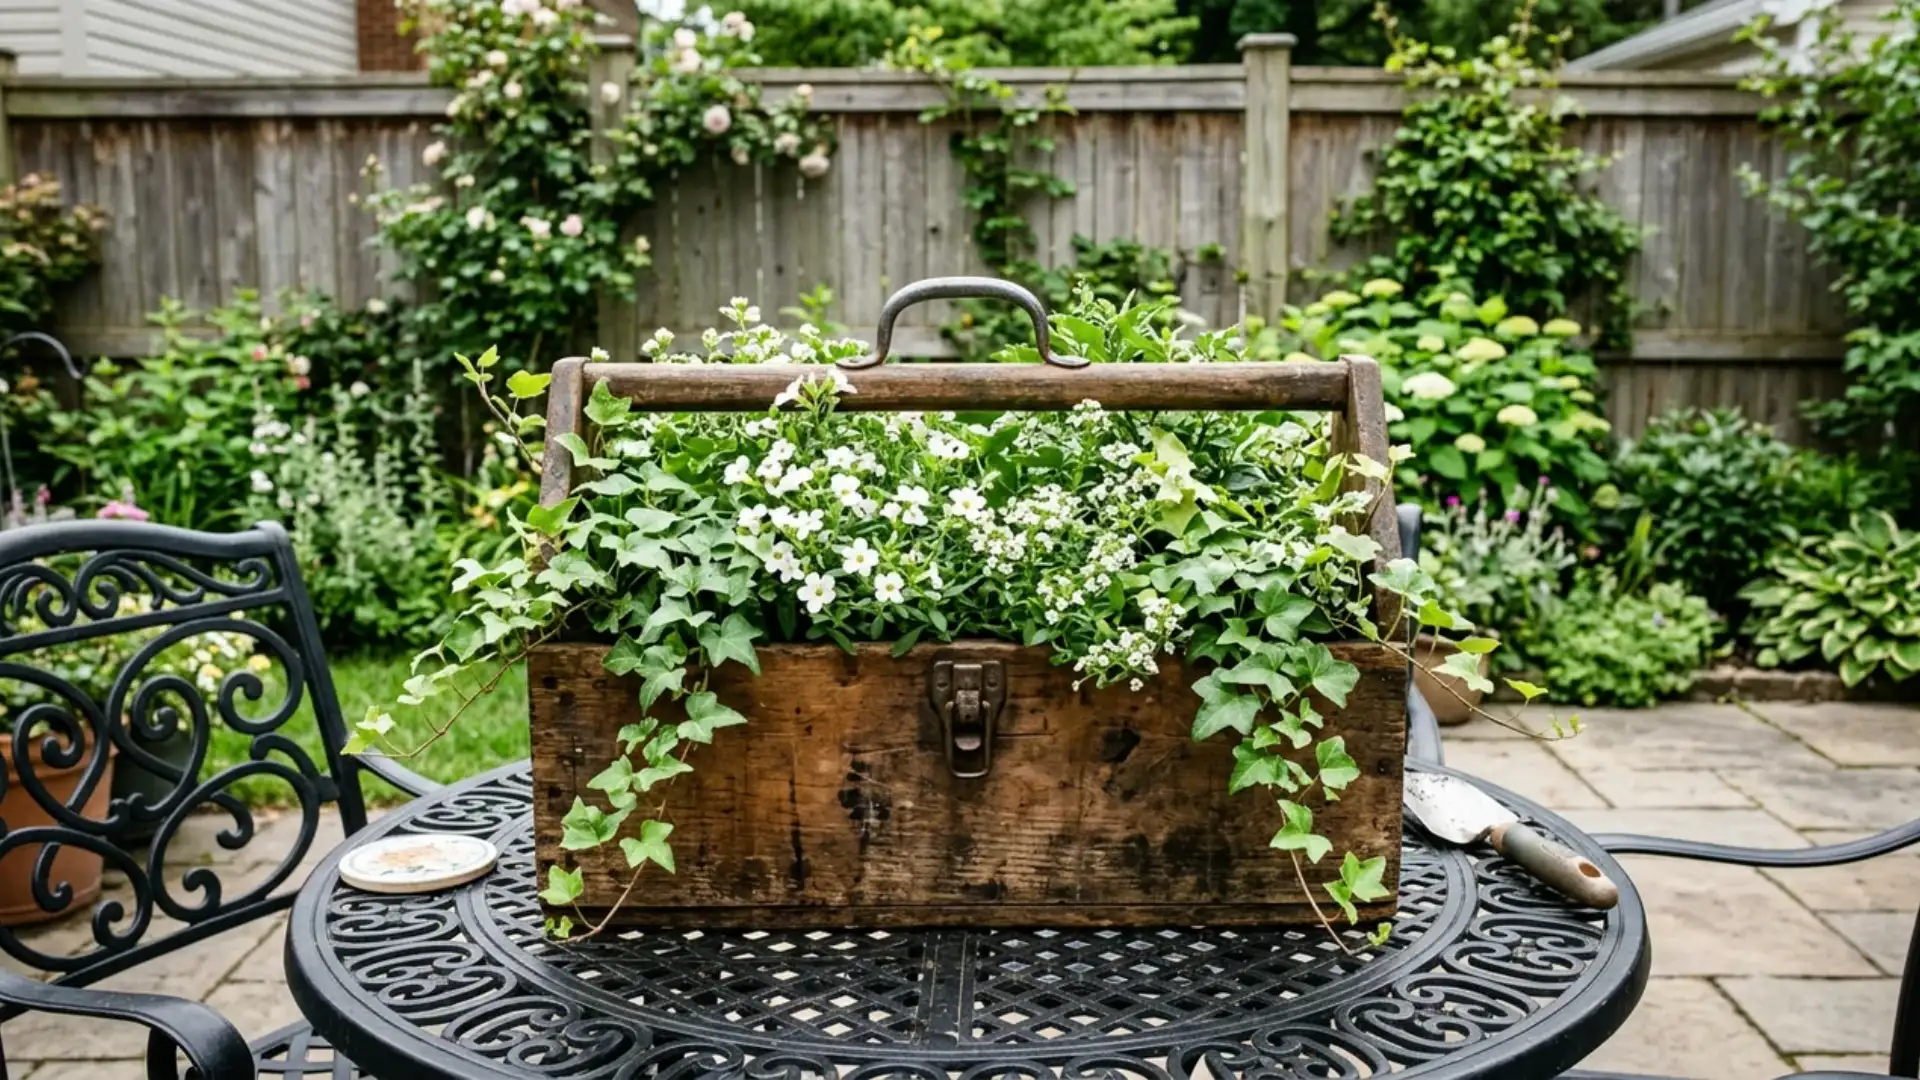
A worn wooden toolbox gets a second life as a rustic planter.
Drill a few drainage holes in the bottom, then coat the inside with exterior sealant to protect against moisture.
Fill it with potting soil and plant trailing flowers or small herbs. The built-in handle makes it easy to move around the patio whenever the light shifts.
3. Build a Rustic Window Box
- Tools and materials needed: Cedar boards, screws, drill, exterior paint, brackets
- Time required: Approximately 3 to 4 hours
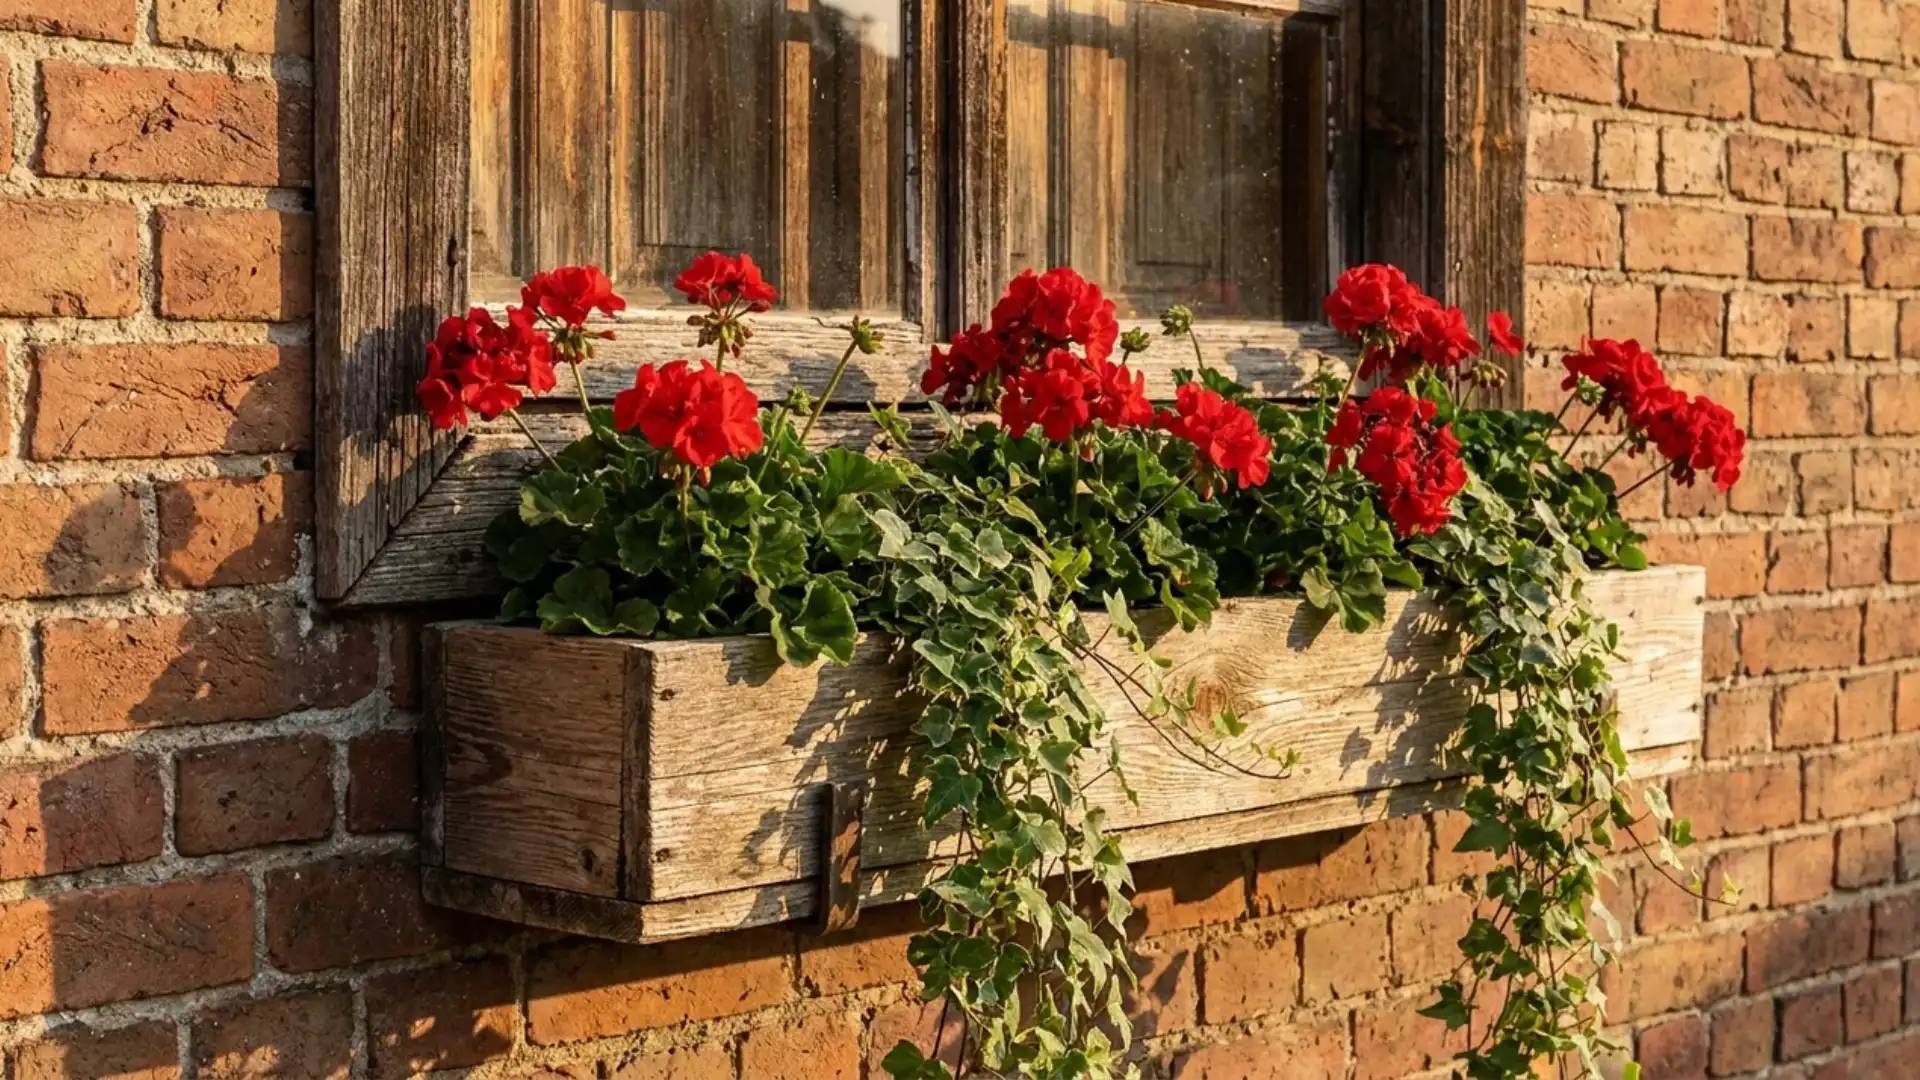
Cedar boards cut to size and screwed into a rectangular frame create a sturdy window box built to last outdoors.
Attach it beneath a window using exterior-rated brackets, making sure it sits level and secure.
A coat of exterior paint in a shade matching the home’s trim finishes the look. Fill with seasonal flowers or trailing greenery for instant curb appeal.
4. Build a Garden Kneeler Bench
- Tools and materials needed: Wood boards, screws, drill, foam padding, outdoor fabric
- Time required: Approximately 3 to 4 hours
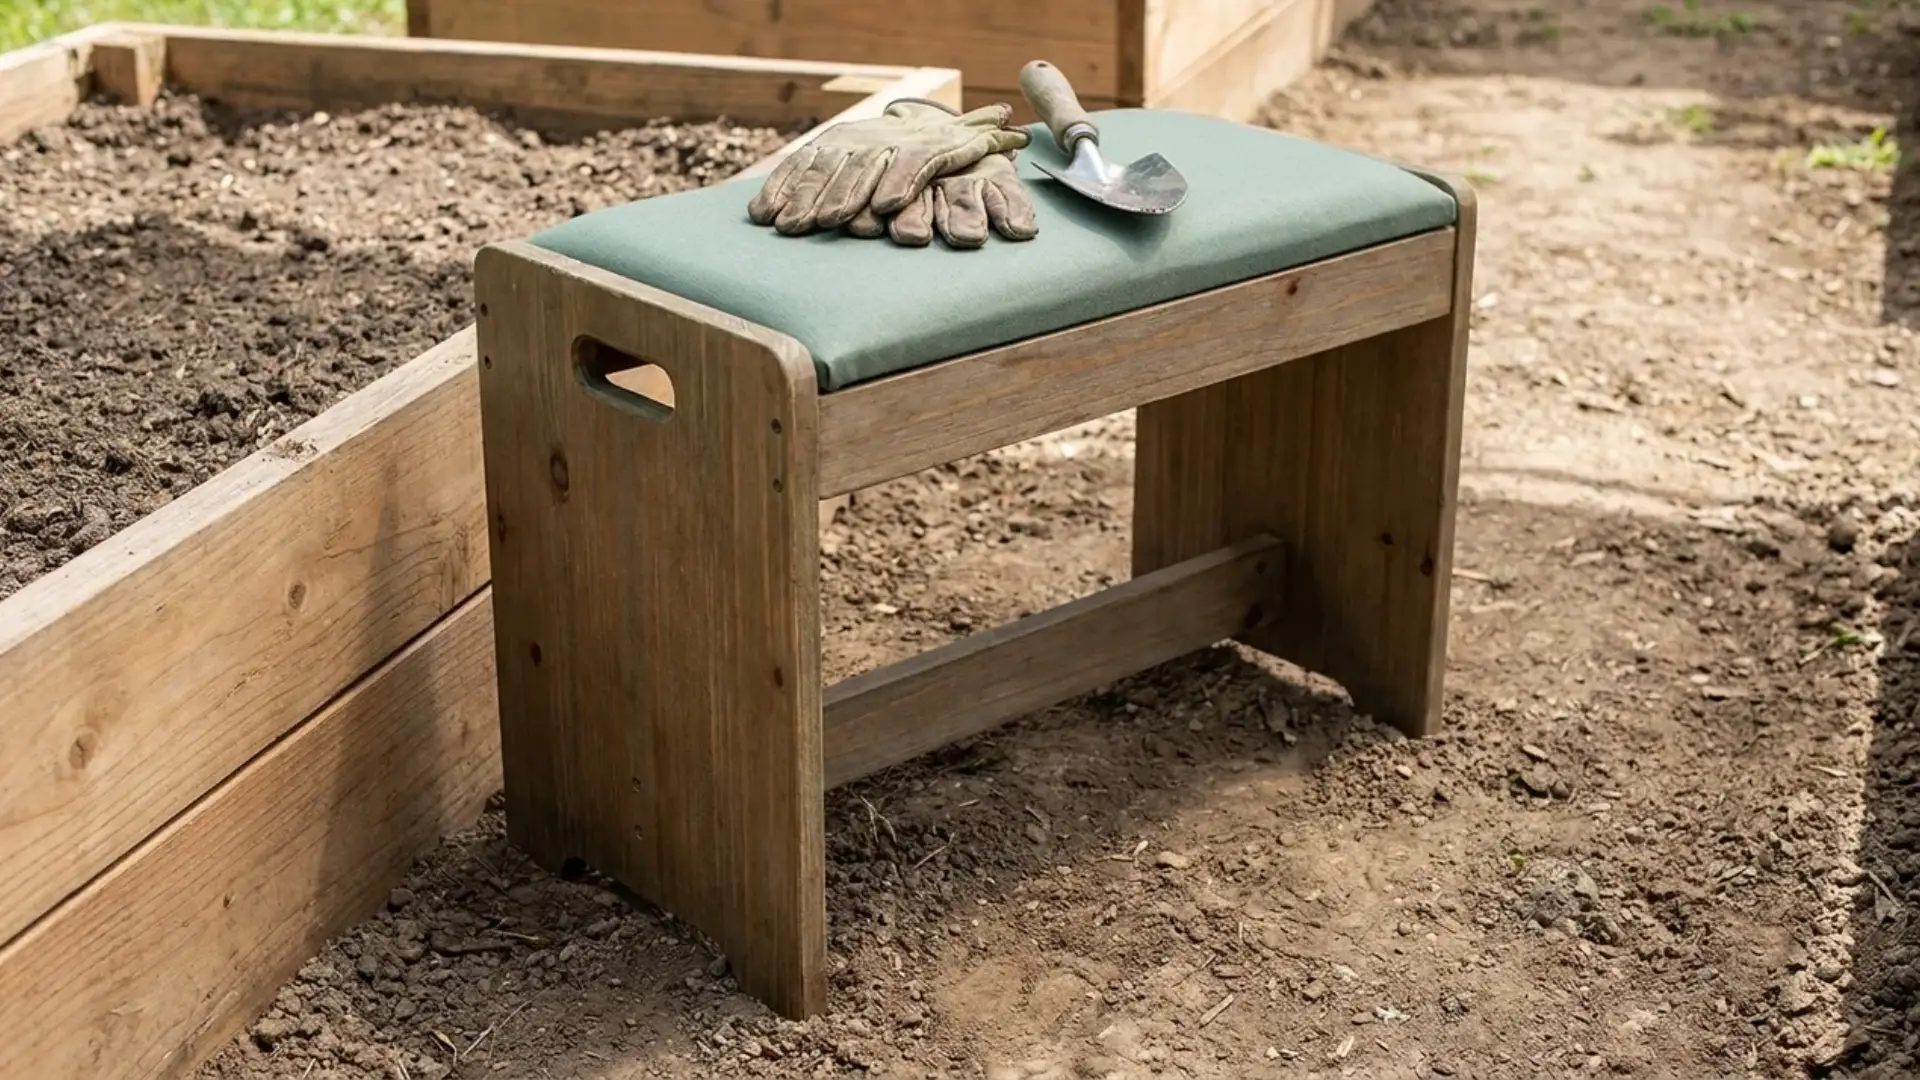
A simple wood frame with side handles flips between a low bench and a padded kneeling pad, saving knees and backs during long planting sessions.
Build a sturdy rectangular frame first, then attach foam padding wrapped in weatherproof fabric to one side.
Cut handle notches into the side panels for an easy grip when flipping it over. Store it upright near the potting bench when not in use.
5. Repurpose a Bathtub Into a Planter
- Tools and materials needed: Old bathtub, drill, gravel, potting soil
- Time required: Approximately 2 to 3 hours
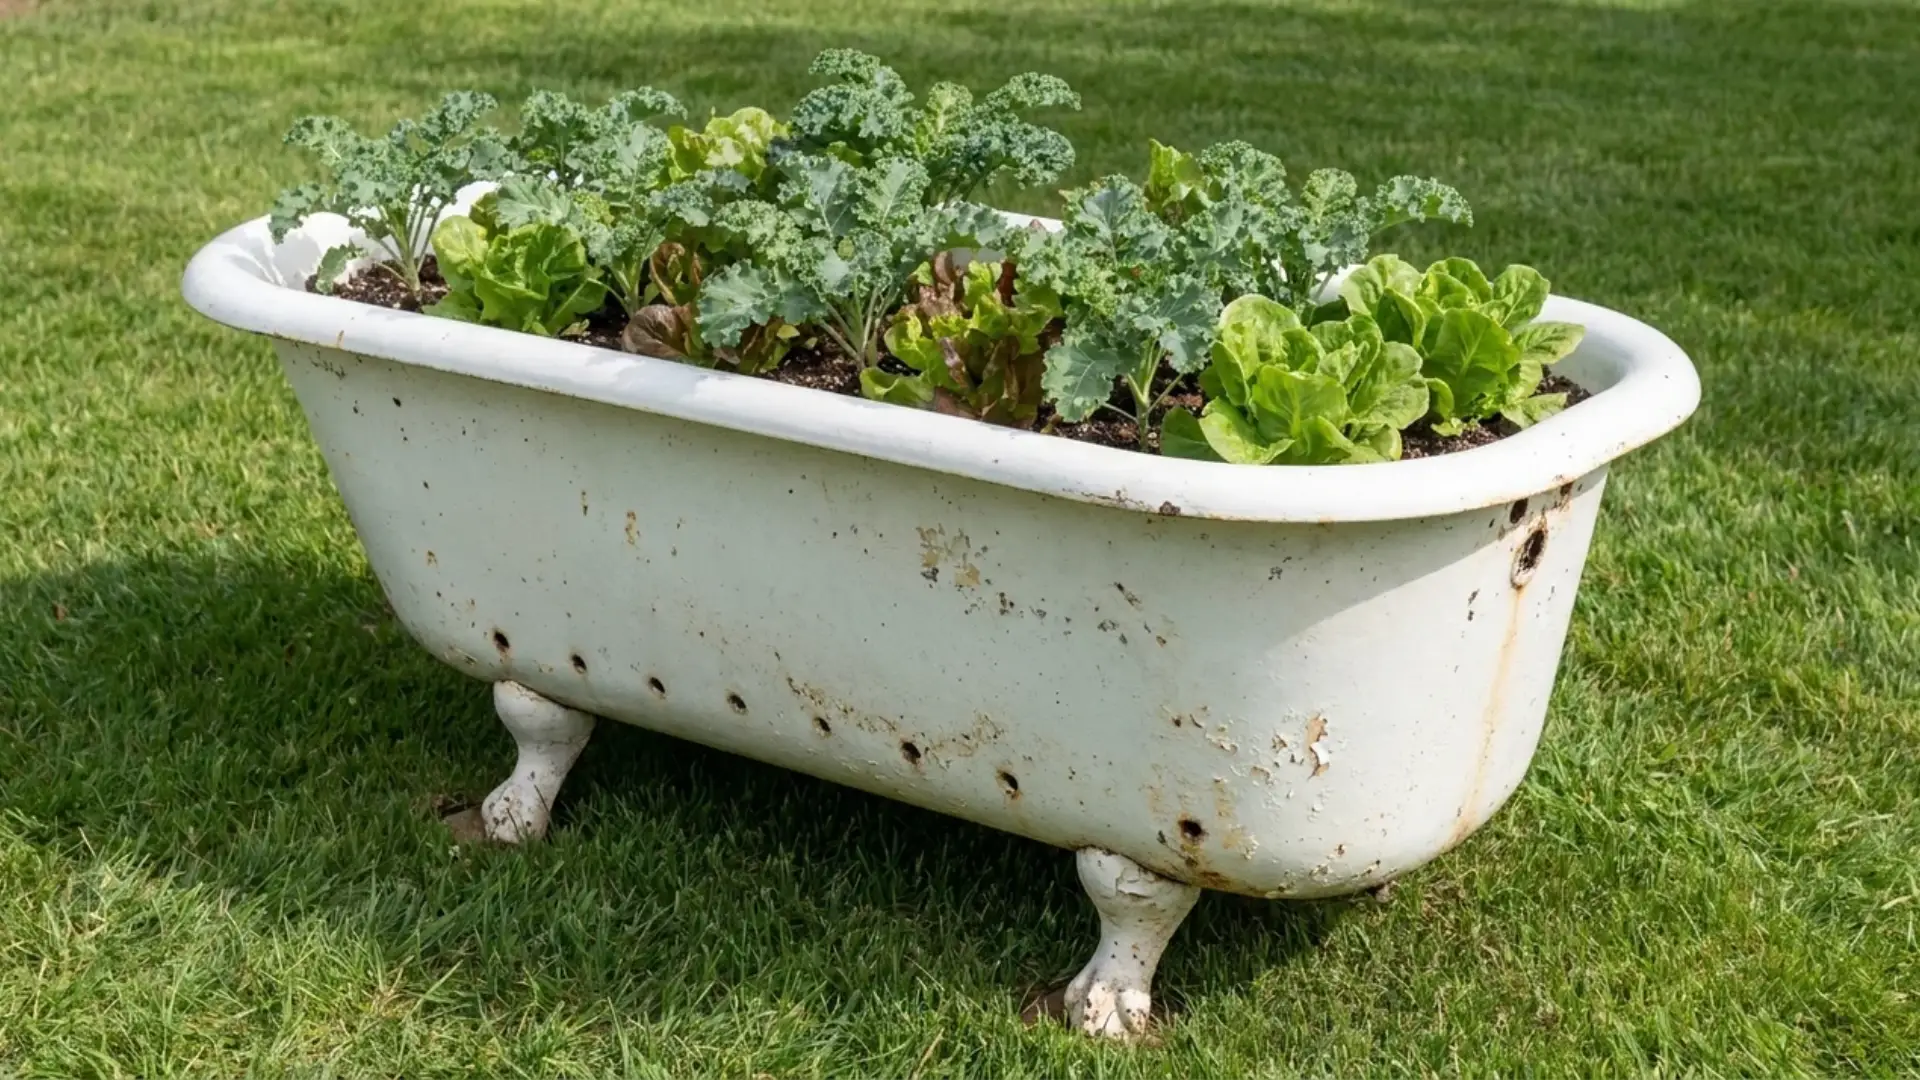
An old clawfoot or standard bathtub makes a surprisingly roomy planter once cleaned out and prepped.
Drill several drainage holes across the bottom, then add a layer of gravel before filling with potting soil.
The deep basin suits vegetables like lettuce or spreading herbs that would otherwise take over a garden bed. Set it on level ground, since a filled tub gets heavy.
6. Build a Wooden Garden Trug
- Tools and materials needed: Thin wood boards, nails, wood glue, curved handle
- Time required: Approximately 2 to 3 hours
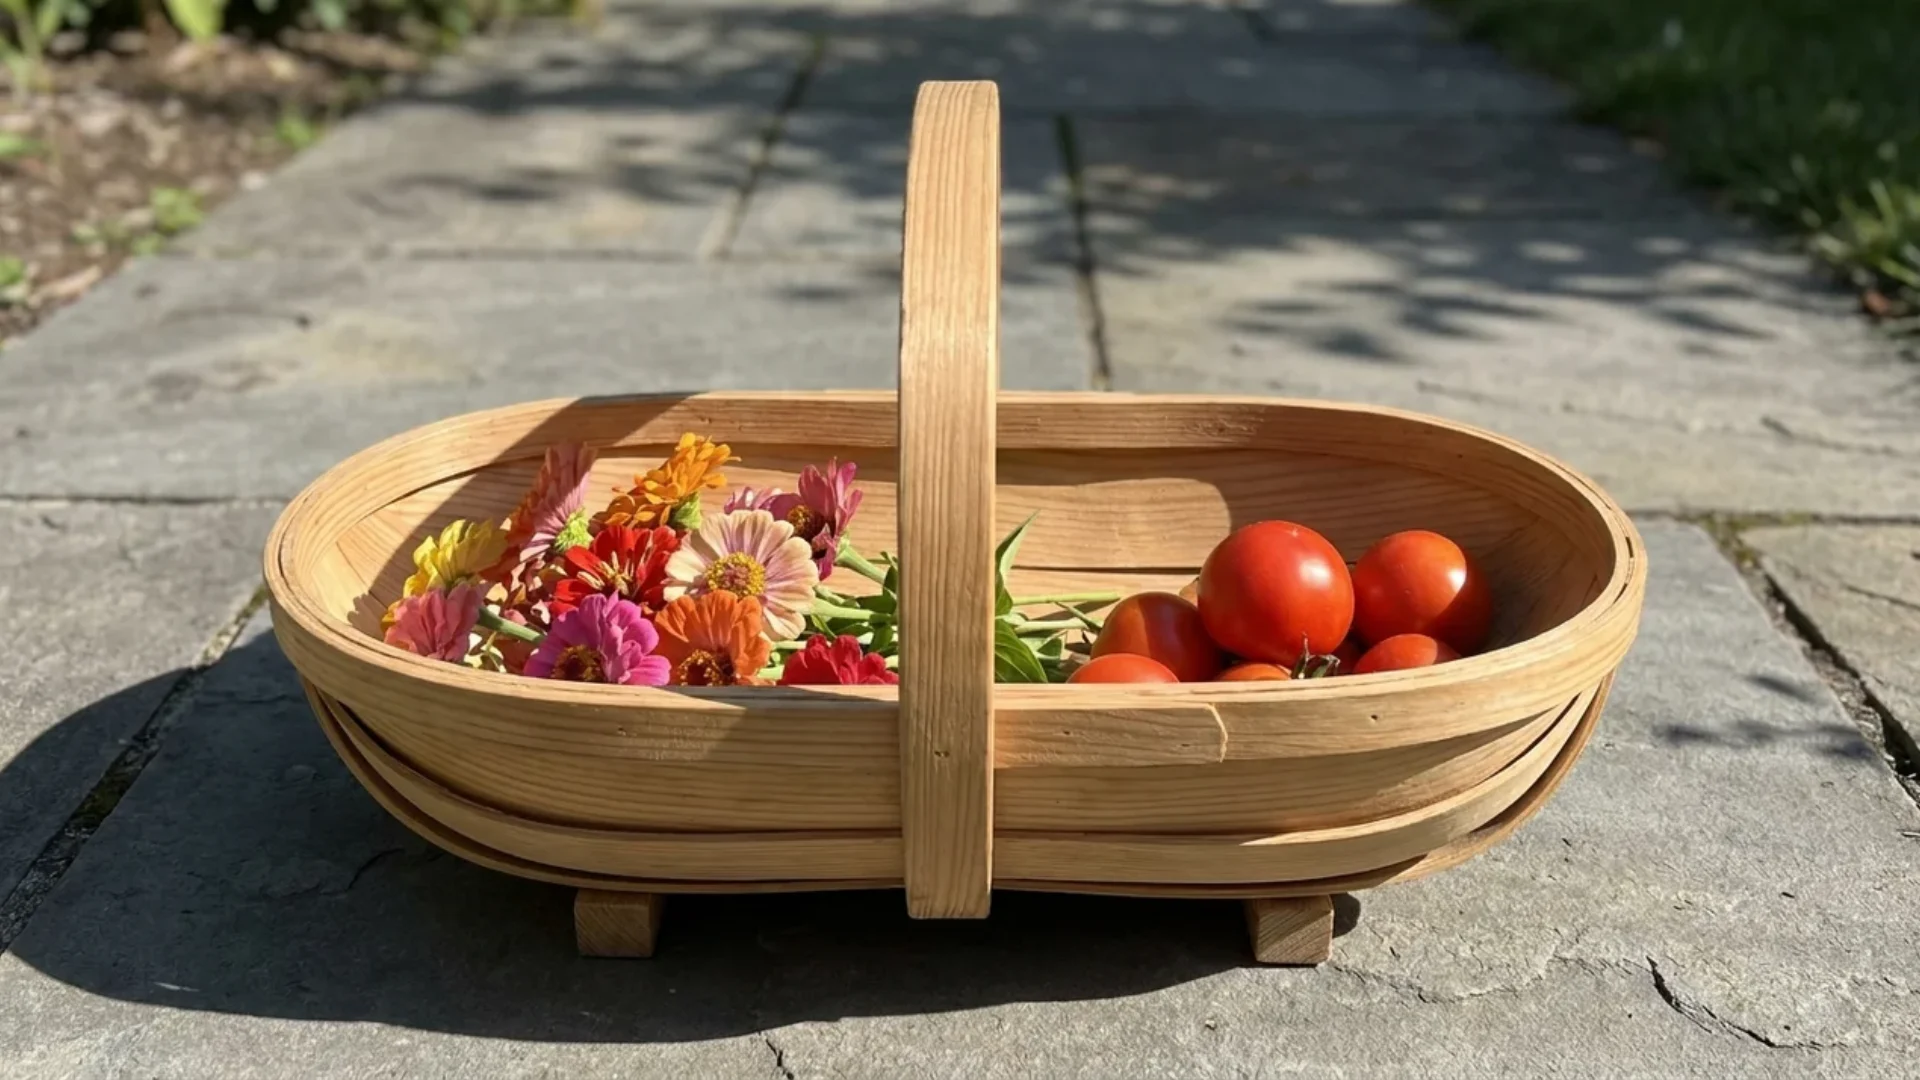
A wooden trug is a shallow, curved basket traditionally used for hauling harvested vegetables, cut flowers, or garden tools around the yard.
Bend thin wood strips into a curved shape using water and clamps, then nail them to solid end pieces cut into a rounded profile.
Attach a sturdy handle across the top. This build makes harvest day far easier than carrying everything by hand.
7. Build a Simple Raised Bed
- Tools and materials needed: Untreated lumber, screws, drill, landscape fabric, soil
- Time required: Approximately 3 to 4 hours
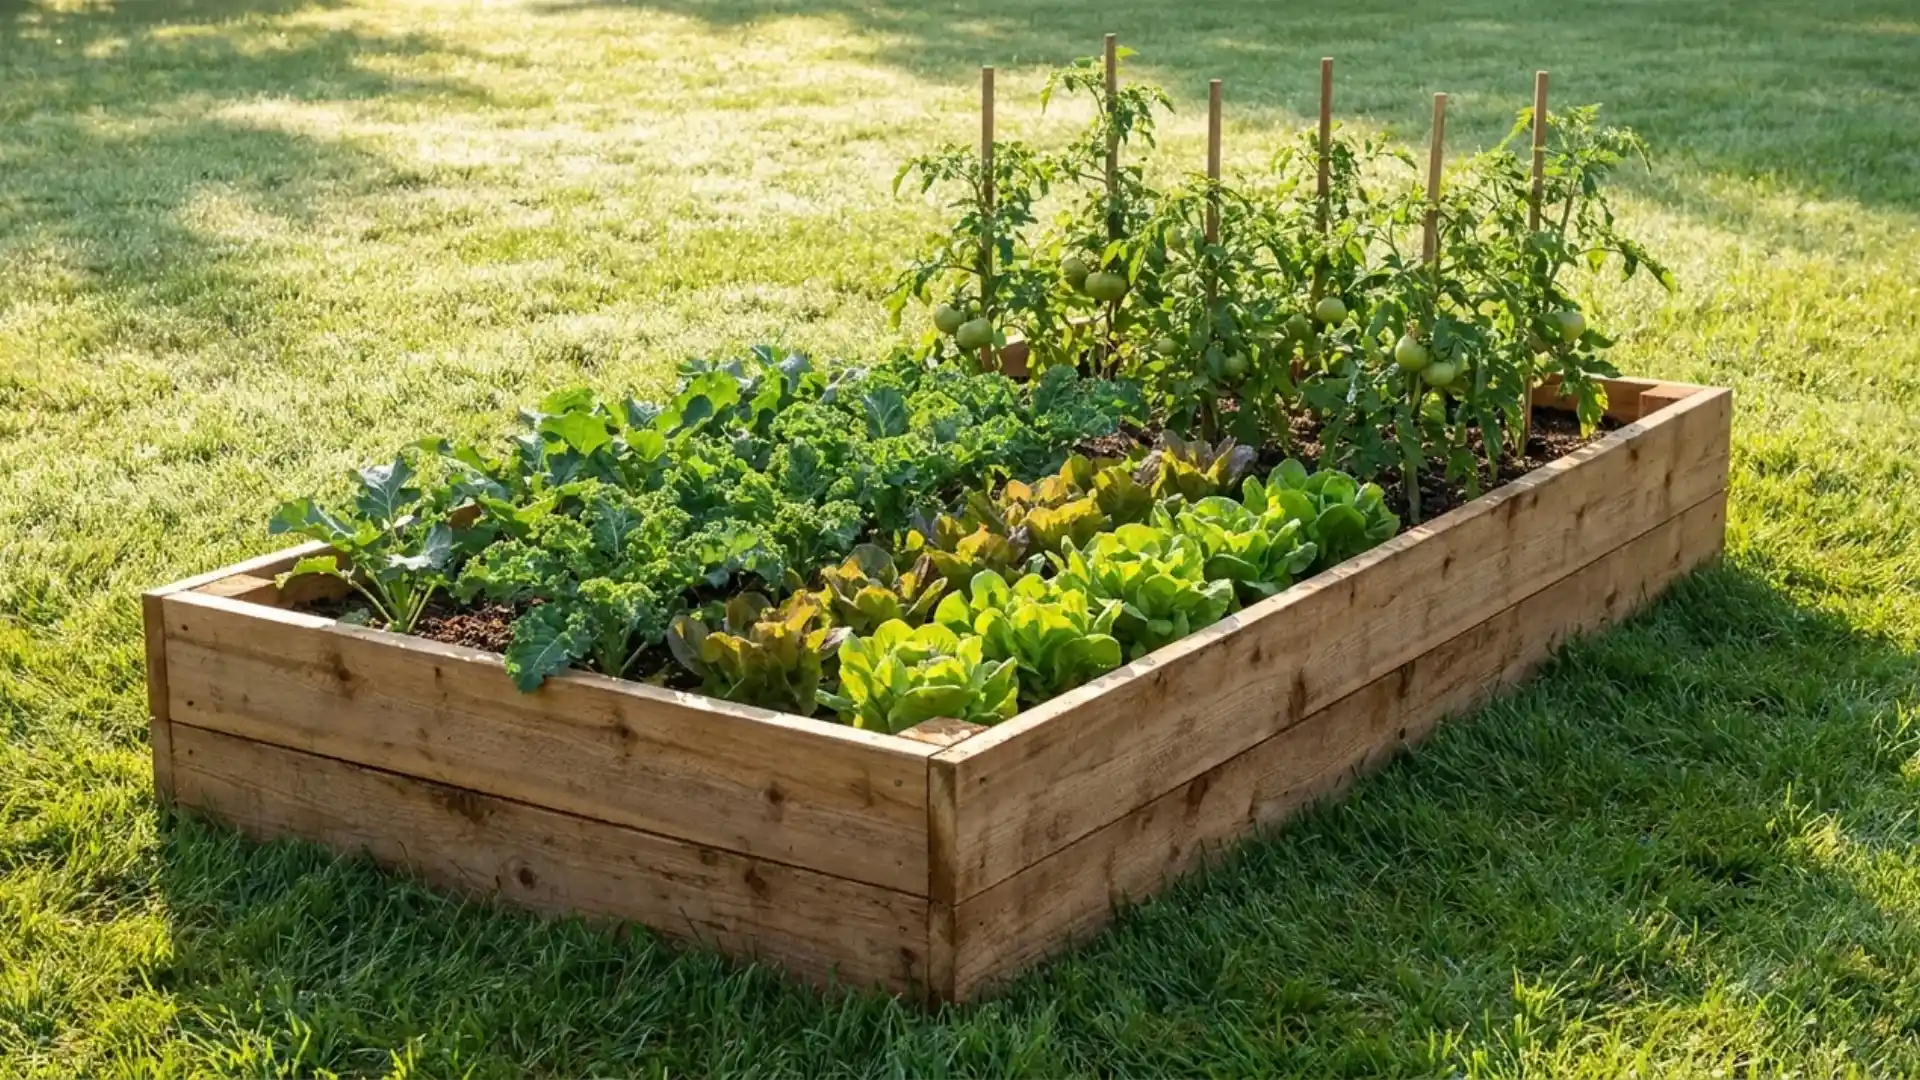
Four boards screwed into a rectangular frame create a raised bed that improves drainage and keeps weeds down.
Line the bottom with landscape fabric before filling with a mix of soil and compost.
Raised beds work well for vegetables, since the soil warms faster in spring and is easier to weed. Place the frame on level ground in a spot that gets full sun.
8. Try a Tiered Garden Planter
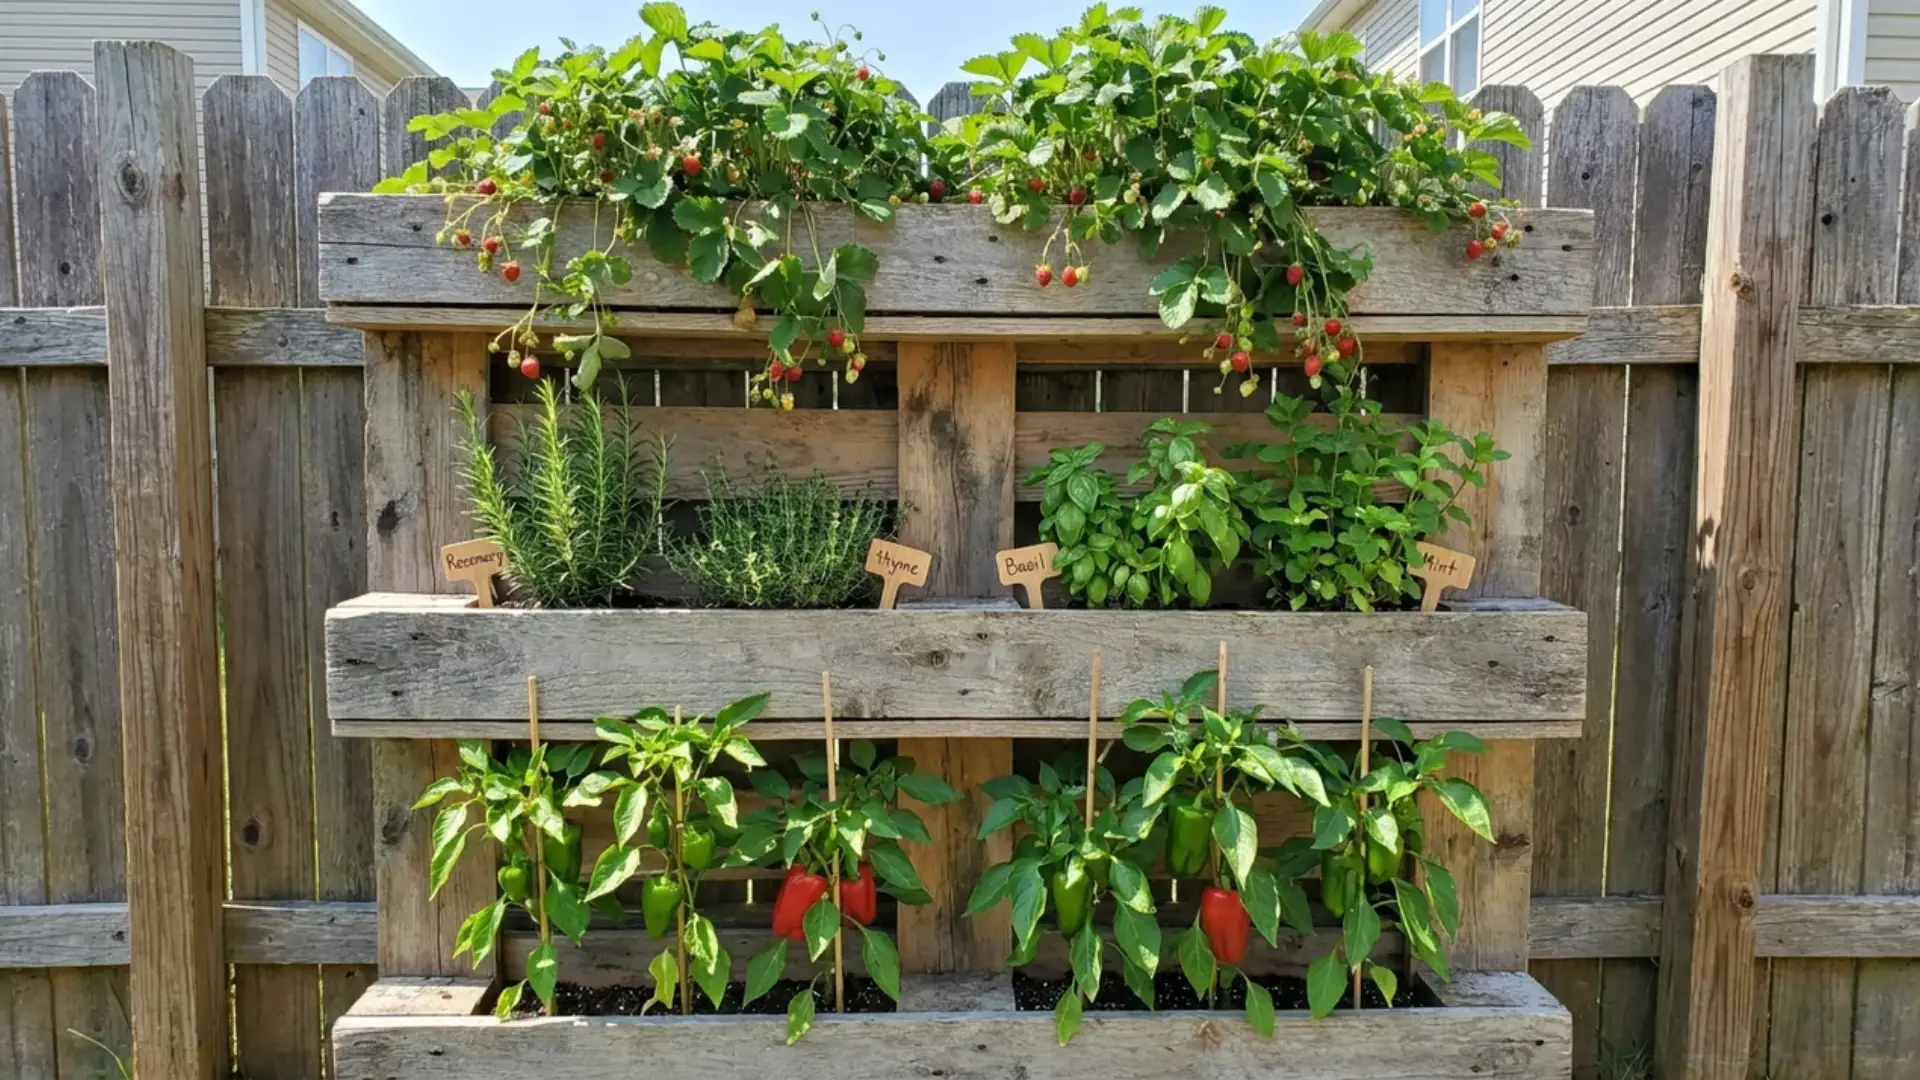
- Tools and materials needed: Lumber, screws, drill, soil, plants of varying heights
- Time required: Approximately 4 to 5 hours
A tiered planter stacks two or three garden beds at different heights, creating built-in structure for plants that need extra support, like tomatoes or peppers.
Build each tier slightly smaller than the one below it, then secure the frames together with screws.
Fill each level with soil suited to the plants going in it. This design also makes harvesting easier on the back.
9. Build a Cedar Wood Trellis
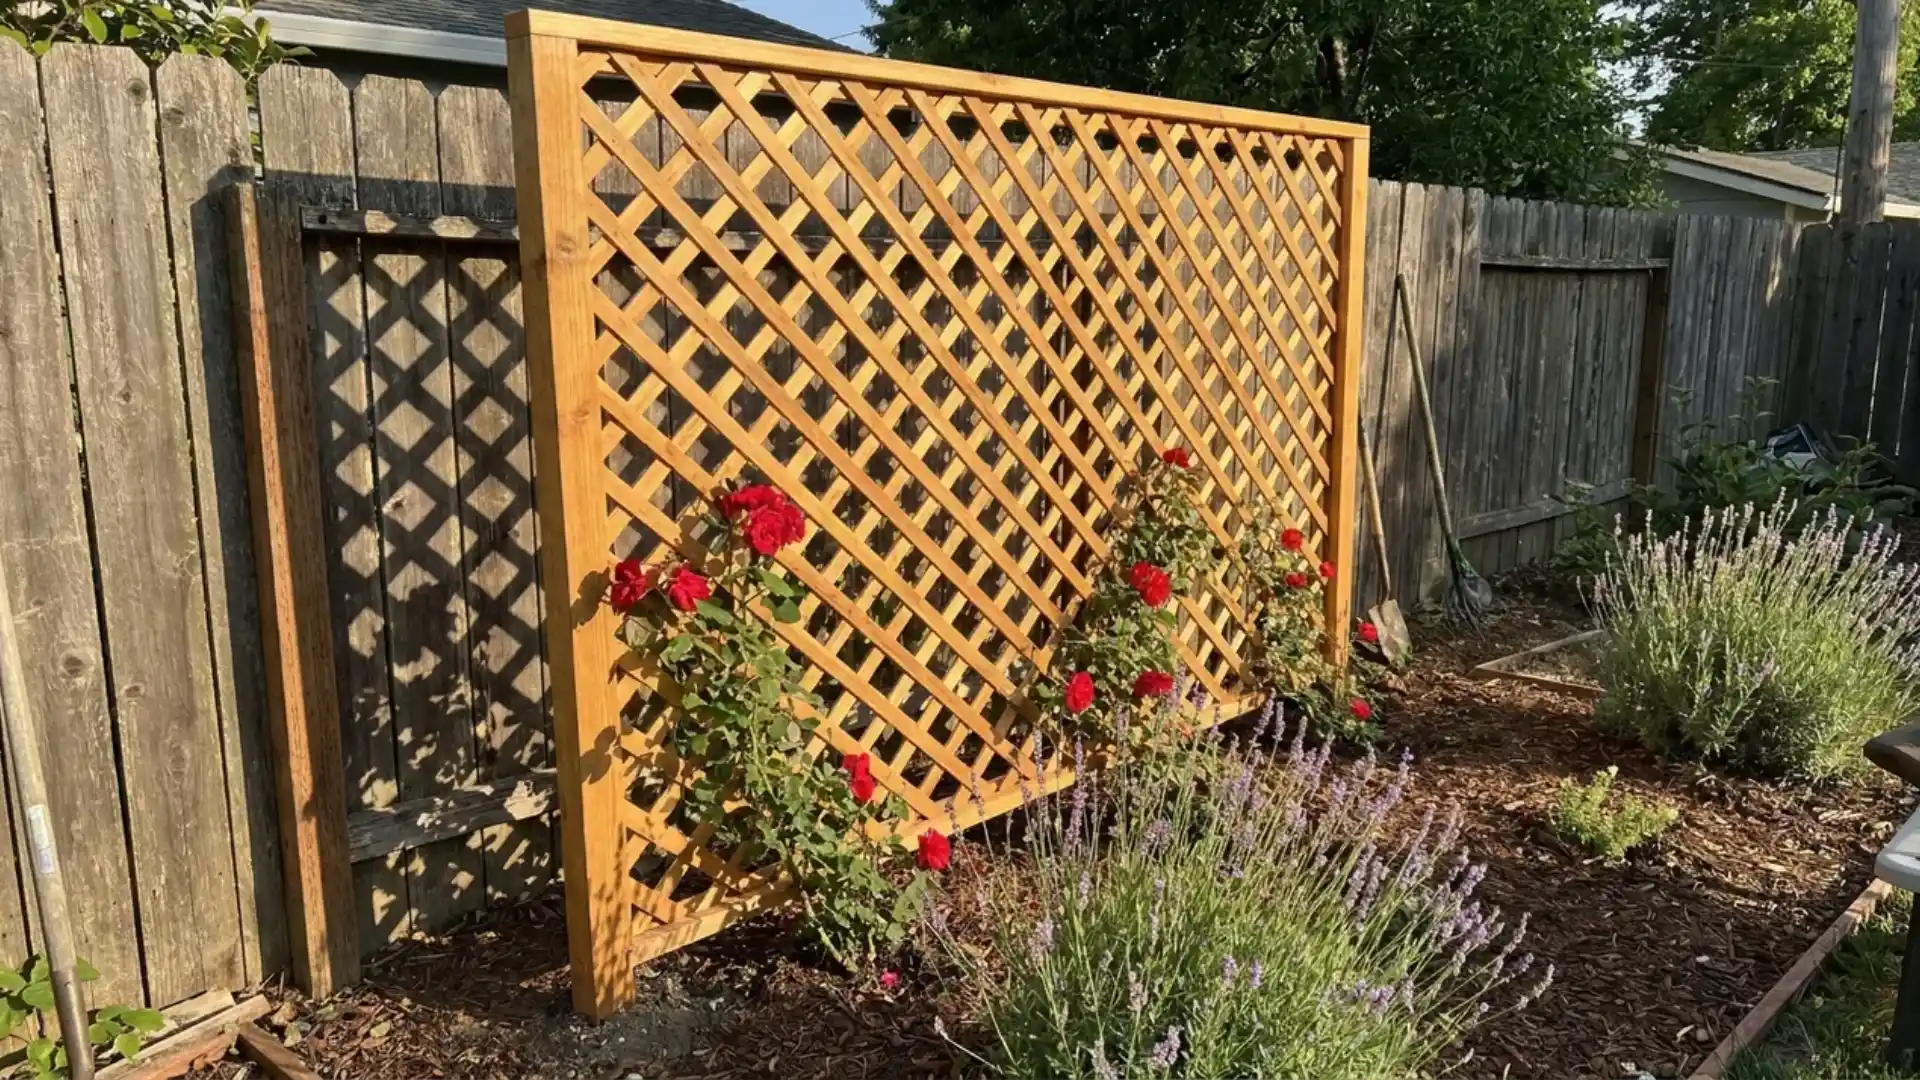
- Tools and materials needed: Cedar boards, screws, drill, exterior stain
- Time required: Approximately 2 to 3 hours
Cedar boards arranged in a simple crisscross pattern make a trellis sturdy enough to support climbing roses, clematis, or beans.
Cut the boards to matching lengths, then screw them together at even intervals for a uniform grid.
A coat of exterior stain protects the wood from weather while keeping its natural look. Anchor the finished trellis into the ground or against a fence.
10. Make a Vintage-Style Trellis
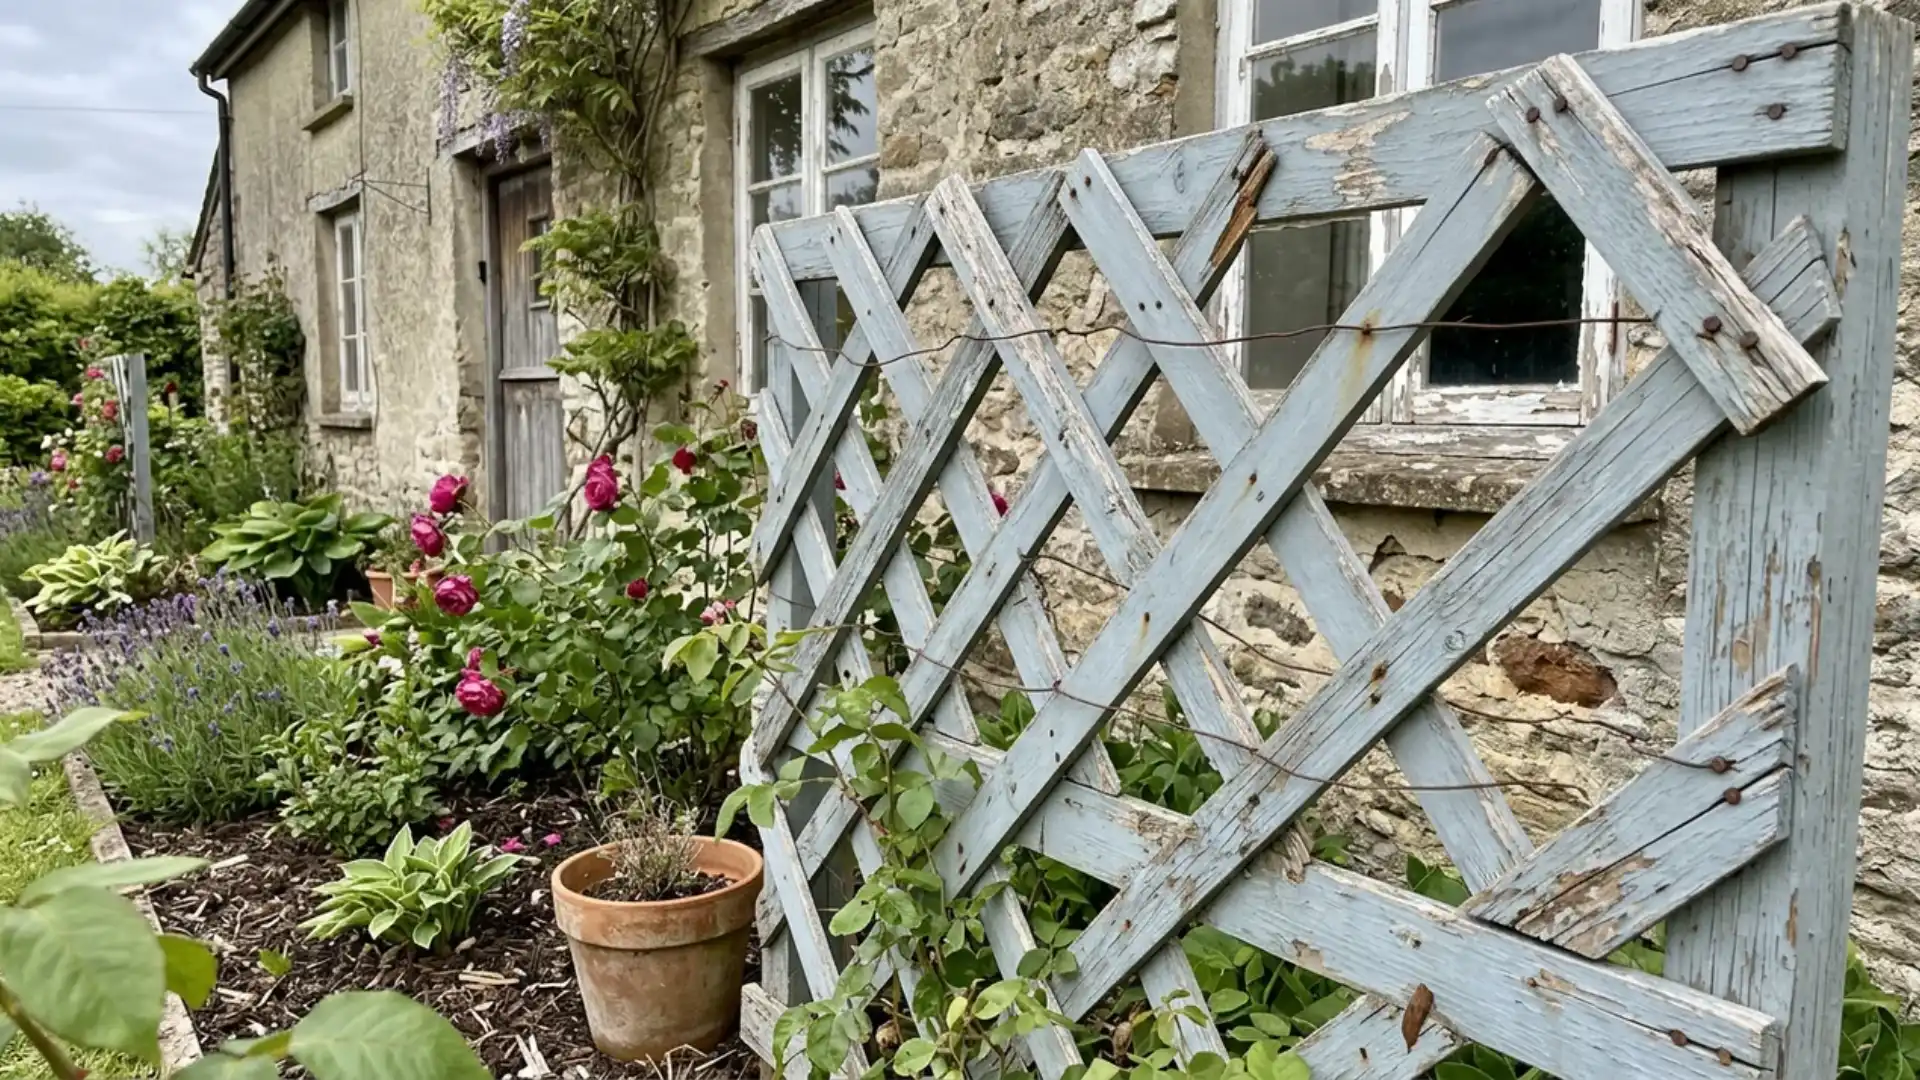
- Tools and materials needed: Reclaimed wood, nails, wire, exterior paint
- Time required: Approximately 2 to 3 hours
Mismatched reclaimed wood pieces nailed together in an irregular lattice give this trellis its vintage character, especially once painted in a soft, weathered shade.
Add sections of thin wire between wood slats to give young vines something extra to grip early on.
This style works especially well near an older home or a cottage-inspired garden. Let the paint distress naturally over time.
11. Build a Wooden Obelisk Trellis
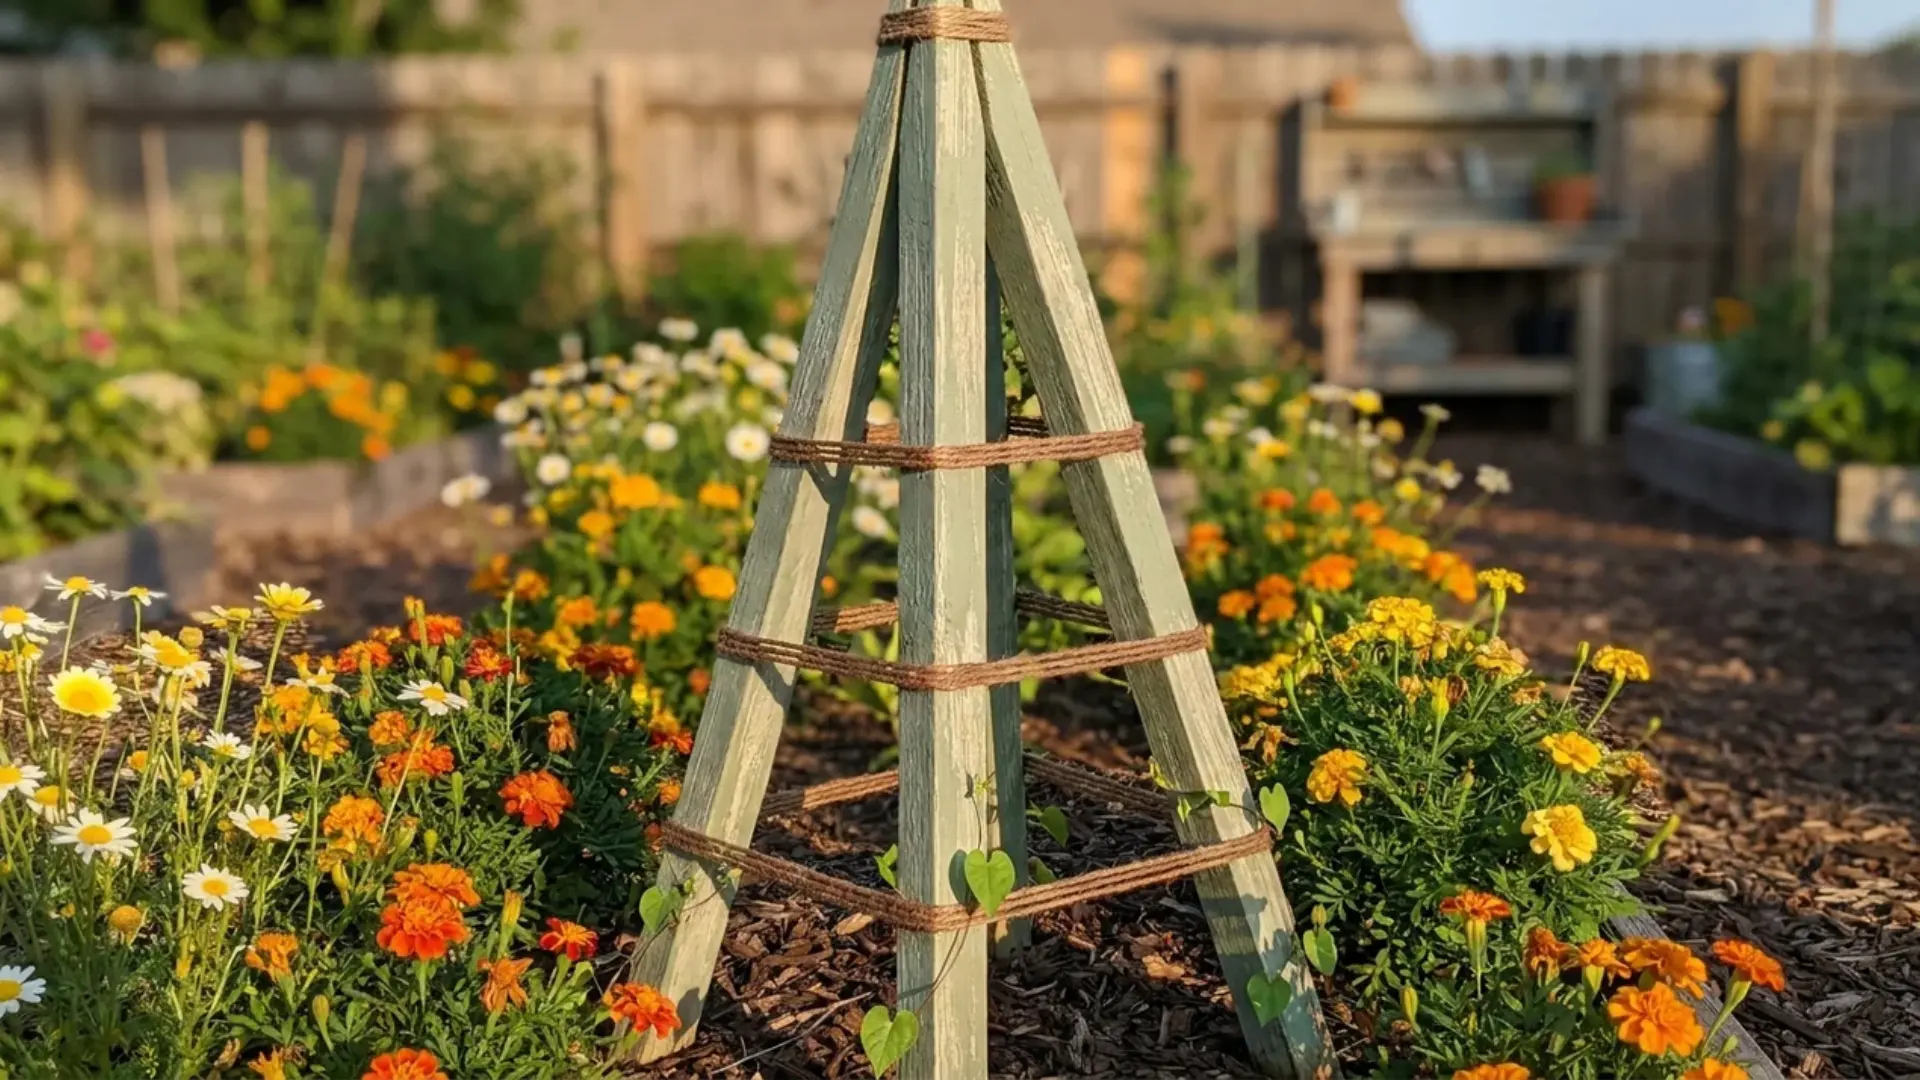
- Tools and materials needed: Wood stakes, screws, drill, twine
- Time required: Approximately 3 to 4 hours
Four wood stakes angled inward and joined at the top form a classic obelisk shape, a striking vertical accent in the middle of a flower bed.
Wrap twine horizontally between the stakes to give climbing plants more surfaces to grab onto.
This design works well as a freestanding centerpiece rather than something mounted against a wall or fence, adding height without blocking the view.
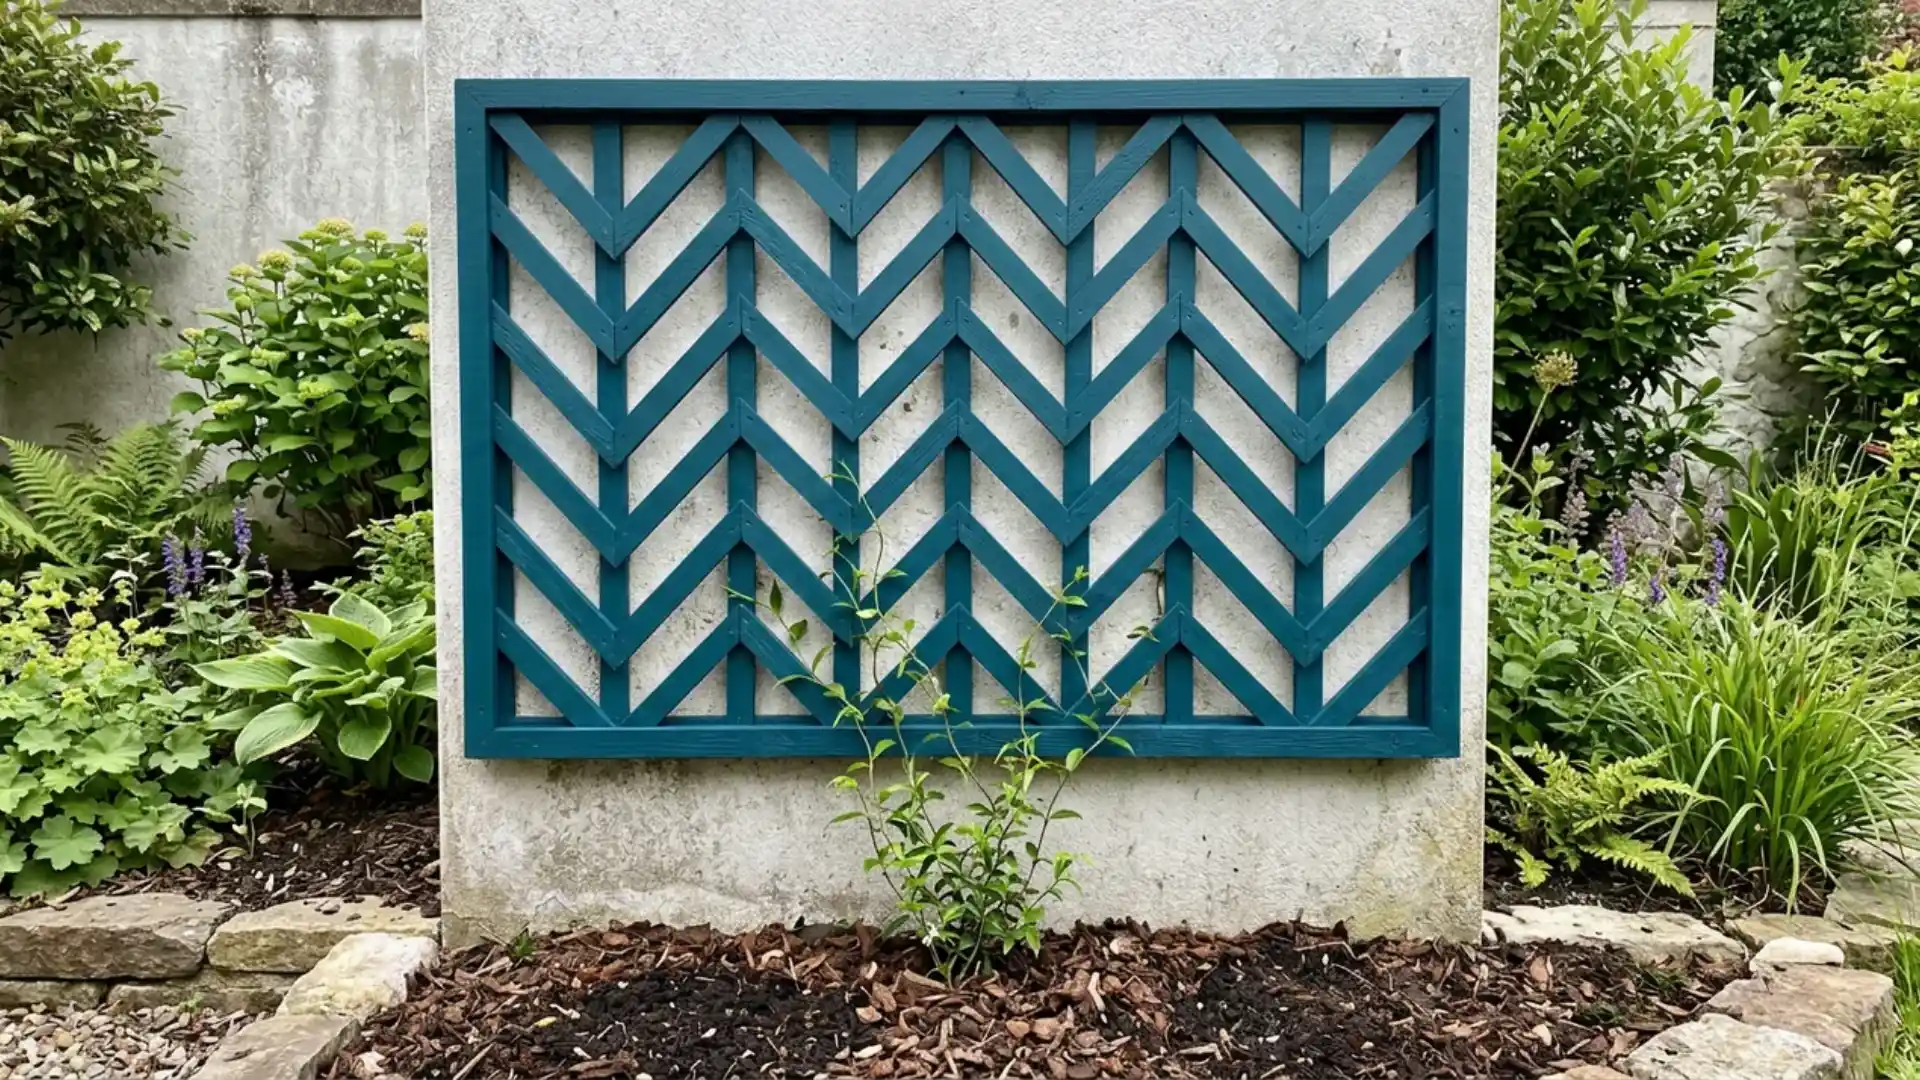
12. Create a Chevron Pattern Trellis
- Tools and materials needed: Thin wood slats, nails, frame boards, paint
- Time required: Approximately 3 to 4 hours
Nailing thin wood slats in a zigzag pattern across a rectangular frame turns a basic trellis into a modern design feature.
Space each slat evenly to keep the chevron pattern crisp and consistent from top to bottom.
Paint the frame a bold color to make it stand out even before plants fill in. This style suits a contemporary garden more than a traditional one.
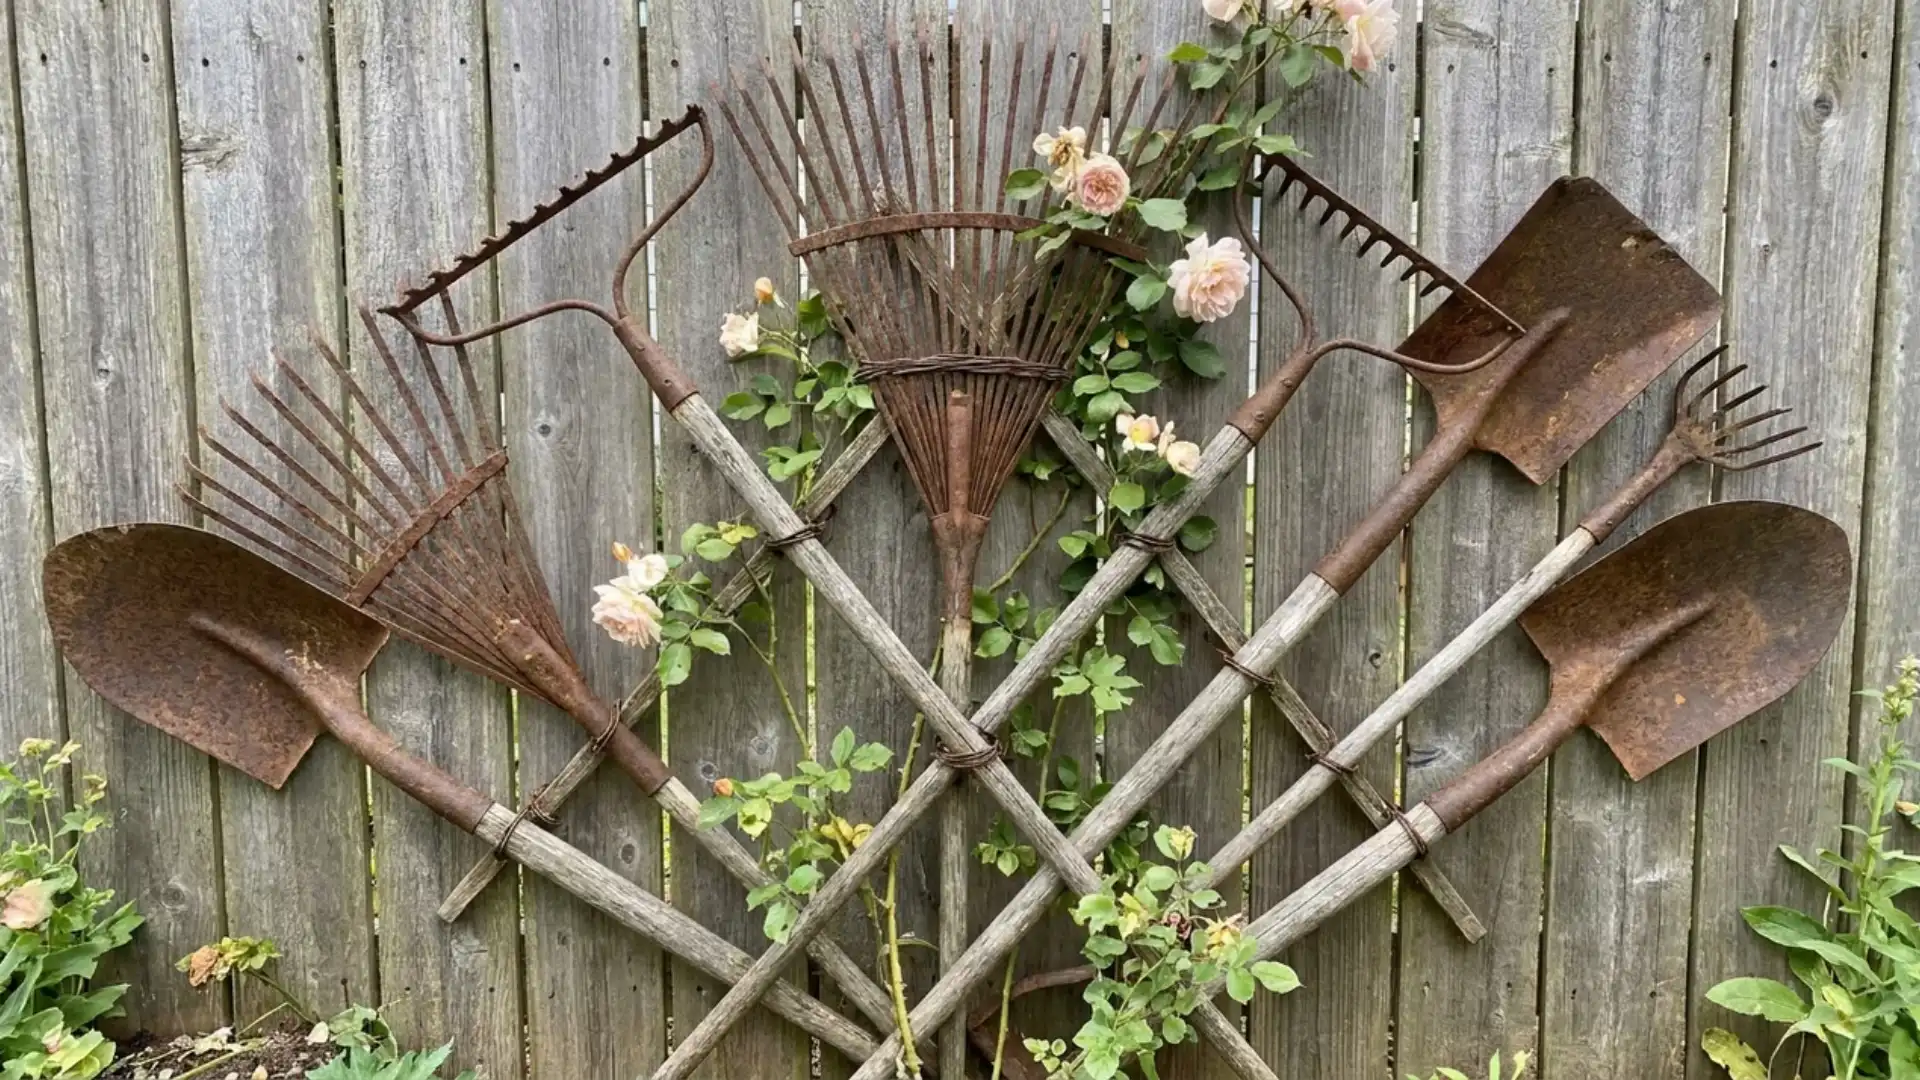
13. Build a Garden Tools Trellis
- Tools and materials needed: Old rakes or shovels, wire, wall mounts
- Time required: Approximately 1 to 2 hours
Old rakes, shovels, or hoes no longer fit for digging can be repurposed into a one-of-a-kind trellis for climbing roses or vines.
Arrange the tool handles in a fan or crisscross shape, then secure them together with wire at the points where they overlap.
Mount the finished piece against a fence or wall. It is a clever way to keep worn tools out of the landfill.
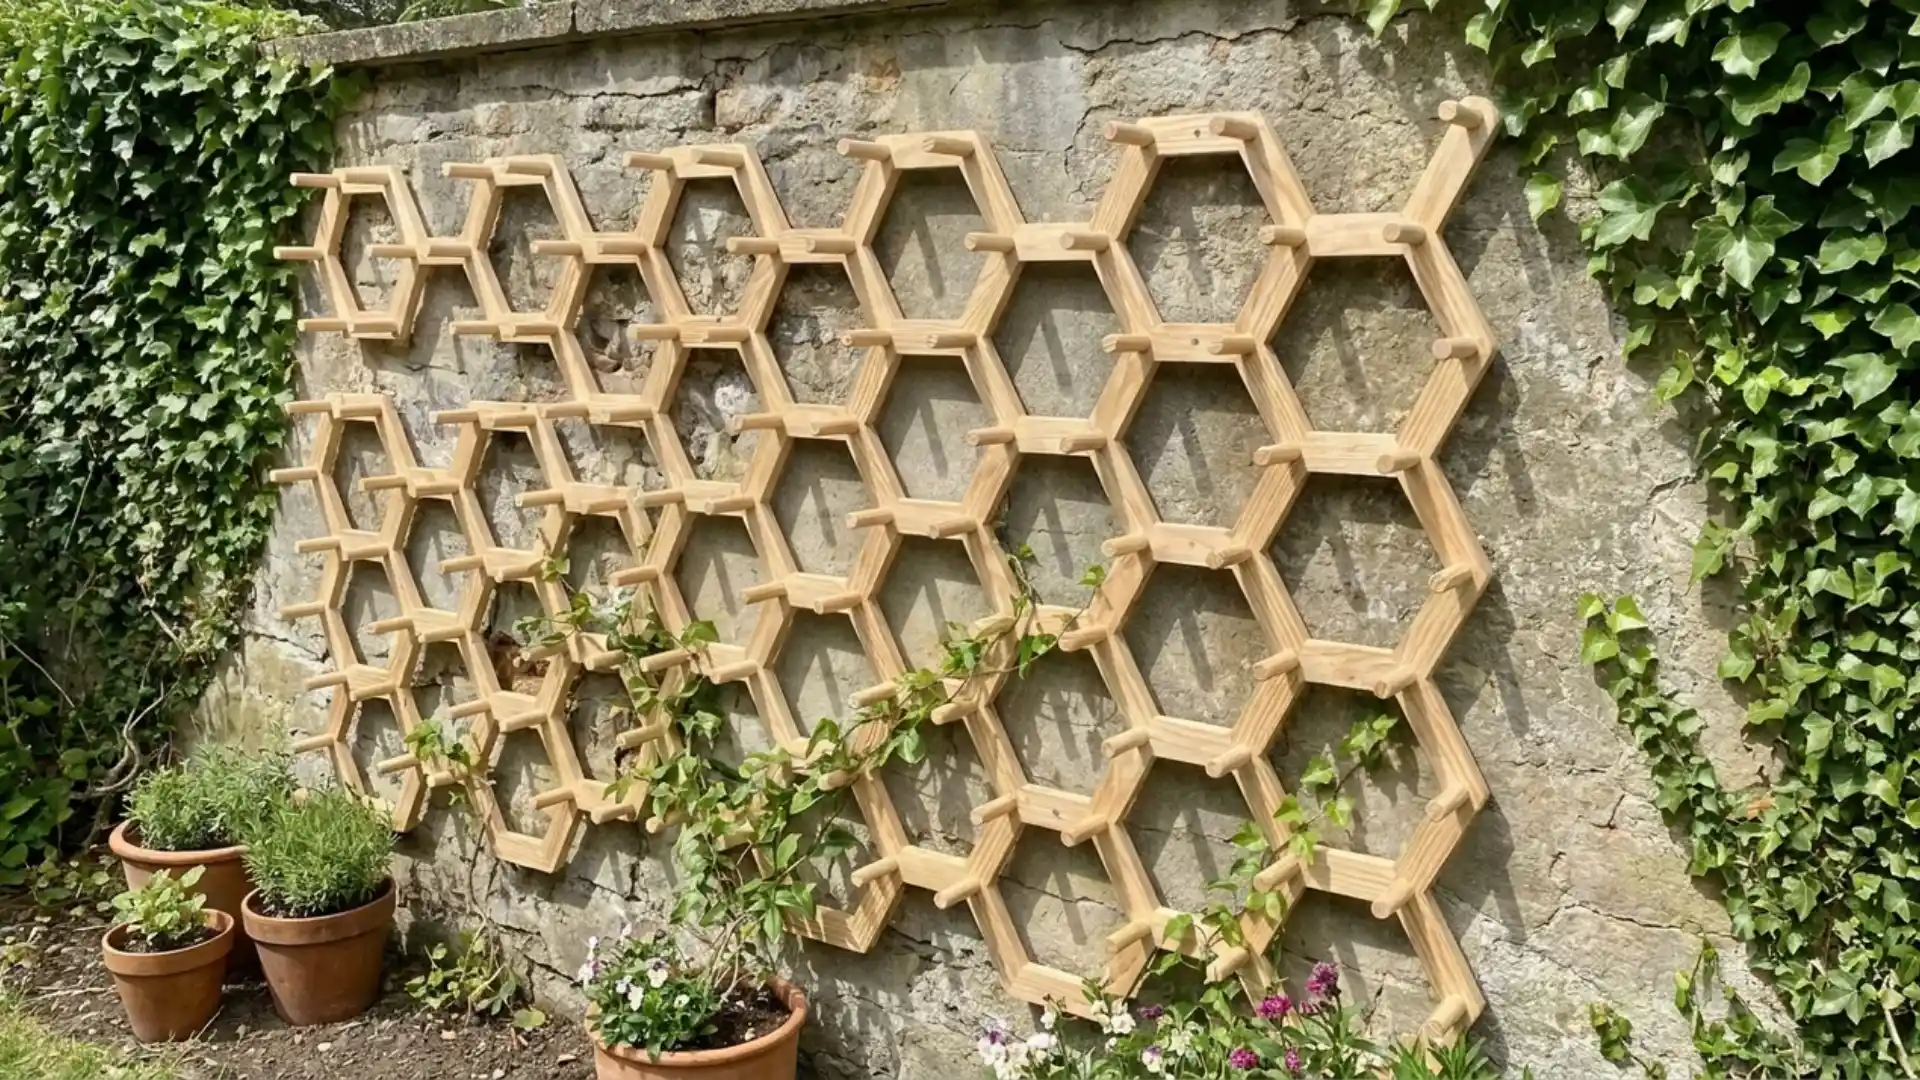
14. Make a Honeycomb Garden Trellis
- Tools and materials needed: Wood dowels or slats, glue, frame, screws
- Time required: Approximately 5 to 6 hours
Hexagon shapes joined together in a honeycomb pattern create one of the more advanced trellis builds on this list, best suited to someone comfortable with precise measuring and cutting.
Each hexagon is built from short wood pieces glued and screwed at matching angles, then connected into a larger grid.
The repeating geometric pattern makes a striking backdrop for climbing plants once filled in.
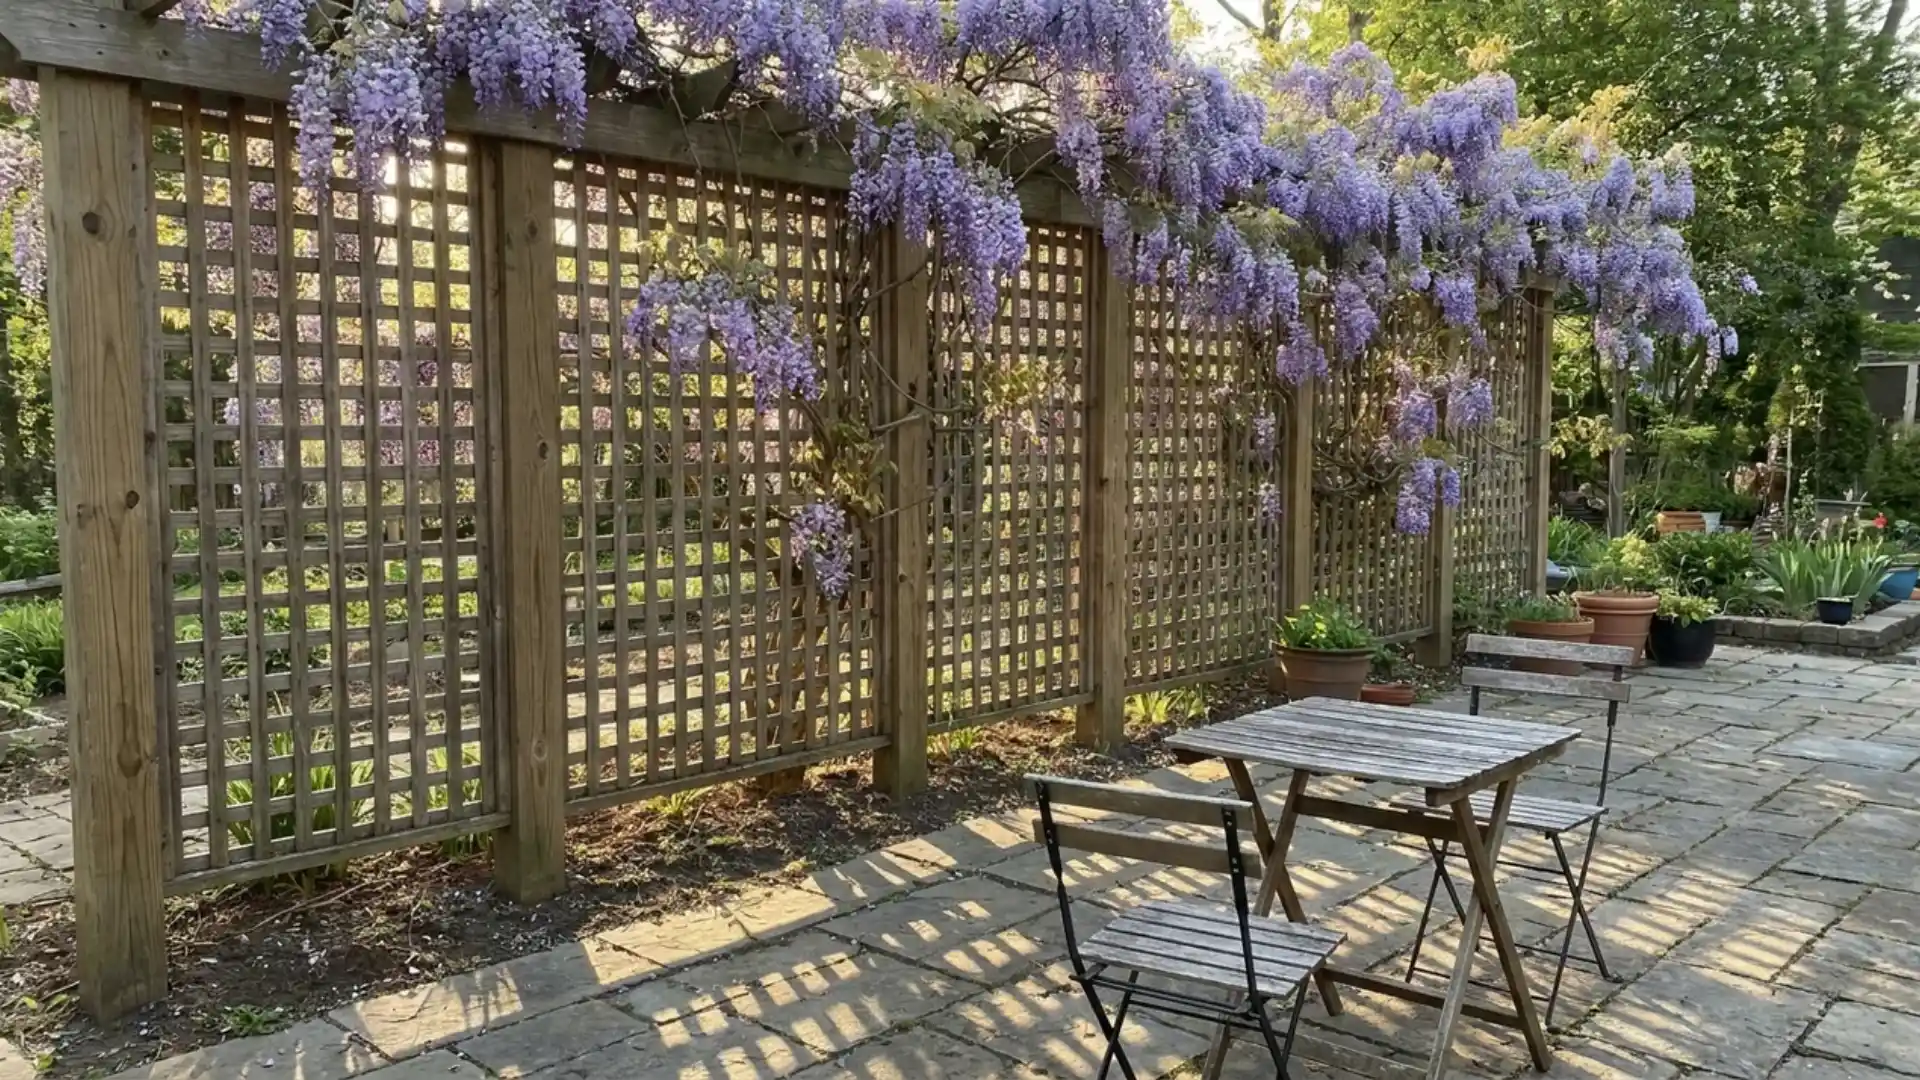
15. Build a Freestanding Privacy Trellis
- Tools and materials needed: Lumber posts, lattice panels, screws, concrete mix
- Time required: Approximately 5 to 6 hours
Tall lattice panels attached to sturdy lumber posts create a freestanding trellis that doubles as a privacy screen between a patio and a neighboring yard.
Set the posts in concrete for stability, especially if the panels will carry heavy vines like wisteria or grapes.
This build works well planted with fast-growing climbers along a property line or beside an outdoor seating area.
16. Create a Vertical Herb Garden
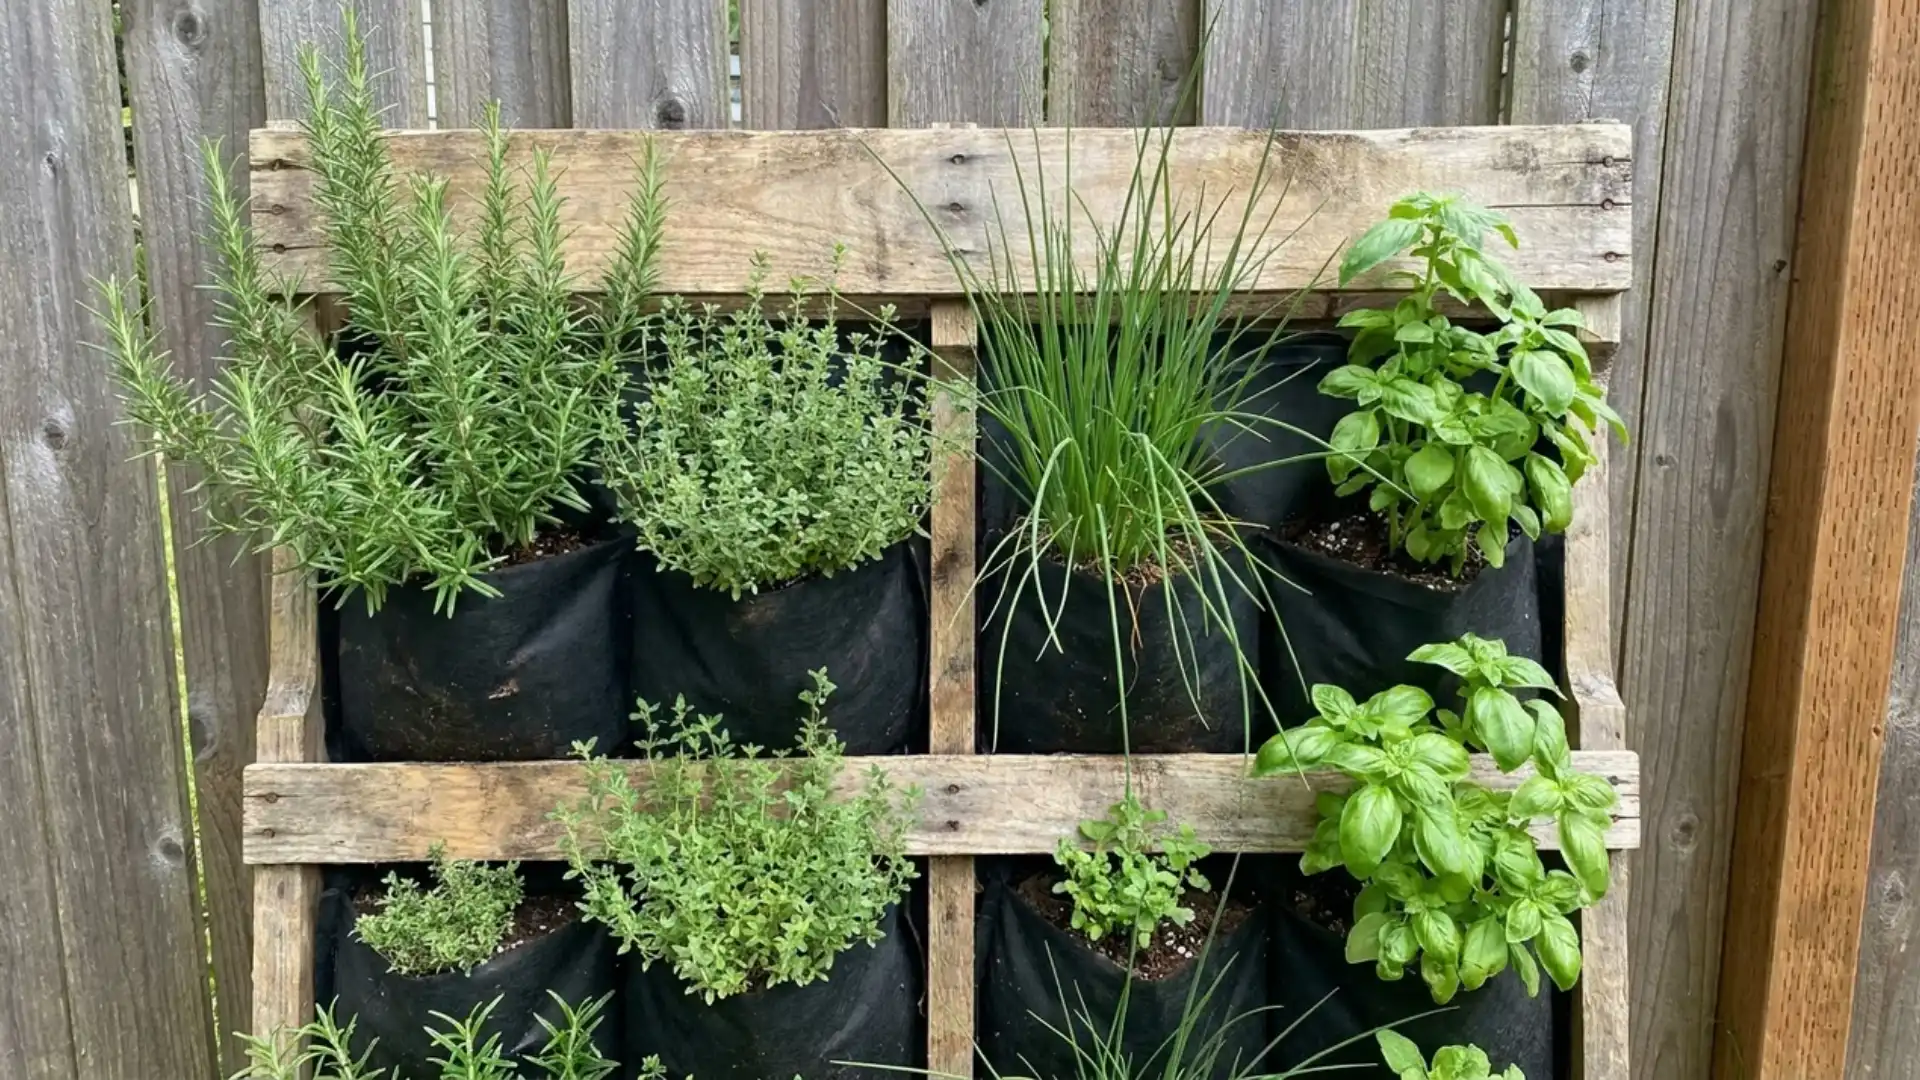
- Tools and materials needed: Wood pallet, landscape fabric, staple gun, soil
- Time required: Approximately 3 to 4 hours
A wood pallet lined with landscape fabric and stapled into pockets becomes a space-saving herb garden that hangs flat against a wall or fence.
Fill each pocket with soil and plant rosemary, thyme, chives, or basil for easy kitchen access.
Let the pallet lie flat for a week or two first so the roots take hold before standing it upright.
17. Build a Copper Pipe Planter
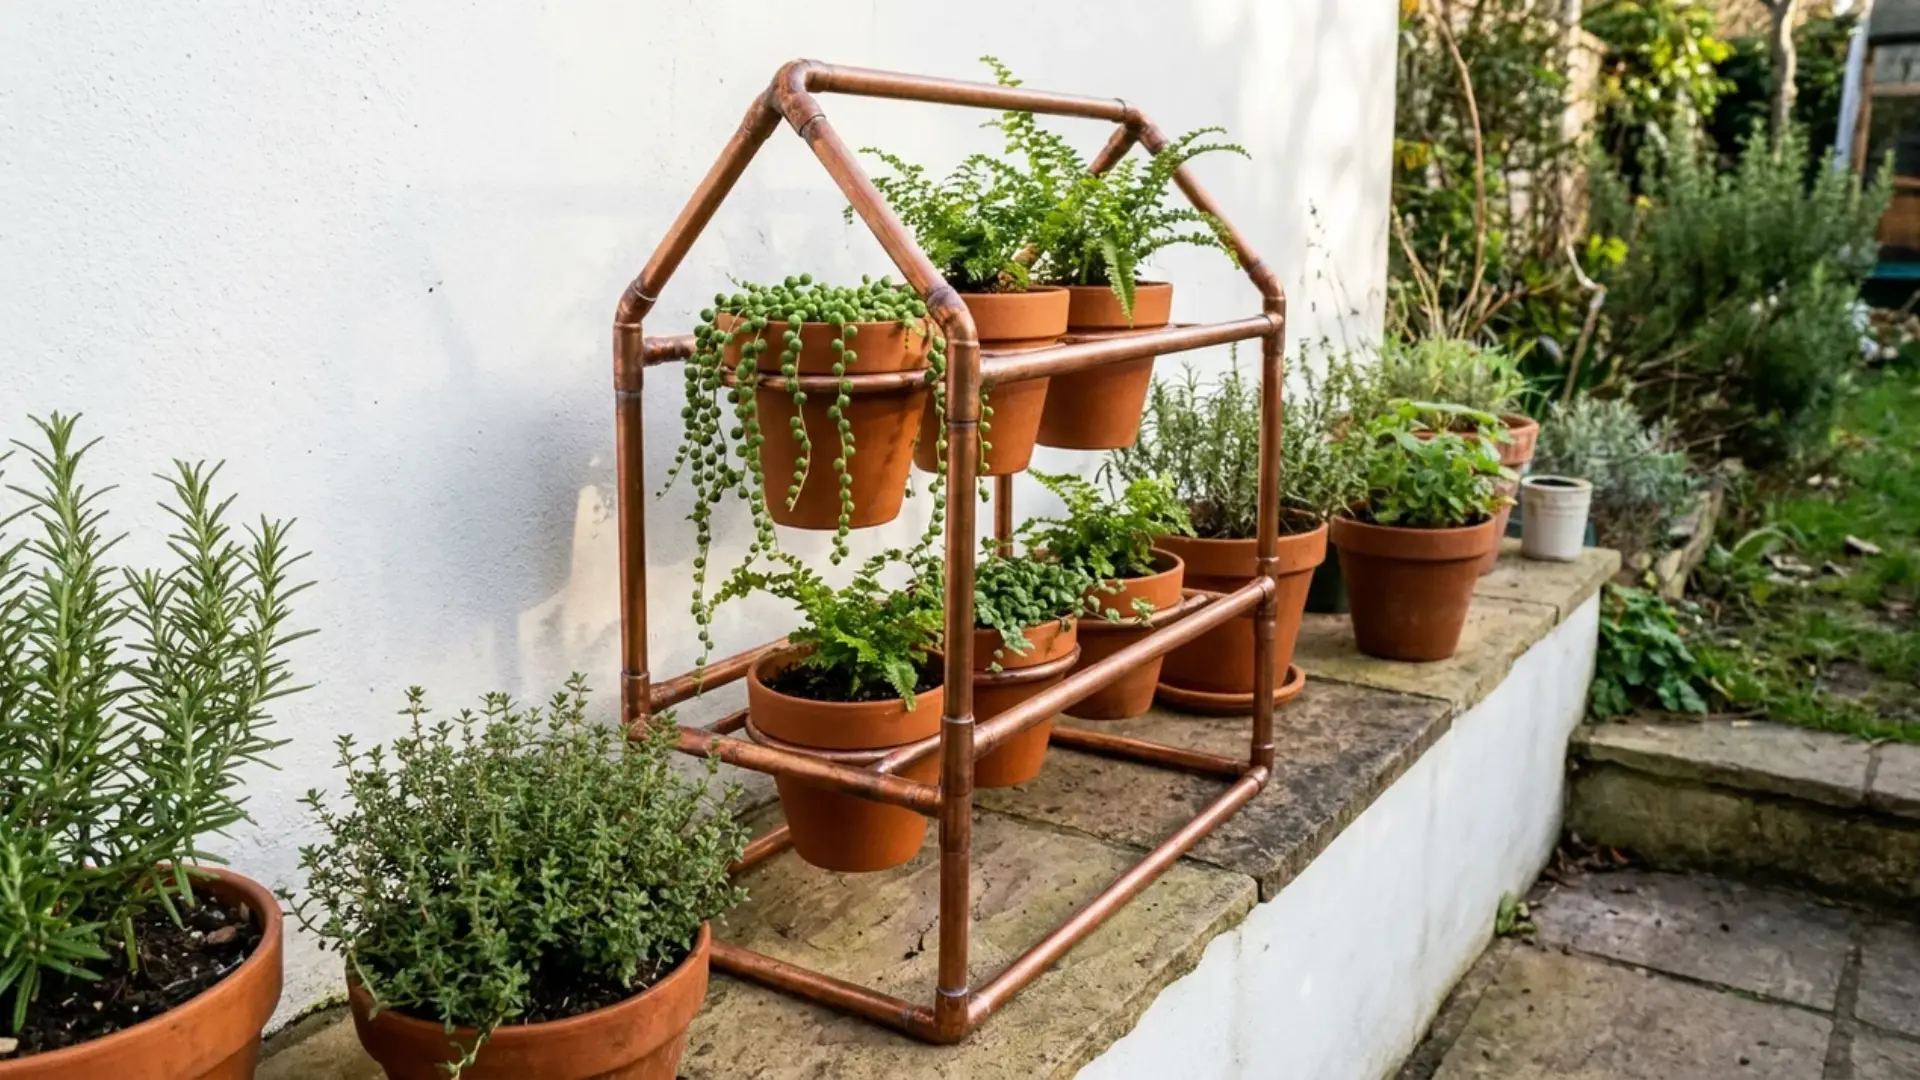
- Tools and materials needed: Copper pipe, pipe cutter, fittings, small pots
- Time required: Approximately 2 to 3 hours
Cutting the copper pipe into matching lengths and joining it with fittings creates a sleek, modern stand for hanging small potted plants against a wall or fence.
The copper develops a natural patina over time, adding warmth and character as it ages outdoors.
This build suits a minimalist garden style and works well in tight spaces where floor room for planters is limited.
18. Build A Stacked Crate Planter
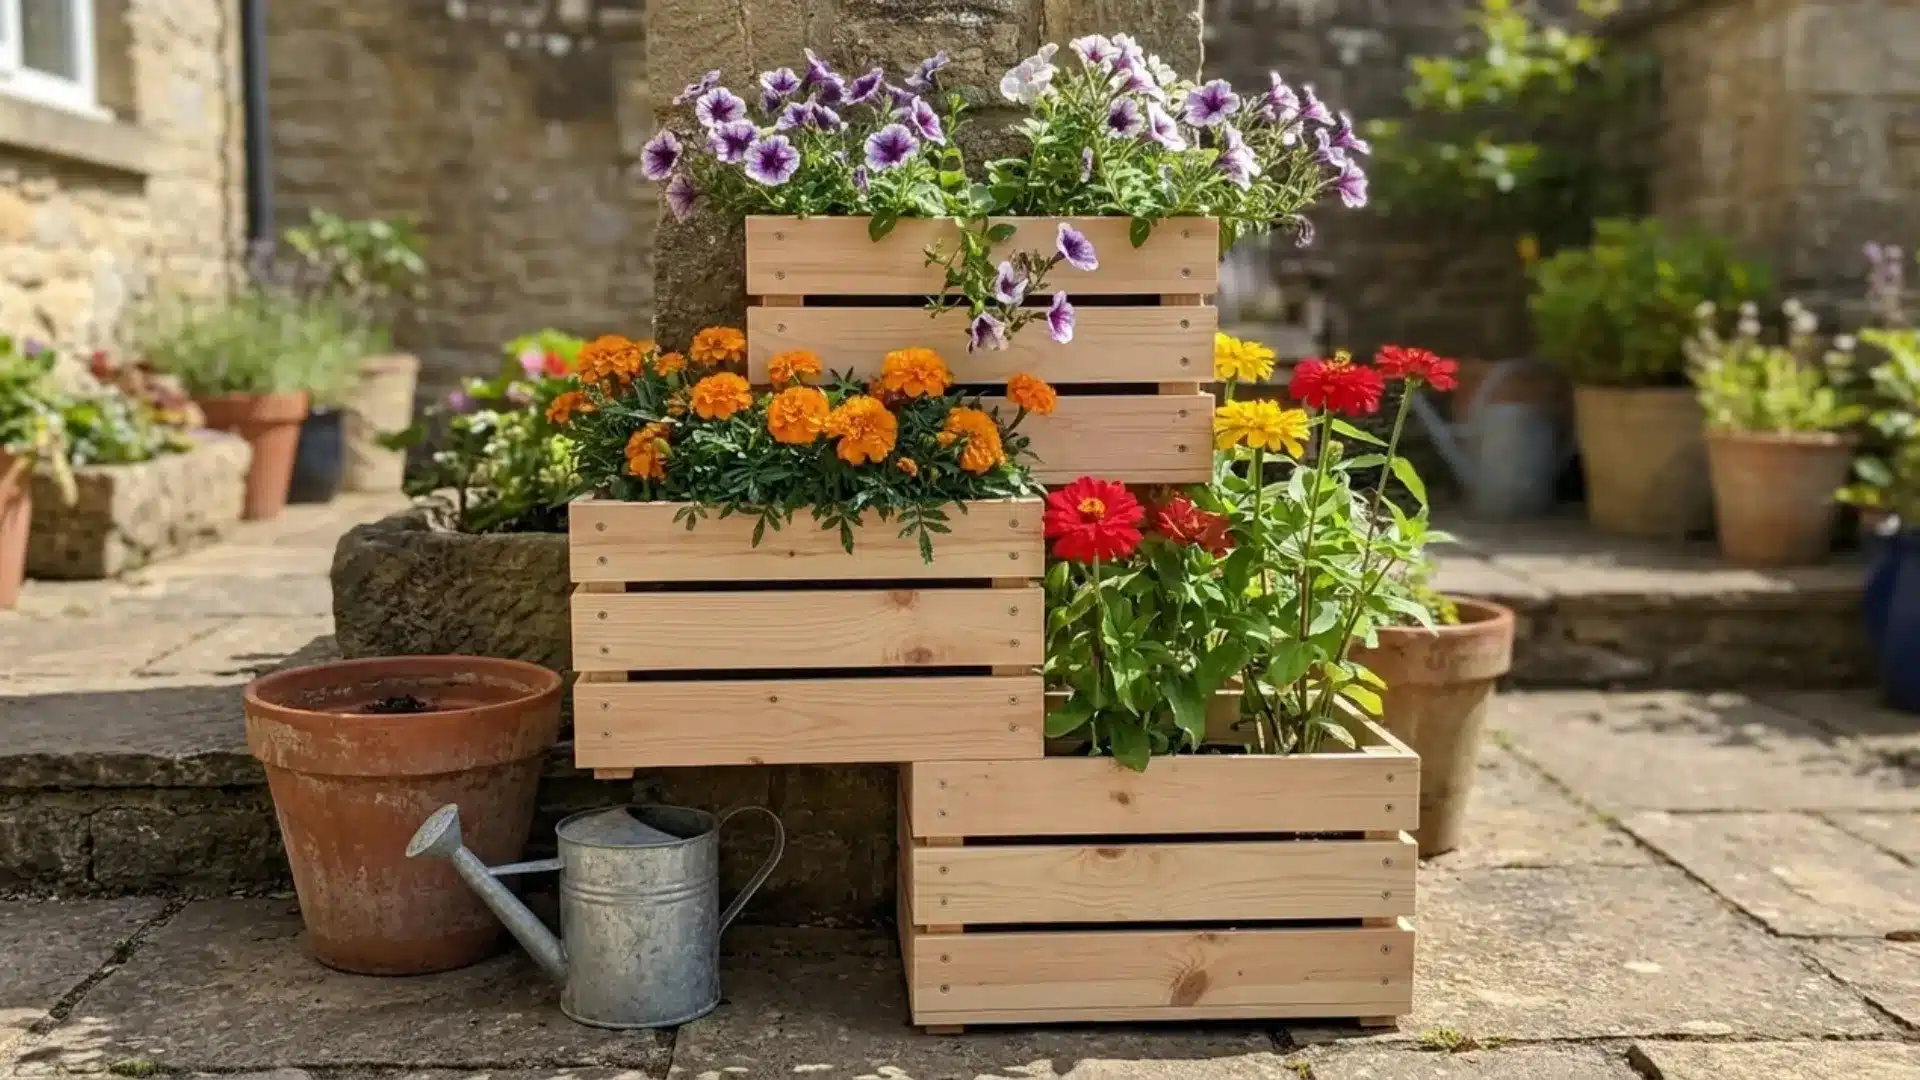
- Tools and materials needed: Wooden crates, screws, drill, wood glue, soil
- Time required: Approximately 2 to 3 hours
Wooden crates stacked and screwed together at offset angles create a sturdy, shelf-like planter with multiple growing levels in one compact footprint.
Secure each crate to the one below it with screws and wood glue so the structure stays stable once filled.
Plant trailing flowers on upper levels and taller plants near the base. This build suits a patio corner or narrow side yard.
19. Paint Vertical Planters Rainbow Colors
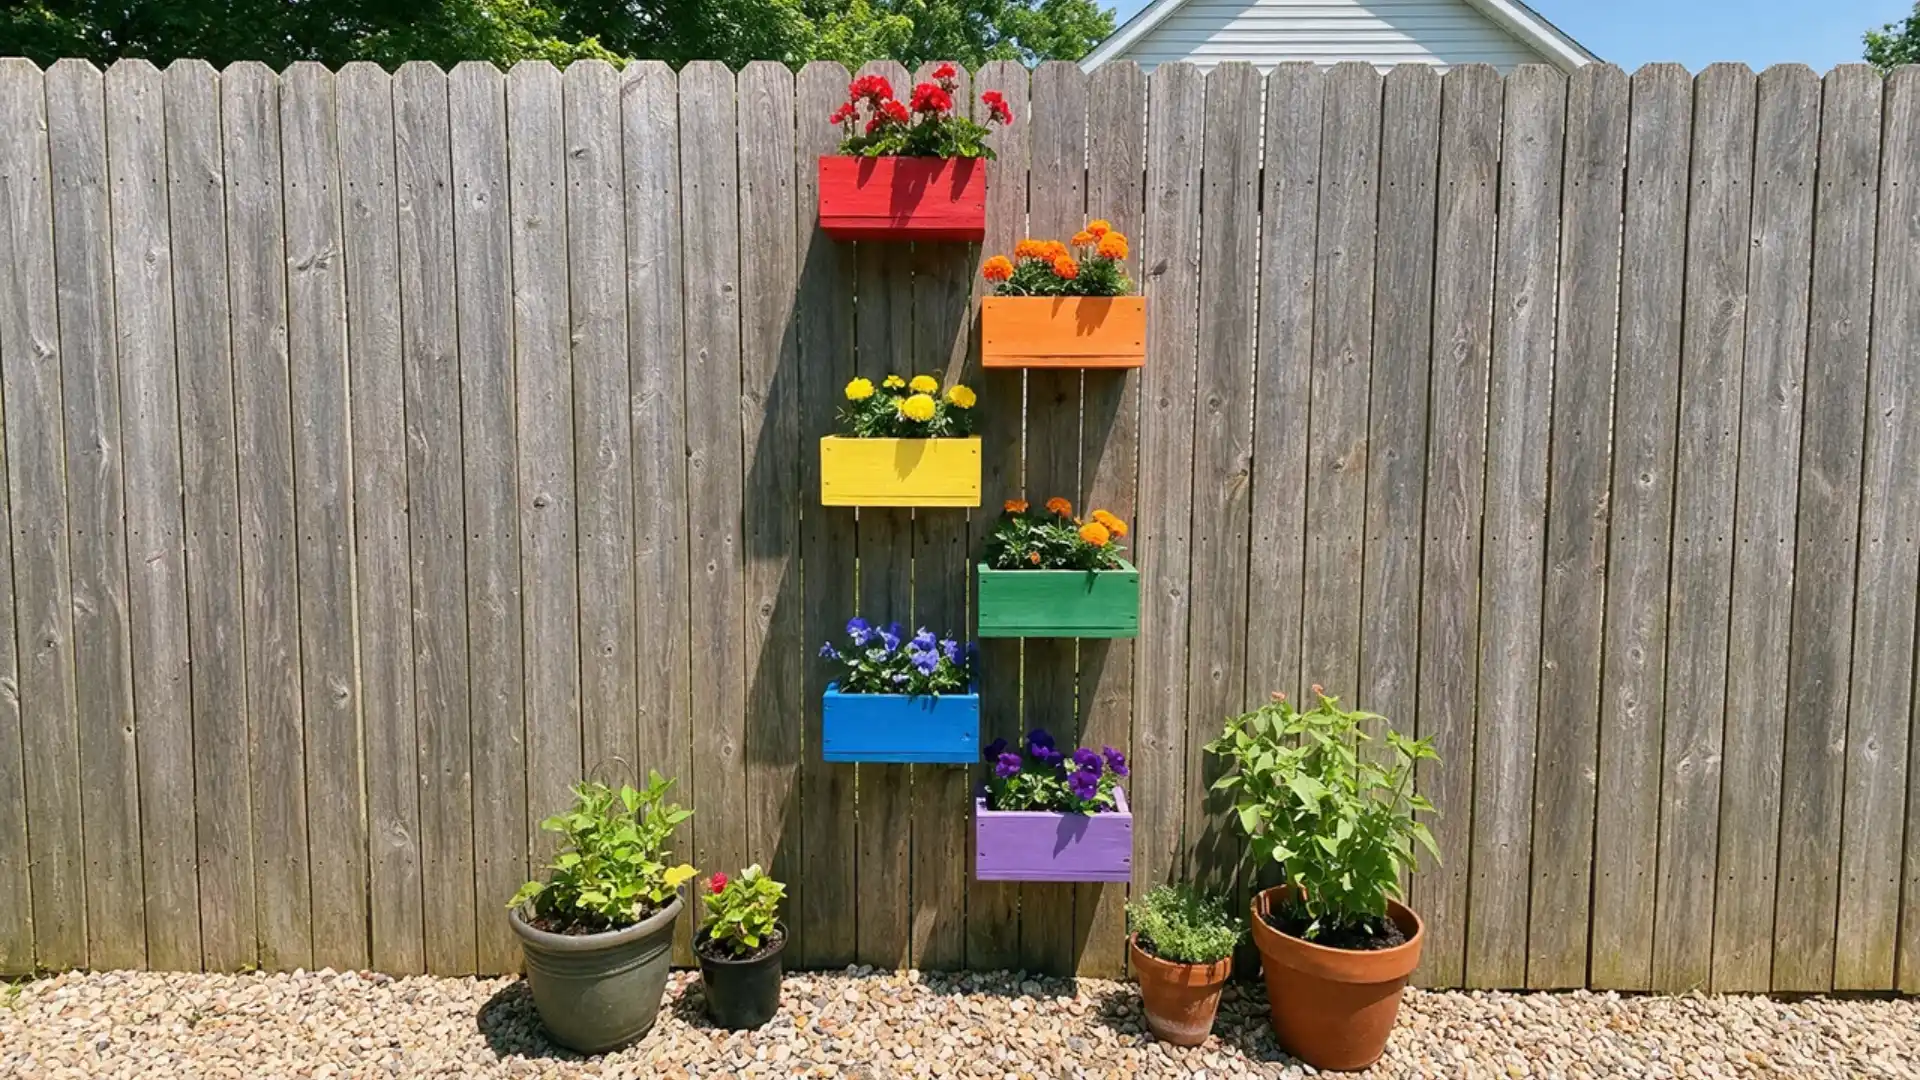
- Tools and materials needed: Wood box planters, exterior paint, brushes, mounting brackets
- Time required: Approximately 3 to 4 hours
Simple wood box planters mounted in a vertical grid and painted in a rainbow gradient turn a plain wall into a colorful garden feature.
Build each box the same size for a clean, uniform look, then paint before mounting to avoid drips on finished plants.
Match flower colors to each box for an extra pop, or let greenery contrast against the bold paint.
20. Turn Shoe Organizer Into Planter
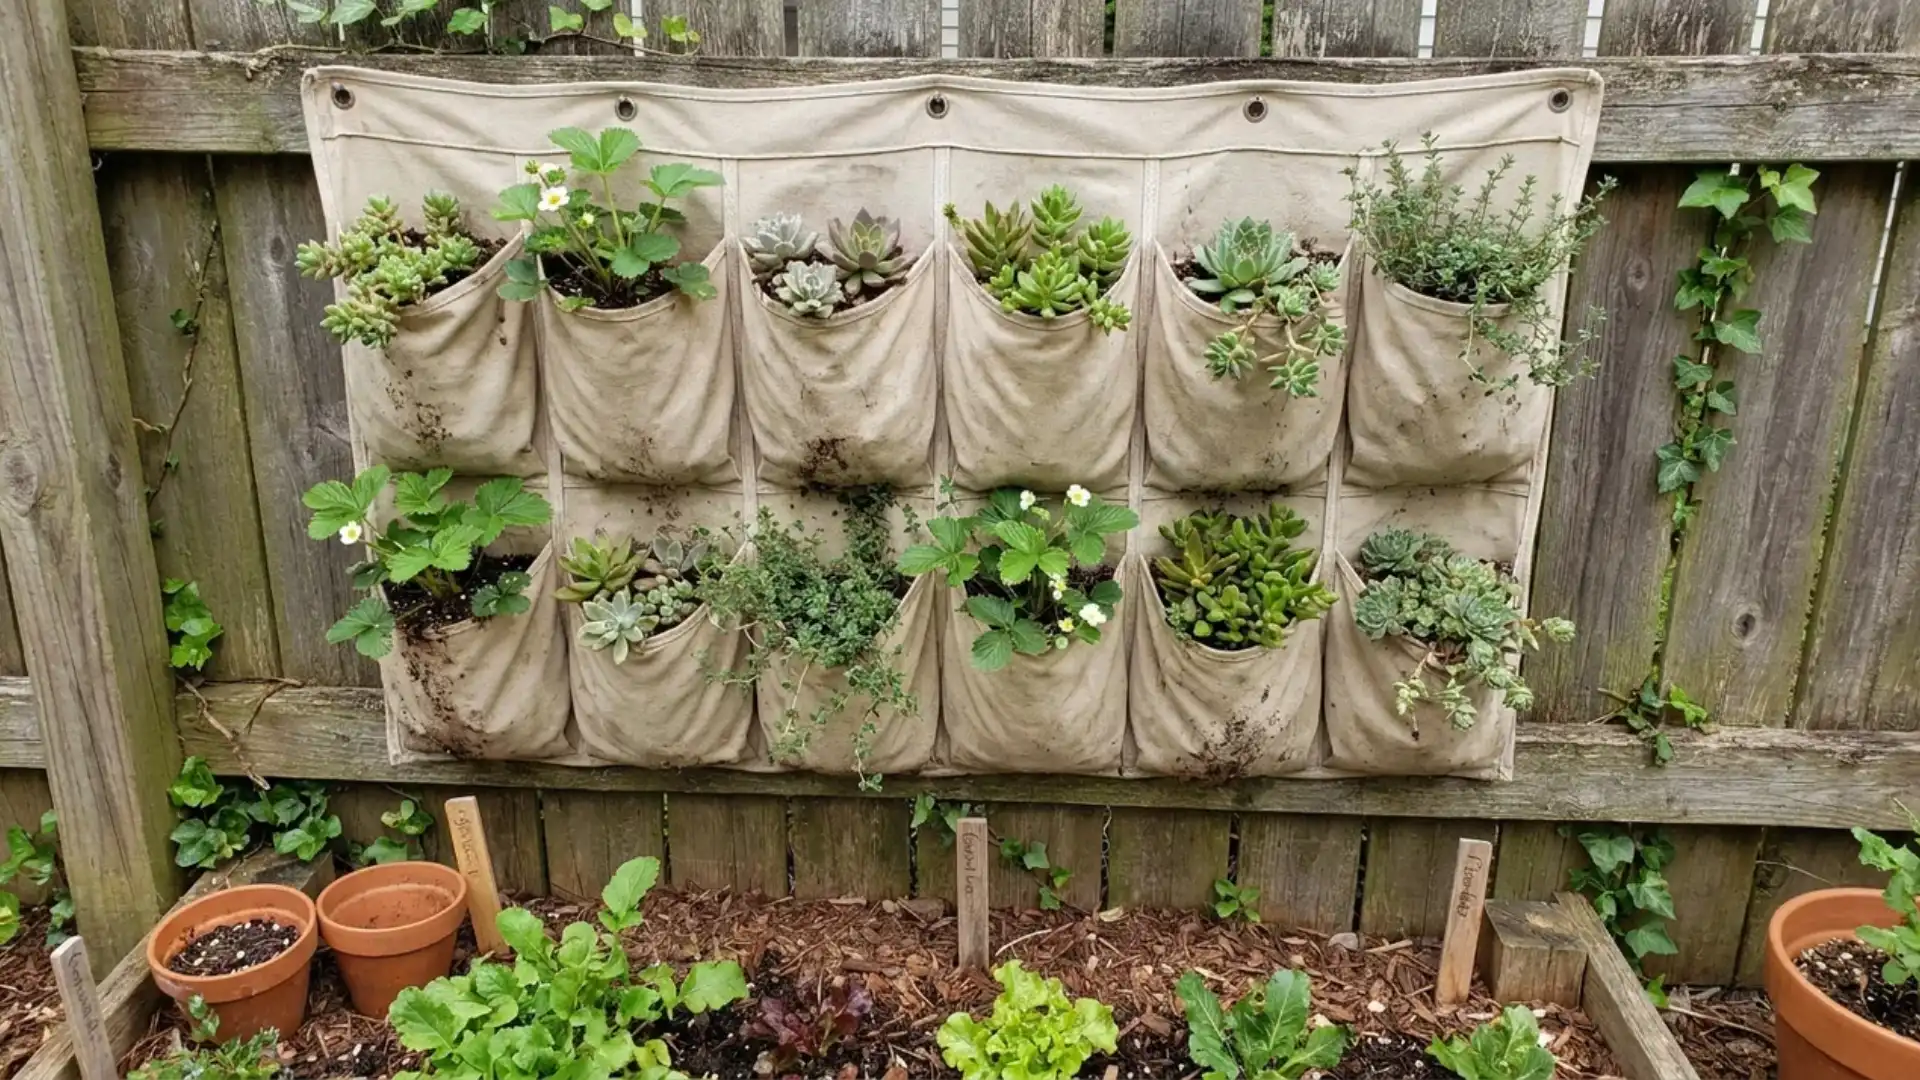
- Tools and materials needed: Hanging shoe organizer, potting soil, small plants
- Time required: Under one hour
A hanging fabric shoe organizer with sturdy pockets makes an instant vertical garden with almost no building required.
Fill each pocket with potting soil and tuck in small plants like succulents, strawberries, or herbs.
Hang it on a fence, wall, or railing that gets enough sunlight for the plants chosen. This is one of the fastest, lowest-cost projects on the entire list.
21. Lay a Pallet Wood Path
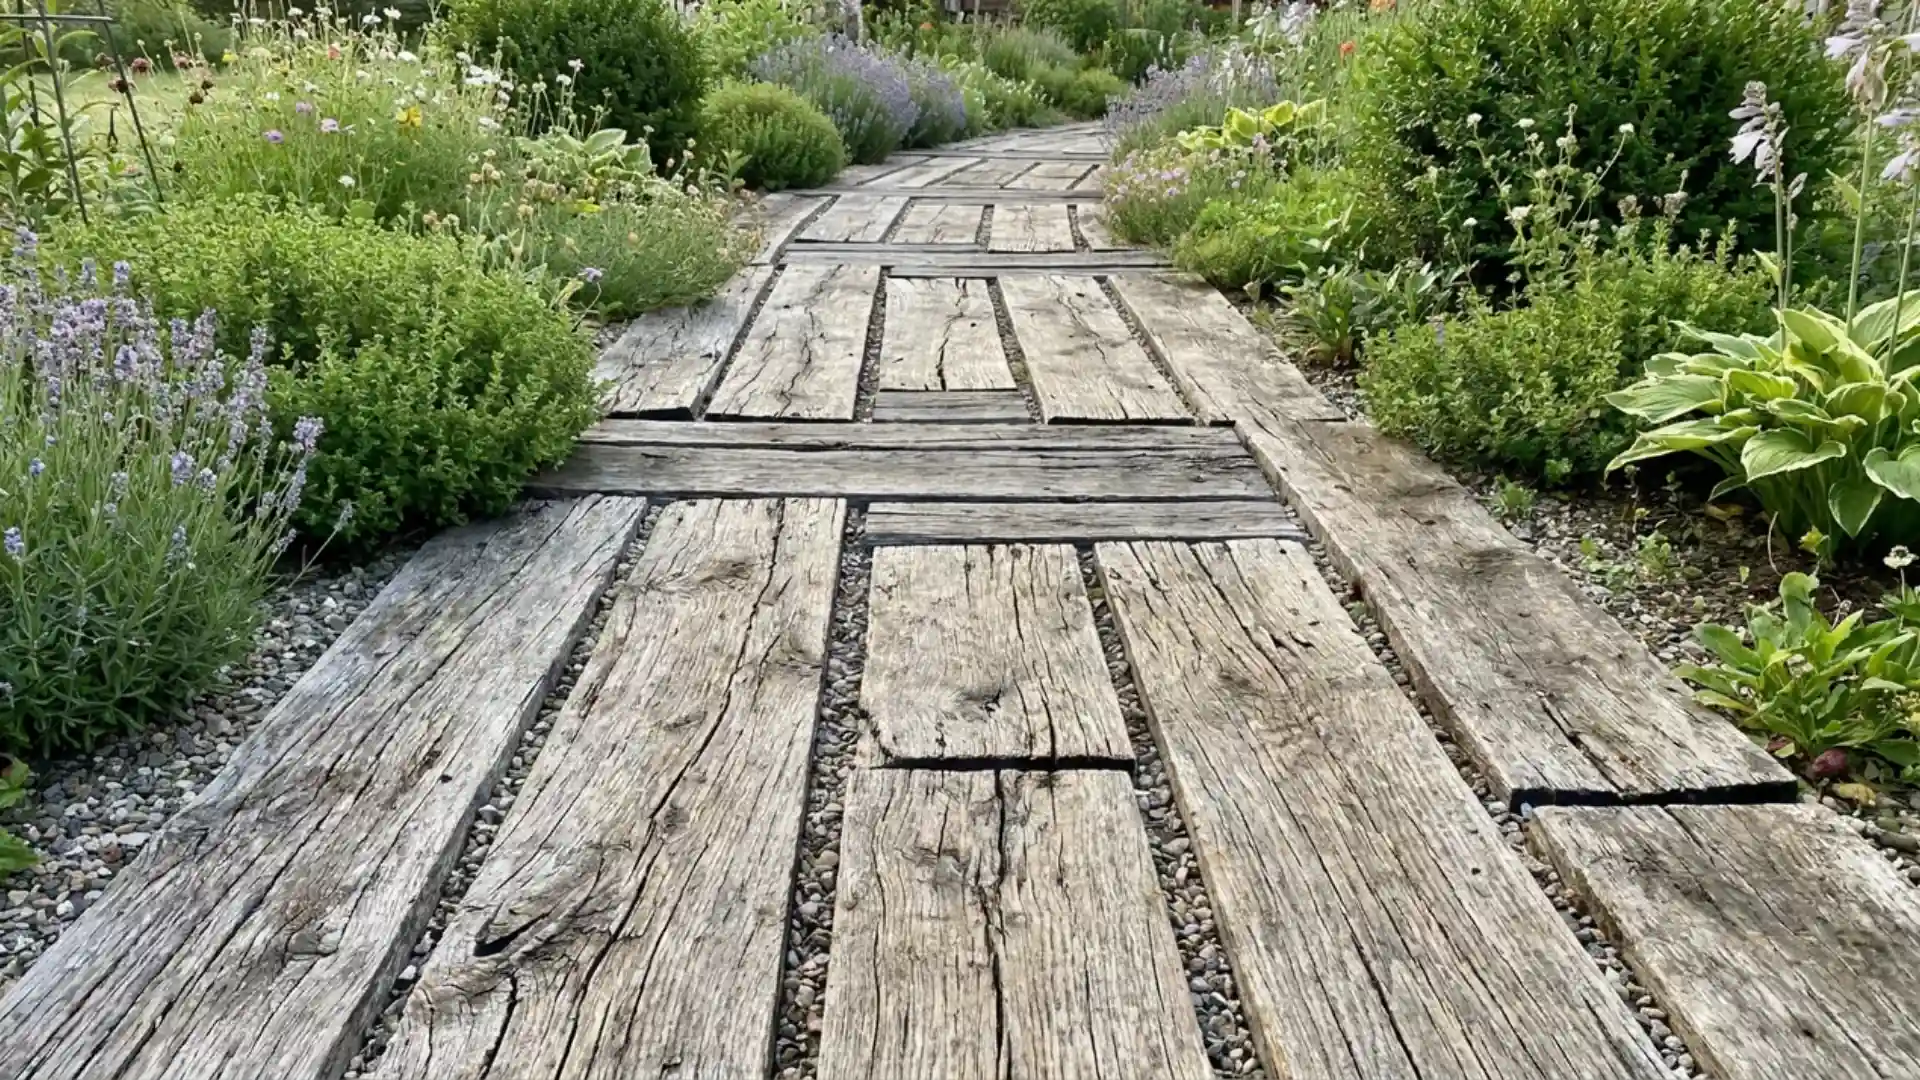
- Tools and materials needed: Wood pallets, saw, gravel base, landscape fabric
- Time required: Approximately 4 to 5 hours
Disassembled pallet wood cut into short planks creates a rustic walking path when laid flat over a gravel base.
Start with landscape fabric to block weeds, then arrange the wood pieces in a staggered pattern for stability underfoot.
This path style suits informal garden areas rather than high-traffic walkways, since wood breaks down faster than stone or brick over time.
22. Build a Budget Gravel Path
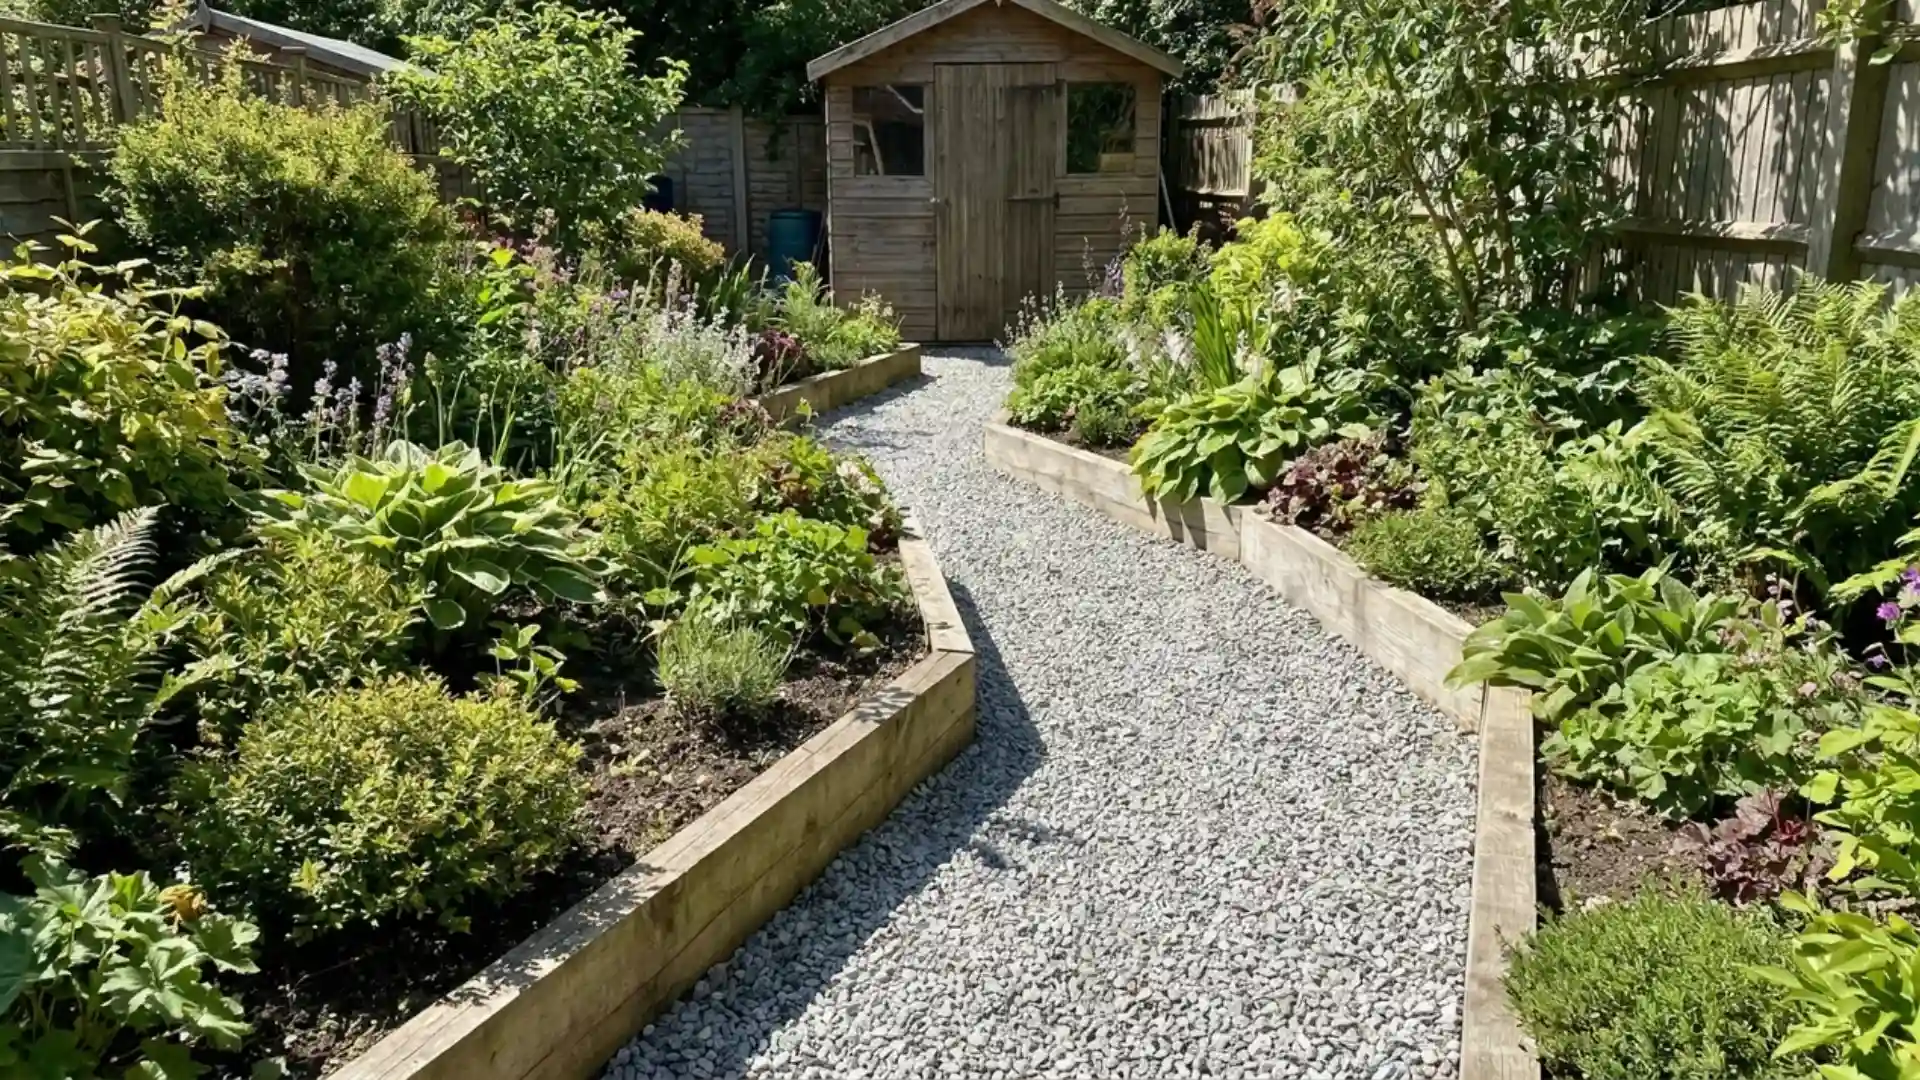
- Tools and materials needed: Gravel, landscape fabric, edging material, rake
- Time required: Approximately 4 to 5 hours
A gravel path is one of the most affordable ways to define a walkway through a garden bed or side yard.
Lay landscape fabric first to prevent weeds, then install edging on both sides to keep gravel contained.
Pour and rake the gravel to an even depth of a few inches. This path drains well and needs very little upkeep.
23. Create Stenciled Stepping Stones Path
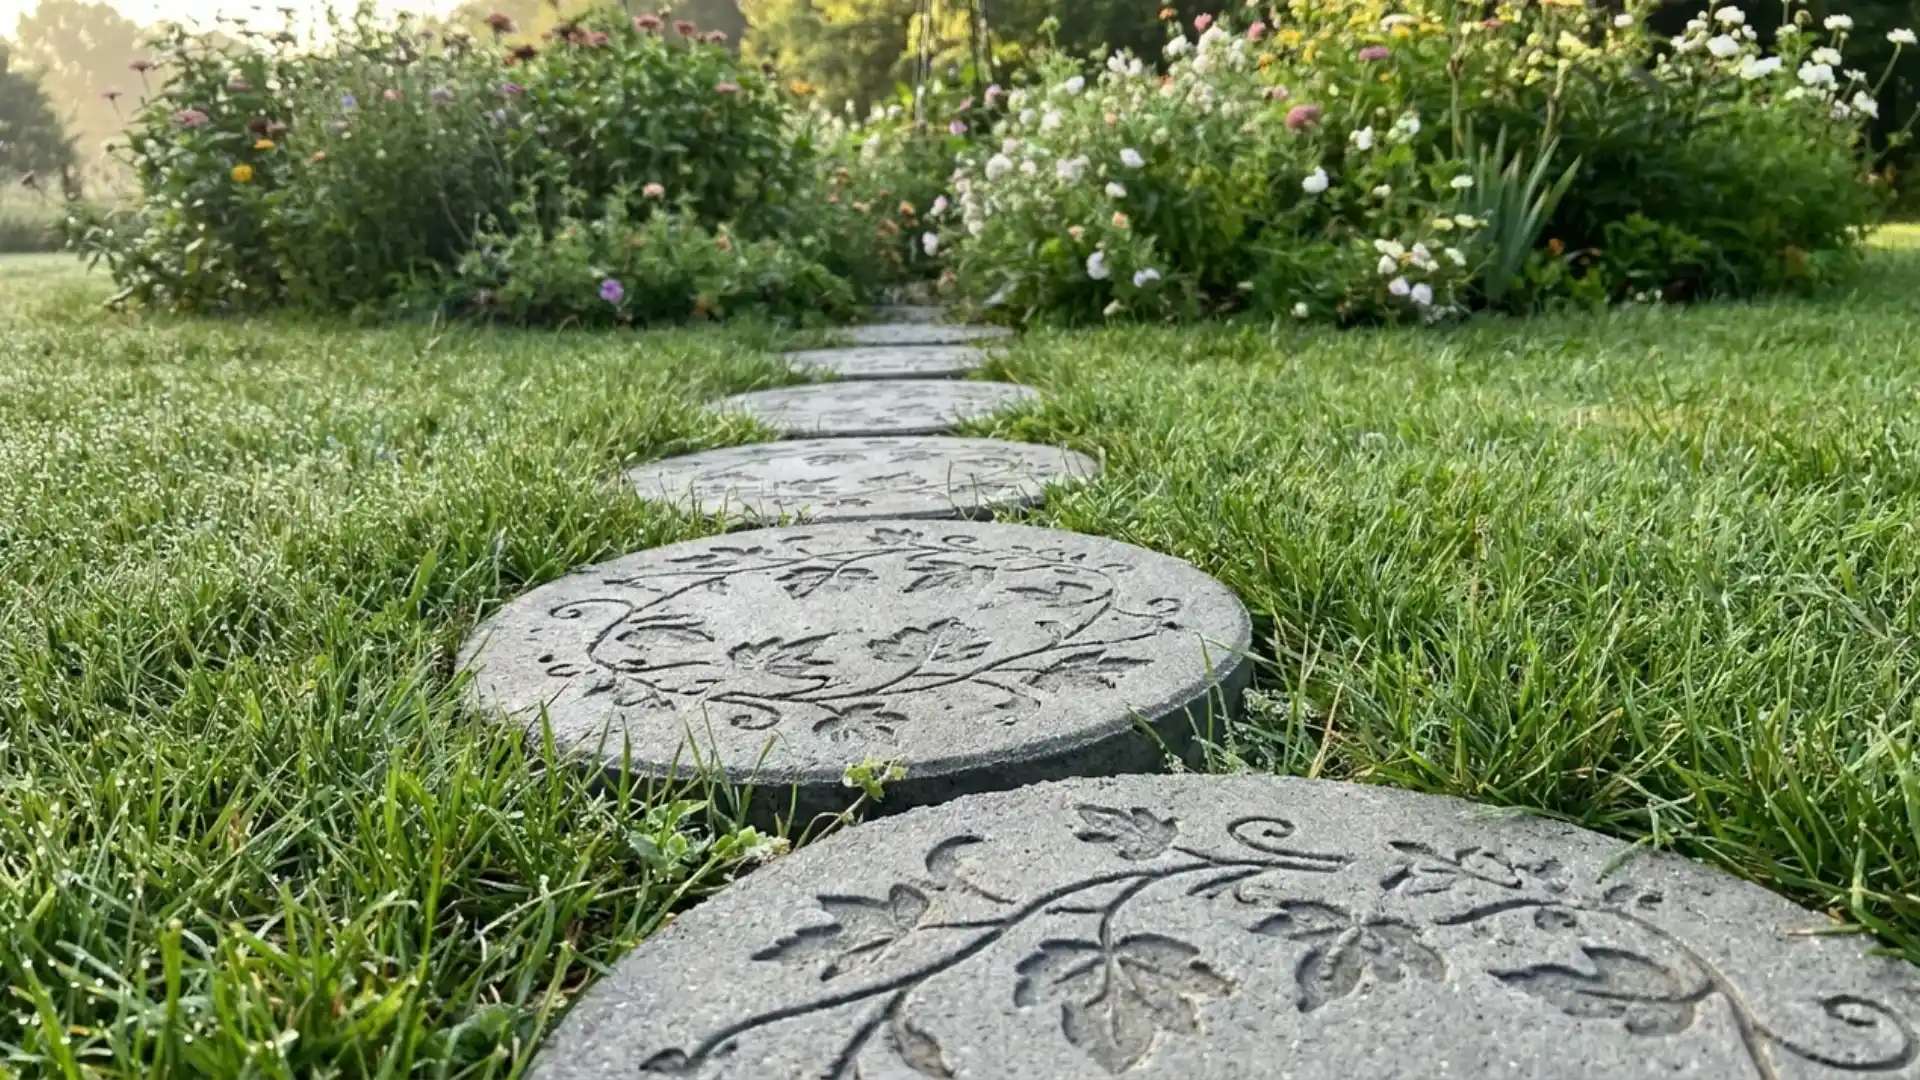
- Tools and materials needed: Concrete mix, stencil or stamp, mixing tub, trowel
- Time required: Approximately 1 day including drying
Poured concrete stamped or stenciled with a decorative pattern turns plain stepping stones into a custom garden feature.
Mix concrete in small batches and pour into simple molds, pressing the stencil in before it sets. Let each stone cure fully before placing it in the garden.
Space stones evenly along a path for a natural stride between them.
24. Build a Pea Gravel Patio
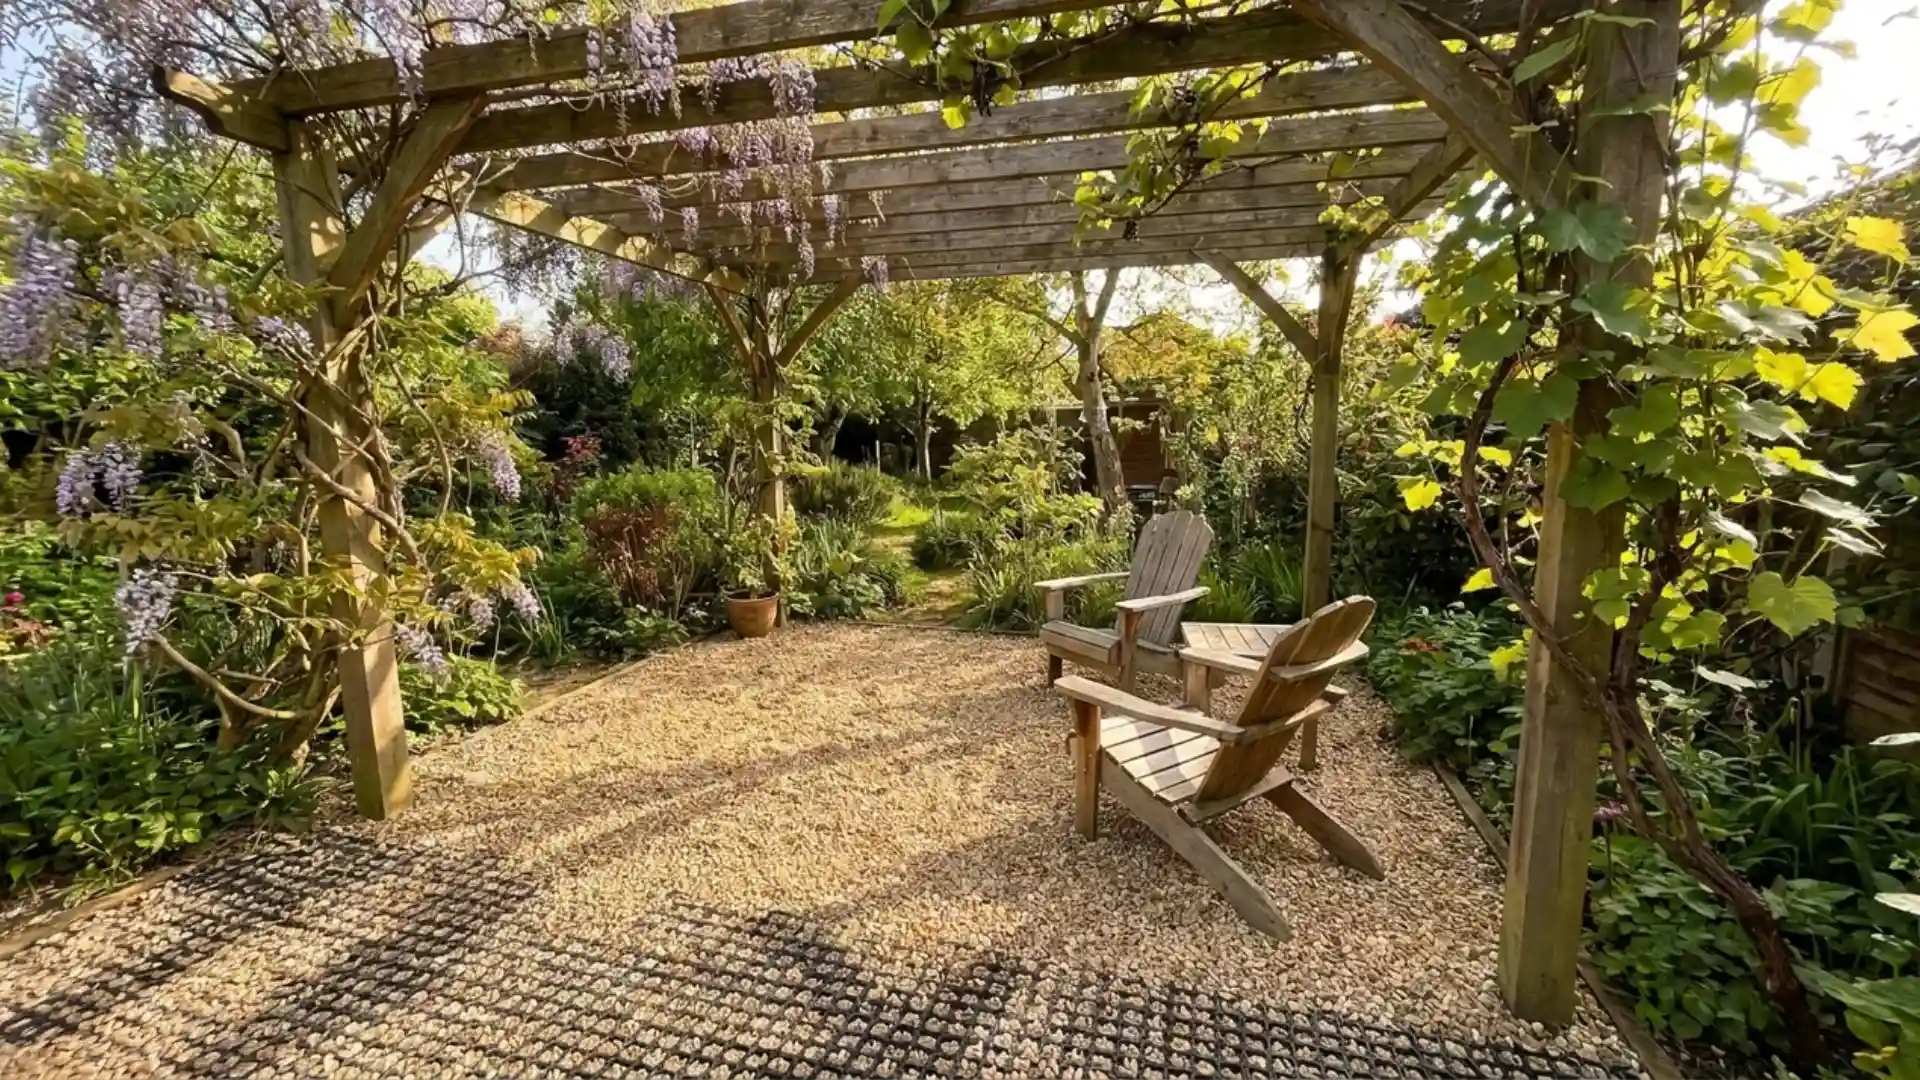
- Tools and materials needed: Pea gravel, paver grid cells, edging, tamper
- Time required: Approximately 1 day
Paver grid cells laid across a cleared, leveled area hold pea gravel in place, creating a low-maintenance patio nook rather than a walking path.
Install the grid system first, then pour pea gravel into each cell and tamp it flush with the frame.
This build suits a small seating area under a pergola or beside a firepit, and resists shifting far better than loose gravel alone.
25. Build a Reclaimed Brick Path
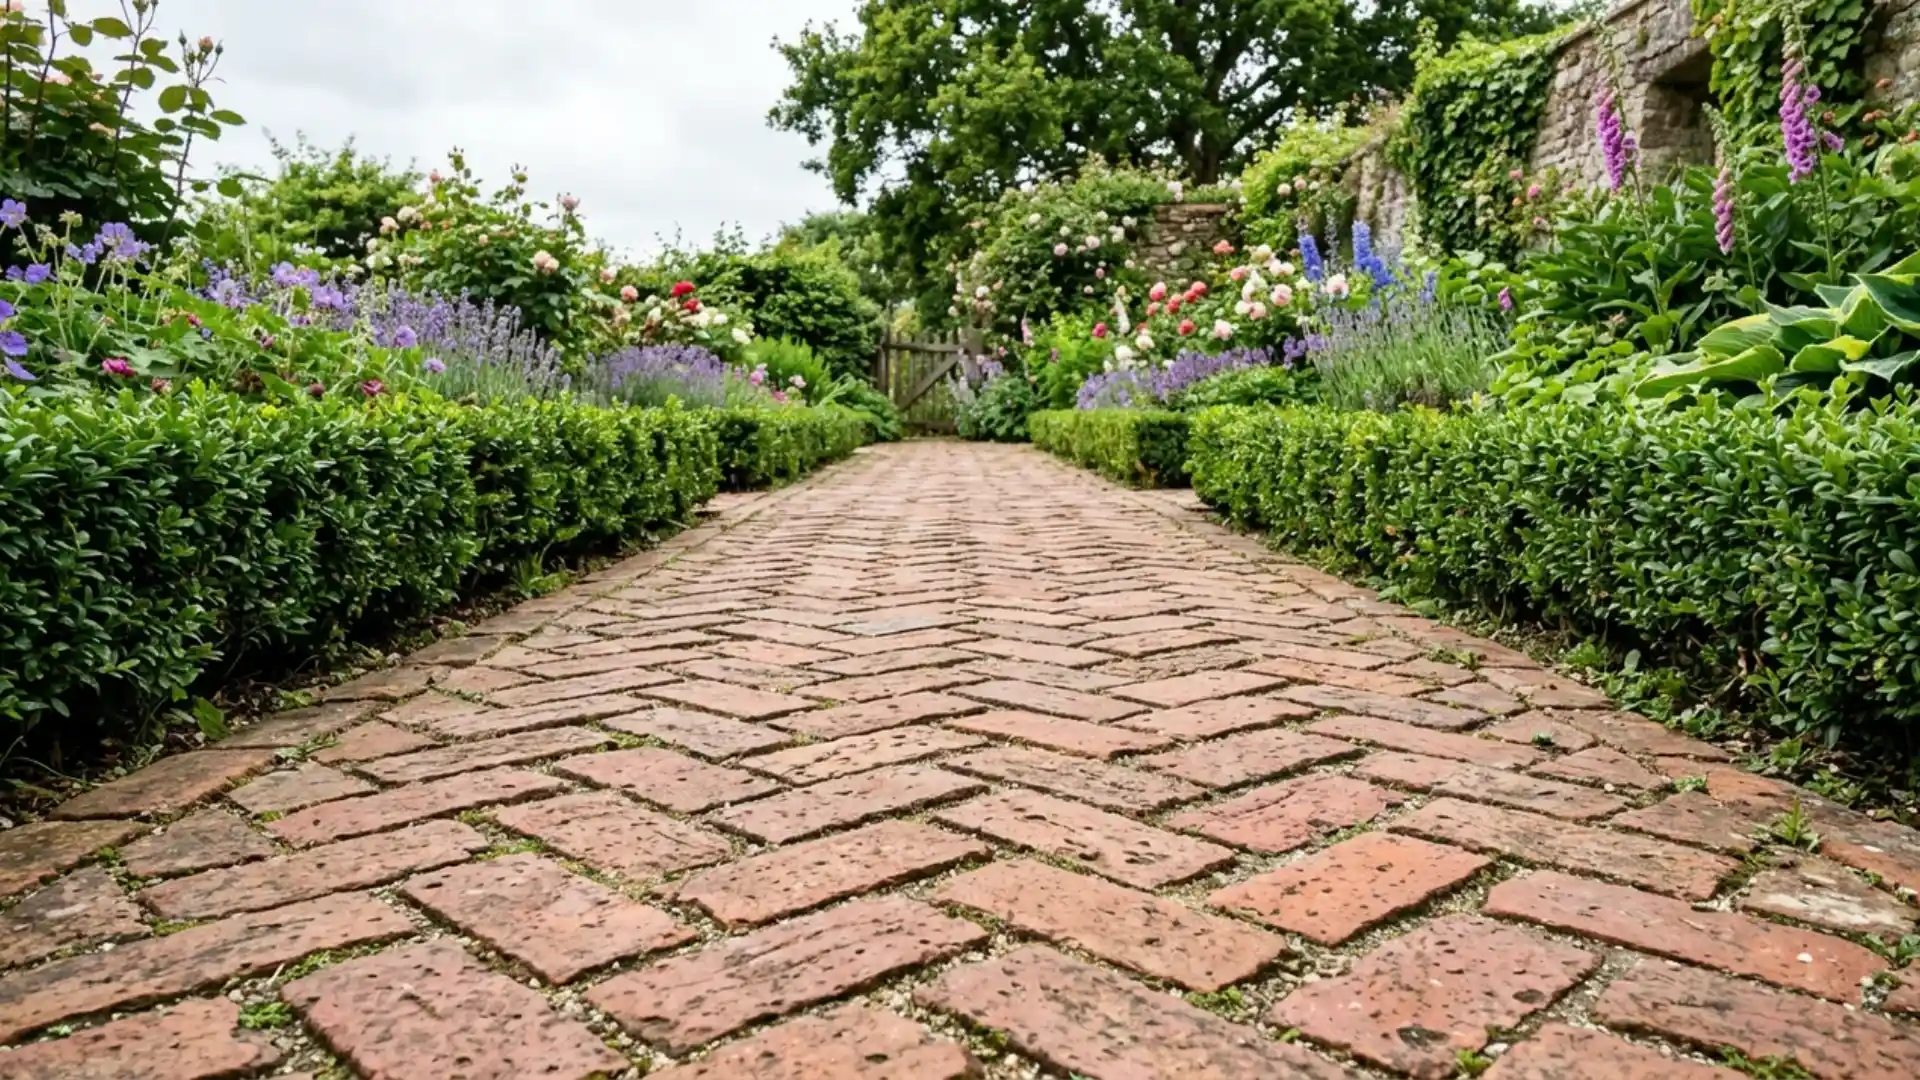
- Tools and materials needed: Reclaimed bricks, sand, landscape fabric, rubber mallet
- Time required: Approximately 1 to 2 days
Reclaimed bricks collected from a demolition or salvage yard make a durable, character-filled garden path at a fraction of the cost of new materials.
Lay landscape fabric and a sand base first, then set bricks in a pattern like herringbone or running bond, tapping each one level with a rubber mallet.
Fill gaps with more sand once the layout is finished.
26. Build a Simple Fence Gate
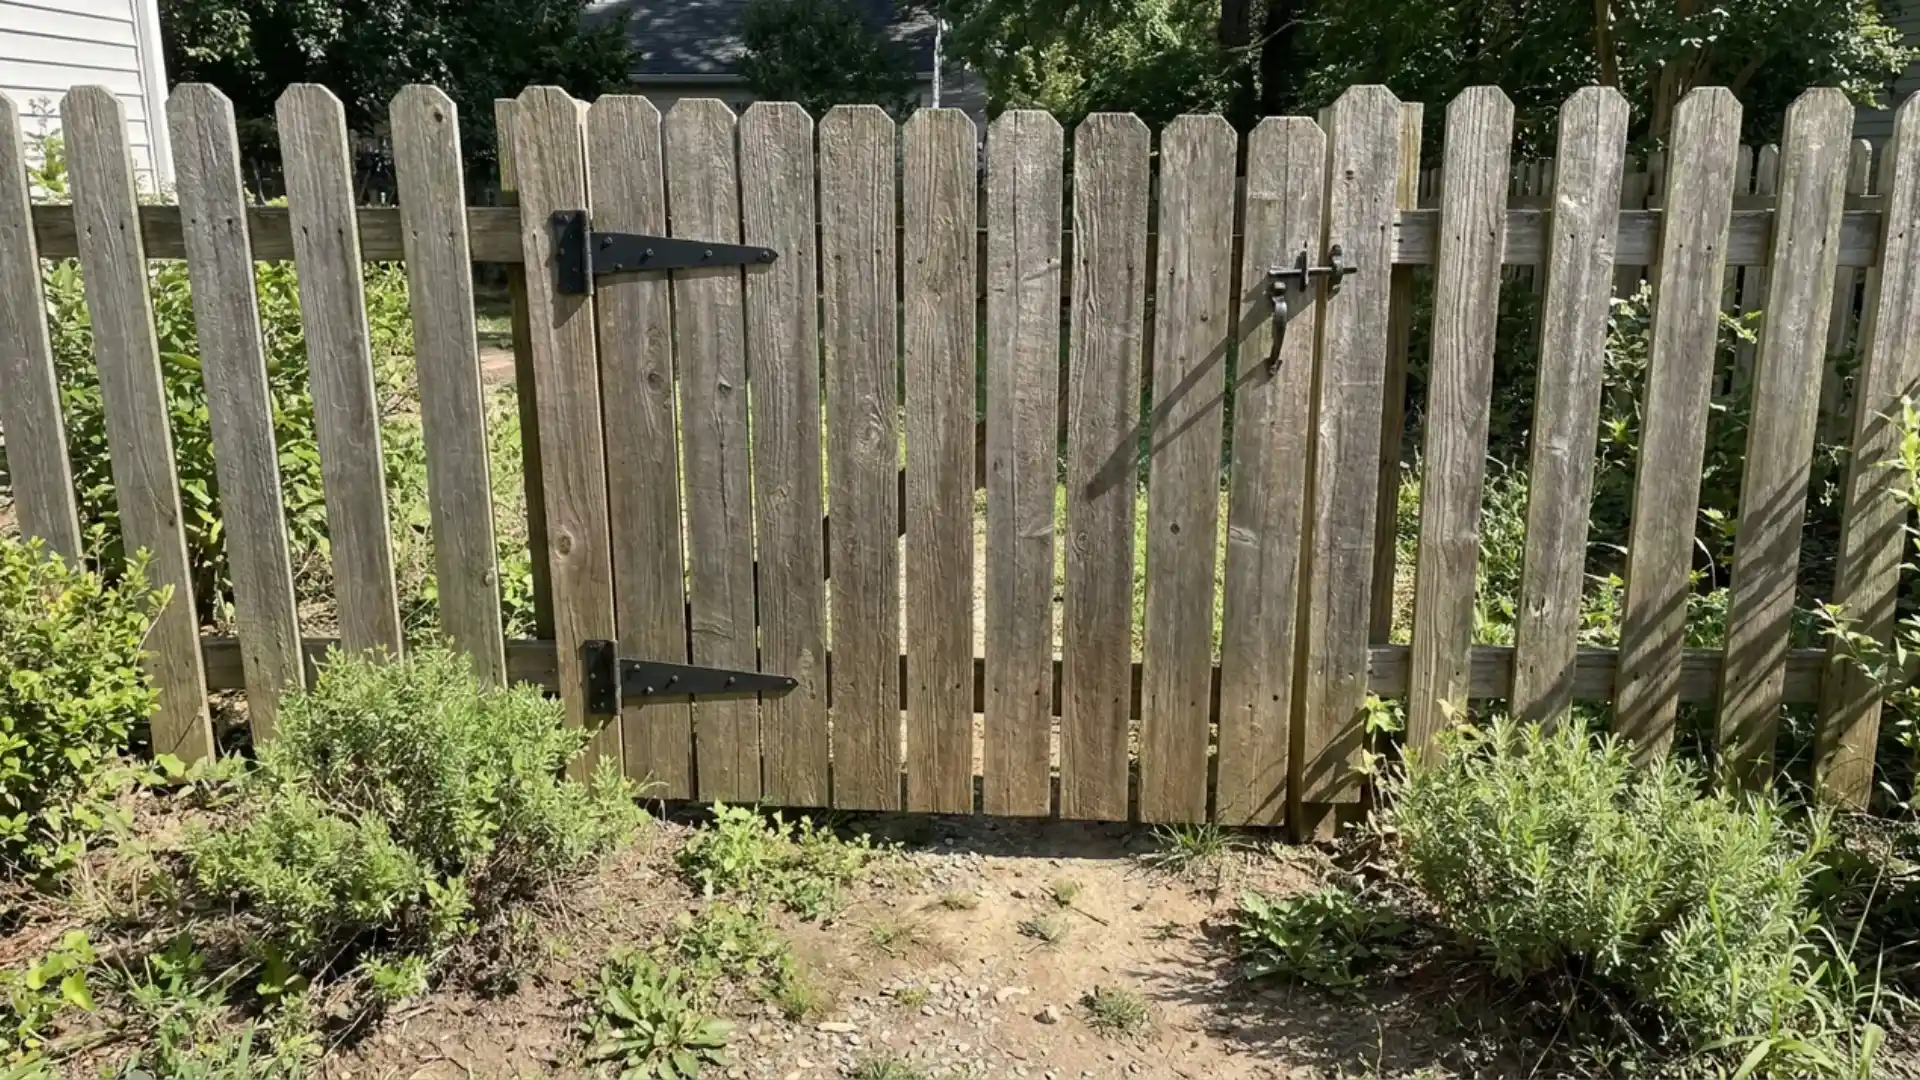
- Tools and materials needed: Wood boards, hinges, latch, screws, drill
- Time required: Approximately 4 to 5 hours
A basic wood-framed gate built to match an existing fence line gives a garden entrance both function and style.
Measure the opening carefully before cutting boards, then assemble the frame and attach hinges to one post.
A simple latch on the opposite side keeps the gate secure against wind or curious pets. Stain or paint to match the surrounding fence.
27. Build a Wooden Garden Fence
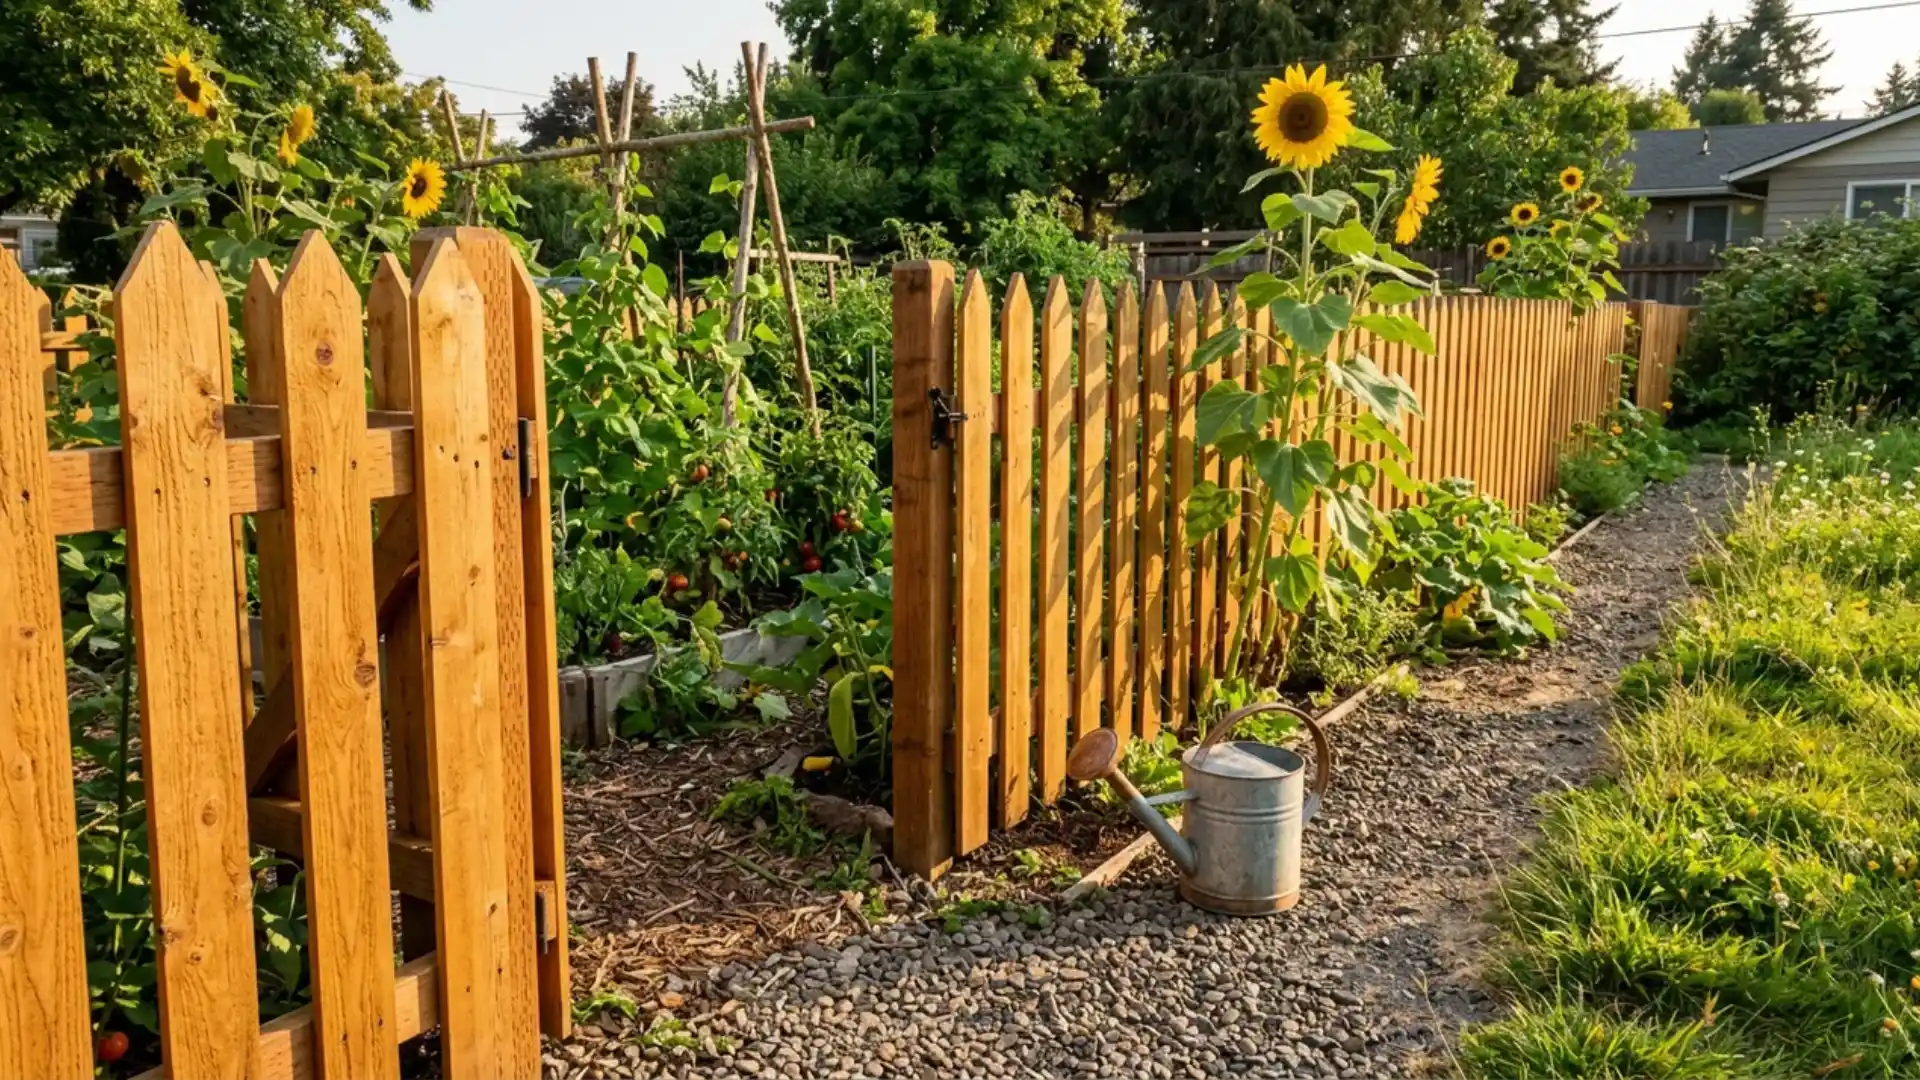
- Tools and materials needed: Fence posts, boards, concrete mix, screws, level
- Time required: Approximately 1 to 2 days
A wood fence built section by section around a garden keeps out wildlife while adding a clean, finished edge to the whole space.
Set posts in concrete first, checking each one with a level before it cures.
Attach horizontal or vertical boards once the posts are stable, spacing them evenly for a consistent look. Stain the finished fence to protect it from the weather.
28. Build a Backyard Potting Bench
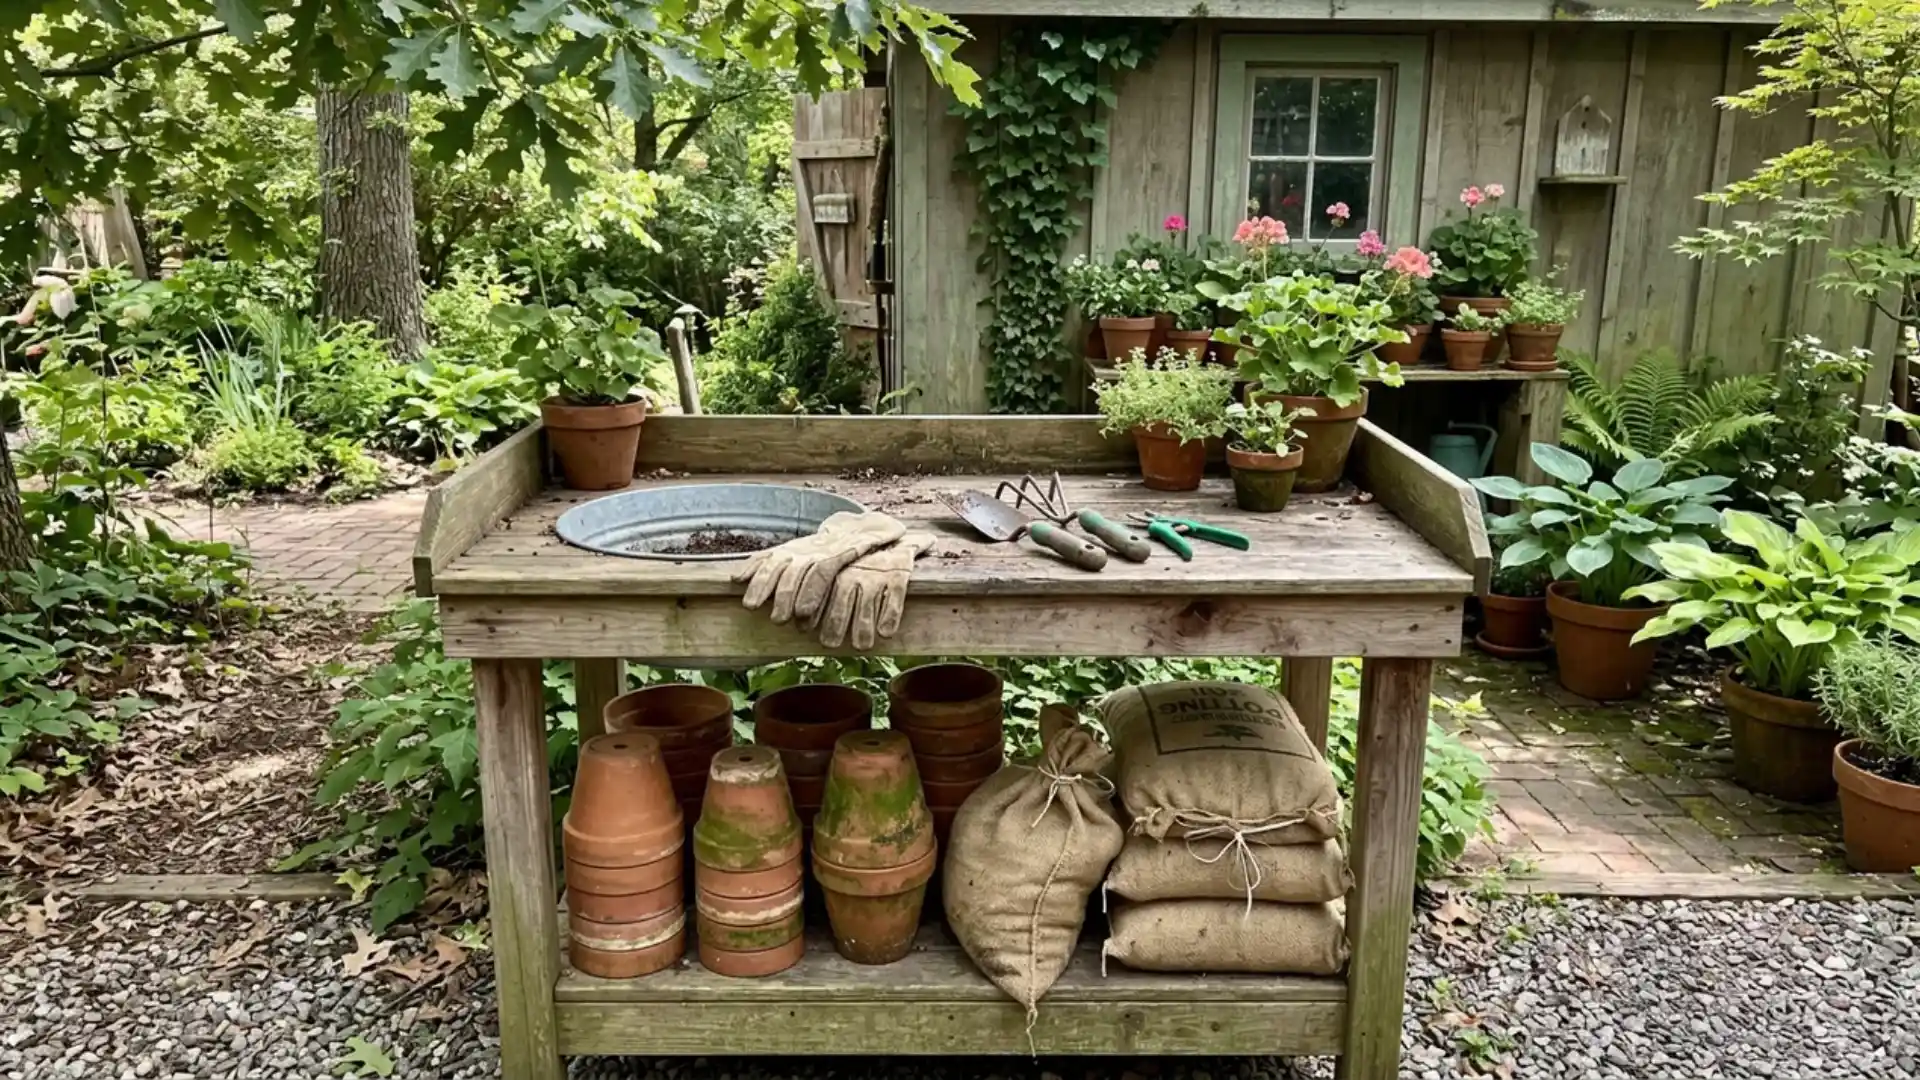
- Tools and materials needed: Lumber, screws, drill, shelf brackets, sink basin optional
- Time required: Approximately 1 day
A dedicated potting bench gives gardening supplies, soil, and tools one central workspace instead of scattering them across the yard.
Build a sturdy tabletop with shelving underneath for pots and bags of soil, and add a small basin if running water is nearby.
Position it in a shaded spot near the garden shed for easy access during planting season. If storage keeps overflowing past the bench itself, laying out a proper garden shed floor plan nearby solves that for good.
29. Build a DIY Outdoor Sofa
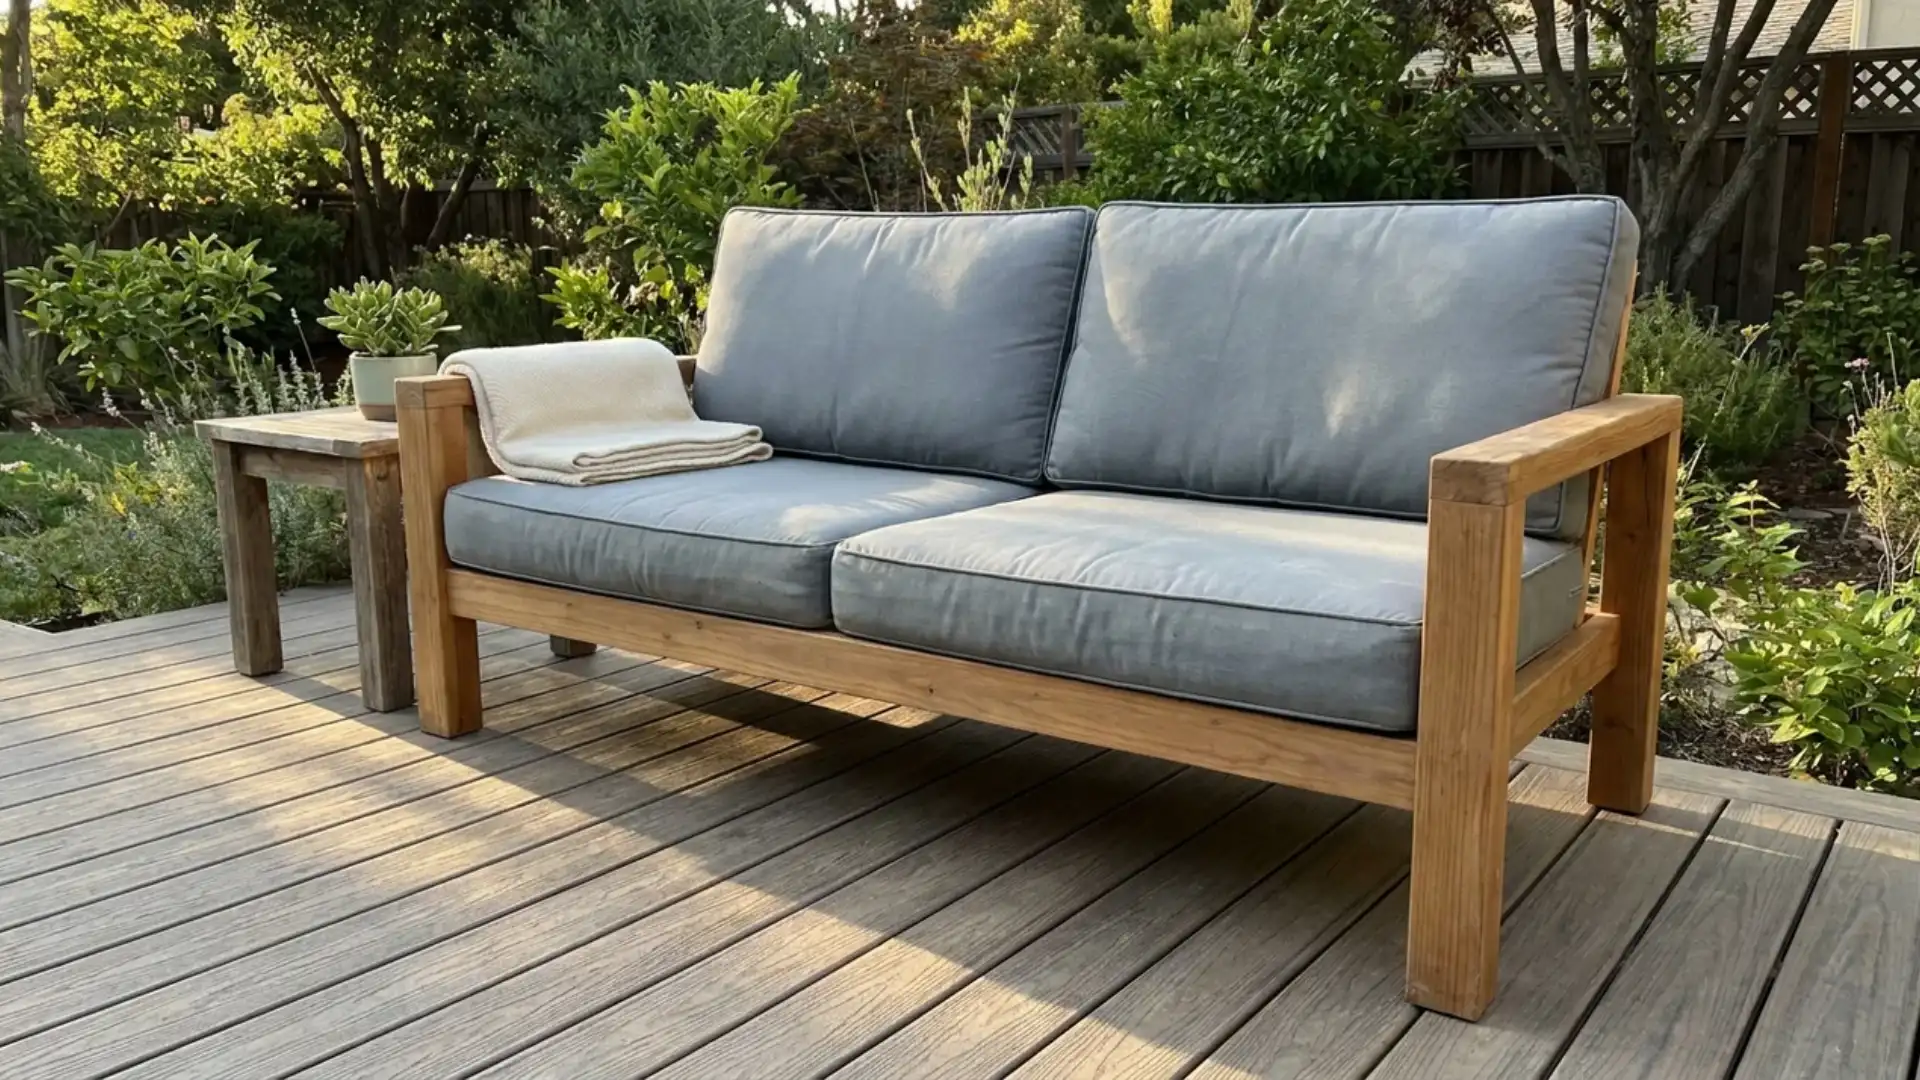
- Tools and materials needed: 2×4 lumber, screws, drill, outdoor cushions, wood stain
- Time required: Approximately 1 to 2 days
A simple 2×4 frame built to standard cushion dimensions creates an outdoor sofa at a fraction of the retail price.
Assemble the base and armrests first, then stain or seal the wood for weather resistance before adding cushions.
This build works well as a centerpiece for a patio seating area, especially paired with a matching coffee table or a nearby fire pit.
30. Turn Indoor Table Outdoor Use
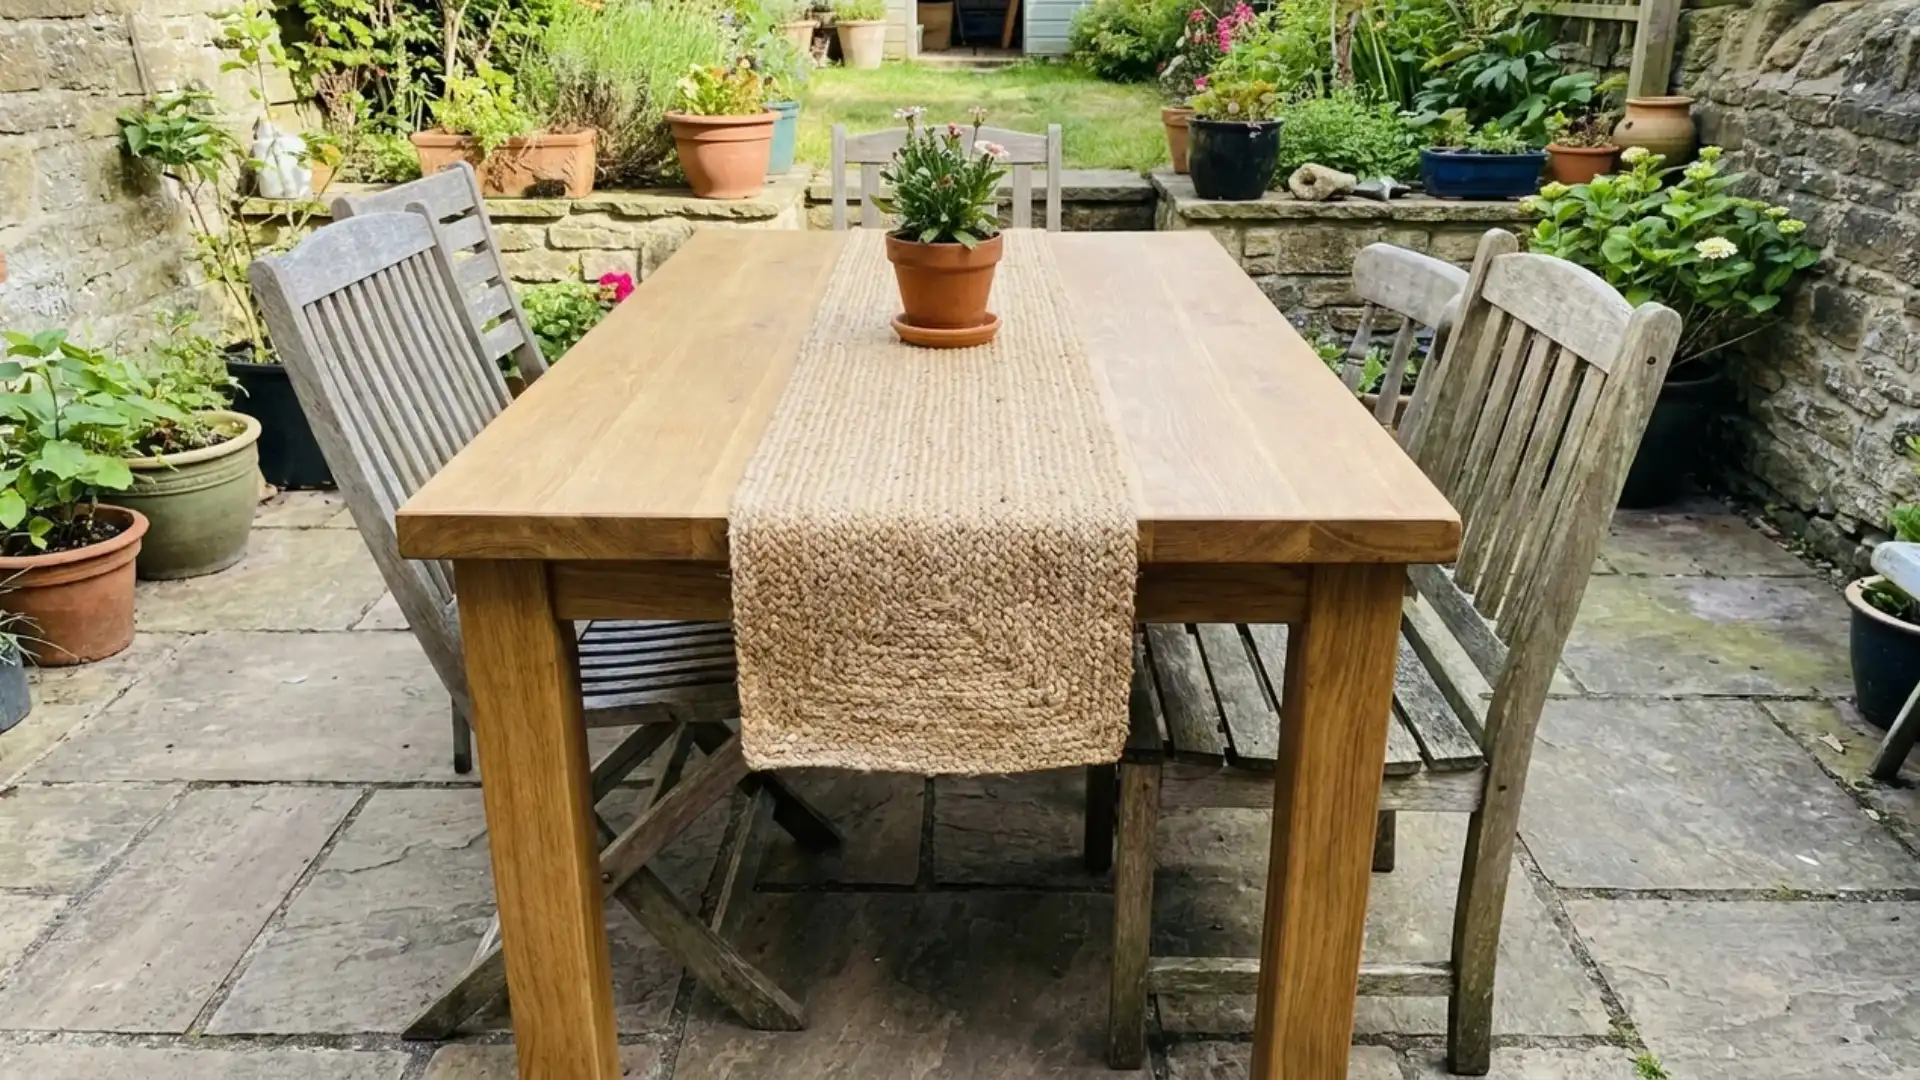
- Tools and materials needed: Old indoor table, exterior sealant, sandpaper, weatherproof paint
- Time required: Approximately 3 to 4 hours
An old dining or side table headed for the curb gets a second life outdoors with the right prep work.
Sand down the surface, then apply a weatherproof sealant or exterior paint to protect it from rain and sun.
This works best with solid wood tables rather than particleboard, which breaks down quickly outside. Add a table runner for extra character.
31. Build a Storage Bench Seat
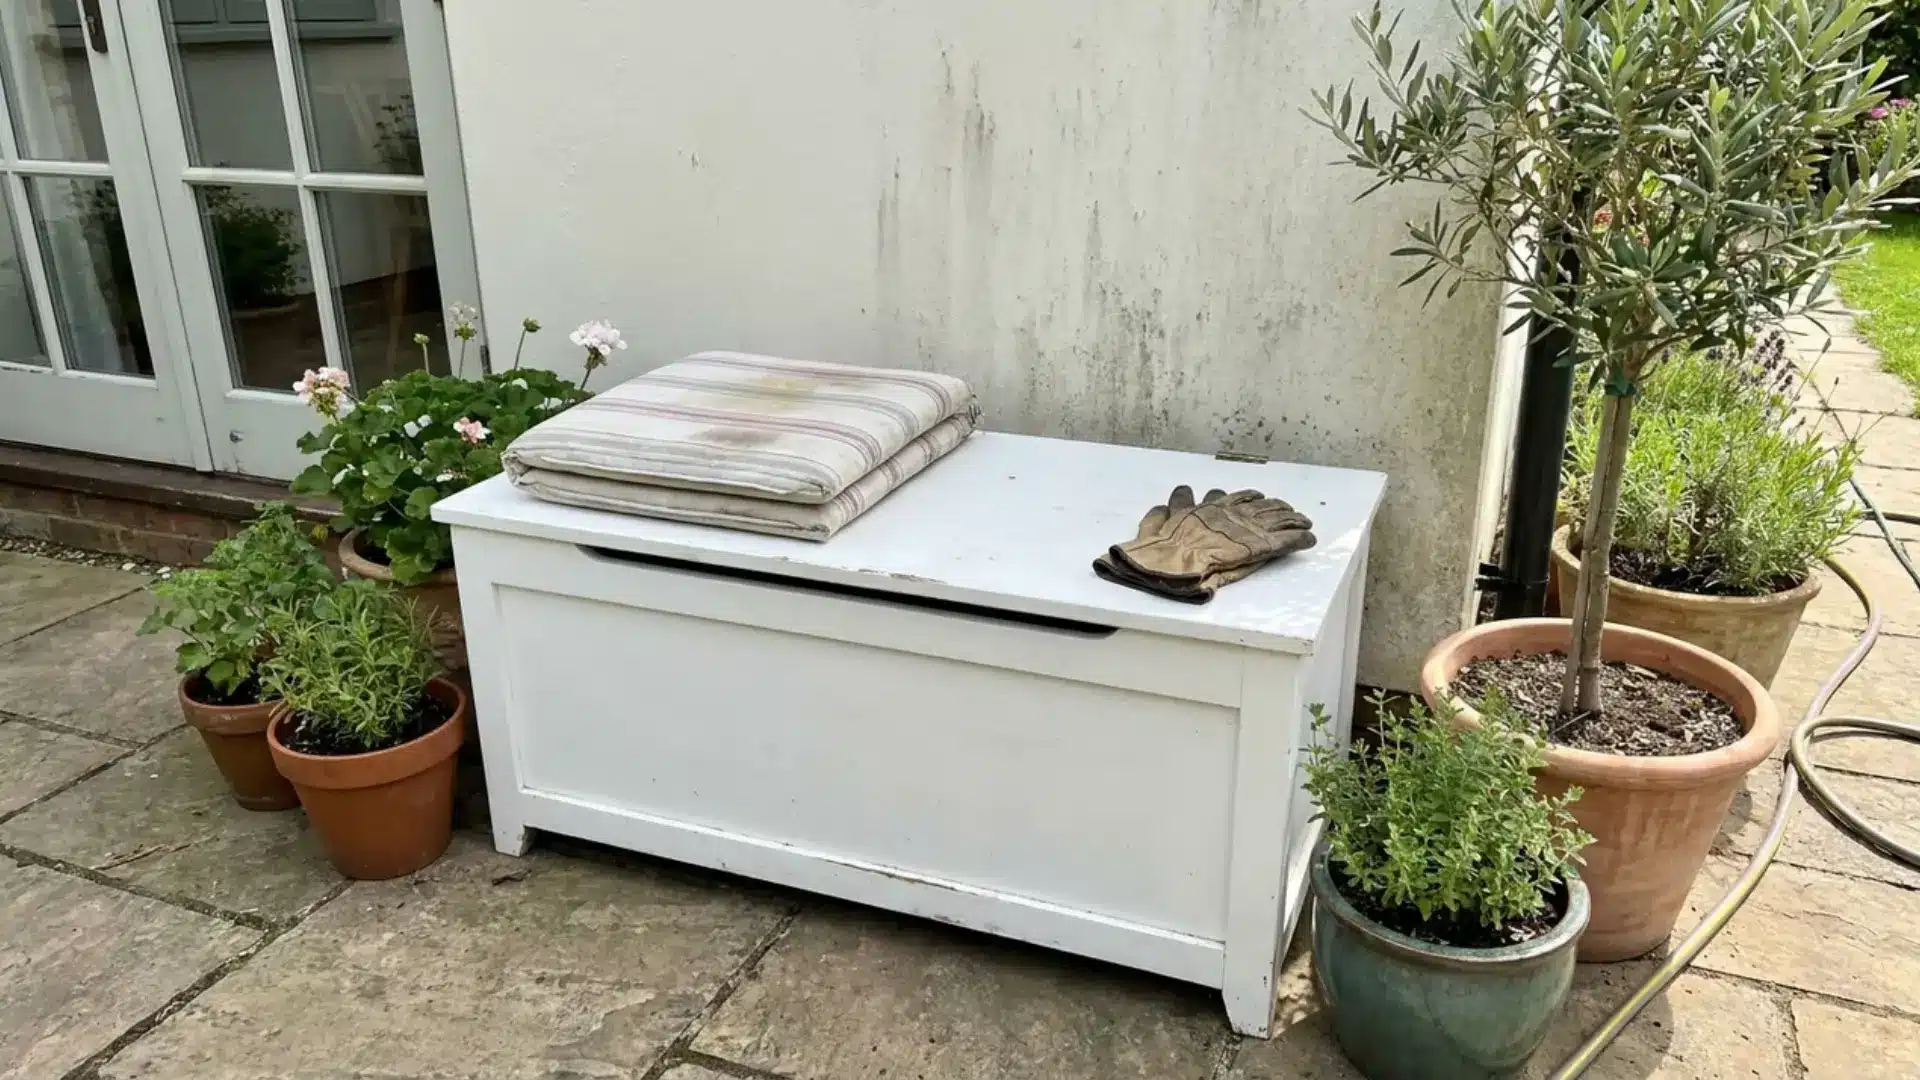
- Tools and materials needed: Plywood, hinges, lumber, screws, exterior paint
- Time required: Approximately 1 day
A bench with a hinged lid and hollow storage base solves two problems at once: extra seating and a place to stash cushions, tools, or hoses.
Build a simple box frame from plywood, then attach a hinged lid cut to fit the top exactly.
Paint or stain the exterior to match nearby furniture. Place it near a patio door for easy access.
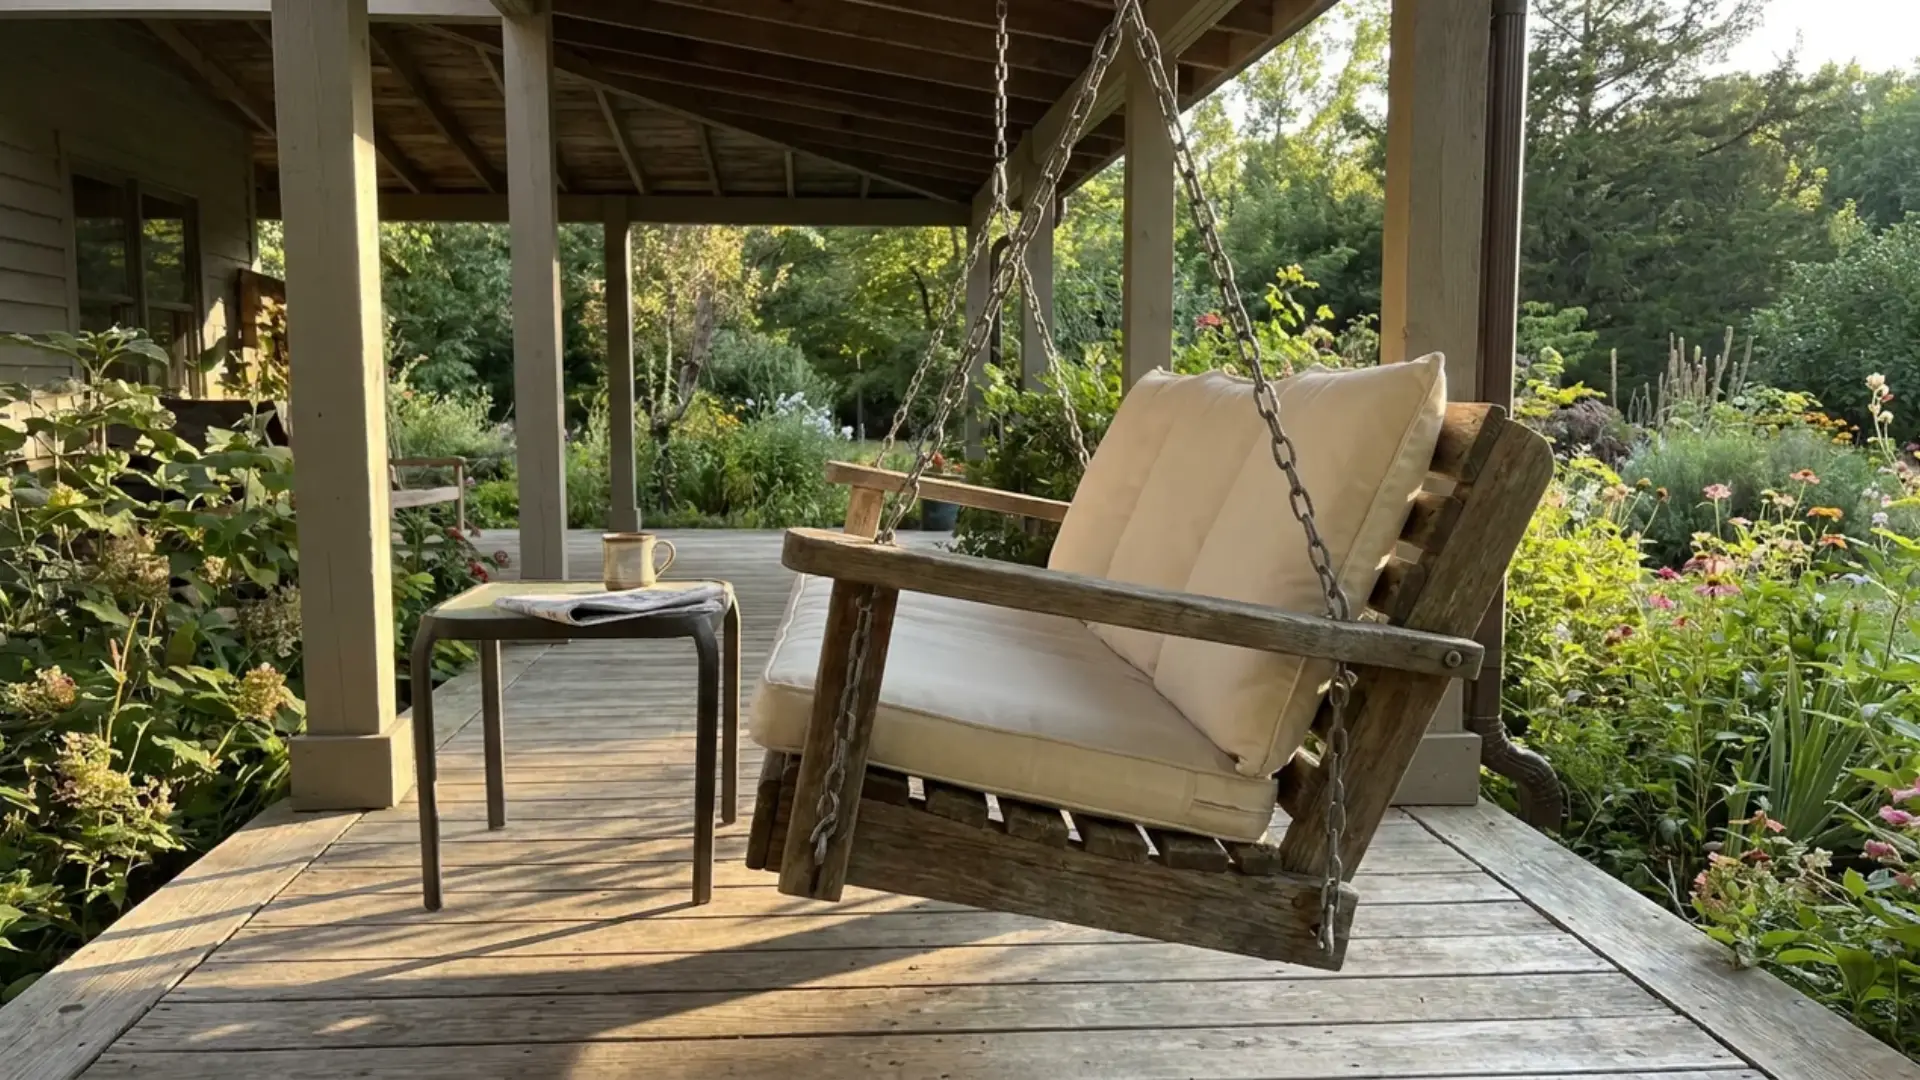
32. Build a Wooden Porch Swing
- Tools and materials needed: 2×4 lumber, chain or rope, eye bolts, screws
- Time required: Approximately 1 to 2 days
A porch swing built from basic 2×4 lumber needs sturdy joinery and a securely anchored porch roof or freestanding frame to hang from safely.
Build the seat and back first, then attach chains or rope through eye bolts at each corner. Test the weight capacity before regular use.
This build turns any covered porch into a relaxing spot to sit.
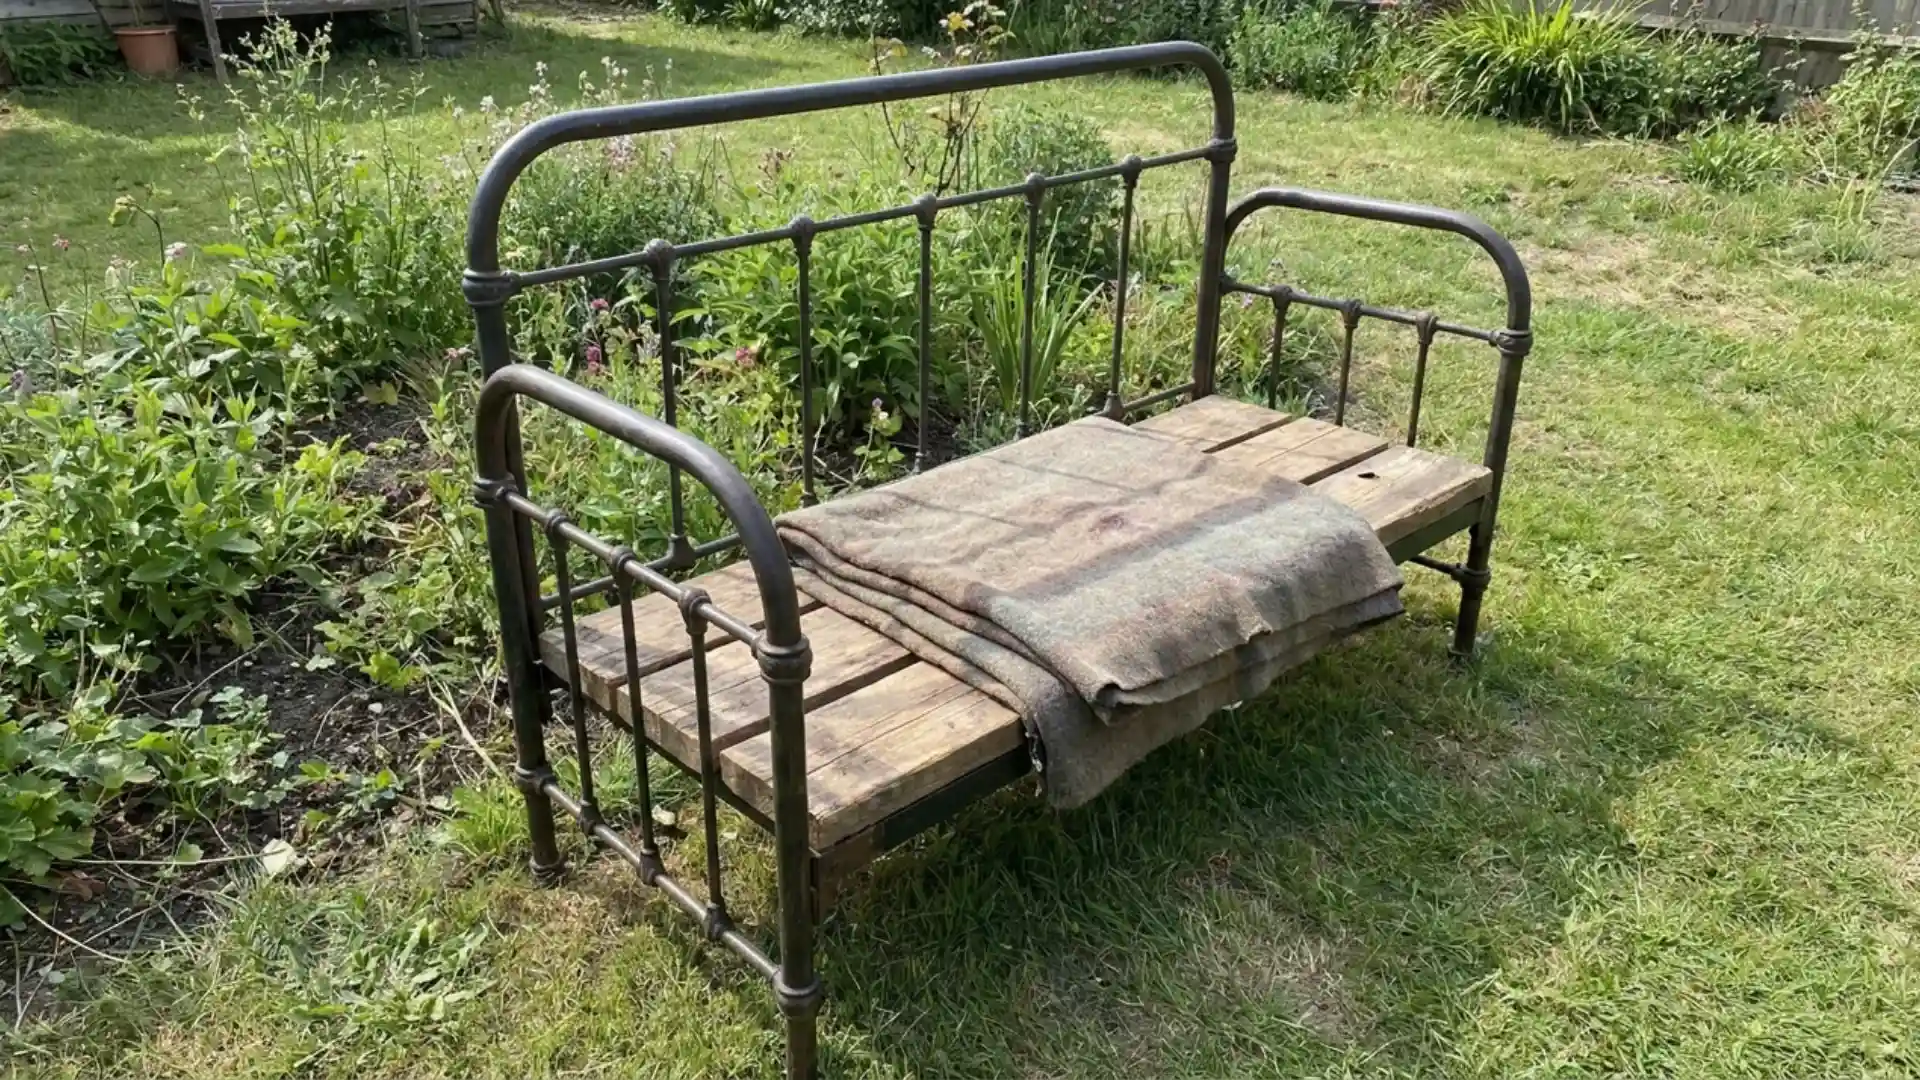
33. Build a Bench From Bedframe
- Tools and materials needed: Secondhand bed frame, saw, screws, cushions
- Time required: Approximately 4 to 5 hours
A secondhand bed frame, especially one with an ornate headboard, gets repurposed into a garden bench by trimming it down to bench height.
Cut the frame rails to size, then attach a seat board across the base. Add outdoor cushions for comfort.
This project works particularly well with metal or wrought iron frames found secondhand for very little cost.
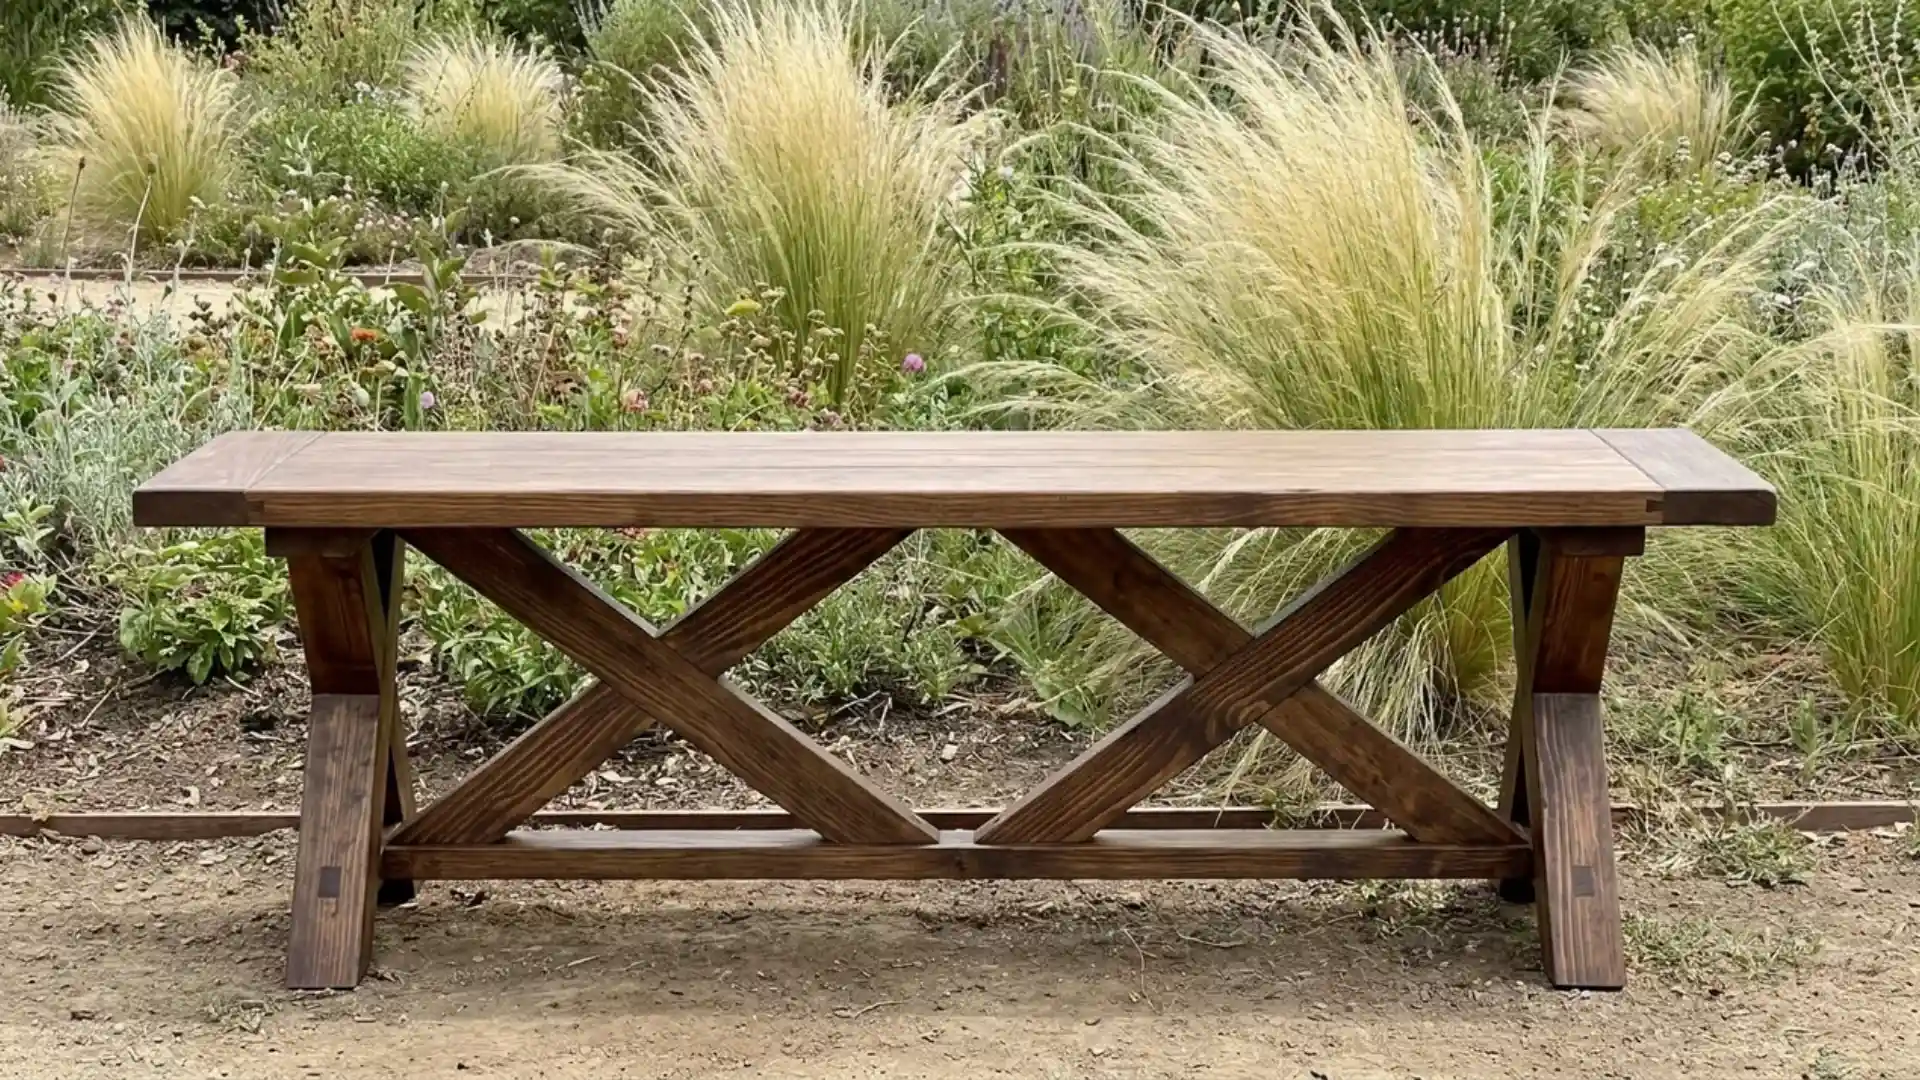
34. Build a Double X Bench
- Tools and materials needed: 2×4 lumber, screws, drill, wood stain
- Time required: Approximately 1 day
Two crossed X-shaped leg frames support a simple plank seat in this sturdy, visually striking bench design.
Cut and join the X legs first, checking that each angle matches before attaching the seat boards across the top.
Stain the finished piece to highlight the joinery detail. This bench works well as a stand-alone accent seat near a flower bed.
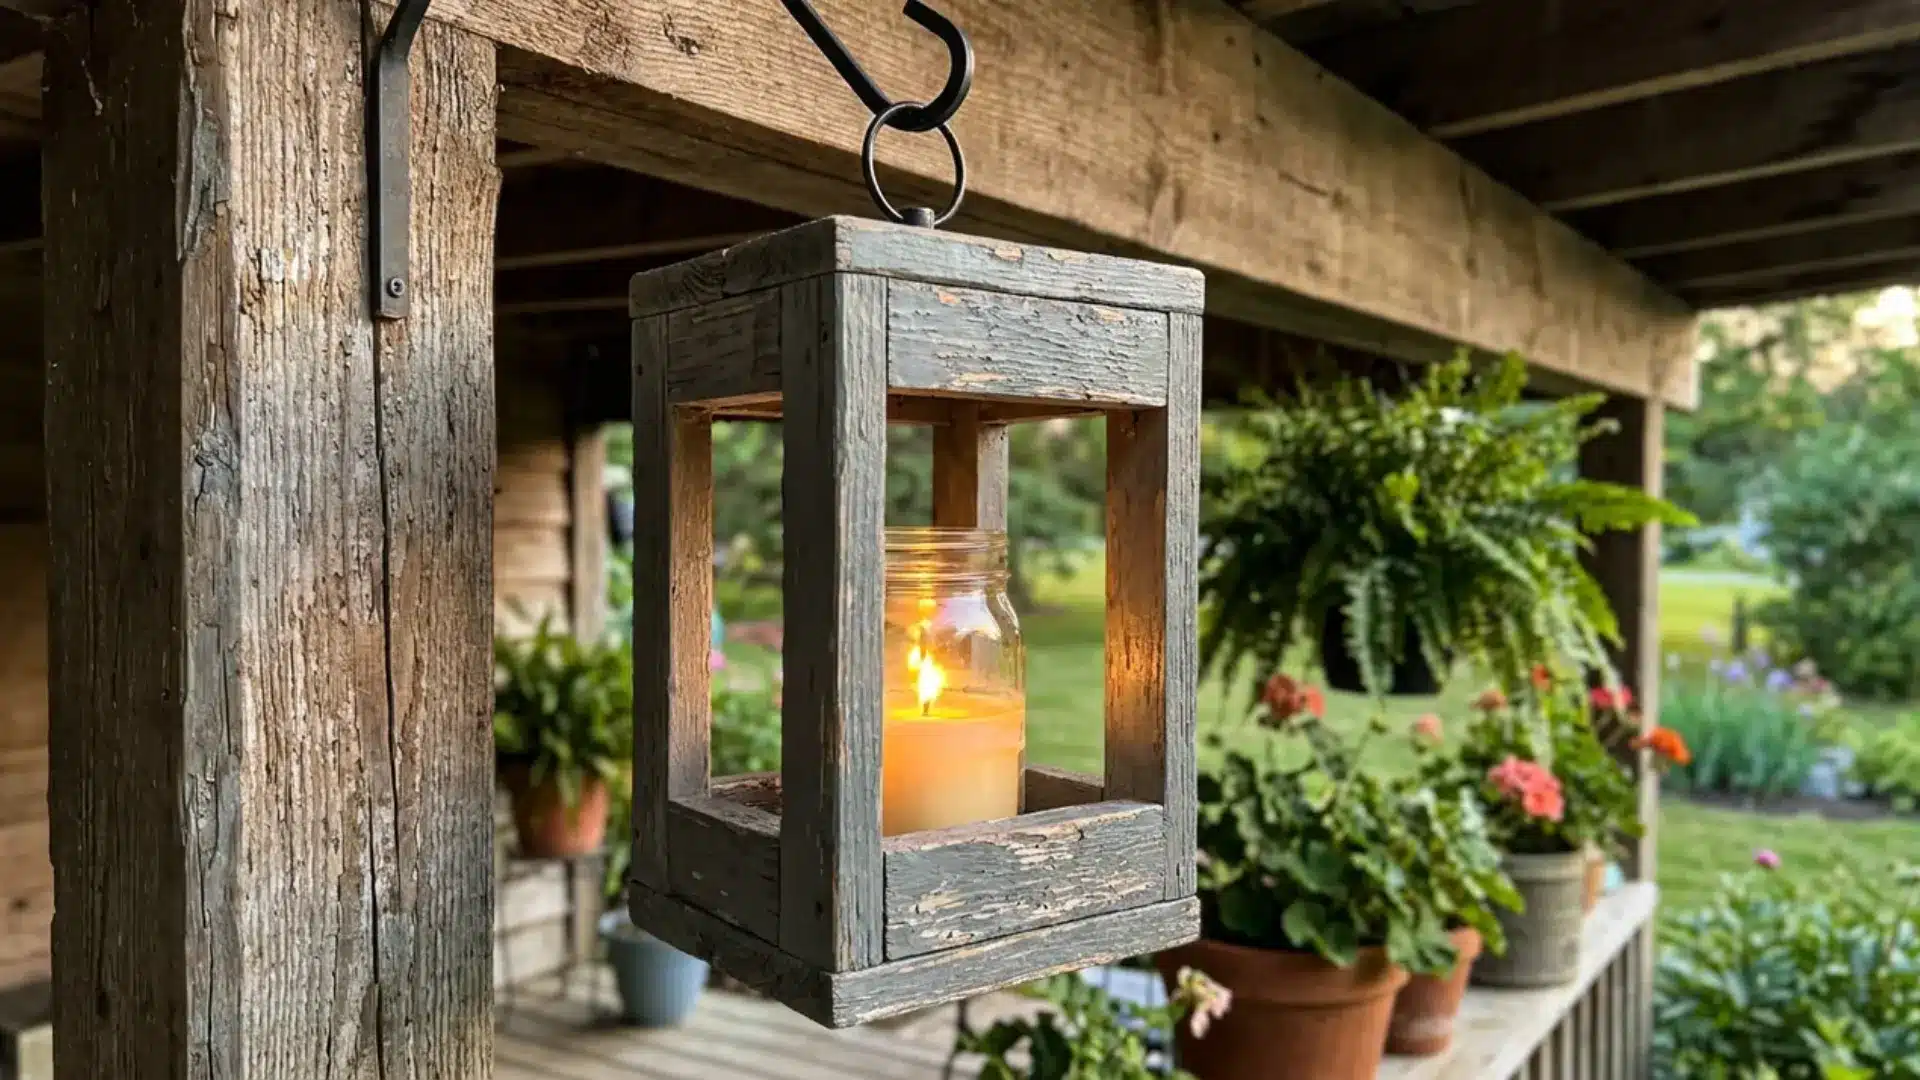
35. Make a Scrap Wood Lantern
- Tools and materials needed: Scrap wood, glass jar, nails, exterior stain
- Time required: Approximately 2 to 3 hours
Assemble leftover scrap wood into a simple open-sided box to create a rustic lantern frame for a candle or glass jar.
Nail the frame together first, leaving one side open for easy access to light the candle.
Stain the wood for a weathered look, then hang it from a hook or set it on a porch ledge for evening ambiance.
36. Build a Scrap Wood Birdhouse
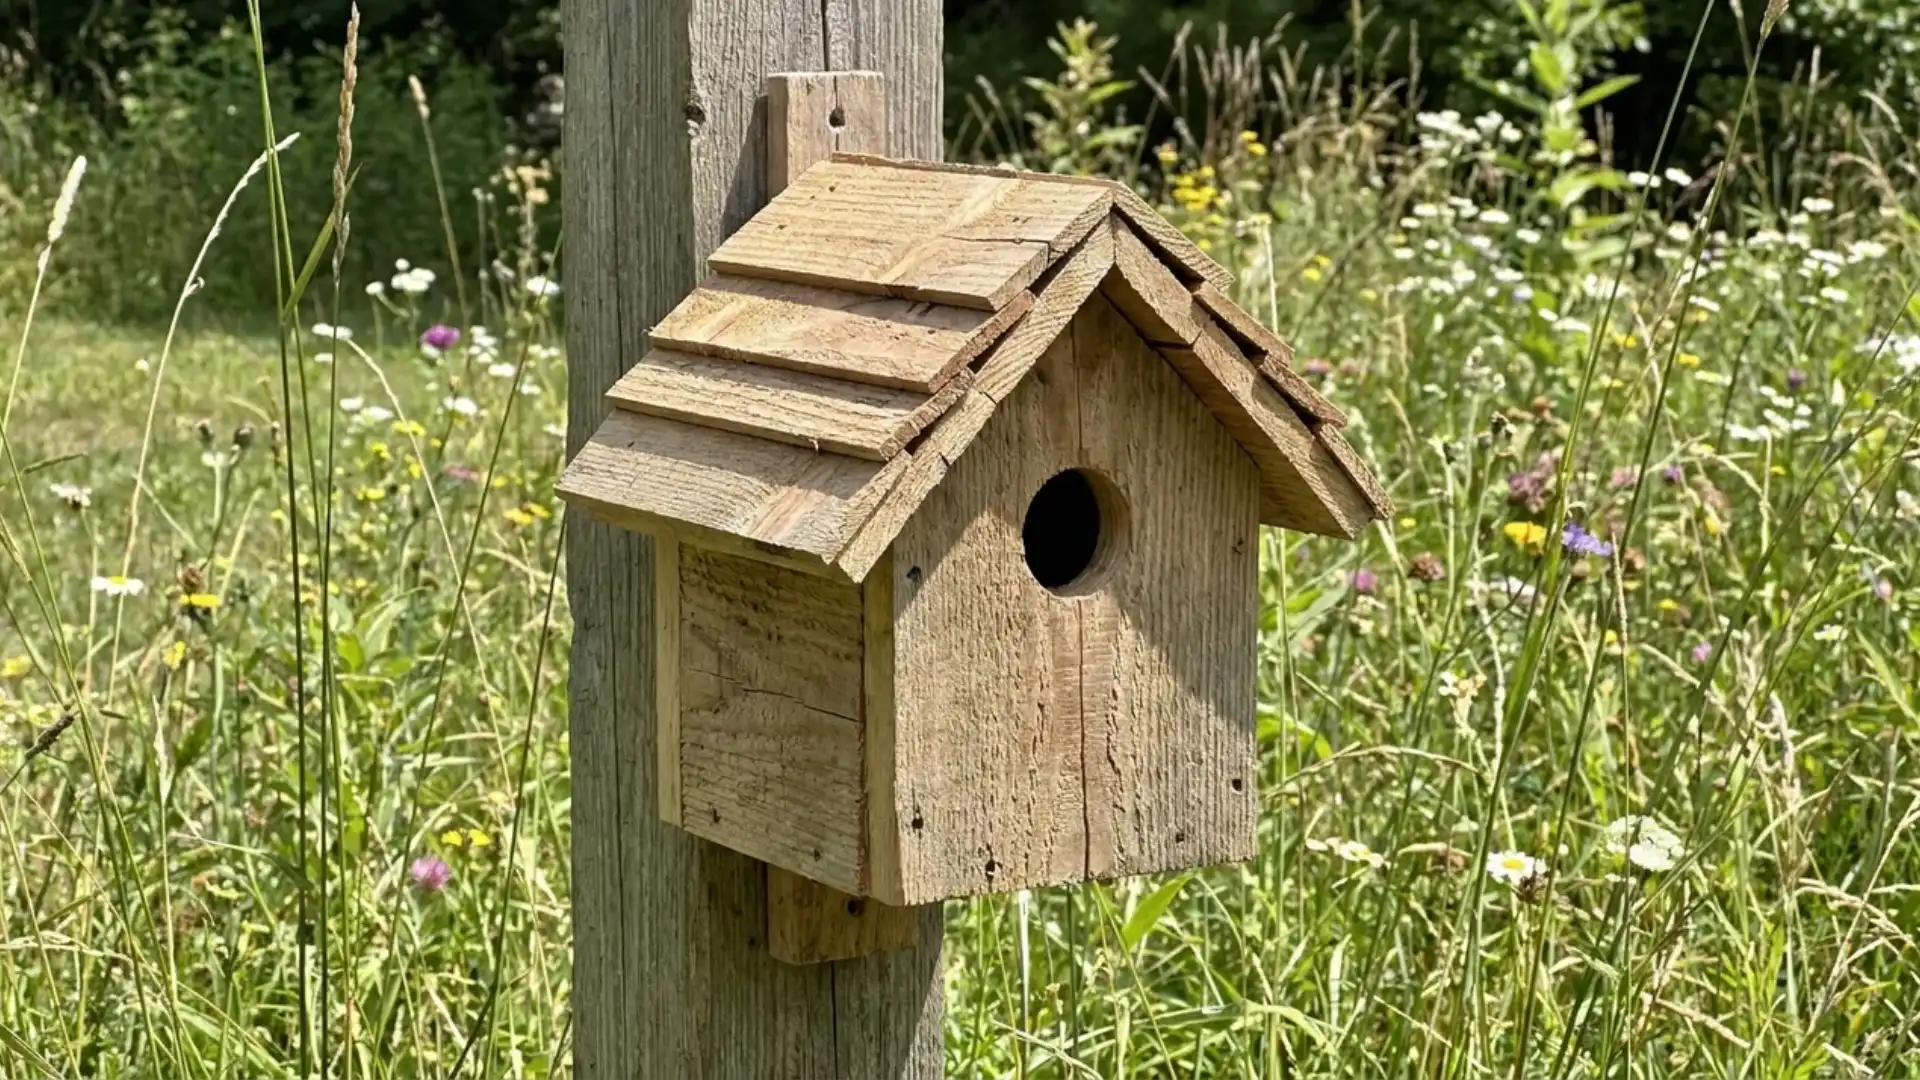
- Tools and materials needed: Scrap wood, nails, drill, exterior paint
- Time required: Approximately 2 to 3 hours
Nail small pieces of scrap wood into a basic box with a sloped roof to make a simple, functional birdhouse for the garden.
Drill an entry hole sized for the birds common to the area, and add small drainage holes in the floor.
Paint the exterior in a weatherproof finish, then mount it on a post or hang it from a tree branch.
37. Make a Bird Feeder House
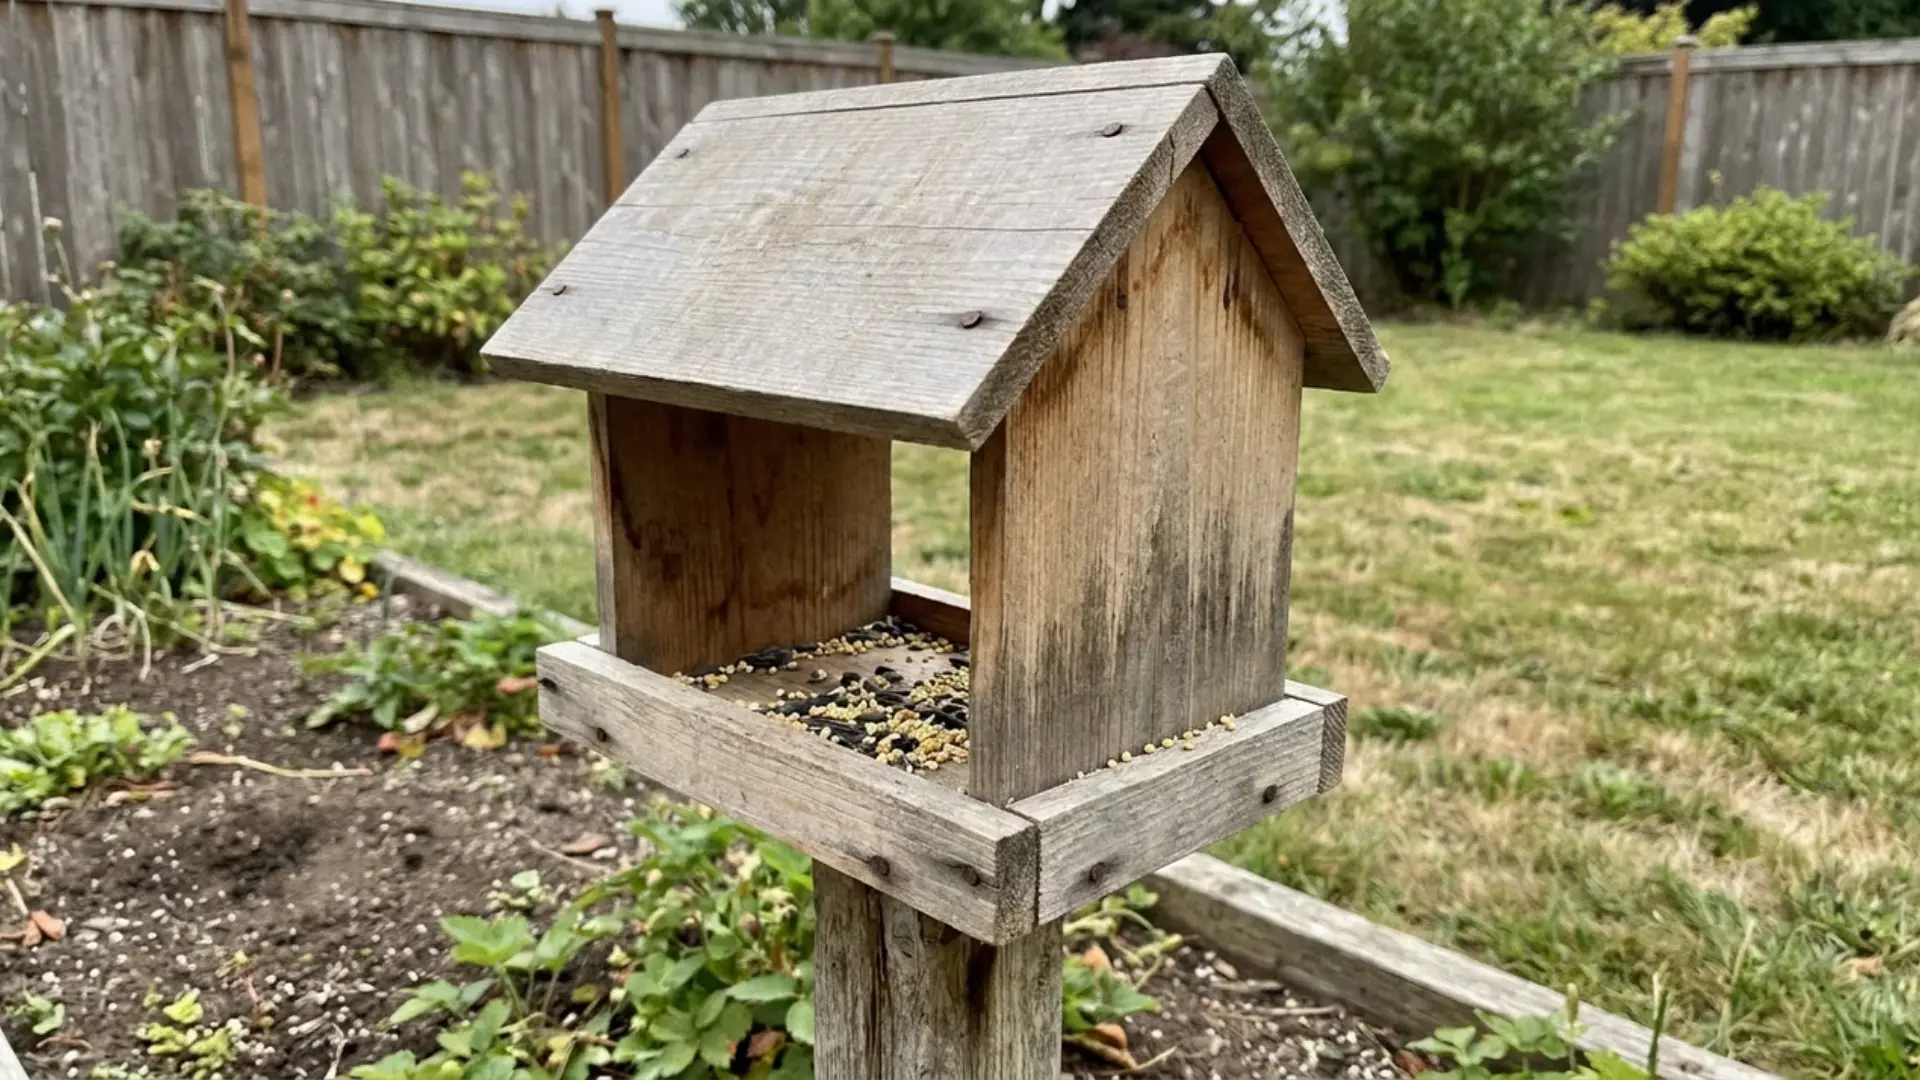
- Tools and materials needed: Scrap wood, plexiglass, nails, screws, birdseed tray
- Time required: Approximately 2 to 3 hours
A small wood house frame with an open front and a built-in seed tray gives birds an easy feeding spot visible from indoors.
Add a plexiglass or acrylic panel over the seed tray to keep food dry during rain.
Mount the finished feeder on a pole away from ground predators. Refill the tray regularly to encourage birds to return.
38. Build a DIY Mailbox Makeover
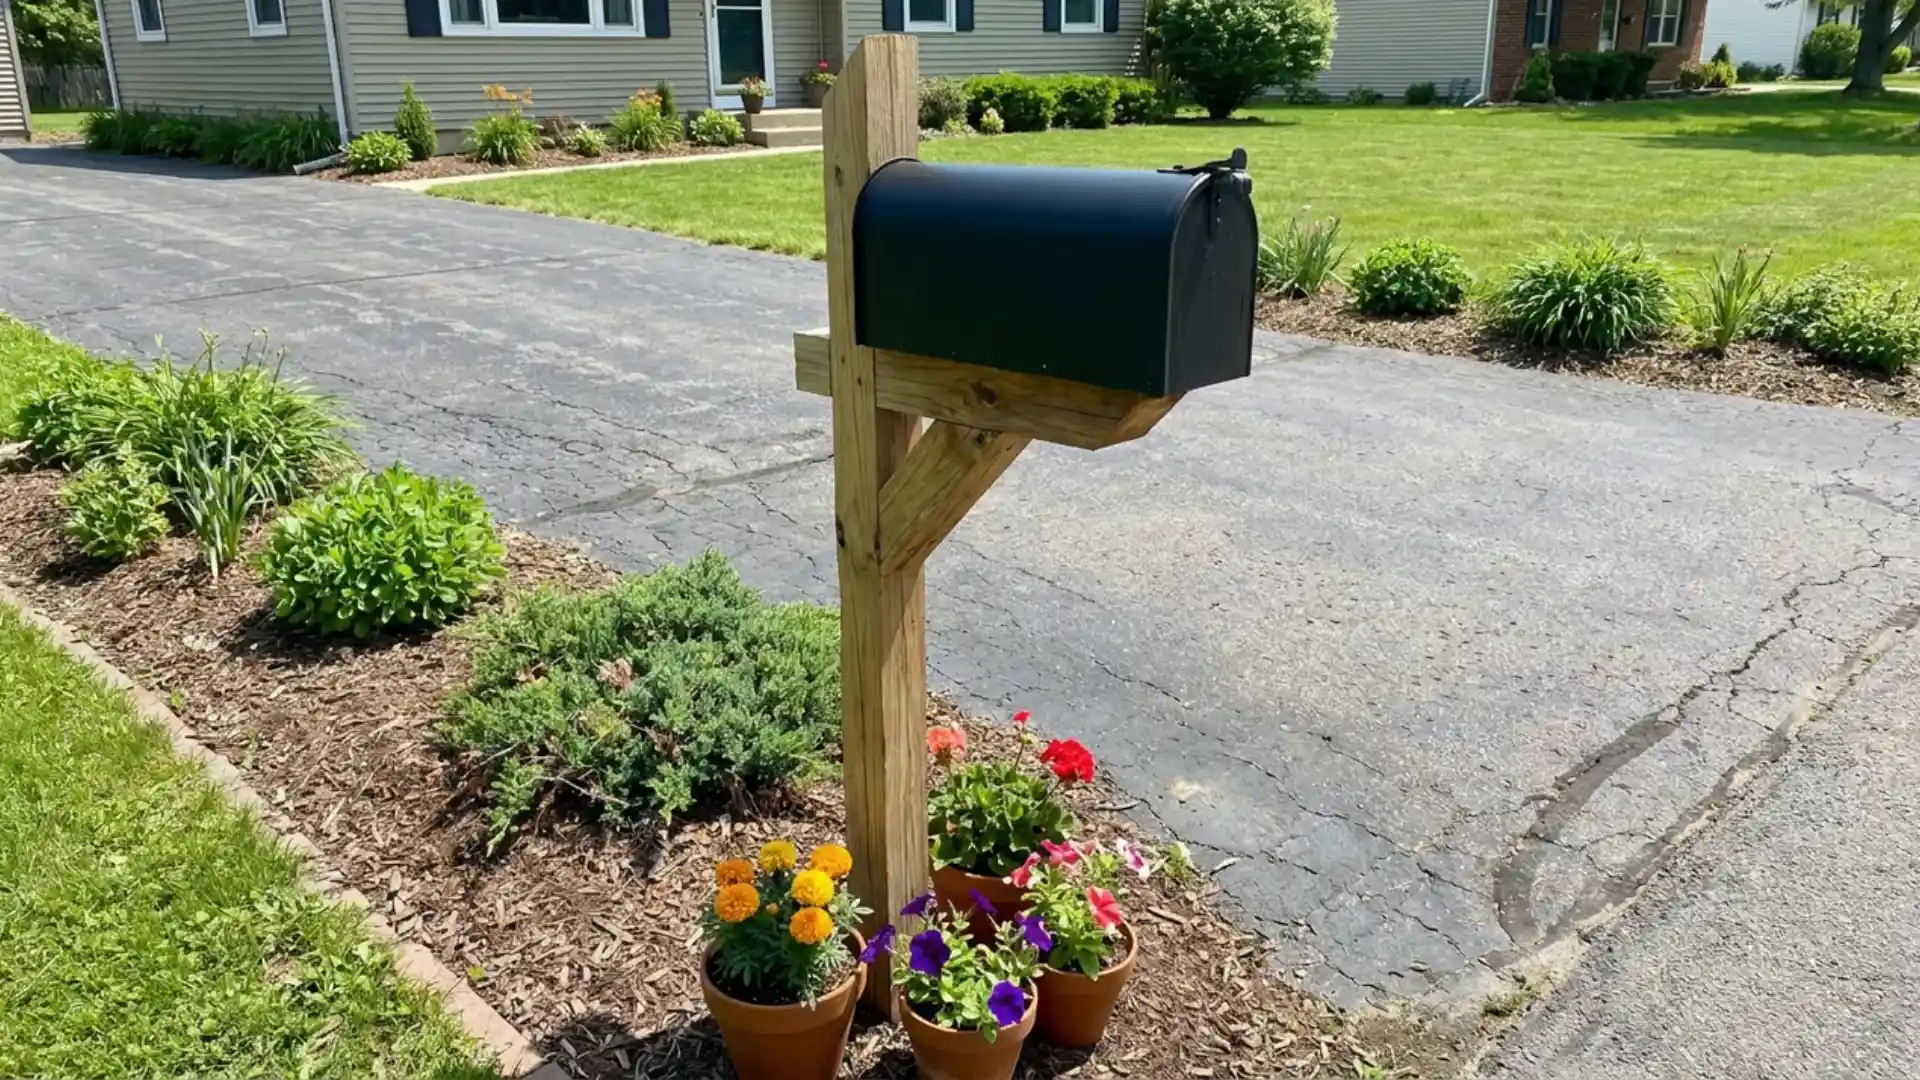
- Tools and materials needed: Existing mailbox, sandpaper, primer, exterior paint, stencils
- Time required: Approximately 2 to 3 hours
An outdated mailbox gets an easy refresh with sanding, a coat of primer, and fresh exterior paint in a color that complements the home’s exterior.
Add house numbers or a stenciled design for a personalized touch.
This project boosts curb appeal without major building, making it one of the simplest and fastest updates on this list.
39. Hang a Chandelier-Style Planter
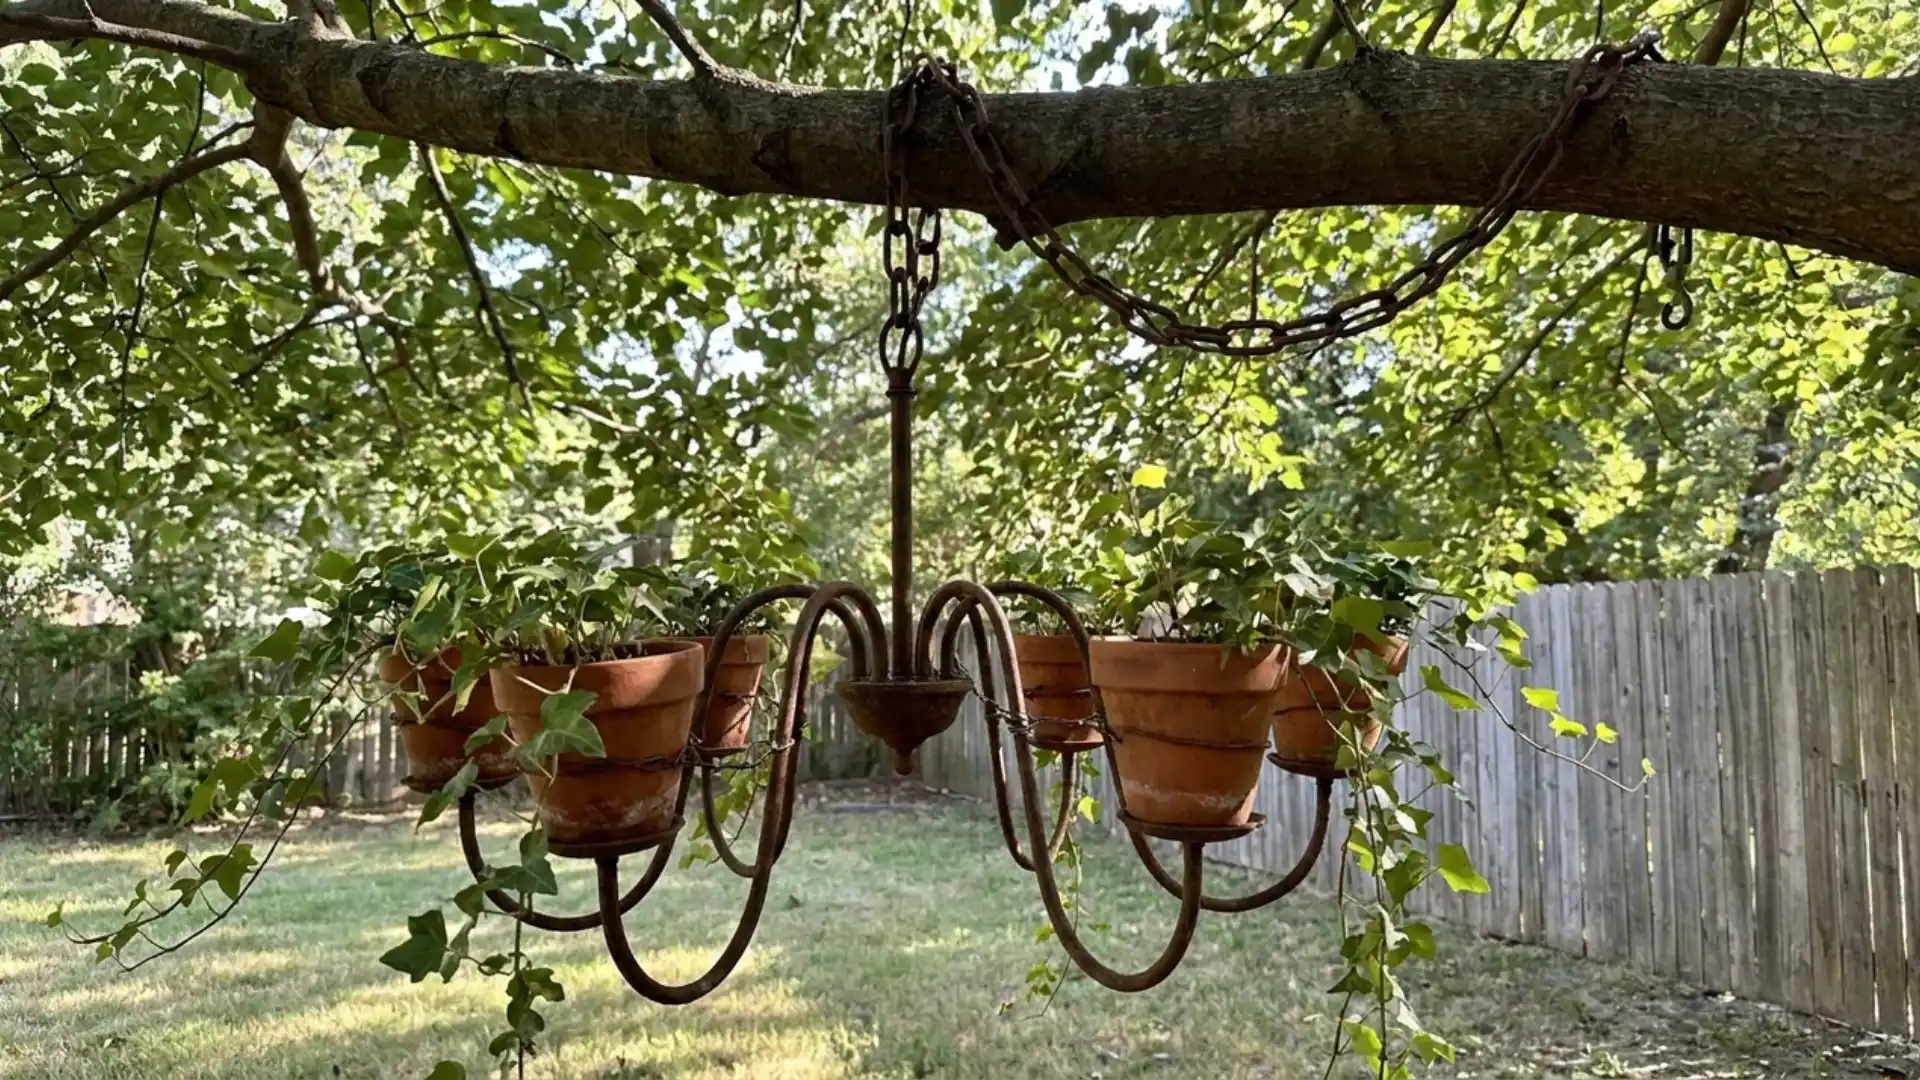
- Tools and materials needed: Old chandelier frame, hanging chain, small planters, wire
- Time required: Approximately 3 to 4 hours
An old chandelier frame stripped of its wiring becomes a striking hanging planter once small pots are wired into each arm.
Hang the finished piece from a sturdy tree branch, pergola beam, or covered patio hook. Fill each cup with trailing flowers so they spill over the frame’s edges.
This project turns a discarded light fixture into a garden centerpiece.
40. Build a DIY Solar Fountain
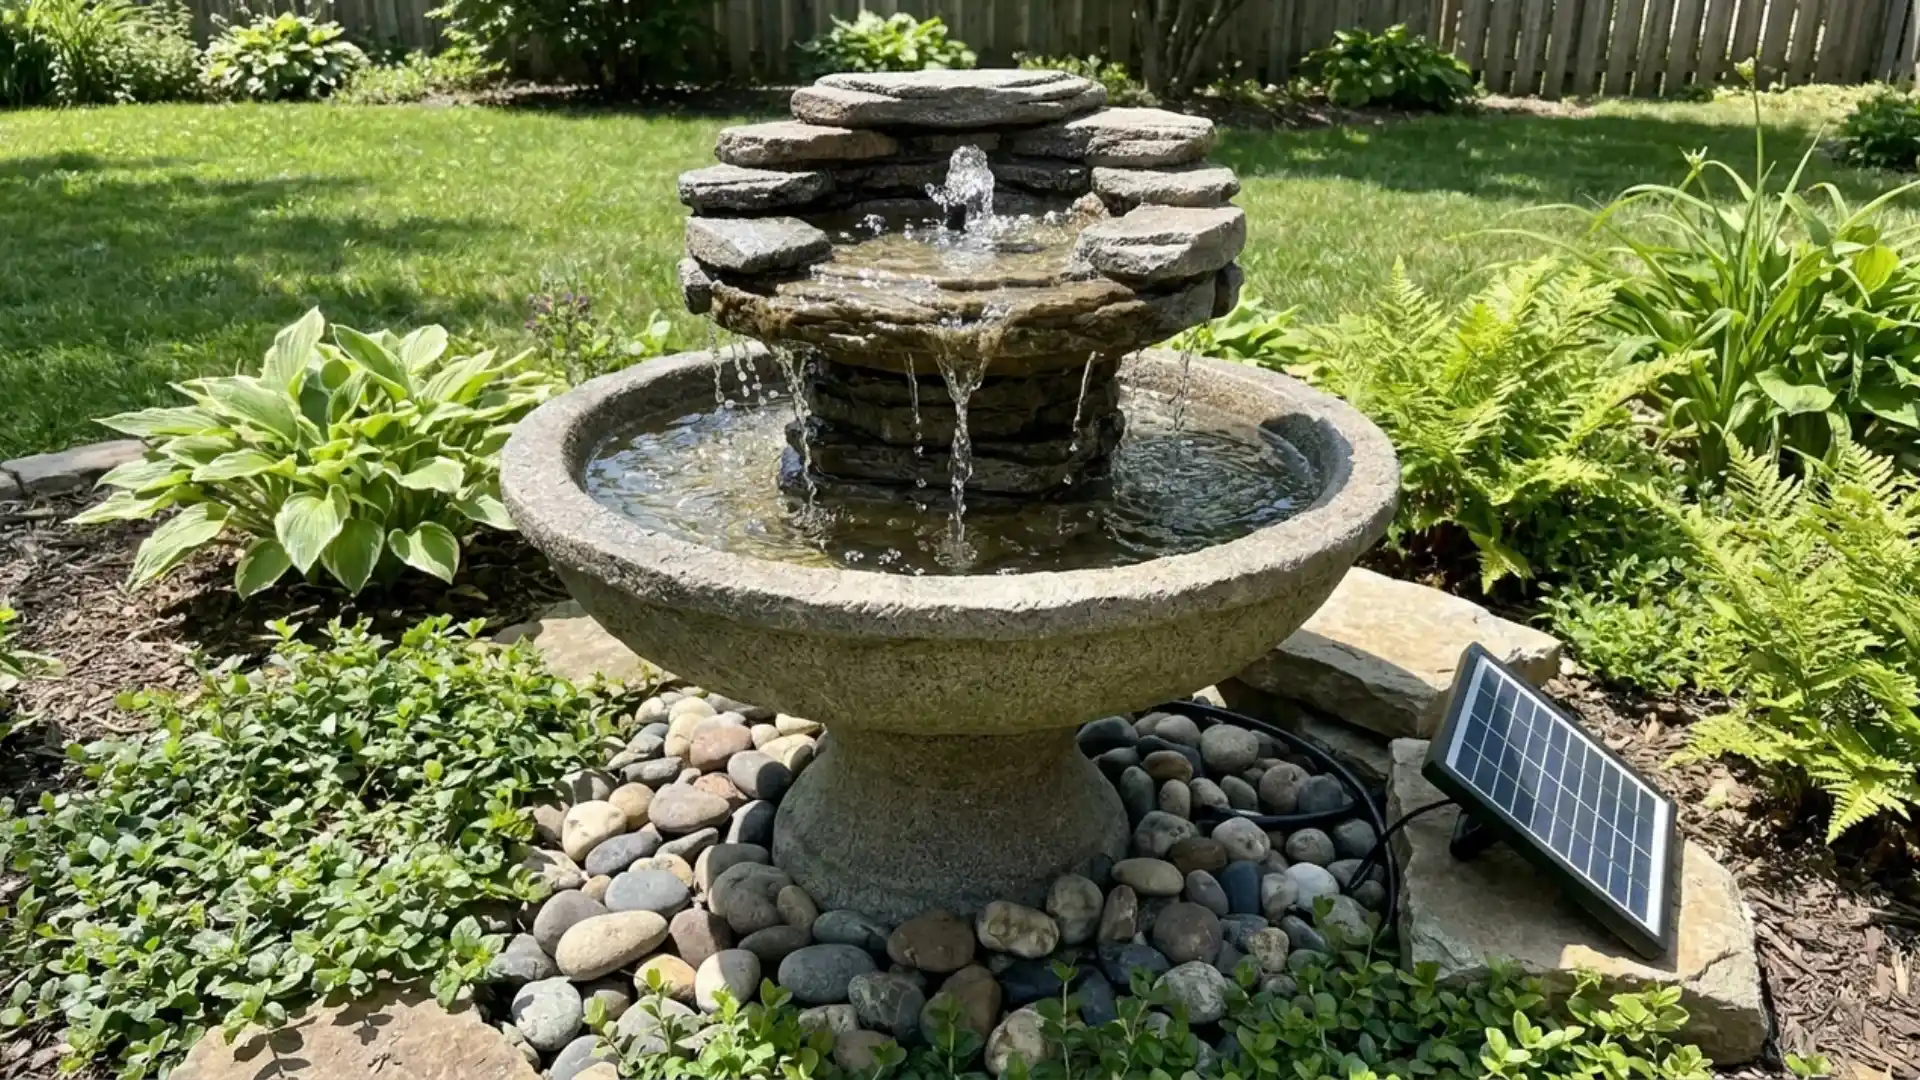
- Tools and materials needed: Solar pump kit, large container, tubing, small stones
- Time required: Approximately 3 to 4 hours
A solar-powered pump dropped into a large decorative container creates a self-sufficient fountain with no wiring or outlet needed.
Arrange stones around the base to hide the tubing and give the water somewhere to trickle.
Position the fountain in a sunny spot so the solar panel gets enough light to keep the pump running through the day.
41. Make a Succulent Fountain Planter
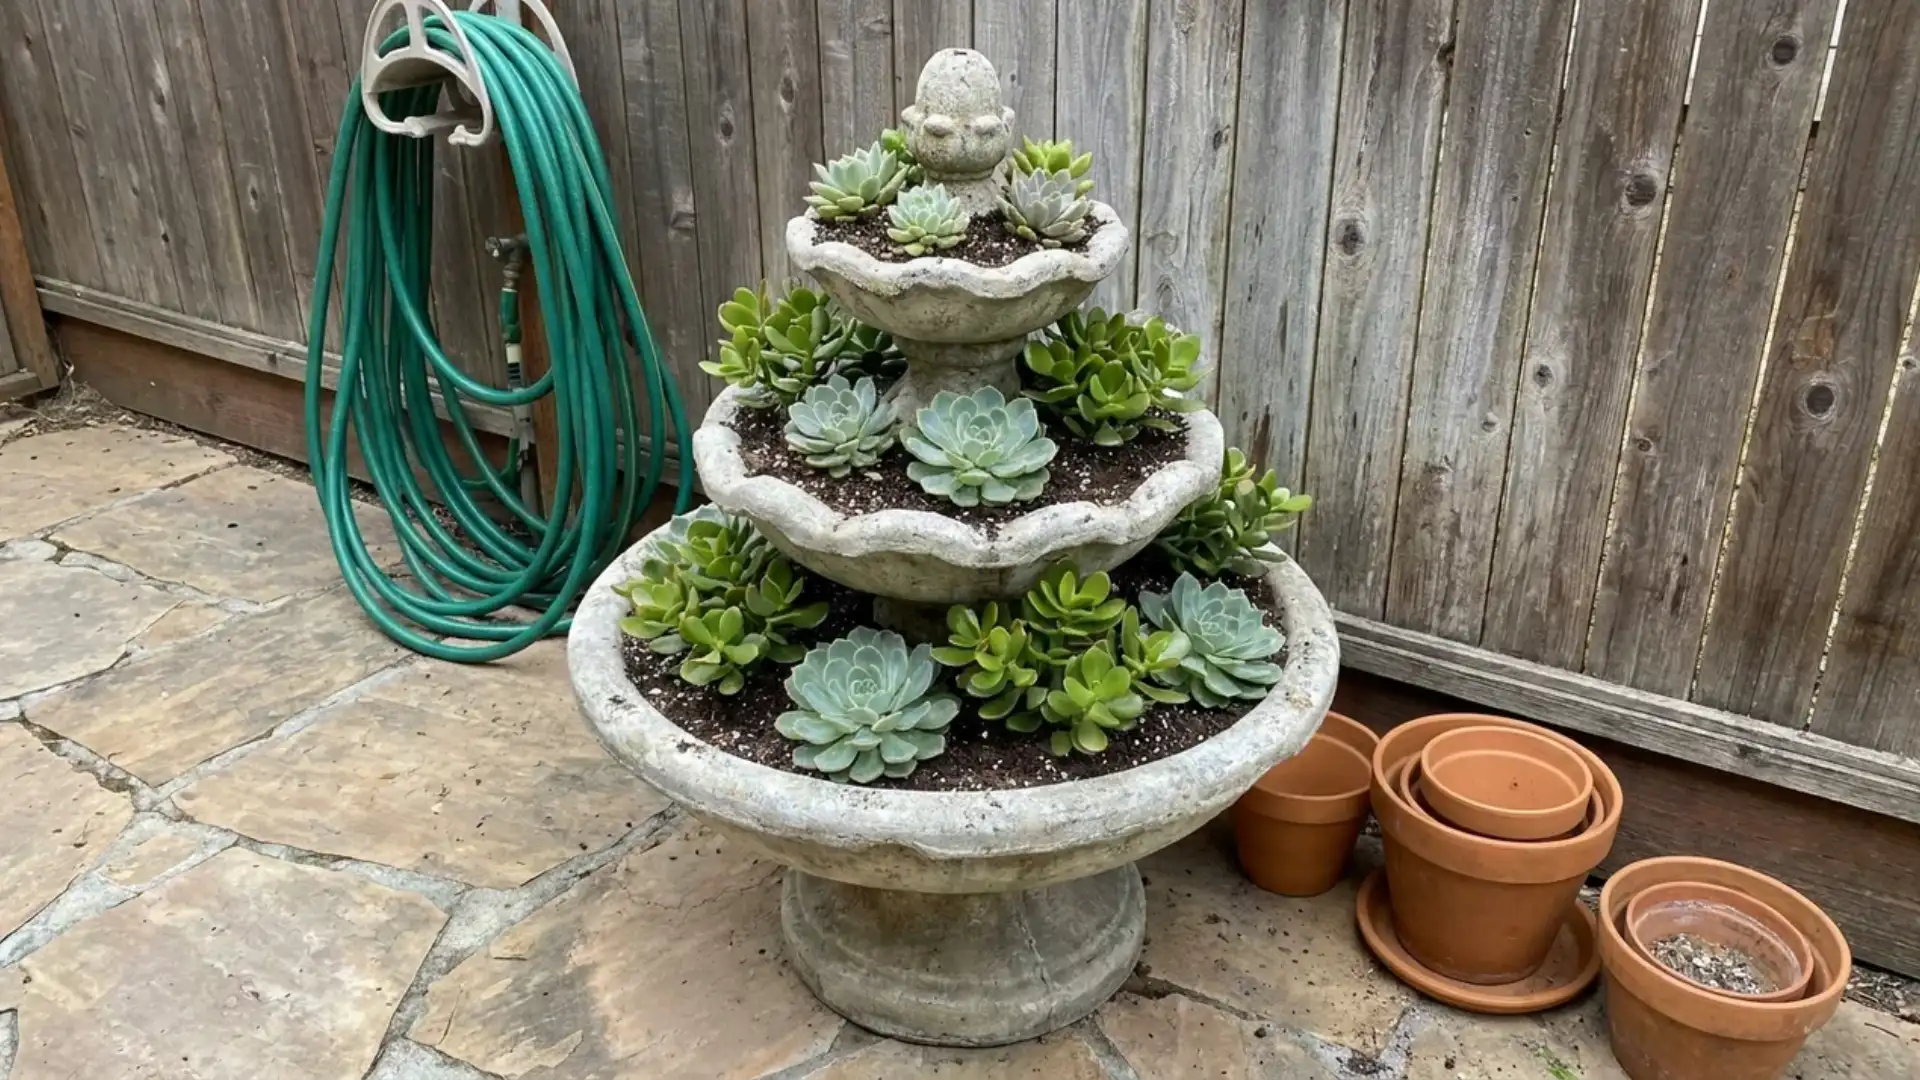
- Tools and materials needed: Old tiered fountain, potting soil, succulents, gravel
- Time required: Approximately 2 to 3 hours
Repurpose an old, non-working tiered fountain into a striking succulent planter instead of throwing it away.
Add a layer of gravel for drainage, then fill each tier with well-draining soil suited to succulents.
Plant a mix of trailing and upright varieties across the tiers for visual contrast. This project works well in dry climates.
42. Build a Small Backyard Firepit
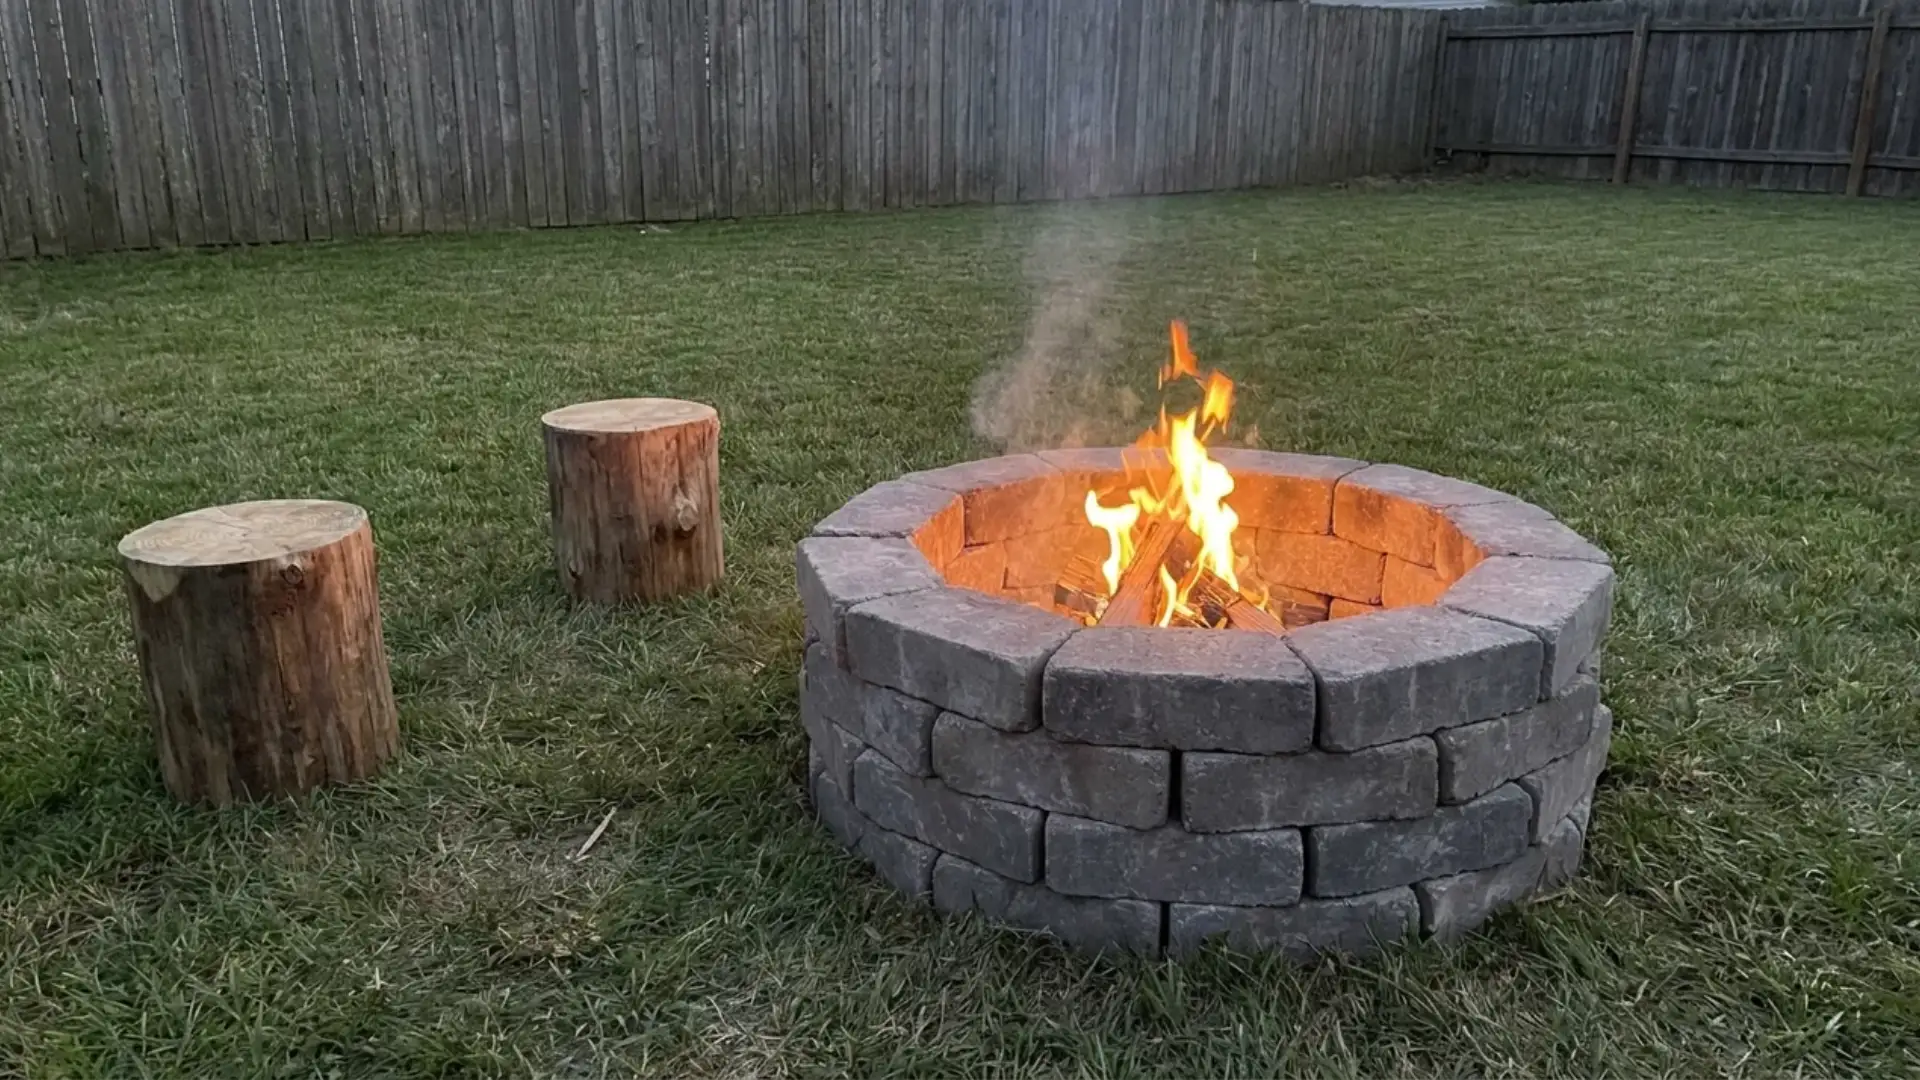
- Tools and materials needed: Fire-rated bricks or pavers, gravel, shovel, level
- Time required: Approximately 1 day
A ring of fire-rated bricks stacked around a gravel base creates a simple, permanent firepit for a backyard gathering spot.
Dig a shallow circular pit first, then line it with gravel for drainage before stacking bricks around the edge.
Check local regulations on open fires before building. Add nearby seating so guests can gather comfortably around the flames.
43. Add String Lights to Arbors
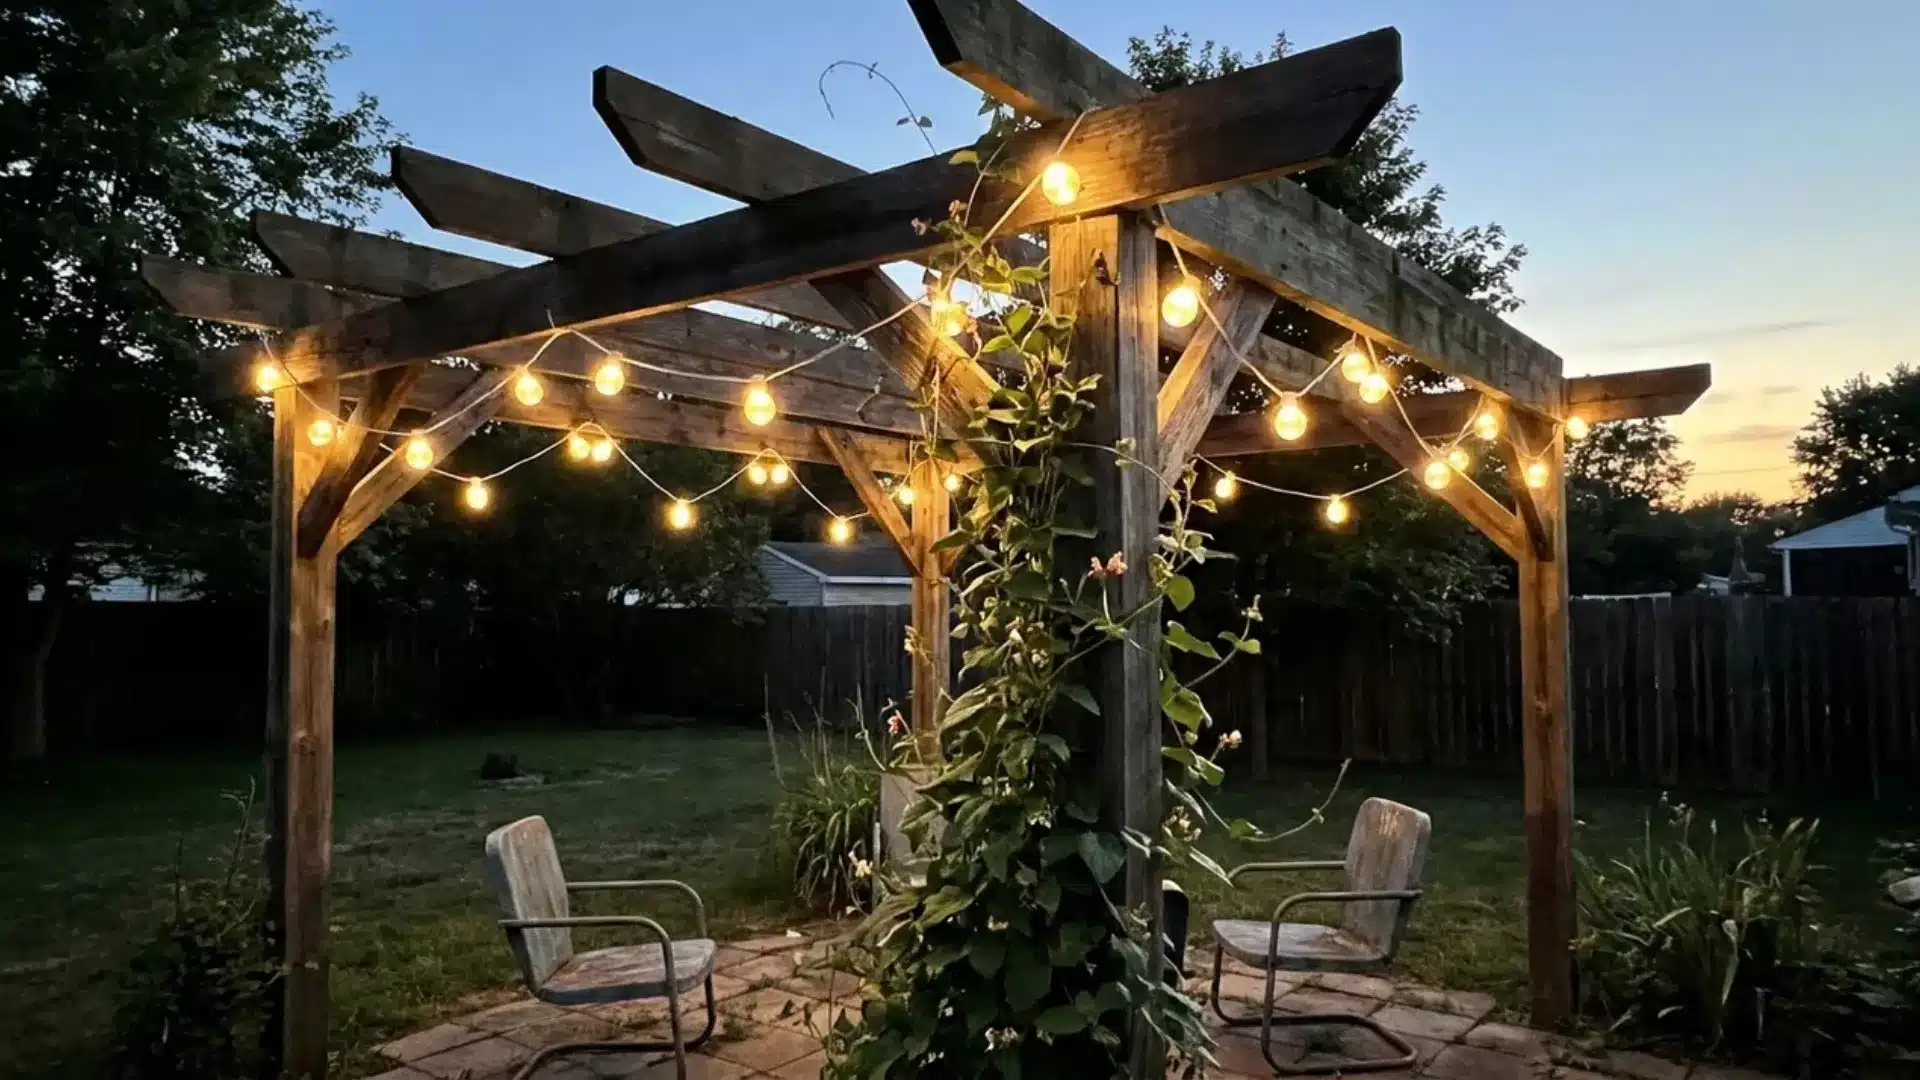
- Tools and materials needed: String lights, hooks, extension cord, zip ties
- Time required: Under one hour
String lights woven through an existing arbor or pergola beam add instant evening ambiance with almost no building required.
Secure the lights with hooks or zip ties along the beams, keeping the wiring tucked out of sight where possible.
Solar-powered string lights eliminate the need for a nearby outlet. This is one of the fastest upgrades on the whole list.
44. Build a Cinder Block Bed
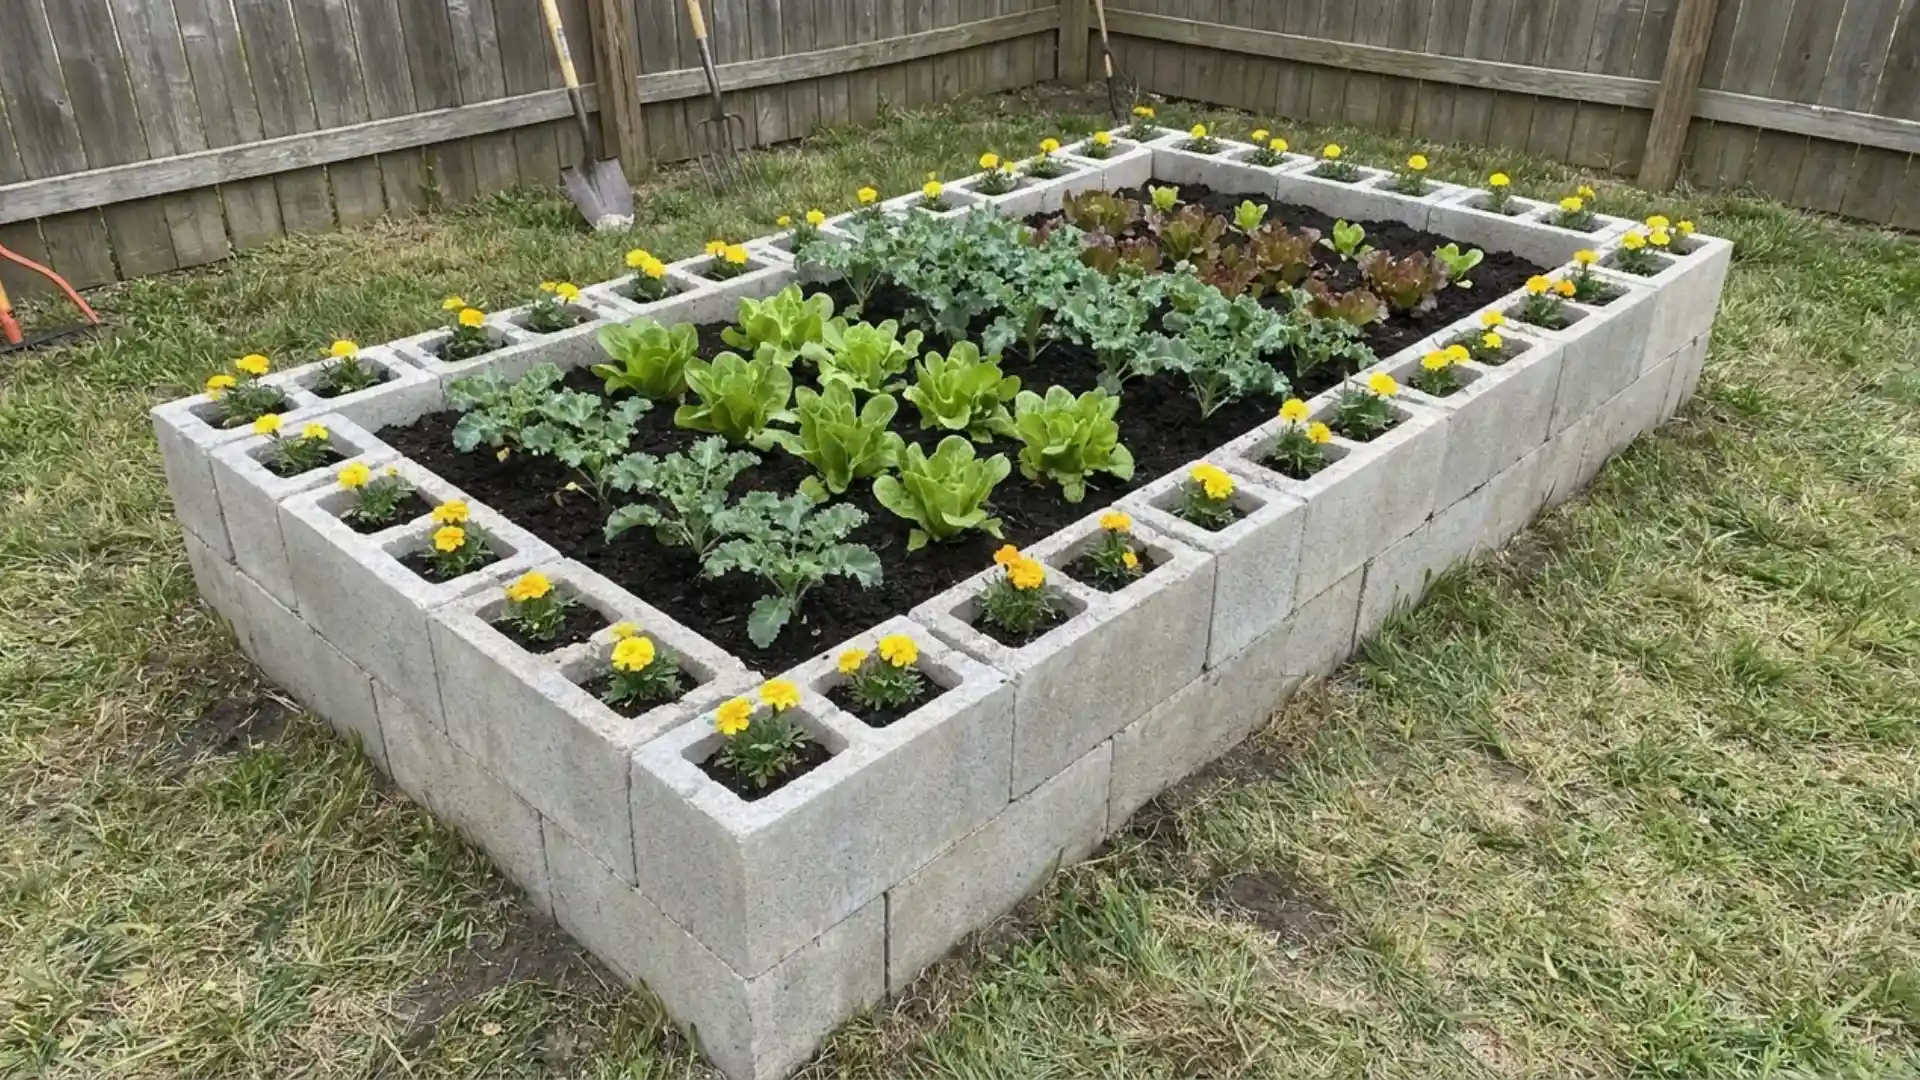
- Tools and materials needed: Cinder blocks, soil, compost, landscape fabric
- Time required: Approximately 2 to 3 hours
Stacked cinder blocks arranged in a rectangle create an instant raised bed with no cutting or fastening required. Line the inside with landscape fabric before filling with a soil and compost mix.
The hollow centers of the blocks themselves can also be planted with small herbs or flowers for extra growing space. This is one of the fastest raised bed builds around.
Topping off the mix with a soil and compost blend from one of the online mulch and soil suppliers saves a trip to the garden center.
45. Try Square Foot Garden Beds
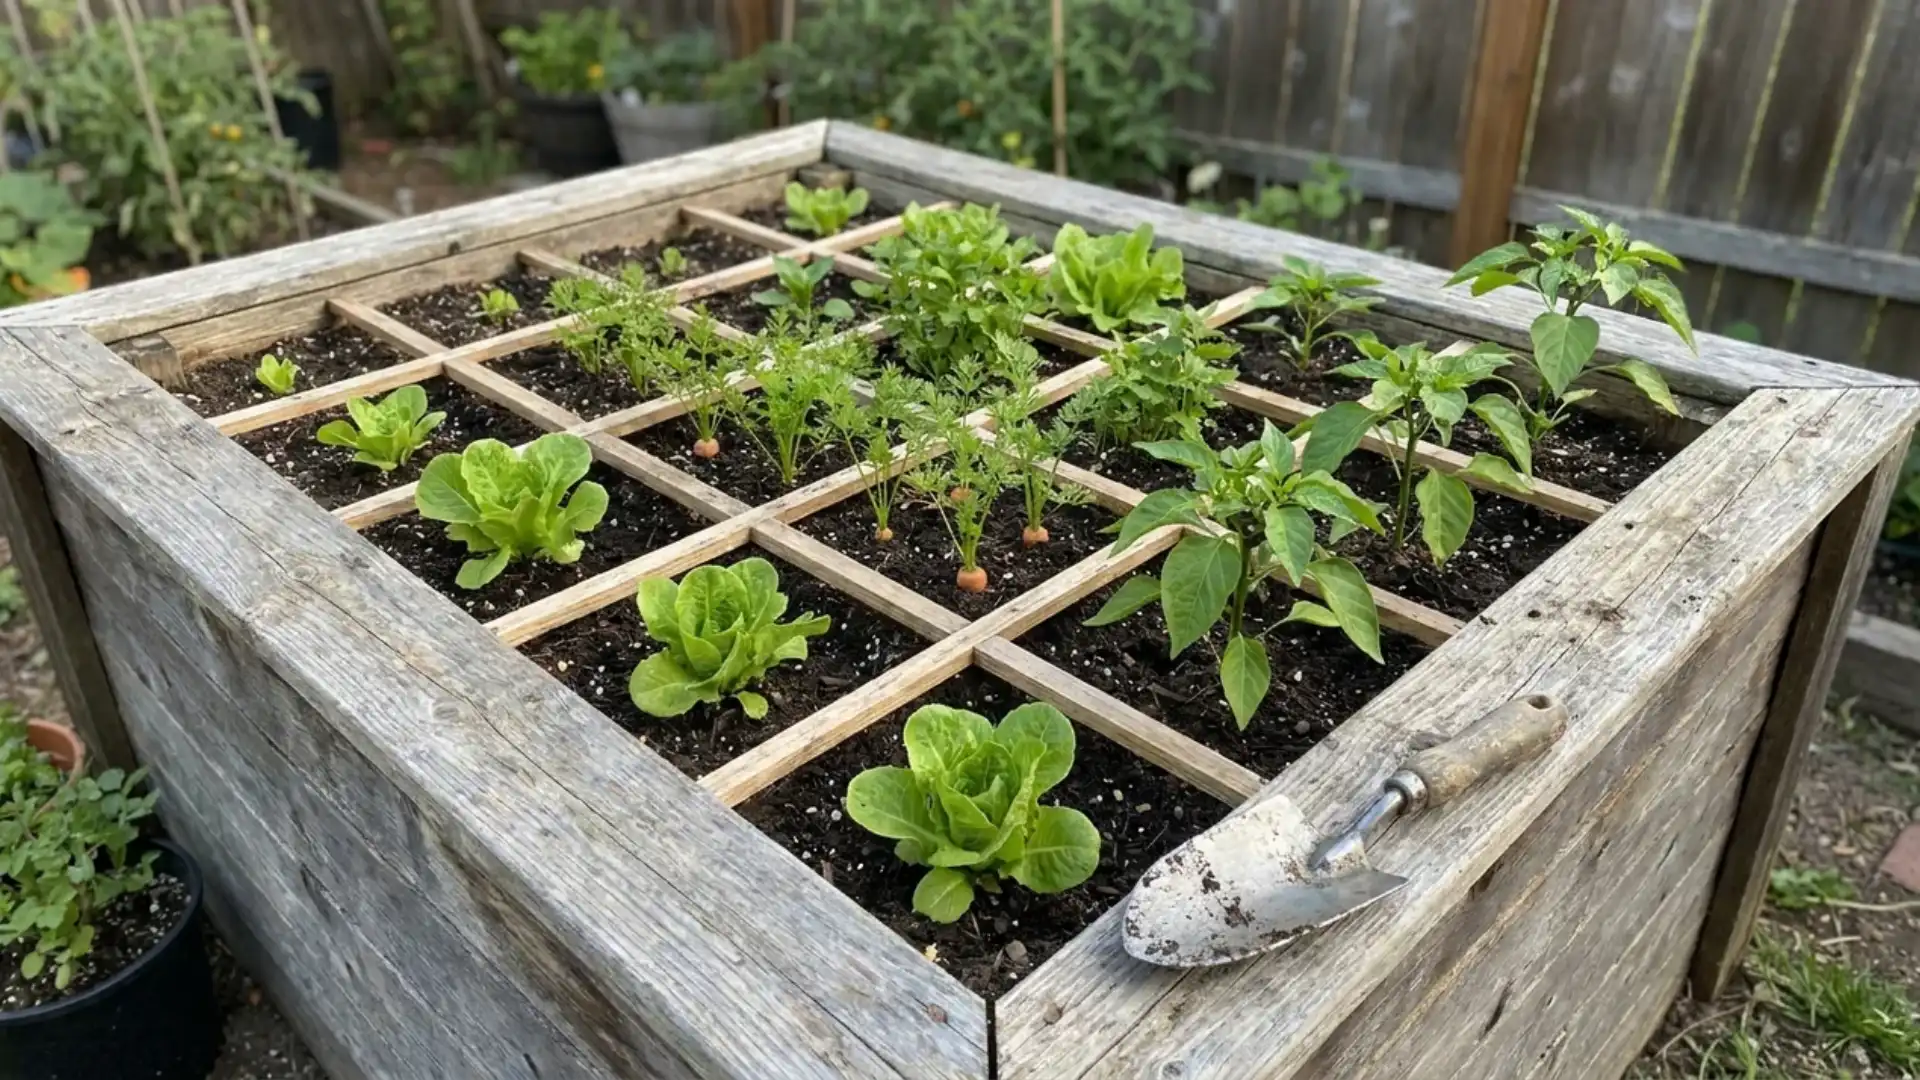
- Tools and materials needed: Lumber, screws, grid string or lattice, soil mix
- Time required: Approximately 3 to 4 hours
A raised bed divided into a grid of one-foot squares makes it easier to plan and rotate crops in a small growing space.
Build the frame first, then add a string or wood lattice grid across the top to mark each square.
Fill with a mix of soil, compost, and peat moss for high-yield planting in limited square footage.
46. Build a Keyhole Garden Bed
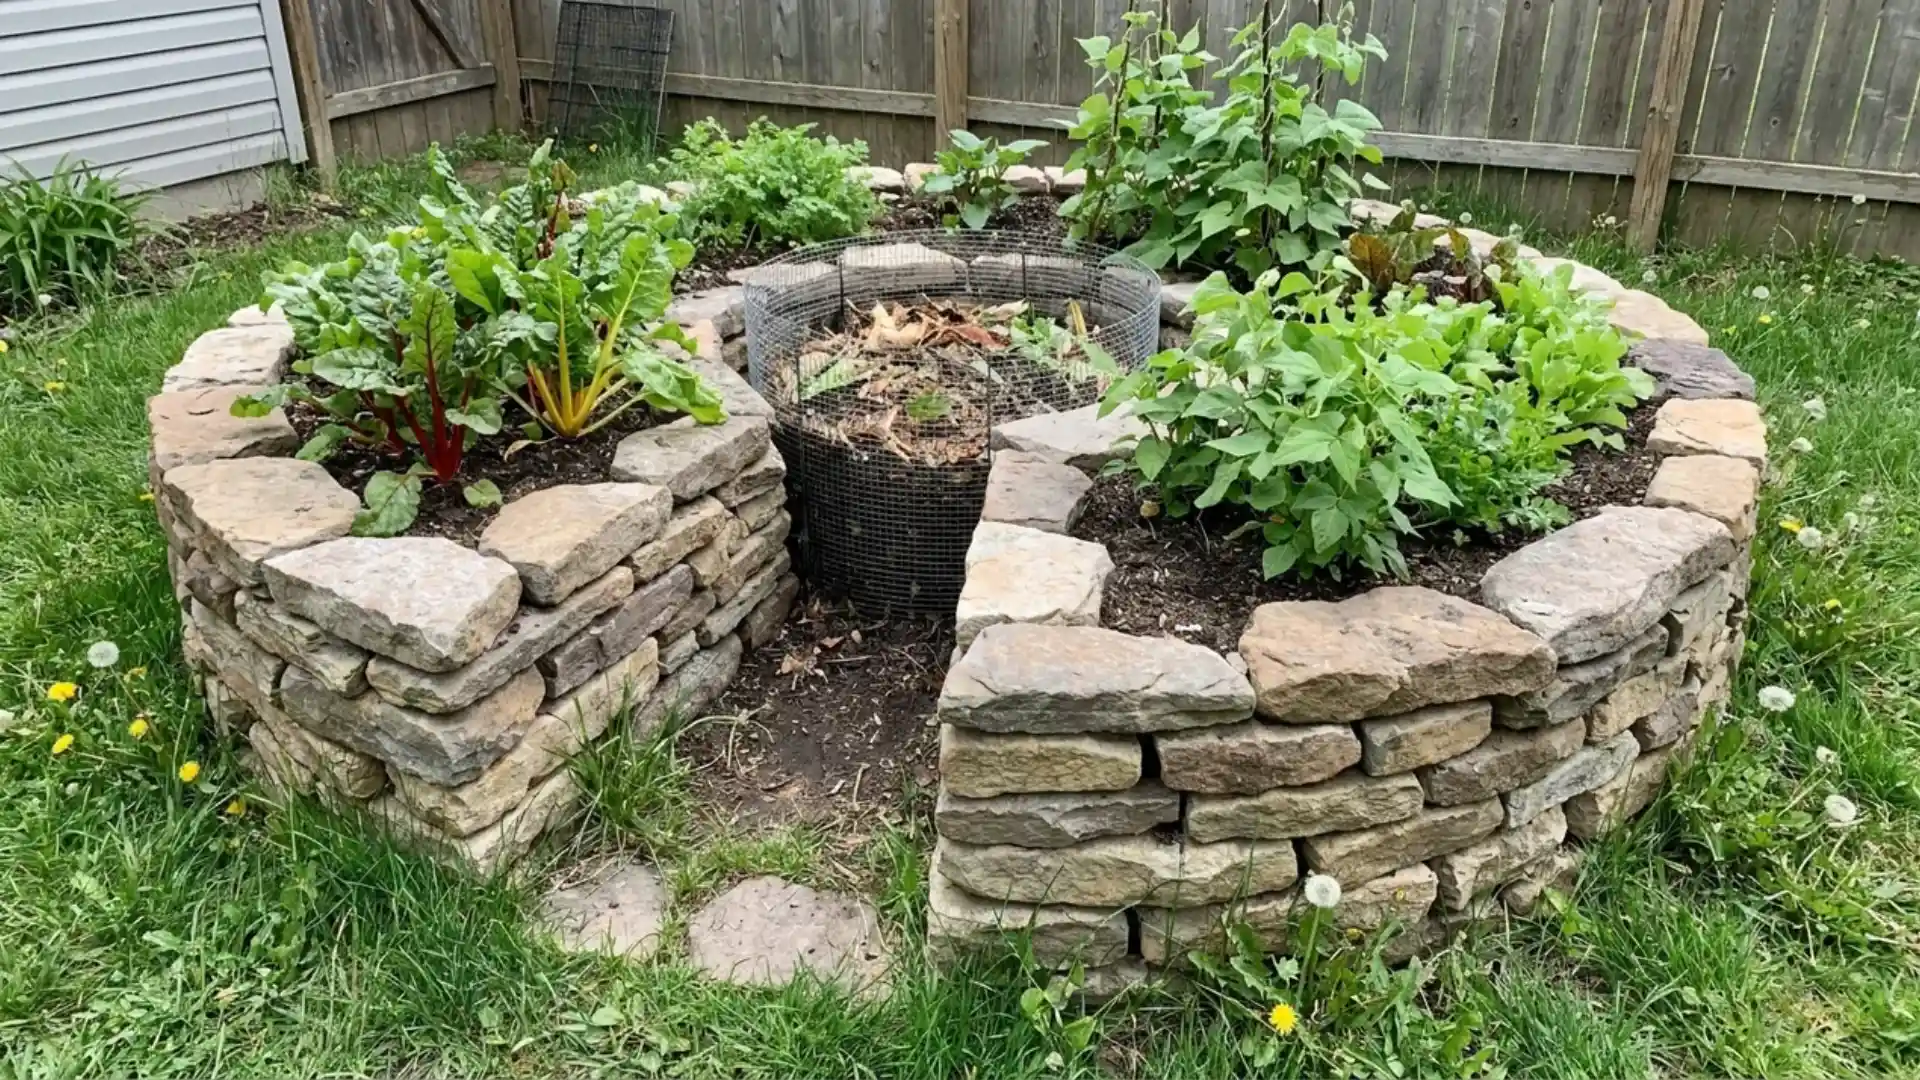
- Tools and materials needed: Bricks or stone, wire mesh, compost, soil
- Time required: Approximately 1 day
A keyhole garden bed uses a circular design with a built-in composting basket at the center, feeding nutrients directly to the surrounding soil.
Build the outer wall from stone or brick, leaving a notch for access to the center basket.
Fill with soil and layer kitchen scraps into the basket regularly. This design suits dry climates especially well.
47. Add Solar Lights Along Paths
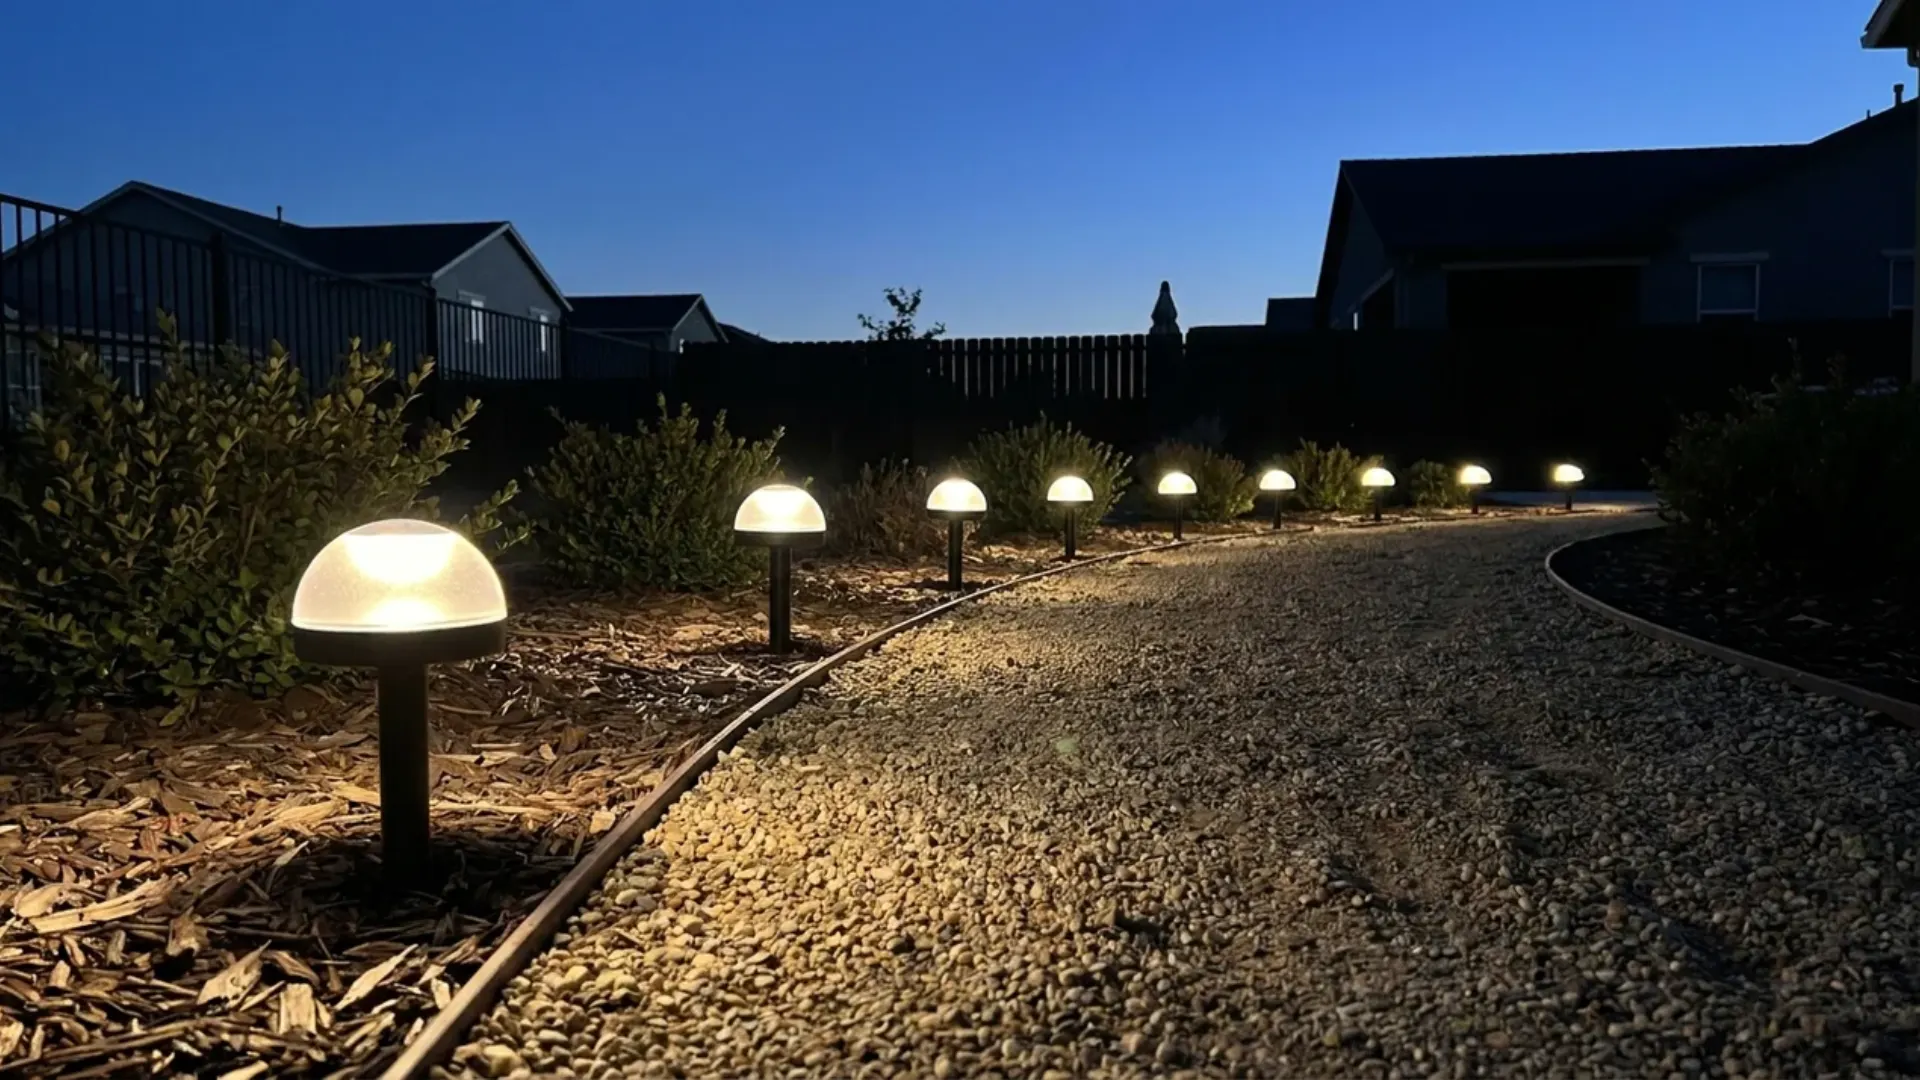
- Tools and materials needed: Solar path lights, shovel, measuring tape
- Time required: Under one hour
Solar path lights pushed into the ground along a walkway add safety and evening charm without wiring or an electrician.
Space the lights evenly, roughly every few feet, so the path stays lit without looking cluttered.
Choose a finish that complements existing fixtures or fencing nearby. This is one of the simplest upgrades to install in a single sitting.
48. Build a Simple Rain Barrel
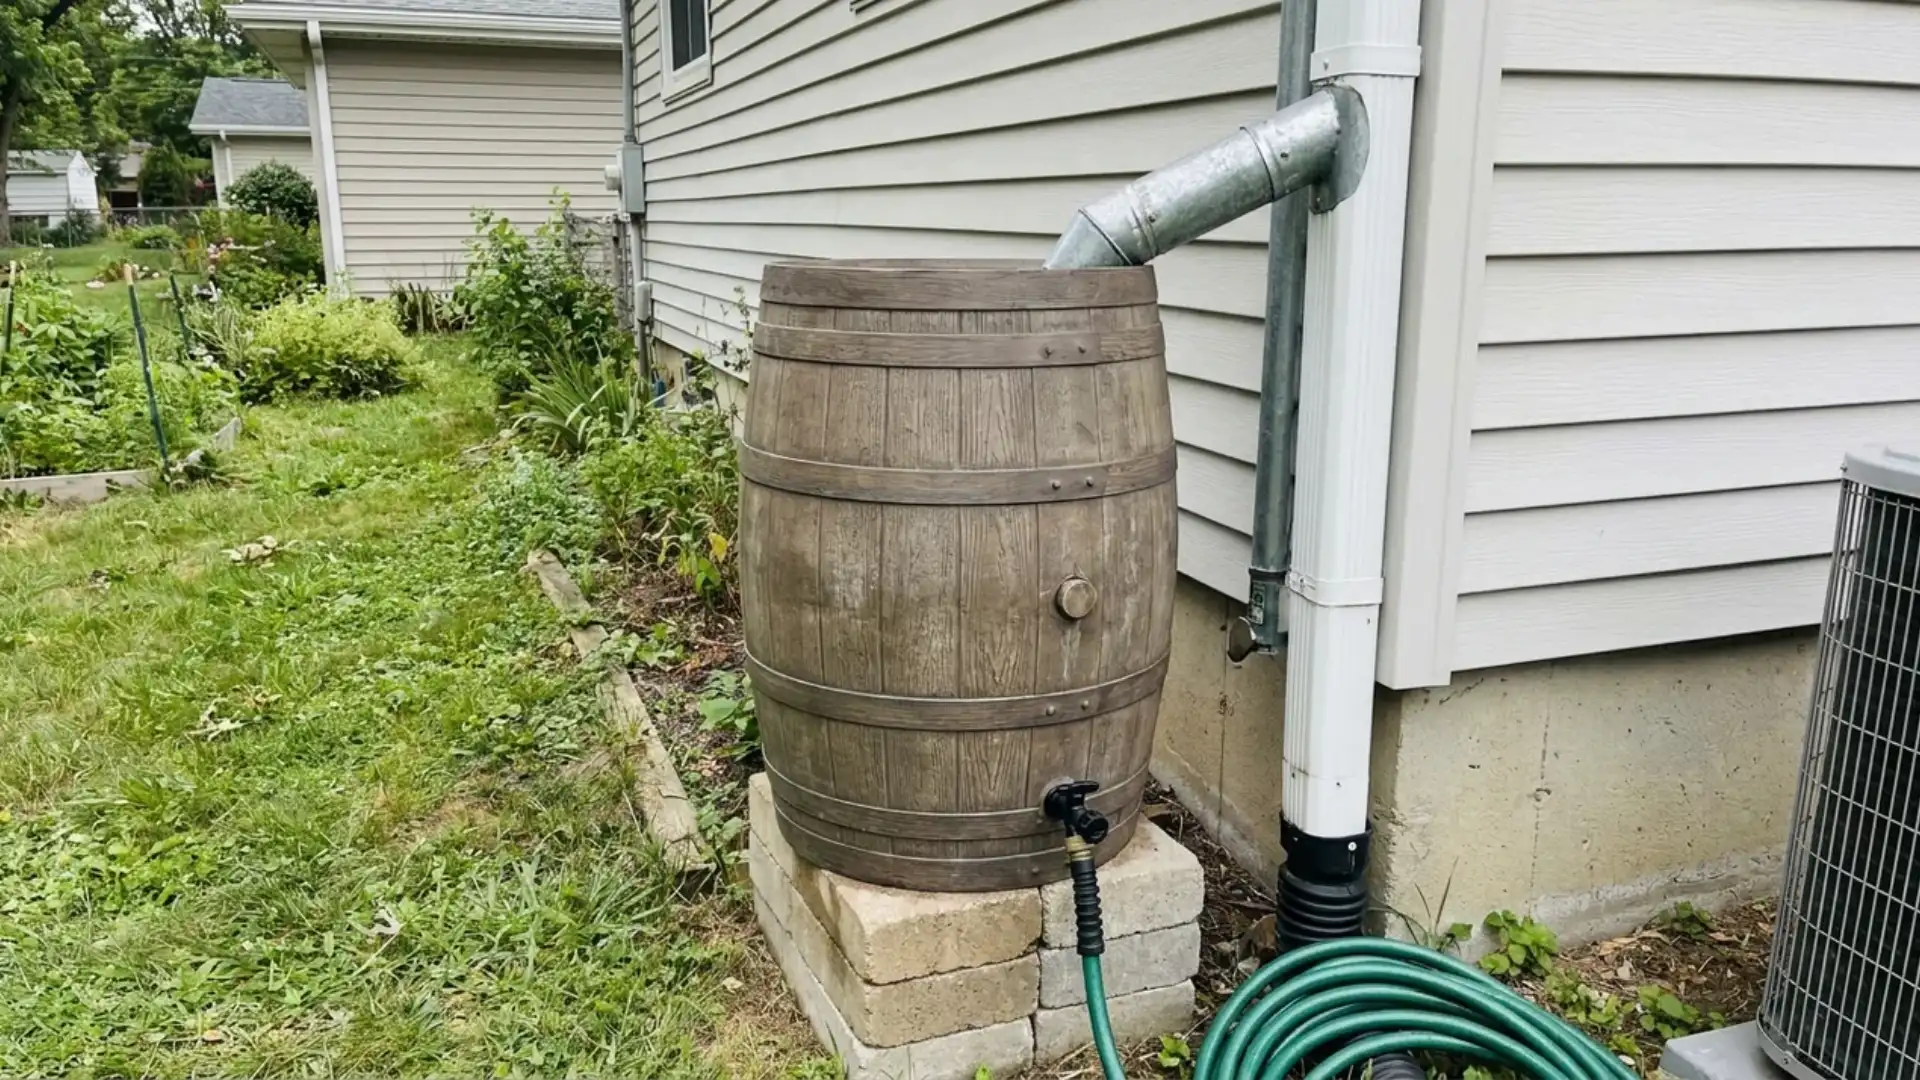
- Tools and materials needed: Large barrel, spigot, drill, mesh screen, downspout diverter
- Time required: Approximately 2 to 3 hours
A large barrel fitted with a spigot near the bottom collects rainwater runoff from a downspout for later use in watering the garden.
Drill a hole for the spigot and another near the top for a diverter connection, then cover the top opening with mesh to keep out debris.
Position the barrel on a stable, slightly elevated base.
49. Build a Simple Compost Bin
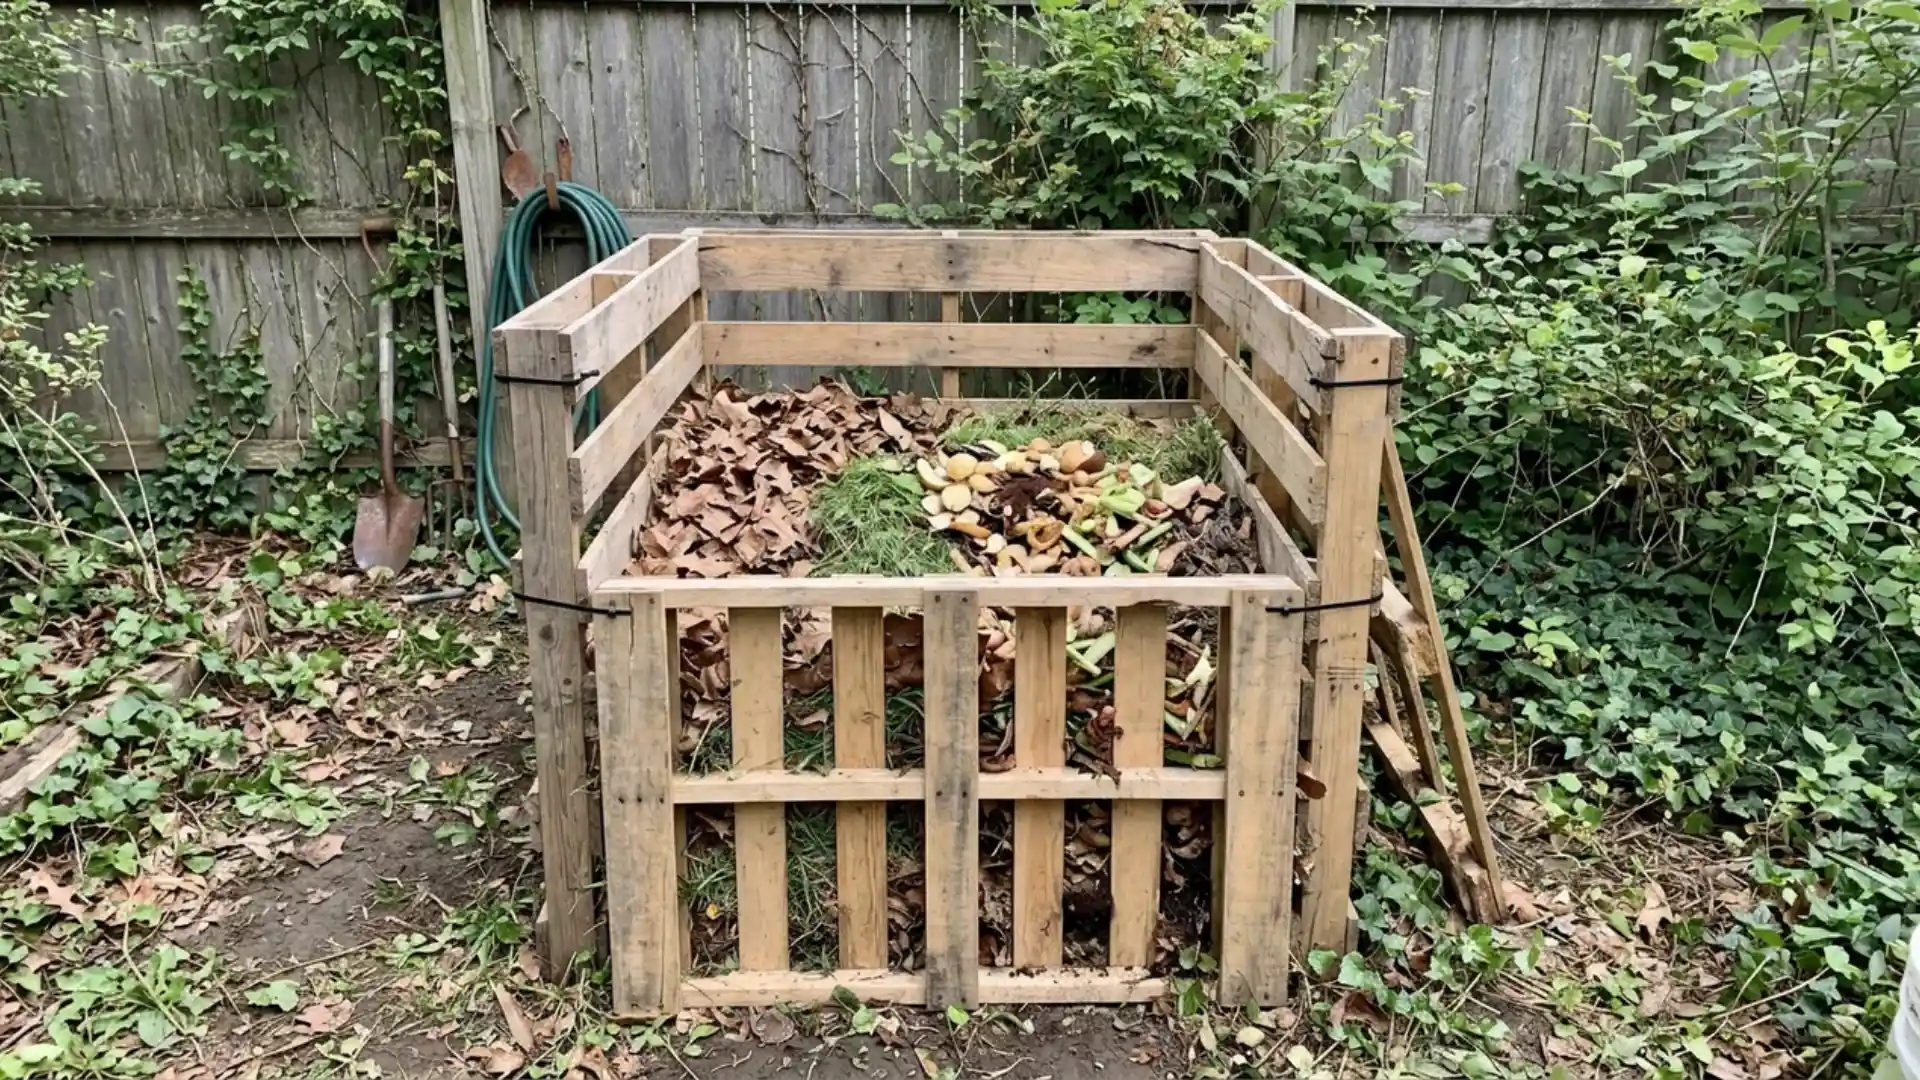
- Tools and materials needed: Wood pallets or wire fencing, zip ties, hinges
- Time required: Approximately 2 to 3 hours
Three or four wood pallets fastened together at the corners create an open-air compost bin that takes almost no skill to assemble.
Leave one side hinged or removable for easy access when turning the pile.
Add kitchen scraps, yard waste, and dry leaves in alternating layers to keep decomposition moving steadily. Place the bin in a shaded, out-of-the-way corner.
50. Build a Garden Arbor Entrance
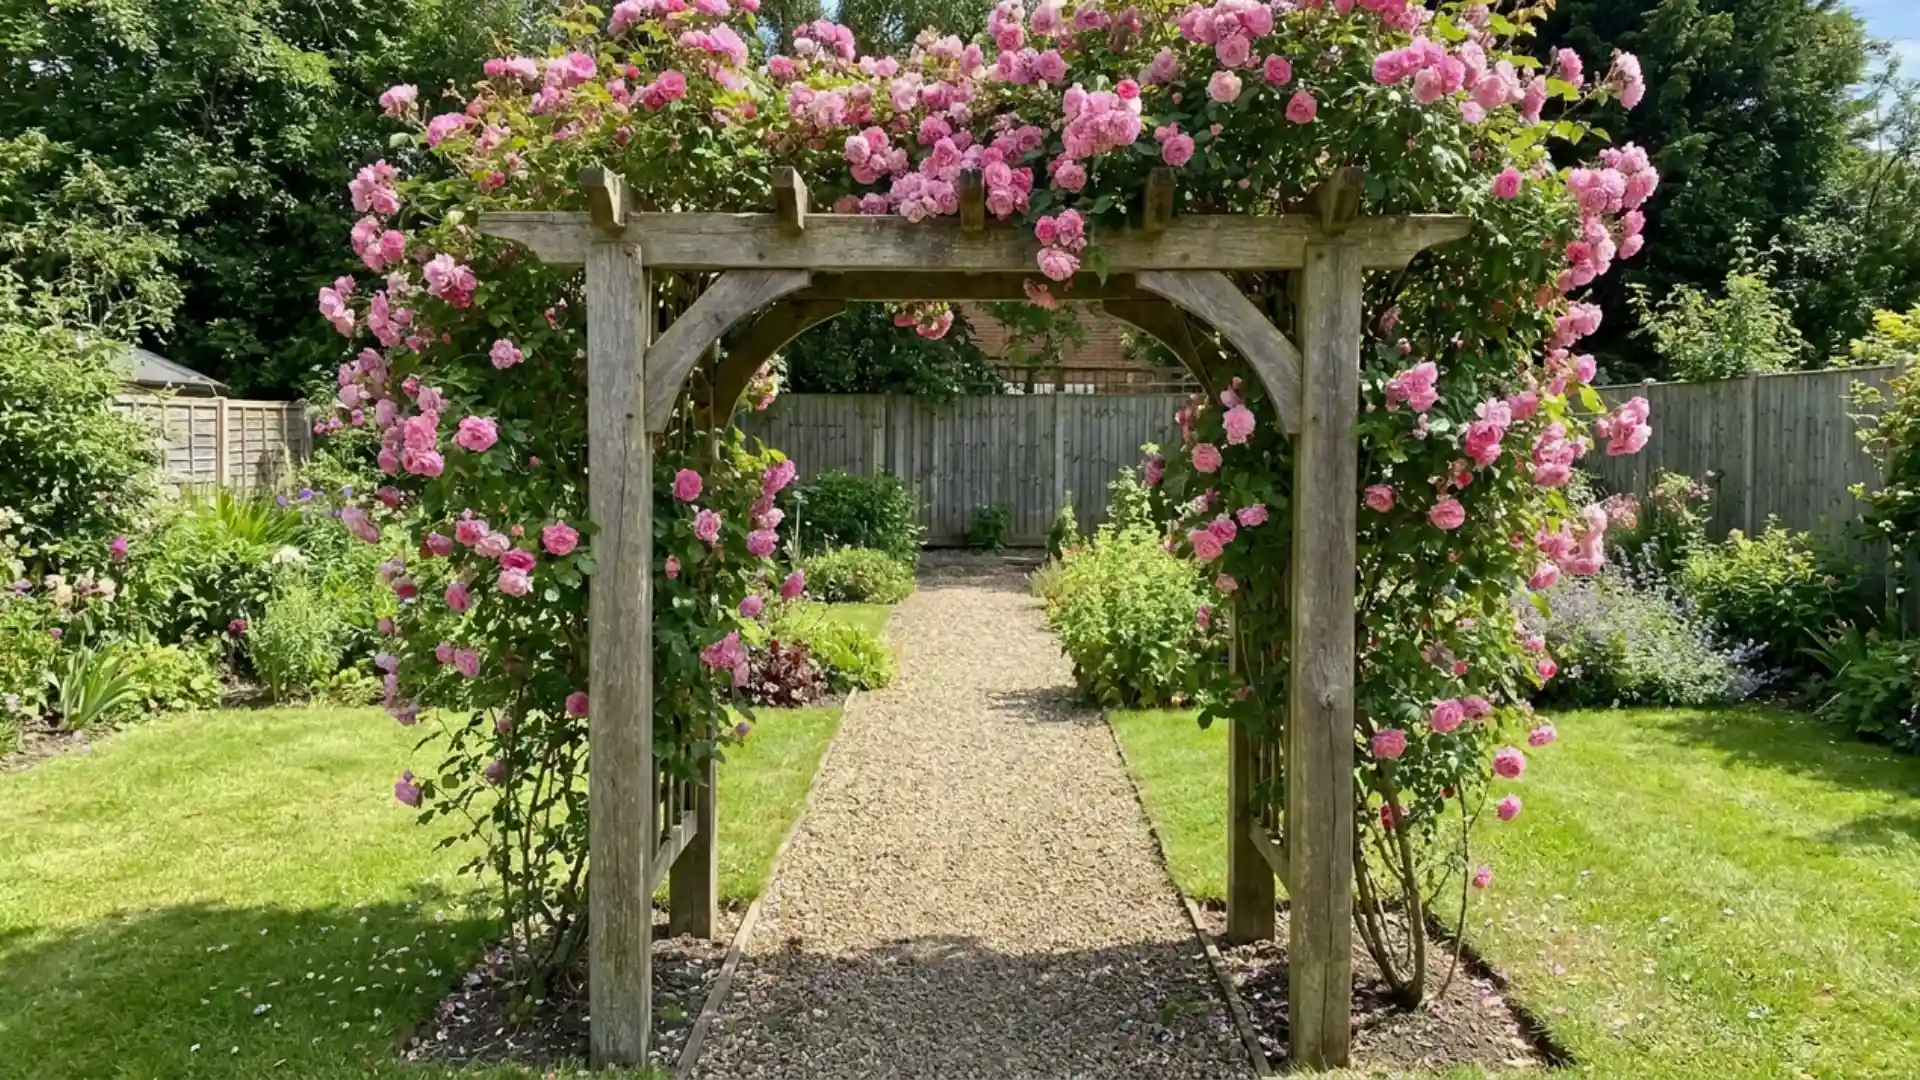
- Tools and materials needed: Lumber posts, crossbeams, concrete mix, screws
- Time required: Approximately 1 to 2 days
A freestanding arbor built over a garden entrance or gate frames the space and gives climbing plants like roses or wisteria a place to grow overhead.
Set the posts in concrete first, then attach angled crossbeams once they’re fully cured.
This structure works well for marking the transition between a lawn and a planting area, adding height where the yard is otherwise flat.
51. Build a Wine Bottle Garden Border
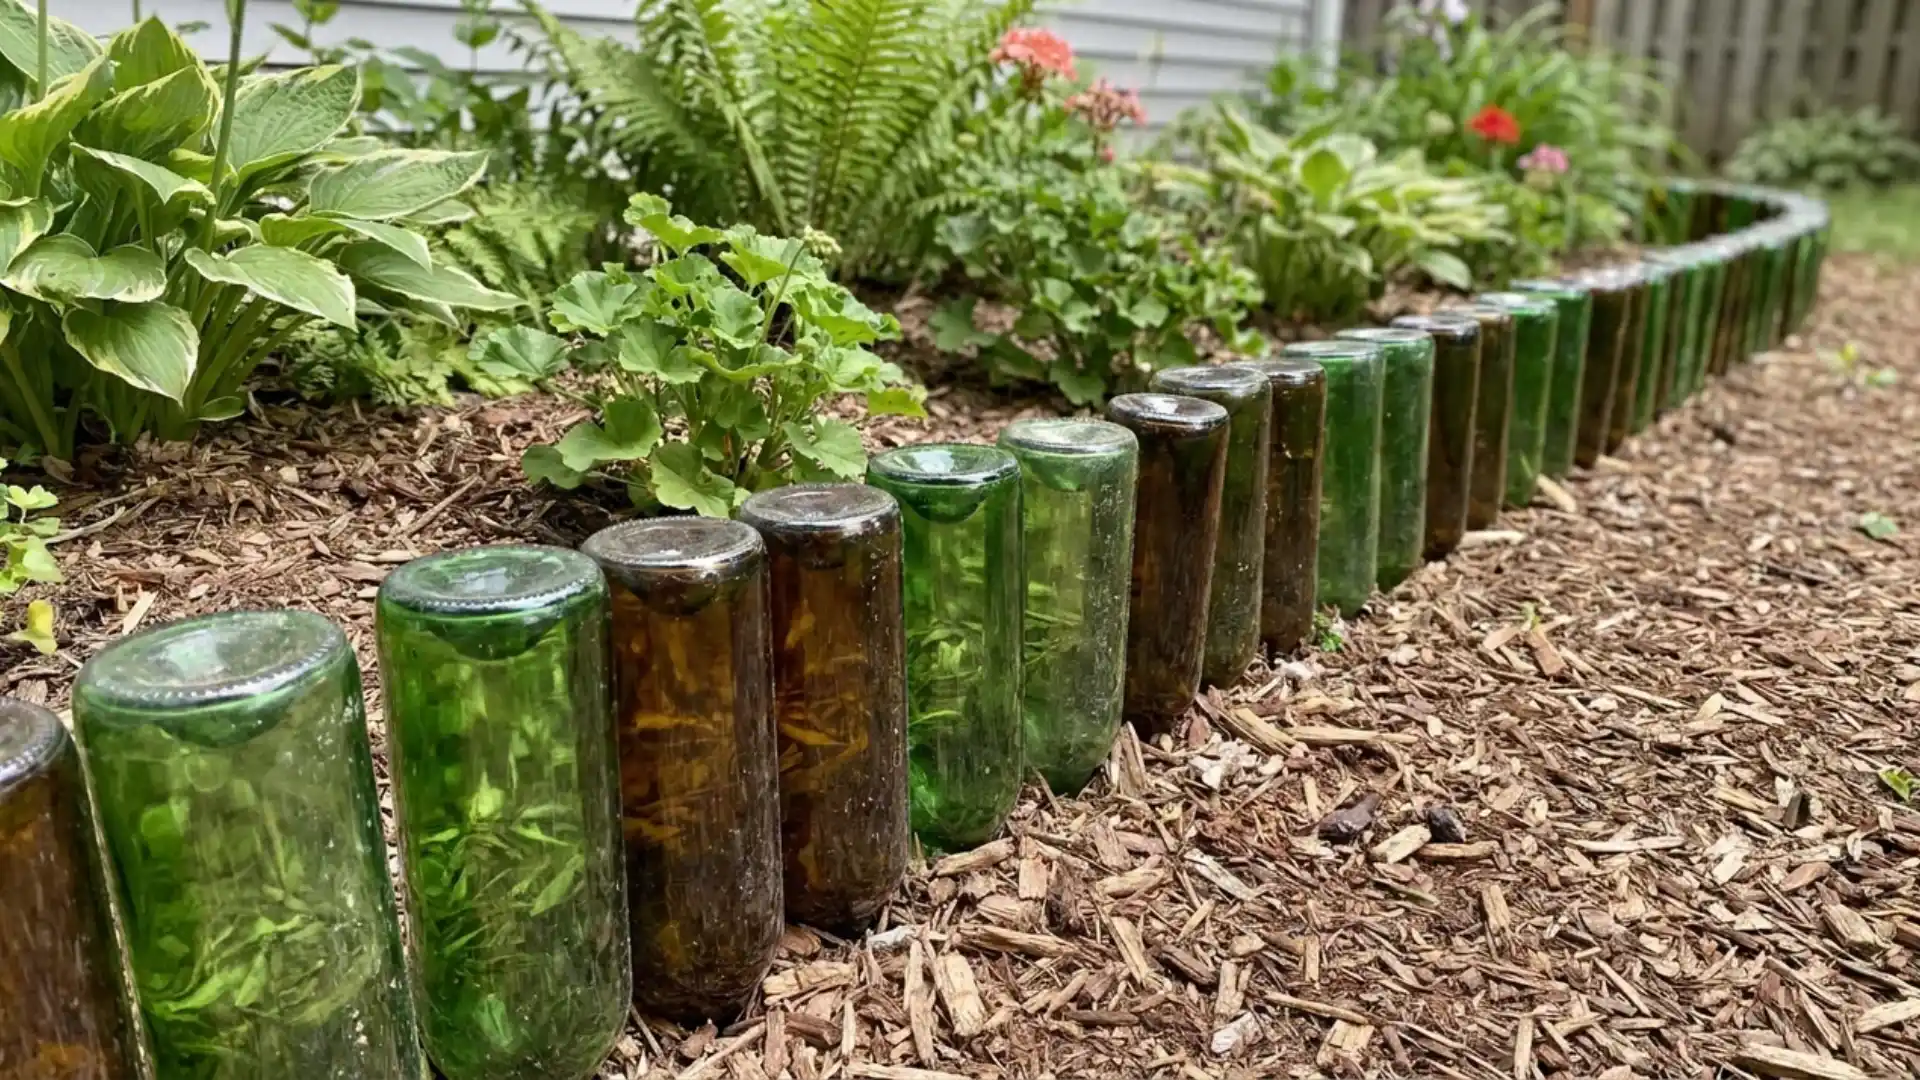
- Tools and materials needed: Empty wine bottles, shovel, level, rubber mallet
- Time required: Approximately 2 to 3 hours
Empty wine bottles buried neck-down along the edge of a flower bed create a colorful, budget-friendly border that also holds soil in place.
Dig a narrow trench first, then set each bottle at a matching depth for a clean, even line.
Tap each one gently with a rubber mallet to seat it firmly. Mixed bottle colors add extra visual interest.
52. Build a Cold Frame Box
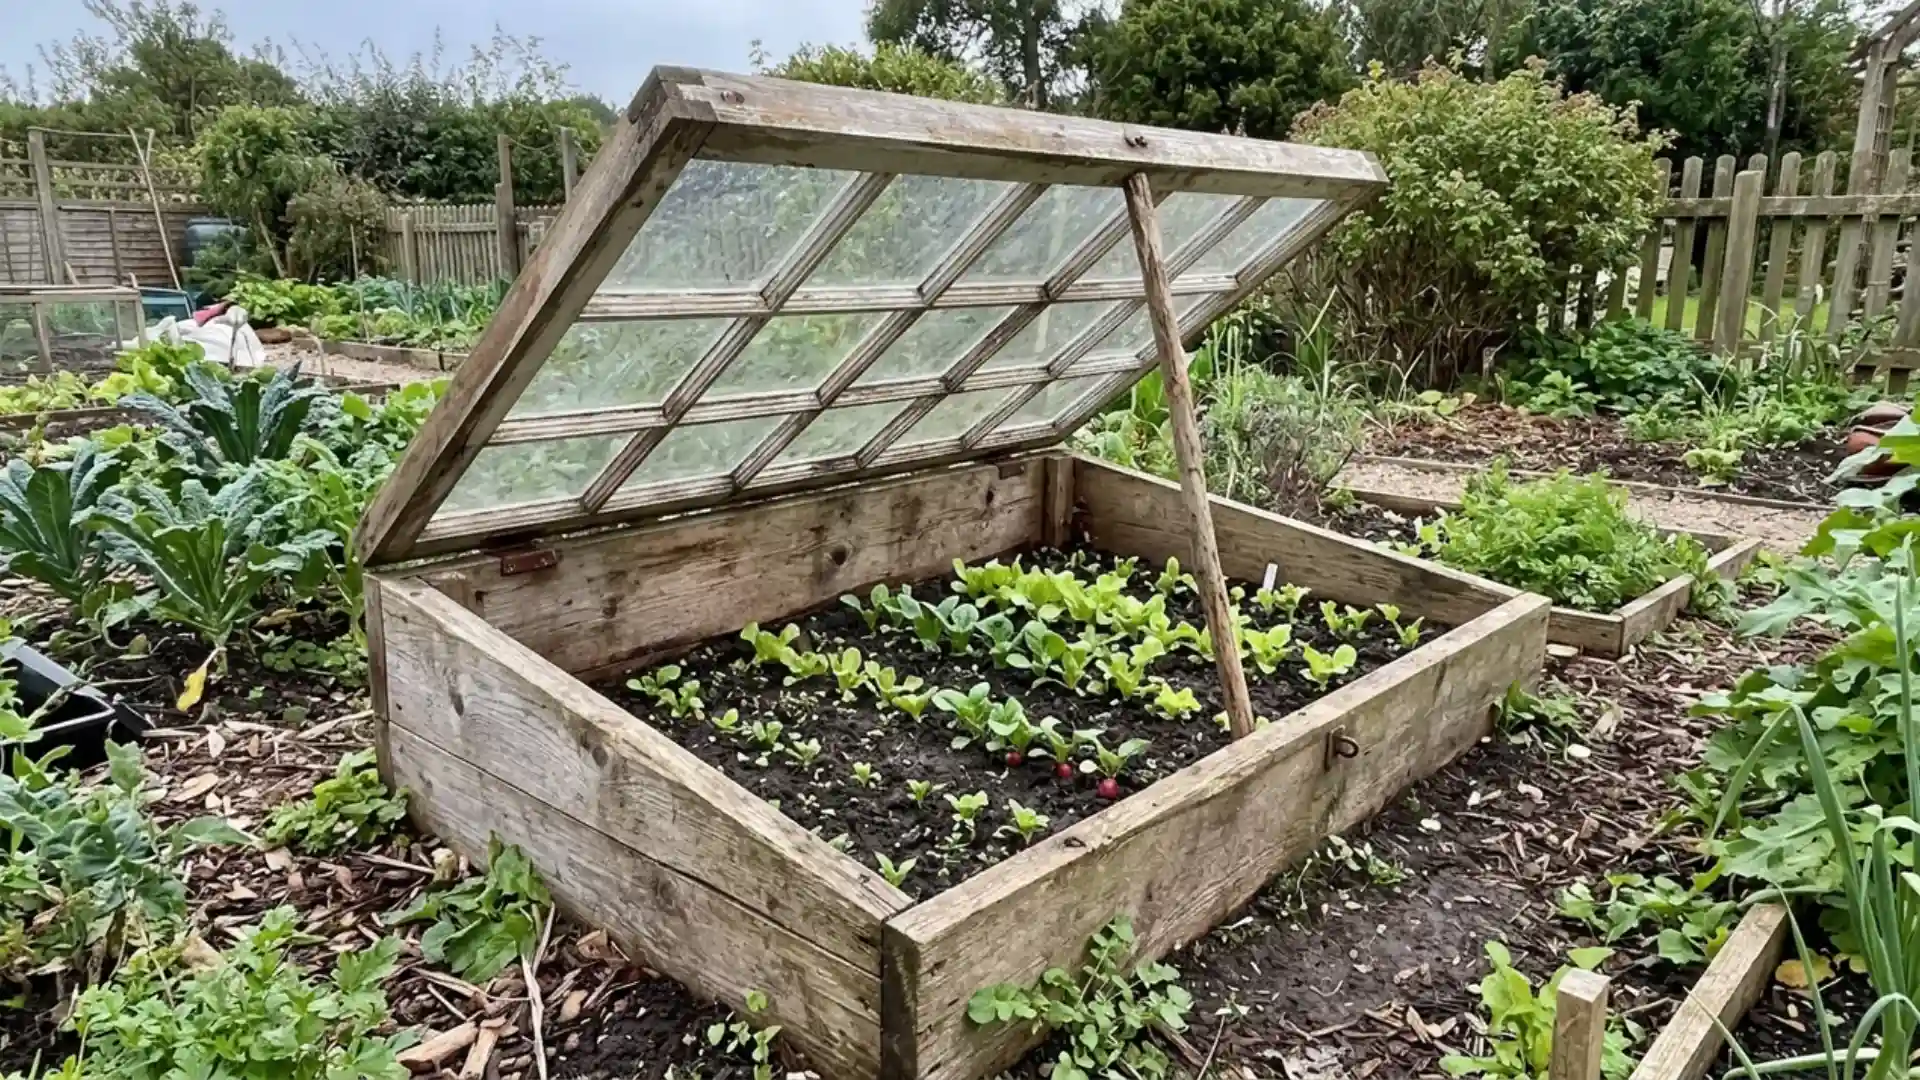
- Tools and materials needed: Old window, lumber, hinges, screws, weatherstripping
- Time required: Approximately 3 to 4 hours
An old window hinged atop a simple wood box frame creates a cold frame that extends the growing season by trapping heat like a mini greenhouse.
Build the box to match the window’s dimensions, then attach it with hinges so it opens for airflow on warmer days.
Seedlings and cool-weather crops benefit most from this early-season protection.
53. Build a DIY Garden Sundial
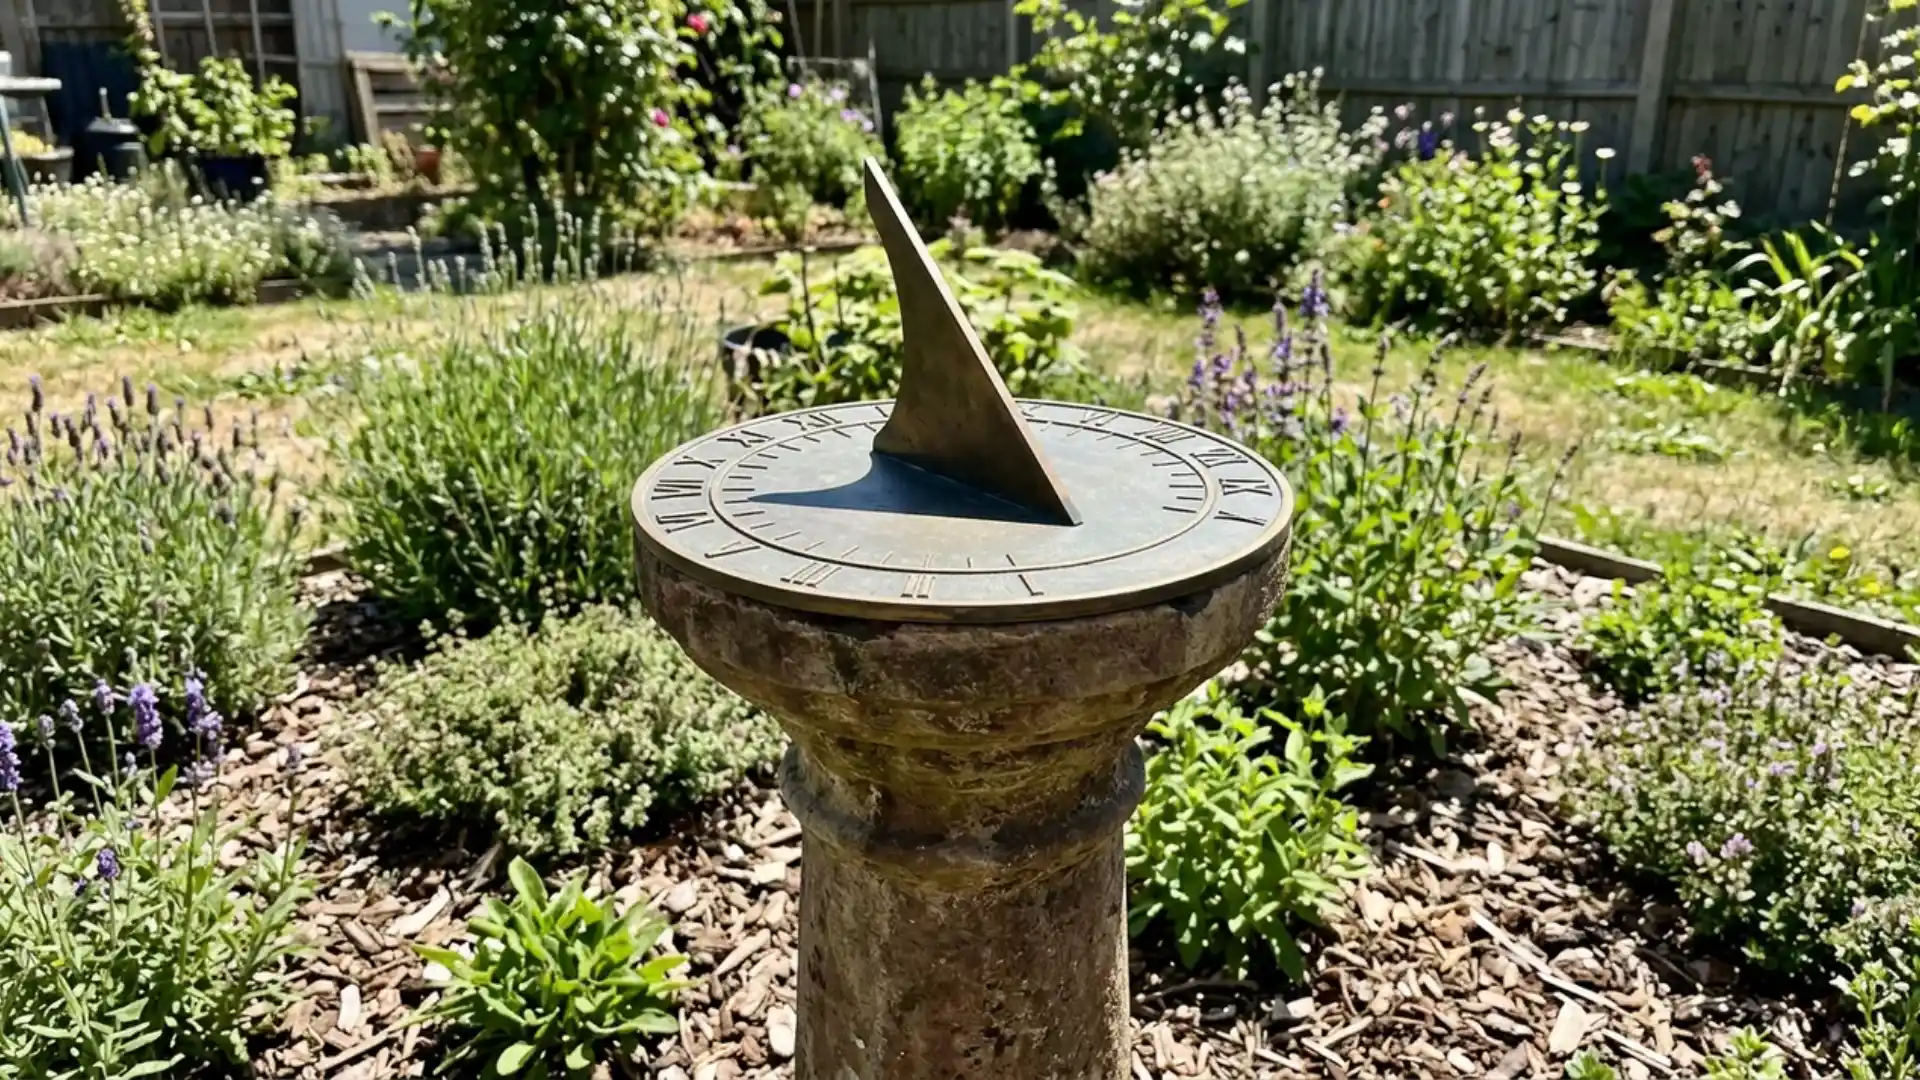
- Tools and materials needed: Flat stone or concrete disc, metal rod, compass
- Time required: Approximately 2 to 3 hours
A flat stone or poured concrete disc fitted with an angled metal rod at its center makes a working sundial and a striking garden centerpiece.
Use a compass to align the rod correctly with true north so it reads time accurately through the day.
Mount it on a pedestal or set it flush into a planting bed as a focal point.
Basic Safety Tips Before You Start
A handful of these builds involve power tools, wet concrete, or an open flame, so a few precautions go a long way before the first cut.
- Gloves and eye protection for any cutting, drilling, or sanding step, including the trellis, bench, and fence builds.
- A dust mask when cutting reclaimed or pressure-treated wood, since older boards can carry lead paint or preservatives.
- A local code check before setting fence posts, building a firepit, or digging near property lines.
- Stable footing for anything freestanding, like the obelisk trellis or privacy screen, since an unanchored structure can tip in wind.
This is general guidance, not a substitute for the safety instructions that come with your specific tools or materials.
Eye strain and sun exposure add up over a long build day too, and simple habits like the ones covered in this eye protection guide for gardeners apply just as well to an afternoon of sawing and staking.
Choosing Materials That Hold Up Outdoors
Picking the right materials makes the difference between a project that lasts and one that needs redoing next season. A few basics go a long way toward getting it right:
- Match Wood to Weather: Cedar and redwood resist rot naturally, worth the extra cost for anything staying outdoors year-round.
- Seal Before It Sits Outside: Untreated lumber needs a coat of sealant or paint before facing rain and sun.
- Think About Weight: Concrete and stone last longer but are harder to move, while wood and metal stay flexible.
- Reuse Before Buying New: Pallets, old furniture, and salvage finds cut costs and keep materials out of landfills.
- Budget for Upkeep Too: Cheaper wood like untreated pine may need restaining every year or two.
Getting the material choice right from the start saves time, money, and a second trip to the hardware store.
Frequently Asked Questions (FAQs)
How Long Do DIY Garden Projects Last?
Wood-based projects typically last three to five years, while stone and brick builds can last well over a decade. Regular sealing helps extend that lifespan further.
Can Beginners Build These Garden Projects?
Yes, most projects need only basic tools and simple cuts. Starting with a small planter build helps build confidence first.
Do DIY Garden Projects Increase Home Value?
Well-maintained outdoor features can boost curb appeal and buyer interest. They may not add direct resale value, but they make a home feel more finished.
End Note!
Once you finish one of these projects, it usually becomes clear what else in the yard could use the same treatment.
Start with whichever project matches the tools you already have and the time you can set aside this weekend.
Let us know which project you are building first in the comments below.


