
There’s something almost magical about plumeria that stops people in their tracks.
Maybe it’s those spiraling, waxy blooms in shades of cream, pink, and sunset yellow. Or perhaps it’s that intoxicating fragrance that instantly transports you to a beachside paradise.
Whatever draws you in, this tropical beauty has earned its devoted following worldwide.
But here’s the thing: plumeria isn’t nearly as fussy as you might think.
With the right approach to light exposure, watering habits, soil composition, and strategic pruning, you can master plumeria plant care and keep these plants thriving year after year.
What is a Plumeria?
Plumeria belongs to the Apocynaceae family and hails from Central America, Mexico, and the Caribbean, though it’s now celebrated across tropical regions worldwide.
You’ll find several species worth knowing.
Plumeria rubra produces those classic fragrant flowers in vibrant hues, while P. Alba offers pure white blooms with yellow centers. P. obtusa stands out with its rounded leaves and compact growth habit.
These versatile plants serve as landscape focal points in warm climates, adapt well to container growing in cooler zones, and are culturally significant in Hawaii, where their flowers are used in traditional leis.
Plumeria Growth Basics
In their native tropical and subtropical habitats, plumerias thrive in warm, sunny environments with distinct wet and dry seasons.
These deciduous beauties develop thick, succulent branches with elongated leaves clustered at branch tips.
Blooms typically appear from spring through fall, releasing their signature sweet fragrance that intensifies during evening hours. The scent varies by variety, ranging from jasmine-like to citrusy or even coconut notes.
As for climate requirements, plumerias perform best in specific zones:
- USDA Hardiness Zones 9-11 for year-round outdoor growing
- Zones 8 and below require container cultivation with winter protection
Caring for Plumeria: Light Requirements
Light is absolutely non-negotiable when it comes to caring for plumeria. These sun-worshippers need substantial daily exposure to produce those fragrant blooms and maintain healthy growth patterns.
| Location | Optimal Placement | Daily Sunlight Needed | Warning Signs |
|---|---|---|---|
| Outdoor | South or west-facing spots with unobstructed exposure | 6 to 8 hours of direct sun | Insufficient: leggy growth, sparse foliage, no blooms, pale leaves |
| Indoor | Brightest south-facing window; supplement with grow lights in winter | 6 to 8 hours of direct sun | Excessive: leaf scorch, brown crispy edges, faded flowers (rare) |
Note: If you’re transitioning plumeria from indoors to outdoors, do it gradually over a week to prevent shock. The investment in proper light positioning pays off dramatically come flowering season.
Watering Plumeria Correctly
Plumeria’s succulent stems store water efficiently, making them surprisingly drought-tolerant once established. The key is finding that sweet spot between adequate hydration and overwatering.
During active growth from spring through summer, water deeply when the top two inches of soil feel dry. As temperatures drop and leaves begin falling, drastically reduce watering frequency.
Dormant plumerias need minimal moisture, sometimes just once monthly or even less in cooler climates.
Best Practices by Planting Method
Getting your watering technique right depends largely on how your plumeria is planted:
- Container Plants: Water until it drains from the bottom holes, then wait until the soil dries before repeating.
- Ground-Planted: Establish deep roots with slow, thorough soaking rather than frequent shallow watering.
- Drainage is Critical: Always use pots with drainage holes and well-draining soil to prevent root rot.
- Dormancy Rule: When leaves drop, stop watering almost entirely until spring growth resumes.
- Morning Watering: Apply water early in the day so foliage dries before nightfall.
Soil & Potting Mix for Plumeria
Plumeria roots despise sitting in soggy conditions, making soil selection one of your most critical decisions. The right mix prevents root rot while providing adequate nutrition and stability for these top-heavy plants.
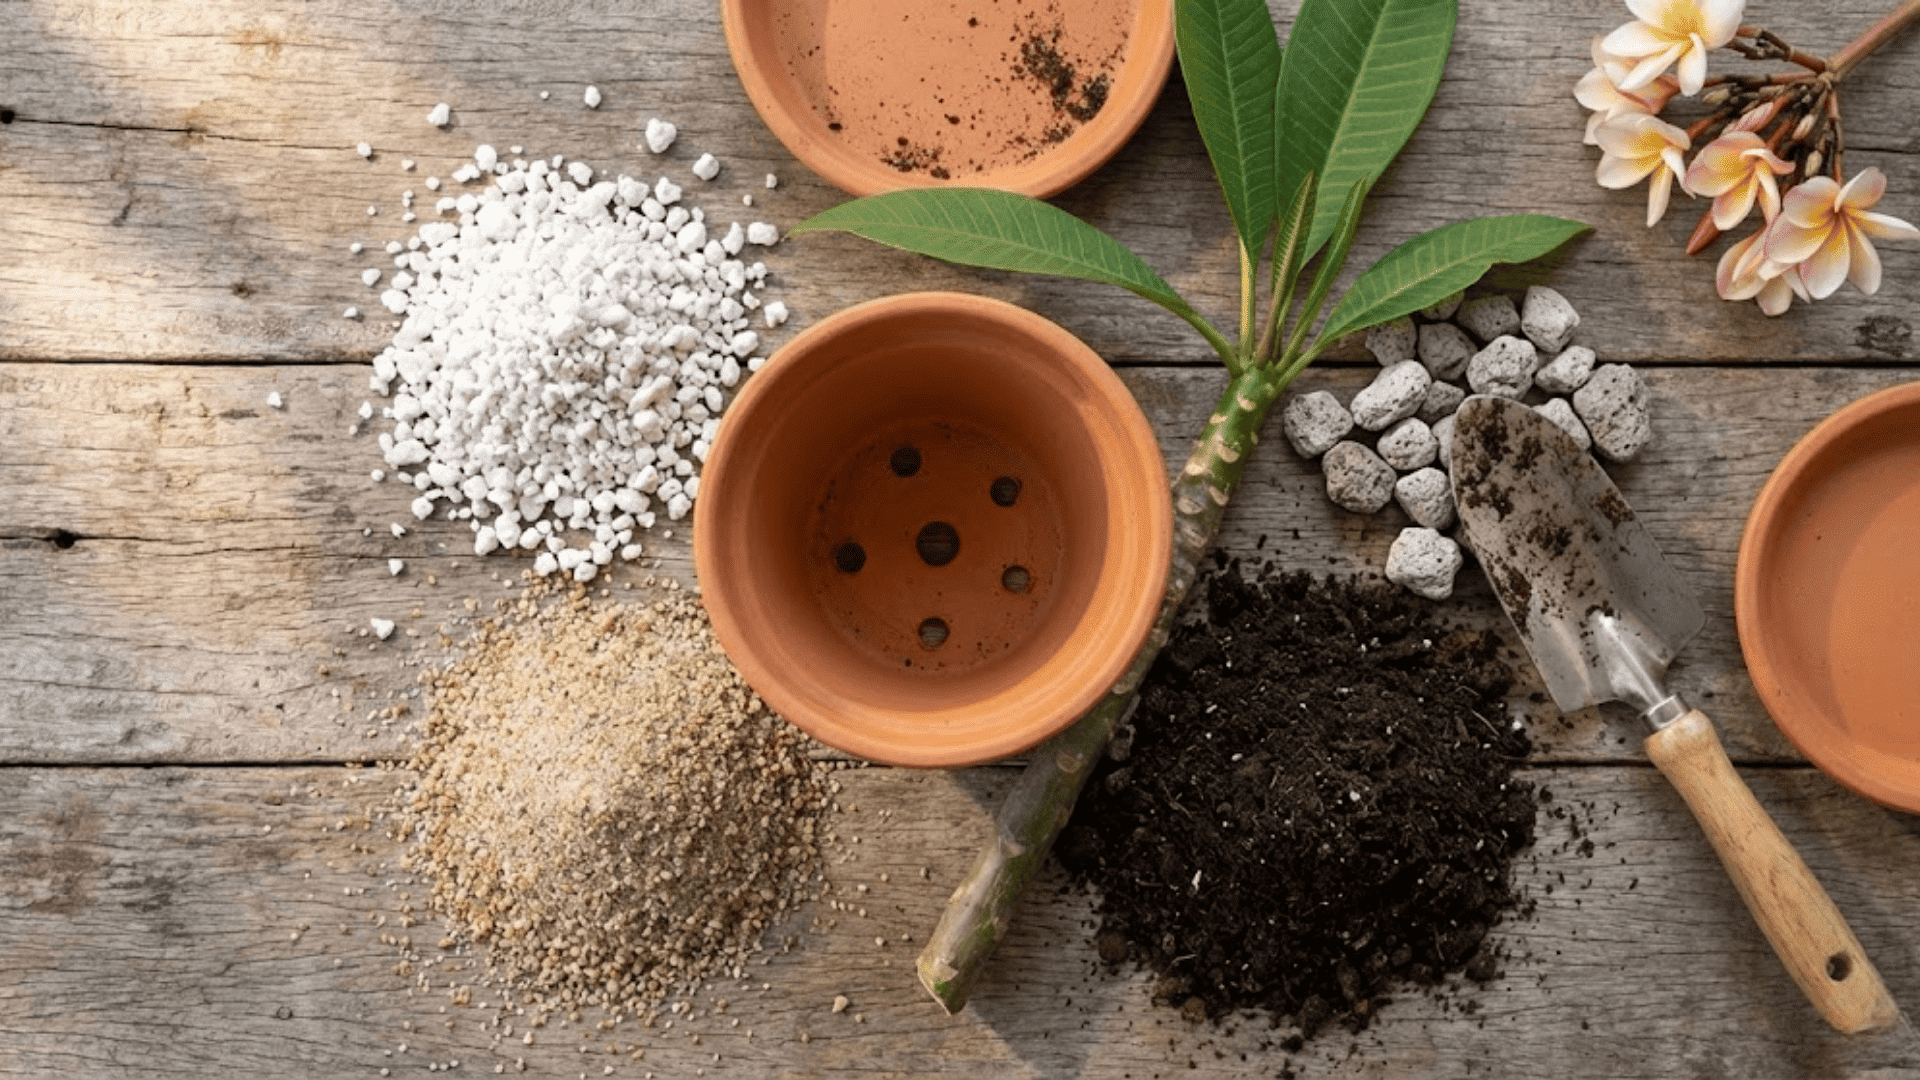
What Makes the Perfect Plumeria Soil Mix?
Your plumeria thrives in fast-draining, gritty mixtures that mimic its native rocky terrain. Commercial cactus or succulent mixes work beautifully straight from the bag.
For a DIY approach, combine equal parts potting soil, perlite, and coarse sand. Some growers add pumice or small lava rock for extra drainage.
Poor drainage creates anaerobic conditions that suffocate roots and invite fungal diseases, with plumeria’s thick, fleshy roots being particularly vulnerable to rot when waterlogged.
Selecting Containers and Improving Garden Soil
Start rooted cuttings in pots just slightly larger than the root system. Mature plumerias need containers that accommodate their root spread while remaining proportional to top growth.
A general rule: the pot diameter should be roughly one-third the plant’s height. Always prioritize drainage holes over decorative appeal.
If planting in heavy garden soil, work in coarse sand, perlite, and compost to a depth of at least eighteen inches. Create raised mounds or berms to elevate planting areas, ensuring water never pools around the root zone.
Feeding Your Plumeria for Maximum Flowering
Plumeria are hungry feeders during their growing season, and proper nutrition directly impacts bloom quantity and quality. A well-fed plant produces more flower clusters with richer colors and stronger fragrance.
The secret lies in choosing fertilizers with raised phosphorus levels, which encourage flowering rather than just leafy growth.
| Aspect | Details | Notes |
|---|---|---|
| Best NPK Ratio | 10-30-10 or 10-50-10 (high phosphorus) | Middle number promotes abundant blooming |
| Feeding Schedule | Every 2 to 3 weeks during active growth | Stop fertilizing when leaves begin dropping in fall |
| Organic Options | Bone meal, fish emulsion, compost tea | Slower release but improves long-term soil health |
| Synthetic Options | Water-soluble bloom boosters | Fast-acting with precise nutrient control |
| Nitrogen Deficiency | Yellowing older leaves, stunted growth | Apply balanced fertilizer or quality compost |
| Phosphorus Deficiency | Reduced flowering, purplish leaf tints | Switch to high-phosphorus bloom formula |
| Micronutrient Issues | Chlorotic new leaves with green veins | Add chelated iron or micronutrient supplement |
Temperature and Humidity Requirements for Plumeria
Plumeria’s tropical heritage means these plants crave warmth and can’t tolerate freezing conditions.
Understanding their temperature thresholds and humidity preferences helps you create an environment where they flourish year-round.
- Ideal Temperature Range: 65 to 95 degrees Fahrenheit for active growth and blooming.
- Cold Tolerance Limits: Damage occurs below 40 degrees; frost kills exposed tissue and can destroy the entire plant.
- Humidity Preferences: Moderate to high humidity (50 to 60 percent) supports healthier foliage, though plumeria adapts to drier air.
- Frost Protection Methods: Move containers indoors before the first frost or wrap in-ground plants with frost cloth and mulch heavily.
- Indoor Overwintering: Store dormant plants in a cool, dark space around 50 to 55 degrees with minimal watering until spring.
Getting the temperature balance right during winter dormancy is just as important as providing summer heat. Plan your protection strategy before cold weather arrives to avoid scrambling during unexpected temperature drops.
Plumeria Temperature Thresholds and Zone Protection
Understanding exactly when cold becomes dangerous helps you protect your plumeria before damage occurs. Here’s a breakdown of critical temperatures and what protection works for your growing zone.
Critical Temperature Thresholds
Knowing exactly what happens at specific temperatures helps you protect your plumeria before damage occurs.
Here’s what to expect as temperatures drop:
| Temperature | Plant Response | Required Action |
|---|---|---|
| 60°F | Growth slows noticeably | Begin transitioning to dormancy care |
| 50°F | Leaf yellowing starts, growth stops | Reduce watering frequency by half |
| 45°F | Leaves begin dropping naturally | Move containers to protected locations |
| 40°F | Tissue damage risk begins | Bring indoors or provide frost protection |
| 35°F | Stem and branch damage is likely | Emergency protection mandatory |
| 32°F (Frost) | Exposed tissue dies, plant can be killed | Fatal without immediate intervention |
Plumeria can survive brief exposure to temperatures just above 40°F, but prolonged cold below this threshold causes irreversible damage.
Winter Protection by USDA Zone
Your protection strategy depends entirely on where you’re growing.
Here’s what works for each zone:
- Zones 10-11: Minimal effort needed; mulch around the base and keep frost cloth handy for rare cold snaps below 40°F.
- Zone 9: Moderate protection required; wrap trunks with frost cloth, apply heavy mulch, or move containers to covered patios during cold spells.
- Zone 8: Indoor overwintering mandatory; move plants to unheated garages or basements, maintaining 50-55°F before first frost.
- Zones 7 and below: Container growing only with full indoor dormancy; no outdoor planting possible without greenhouse protection.
For unexpected temperature drops, drape plants with old sheets or blankets overnight and remove them by morning to prevent moisture buildup.
Plumeria Cold Damage: Signs and Recovery
Cold damage shows up in different ways depending on exposure severity and duration. Knowing what to look for helps you catch problems early and take action before damage spreads.
- Blackened, Mushy Stems: Severe frost damage; tissue is dead and must be cut back to firm, healthy growth immediately.
- Soft, Water-Soaked Spots on Branches: Early-stage cold injury; may recover if temperatures stabilize, monitor closely.
- Yellowing Leaves After Cold Exposure: Usually temporary stress; leaves often recover once warmth returns.
- Brown, Crispy Leaf Edges or Tips: Dead tissue from freezing; remove affected leaves, but wait until spring to prune stems.
- Mushy, Dark Roots with Foul Odor: Root rot from cold + waterlogged soil; requires immediate repotting into fresh, dry mix.
Most plumeria survive cold damage if the main trunk remains firm and healthy. Even plants that lose all branches can regenerate from the base, given time and proper care.
Pruning and Shaping Your Plumeria
Strategic pruning transforms lanky, single-stemmed plumerias into full, multi-branched specimens that produce exponentially more blooms.
The process requires timing, technique, and proper tool hygiene to keep your plant healthy and beautifully shaped.
When and Why to Prune Plumeria?
The best pruning window opens in late winter or early spring before new growth emerges. Pruning during dormancy minimizes stress and allows wounds to heal as the growing season begins.
Remove damaged, diseased, or frost-bitten branches whenever you spot them, regardless of season. Pruning encourages branching at cut sites, with each branch tip potentially producing flower clusters.
A well-pruned plumeria develops a bushier silhouette with multiple flowering points rather than a single tall stem.
Step-by-Step Shaping Techniques
Here’s how to shape your plumeria for maximum branching and bloom production:
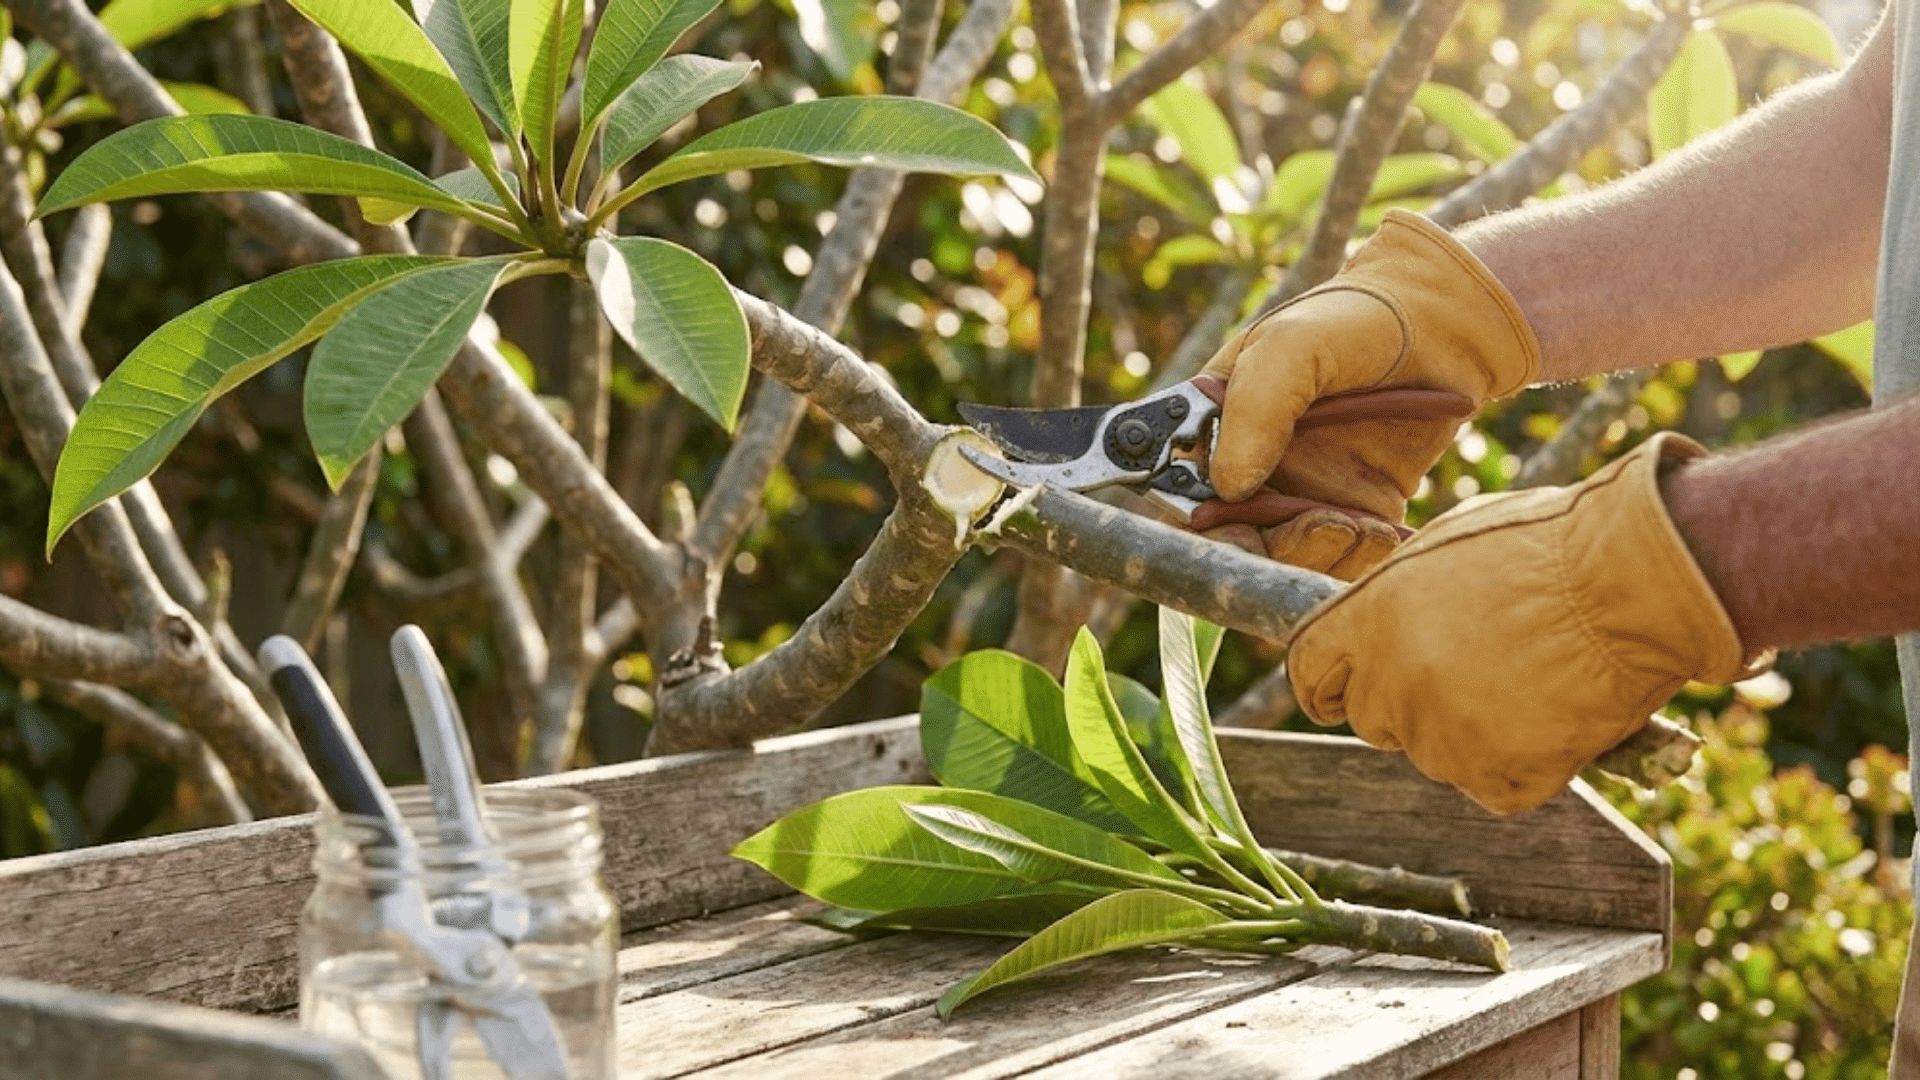
- Step 1: Sterilize pruning shears with rubbing alcohol or bleach solution before making any cuts.
- Step 2: Cut main stems at a 45-degree angle, leaving at least 12 inches of growth from the base.
- Step 3: Make cuts just above a node or natural branch junction to promote healing and new growth.
- Step 4: Remove any leggy, weak, or crossing branches to improve air circulation and structure.
- Step 5: Allow cut ends to dry and callus for several days before watering to prevent rot.
Always wear gloves when pruning, as plumeria sap can irritate skin. Clean tools between plants to avoid spreading potential diseases through your collection.
Plumeria Plant Care: Problems & Fixes
Nothing frustrates plumeria growers more than a healthy plant that refuses to bloom. Understanding the common culprits behind bloom failure helps you troubleshoot and coax those fragrant flowers into appearing.
Problem 1: Insufficient Sunlight Exposure
Plumeria needs at least six to eight hours of direct sun daily. Move your plant to the brightest location available or supplement indoor specimens with grow lights.
Problem 2: Inadequate Phosphorus Levels
Without enough phosphorus, plants focus on foliage instead of flowers. Switch to a high-phosphorus fertilizer with an NPK ratio like 10-30-10 during the growing season.
Problem 3: Skipped Dormancy Period
Plumeria requires a winter rest to reset its blooming cycle. Allow the plant to go dormant by reducing water and keeping it cool for at least two months.
Problem 4: Premature Bud Drop
Sudden temperature fluctuations, inconsistent watering, or transplant shock cause buds to abort. Maintain stable conditions and avoid moving plants once buds form.
Problem 5: Overfertilization with Nitrogen
Too much nitrogen produces lush foliage at the expense of blooms. Cut back on fertilizer or choose a bloom-specific formula with lower nitrogen content.
Propagating Plumeria
Growing new plumerias from cuttings is remarkably straightforward and deeply satisfying. This method produces genetically identical plants that will bloom with the same color and fragrance as the parent.
Step-by-Step Cutting Propagation
Follow these steps to successfully propagate plumeria from stem cuttings:
- Step 1: Cut a healthy branch 12 to 18 inches long at a 45-degree angle using sterilized shears.
- Step 2: Allow the cut end to dry and callus in a shaded, dry location for five to seven days.
- Step 3: Dip the callused end in rooting hormone powder to encourage faster root development.
- Step 4: Plant the cutting two to three inches deep in well-draining cactus mix or perlite.
- Step 5: Water lightly and place in bright, indirect light until roots establish in four to eight weeks.
Rooting Methods: Soil vs. Water
Both techniques work, though each has distinct advantages depending on your situation:
| Method | Pros | Cons |
|---|---|---|
| Soil | Roots adapt immediately; less transplant shock | Harder to monitor progress |
| Water | Visual root monitoring; faster initial growth | Roots must adapt when transplanted |
Once roots reach two to three inches long, transition your cutting to regular care.
Water sparingly at first, gradually increasing as the root system establishes. Avoid fertilizing for the first two months. Provide bright light but protect from intense afternoon sun initially.
Most cuttings bloom within two to three years when given proper care.
Pests & Diseases
Plumeria faces relatively few pest and disease problems, but staying vigilant helps you catch issues early.
- Spider mites create fine webbing and stippled leaves, treatable with insecticidal soap or neem oil spray.
- Mealybugs appear as white cottony masses in leaf joints, removable with rubbing alcohol on cotton swabs.
- Aphids cluster on new growth and buds, controlled with a strong water spray or horticultural oil.
- Scale insects look like brown bumps on stems, requiring manual removal or systemic insecticides.
- Fungal rust causes orange pustules on leaf undersides, managed by removing affected foliage and improving air circulation.
- Black tip rot attacks branch ends during cool, wet conditions and needs immediate pruning of infected tissue.
Prevention through proper spacing, adequate sunlight, and avoiding overhead watering beats treatment every time.
Seasonal Plumeria Care
Plumeria’s care requirements shift dramatically with the seasons, following their natural cycle of active growth and dormancy.
Adjusting your routine throughout the year keeps plants thriving and blooming reliably.
| Season | Key Tasks | Watering & Feeding |
|---|---|---|
| Spring | Resume care as leaves emerge; transition outdoors gradually | Start light watering; begin biweekly fertilizing |
| Summer | Maintain consistent care; monitor pests | Deep water when the top two inches are dry; fertilize every 2-3 weeks |
| Fall | Reduce frequency; prepare for dormancy | Taper watering as leaves drop; stop fertilizing by late fall |
| Winter | Allow full dormancy; protect from cold | Stop watering or minimal monthly amounts; no feeding |
Container vs. In-Ground Plumeria
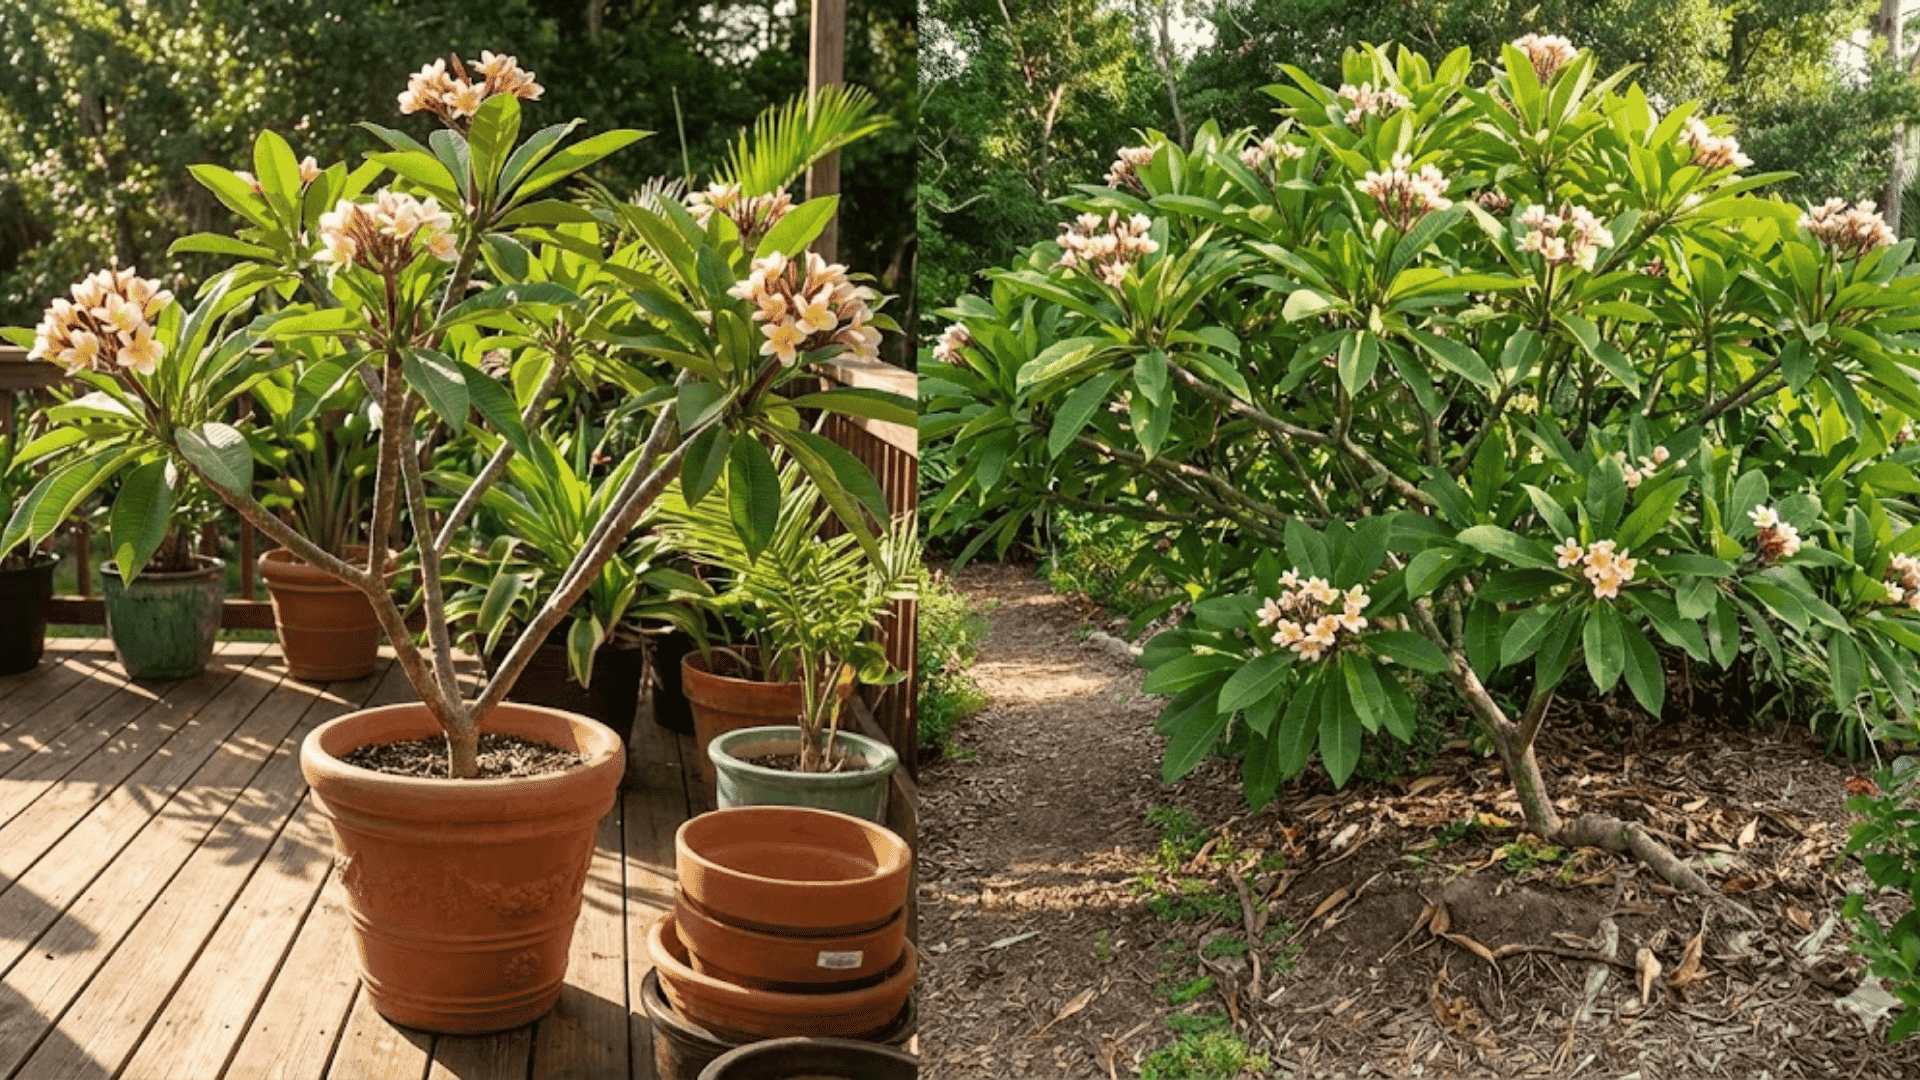
Deciding between container and in-ground planting depends on your climate, space, and mobility needs. Each method offers distinct advantages that suit different growing situations and lifestyles.
Container vs. In-Ground Comparison
Container growing offers flexibility to move plants indoors during cold weather and complete control over soil drainage.
Pest management stays simpler through periodic repotting, though limited root space restricts size and demands repotting every two to three years.
In-ground planting allows unrestricted root growth for larger specimens with reduced watering needs once established. However, this permanent option only works in frost-free climates or requires extensive winter protection.
Repotting and Root Pruning Guidelines
Keep your container plumerias healthy and appropriately sized with these repotting and root management practices:
- Repot when roots circle the pot interior or emerge from drainage holes, ideally in spring, before active growth.
- Choose pots only two to four inches larger in diameter than the current container.
- Trim away one-third of the root mass with clean shears for mature plants you want to maintain at specific sizes.
- Allow pruned roots to dry slightly before replanting in fresh cactus mix to prevent rot.
Caring for Plumeria: Decorative & Landscaping Uses
Plumeria brings instant tropical ambiance to outdoor spaces with its sculptural form and intoxicating blooms. Strategic placement maximizes both visual impact and plant health throughout your landscape.
- Tropical Garden Focal Points: Plant plumeria as specimen trees in prominent locations where their architectural branching and flower clusters command attention.
- Poolside Paradise Plantings: Position containers around pool decks where fallen flowers create a spa-like atmosphere, and fragrance enhances the resort experience.
- Patio Container Groupings: Cluster multiple plumerias in varying heights with complementary foliage plants for moveable tropical displays.
- Companion Plant Pairings: Underplant with hibiscus, bird of paradise, crotons, or ornamental grasses that share similar sun and water requirements.
- Entryway Statement Pieces: Flank doorways or gates with matching plumerias in decorative containers for a welcoming tropical greeting.
Plumeria’s low-maintenance nature and high visual reward make it ideal for both novice gardeners and seasoned landscape designers seeking that perfect island touch.
The Closing Note
Caring for plumeria doesn’t demand perfection, just a little attention and patience.
These plants reward you with beautiful blooms and a quiet sense of accomplishment that comes from watching something thrive under your care.
Adjust watering habits as seasons change, find that perfect sunny corner, or simply pause to enjoy their fragrance on a warm afternoon. Plumeria plant care becomes part of life’s gentler rhythms.
Have questions or tips of your own? Drop a comment below. We’d love to hear how your plumerias are doing.


One Response
What is the best distance between to place multiple trees in a yard?