
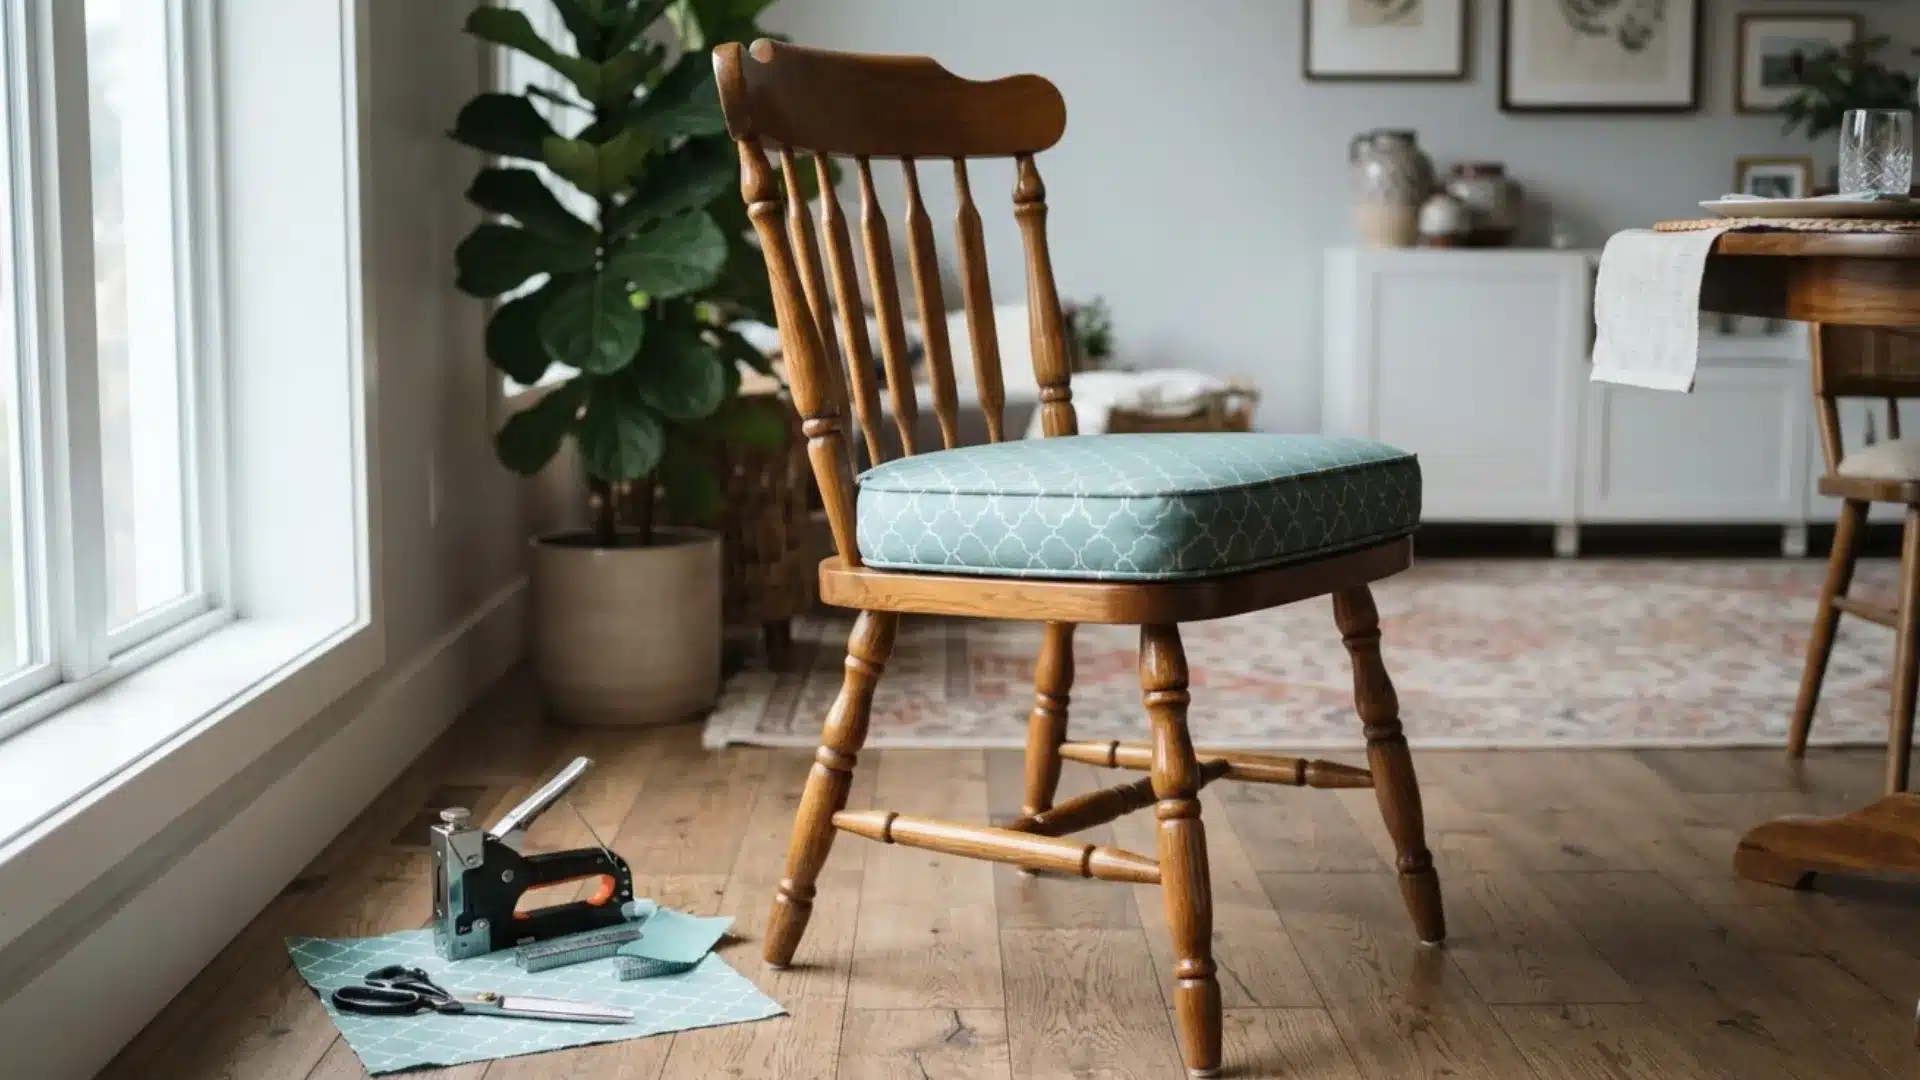
A worn chair had only two options: hide it in a corner or replace it.
But when the frame is still strong, faded fabric, small stains, or flattened padding do not have to mean the end of a good chair.
Learning how to reupholster a chair gave me another option. I could keep the shape and comfort I liked while choosing fabric that actually suited my space.
Better yet, I did not need to be a professional upholsterer to get started.
Instead of spending money on new furniture, I can give an existing piece a fresh purpose.
Factors to Consider Before Reupholstering a Chair
Before removing the old fabric, check the chair carefully to decide whether reupholstering is practical. Consider its condition, design, materials, and expected costs.
- Frame Condition: Check the chair frame for cracks, loose joints, or structural damage to ensure it can support new upholstery properly.
- Existing Padding: Inspect the foam and batting for sagging, odors, stains, or deterioration to determine whether replacement materials are necessary.
- Chair Design: Consider curves, tufting, arms, and separate cushions, as detailed chair designs usually require more time, tools, and upholstery skills.
- Fabric Requirements: Measure each upholstered section carefully and consider pattern matching to estimate how much durable upholstery fabric you will need.
- Project Cost: Compare the cost of fabric, padding, tools, and repairs with the chair’s value before starting the reupholstery project.
Tools and Materials Needed to Reupholster a Chair
Gather everything you need before removing the chair seat. The exact materials depend on whether you are only replacing the fabric or also replacing the old cushion and padding.
- Upholstery or medium-weight drapery fabric
- Cambric dust cover fabric (optional)
- Staple gun and staples
- Staple or tack removal tool
- Scissors or rotary cutter
- 2-inch upholstery foam, if replacing the cushion
- Dacron upholstery padding
- Serrated or electric knife
- Screwdriver, if the seat is screwed to the chair
How to Reupholster a Chair: Step-by-Step Process
Reupholstering a chair involves removing the old material, checking the cushion, adding fresh padding when needed, and securing new fabric properly.
Follow these steps in order to keep the fabric smooth, the corners neat, and the finished seat comfortable and secure.
Step 1: Remove the Seat Cushion and Old Fabric
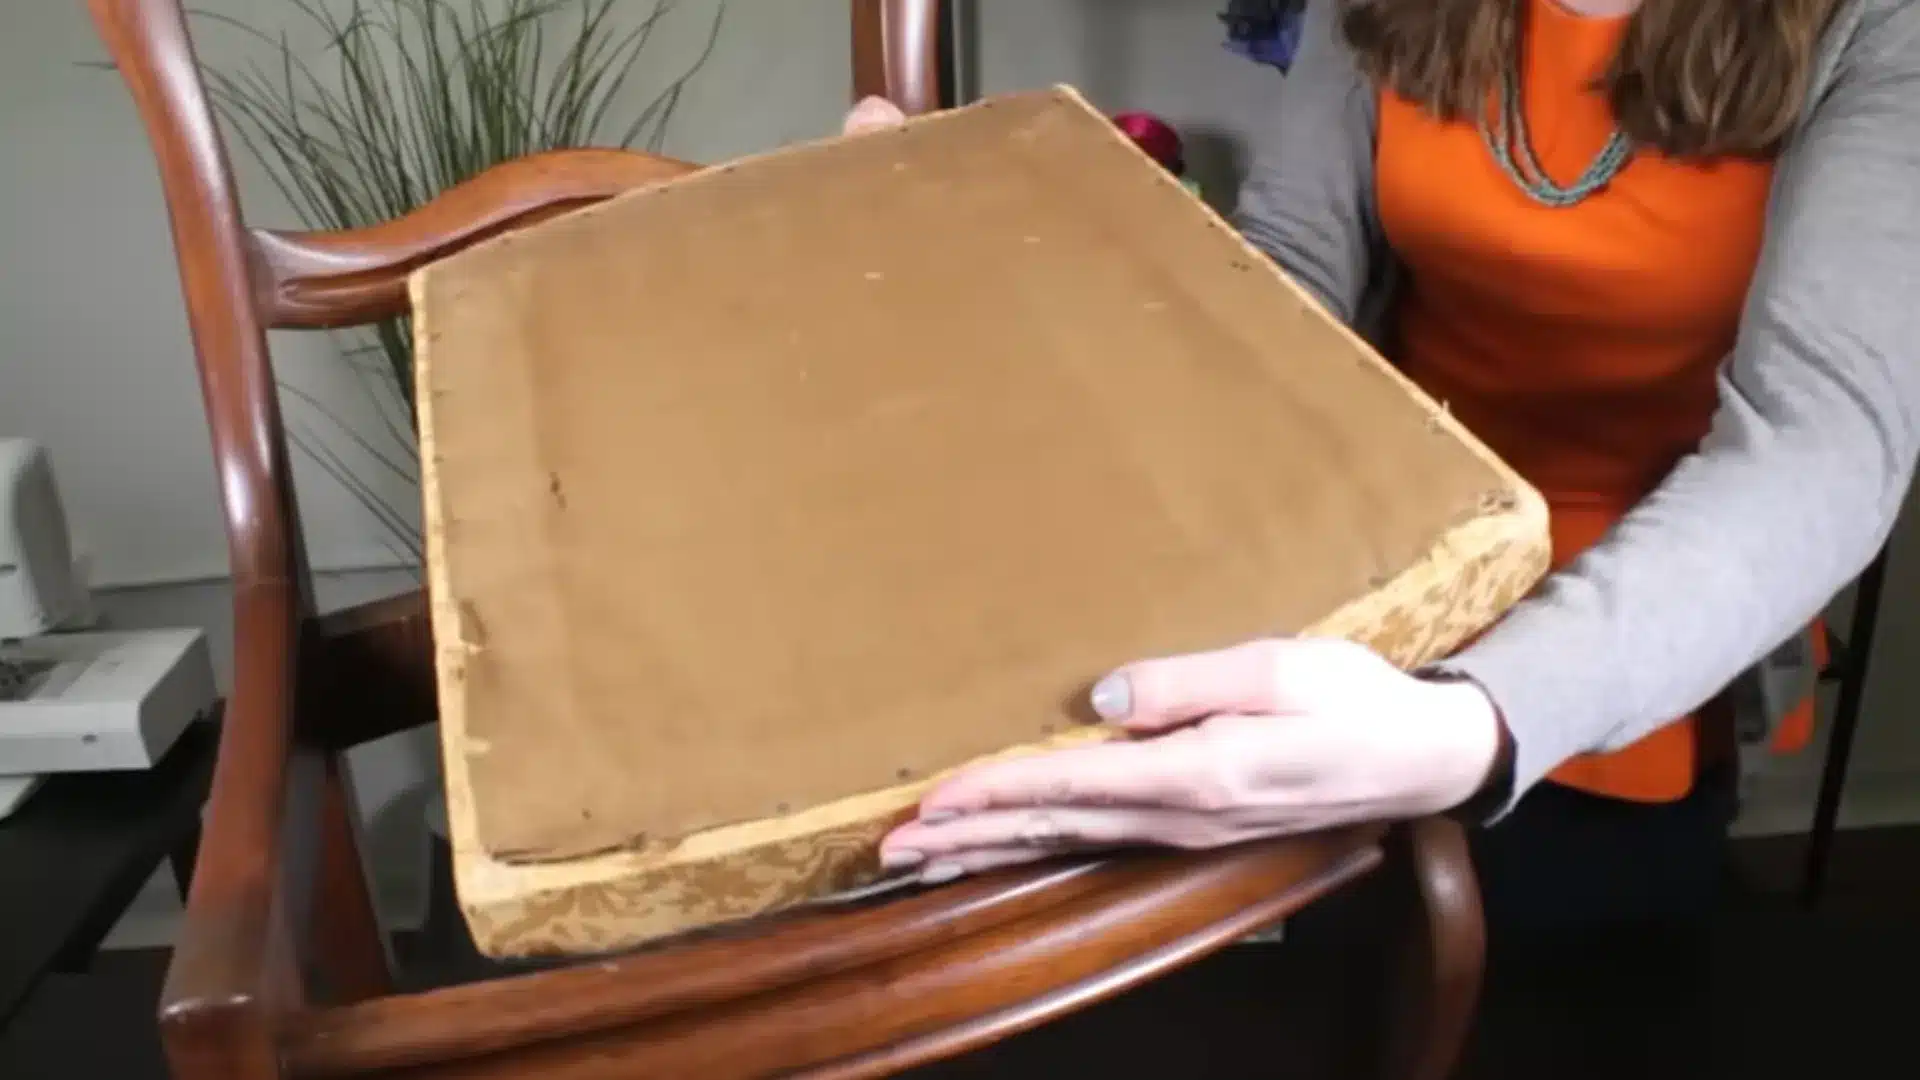
Turn the chair over and locate the screws holding the seat cushion to the frame. Remove them carefully, then lift the cushion away from the chair.
Turn the cushion upside down and remove the dust cover, if present.
Use a staple remover or combination tool to pull out every staple or tack holding the upholstery in place.
Step 2: Remove and Replace the Old Cushion
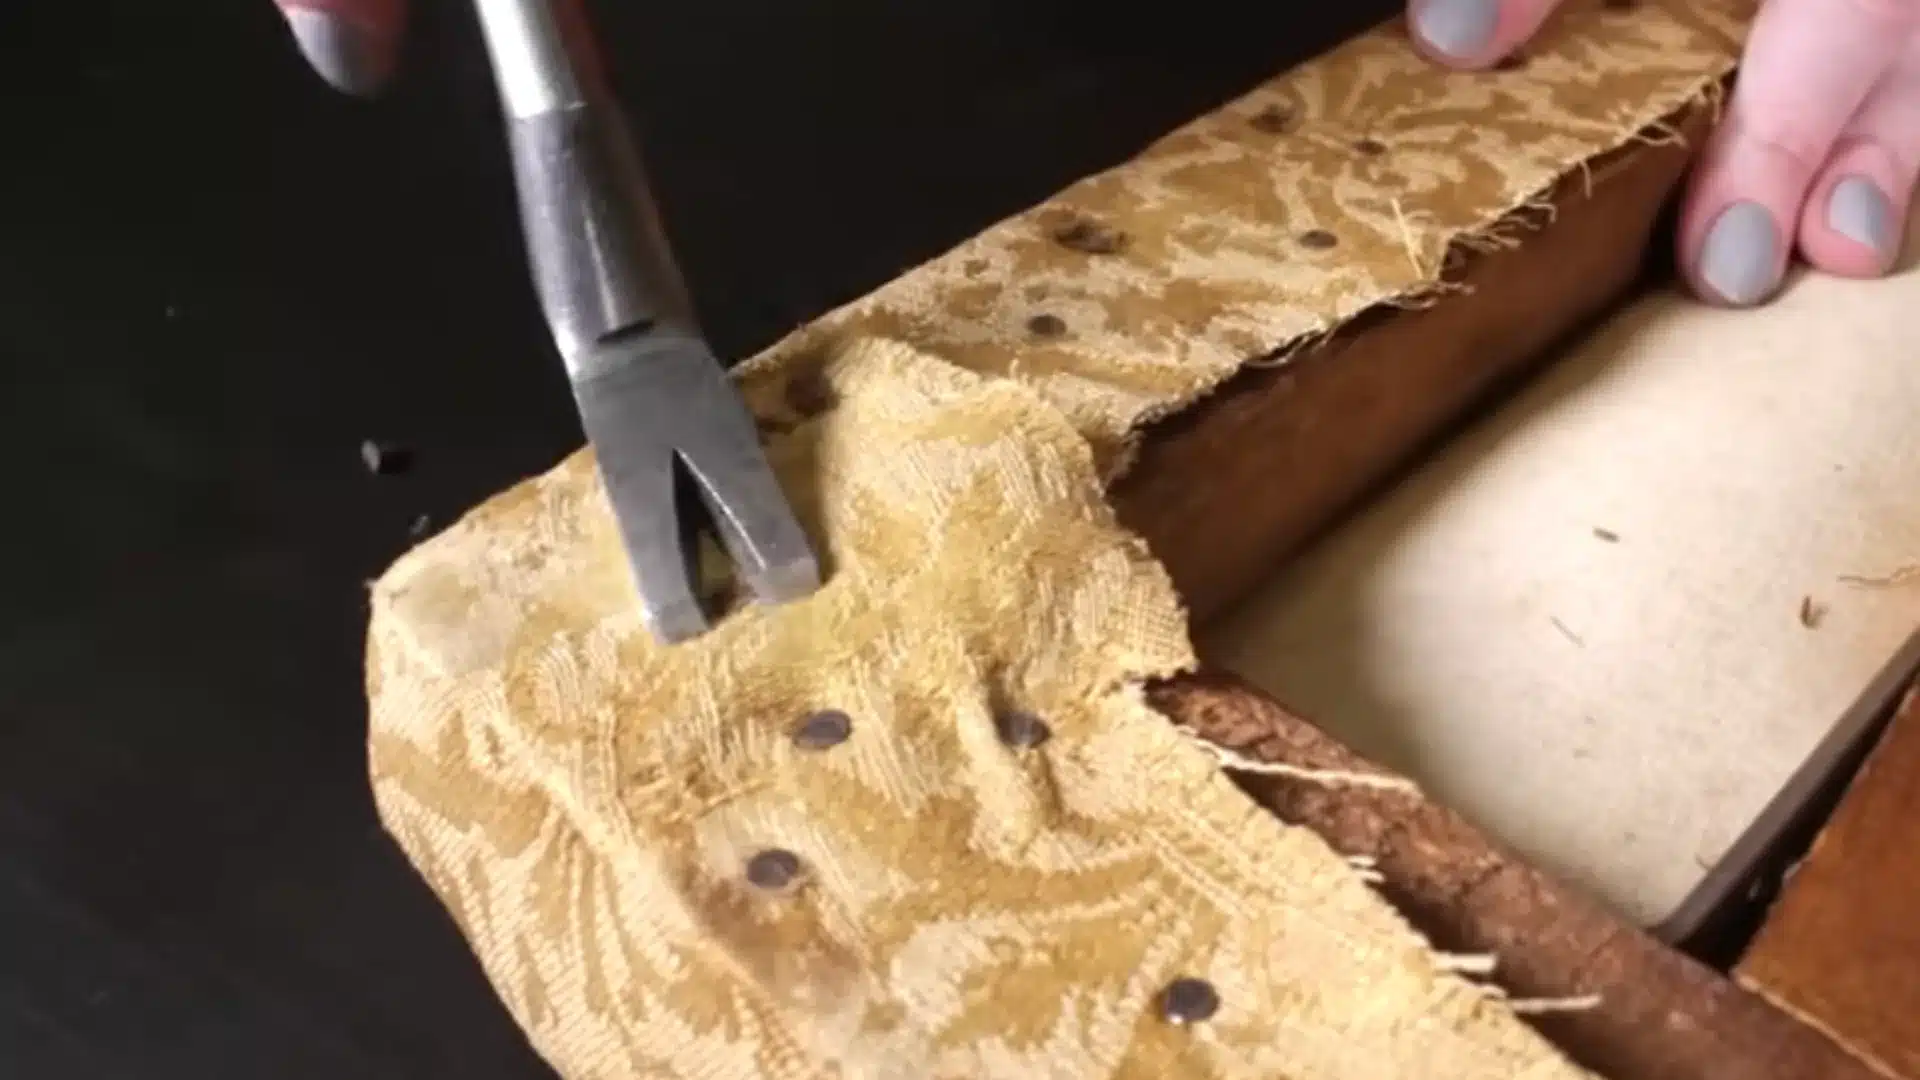
Inspect the existing cushion after removing the upholstery. If the foam is still firm and comfortable, you may be able to reuse it.
Replace old, flattened, crumbling, or outdated filling when necessary. Remove everything down to the wooden frame, webbing, or plywood base.
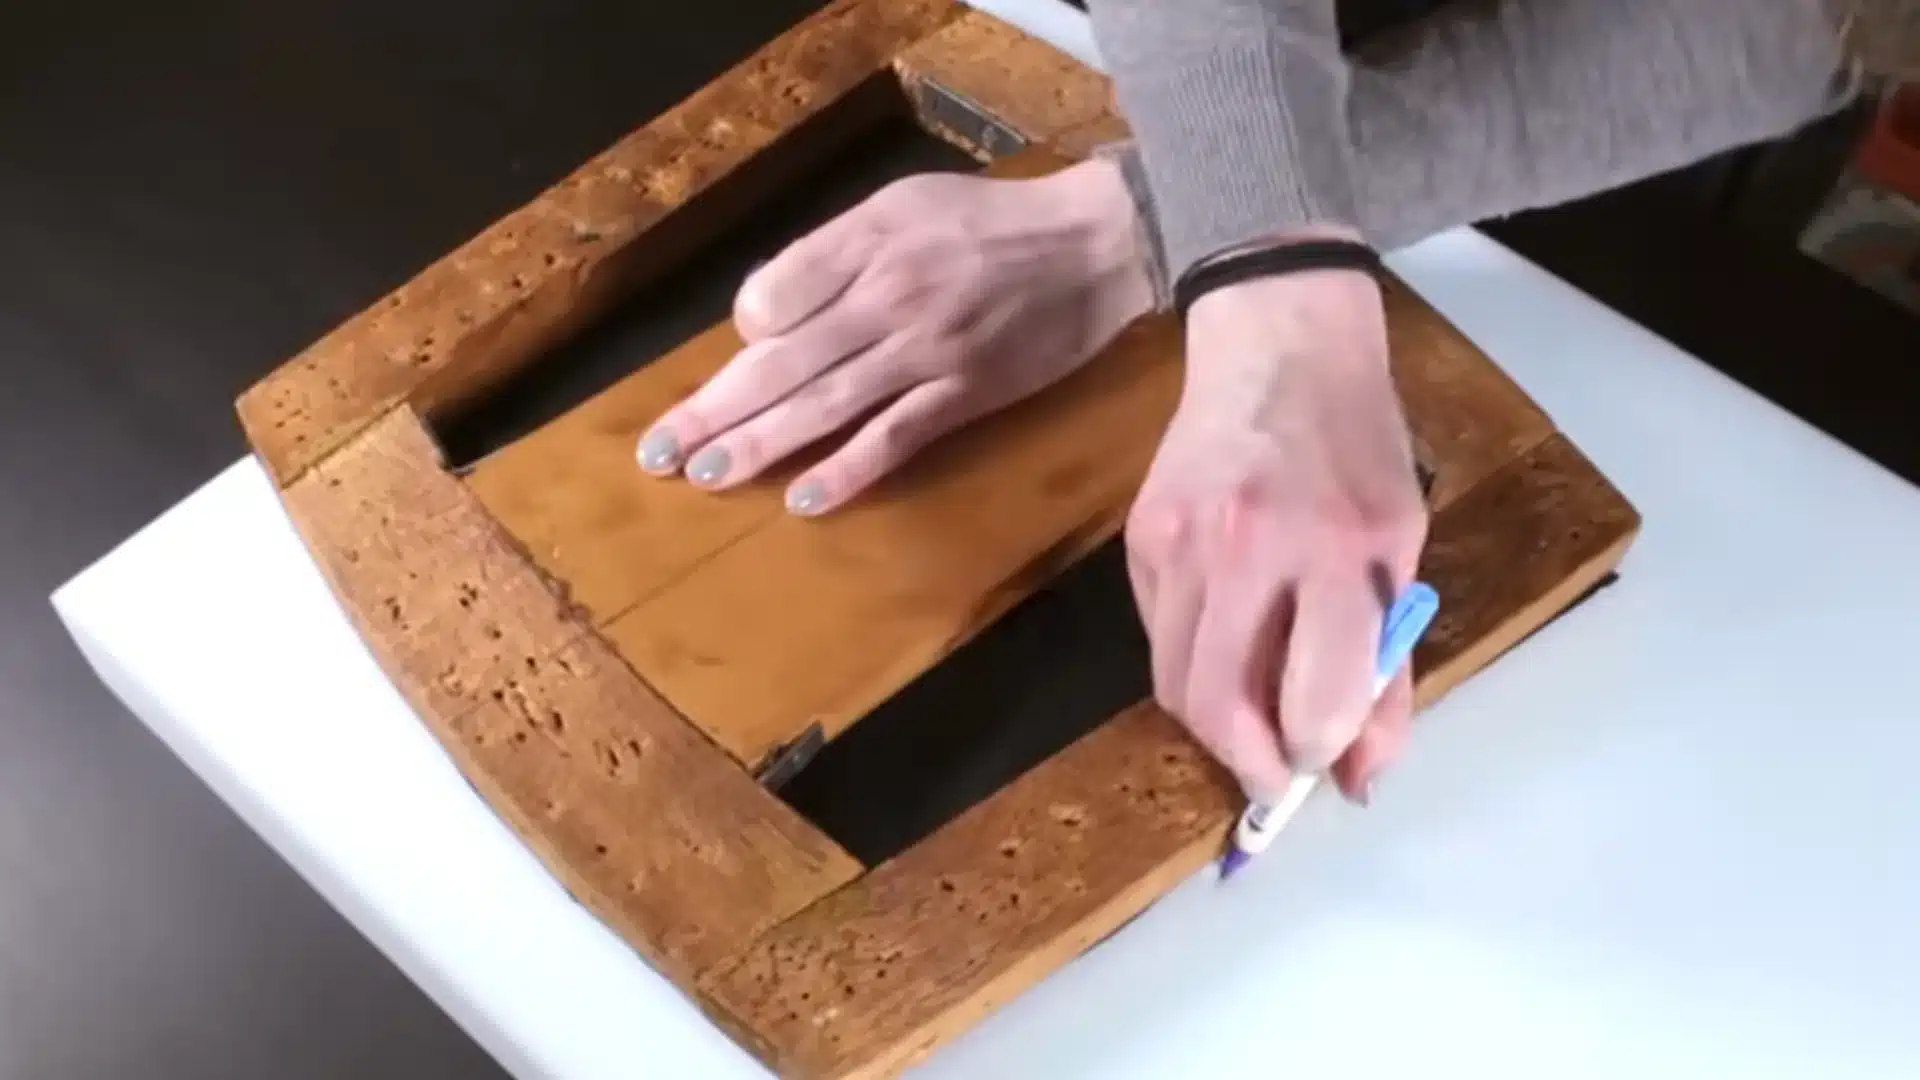
Place the seat frame over 2-inch upholstery foam and trace around its outer edge. Carefully cut along the traced line using a serrated or electric knife for an accurate fit.
Step 3: Add Dacron Padding Over the Foam
Place the cut foam on the seat frame, then position both face down over a sheet of Dacron upholstery padding.
Cut the padding large enough to extend approximately two inches around the underside of the frame. Staple the middle of each of the four sides first to hold everything in position.
Continue stapling outward from each center point while gently pulling the padding taut. Stop a short distance from each corner so you can fold them neatly later.
Step 4: Secure and Trim the Padding at the Corners
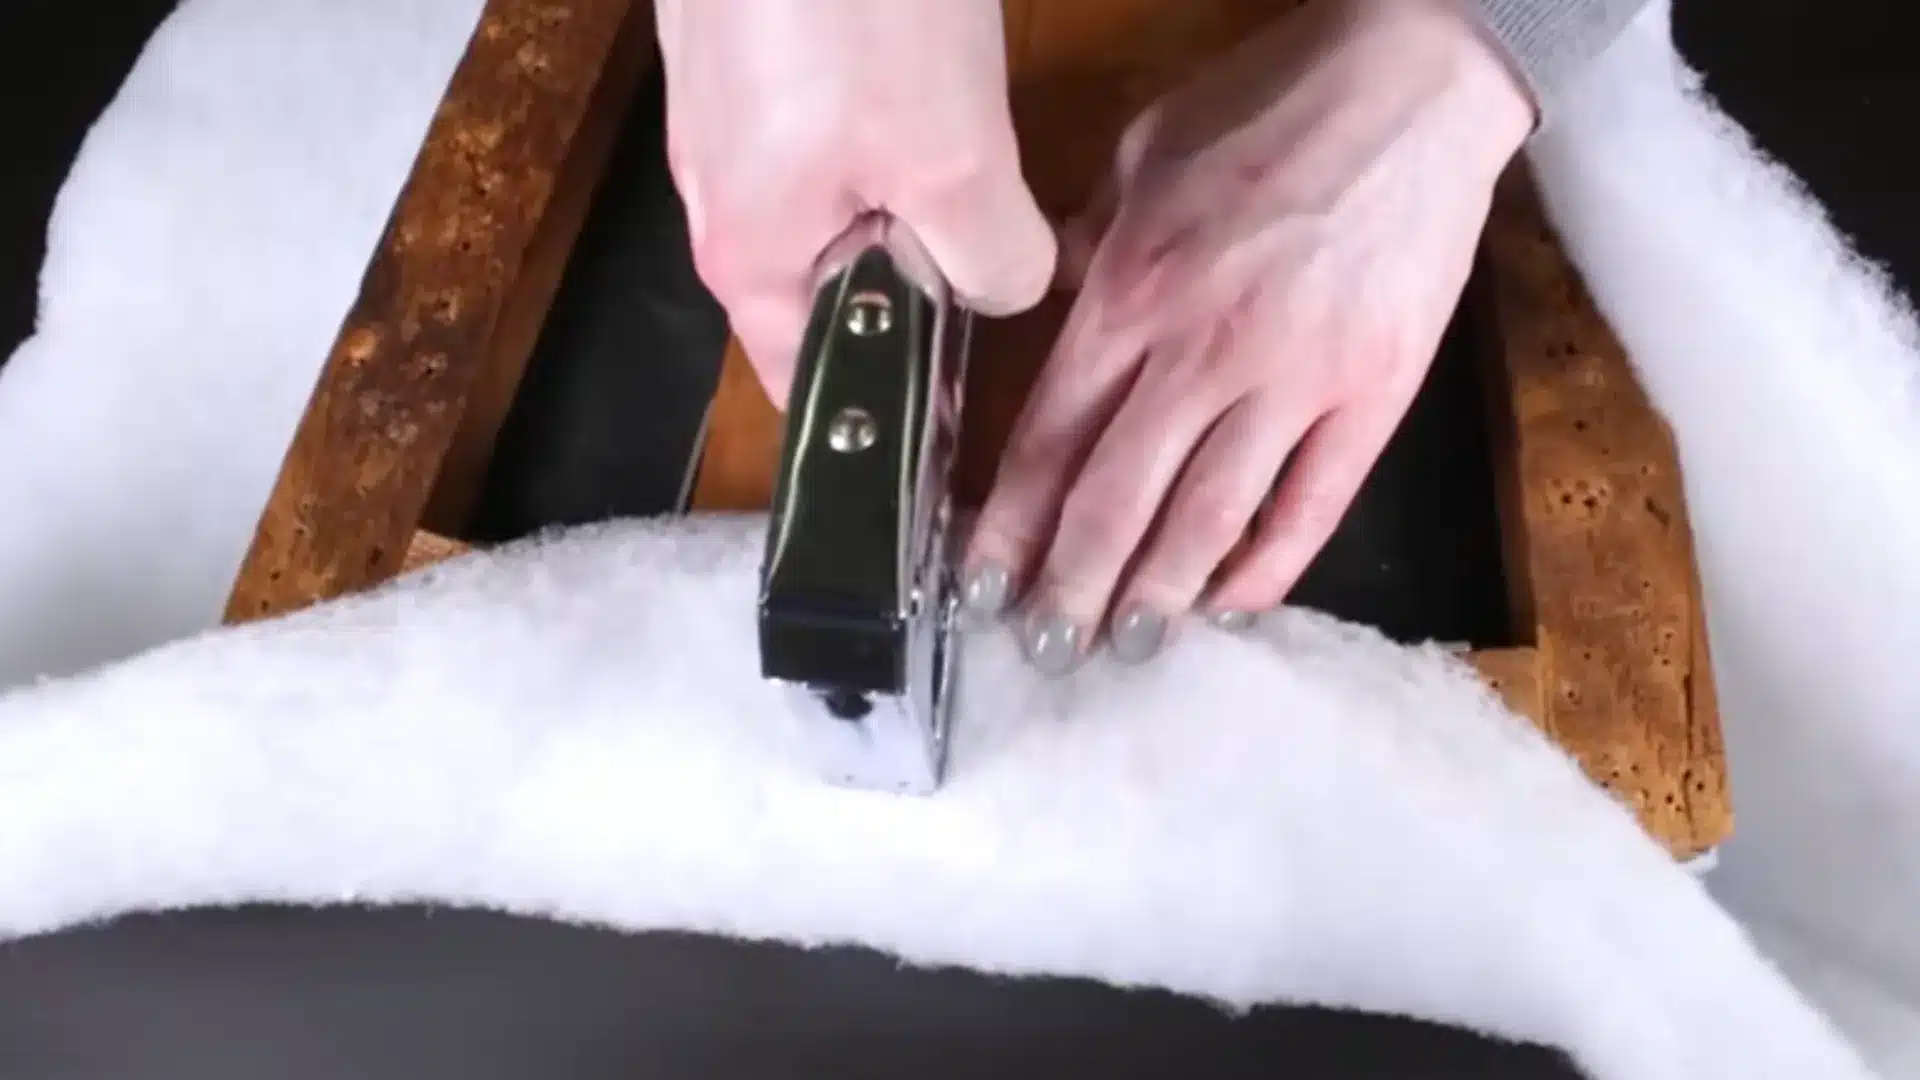
Finish the padding by working carefully around each corner. Pull the center section of the Dacron toward the middle of the seat frame and secure it with a staple.
Smooth the loose padding on both sides of the corner and staple those sections down separately.
Repeat this process around every corner, keeping the padding firm without creating large lumps underneath the seat.
Once everything is secure, use sharp scissors to trim away excess padding around the staples.
Step 5: Cut and Position the Upholstery Fabric
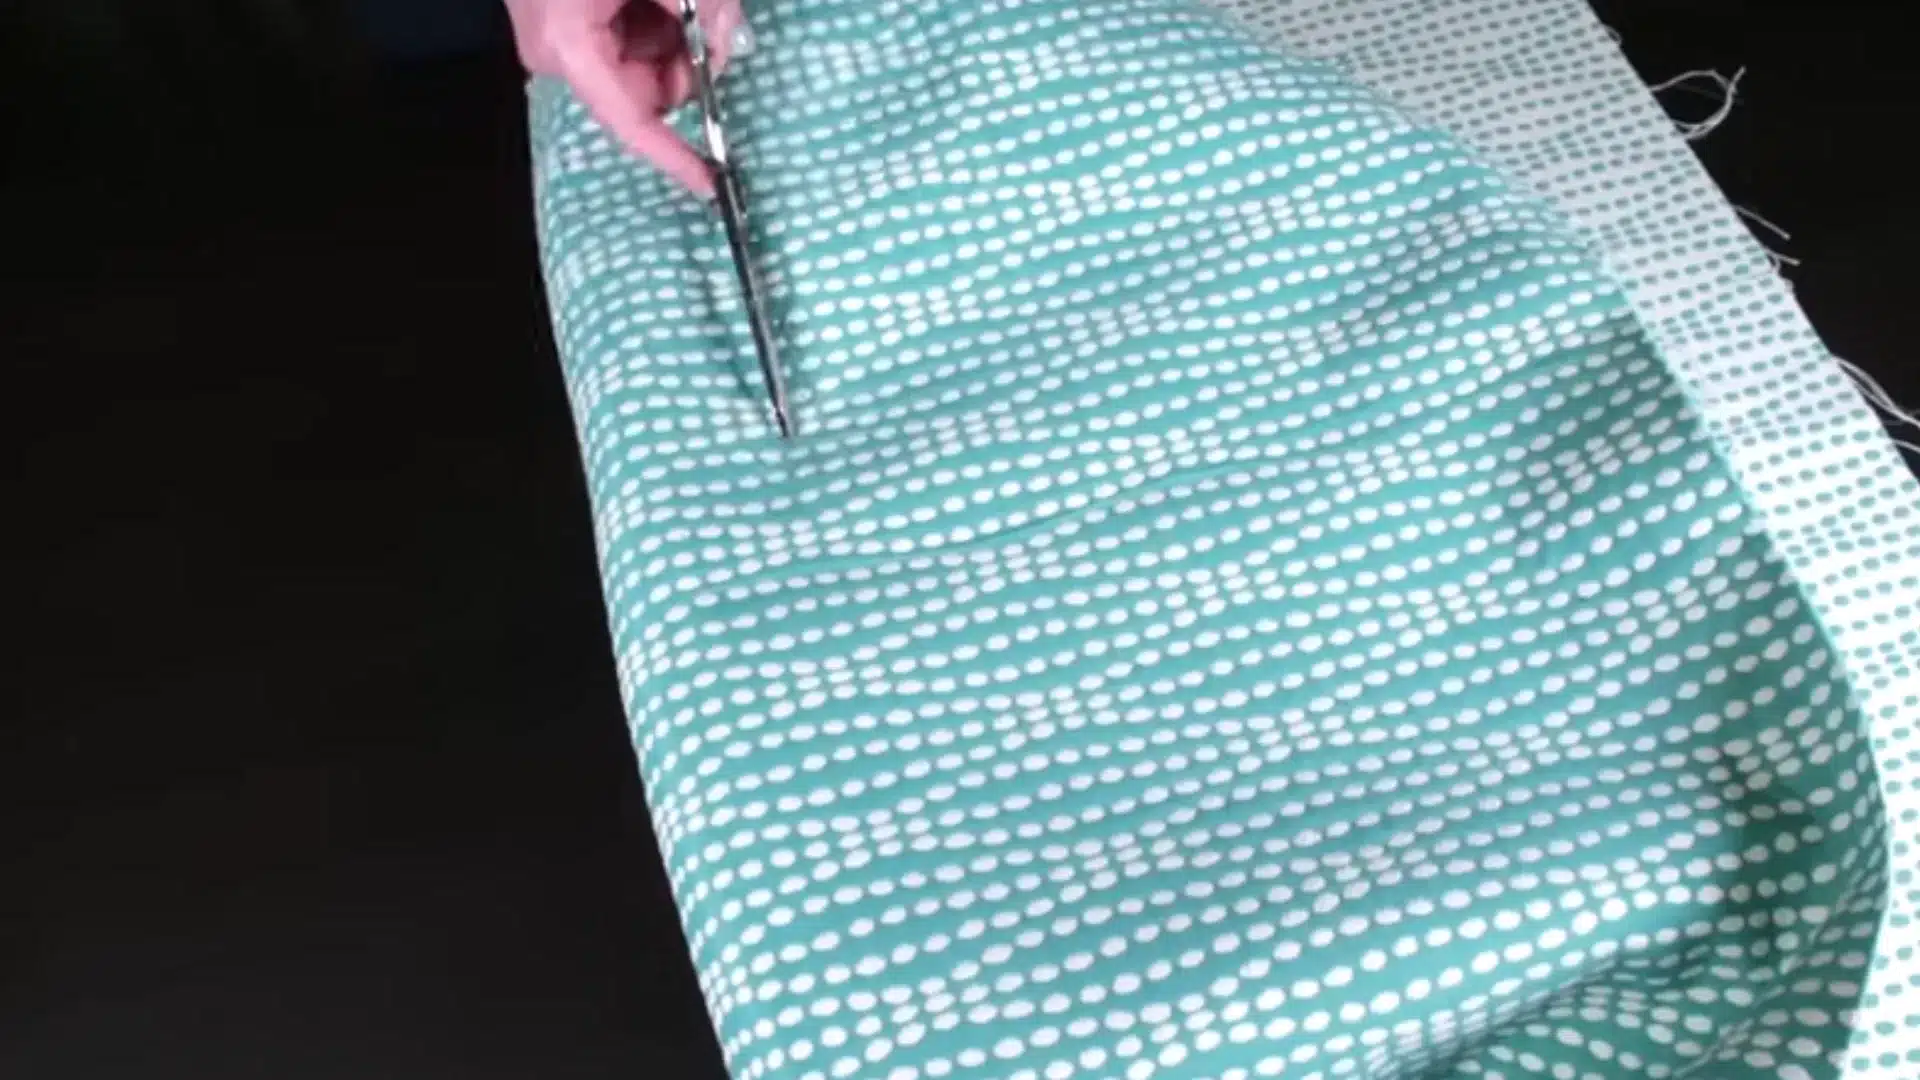
Lay your upholstery fabric face down on a clean, flat work surface. Position the padded seat face down on top of it.
Check that any stripes, woven designs, or repeating patterns run straight across the seat. Cut the fabric, leaving about three to four inches beyond every edge of the cushion.
This extra material provides enough fabric for wrapping and stapling underneath.
Check the pattern placement once more before attaching the fabric to avoid a crooked finished seat.
Step 6: Staple the Fabric and Fold the Corners
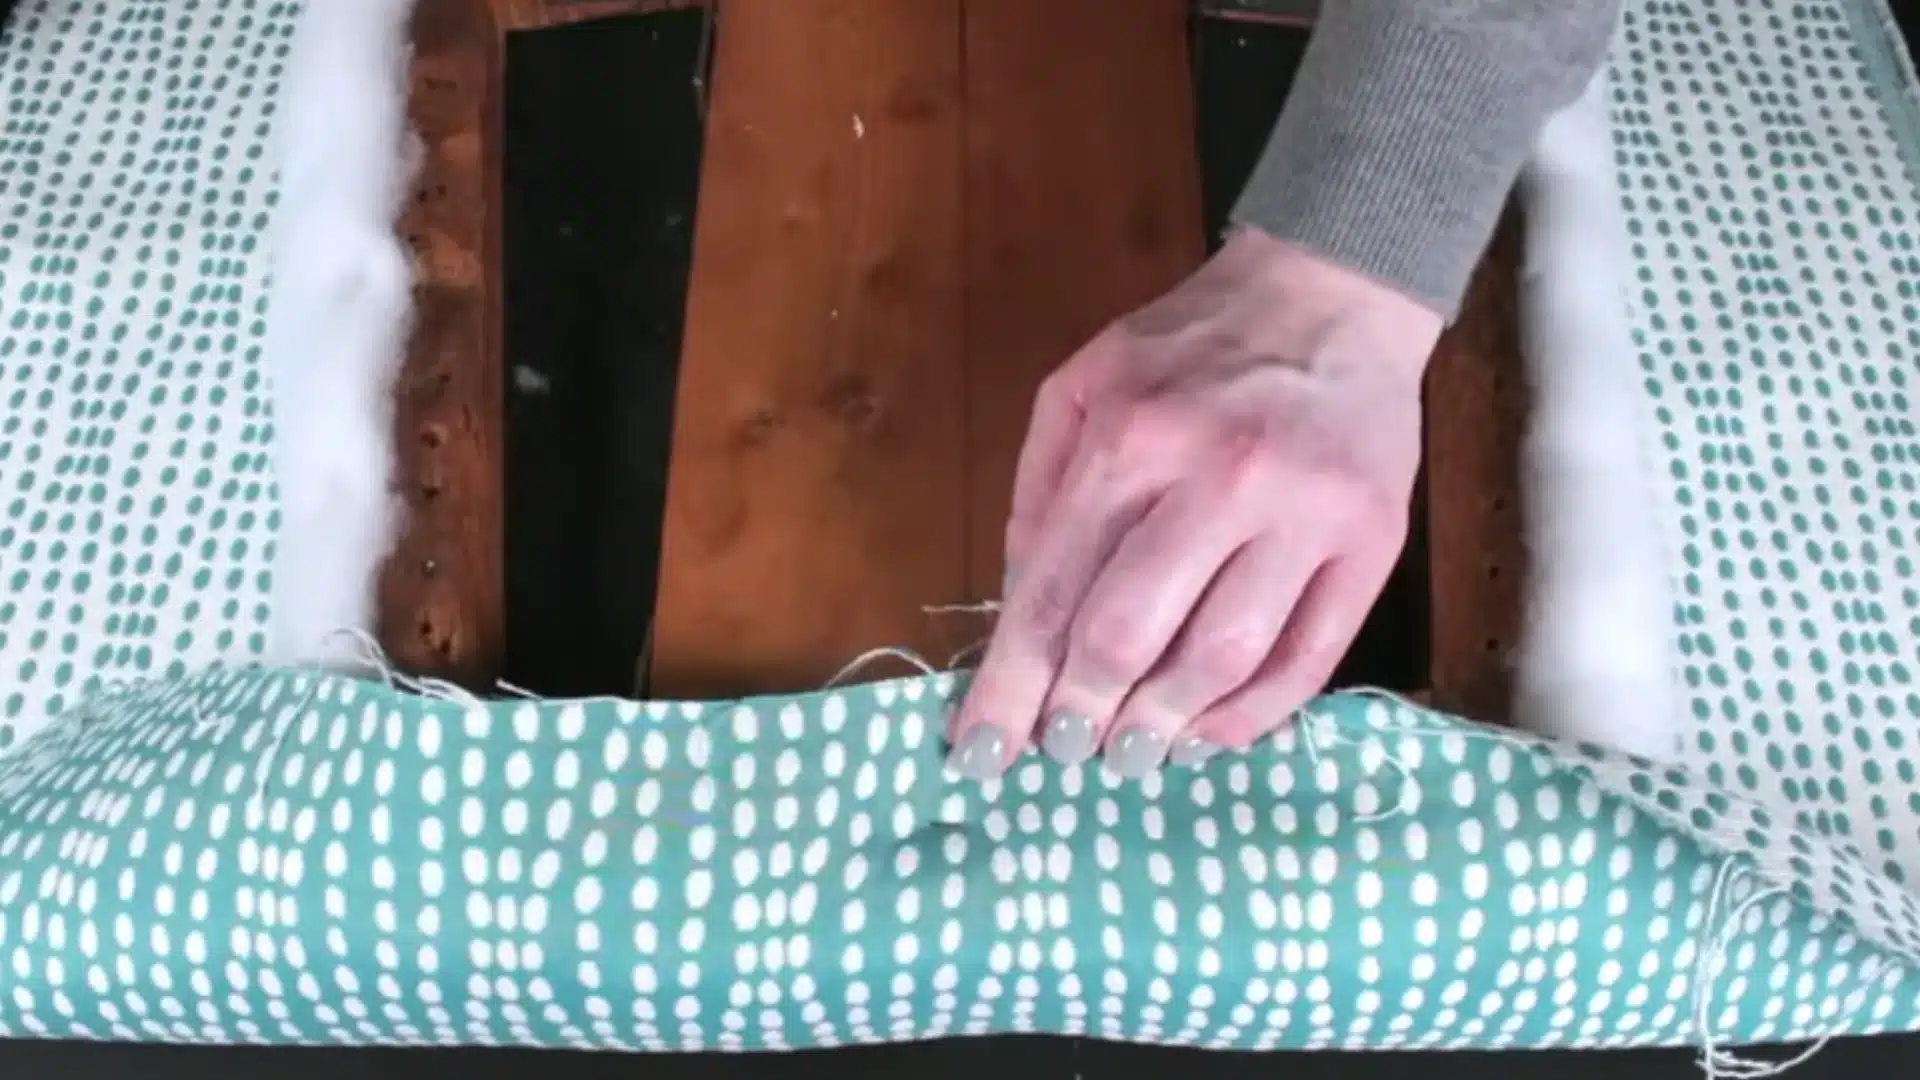
Place one staple in the center of each side to hold the fabric in position.
Working from these center staples toward the corners, pull the fabric evenly and smooth the seat surface as you staple. Leave several inches unstapled around each corner.
Pull the corner fabric toward the center and staple it, then fold each loose side inward to create two neat pleats.
Secure the folds and repeat on every corner before trimming excess fabric.
Step 7: Attach the Dust Cover and Reinstall the Seat
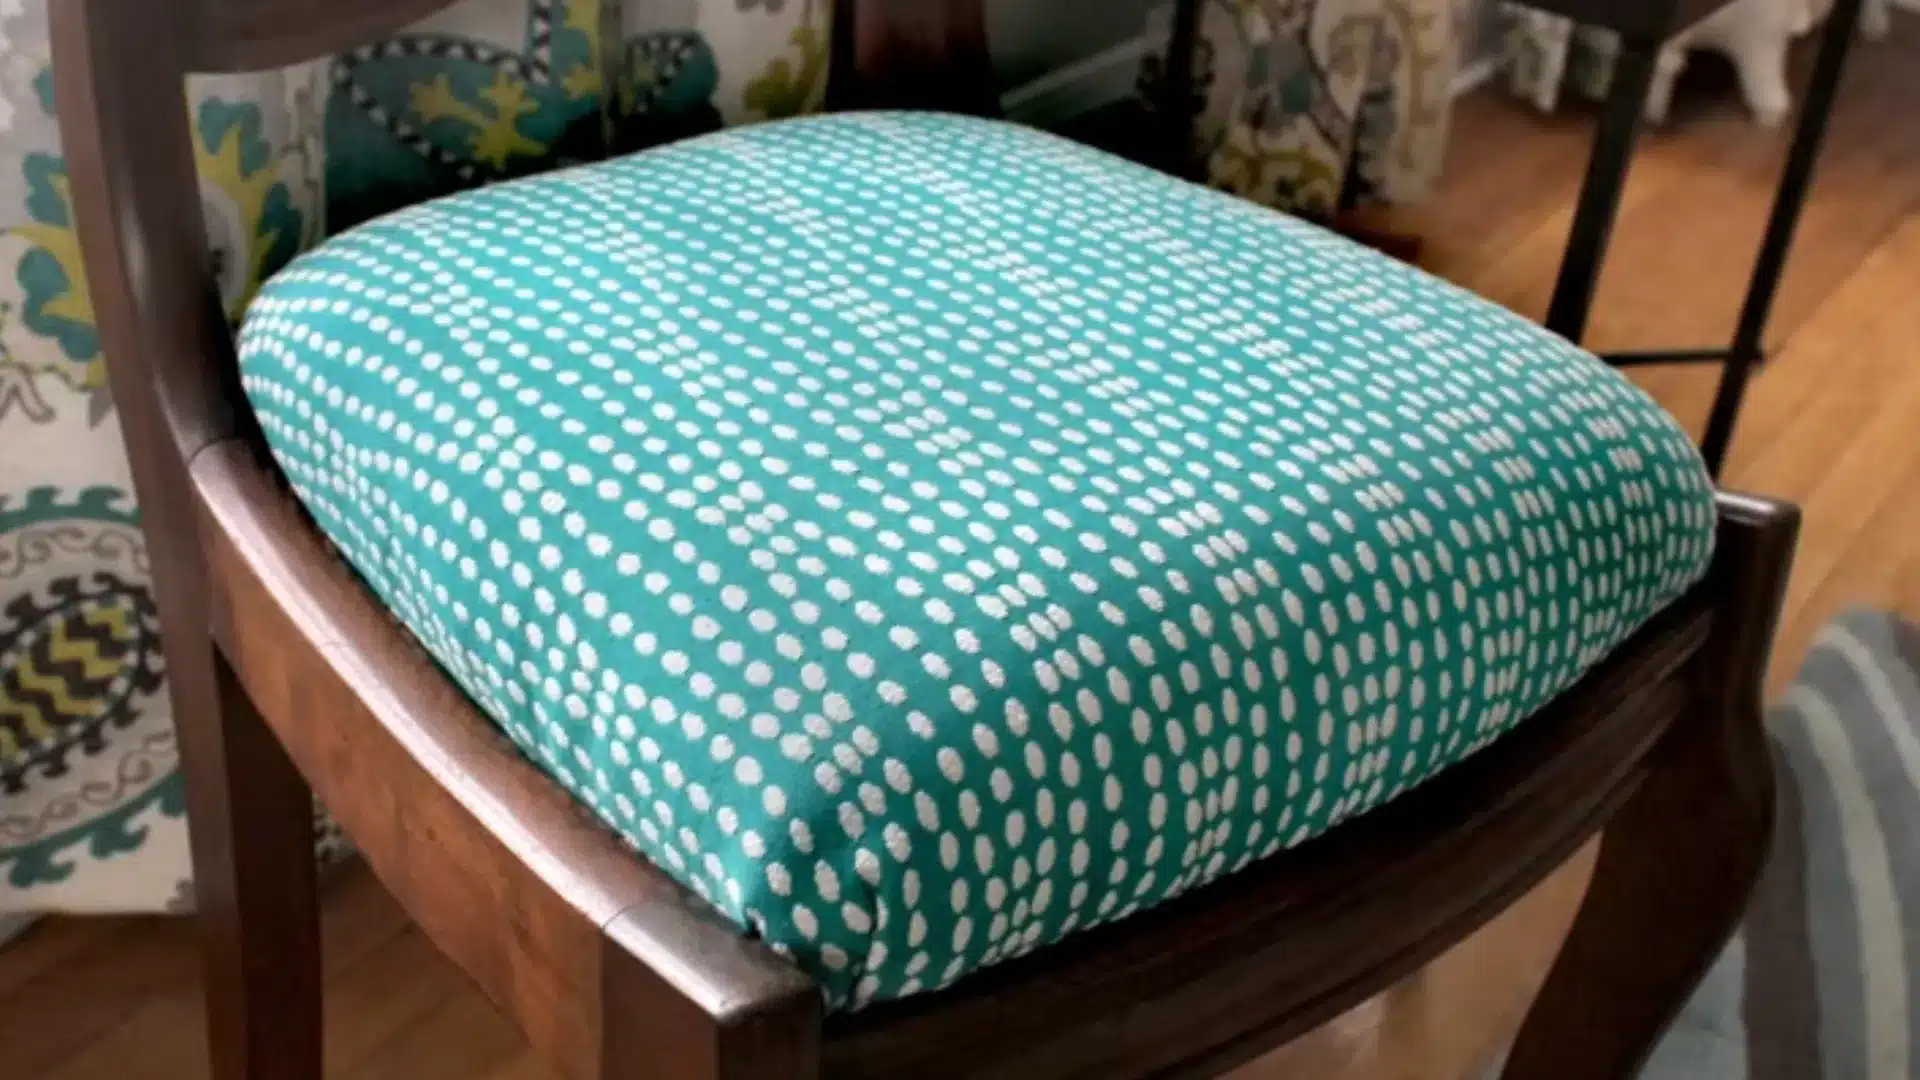
For a cleaner underside, finish the cushion with a cambric dust cover, although this step is optional.
Cut the cambric approximately the same size as the seat frame.
Position it over the exposed staples and raw fabric edges, fold its edges underneath, and staple it neatly around the frame. Check that no loose fabric hangs from the bottom.
Once the cushion is complete, position it back on the chair and secure it using the original screws.
This tutorial is based on a helpful video by OnlineFabricStore. You can check out the original video on their YouTube channel here or watch it below.
How to Choose the Right Upholstery Fabric?
The right upholstery fabric and material for your furniture should match how often the chair is used, where it is placed, and how much maintenance it needs.
Consider durability, texture, stain resistance, and appearance before choosing a material.
| Type of Material | Best For |
|---|---|
| Cotton | Lightly used dining chairs, accent chairs, and casual spaces |
| Linen | Decorative and accent chairs |
| Polyester | Everyday chairs |
| Microfiber | Frequently used chairs |
| Velvet | Statement and accent chairs |
| Leather | Frequently used for armchairs or office chairs |
| Faux Leather | Dining, office, and accent chairs |
| Chenille | Comfortable armchairs and lounge chairs |
How Much Fabric Do You Need to Reupholster a Chair?
The amount of fabric you need depends on the chair’s size, design, and number of upholstered sections.
A simple dining chair seat may need about ½ to 1 yard of fabric, while an average accent chair can require 3 to 5 yards.
Larger armchairs may need 5 to 7 yards or more, especially when the arms, back, and cushions are fully upholstered.
Measure the width and length of every section before buying fabric, including the seat, back, arms, and cushions.
Add a few extra inches around each measurement for folding, pulling, and stapling.
If you choose striped, floral, or other patterned fabric, purchase extra material so you can properly match the pattern across different parts of the chair.
How Much Does it Cost to Reupholster a Chair?
The cost to reupholster a chair depends on its size, fabric choice, condition, and whether you do the work yourself or hire a professional.
For a DIY project, you may spend around $50 to $300 on upholstery fabric, foam, batting, staples, and other supplies.
Costs can increase if the chair needs frame repairs or expensive fabric.
Professional chair reupholstery typically costs around $200 to $1,000 or more, depending on the chair’s design and the amount of labor required.
A simple dining chair usually costs less than a large armchair with cushions, piping, or detailed upholstery.
Before starting, compare the total reupholstery cost with the chair’s quality, condition, and replacement value to decide whether the project is worthwhile.
Common Chair Reupholstery Mistakes to Avoid
Small mistakes during reupholstery can affect the chair’s appearance, comfort, and durability. Avoid these common errors for a cleaner, longer-lasting finish.
- Skipping Frame Repairs: Reupholstering over loose joints or damaged wood can leave the finished chair unstable and difficult to use.
- Choosing the Wrong Fabric: Thin or delicate fabric may wear quickly, especially on chairs that receive frequent everyday use.
- Cutting Fabric Too Small: Always leave extra fabric around the edges for pulling, folding, stapling, and making necessary adjustments.
- Applying Uneven Tension: Pulling fabric too tightly or loosely can create wrinkles, distortion, and uneven areas across the upholstered surface.
- Ignoring Pattern Alignment: Check stripes, prints, and repeated designs before stapling to keep the finished upholstery centered and visually balanced.
Conclusion
Reupholstering a chair gives you the chance to keep a piece you already own while changing its look, comfort, and function.
The key is to work carefully rather than rush through the fabric removal, measuring, cutting, and stapling stages.
Next, gather your tools, measure the chair, calculate your fabric needs, and take clear photos before removing anything.
Now it’s your turn to transform an old chair. Get started and tell us how the project goes in the comments.
Frequently Asked Questions
Do I Need to Replace the Foam When Reupholstering a Chair?
Not always. Keep foam that feels firm and supportive, but replace padding that is flattened, crumbling, stained, or has persistent odors.
Should I Wash Upholstery Fabric Before Using It?
Check the manufacturer’s care instructions first. Some washable natural fabrics benefit from prewashing because it helps prevent unexpected shrinkage after installation.
Can I Paint a Chair Frame Before Reupholstering It?
Yes. Paint or refinish exposed wooden sections after removing old upholstery, and complete the finish before attaching your new fabric.
How Long Does it Take to Reupholster a Chair?
A single slip-seat dining chair usually takes 3 to 5 hours for a first-timer, mostly spent stapling and adjusting corners. Chairs with a fixed seat, arms, or a separate back cushion take longer, often spread across a full weekend.


