Many of us toss cherry pits away without thinking twice about what was hidden inside them.
Then I learned that each pit contains a seed with the potential to become a full-sized cherry tree.
That is when I became curious about how to plant cherry seeds and whether a pit from a ripe cherry could actually sprout at home.
The process requires more than simply pushing a seed into soil, but it does not require advanced gardening skills either.
Understanding how do cherries grow starts with knowing what that small seed needs before it can wake from dormancy and produce its first shoot.
How Do Cherries Grow?
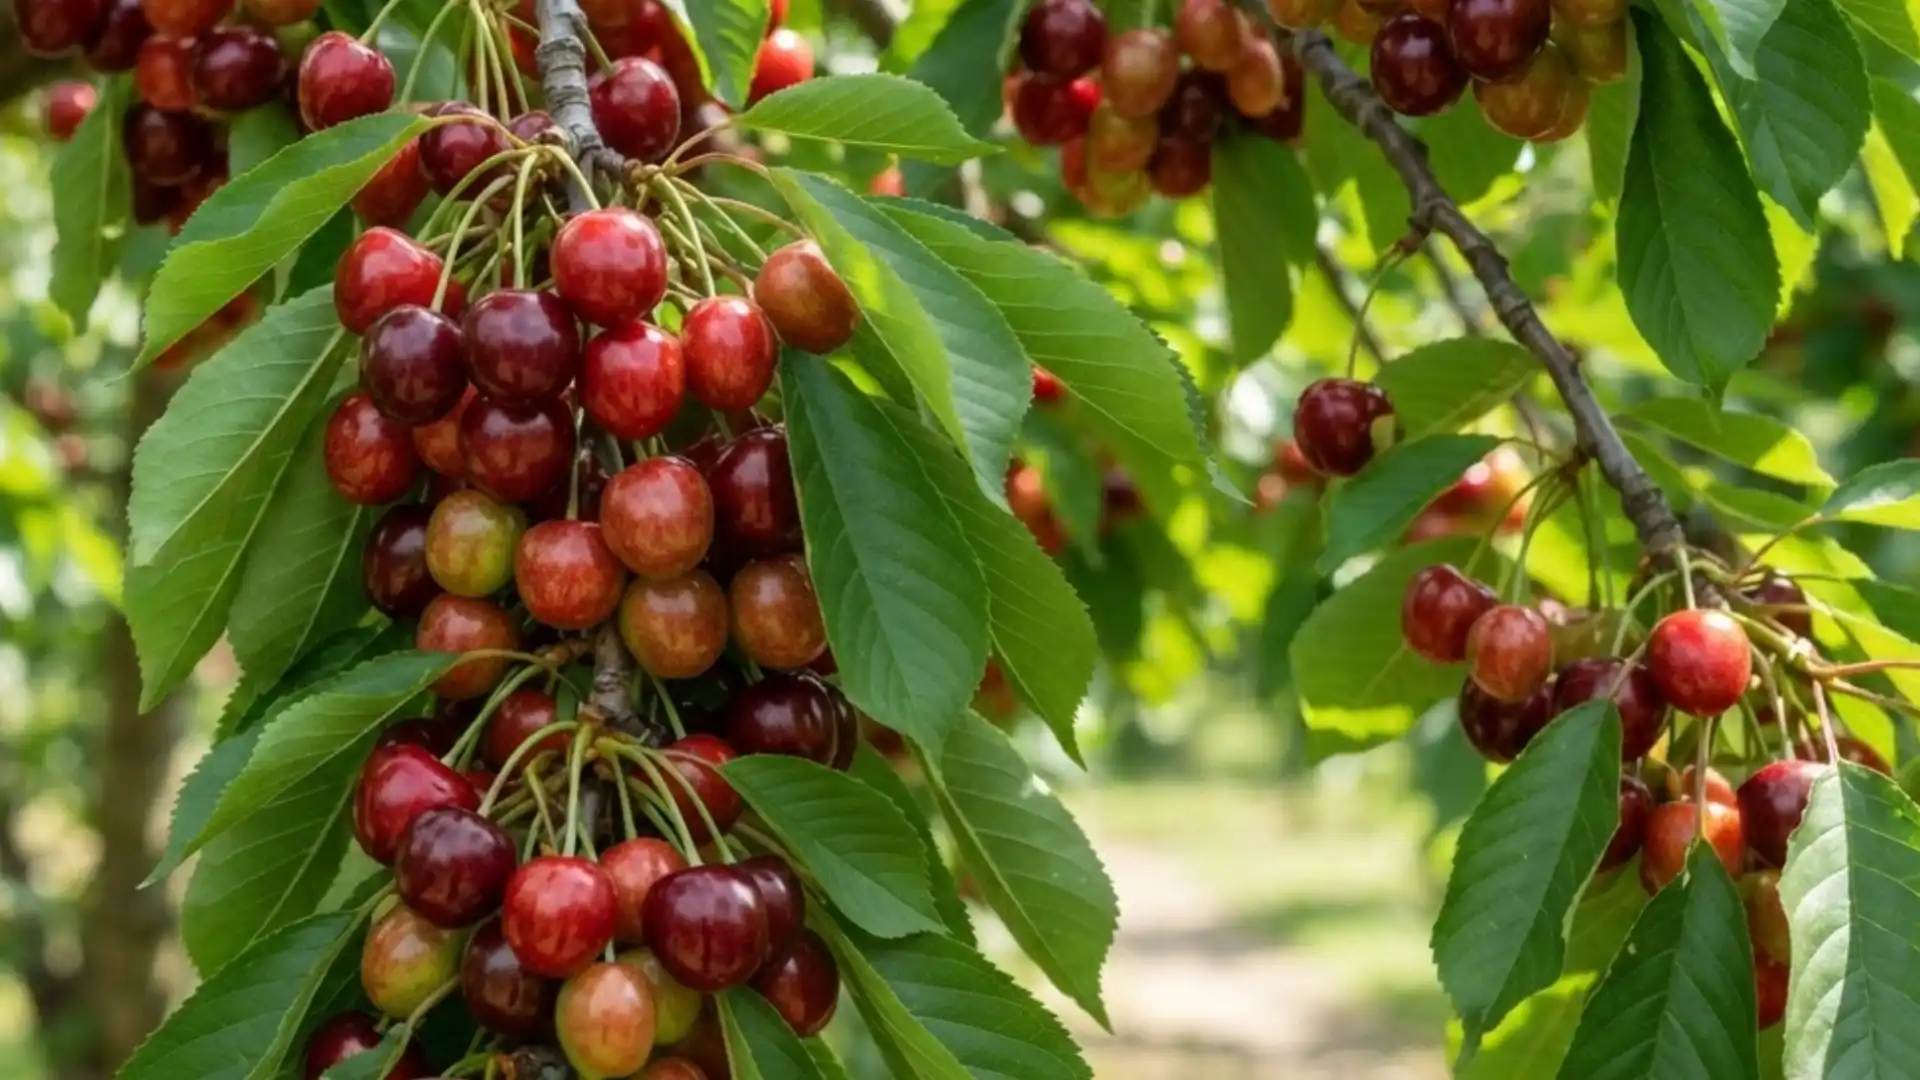
Cherries grow on trees that produce flowers in spring, followed by fruit when the blossoms are successfully pollinated.
Most cherry trees grow best in full sun, well-draining soil, and climates that provide enough winter chill for their variety.
After pollination, the center of each flower begins developing into a small green cherry.
The fruit gradually increases in size and changes color as it ripens, usually becoming red, dark red, yellow, or nearly black depending on the variety.
When is the Best Time to Plant Cherry Seeds?
The best time to plant cherry seeds depends on whether you start them indoors or outdoors.
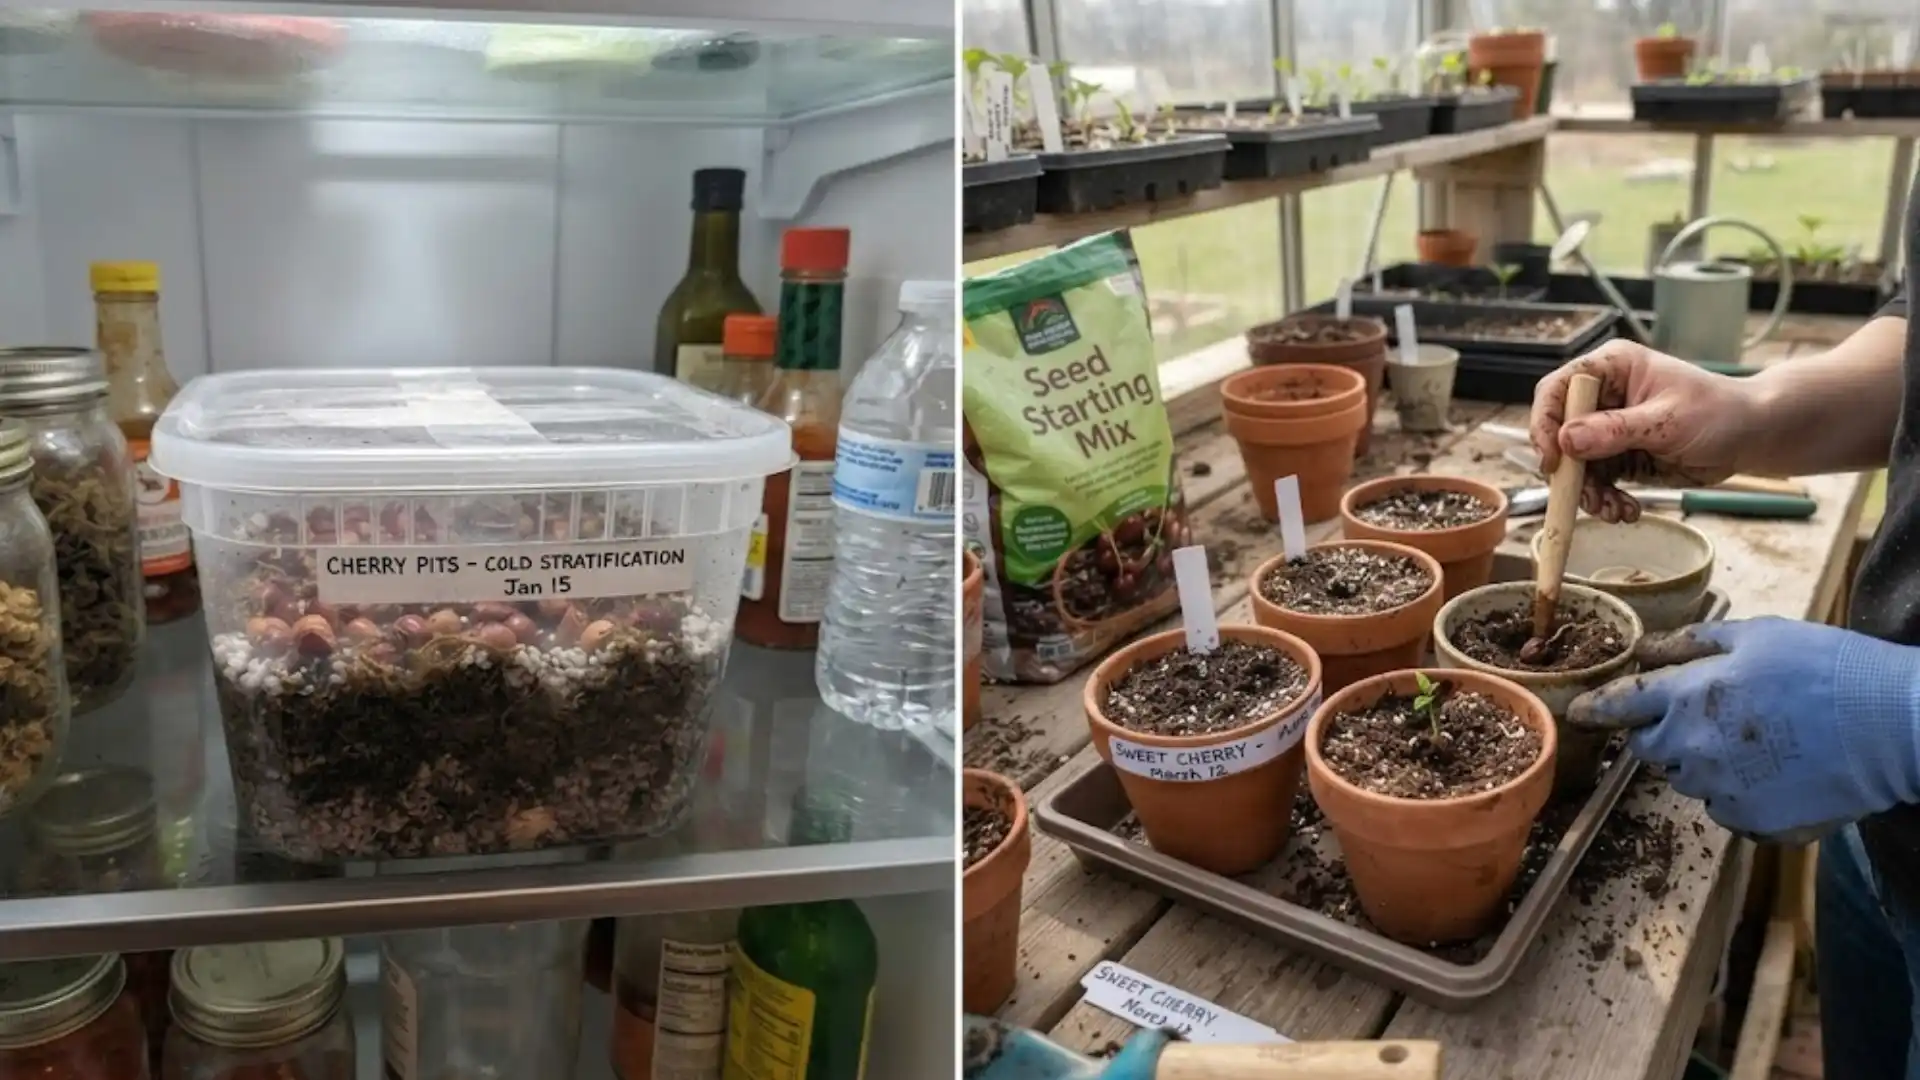
Cherry seeds need a period of cold temperatures, called cold stratification, before they can germinate.
For outdoor planting, sow the cleaned seeds in fall, allowing winter temperatures to provide this natural cold period. I find them to begin sprouting when temperatures warm in spring.
If you prefer starting seeds indoors, place them in a moist growing medium in the refrigerator for about 10 to 12 weeks during winter.
After stratification, plant the seeds in pots in late winter or early spring. Keep the soil slightly moist and place the pots in a warm, bright location.
Timing may vary depending on your local climate and cherry variety.
How to Prepare Cherry Seeds for Planting?
Cherry seeds need proper preparation before planting because fresh pits usually will not germinate immediately.
Cleaning, drying, and exposing the seeds to cold conditions helps prepare them for successful germination.
- Choose Ripe Cherries: Select fully ripe, healthy cherries without signs of mold, damage, or disease.
- Remove the Pits: Take the pits from the cherries and remove as much fruit flesh as possible.
- Clean the Pits: Rinse the pits thoroughly with water to remove remaining pulp that could encourage mold.
- Dry the Pits: Spread the cleaned pits on a paper towel and let them dry for several days.
- Keep Pits Away From Ripening Fruit: Store the drying pits away from apples, bananas, and other fruit that release ethylene gas, since it can interfere with the seed’s dormancy cycle.
- Cold-Stratify the Seeds: Keep the pits in a moist medium inside the refrigerator for about 10-12 weeks before planting.
Optional: Some gardeners lightly nick the hard outer shell with a nutcracker before stratifying, taking care not to damage the seed inside, to help water reach the embryo faster. Go slowly here, since too much pressure can crush the seed.
How to Plant Cherry Seeds?
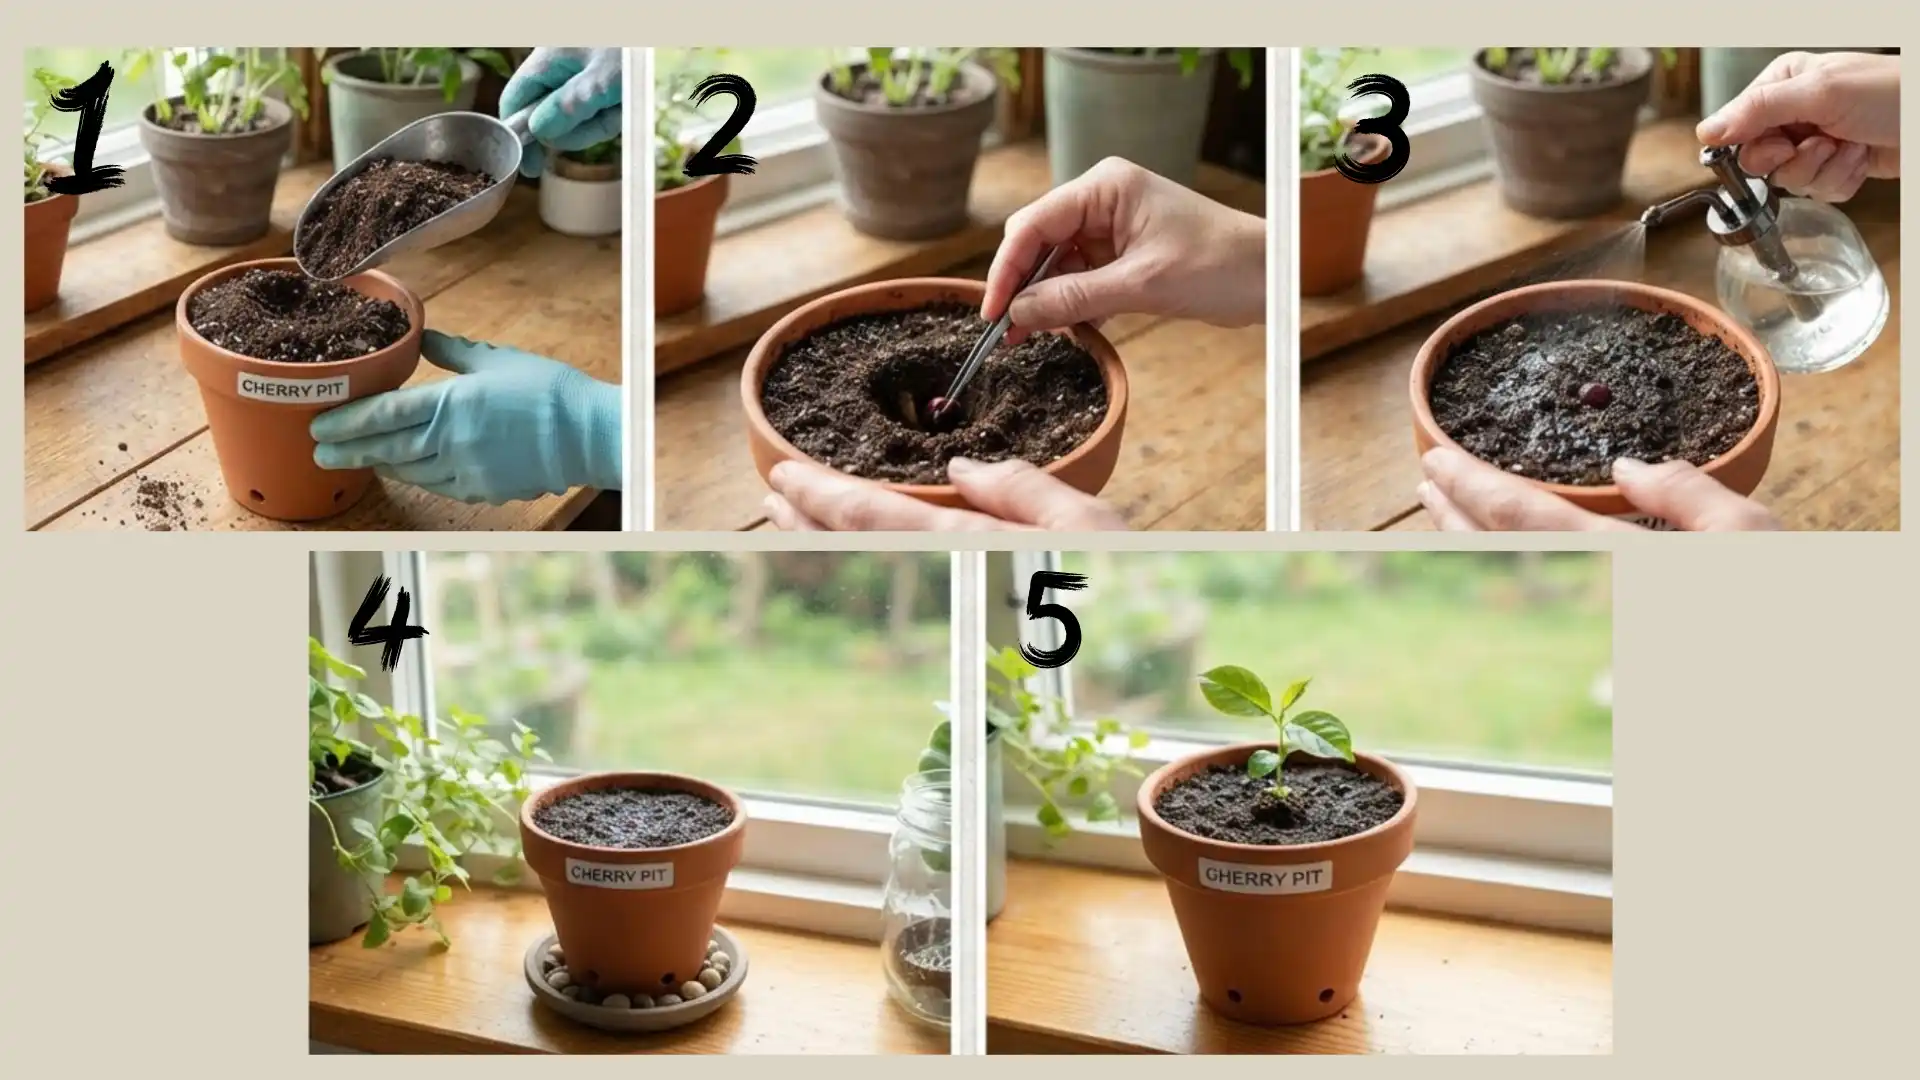
The right soil, planting depth, moisture, and growing conditions give the seeds a better chance of sprouting. Follow these simple steps to get started.
Step 1: Prepare the Pot and Soil
Choose a small pot with drainage holes at the bottom so excess water can escape easily.
Fill it with a loose, well-draining potting mix that holds some moisture without becoming soggy. Leave about an inch of space below the rim for easier watering.
Lightly moisten the soil before planting. If you are planting several cherry seeds, use separate pots to give each seed enough room to develop.
Step 2: Plant the Cherry Seed
Make a small hole about 1 to 2 inches deep in the center of the soil. Place one cold-stratified cherry seed into the hole and cover it gently with potting mix.
Do not press the soil down too firmly, as loose soil makes it easier for new roots to develop.
If you are planting different cherry varieties, label each pot so you can easily identify the seedlings later.
Step 3: Water the Soil
Water the soil gently after planting until it is evenly moist. Let any excess water drain from the bottom of the pot.
During germination, check the soil regularly and water when the top layer feels slightly dry. Avoid soaking the pot or leaving the soil constantly wet.
Too much moisture can cause the cherry seed to rot or encourage mold before it has a chance to sprout.
Step 4: Place the Pot in the Right Location
Place the pot in a warm location with bright, indirect light while you wait for germination. A temperature around 65 to 75°F generally provides suitable conditions for sprouting.
Keep the pot away from cold drafts, heating vents, and sudden temperature changes.
Once a seedling appears, gradually provide it with stronger light so it can develop sturdy stems and healthy green leaves as it continues growing.
Step 5: Care for the Seed Until It Germinates
Check the pot regularly and keep the soil consistently moist but never waterlogged. Avoid digging into the soil to see whether the seed is growing, since this can damage developing roots.
Cherry seeds may germinate at different times, even when planted together under the same conditions.
Continue providing steady moisture, warmth, and light, and watch for the first green shoot to emerge.
How Long Do Cherry Seeds Take to Germinate?
Cherry seeds can take several weeks to a few months to germinate after planting, depending on the variety and growing conditions.
Before planting, most cherry seeds also need about 10 to 12 weeks of cold stratification to break dormancy and prepare for sprouting.
Once planted, keep the soil consistently moist but not soggy and maintain a temperature around 65 to 75°F.
Some seeds may sprout within a few weeks, while others can take much longer.
Germination may also be uneven, so seeds planted at the same time might not emerge at the same time.
Using fresh, healthy pits and completing the cold treatment properly can improve germination.
Tips to Care for Cherry Seedlings
Once cherry seedlings emerge, they need steady care to develop strong roots, stems, and leaves.
Young seedlings are sensitive to excess water, poor lighting, and sudden temperature changes.
I recommend keeping the cherry seedlings in the following conditions:
- Give seedlings at least 6 hours of bright light each day.
- Keep the soil slightly moist, but never waterlogged.
- Water when the top inch of soil feels dry.
- Make sure containers have drainage holes to prevent root rot.
- Keep seedlings away from cold drafts and extreme temperature changes.
- Repot seedlings when roots begin filling their current containers.
Continue checking your cherry seedlings regularly as they grow. Increase watering and container size gradually rather than making sudden changes.
Once seedlings become stronger and outdoor conditions are suitable, slowly introduce them to direct sunlight and outdoor temperatures.
What Conditions Do Cherry Trees Need to Grow?
Providing the right conditions from the beginning helps young trees establish strong roots and supports healthy flowering and fruit production as they mature.
| Growing Condition | What Cherry Trees Need |
|---|---|
| Sunlight | At least 6–8 hours of direct sunlight each day |
| Soil | Fertile, well-draining soil that does not remain waterlogged |
| Soil pH | Slightly acidic to neutral soil, generally around pH 6.0–7.0 |
| Water | Consistent moisture, especially while young, without keeping roots constantly wet |
| Temperature | A temperate climate with enough winter chill for the variety |
| Air Circulation | Good airflow around branches to help reduce fungal problems |
| Spacing | Enough space for roots and branches to spread as the tree matures |
| Pollination | A compatible pollinator may be needed, depending on the cherry variety |
Chill requirements and mature size can vary widely across cherry varieties, so it helps to know which type you are growing before you plan its permanent spot.
How to Transplant a Cherry Seedling Outdoors?
Choose the planting location carefully because cherry trees need plenty of space, sunlight, and good drainage as they mature.
- Harden Off the Seedling: Gradually expose the seedling to outdoor sunlight, wind, and temperatures for 7-10 days before transplanting.
- Choose a Sunny Location: Select a well-drained spot that receives at least 6–8 hours of direct sunlight each day.
- Prepare the Planting Hole: Dig a hole slightly wider than the root ball and deep enough to keep the seedling at its original depth.
- Plant the Seedling Carefully: Gently remove the seedling from its container, place it upright, and fill the hole with soil.
- Water and Mulch Thoroughly: Water deeply after planting, then apply mulch around the tree while keeping it away from the trunk.
Conclusion
Your seed-grown tree may eventually produce cherries that look or taste different from the fruit you started with, which makes the outcome even more interesting.
As your tree grows, keep observing how it responds to each season and adjust its care when needed.
Take photos or notes along the way so you can track changes over the years.
What variety of cherry tree are you going to opt for? Share your options in the comments below.
Frequently Asked Questions
How Long Does It Take a Cherry Tree to Grow From Seed?
A cherry tree grown from seed may take about 7-10 years to produce fruit, depending on the variety, climate, care, and growing conditions provided.
How Tall Do Cherry Trees Grow?
Cherry trees typically grow 15-35 feet tall, depending on the variety and rootstock. Dwarf types stay smaller, while standard cherry trees can become considerably taller.
Can You Separate Seedlings?
Yes, you can separate cherry seedlings once they develop several true leaves. Gently divide their roots and transplant each seedling into its own individual container.
Can You Grow a Cherry Tree From a Store-Bought Pit?
Yes, but with a catch. A cherry tree grown from a pit will not grow “true to type,” which means the fruit it eventually produces can look and taste different from the cherry you ate.