Your deck deserves to be loved in every season, not just when the weather plays nice.
Creating a cozy, covered outdoor space doesn’t have to drain your wallet to feel truly beautiful.
More and more homeowners are finding that a little creativity goes a long way when it comes to upgrading their outdoor spaces on a budget.
So if you’ve been dreaming of a shaded, stylish deck that actually gets used all year long, you’re in the right place.
Let’s make it happen.
Things to Consider Before Adding a Covered Deck
Before you jump into picking materials and styles, a little planning up front can save you a lot of headaches (and money) down the road.
Here’s what to think through first:
- Set a realistic budget that accounts for both materials and any unexpected costs along the way.
- Decide between a permanent or temporary structure based on how long you plan to stay in your home.
- Think about your local climate and what kind of weather protection your deck actually needs.
- Weigh the pros and cons of DIY versus hiring a professional before committing to either.
- Check your local permits and restrictions so there are no surprises once you’ve already started.
Getting these decisions out of the way early means you can move forward with confidence and focus on the fun part, which is actually designing your dream outdoor space.
23 Covered Deck Ideas on a Budget
A covered deck doesn’t have to come with a hefty price tag to look and feel incredible.
These ideas range from quick weekend projects to slightly more involved builds, but all of them are designed with your budget in mind.
1. Simple Fabric Canopy
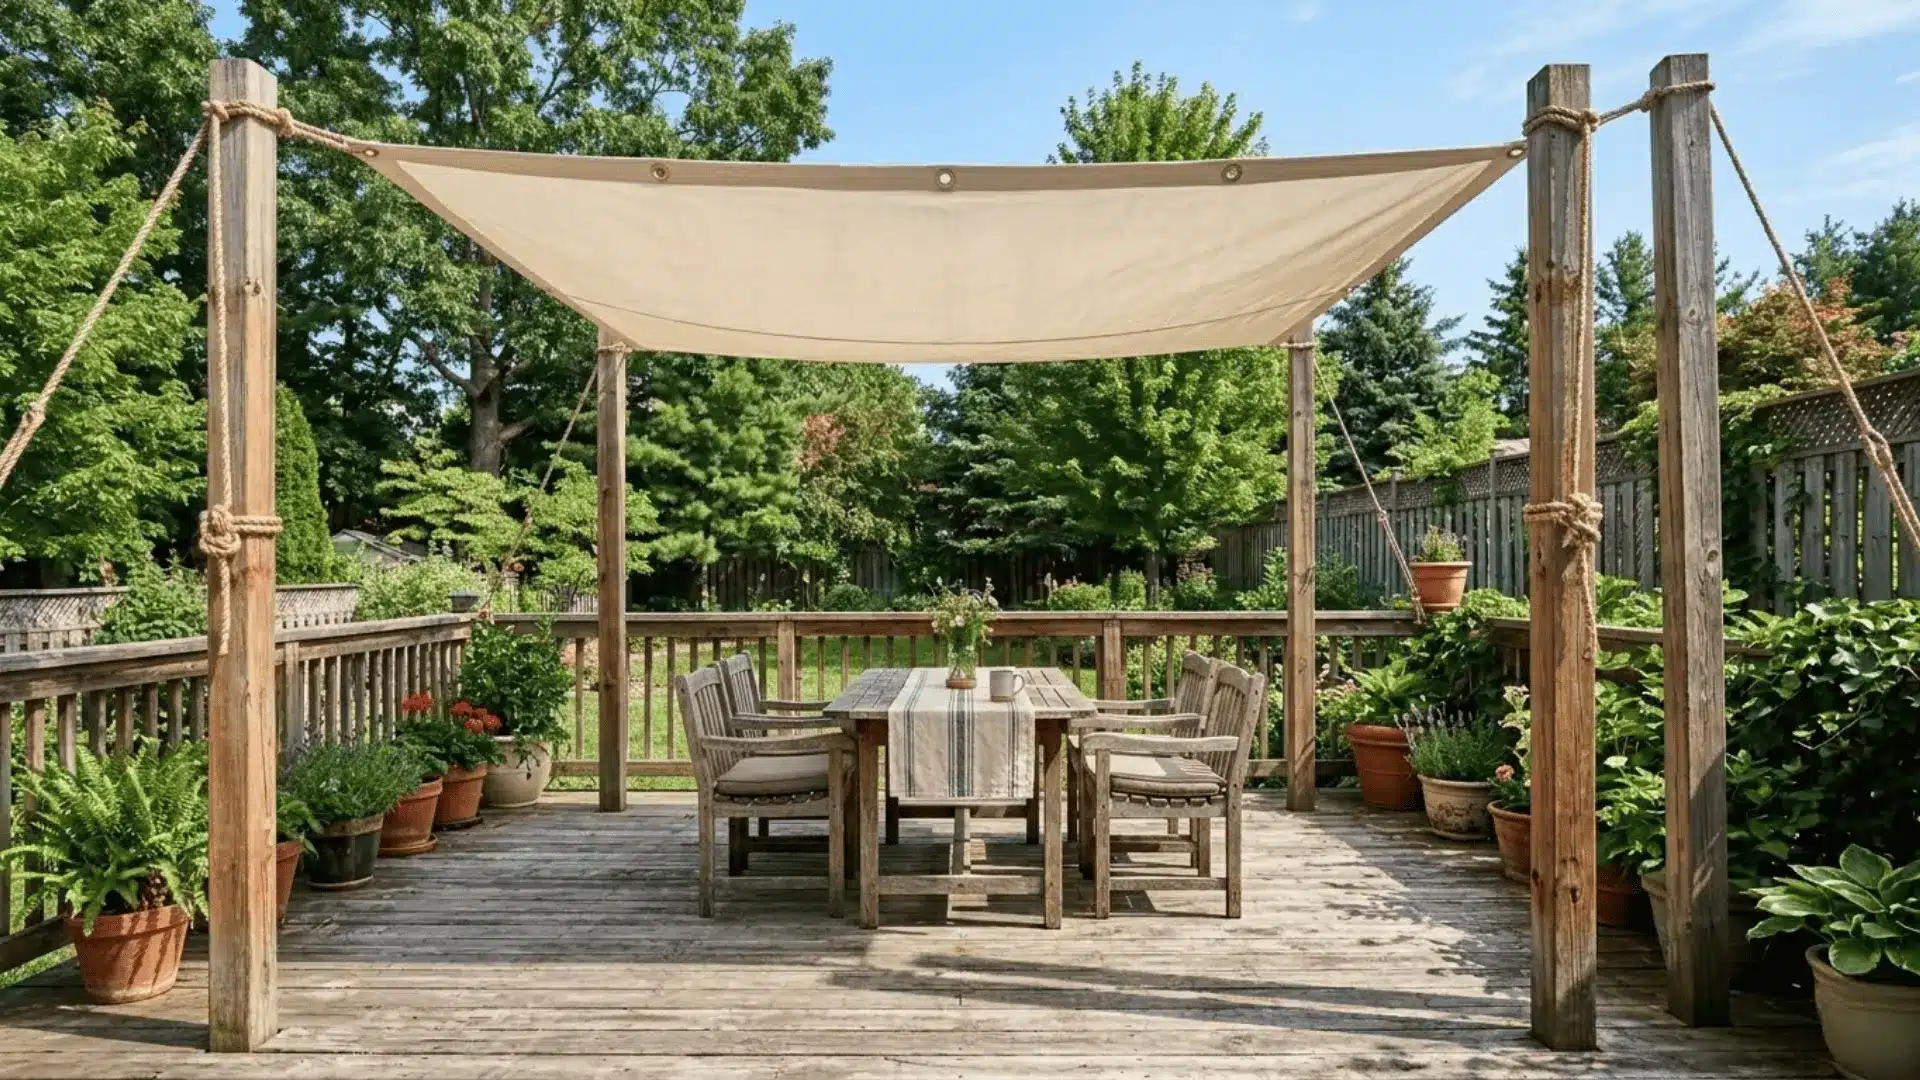
A fabric canopy is one of the easiest ways to add a soft, dreamy cover to your deck without committing to anything permanent.
Here’s how to get it done:
- Step 1: Measure your deck and buy outdoor canvas or polyester fabric with a few extra inches on each side for wrapping and securing the edges.
- Step 2: Cut four pressure-treated 4×4 posts to around 8 feet and anchor them at each corner using post anchors bolted into the decking.
- Step 3: Run a 2×4 beam across the top of each post pair, stretch the fabric over it, and fasten it with stainless steel grommets every 12 inches along the edges.
- Step 4: Create a slight center peak using a rope or ridge pole down the middle, so rainwater rolls off the sides instead of pooling in the center.
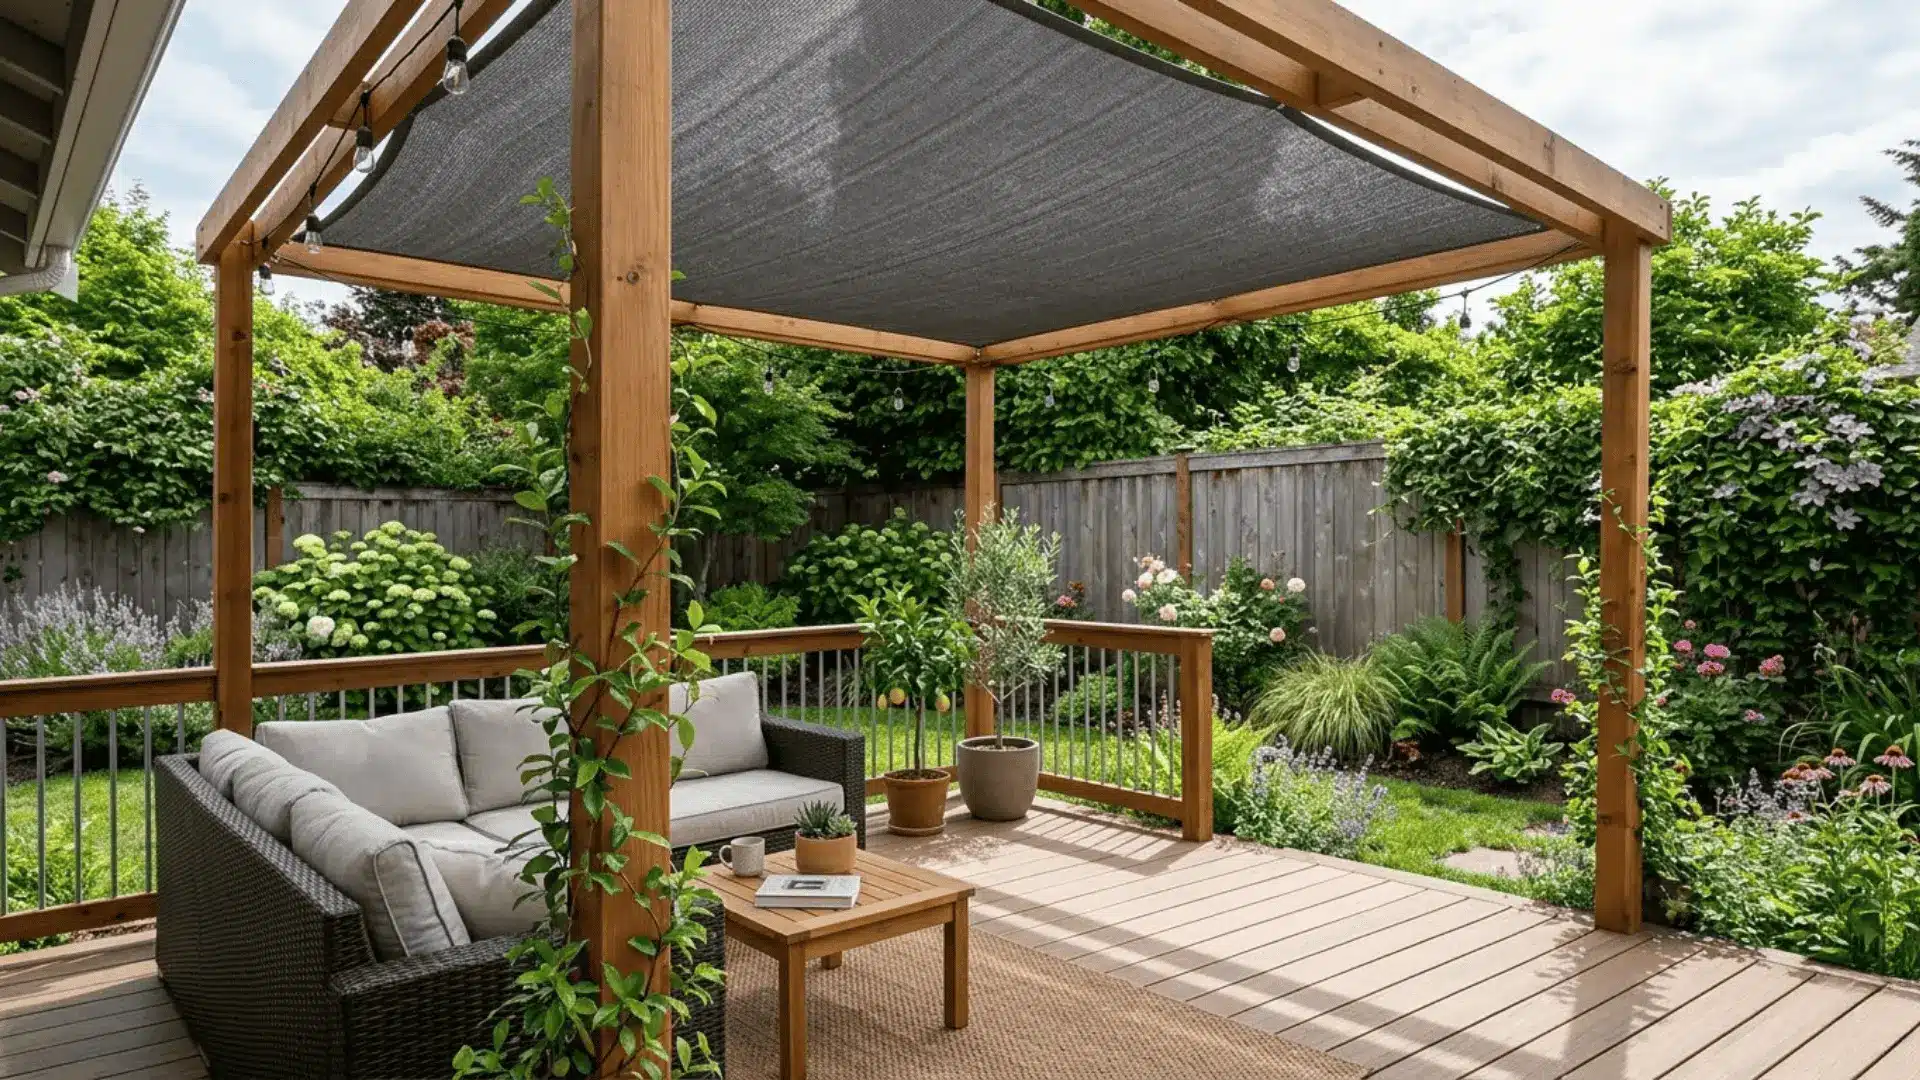
2. Shade Sail Installation
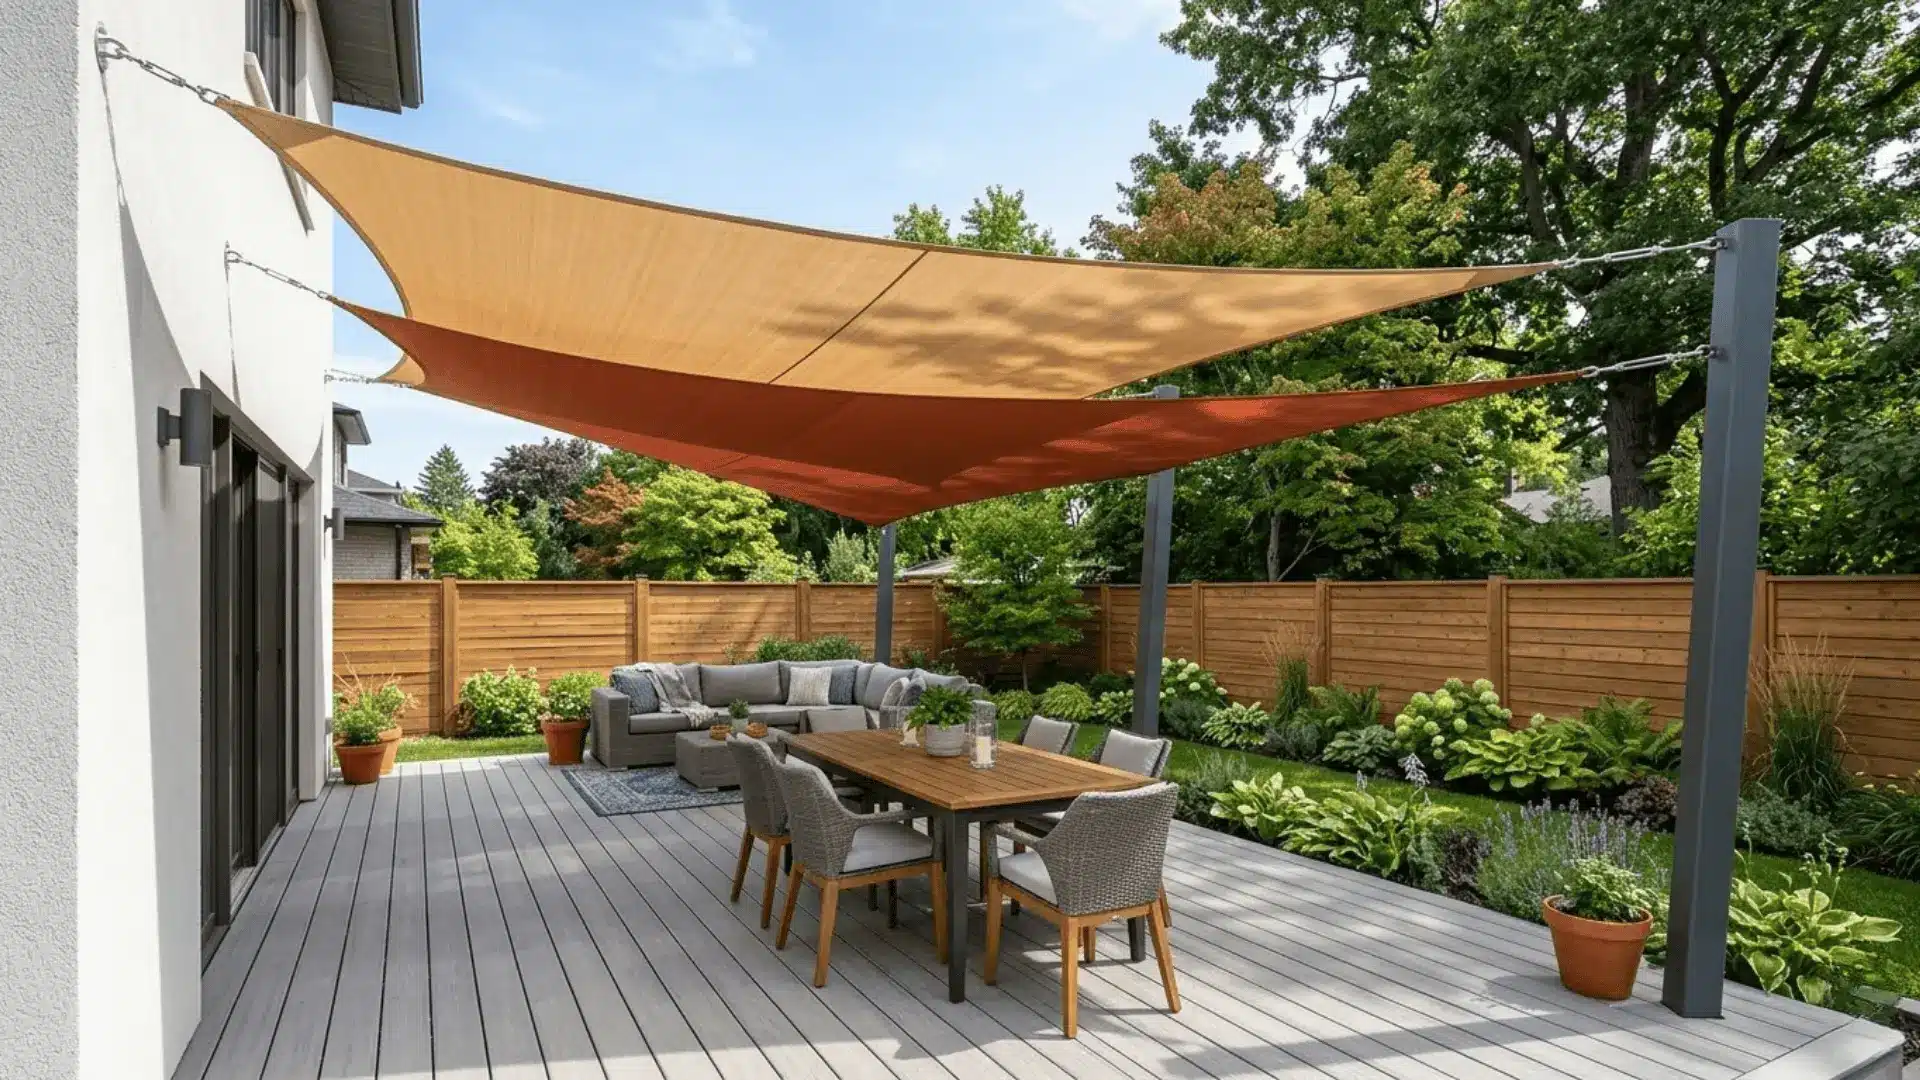
Shade sails are a modern, low-effort way to cover your deck, and they look incredibly intentional once they’re up.
Here’s how to install them:
- Step 1: Choose a sail 12 to 16 inches larger than your target area since sails lose some coverage once pulled taut.
- Step 2: Set steel posts in concrete at least 24 inches deep, positioning anchor points at varying heights so the sail sits at an angle for proper water runoff.
- Step 3: Clip the sail’s corner rings onto stainless steel D-rings or pad eyes at each anchor point using the included shackles.
- Step 4: Tighten the turnbuckles until the sail is firm and wrinkle-free, maintaining at least a 20 to 30 degree angle from horizontal so rain runs off cleanly.
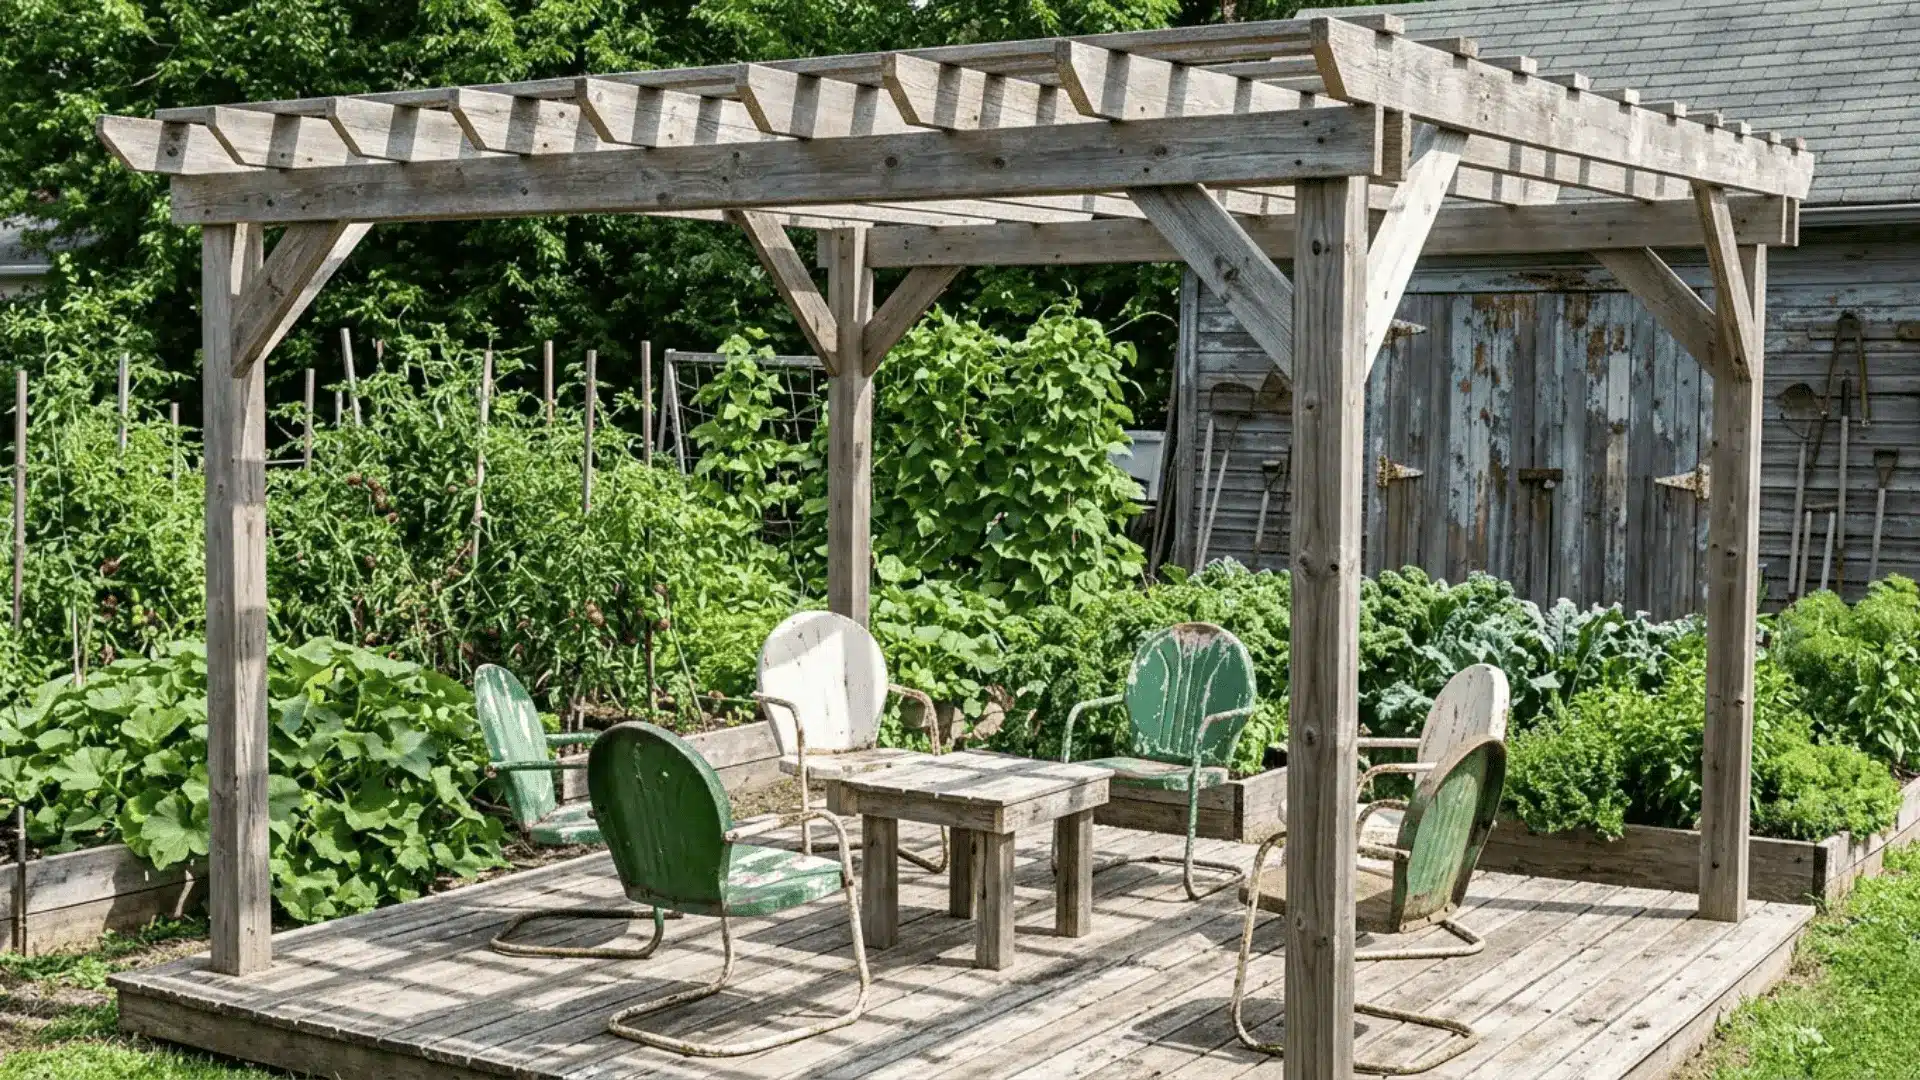
3. Pergola with Climbing Plants
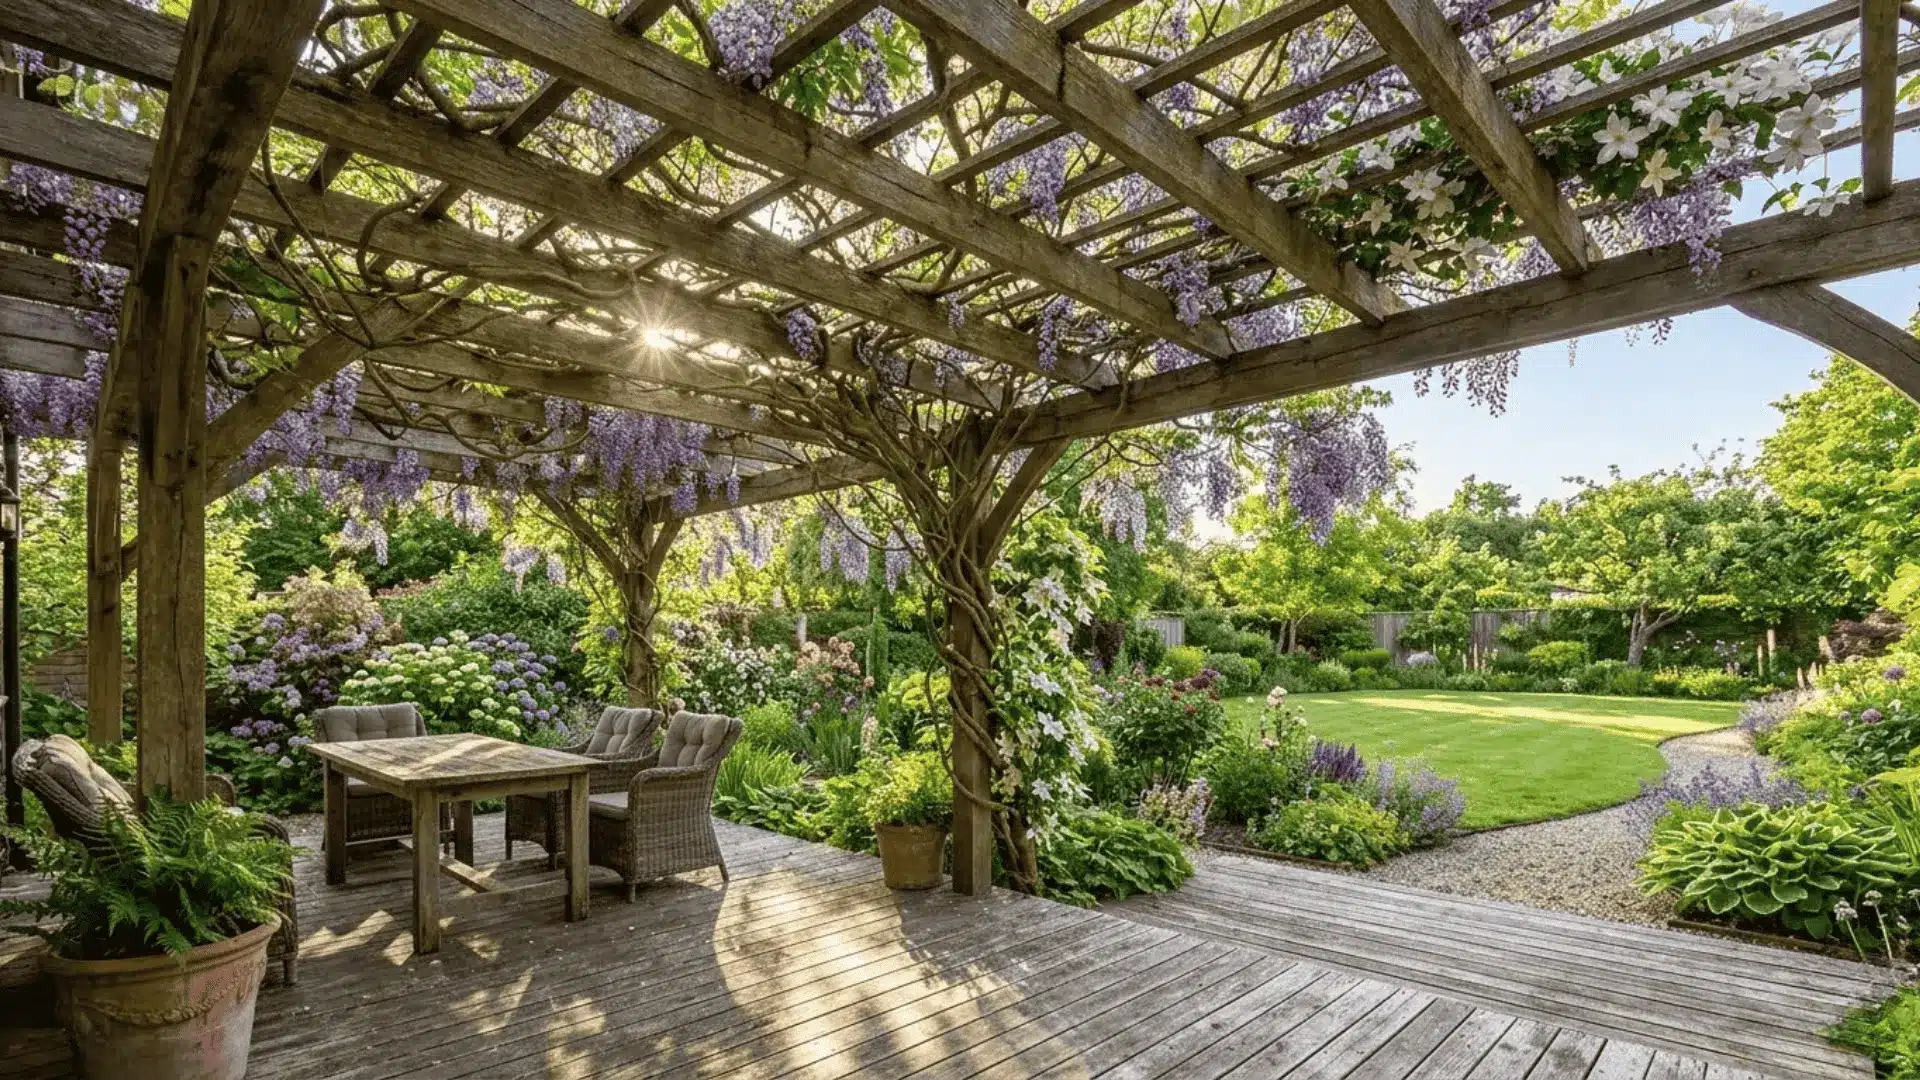
A basic wood pergola paired with climbing vines is the kind of idea that gets more beautiful with every passing season.
Here’s how to bring it together:
- Step 1: Build a freestanding pergola using 4×4 posts in post anchors, connected with 2×6 beams and 2×4 rafters spaced roughly 16 inches apart.
- Step 2: Dig planting holes 12 inches deep at the base of each post and fill with well-draining soil mixed with compost before planting fast-growing climbers like wisteria, clematis, or star jasmine.
- Step 3: Screw galvanized wire vertically up each post at 8 to 10 inch intervals so the vines have something to grip as they grow toward the beams.
- Step 4: In the first season, loosely tie new stem growth to the wires with garden twine to encourage lateral spreading across the beams rather than straight vertical climbing.
4. Corrugated Metal Roof Cover
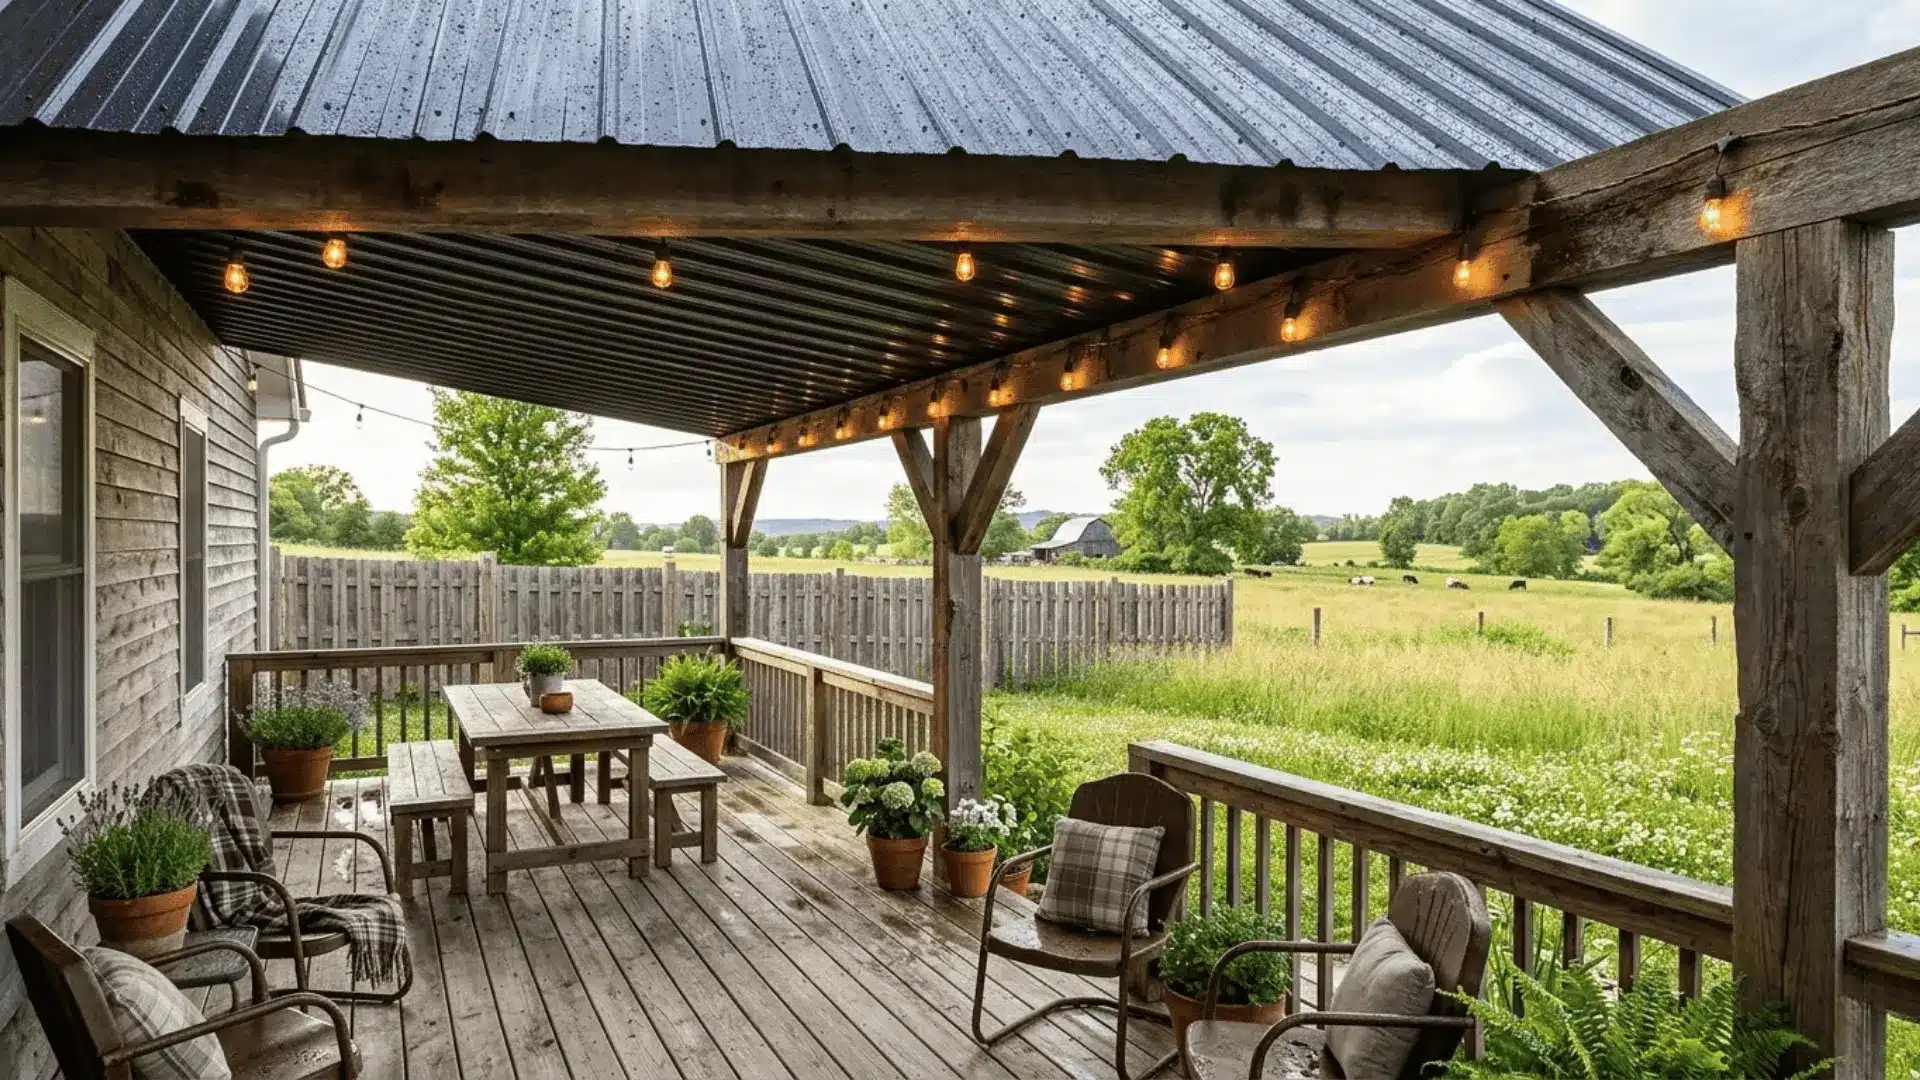
Corrugated metal roofing is one of the most durable and cost-effective ways to cover a deck, and it carries a rugged charm that suits farmhouse and industrial styles beautifully.
Here’s how to do it:
- Step 1: Build an overhead frame with 4×4 posts and 2×6 beams at a slope of at least 1 inch per foot so water drains consistently away from the house.
- Step 2: Purchase 26 or 29-gauge corrugated steel panels, measuring your frame carefully to minimize cutting.
- Step 3: Starting from the lowest edge, lay each panel overlapping the previous one by at least one full ridge, around 1.5 inches, for a watertight seal between sheets.
- Step 4: Fasten with hex-head roofing screws and neoprene washers every 12 inches, then seal the upper edge with a ridge cap and butyl tape to stop water backing up under the sheets.
5. Polycarbonate Roof Panels
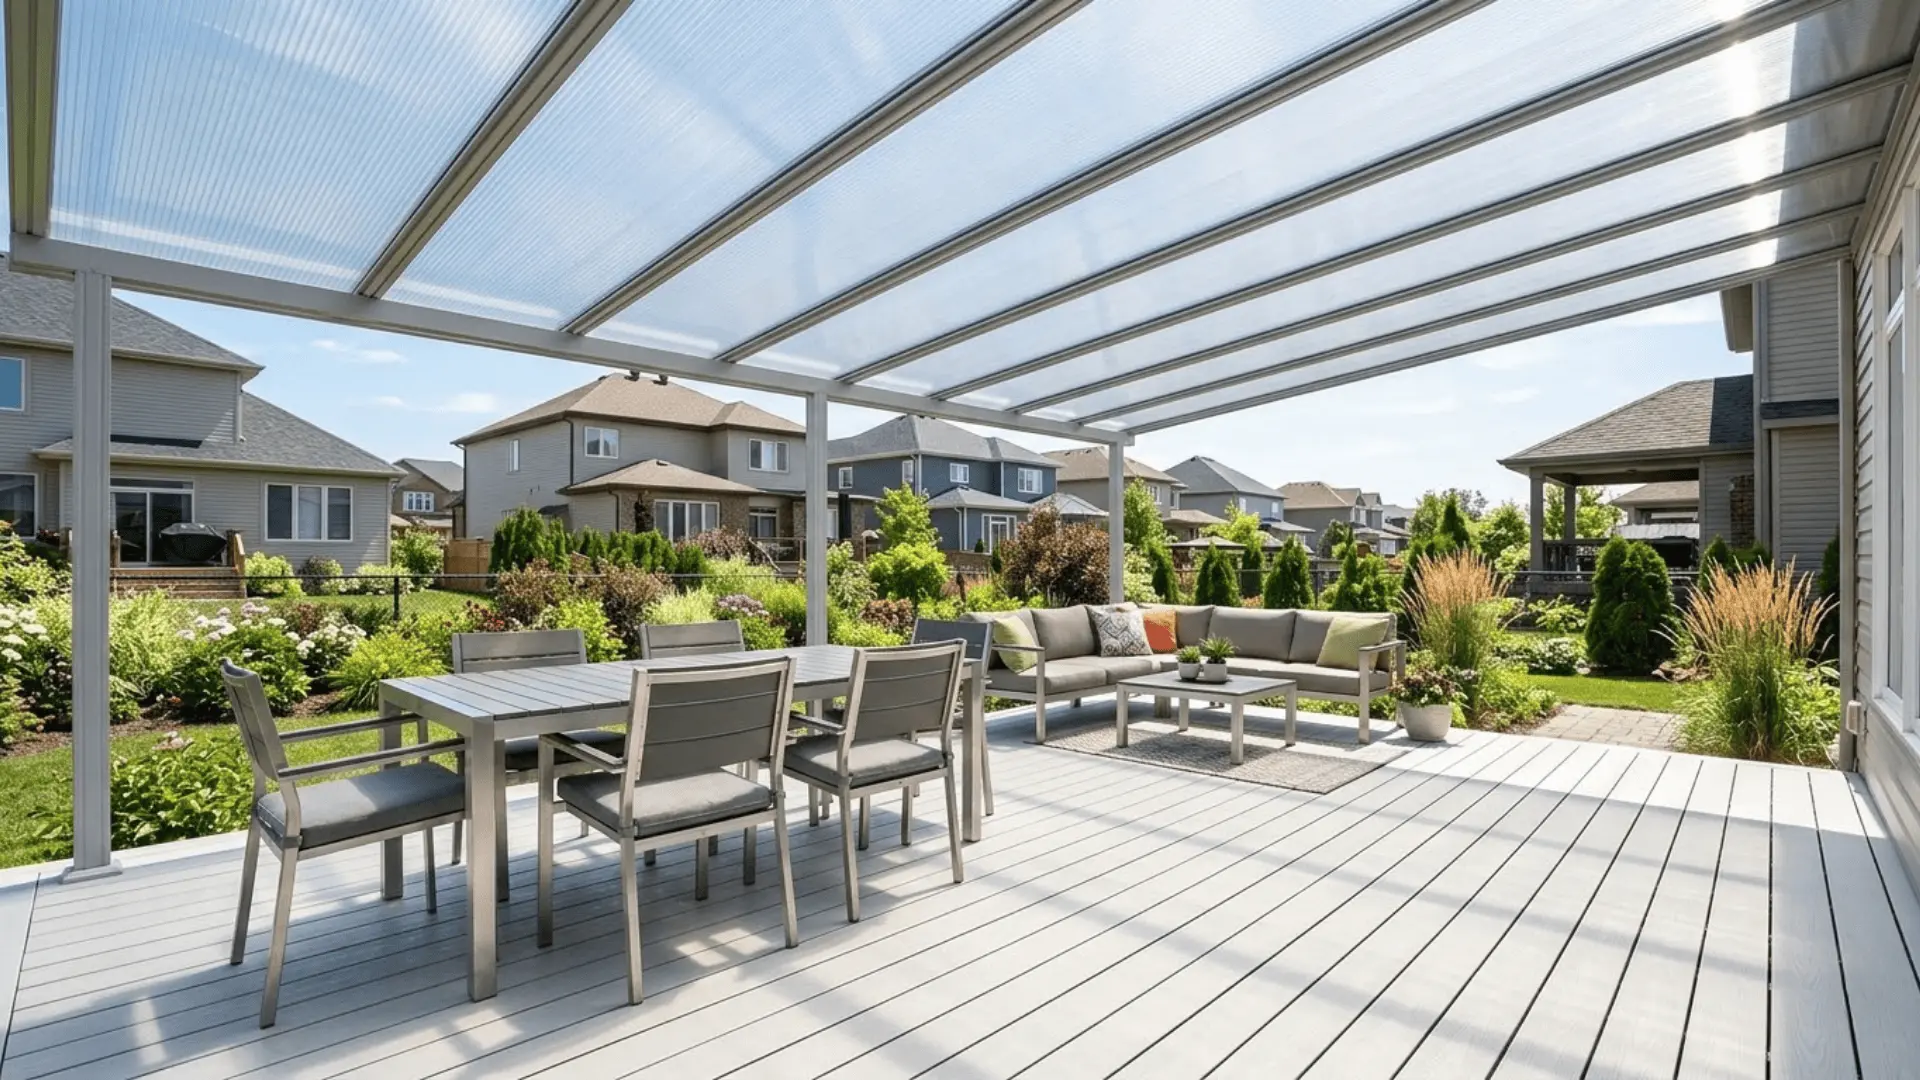
Polycarbonate panels give you reliable rain protection without blocking out all that beautiful natural light.
Here’s how to install them:
- Step 1: Build a sloped frame at least 5 degrees with aluminum or treated timber purlins spaced no more than 24 inches apart to properly support the panels.
- Step 2: Cut twin-wall polycarbonate panels with a fine-toothed saw and immediately seal the open fluted ends with aluminum closure tape to block moisture and insects from entering the channels.
- Step 3: Lay panels UV-protected side up, overlapping each one by at least 3 inches over the purlin at every joint.
- Step 4: Use pre-drilled polycarbonate roofing screws with rubber washers and leave a small gap at each hole to allow for thermal expansion and contraction.
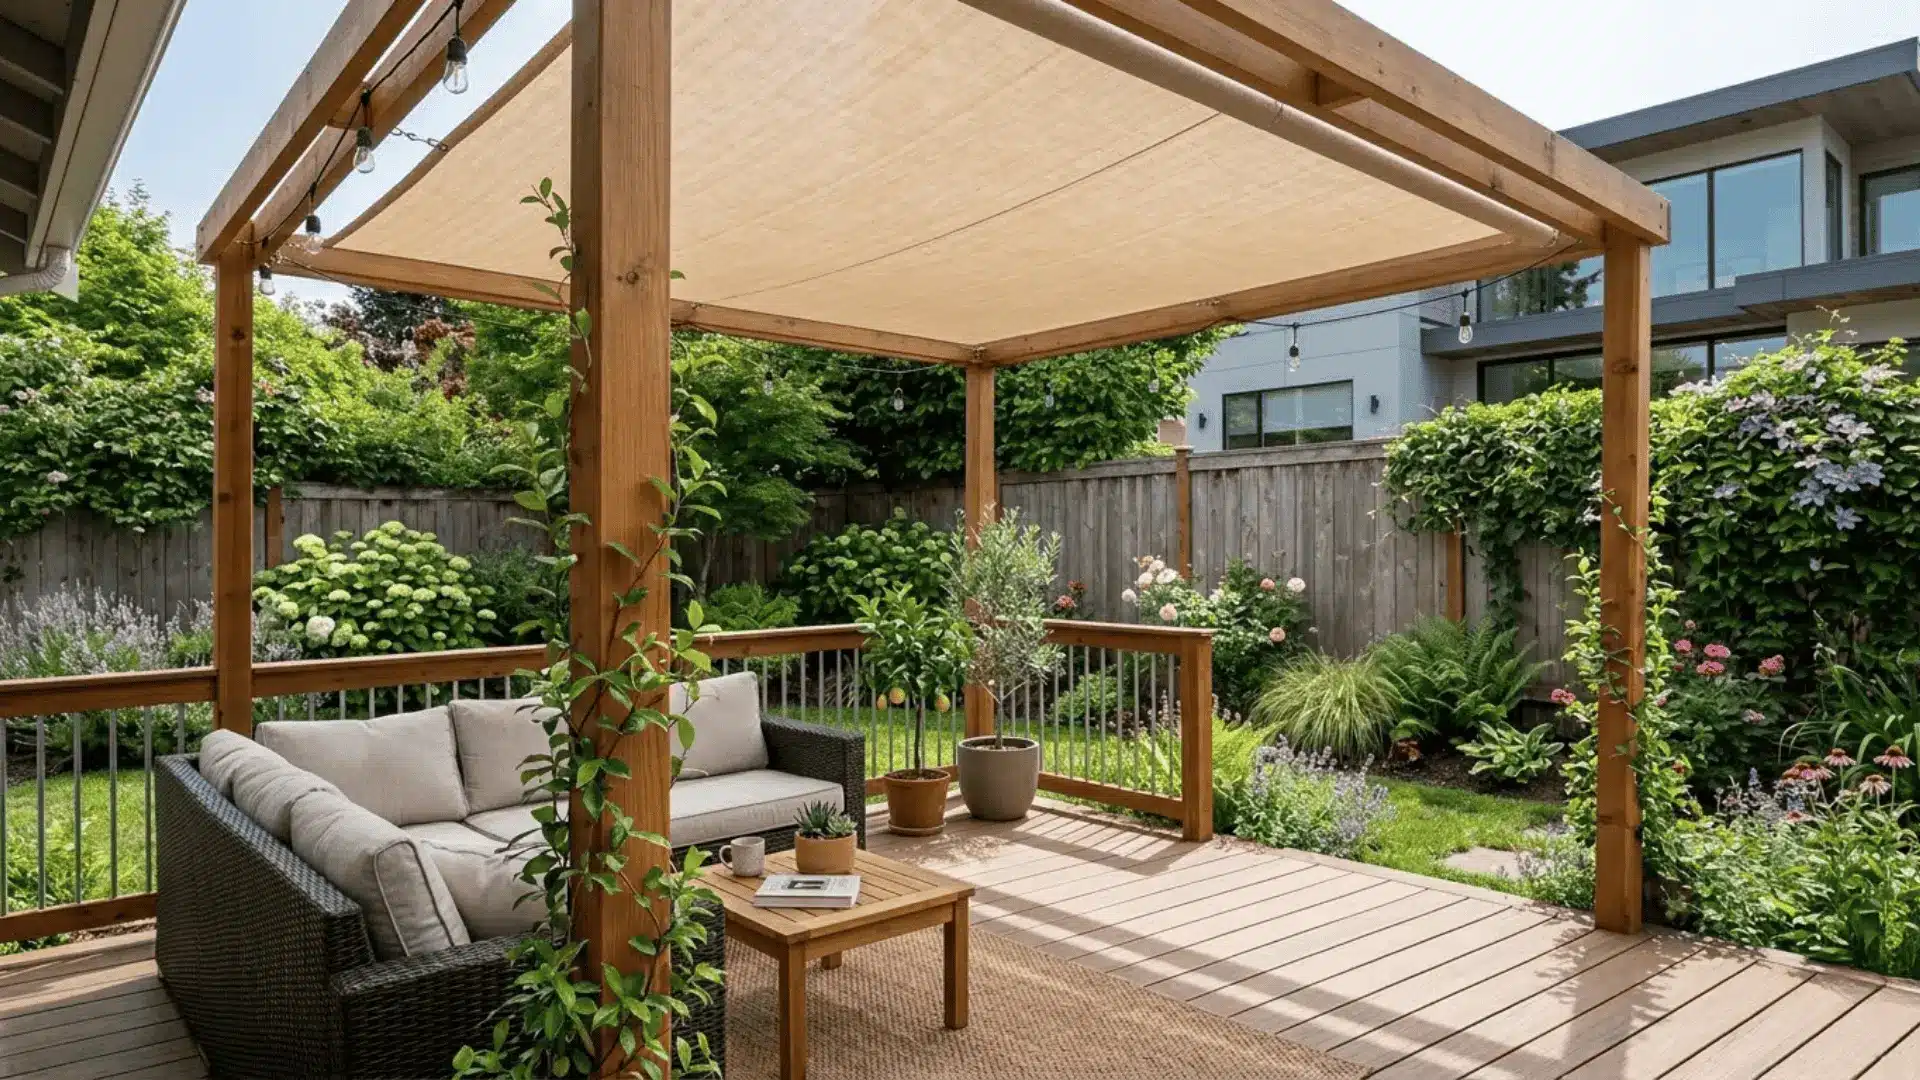
6. Retractable Awning
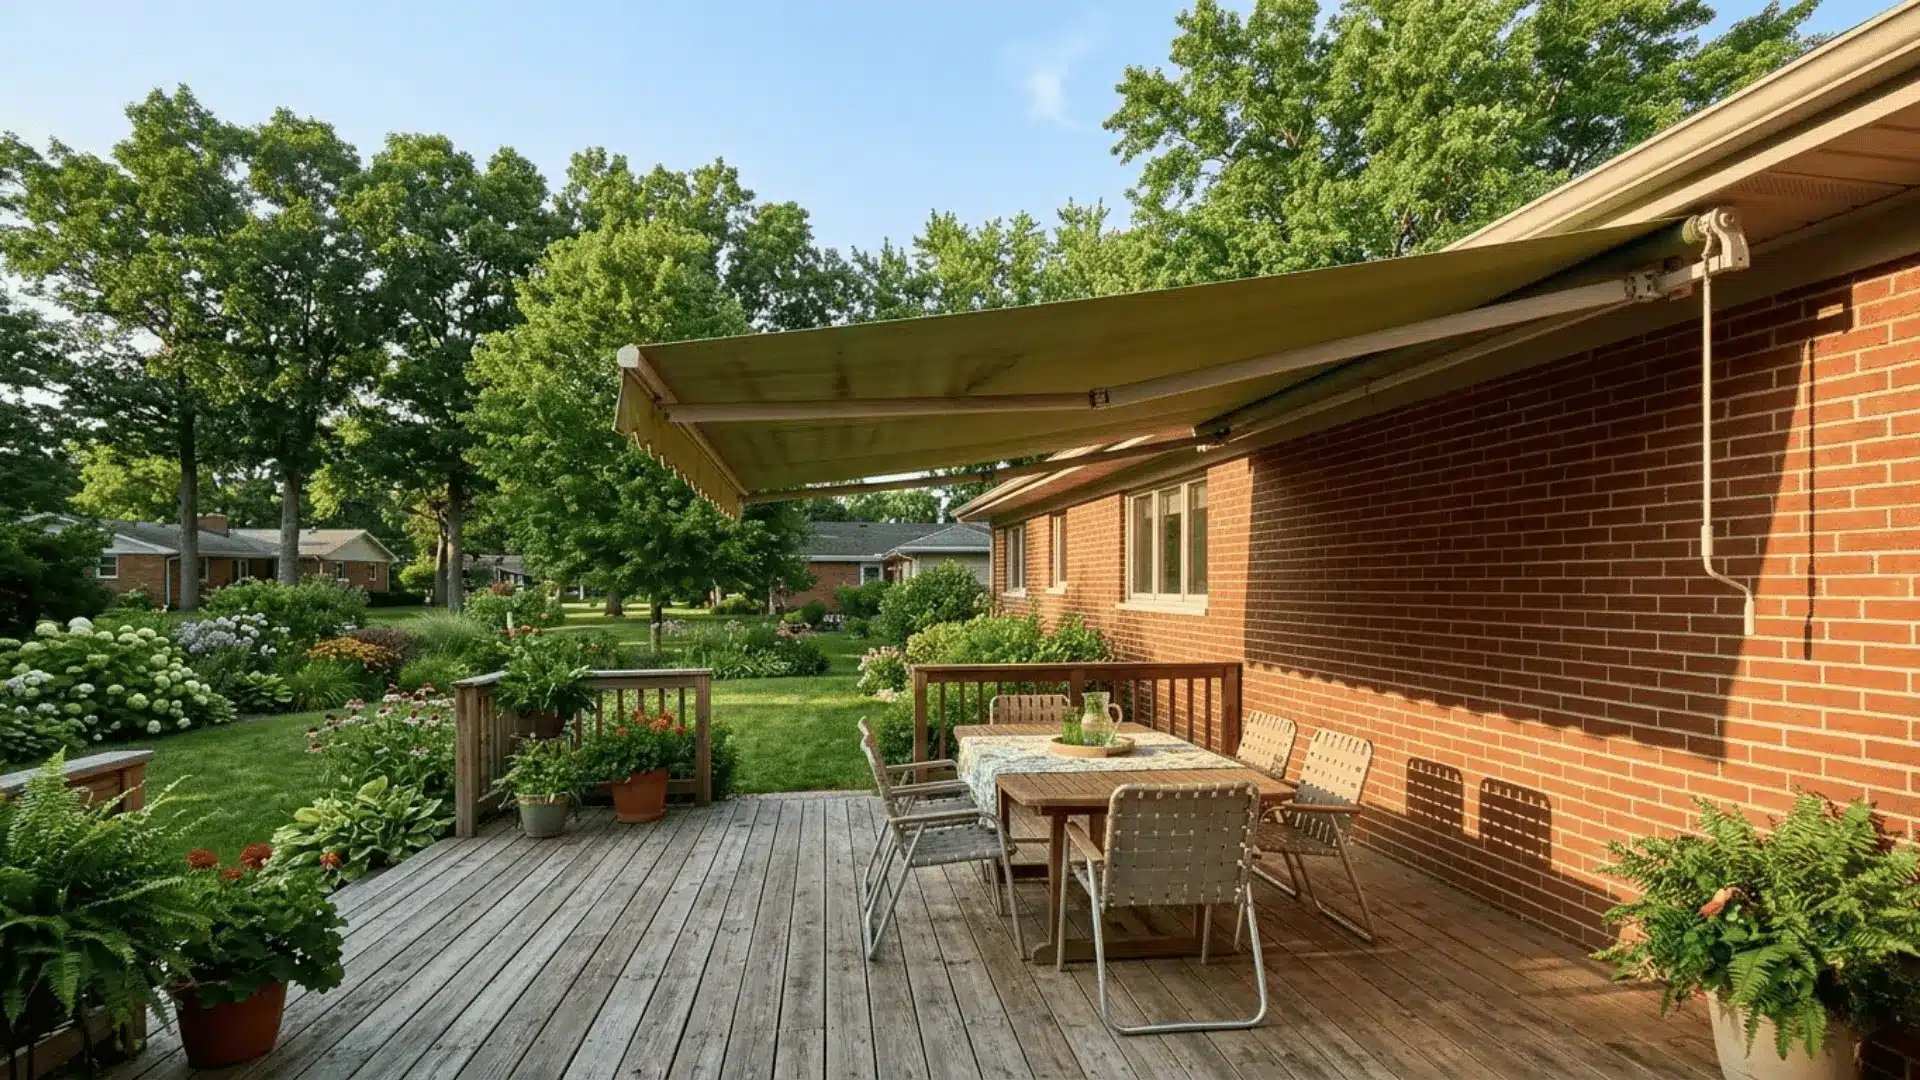
A retractable awning is a clean, flexible solution that lets you control how much sun or shade your deck gets at any given time.
Here’s how to set one up:
- Step 1: Measure your deck width and choose a manual crank awning with at least a 10-foot projection in solution-dyed acrylic fabric, which resists mildew and holds color far better than polyester.
- Step 2: Use a stud finder to locate solid wall framing since the bracket must anchor into structural lumber, not just sheathing, to safely hold the awning’s weight.
- Step 3: Mount the wall brackets at least 8 feet above the deck surface using lag screws of at least 3 inches driven into the studs.
- Step 4: Extend the awning fully and confirm it pitches downward at 5 to 15 degrees so rainwater runs off the front edge rather than pooling on the fabric.
7. Outdoor Curtains for Partial Coverage
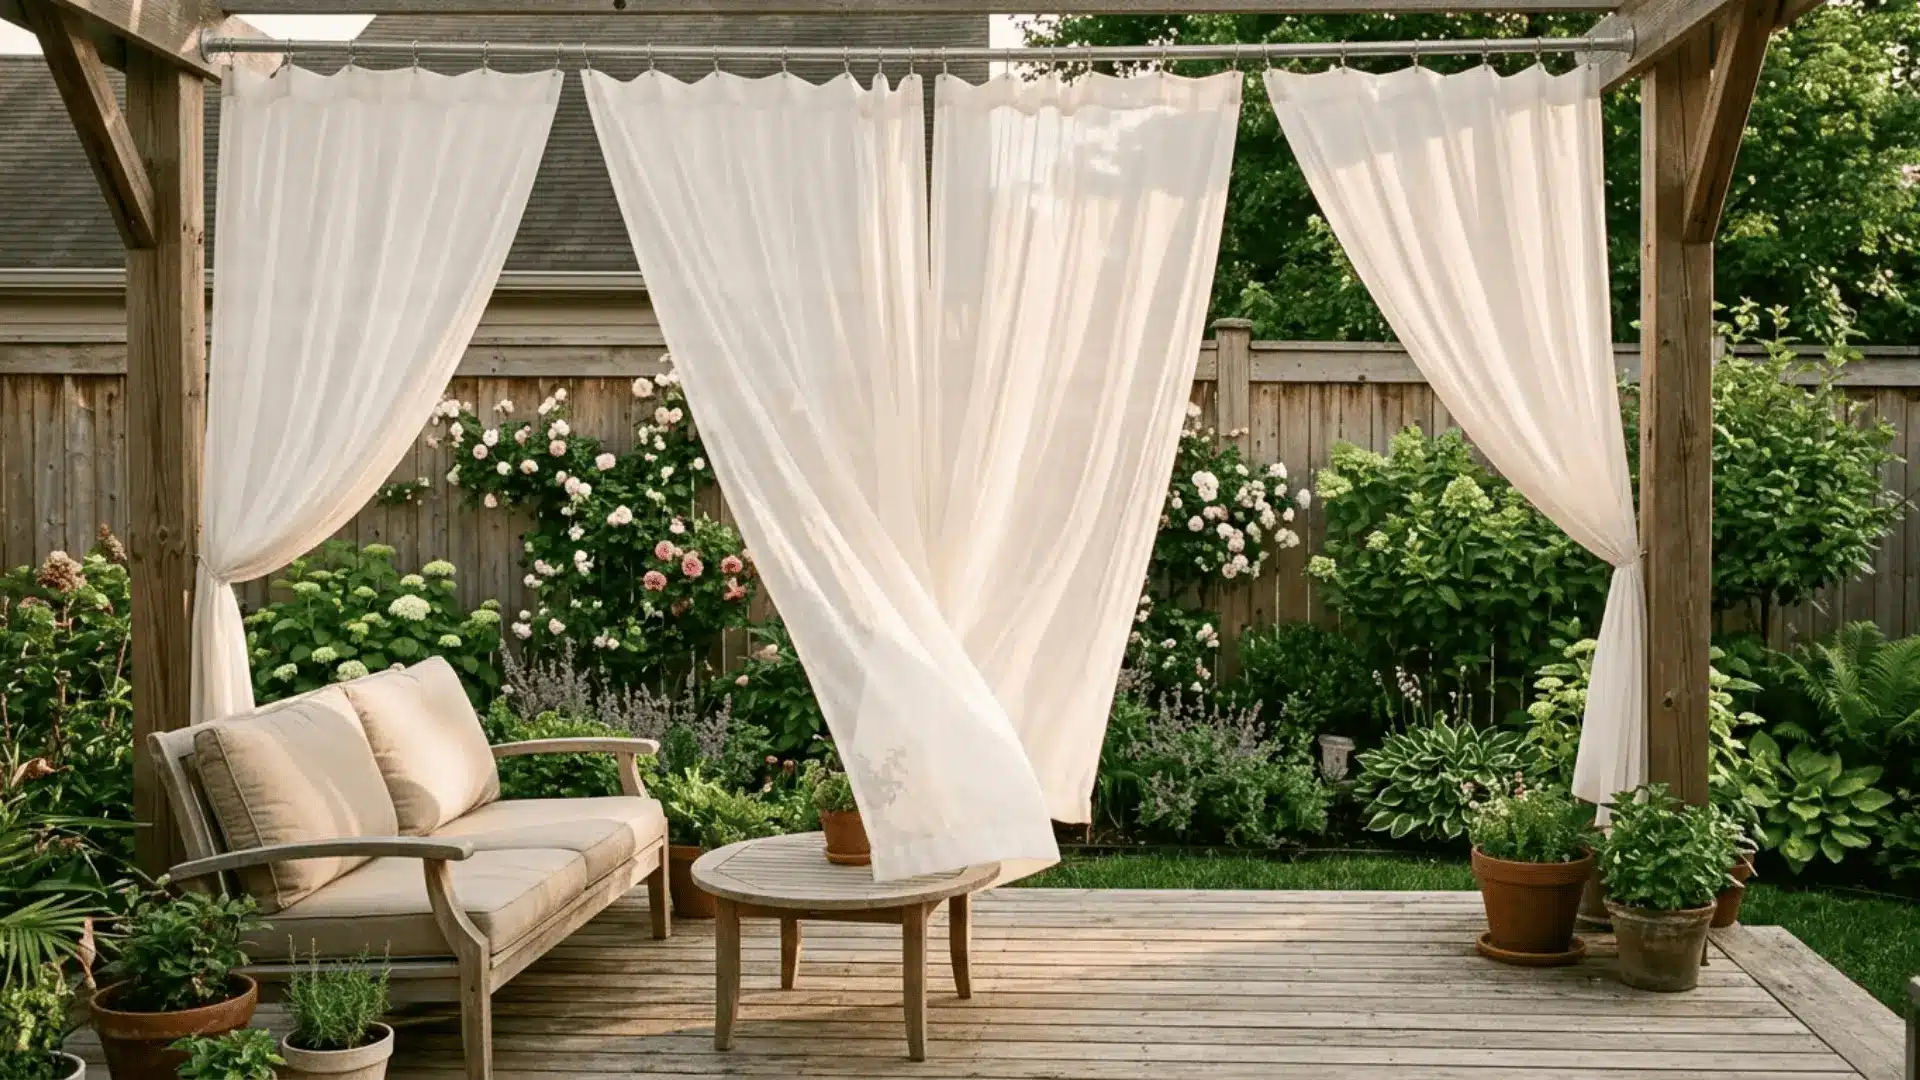
Outdoor curtains are a soft, affordable way to add shade and privacy to your deck without any heavy construction involved.
Here’s how to hang them:
- Step 1: Install a 1.5-inch galvanized steel rod or conduit overhead using brackets rated for at least 50 pounds, since wet outdoor curtains get heavier than expected.
- Step 2: Choose solution-dyed acrylic or Sunbrella-type panels sized at least twice the width of the opening for a full, gathered look.
- Step 3: Hang using stainless steel rings or clip hooks rated for outdoor use since standard indoor rings rust within a single season and stain the fabric.
- Step 4: Hem the bottom panels about an inch above the deck surface and sew in curtain weights along the hem on windy sites to keep them hanging straight.
8. Tarp Cover for Temporary Protection
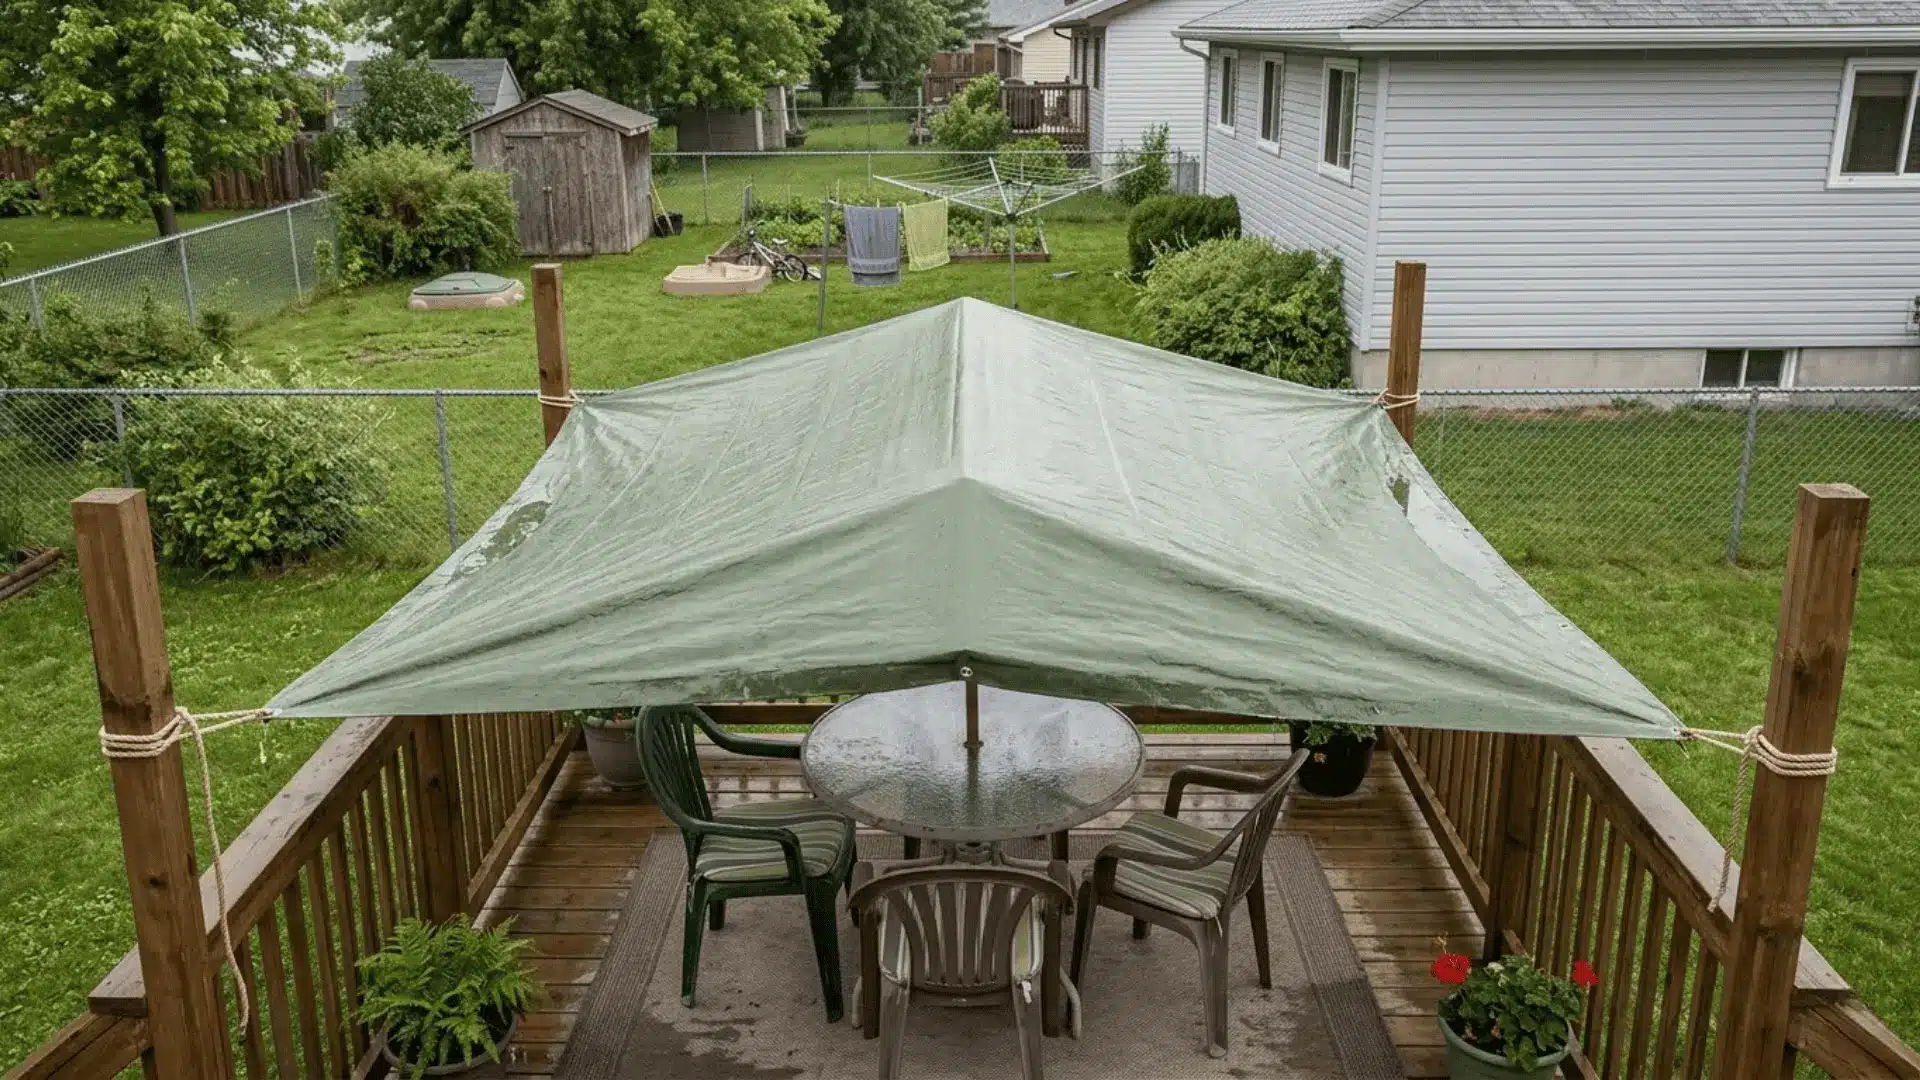
A heavy-duty tarp is the most straightforward budget solution when you need coverage fast and without fuss.
Here’s how to set it up so it actually holds:
- Step 1: Choose a polyethylene tarp at least 6 mil thick with reinforced grommets every 18 inches, and size up since the usable area is always smaller than the labeled dimensions.
- Step 2: Run a tight ridgeline rope down the center length of the tarp to create a peak, so rain runs off both sides rather than pooling in the middle.
- Step 3: Thread the rope through each grommet and tie to anchor points using a taut-line hitch knot, which lets you adjust tension after rain loosens it without retying from scratch.
- Step 4: After the first heavy rain or wind, check every grommet point and reinforce any pulling through with inexpensive grommet repair kits from the hardware store.
9. Bamboo or Reed Roof Panels
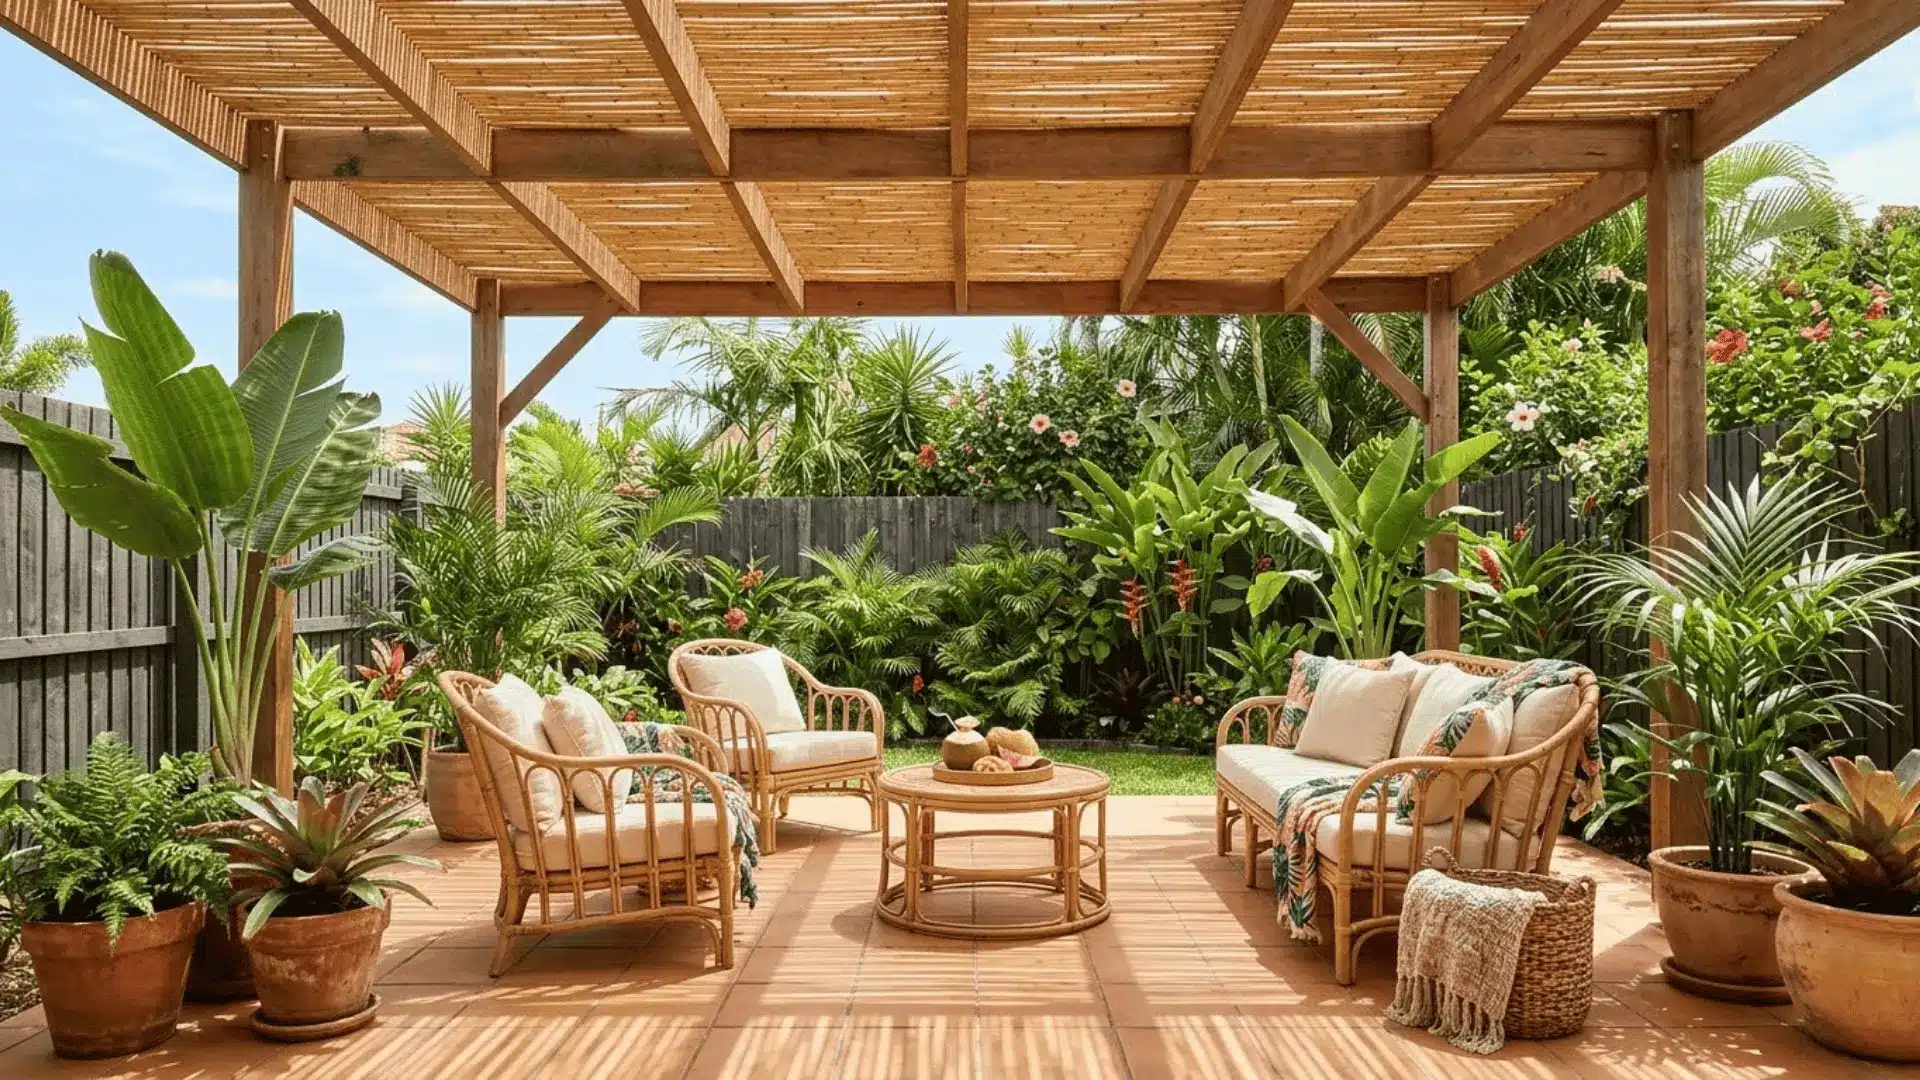
Bamboo and reed panels bring a warm, natural texture to your deck overhead and cost very little to source or install.
Here’s how to use them:
- Step 1: Build an overhead frame with crossbeams spaced no more than 24 inches apart since bamboo and reed panels need frequent support underneath to prevent sagging.
- Step 2: Roll the panels out across the frame and cut to length by scoring the backing repeatedly with a sharp utility knife rather than trying to cut through in one pass.
- Step 3: Fasten each panel to the crossbeams using galvanized staples every 6 inches at each beam crossing, or use wire ties threaded through the backing and twisted tight around the beam.
- Step 4: Brush the finished panels with outdoor wood sealer or linseed oil once installed, and plan to reapply every year or two, since natural materials break down faster than synthetic roofing.
10. Lattice Roof with Fabric Overlay
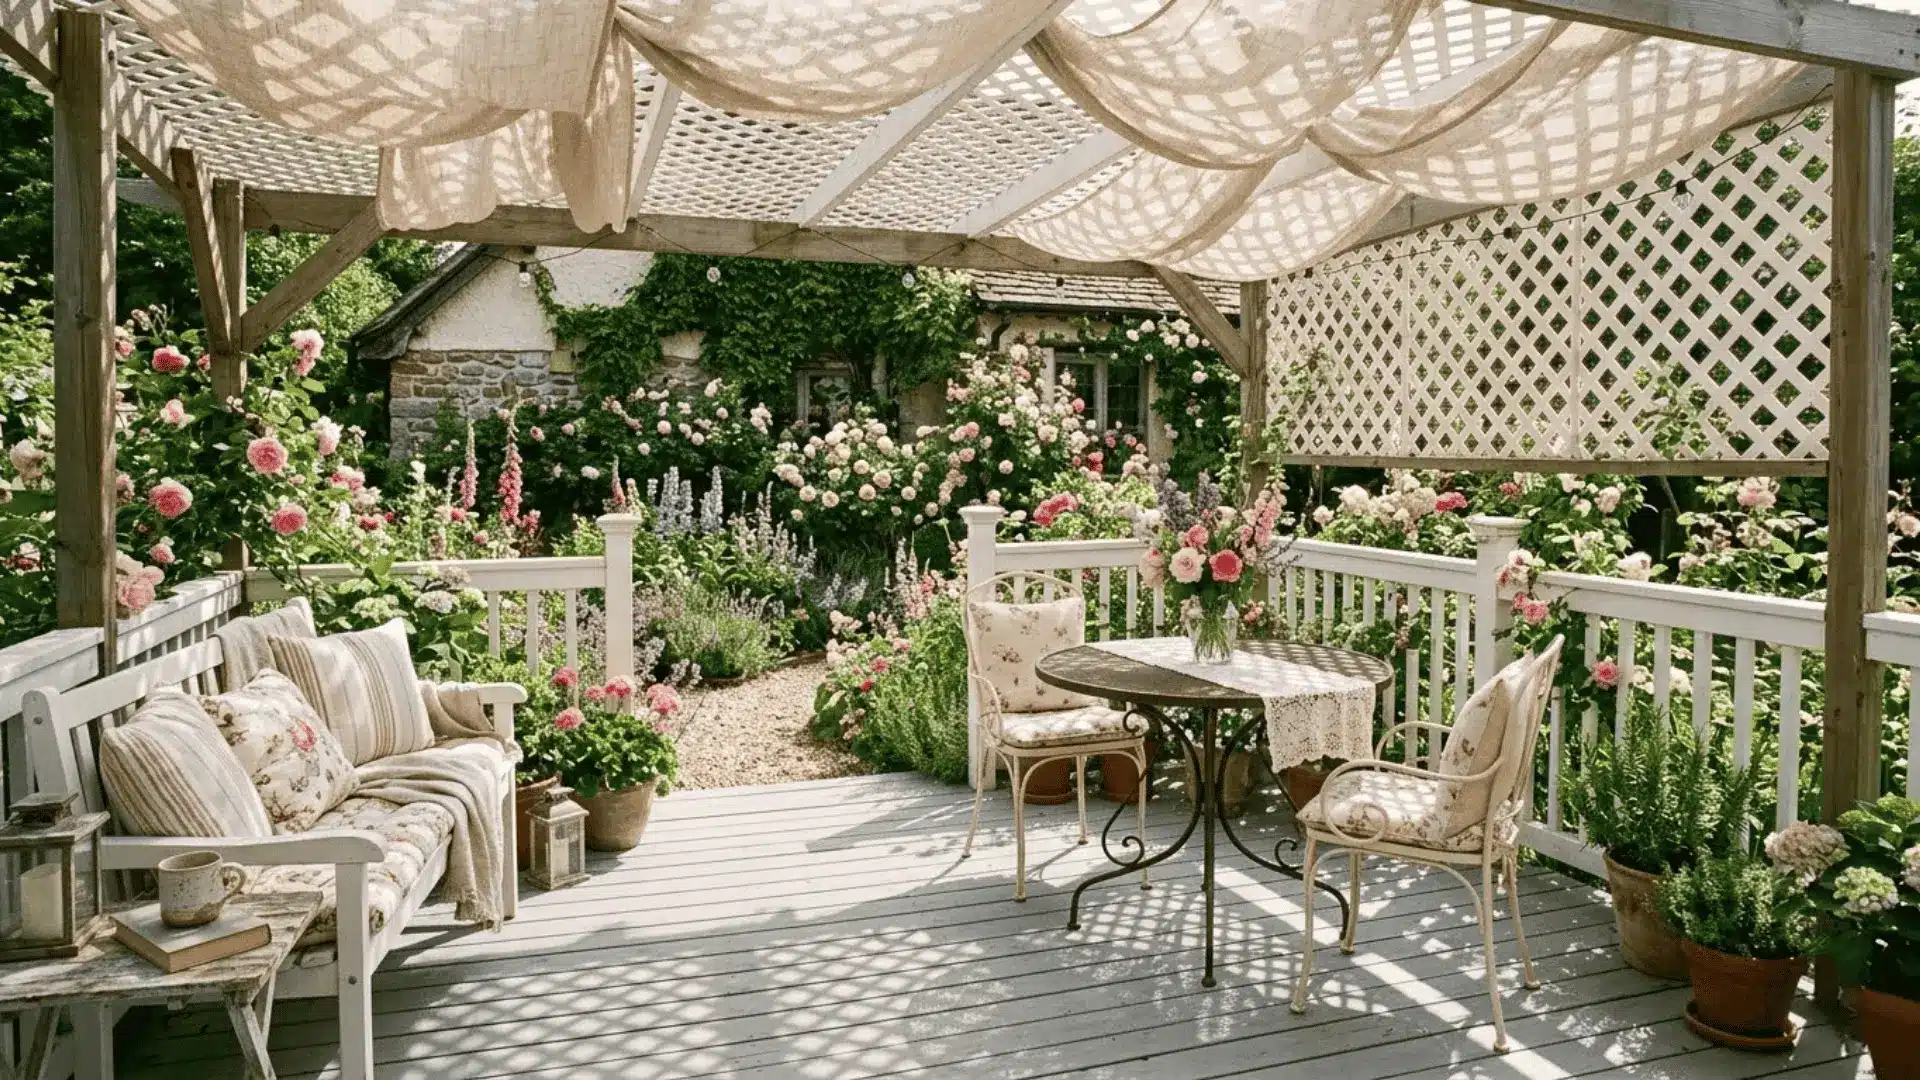
A lattice roof topped with draped fabric creates a beautifully filtered, dappled light effect that feels incredibly curated.
Here’s how to put it together:
- Step 1: Cut standard 4×8 wood lattice panels to fit your roof opening using a fine-tooth circular saw blade to keep the thin slats from splintering at the edges.
- Step 2: Fasten the lattice to the top of your beams with exterior screws through the lattice intersections every 12 to 16 inches so it can’t lift or shift in the wind.
- Step 3: Cut a sheer UV-resistant outdoor fabric about 6 inches larger than the roof on all sides so you have enough to fold over the edges and staple neatly underneath.
- Step 4: Staple the fabric perimeter using 1/2 inch stainless staples, pulling just taut enough to remove wrinkles without stretching it so tight it tears in the first strong wind.
11. DIY Wooden Frame with Tin Sheets
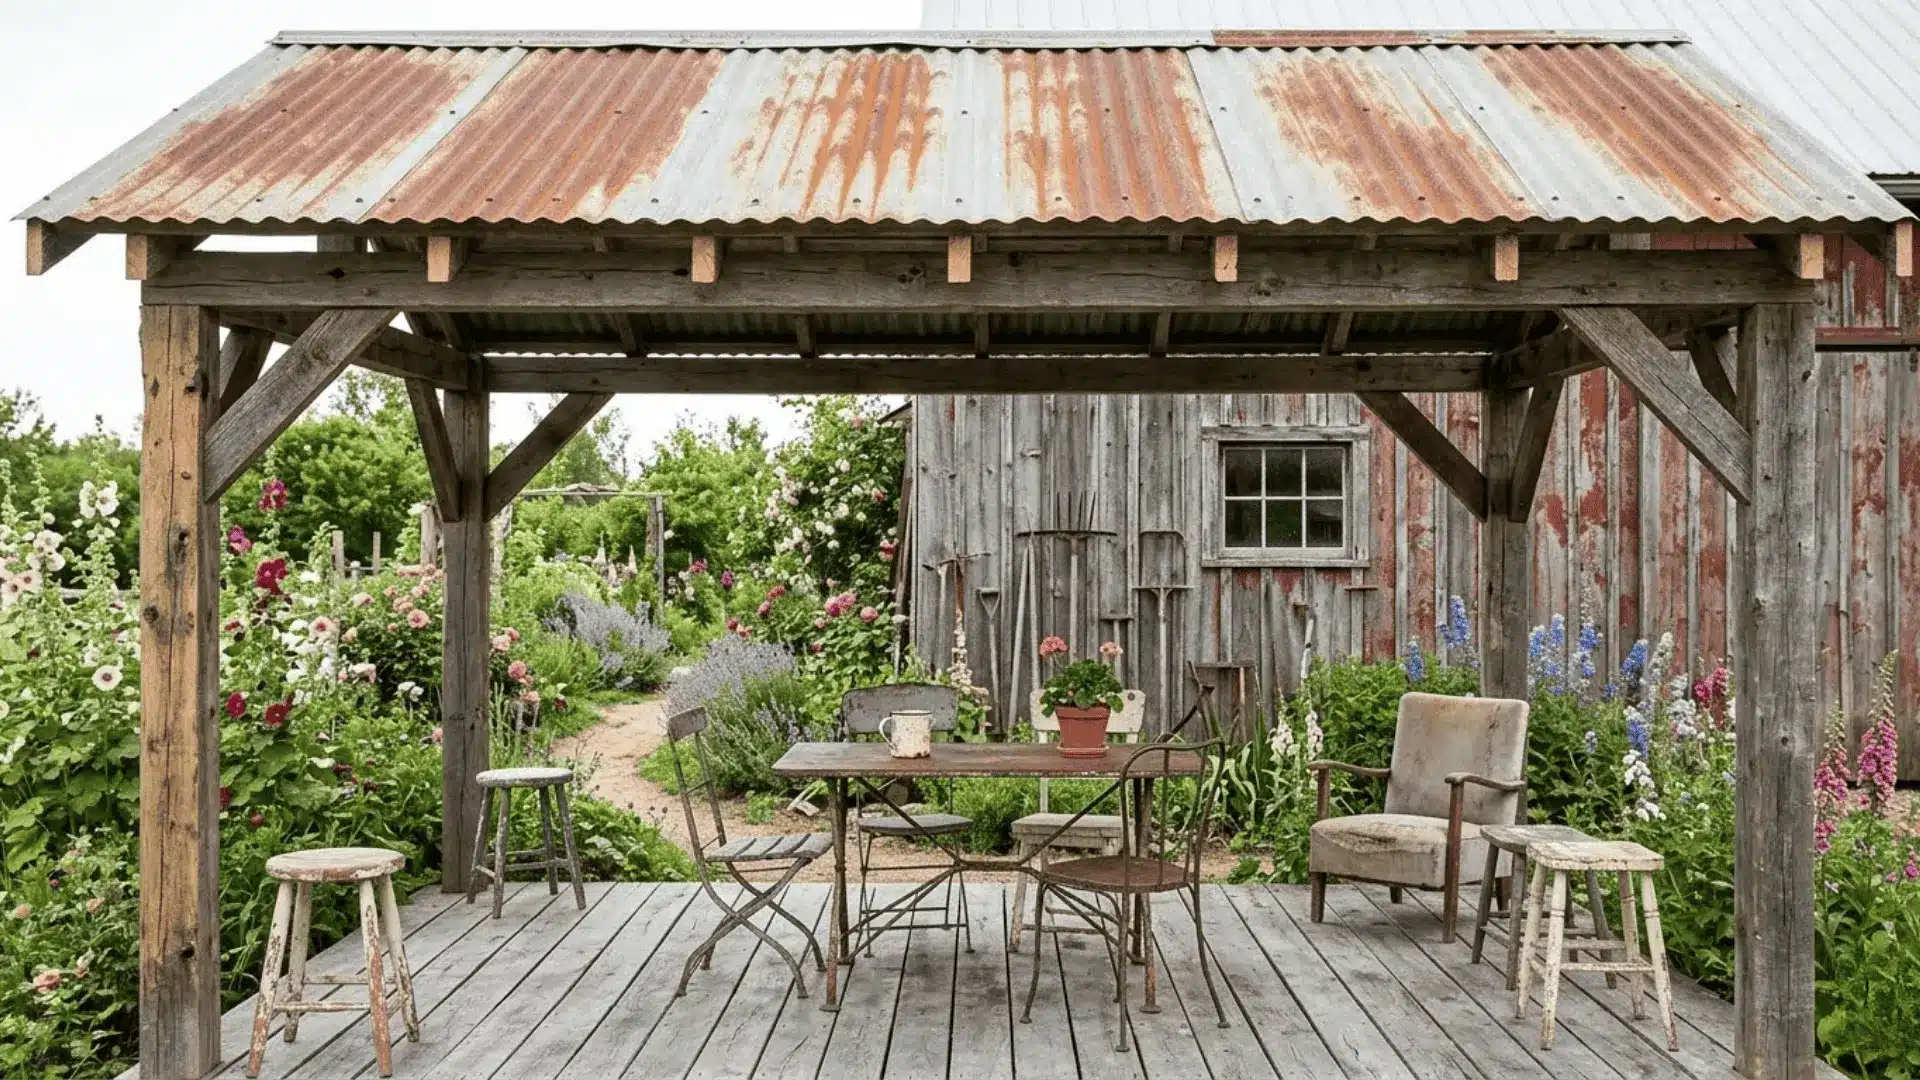
Reclaimed wood and salvaged tin sheets come together to create a roof that’s sturdy, full of character, and extremely easy on the budget.
Here’s how to build it:
- Step 1: Source heat-treated reclaimed timber in at least 4×4 for posts and 2×6 for beams, pressing a screwdriver firmly into each piece to check for soft spots that signal rot and unreliable fastener hold.
- Step 2: Connect beams to posts using structural metal connectors rather than just toe-nailing, which gives the frame significantly better resistance to wind uplift.
- Step 3: Lay salvaged tin sheets from the lowest edge upward, overlapping each sheet by one full corrugation and driving roofing screws through the high points to keep water out of the fastener holes.
- Step 4: Coat all exposed timber with penetrating outdoor sealer, and prime raw tin cut edges with rust-inhibiting metal primer, since those are the spots where corrosion starts first.
12. Umbrella Cluster Setup
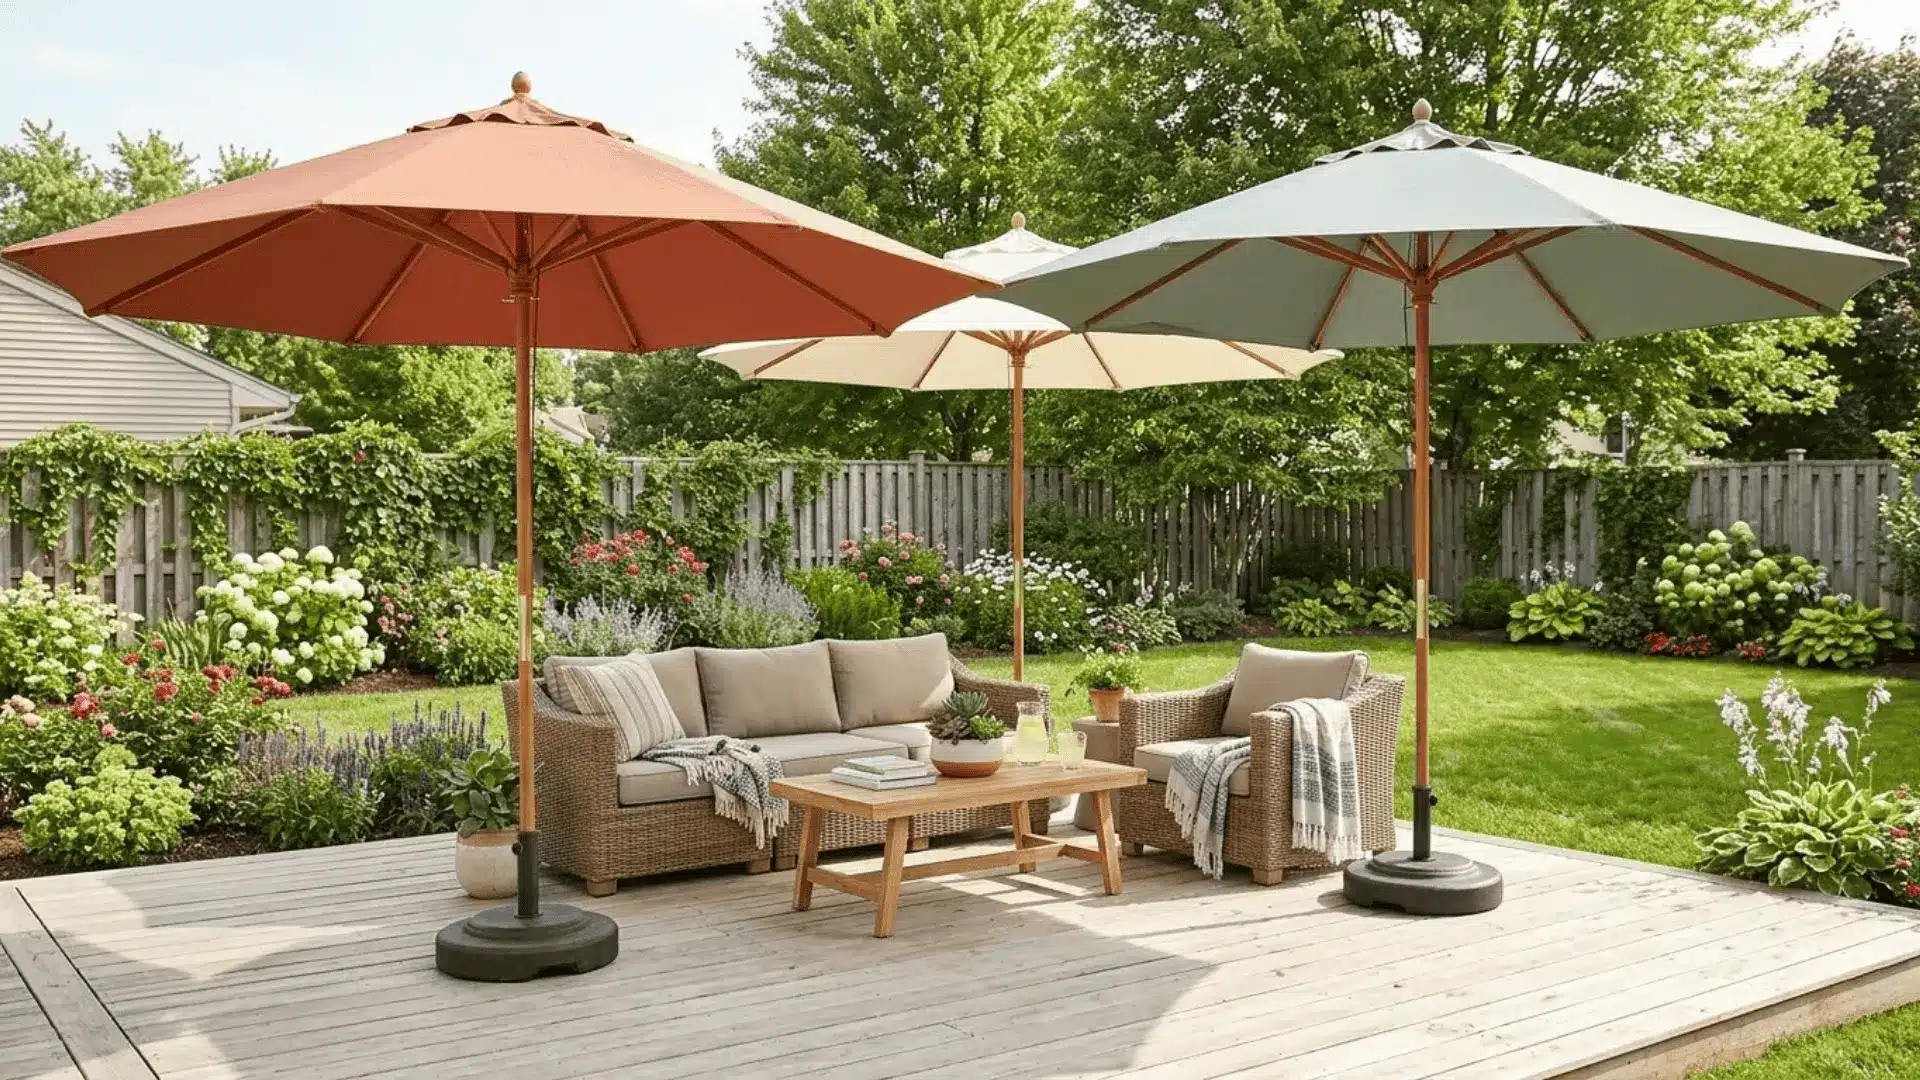
A cluster of large patio umbrellas creates flexible, no-commitment coverage that can be rearranged whenever you feel like it.
Here’s how to set it up well:
- Step 1: Choose market-style umbrellas with a canopy diameter of at least 9 to 11 feet and a pole diameter of at least 1.5 inches for enough stability in a cluster arrangement.
- Step 2: Fill each base with at least 50 pounds of sand or use a weighted base rated for outdoor use to handle the leverage a large canopy creates in even a moderate breeze.
- Step 3: Arrange umbrellas so canopy edges overlap by at least 12 to 18 inches, positioning the center one slightly higher than the surrounding ones for a layered, intentional look.
- Step 4: Close and strap all umbrellas when winds exceed 20 mph, since an unsecured large canopy can tip even a well-weighted base and cause real damage to your deck or furniture.
13. Lean-to Roof Extension
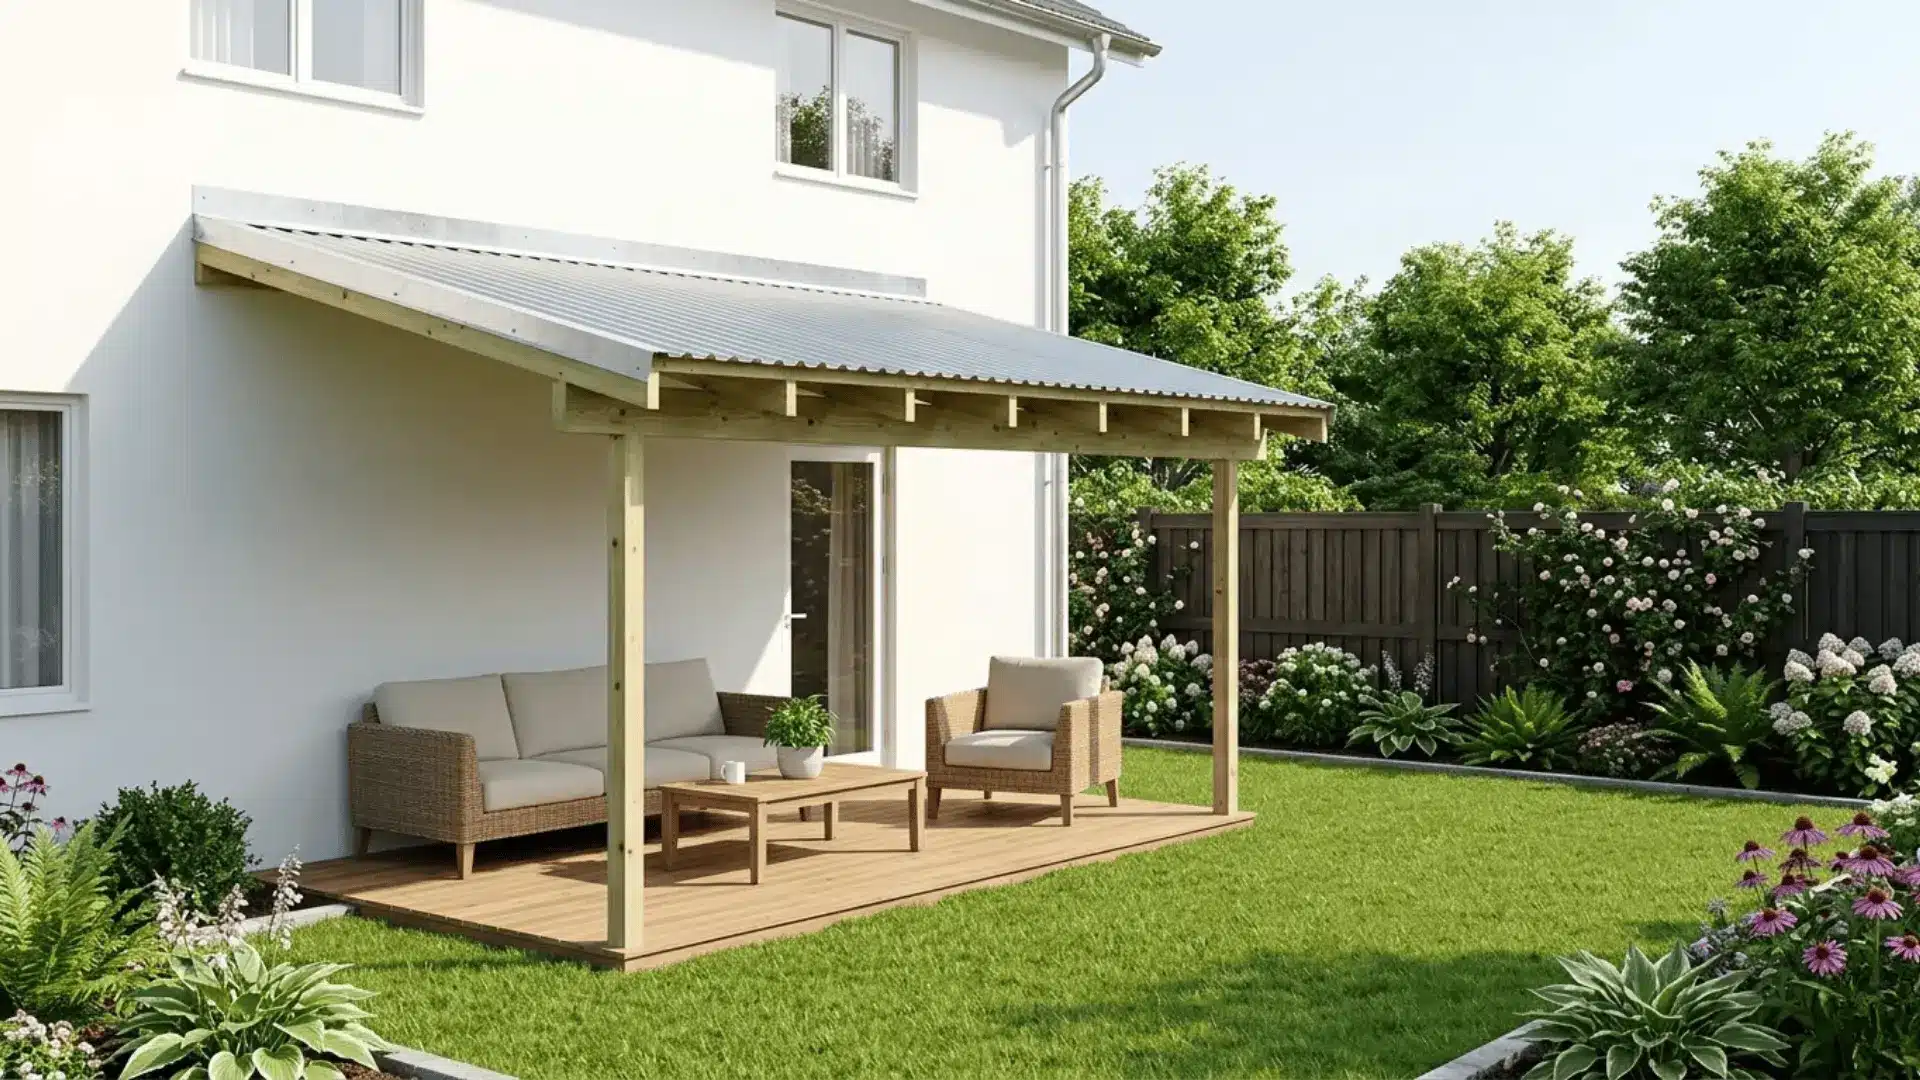
A lean-to roof attaches directly to your home’s exterior wall and creates a clean, semi-permanent covered space with minimal materials.
Here’s how to build one:
- Step 1: Attach a pressure-treated 2×8 ledger board to the house wall using 1/2 inch lag screws into studs every 16 inches, running a bead of polyurethane sealant along the top edge before screwing it in to stop water.
- Step 2: Set 4×4 support posts at the outer deck edge, cut to height so the finished roof slopes away from the house at roughly 1 inch of drop per foot of horizontal run.
- Step 3: Run 2×6 rafters from the ledger down to a 2×6 header beam on the outer posts, spaced 16 inches on center and fastened at both ends with 3-inch structural screws.
- Step 4: Install step flashing where the roof meets the house wall, a series of L-shaped metal pieces tucked behind the siding and over each rafter to stop water from running down the wall and under the roof junction.
14. Gazebo Kit on a Budget
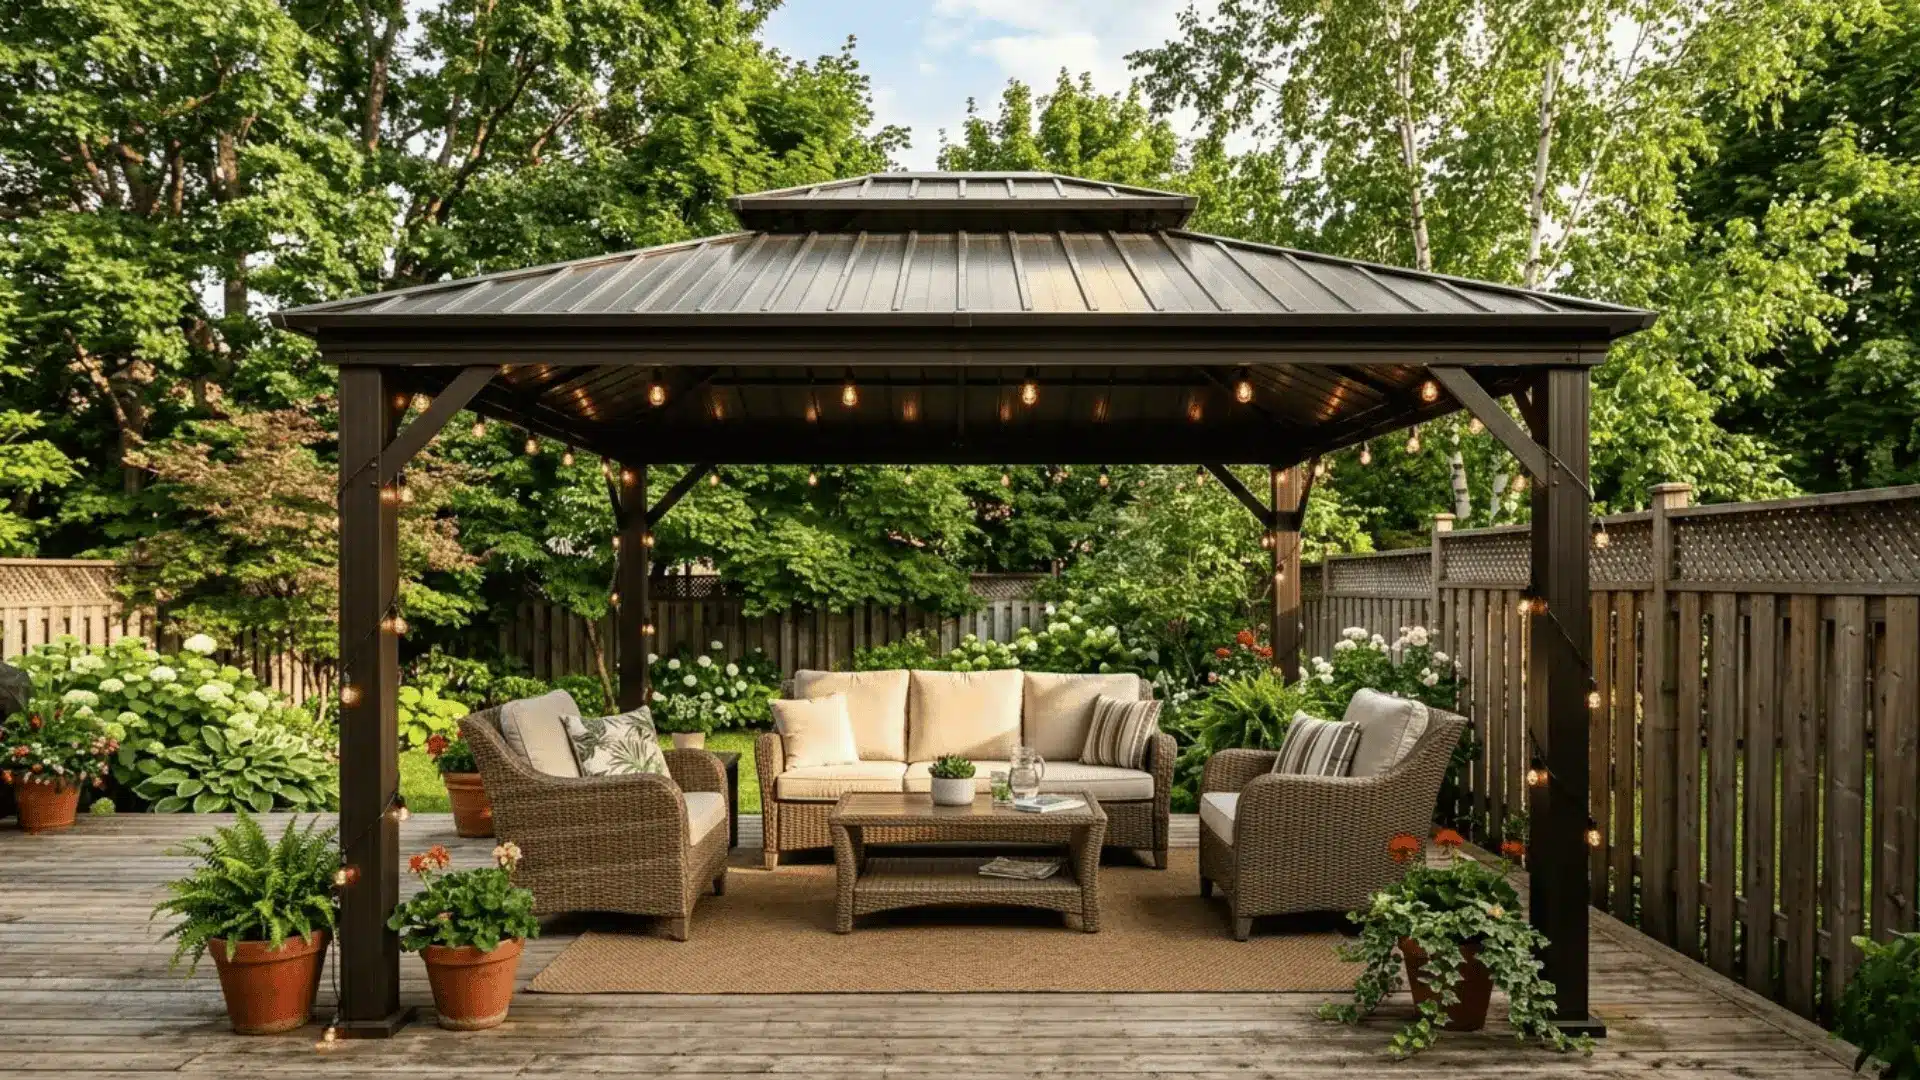
Prefabricated gazebo kits offer a fully covered outdoor room feel with very little effort and a surprisingly accessible price tag.
Here’s how to make the most of one:
- Step 1: Look for hardtop kits with a powder-coated aluminum frame rather than all-steel versions, since aluminum won’t rust and holds up significantly better over time for a small price difference.
- Step 2: Check that your deck surface is level within 1/4 inch across the full footprint before assembly, since an unlevel base causes frame joints to bind and roof panels to sit unevenly.
- Step 3: Loosely attach all bolts before tightening any of them fully so the frame can self-align before everything is locked in place.
- Step 4: Anchor the legs using the included hardware or add L-brackets rated for at least 200 pounds per corner if your area experiences strong seasonal winds.
15. Pallet Wood Pergola
Reclaimed pallet wood is one of the most accessible, low-cost building materials around, and it builds a pergola with genuine rustic character.
Here’s how to use it:
- Step 1: Source only pallets stamped “HT” for heat-treated and avoid any marked “MB” since methyl bromide-treated wood is a chemical hazard you don’t want overhead in a space you use regularly.
- Step 2: Disassemble pallets using a reciprocating saw to cut the nails rather than prying boards apart, which splits far less wood and gives you longer, cleaner boards to work with.
- Step 3: Double or triple up the thinner pallet boards for posts and beams, bonding them with exterior wood glue and screwing them together to achieve the structural depth needed.
- Step 4: Apply two coats of penetrating exterior stain or sealer once built, paying close attention to joints and end grain since those are where moisture enters first, and rot begins.
16. PVC Pipe Canopy Frame
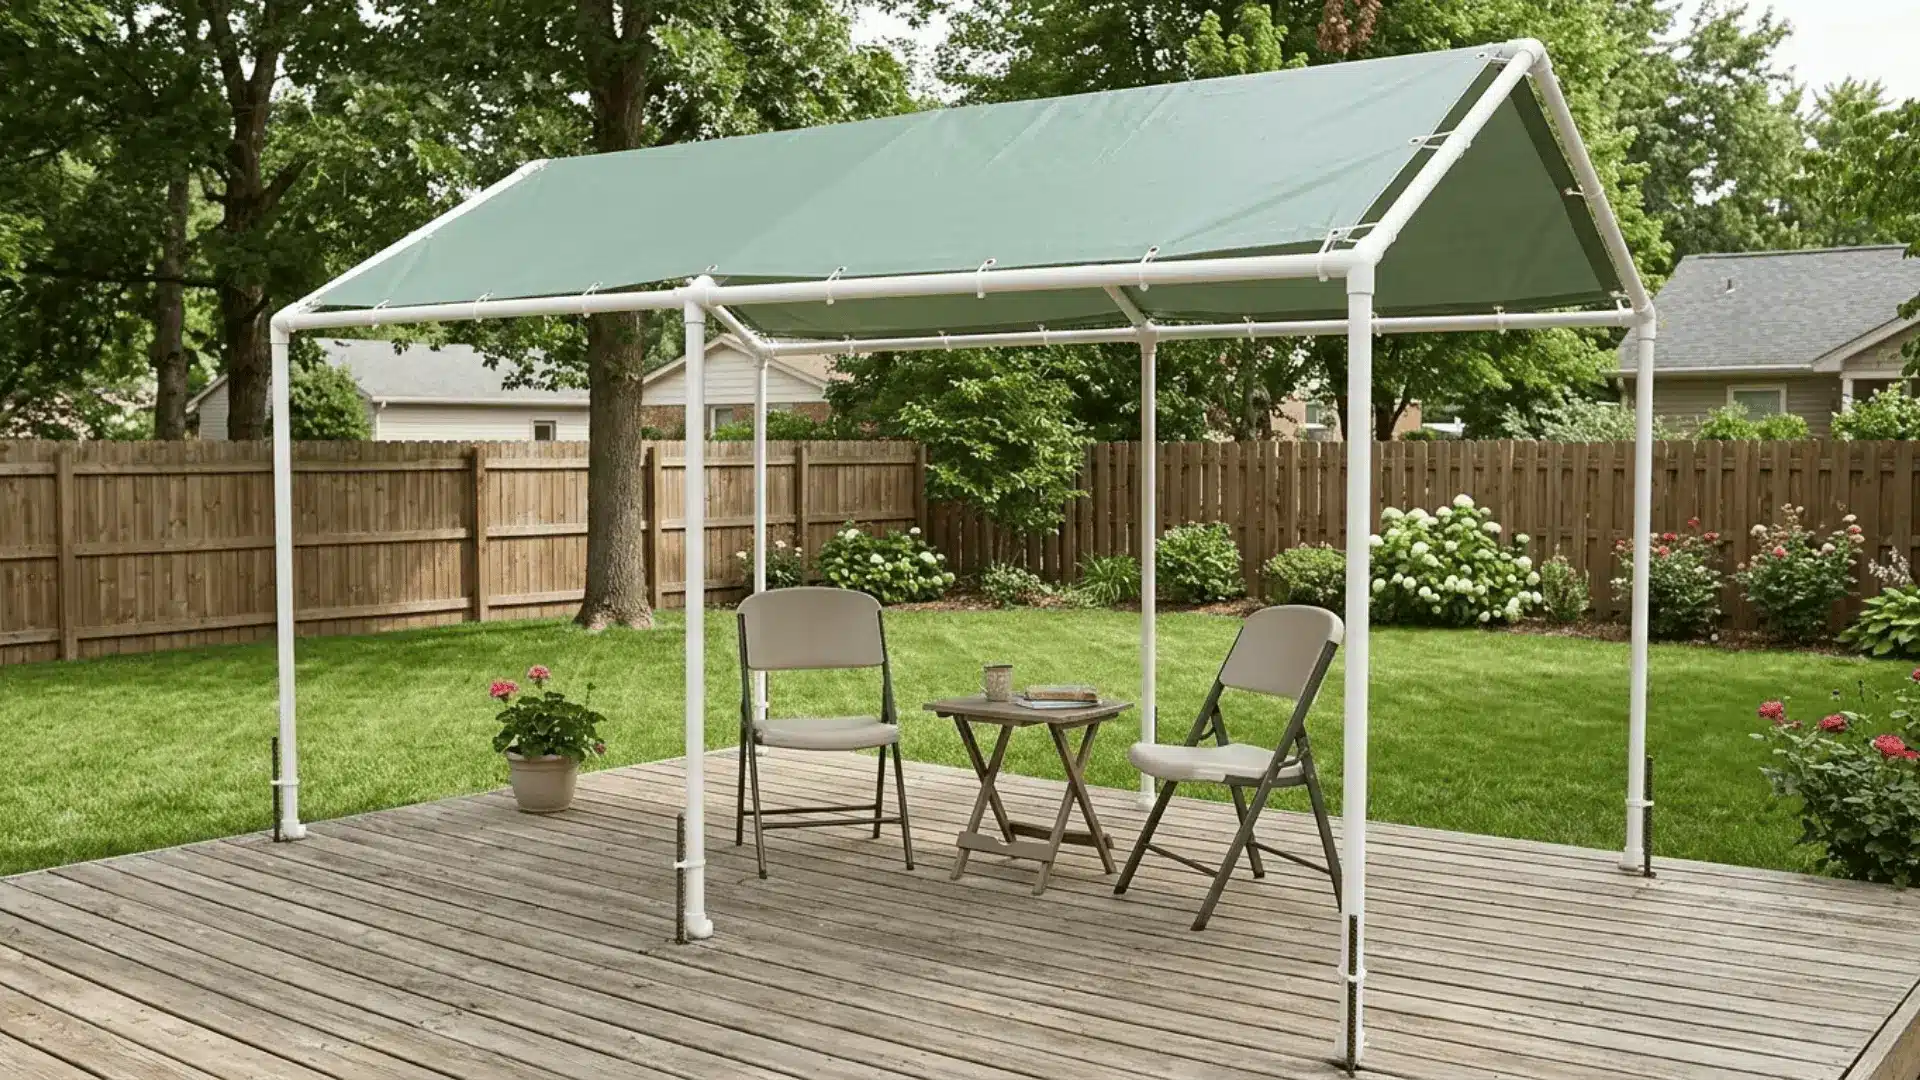
A PVC pipe frame is lightweight, beginner-friendly, and easy to put together in an afternoon. Here’s how to build one:
- Step 1: Use schedule 40 PVC pipe in at least a 1.5-inch diameter for the main frame members, since thinner schedule 20 pipe bends and sags noticeably once fabric weight and wind pressure are applied.
- Step 2: Dry-fit the entire frame first using T-joints, elbows, and cross connectors, then photograph the assembled structure before gluing anything permanently with PVC cement.
- Step 3: Drape a UV-resistant polyester or canvas tarp over the top rail and secure with zip ties through grommets every 10 to 12 inches so the load distributes evenly rather than stressing a single point.
- Step 4: Slip the PVC base corners over 18-inch rebar stakes driven into the ground or deck gaps beside each leg, which anchors the frame far more reliably than relying on its own weight.
17. Thatched Roof Cover
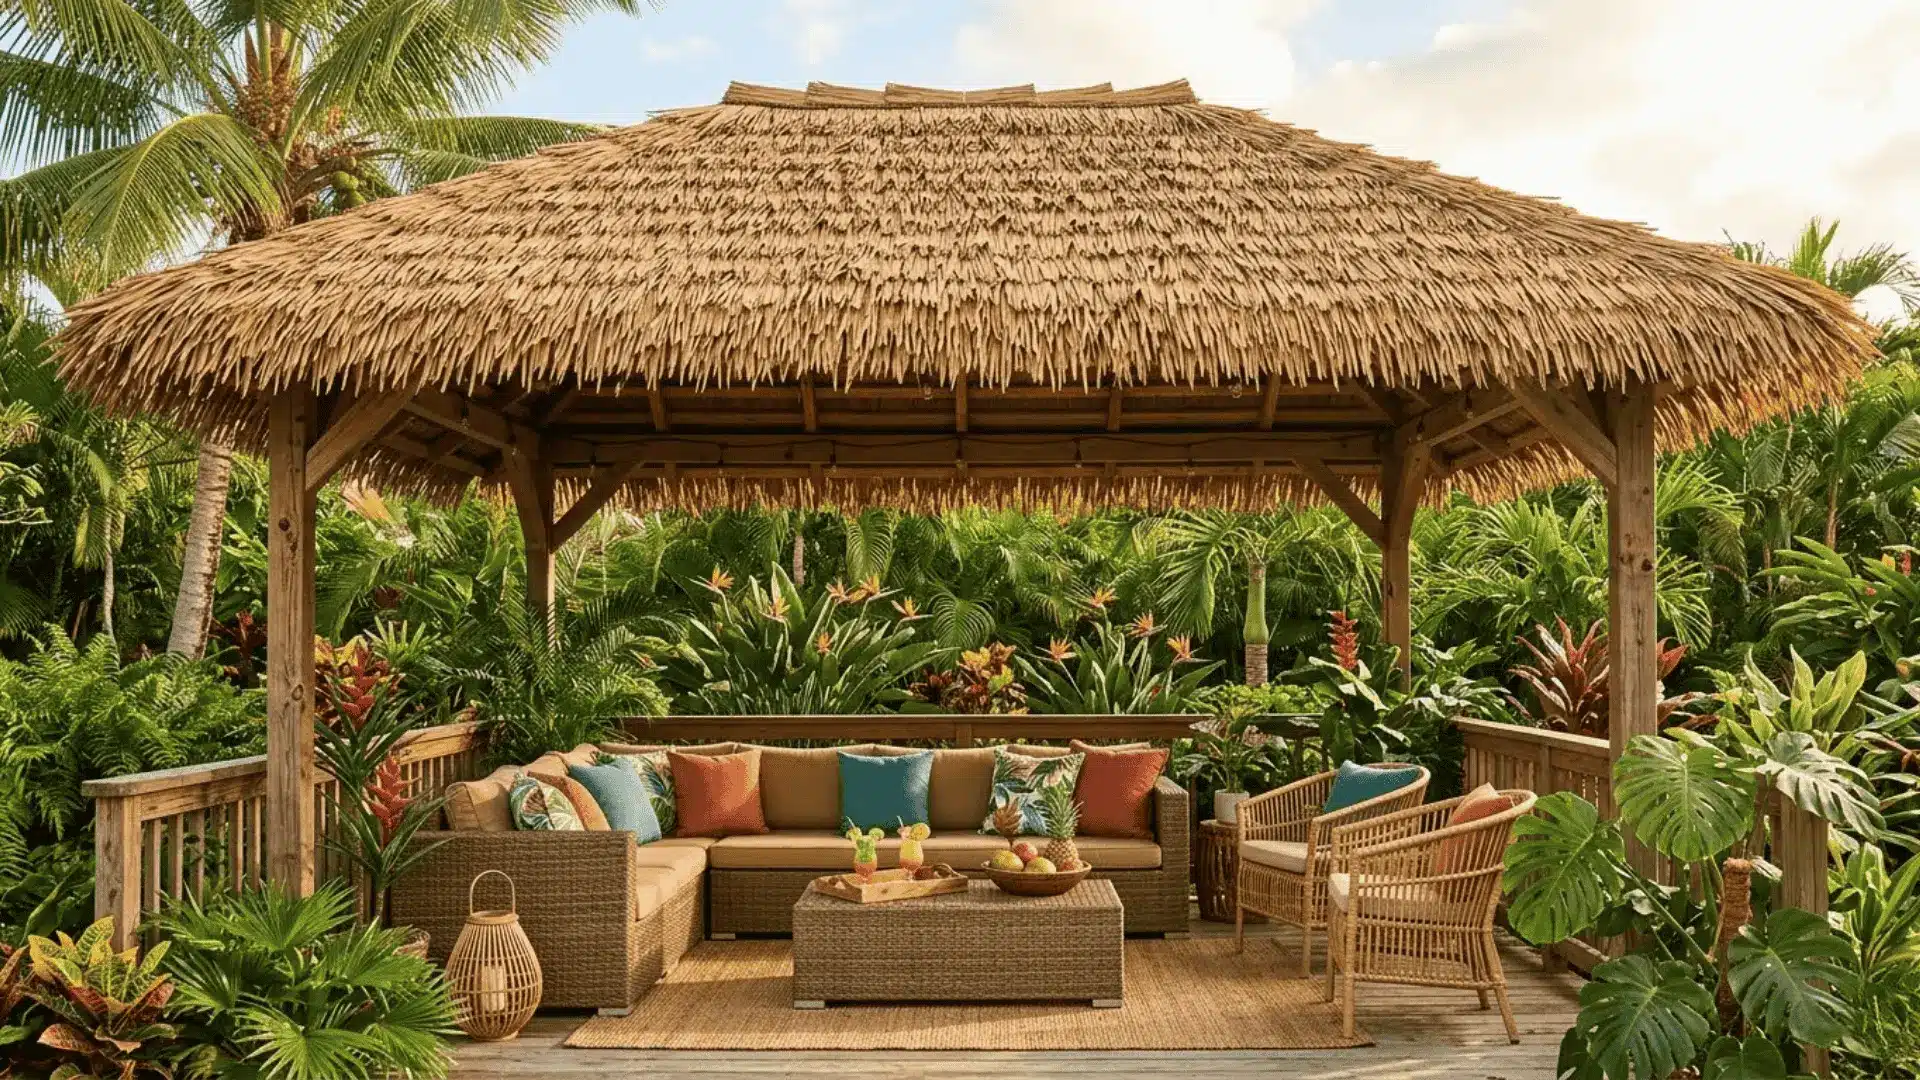
Synthetic thatch panels bring a relaxed, resort-inspired warmth to any deck without the upkeep that natural materials demand.
Here’s how to install them:
- Step 1: Build or adapt a frame with purlins spaced no more than 16 inches apart, since thatch panels need closer support than solid roofing to prevent flexing and cracking at attachment points.
- Step 2: Start at the lowest roof edge and lay the first row so panels overhang the frame by 4 to 6 inches, creating a natural drip edge that throws water clear of the structure below.
- Step 3: Overlap each successive row by at least one-third of the panel height, typically 8 to 10 inches, fastening through the overlap zone with stainless screws so fasteners are hidden by the row above.
- Step 4: Fold a double layer of thatch over the ridge peak and fasten on both sides, or use a matching synthetic ridge cap if supplied, since an unsealed ridge is the most common point where wind and rain get underneath.
18. Clear Plastic Roof Panels
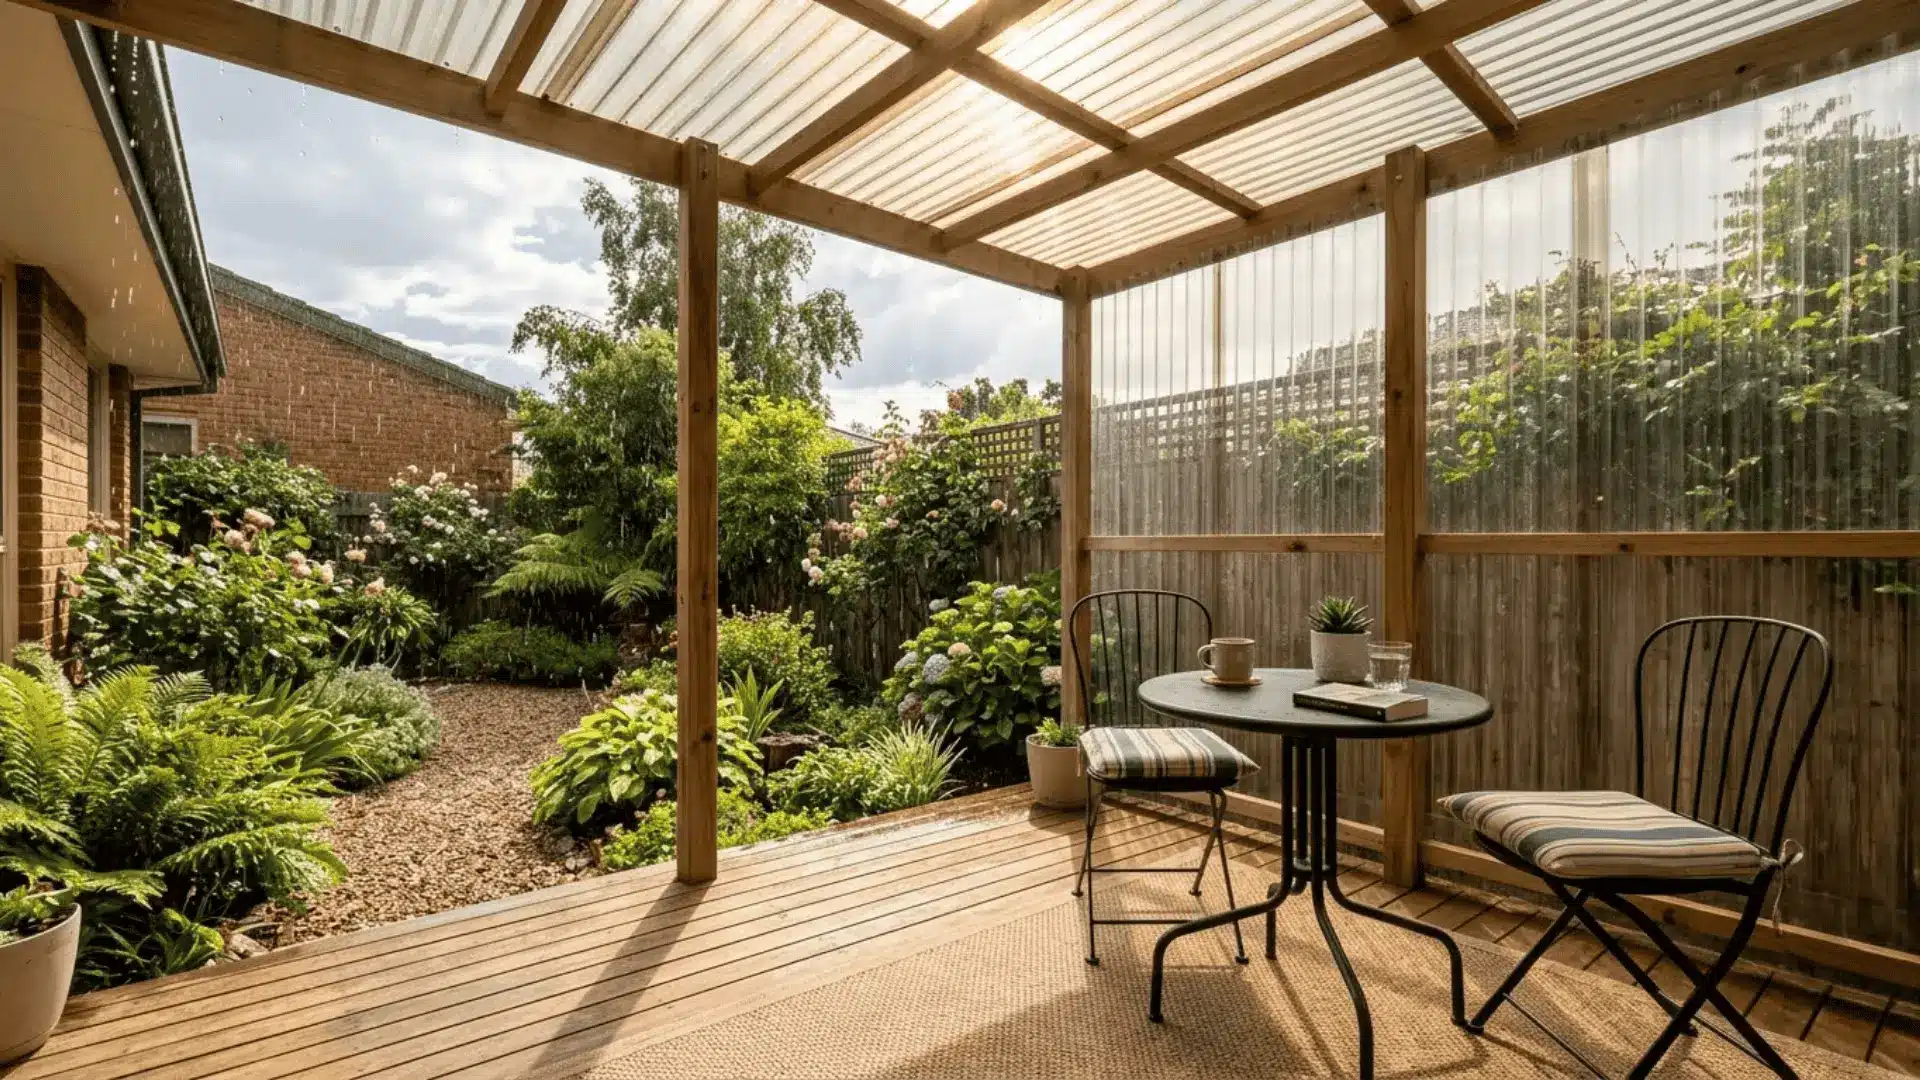
Clear plastic panels keep rain out while letting all that natural light in, which makes them a great pick for smaller or darker deck spaces.
Here’s how to install them:
- Step 1: Build a frame with a minimum 5-degree slope and space purlins no more than 24 inches apart since plastic panels sag visibly between wider spans, especially when summer heat softens the material.
- Step 2: Cut corrugated plastic with a fine-tooth jigsaw blade, scoring the cut line first with a utility knife to reduce cracking, always orienting corrugations to run down the slope for proper drainage.
- Step 3: Overlap side joints by one full corrugation width and end joints by at least 6 inches, applying clear butyl tape along each overlap before driving screws rather than relying on screw pressure alone.
- Step 4: Drive screws only through the high points of the corrugation and never overtighten, since cracking the panel around the screw hole creates an immediate leak that’s very difficult to seal cleanly afterward.
19. Trellis Roof with Shade Cloth
A trellis roof paired with shade cloth gives you a structured, purposeful look that can also support climbing plants down the line.
Here’s how to set it up:
- Step 1: Fasten wood or powder-coated metal trellis panels to the top of your beams with screws through the grid every 16 inches so the panels can’t lift or shift in wind.
- Step 2: Choose knitted polyethylene shade cloth rated between 30 and 50 percent density for a good balance of sun protection and airflow, going denser only in very hot climates.
- Step 3: Fold the cloth edges over by 3 inches before stapling to create a reinforced, doubled border that handles tension far better than stapling through a single layer at the very edge.
- Step 4: Attach the cloth perimeter to the trellis frame using stainless zip ties through the grommets every 12 inches so wind load spreads across many points rather than stressing a single spot.
20. Outdoor Roller Shades Overhead
Mounting roller shades horizontally overhead is a clever, minimal approach to deck coverage that not enough people think about.
Here’s how to do it:
- Step 1: Purchase exterior-grade roller shades in fiberglass or vinyl-coated polyester fabric since indoor fabric shades sag, mold, and lose rolling tension within a single outdoor season.
- Step 2: Mount the roller tube brackets using lag screws into solid beam wood rather than standard wood screws, since the spring mechanism puts consistent lateral stress on the mount every time the shade is operated.
- Step 3: Attach a cable, hook, or cleat system to the opposite beam so the free shade edge can be pulled taut and locked open without sagging across the middle of the span.
- Step 4: For spans wider than 8 feet, add a center support bracket and a small roller guide screwed to an intermediate beam to prevent the shade from bowing downward under its own weight.
21. Carport-Style Metal Cover
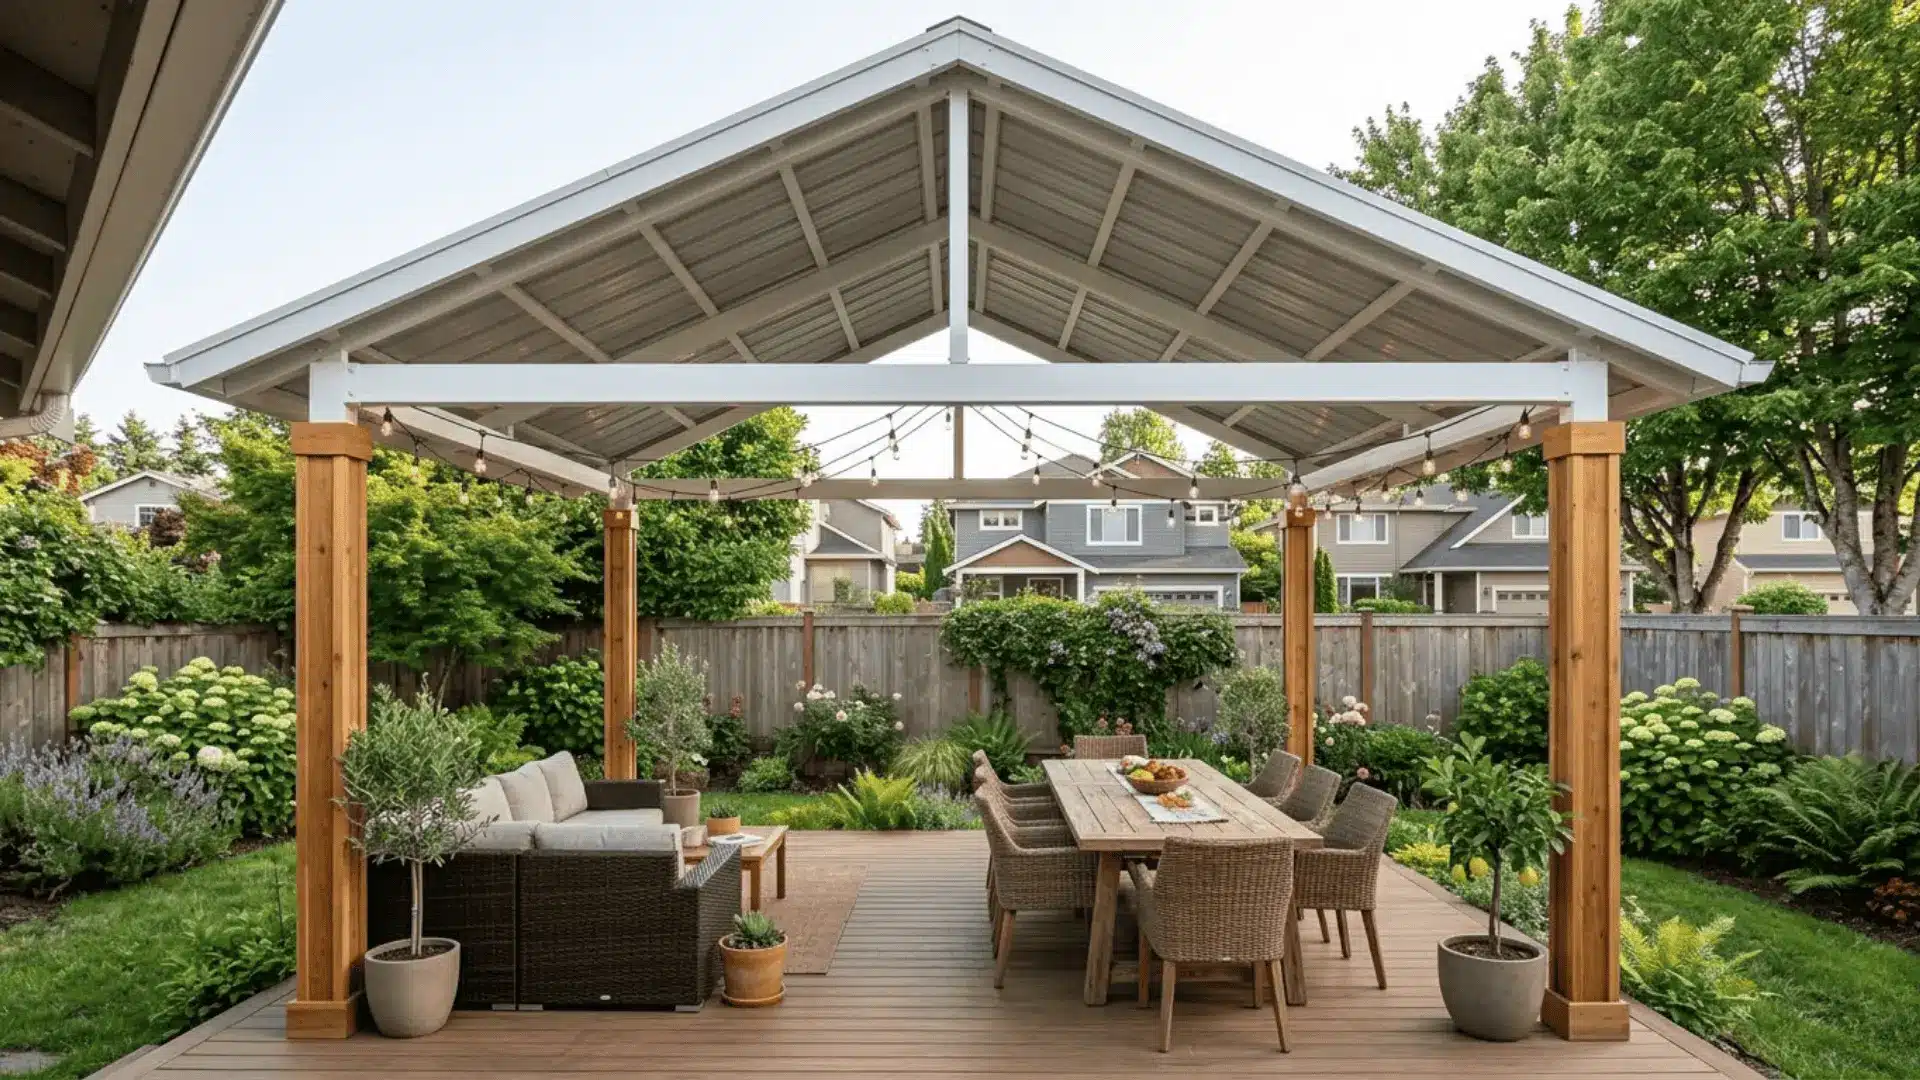
A prefabricated metal carport structure repurposed as a deck cover is broad, reliable, and available at a price point that’s hard to argue with.
Here’s how to set one up:
- Step 1: Choose a kit with legs at least 8 feet tall and a roof rated for your local snow load, since undersized kits in snowy climates can fail under a heavy accumulation.
- Step 2: Pre-drill anchor holes for the base plates before assembly begins, making sure the bolt pattern aligns with deck joists rather than just the decking boards for a structurally sound connection.
- Step 3: Assemble end frames first, connect them with ridge and purlin members, and keep all bolts finger-tight until the full frame is square before tightening everything down.
- Step 4: Wrap the posts with cedar trim boards or outdoor-rated lattice panels to conceal the raw metal legs and shift the aesthetic from utilitarian to intentional.
22. Repurposed Materials Roof (Doors, Windows, Scrap)
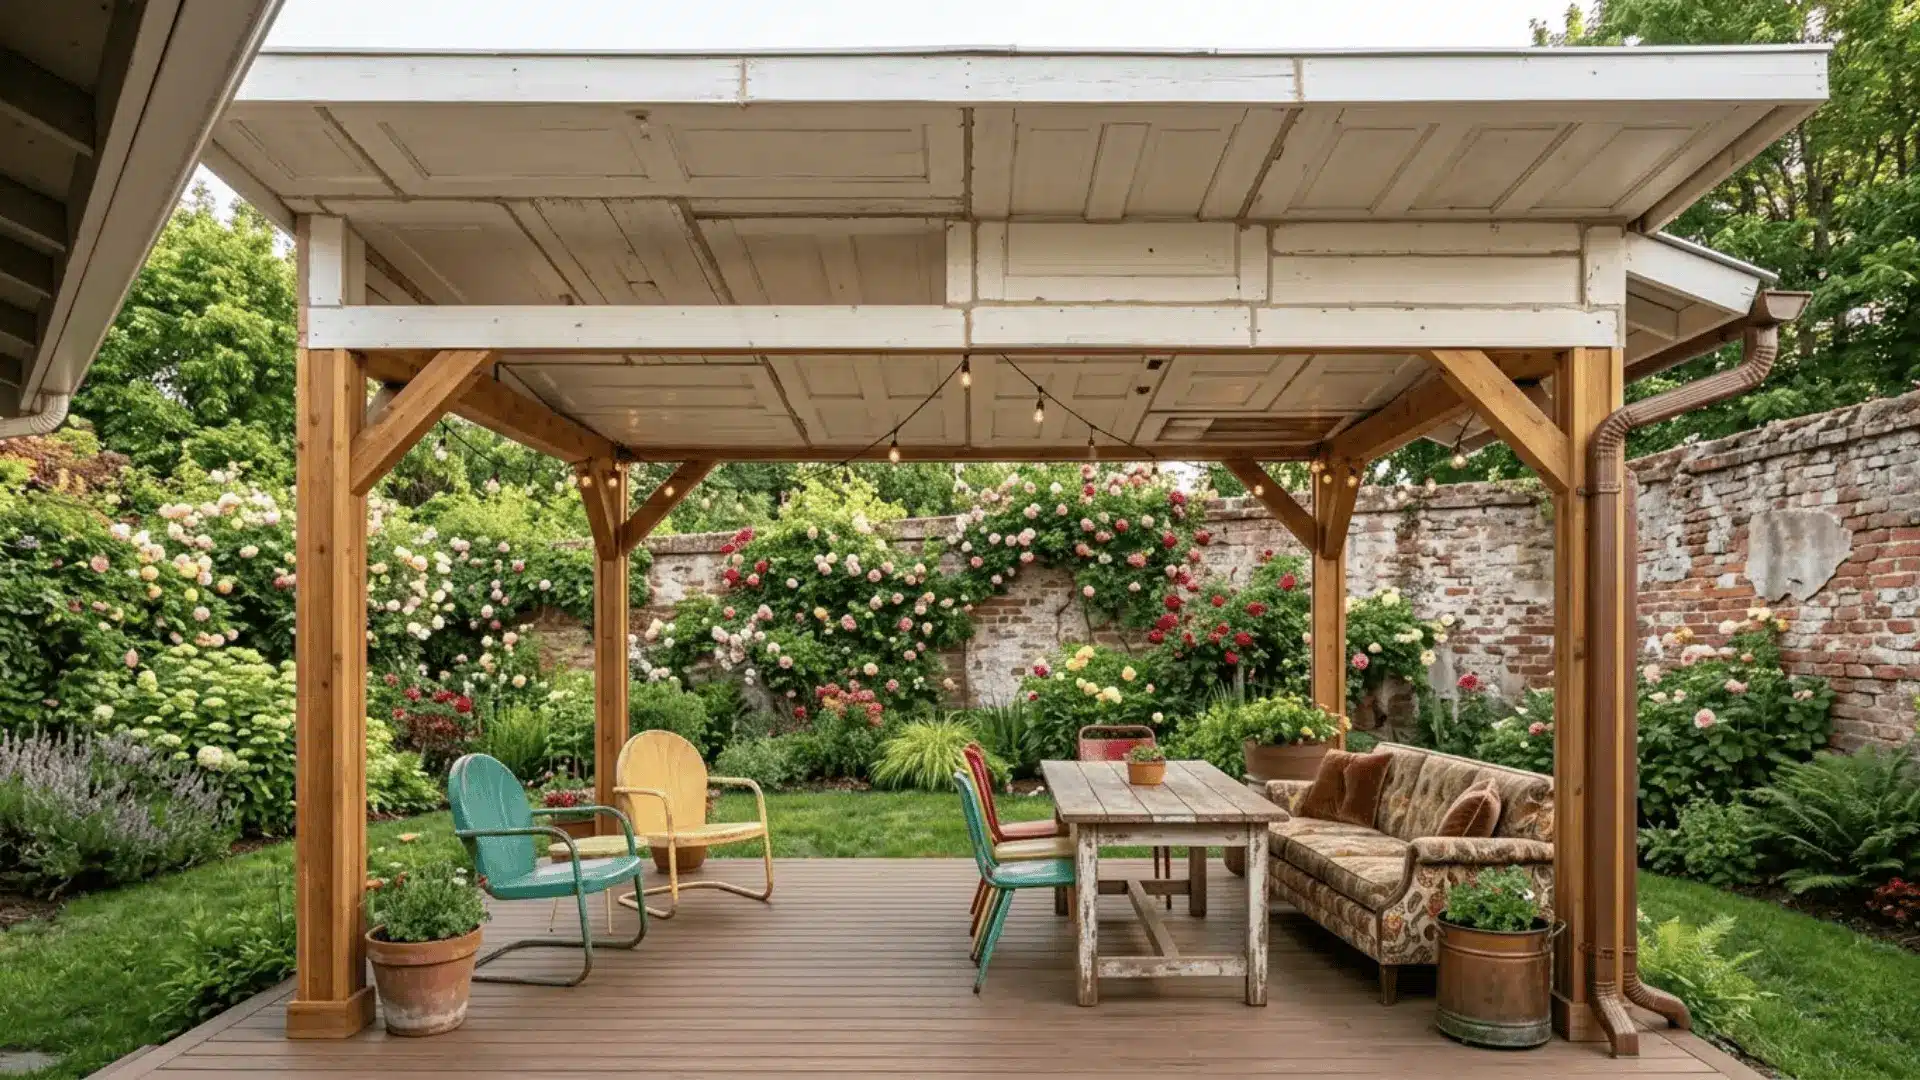
Building a roof from salvaged doors, window frames, or scrap wood creates a completely one-of-a-kind structure with real personality and an extremely low price tag.
Here’s how to approach it:
- Step 1: Visit architectural salvage yards and collect flat, solid pieces like flush doors or framed window sashes, sketching a rough layout so you know how they’ll tile together before building the support frame.
- Step 2: Build a post-and-beam frame sized to your collected materials rather than standard dimensions since fitting the frame to the salvage pieces is far easier than cutting salvage to fit a pre-built frame.
- Step 3: Lay the salvaged panels across the frame at a consistent slope and fill all joints with paintable exterior caulk, tooling it smooth so water has no path through the seams.
- Step 4: Apply two coats of exterior paint or solid-color deck stain over the entire roof surface to unify mismatched materials and add critical weather protection to older, more porous wood.
23. String Light Canopy with Fabric
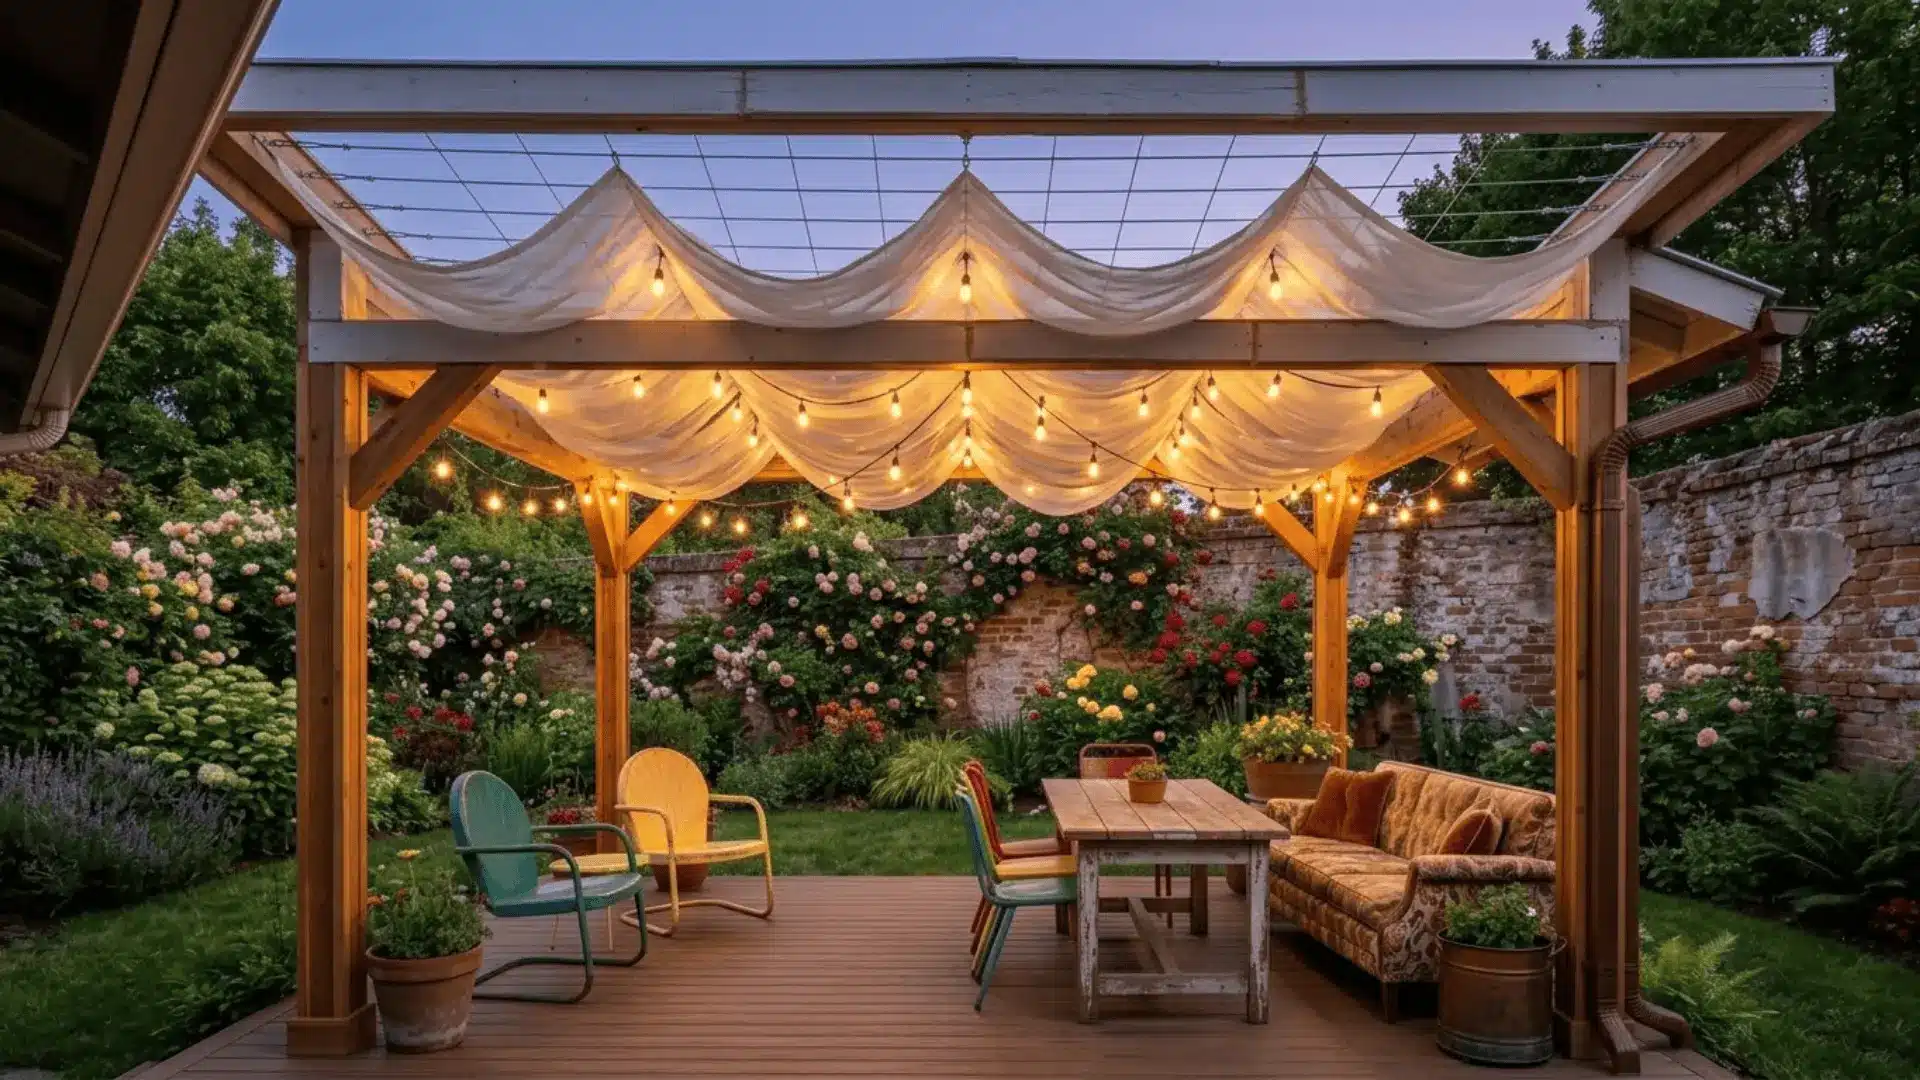
This one leans more decorative than structural, but the atmosphere it creates after dark more than earns its spot on this list.
Here’s how to put it together:
- Step 1: Install 3/8 inch eye bolts with at least a 2-inch thread length into solid structural framing around the deck perimeter, spaced every 4 to 6 feet, never into fascia boards that will pull out under tension.
- Step 2: Run 14-gauge galvanized wire cable between opposite eye bolts, tightening with cable tensioners to create a stable overhead grid that won’t sag the way rope or twine does once weight is added.
- Step 3: Drape sheer outdoor fabric loosely over the wire grid and clip it to the cables at regular intervals using small binder clips or curtain rings so it stays put without being pulled flat.
- Step 4: Weave string lights with a UL wet-location rating through the fabric from above, and plug them into a GFCI outlet only, since standard outlets without ground-fault protection are a genuine safety risk.
Best Materials for Budget Covered Decks
Picking the right material up front saves you from costly replacements down the road.
Here’s a straightforward breakdown of how the 3 main options stack up so you can make the most informed choice for your space and budget.
| Factor | Wood | Metal | Fabric |
|---|---|---|---|
| Cost | Low to moderate | Low to moderate | Very low |
| Durability | Moderate | High | Low to moderate |
| Lifespan | 10 to 20 years | 15 to 30 years | 2 to 5 years |
| Maintenance | Seal and stain annually | Inspect for rust periodically | Clean regularly, replace every few seasons |
| DIY Friendly | Yes | Moderate | Very easy |
| Best Style Fit | Rustic, natural, traditional | Industrial, modern, farmhouse | Boho, coastal, decorative |
| Biggest Pro | Versatile and easy to customize | Extremely durable and low maintenance | Fastest and cheapest to install |
| Biggest Con | Prone to rot without upkeep | Can feel cold without softening elements | Shortest lifespan of the three |
Common Mistakes to Avoid
Even the best-planned budget deck project can go sideways with a few avoidable missteps. Keep these in mind before you get started:
- Ignoring your local weather conditions when choosing materials leads to covers that warp, rust, or fail far sooner than they should.
- Opting for the cheapest materials available often costs more in the long run through frequent repairs, replacements, and weatherproofing fixes.
- Skipping proper anchoring and installation is the fastest way to end up with a structure that shifts, sags, or comes down entirely in the first strong storm.
- Overcomplicating the design for the sake of aesthetics can push a budget project well past its intended cost and timeline without adding much real value.
- Skipping local permit checks before building can result in fines, forced removal, or complications when it comes time to sell your home.
A little awareness goes a long way here. The most successful budget deck covers are the ones that are planned thoughtfully, built simply, and maintained consistently from the start.
DIY vs. Prefab Covered Deck Options
Choosing between building from scratch and buying a prefab kit comes down to three things: your budget, your skill level, and how much time you’re realistically willing to put in.
Here’s how they compare:
| Factor | DIY | Prefab |
|---|---|---|
| Upfront Cost | $200 to $800 (materials only) | $500 to $3,000 (kit price included) |
| Long-Term Cost | Low if built and sealed well | Moderate (replacement parts can add up) |
| Skill Level Required | Moderate to high (basic carpentry needed) | Low to moderate (follows included instructions) |
| Time Investment | 2 to 4 weekends | 1 to 2 days |
| Customization | Fully customizable to any size or style | Limited to kit dimensions and design |
| Tools Required | Saw, drill, level, post anchors, measuring tape | Basic hand tools and a drill |
| Structural Strength | High when properly anchored and built | Varies, lighter gauge kits are less wind-resistant |
| Best For | Unique spaces and very tight budgets | Quick installs and first-time builders |
| Biggest Pro | Complete creative control over design and materials | Fast, straightforward weekend setup |
| Biggest Con | Time-intensive and requires confident DIY skills | Less design flexibility and a higher starting cost |
That’s a Wrap
Your perfect outdoor space is closer than you think, and it doesn’t have to stretch your budget to get there.
A breezy shade sail, a charming pallet wood pergola, or even a simple fabric canopy can all prove that these covered deck ideas on a budget only need a little creativity and planning to come to life.
Pick the idea that fits your space, your climate, and your weekend schedule, and just start. The hardest part is always the first step.
Which idea are you trying first? Drop it in the comments below!