
Polyurethane has that glossy, sealed finish that protects your furniture well, which is the same reason paint slides off or peels when it goes straight on.
I found an old oak dresser at a neighbor’s yard sale and felt how smooth and glassy the finish was. It was solid and well built, but the honey-brown color felt stuck in another decade.
I could already see it painted in my own bedroom, bright and fresh against the morning light.
But the question was, can you paint over polyurethane and have the color stay put, or will it just peel?
I’ll walk you through the prep, the primers and paints that hold up, and the spots where this project usually goes wrong.
Can You Paint Over Polyurethane?
Yes, you can paint over polyurethane and get a lasting finish, but the order matters. Cleaning, sanding away the sheen, removing dust, and priming for slick surfaces all come before painting.
Fresh polyurethane needs to fully cure, as directed on the container. A finish can feel dry to the touch days before it has cured.
I would also check the existing finish before starting (not just its color!). Cracking, peeling, or flaking areas need sanding or stripping back to stable material.
Fill deep scratches or gouges with wood filler, let it dry as directed, and sand it flush.
New paint cannot hold a failing coating together, and primer will not glue it back in place.
Why is Polyurethane Hard to Paint?
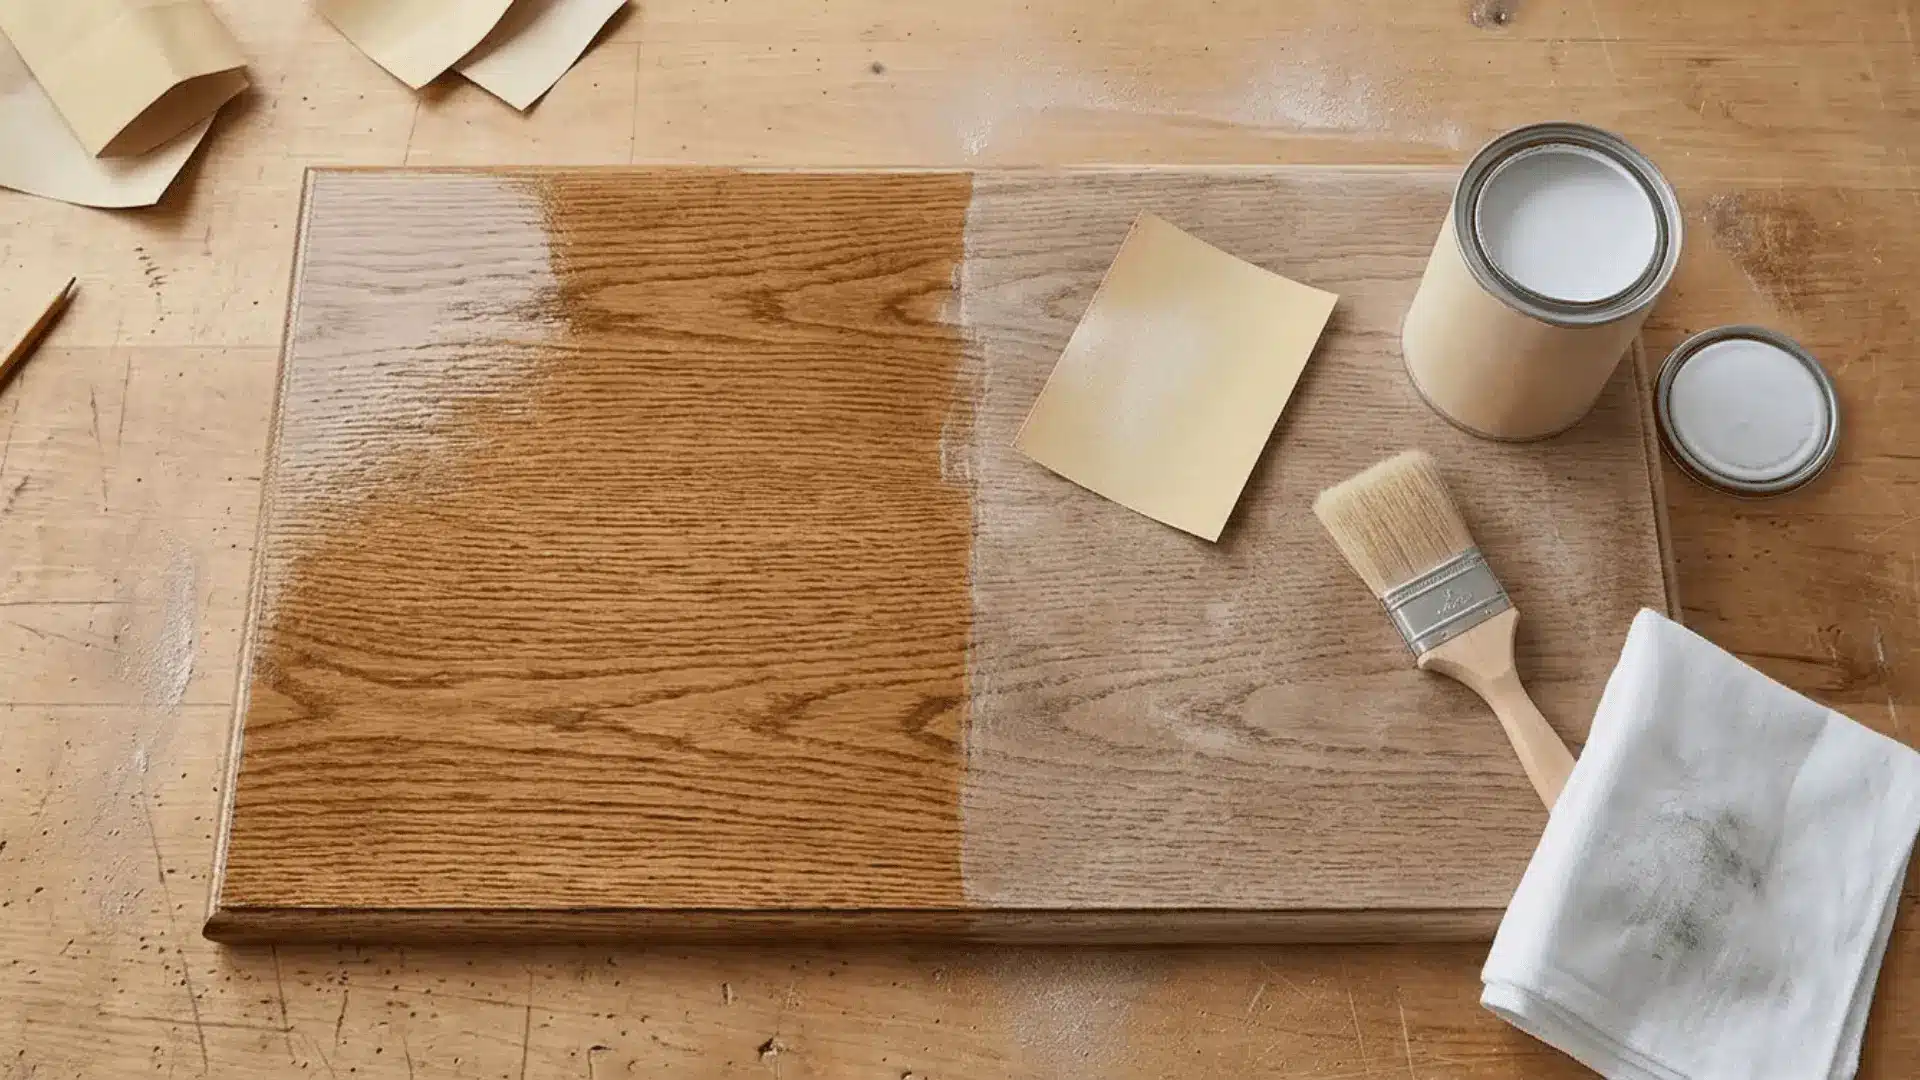
Polyurethane is hard to paint because it cures into an incredibly smooth, non-porous surface that looks beautiful but gives paint almost nothing to grip onto.
It is a clear protective finish applied to wood surfaces to seal and shield them from moisture, scratches, and daily wear.
It comes in two forms: oil-based, which is more durable and amber-toned, and water-based, which dries clear and faster.
Both create an incredibly smooth, non-porous surface that looks beautiful but gives paint almost nothing to grip onto.
What Happens If You Paint Over Polyurethane Without Prep?
Unprepped paint peels, chips, and looks patchy because it never bonds to the sealed surface underneath.
-
Peeling Starts Early: Paint lifts from edges and high-contact areas fast.
-
Finish Looks Uneven: Streaks, bubbles, and patchy coverage are common when paint sits on a slick surface.
-
Chips Appear Quickly: Handles, edges, and tabletops chip first, because daily contact keeps pulling at paint that never bonded.
-
Time and Materials Go to Waste: You end up stripping and repainting anyway, which is exactly what good prep helps you avoid.
Supplies You’ll Need to Paint on Polyurethane
Each item below has one job when you paint polyurethane, so check the last column before you buy:
|
Supply |
What It Does |
What to Look For |
|---|---|---|
|
Sandpaper |
Scuffs the polyurethane surface to improve paint adhesion |
Medium-grit (150) to rough up, fine-grit (220) to smooth after, plus a synthetic scuff pad for curves and edges |
|
Degreaser or Cleaner |
Removes grease, dust, and residue before sanding |
Dish soap and warm water for light grime, or a TSP substitute for greasy surfaces |
|
Bonding Primer |
Creates a grippy base layer between polyurethane and paint |
Look for one specifically labeled for slick or sealed surfaces |
|
Paint |
The actual finish and color you want |
Latex for ease and flexibility; oil-based for extra durability |
|
Brushes or Rollers |
Applies primer and paint evenly across the surface |
Foam rollers for smooth surfaces; angled brushes for edges and detail work |
|
Safety Gear |
Protects you from sanding dust and primer fumes |
Gloves, safety glasses, and a dust mask or respirator. |
How to Paint Over Polyurethane: Step-by-Step Guide
Sanding and refinishing release dust and fumes, so follow every product label and consult a lead-safe certified professional before disturbing paint in an older home.
This sequence is what every successful paint-over-polyurethane job follows. We’ll work in this order, letting each product fully dry before moving to the next. So, let’s get started!
Step 1: Clean the Surface Thoroughly
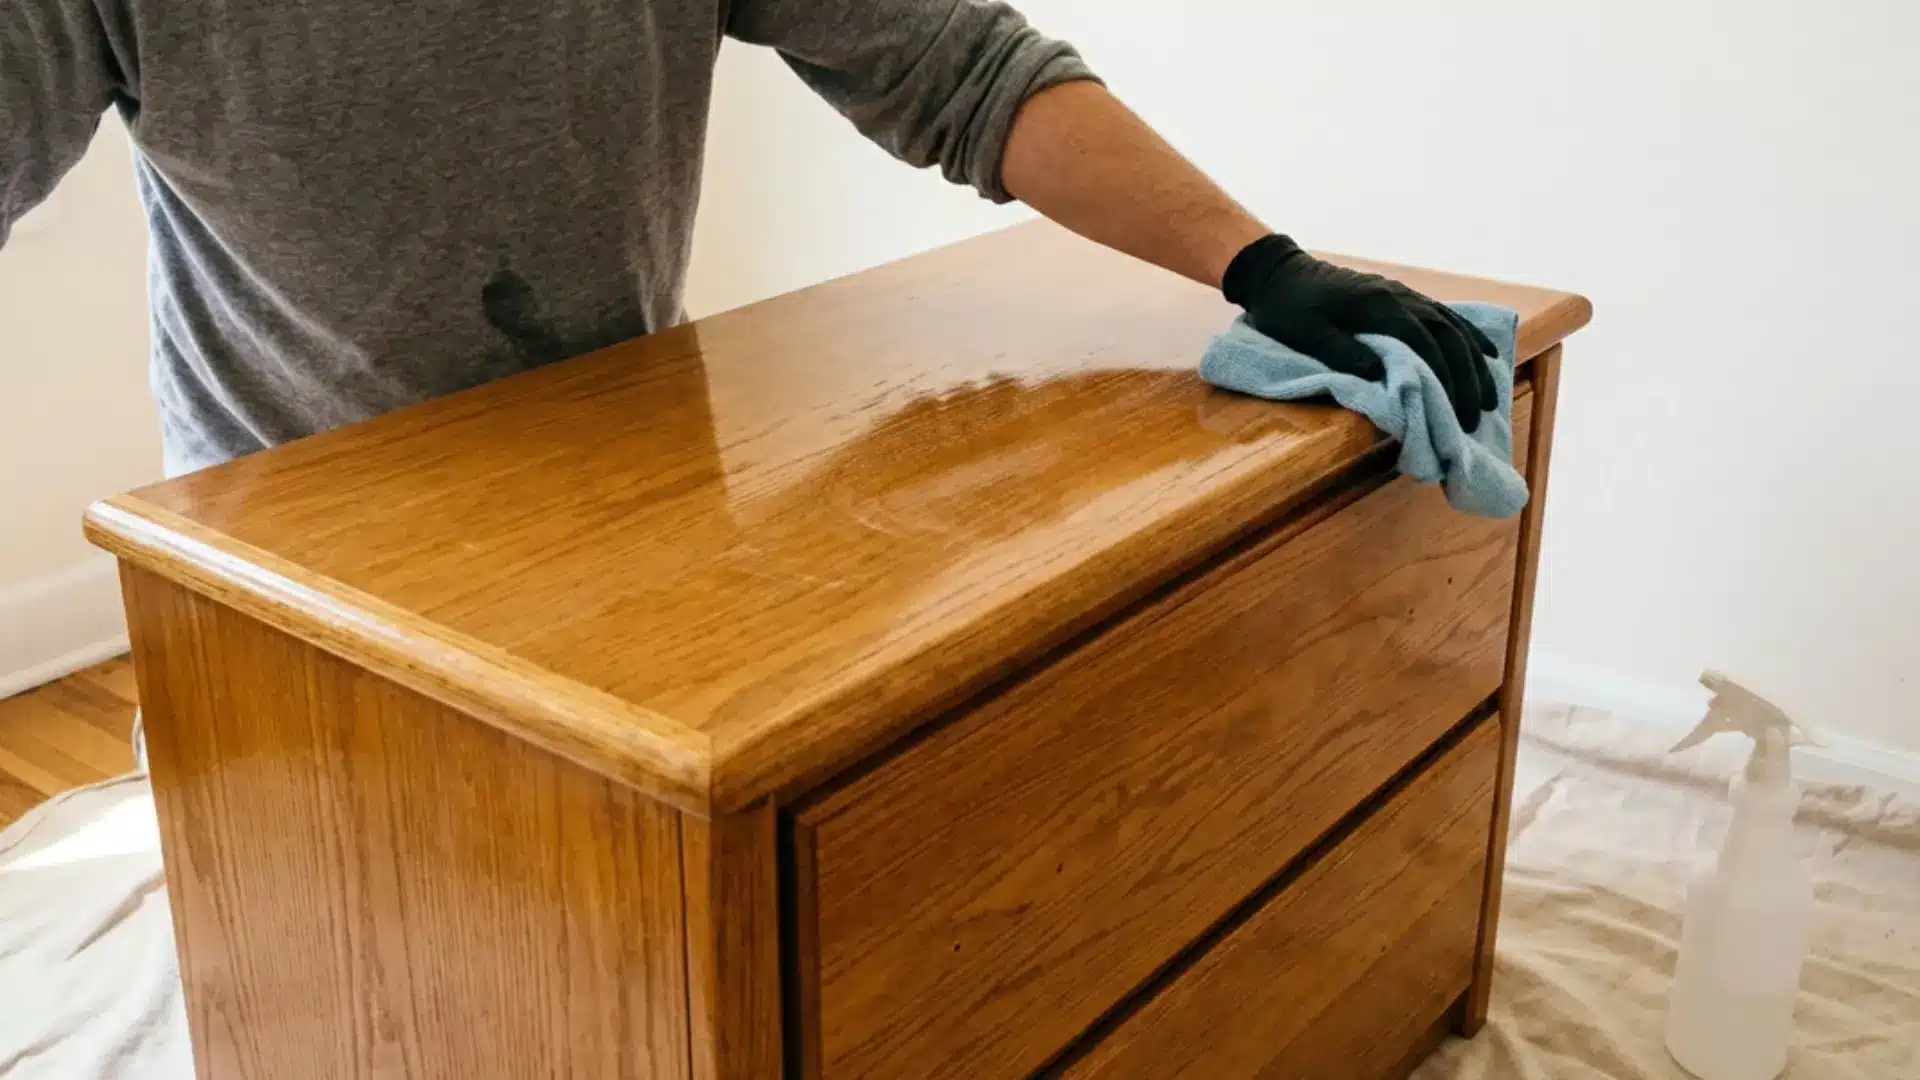
First, let the fresh polyurethane fully cure before you clean the entire surface with a degreaser or TSP substitute, following the directions.
Even wood that looks clean can hold grease, dust, or leftover cleaning products. That invisible layer can keep your primer from sticking (frustrating after all that prep!).
Remove cleaner residue as directed, then let everything dry completely. You don’t want damp wood here.
Step 2: Sand the Surface Lightly
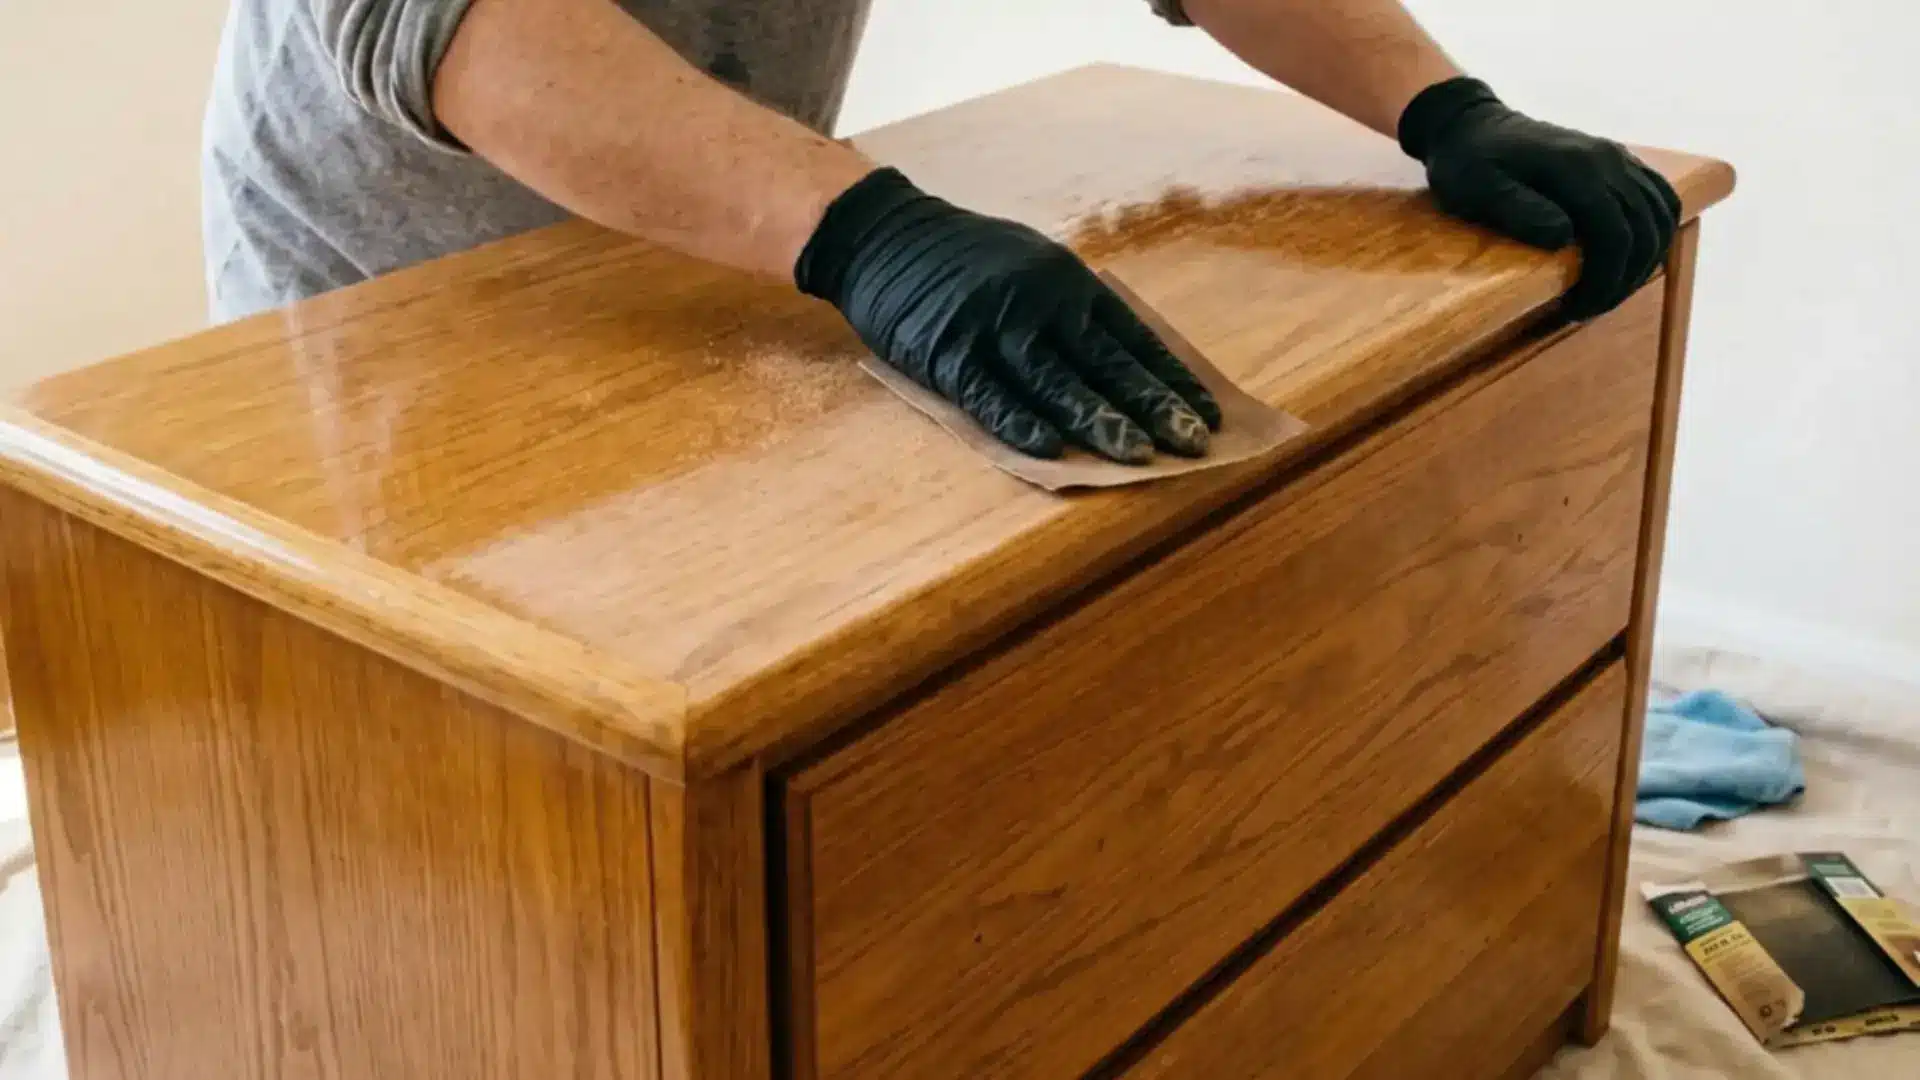
You’re not trying to strip the polyurethane, just dull it. Use medium-grit sandpaper to knock back the sheen, then follow up with fine-grit to smooth things out.
What you’re creating is tooth, a subtle texture that lets paint grip the surface and stay put over time.
Note: Older pieces need extra care. Homes built before 1978 can hide lead paint under clear coats, and EPA lead-safe practices suggest testing first, then sanding damp and light.
Step 3: Wipe Away All the Dust
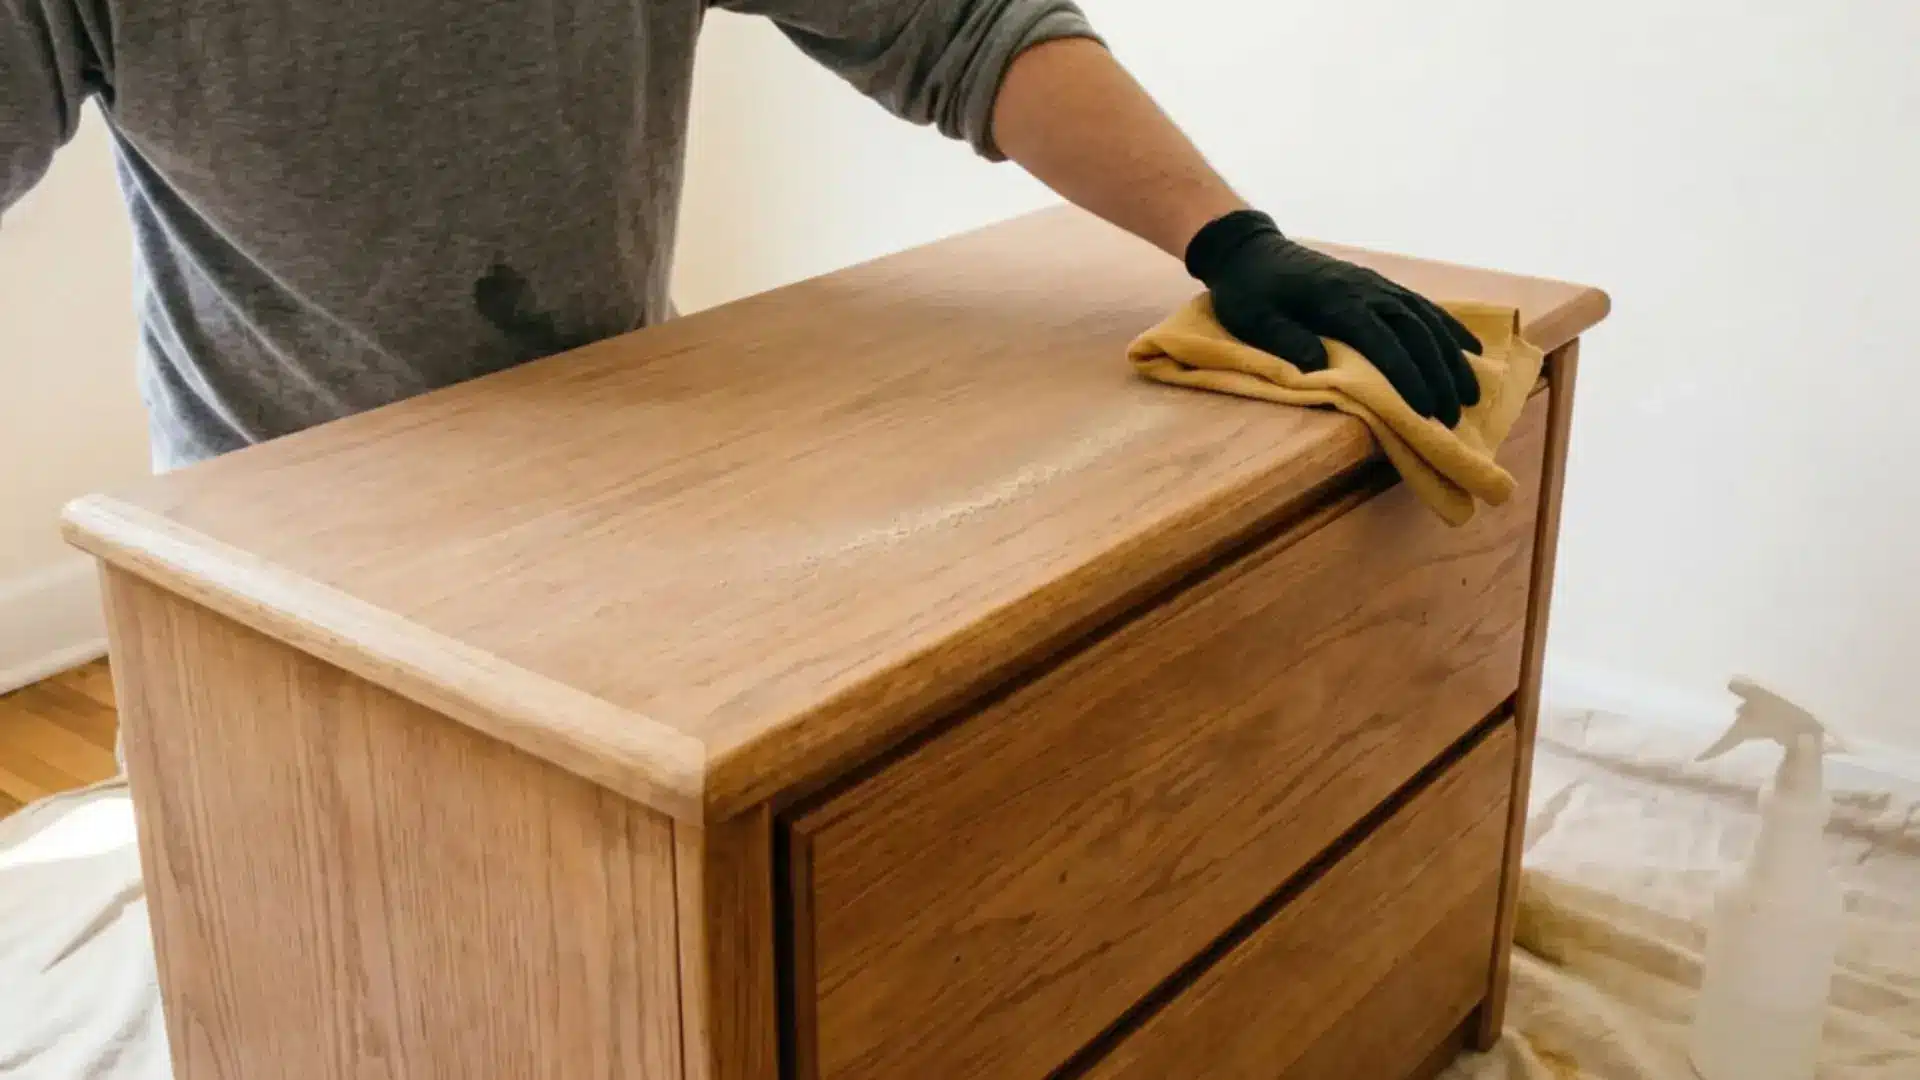
Once sanding is done, I’d wipe everything with a tack cloth or slightly damp rag, including corners and edges.
Dust under primer leaves bumps and interferes with adhesion; you want sanding texture, not loose powder! So the surface needs to dry completely before you move on.
Step 4: Apply Bonding Primer
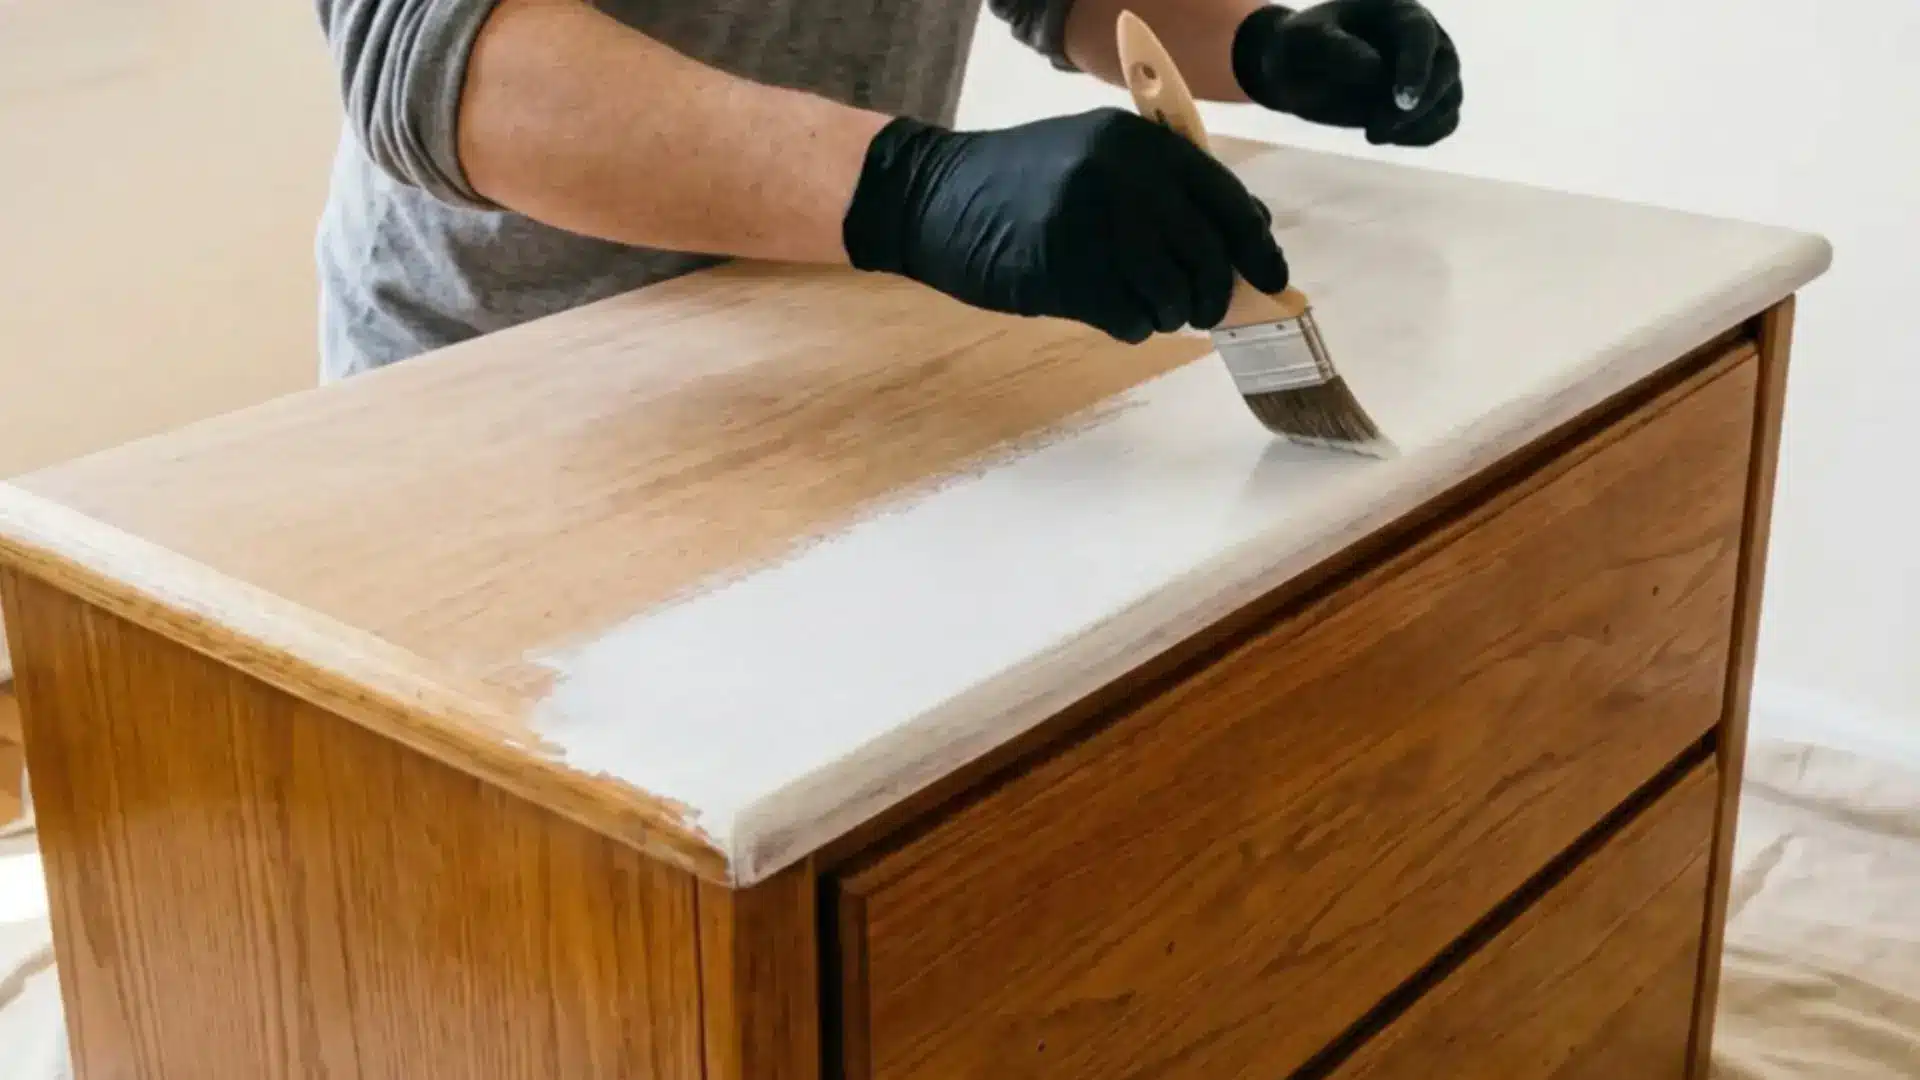
This is the step that holds everything together. A bonding primer is specifically formulated to adhere to slick, sealed surfaces where regular primer would struggle.
Apply it in a thin, even coat and let it dry for the full recoat time listed on the label. Skipping or rushing this step is the fastest way to get a finish that peels.
Before you paint the whole piece, check the bond on a hidden spot. Press a strip of painter’s tape onto the dry primer and pull it off quickly.
If primer comes up with the tape, sand that area a little more and prime again.
Step 5: Paint in Thin, Even Coats
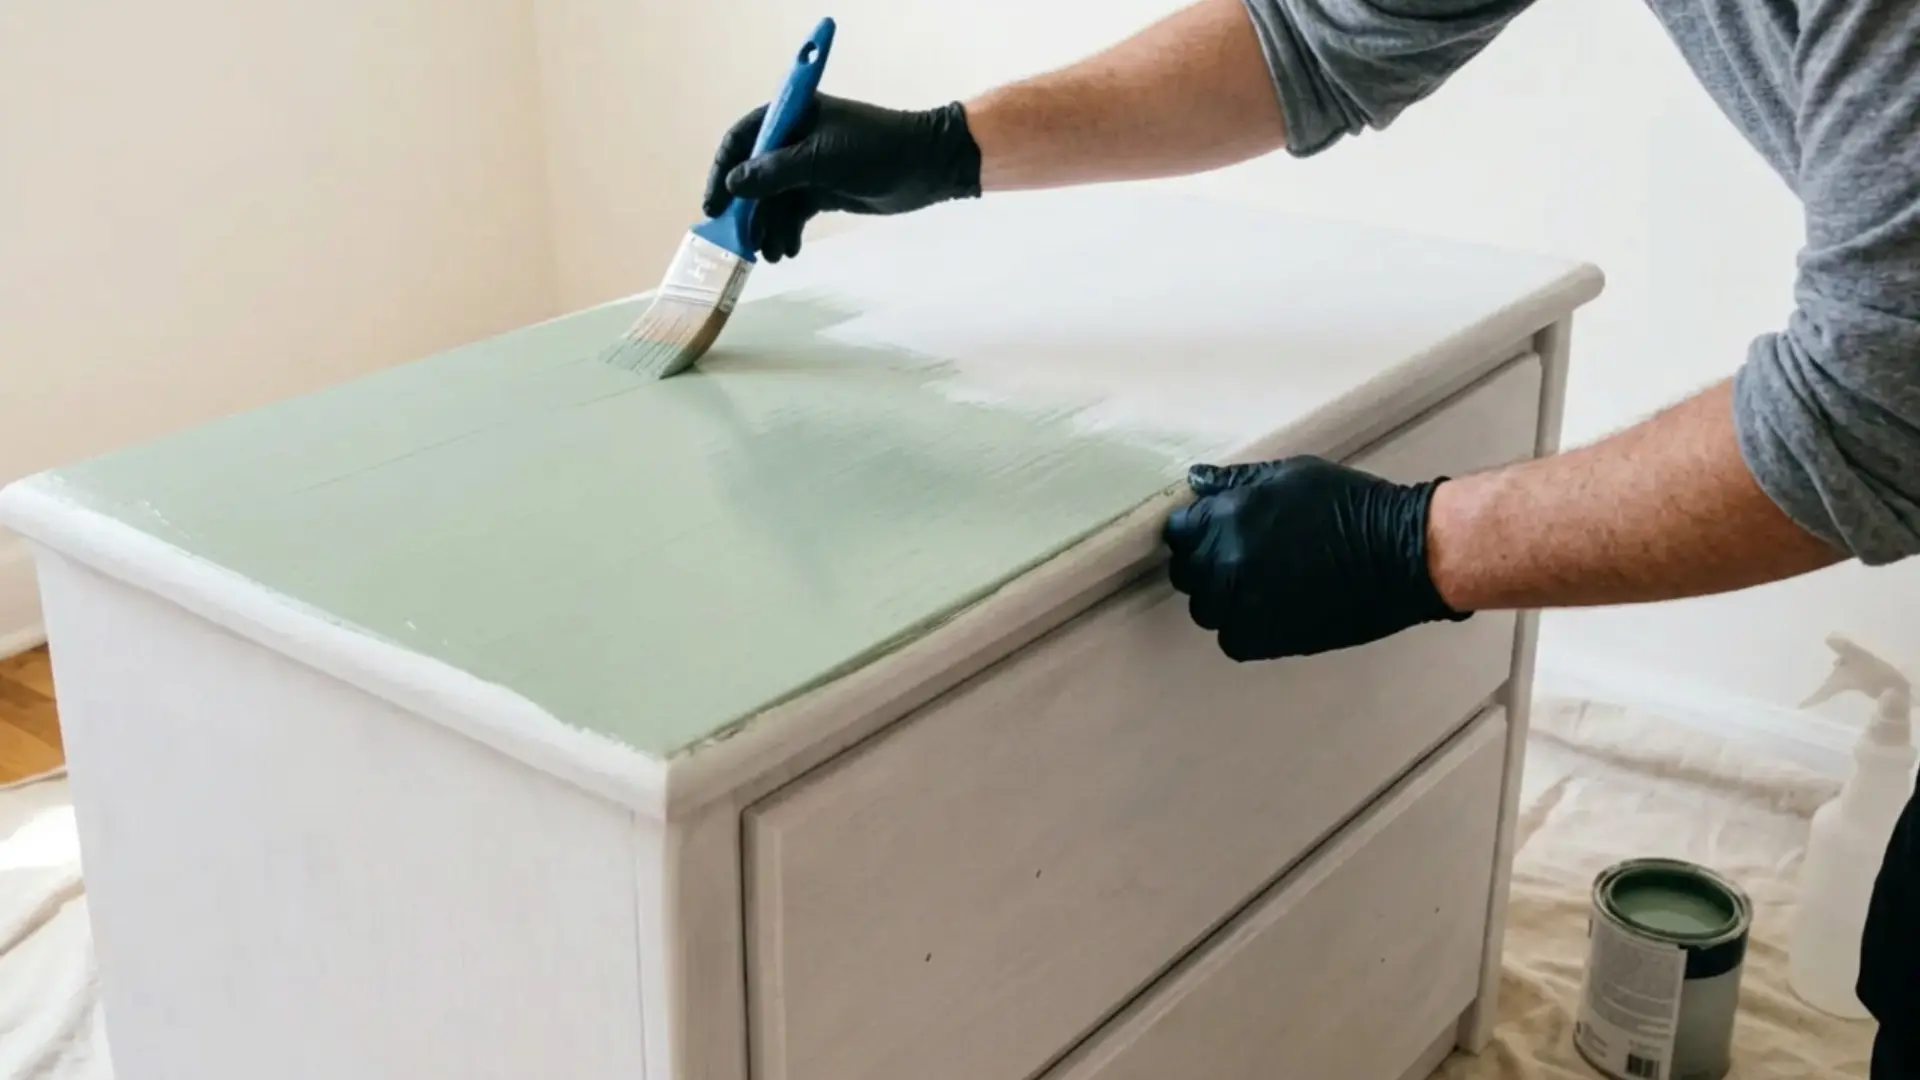
Now for my favorite part: color. I’d use light, even coats rather than covering everything at once; thick paint can drip, dry unevenly, and crack.
Two or three thin coats give you a smoother, more durable result than one heavy application.
But you still need to follow the manufacturer’s directions for letting paint dry between coats, even when the surface feels dry.
Do You Always Need to Sand Polyurethane?
Almost always, yes. I recommend sanding almost every time before you paint over polyurethane because it creates physical grip, and that extra effort is worth it when your piece gets daily use.
You have three ways to prepare the surface:
-
Sanding: The most reliable option, and the one I reach for first.
-
Liquid deglosser: Also called liquid sandpaper, it chemically reduces sheen. It helps where sandpaper can’t easily reach, but generally doesn’t replace abrasion as well on thick finishes or busy surfaces.
-
Bonding primer only: Some bonding primers say they stick to glossy surfaces without sanding. That can work on low-wear pieces, but I’d still scuff anything you use daily.
Best Primers for Polyurethane Surfaces
A bonding primer is the safest choice for any polyurethane surface, and oil-based or shellac-based primers step in for heavy-use pieces and stubborn stains.
Your pick comes down to how hard the piece works and how much fume and drying time you’re willing to put up with:
-
Bonding primer: This one works on any polyurethane surface, so I always reach for it first when I’m dealing with something slick and sealed.
-
Oil-based primer: Go with this for furniture, cabinets, and heavy-use surfaces. It grips well, but expect a longer dry time and stronger fumes.
-
Water-based primer: A good fit for walls and lighter indoor projects. It dries faster, smells milder, and cleans up with soap and water.
-
Shellac-based primer: Save this for stubborn stains and heavily coated surfaces. It bonds to almost anything, so just keep the room well ventilated while you work.
When shopping, look for “adhesion primer” or “bonds to glossy surfaces” on the label. That’s your clearest signal it’s built for this job.
Best Paints to Use Over Polyurethane
The best paint depends on how much wear our surface will get. Preparation really matters with every option (even easy-application products); no paint gets a free pass over a dirty, glossy finish.
|
Paint Type |
Best For |
Durability |
|---|---|---|
|
Latex Paint |
Walls, general wood surfaces |
Good with proper bonding primer |
|
Oil-Based Paint |
Furniture, cabinets, high-use surfaces |
Excellent; harder and more resilient finish |
|
Chalk Paint |
Furniture, decorative pieces |
Moderate; needs a wax or topcoat to seal |
|
Enamel Paint (Oil or Water-Based) |
Cabinets, trim, doors, anything heavy-use |
Very high; resists chipping and daily wear |
For anything that takes a beating daily, enamel or oil-based is worth the extra prep.
Can You Paint Over Water-Based and Oil-Based Polyurethane?
Both can be painted, but your sanding effort can differ. Water-based polyurethane usually goes on thinner and dries clear, so ordinary scuff sanding is often enough.
Oil-based polyurethane forms a harder coating and may need more abrasion. Its appearance is often warmer and yellower, while a water-based finish stays completely clear.
If unsure, I’d sand thoroughly and use bonding primer.
Older furniture may have shellac instead, so you can dab a little denatured alcohol on a hidden area underneath or behind the piece, following safe handling directions.
Shellac softens or gets gummy; polyurethane stays hard. I’d check before treating every shiny old finish the same way!
Surfaces Where Painting Over Polyurethane Works Well
You can refresh furniture, cabinets, trim, and paneling this way, matching preparation and paint to the wear.
|
Surface |
What to Keep in Mind |
|---|---|
|
Cabinets |
Full prep is essential; enamel paint holds up best here |
|
Furniture |
Chalk paint works beautifully for decorative pieces; oil-based for daily-use furniture. |
|
Trim and Doors |
Sand carefully around edges and detail work for a clean finish |
|
Wood Paneling |
Large surface area; a roller speeds things up significantly |
Floors take far more wear than any of these, so if you’re painting a polyurethane floor, use a paint made specifically for floors.
Final Thoughts
A worn cabinet, a dated furniture piece, a tired wood panel all have more potential than they let on.
The answer to can you paint over polyurethane, only turns into a problem when the prep gets skipped.
Before you commit to the whole piece, test your plan on the underside of a table or the back of a drawer. A small sample shows how the primer grips and how the color looks, and it costs you very little time.
Tried this on a project of your own? Drop your experience in the comments below, along with the primer and paint you used.
Frequently Asked Questions
Can You Paint Over Varathane?
Yes, you can paint over it. Varathane once it has fully cured. Clean it, scuff-sand away the sheen, apply a bonding primer, and then paint in thin, even coats.
Can You Paint Over Spar Urethane?
Yes, you can paint over spar urethane. Clean it thoroughly, sand to dull the glossy finish, apply a bonding primer, and finish with paint that suits your surface.
Can Chalk Paint Go Straight onto a Sealed Finish?
Chalk paint is the most forgiving option here, and a light scuff is often enough. It dries to a softer finish than oil-based or enamel paint, though, so seal it with wax or a clear coat.
Will Latex Paint Stick to an Oil-Based Finish?
Not on its own. Once you clean the surface, sand it, and apply a bonding primer, latex paint adheres well to an oil-based polyurethane finish.