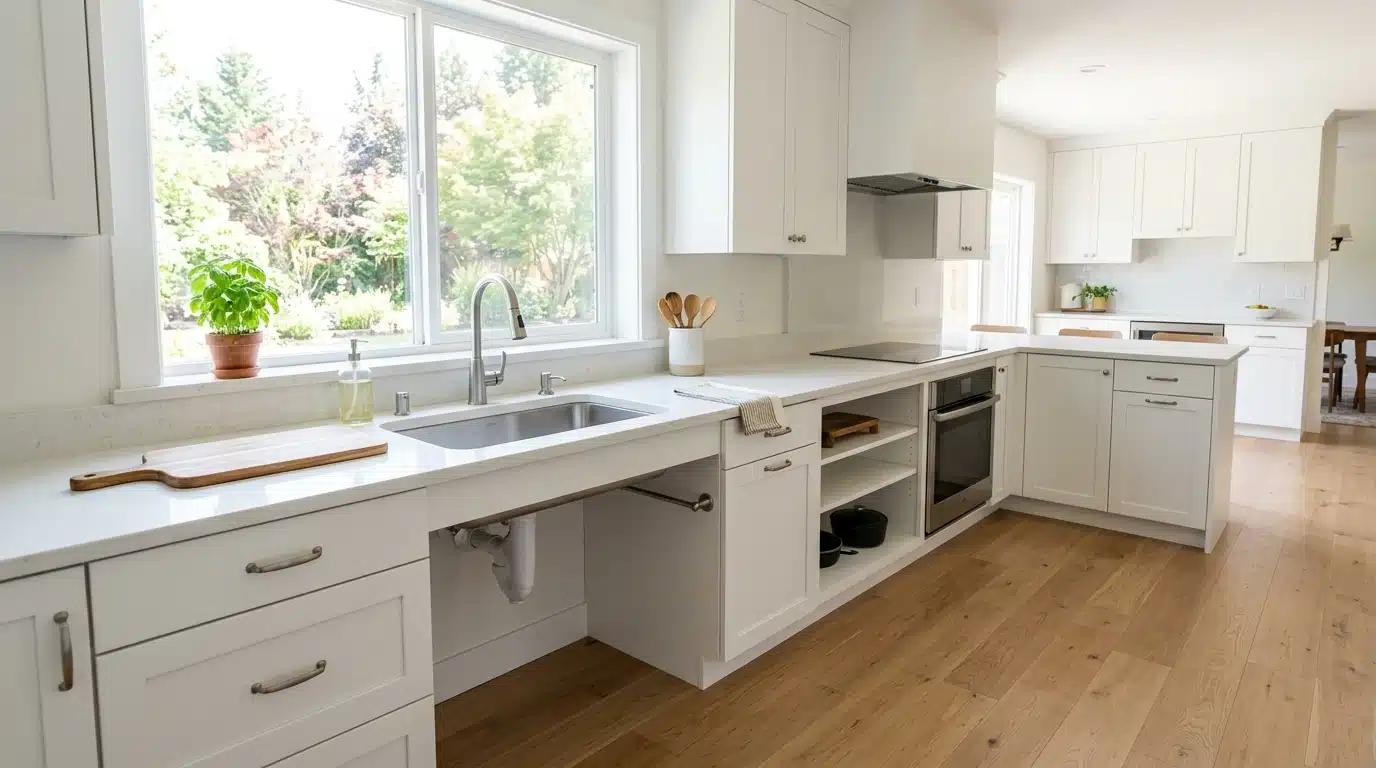
Even a quarter-inch discrepancy on a countertop can cause an inspection to fail.
I’ve watched contractors learn it the hard way when a project gets flagged on a final walkthrough. 28 to 34 inches sounds simple, but that range matters for wheelchair users reaching sinks or signing forms at a service desk.
Codes exist because bodies move differently, and a counter built for one height shuts out everyone else.
This blog walks through every ADA counter height and sink height measurement that matters, including sales, service, and built-in counters, so your next build clears inspection the first time.
What is the Standard ADA Counter Height?
ADA counter height is between 28 and 34 inches from the floor.
That range gives wheelchair users room to roll up and work comfortably. Knee clearance matters too, so codes call for at least 27 inches of open space underneath. Countertops need a maximum depth of 24 inches for easy reach.
Kitchens and bathrooms both follow this rule, and so do reception desks in public buildings.
Builders measure twice, since even an inch off can fail inspection.
Getting this right isn’t just code compliance; it’s basic accessibility done well.
ADA Counter Dimensions: Height, Length, Depth, and Clearance
Getting these numbers right saves you a failed inspection and a lot of rework.
| Dimension | Standard Requirement |
|---|---|
| Height | 28–34 inches from floor |
| Length | Minimum 30 inches clear floor space at counter |
| Depth | Maximum 24 inches |
| Knee Clearance | Minimum 27 inches high, 30 inches wide, 19 inches deep |
ADA Sink Height and Lavatory Height Requirements
Sink height rules protect both comfort and safety for wheelchair users.
The rim can’t exceed 34 inches, giving a seated person a natural reach without straining shoulders.
The depth underneath must allow full leg room, and exposed pipes must be insulated to prevent burns.
- Rim Height: Maximum 34 inches from floor
- Apron Clearance: Minimum 27 inches high at front
- Forward Approach Depth: 17–19 inches under the basin
- Toe Clearance: 9 inches high, extending 6 inches under
- Hot Water and Drain Pipes: Insulated or shielded
Contractors verify rim dimensions before installation to prevent mounting sinks too high, which defeats their purpose.
The Right Height for Each Type of Counter
Since each counter has its own purpose, ADA assigns specific ranges to each one.
1. Sales and Service Counters

The 2010 ADA Standards give builders two ways to make this counter accessible: a parallel or a forward approach.
Retail desks, bank counters, and reception desks all fall under this rule.
- Parallel Approach: A section at least 36 inches long, 36 inches high maximum. If the whole counter is shorter than 36 inches, the entire surface must drop to a maximum height of 34 inches.
- Forward Approach: A section at least 30 inches long, 36 inches high maximum, with knee and toe clearance built in underneath.
- Clear Floor Space: 30 x 48 inches positioned in front of the accessible section.
Employees on the working side rarely notice the difference, but customers feel it right away.
2. Checkout Counters

Checkout lanes follow ADA Section 904.3.
The counter surface is 38 inches, or 40 inches with a raised lip or edge protection between the counter and aisle.
The access aisle must be at least 36 inches wide and marked with the international accessibility symbol. How many accessible lanes a store needs depends on the total number of checkout aisles it runs.
A store with one to four lanes needs at least one accessible lane.
Five to eight lanes call for two, and stores with nine or more scale up from there.
Placement matters too, since a lowered lane buried in a corner defeats the purpose.
3. Dining and Work Surfaces
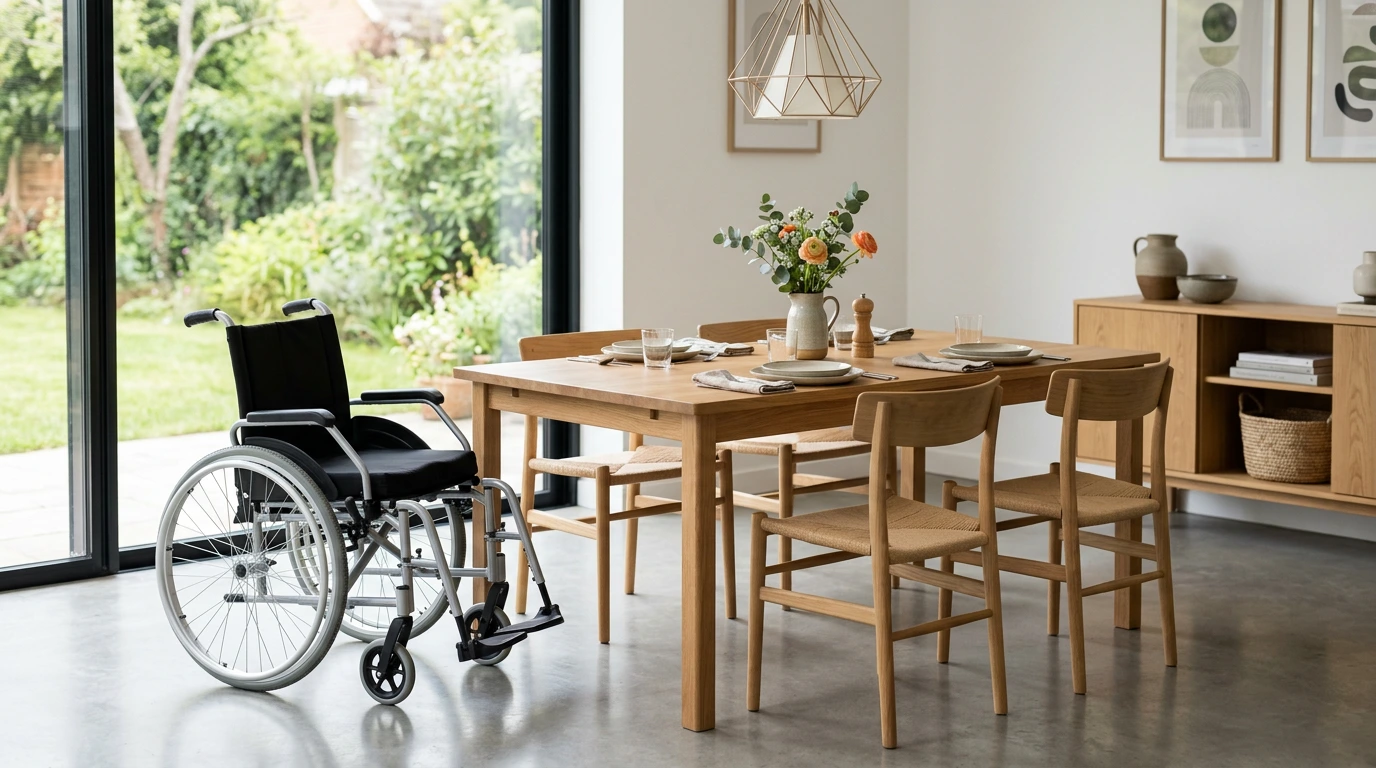
Tables and desks need enough legroom for a wheelchair to slide in fully.
Thickness at the edge often gets overlooked, but it directly eats into usable knee space underneath.
Even sturdy trim pieces can shave off inches that matter.
- Height: 28–34 inches
- Knee Clearance: 27 inches high, 30 wide, 19 deep
- Compliant Seating: Minimum 5% of fixed seats
4. Kitchen Work Surfaces
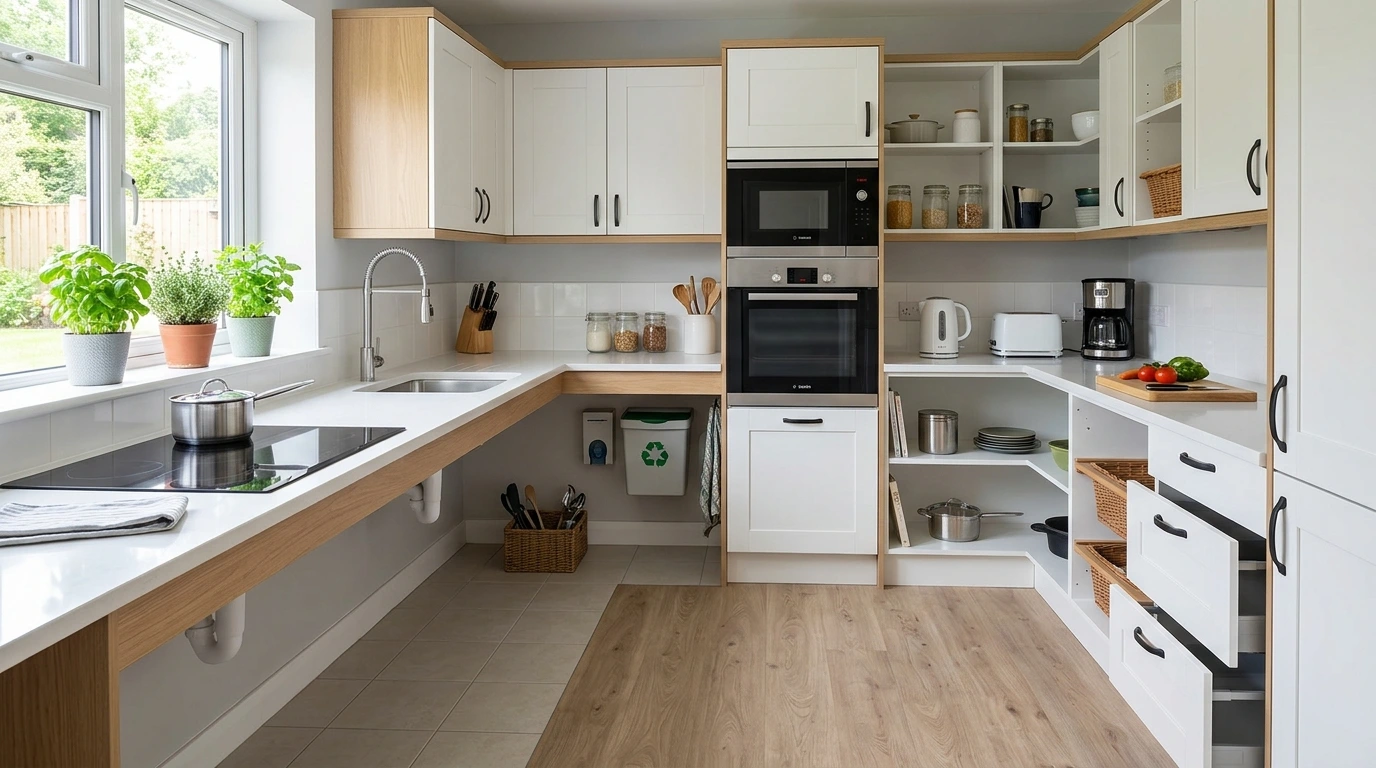
Kitchens serve cooks of every height and mobility level, so flexibility matters here more than anywhere else.
Sinks need matching clearance, since plumbing often blocks the space wheelchairs need.
Adjustable counters solve this better than fixed ones ever could.
- Height: 28–34 inches
- Max Depth: 24 inches
- Knee Clearance: 27 inches high, 30 wide, 19 deep
5. Bathroom Vanity Counters
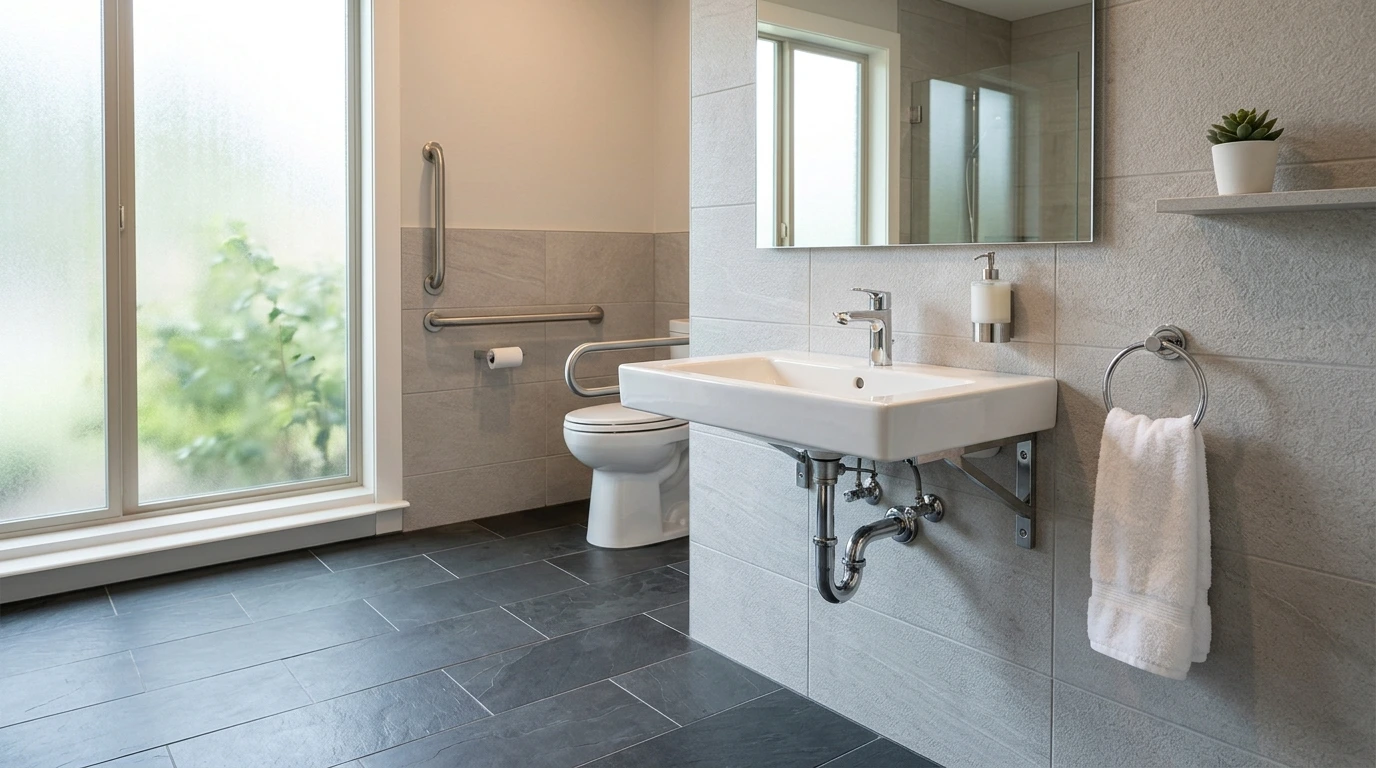
Vanities combine reach range and legroom in a tight footprint, so plumbing placement becomes critical.
Faucets and controls need to stay within easy reach for someone seated. Pipes tucked too far forward can block the exact space a wheelchair needs.
- Height: 28–34 inches
- Clear Floor Space: 30 x 48 inches
- Faucet/control Height: Max 44 inches
A vanity height helps reach these numbers by increasing knee space and removing extra cabinetry.
Clearance Under a Sink or Counter
Legroom underneath determines whether a wheelchair actually fits, so measure this space down to the inch.
| Clearance Type | Requirement |
|---|---|
| Height | Minimum 27 inches from floor |
| Depth | Minimum 17 inches, ideally 19 inches |
| Width | Minimum 30 inches |
| Toe Space Height | 9 inches max, extending 6 inches deep |
| Pipe Protection | Insulated, no sharp edges underneath |
Clearance rules connect to the rest of the house too. Simple layout choices, from wider walkways to lower storage, make daily routines easier for anyone with limited mobility.
How to Measure Counter and Sink Height Correctly
Take a tape measure and a level, because guesswork often results in failed inspections.
- Step 1: Start with an empty, flat floor surface directly below the counter.
- Step 2: Measure straight up from the floor to the counter’s top surface.
- Step 3: Record height at both the front edge and back edge.
- Step 4: Check knee clearance by measuring open space under the counter.
- Step 5: Measure the depth of that clearance from the front edge to the obstruction.
- Step 6: Note sink rim height separately from the surrounding counter surface.
- Step 7: Measure toe space height and depth near the floor.
- Step 8: Check pipe placement and confirm insulation covers hot water lines.
- Step 9: Cross-check every number against ADA minimums before calling the job done.
Common Counter Height Mistakes that Cause Problems
Contractors often round measurements instead of hitting exact numbers, and that small shortcut fails inspections.
Skipping the lowered section on service counters ranks as another frequent error.
Some builders measure only the front edge, ignoring how backsplashes or trim affect true clearance.
Sink installers sometimes forget pipe insulation, leaving exposed hot water lines as a safety hazard.
Countertop overhangs get placed too far forward, cutting into required knee space. Rushing through toe clearance checks causes issues too, since that 9-inch zone is easy to overlook.
Double-checking every dimension against code prevents costly rework later.
What Changes When an Existing Counter is Being Remodeled?
Remodeling triggers different rules than new construction, and older buildings often get some flexibility.
Structural walls or plumbing lines already in place can limit how much height can be adjusted.
Technical infeasibility clauses allow builders to get as close to code as the space permits. Existing cabinetry sometimes forces compromises on knee clearance, especially in tight kitchens.
Permits for remodels still require documentation showing why full compliance wasn’t possible.
Inspectors look for genuine effort, not shortcuts disguised as limitations.
Older homes converted to rentals or public spaces face tougher scrutiny than private upgrades.
Official Measurements and Standards to Check Before Building
Pull the current 2010 ADA Standards for Accessible Design from the U.S. Access Board before drafting any layout.
Local building codes sometimes add stricter requirements on top of federal minimums, so check both.
ANSI A117.1 standards often get referenced alongside ADA for state-level projects. Confirm whether the project falls under public accommodation rules or residential exemptions, since requirements shift accordingly.
Cross-reference clearance, height, and depth numbers against your jurisdiction’s amendments.
Building departments usually publish checklists specific to counters and sinks. Reviewing these documents early saves time, since fixing framing after drywall goes up costs far more than catching errors on paper.
Counter Height vs. Other Accessibility Dimensions
Counters don’t work alone, so comparing them against nearby accessibility features shows how spaces connect.
| Feature | Standard Requirement |
|---|---|
| Counter Height | 28–34 inches |
| Door Width | Minimum 32 inches clear |
| Ramp Slope | Maximum 1:12 rise-to-run ratio |
| Grab Bar Height | 33–36 inches from floor |
| Light Switch/Outlet Height | 15–48 inches from floor |
Frequently Asked Questions (FAQ’s)
1. Is There a Code for Countertop Height?
Yes, the ADA sets 28–34 inches as the standard range for accessible countertops.
2. How Much Lower Are ADA Countertops?
ADA counters sit roughly 2–8 inches lower than the standard 36-inch kitchen counter height.
3. What is the Maximum Height for ADA Counter Outlets?
Outlets near ADA counters max out at 48 inches from the floor.
4. Do All Receptacles Need to Be ADA Compliant?
No, only outlets in accessible routes or designated accessible spaces require ADA compliance.
5. What is the Right Height for an ADA Kitchen Counter Receptacle?
Kitchen counter receptacles should sit between 15 and 48 inches from the floor.
Wrapping It Up!
Numbers on a blueprint mean nothing until they’re built correctly.
ADA counter height standards protect real people trying to live, shop, and work without obstacles.
Every inch documented here, from knee clearance to outlet placement, serves that same goal.
Skipping measurements or rounding numbers creates unintended barriers. Contractors who treat these codes as a checklist, rather than an afterthought, save themselves rework and protect their clients from costly violations.
Have you run into a counter height detail that caught you off guard on a job or a remodel?
Drop it in the comments. It might save the next reader a failed inspection.