Canna lilies can produce towering foliage and bold flowers, but poor planting choices may delay the first shoot from appearing.
Learning how to plant canna bulbs correctly begins with warm soil, proper depth, good drainage, and enough space for each rhizome to spread. In my own beds, the same few mistakes keep coming up with new gardeners, so I’ll flag those along the way.
You will find clear guidance on planting time, site preparation, rhizome direction, spacing, sunlight, watering, feeding, and container care.
Pest control, weak flowering, seasonal maintenance, common planting mistakes, and canna lily care basics are also explained. Gardeners in colder areas often ask: can you leave canna lilies in the ground?
These practical instructions will help you establish healthy plants, support steady growth, and enjoy stronger blooms throughout the growing season.
What are Canna Bulbs?
Cannas are often sold as bulbs, but their thick underground structures are technically called rhizomes. These rhizomes grow sideways beneath the soil and store the energy needed for roots, shoots, and future growth.
Small surface marks are usually harmless, but soft areas, dark decay, strong odors, or spreading mold may signal rot. Check each rhizome carefully before planting, as damaged sections can worsen in cold, wet soil and reduce the chance of healthy sprouting.
Once you identify a healthy canna rhizome, choose a warm planting time that supports fast rooting, steady sprouting, and strong early growth.
How to Plant Canna Bulbs?
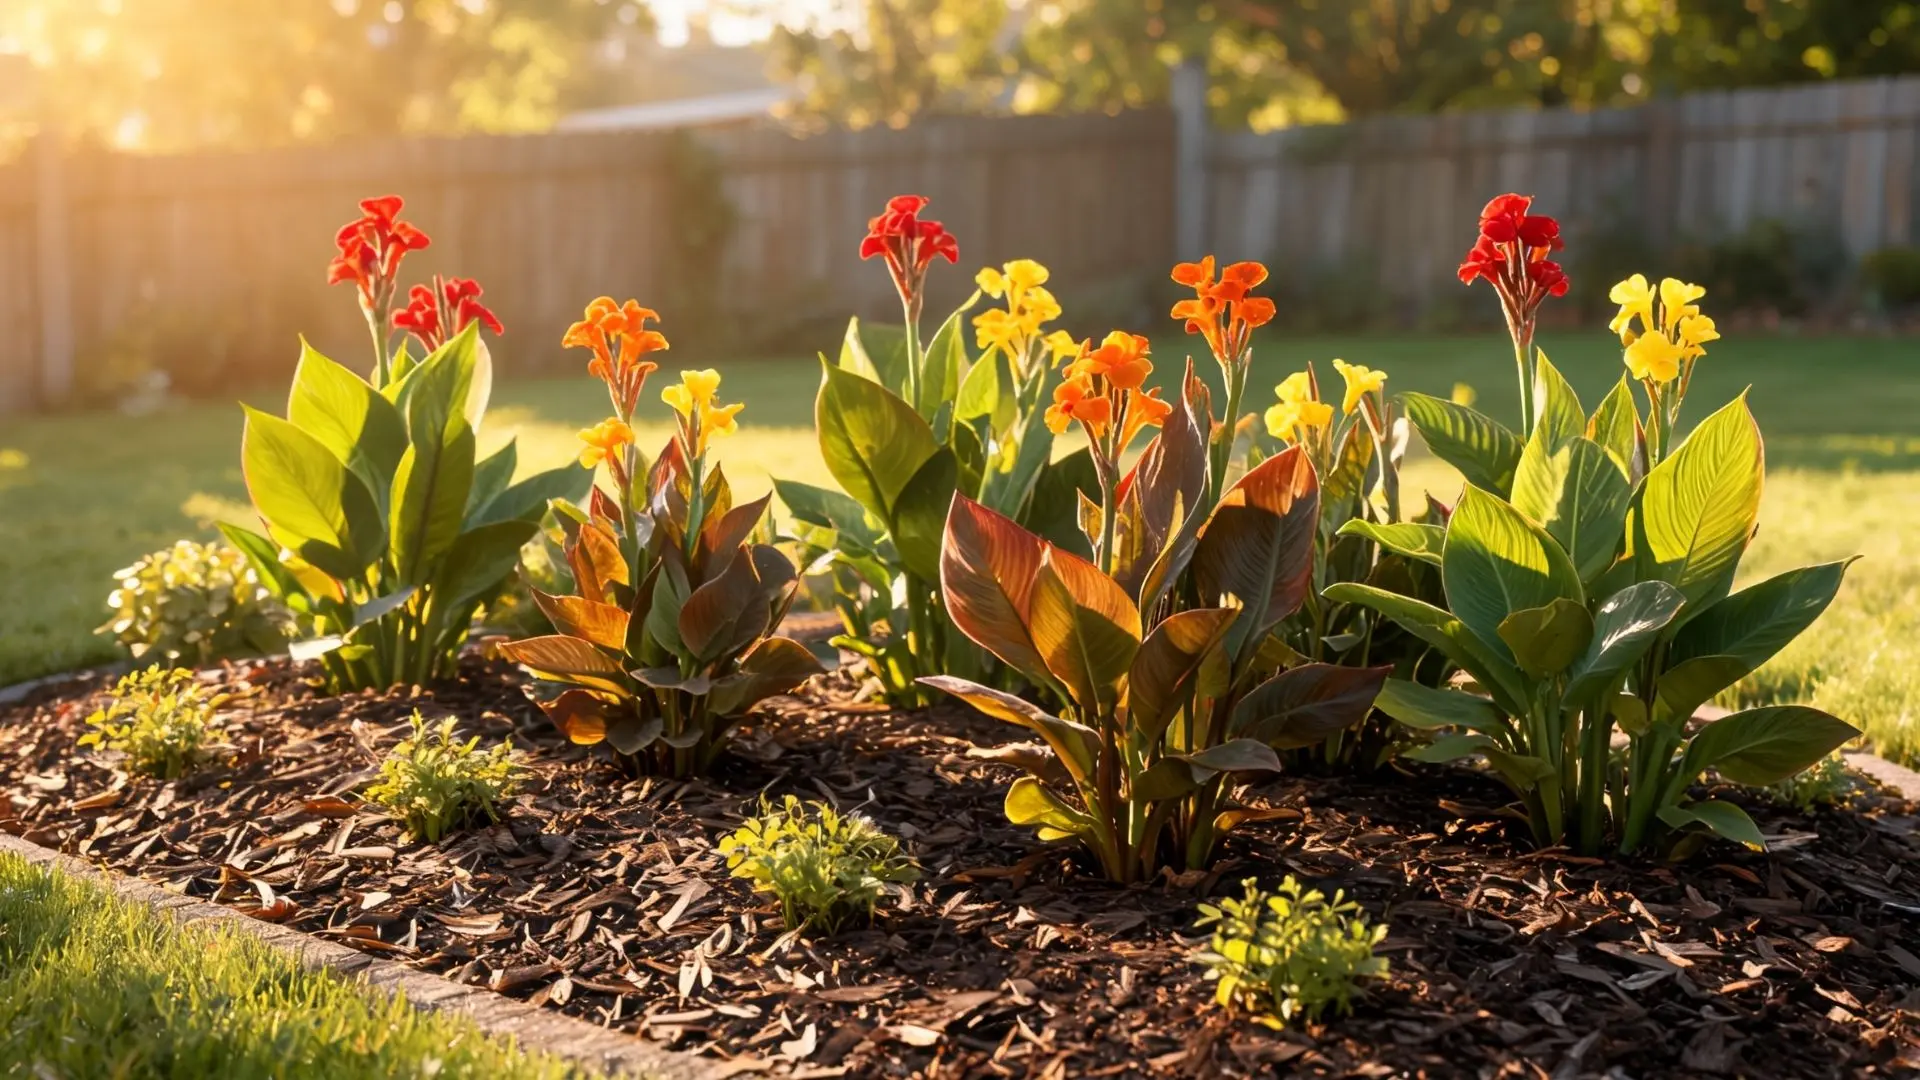
Learninghow to plant canna bulbs correctly starts with timing, healthy rhizomes, suitable soil, and enough space for mature growth.
Choosing the right location with adequate sunlight and drainage also reduces common problems during the growing season.
Choosing Healthy Rhizomes and the Right Location
Start with firm, healthy rhizomes and select a planting site that supports strong growth, flowering, and long-term plant health.
Choose plump rhizomes without soft spots, mold, deep cuts, or sour smells, as visible eyes or buds indicate active growing points. Avoid badly shriveled or rotting pieces, since damaged rhizomes may struggle to establish.
Select a location that receives at least 6 hours of direct sunlight daily for stronger foliage and reliable blooms.
For tall varieties, choose a sheltered area near fences or borders while maintaining airflow around the leaves. Healthy rhizomes and proper placement create a stronger foundation for steady canna growth.
Soil Preparation, Planting Time, and Sunlight Requirements
Cannas grow best in rich, warm soil with steady sunlight, and getting these three factors right before planting is what determines whether rhizomes sprout in two weeks or sit dormant for a month.
- Prepare Fertile Soil: Use rich, moist, well-drained soil that holds moisture without staying waterlogged. Mix compost, aged manure, or leaf mold into the top 8 to 12 inches.
- Improve Poor Soil: Add compost or fine bark to heavy clay soil to improve drainage. Mix organic matter into sandy soil to improve moisture and nutrient retention.
- Check Soil pH: I’m not fully certain of an exact figure, but most sources put canna’s ideal range around pH 6.0 to 7.0; it’s worth testing your soil rather than assuming it fits.
- Plant at the Right Time: Plant rhizomes after the final frost when soil temperatures reach 60°F or above. In colder regions, start rhizomes indoors four to six weeks earlier, then harden them off for a few days before moving them outside so the leaves don’t scorch or wilt in direct sun.
- Provide Proper Sunlight: Give cannas at least 6 hours of direct sunlight daily for strong stems and better flowering. Partial shade is tolerated in hot climates but may reduce blooms and weaken growth.
Best Time to Plant and Sunlight Requirements
Plant canna rhizomes in spring after the final frost has passed and the soil has warmed. Cold, wet ground can delay sprouting and increase the risk of rot, so wait until soil temperatures remain at or above 60°F.
Gardeners in colder regions can start rhizomes indoors four to six weeks before the expected final frost and move them outside once temperatures become stable.
Cannas also need sufficient sunlight to support strong foliage, upright stems, and consistent flowering. Choose a location with at least 6 hours of direct sunlight daily for the best results.
They can tolerate partial shade, especially in hot climates, but limited light may reduce flower production and create weaker growth. Adequate sunlight combined with warm soil helps rhizomes establish faster and produce healthier plants.
Fertilizing and Mulching Tips
Fertilizer supports foliage and flowers, while mulch helps maintain moisture and reduce weed competition around the rhizome.
- Fertilize During Growth: Apply a balanced 10-10-10 fertilizer after shoots appear and continue during active growth.
- Choose Organic Options: Compost, aged manure, and organic fertilizers provide gradual nutrients.
- Avoid Excess Nitrogen: Too much nitrogen may encourage leaves while reducing blooms.
- Use Suitable Mulch: Apply compost, shredded bark, or straw to retain moisture and control weeds. If you’re not sure how much to buy, figuring out how much mulch your beds need saves a wasted second trip.
- Keep Mulch Away: Leave space around stems to prevent trapped moisture and rot.
Step-by-Step Planting Instructions
Plant canna bulbs after frost danger has passed and the soil has warmed. Choose a sunny area with fertile, well-drained soil before preparing the planting space.
- Step 1: Loosen the ground to a depth of 8 to 12 inches. Remove weeds, stones, and compacted clumps, then mix finished compost through the area to improve fertility, moisture retention, and drainage.
- Step 2: Lay each canna rhizome horizontally in the planting hole. Turn visible eyes or raised buds upward. When no clear growth point is visible, leave the rhizome flat rather than forcing it upright.
- Step 3: Add 2-4 inches of soil above the rhizome. Measure from its upper surface, not the bottom of the hole. Avoid planting too deeply because excess soil may delay sprouting.
- Step 4: Place compact varieties about 12 inches apart. Give taller or vigorous cannas 18 to 24 inches of space. Adequate spacing supports airflow, limits crowding, and leaves room for watering and future division.
- Step 5: Moisten the soil enough to settle it around the rhizome. Avoid soaking the area while the rhizome remains dormant. Increase watering gradually after shoots emerge and active growth begins.
Correct placement, depth, and spacing, along with early watering, help canna rhizomes establish strong roots and produce steady growth.
Common Canna Lily Planting Mistakes to Avoid
Most stalled or rotted canna beds trace back to one of these planting errors. I planted my own first bed in the wrong spot years ago and lost half the rhizomes to rot, so I’d rather you skip that lesson.
- Planting into Cold Soil: Rhizomes set into soil below 60°F often sit dormant or rot before sprouting. Wait for the soil to warm rather than going by the calendar date alone.
- Burying Rhizomes Too Deep: More than 4 inches of soil above the rhizome can delay or block sprouting. Measure from the rhizome’s top surface, not the base of the hole.
- Crowding the Planting Bed: Spacing tall varieties less than 18 inches apart limits airflow and raises the risk of fungal disease later in the season.
- Overwatering Dormant Rhizomes: Heavy watering right after planting, before shoots appear, is one of the fastest ways to cause rot. Keep the soil just barely moist until growth starts.
- Choosing a Shaded Site: Cannas planted with less than 6 hours of direct sun tend to produce fewer flowers and leggier stems.
- Skipping the Rhizome Check: Planting a rhizome with soft spots or mold spreads rot to the surrounding soil and nearby plants.
Seasonal Canna Lily Care Calendar
Canna care changes as temperatures, rainfall, and plant growth shift through the year.
Use this calendar as a quick reminder of the main seasonal tasks and warning signs, rather than as a replacement for the detailed sections on planting, watering, feeding, and winter care.
| Season | Essential Care | What to Watch |
|---|---|---|
| Spring | Plant after frost, confirm drainage, and keep newly planted rhizomes lightly moist | Cold soil, standing water, and delayed shoots |
| Early Summer | Increase watering, begin feeding, refresh mulch, and remove weeds | Slugs, aphids, pale leaves, and slow growth |
| Midsummer | Water deeply, remove faded flowers, inspect foliage, and support tall stems | Spider mites, caterpillars, wind damage, and dry soil |
| Fall | Reduce feeding, continue light watering, and prepare plants for frost | Wet soil, early freezes, and damaged foliage |
| Winter | Mulch outdoor rhizomes or store lifted rhizomes in a frost-free place | Rot, freezing, shriveling, and early sprouting |
The calendar adds value without unnecessary repetition because it condenses earlier care advice into a seasonal checklist. Keep the explanations brief and avoid repeating exact planting depths, fertilizer details, or storage instructions in this section.
Can You Leave Canna Lilies in the Ground?
Whether canna lilies can remain in the ground depends on your USDA hardiness zone, winter temperatures, soil drainage, and frost conditions.
In Zones 8–11, rhizomes usually survive outdoors when planted in well-drained soil and protected with mulch. In Zone 7, survival is possible but less predictable, so valuable varieties may need extra protection.
In Zones 3–6, lifting and storing rhizomes indoors is generally safer because prolonged freezing can damage them. Heavy mulch can help protect roots, but wet winter soil may still cause rot.
Decision: Mild winter + dry soil = leave outdoors. Cold freezes or wet soil = dig up rhizomes.
How to Dig Up and Store Canna Rhizomes for Winter
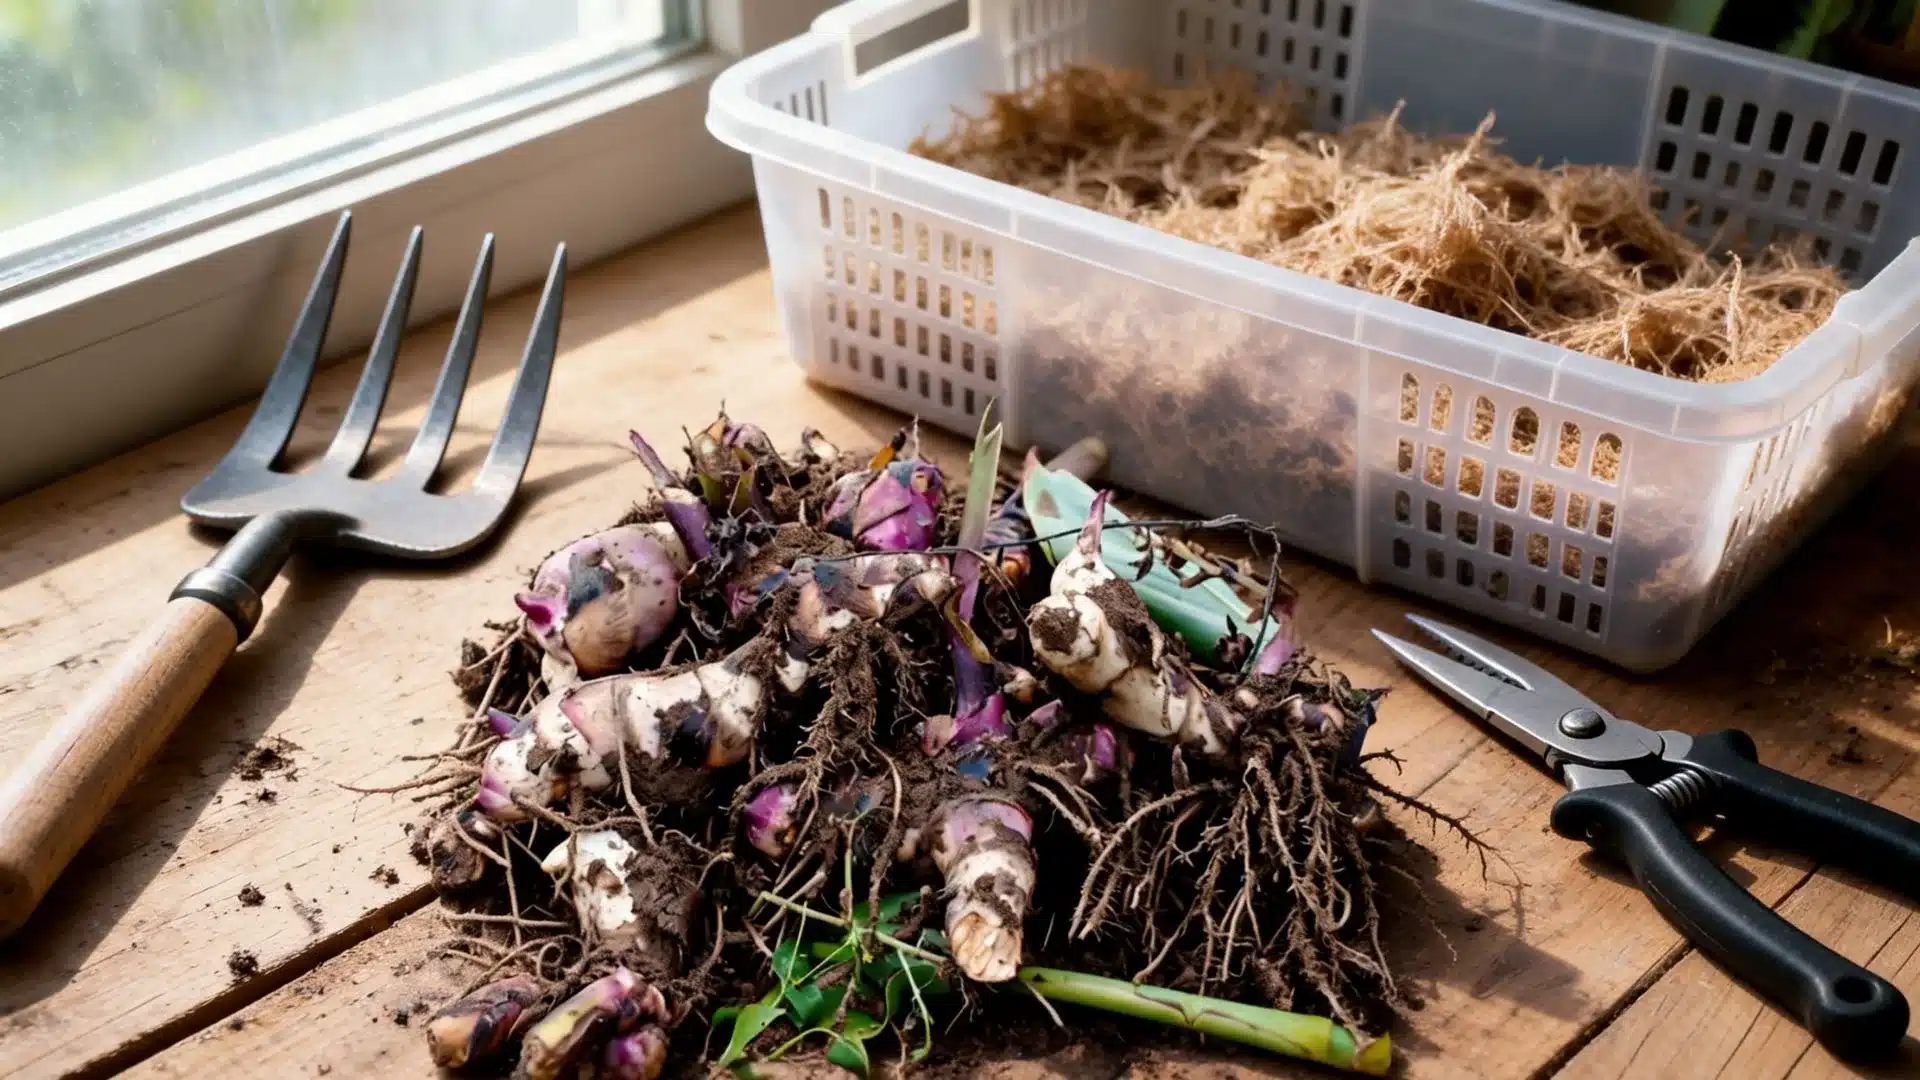
In colder regions, lifting and storing canna rhizomes before freezing weather helps protect them for the next growing season. Wait until after the first frost damages the foliage but before the ground freezes. Proper cleaning, drying, and storage prevent rot, shriveling, and early sprouting during winter.
- Step 1: After frost turns the leaves yellow or brown, cut the stems back to about 4 to 6 inches above the soil. Removing damaged foliage makes digging easier and reduces the amount of stored moisture.
- Step 2: Use a garden fork to loosen the soil several inches away from the plant base. Lift the clump gently to avoid cutting or breaking the rhizomes.
- Step 3: Remove loose soil and check each rhizome for soft spots, mold, or rot. Cut away damaged sections with a clean tool before storage.
- Step 4: Allow the rhizomes to dry in a cool, shaded, well-ventilated area for several days. This helps the outer surface toughen and reduces moisture-related problems.
- Step 5: Place cured rhizomes in a breathable container with dry peat moss, vermiculite, shredded paper, or wood shavings. Keep them in a dark, frost-free location at around 40°F to 50°F, and check them occasionally for rot or excessive drying.
When spring arrives and the soil reaches about 60°F, inspect stored rhizomes, divide healthy sections if needed, and replant them outdoors after frost danger has passed.
Growing Canna Lilies in Pots
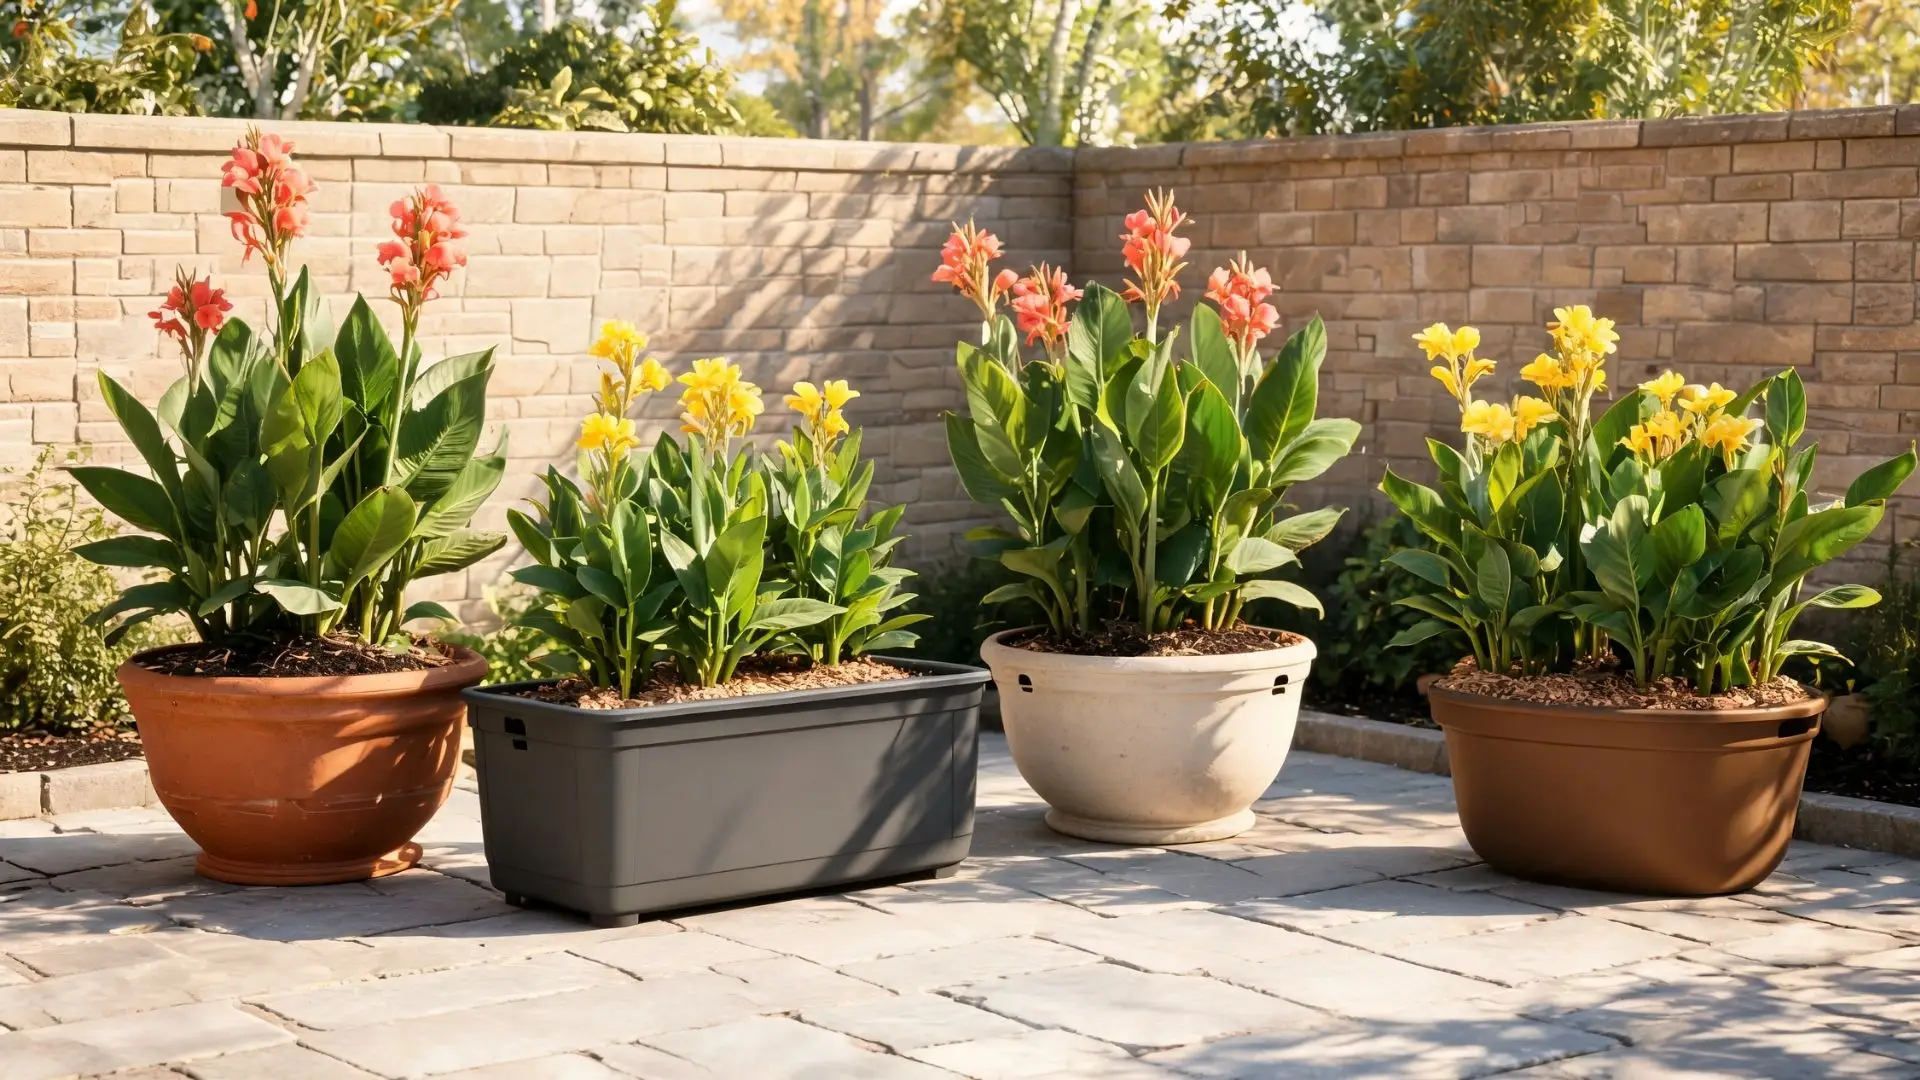
Canna lilies grow well in containers when provided with enough space, drainage, and nutrients. Choose an 18 to 24-inch-wide pot with drainage holes to support root growth and prevent water buildup.
Use a rich, well-draining potting mix instead of garden soil. Water potted cannas more frequently than garden plants, especially during hot weather, while avoiding soggy conditions.
Feed during active growth with a balanced fertilizer according to label directions. Dwarf varieties like ‘Tropical Series,’ ‘Cannova,’ and ‘Pixie’ cannas are suitable for containers.
Before frost, move pots indoors or lift and store rhizomes in a cool, dry location.
When and How to Divide Canna Rhizomes?
Dividing canna rhizomes helps prevent overcrowding, improves flowering, and gives older plants room for healthier growth. It is usually needed when clumps become dense or blooms begin to decline.
- Choose the Right Time: Divide canna rhizomes every 3 to 4 years during dormancy in fall after frost or in early spring before new growth begins. Lift the clump, separate firm sections, and ensure each piece has at least one healthy growth point.
- Replant Healthy Sections: Remove damaged parts, then replant divisions at the recommended depth with enough space for future growth.
- Improve Plant Performance: Dividing reduces competition for nutrients and sunlight, encourages stronger stems, and helps maintain consistent flowering.
Regular division keeps canna beds productive and prevents crowded plants from losing their vigor.
How Fast Do Canna Lilies Grow and How to Get More Flowers?
Canna lilies are fast-growing plants once temperatures rise and the rhizomes become active. New shoots usually appear within a few weeks in warm soil, with mature foliage developing quickly during summer.
Most cannas begin flowering about 10 to 12 weeks after planting, although timing depends on variety, sunlight, temperature, watering, and overall plant health.
First-year growth may be slower for newly planted or divided rhizomes as they focus energy on root establishment. To encourage more flowers, provide full sun, maintain consistent moisture, and feed regularly during active growth.
Remove faded blooms through deadheading, avoid overcrowding by dividing dense clumps, and choose reblooming varieties for longer-lasting flower displays. Proper spacing and healthy rhizomes also help plants produce stronger stems and more blooms.
Common Canna Lily Problems and Solutions
Canna lilies are usually easy to grow, but changes in leaves, flowers, or growth may indicate care issues. This quick guide covers the most common problems and simple fixes.
| Problem | Cause | Solution |
|---|---|---|
| Yellow Leaves | Overwatering or aging | Improve drainage |
| Brown Edges | Heat or dry soil | Maintain moisture |
| No Flowers | Low light or excess nitrogen | Increase sun, adjust feeding |
| Drooping Leaves | Underwatering or heat | Water deeply |
| Rotting Rhizomes | Wet soil or cold conditions | Reduce moisture, improve drainage |
Early care adjustments can help prevent lasting damage and keep canna lilies healthy throughout the growing season.
Common Pests and Diseases
Canna lilies can face pest and disease problems when plants are stressed, overcrowded, or exposed to poor growing conditions. Regular inspection and early action help prevent serious damage.
- Japanese Beetles: Create leaf holes. Remove beetles and monitor damage.
- Aphids: Affect new shoots. Spray with water or use suitable controls.
- Slugs: Cause ragged edges. Reduce damp hiding areas and inspect plants.
- Spider Mites: Create pale spots. Check leaf undersides and maintain moisture.
- Caterpillars: Damage folded leaves. Remove larvae and affected foliage.
- Rust, Leaf Spot, and Virus: Cause leaf marks or distortion. Remove infected parts and improve airflow.
- Rhizome Rot and Prevention: Avoid wet soil, inspect weekly, remove infected debris, and treat only identified problems.
Regular checks, proper spacing, and quick removal of damaged areas help keep canna lilies healthier and reduce the chance of pests or diseases spreading.
Popular Types of Canna Lilies
Canna lilies come in a wide range of sizes, foliage colors, and flower shades. Choosing a variety depends on the space available, desired height, and whether you want bold foliage, container growth, or long-lasting blooms.
| Variety | Flower Color | Height | Best Use |
|---|---|---|---|
| Tropicanna | Orange with striped foliage | 4–6 feet | Tropical borders and statement planting |
| Pretoria | Orange-yellow flowers | 4–6 feet | Decorative foliage displays |
| Wyoming | Deep orange blooms | 3–4 feet | Sunny garden beds |
| Lucifer | Red flowers with yellow edges | 3–4 feet | Colorful borders and containers |
| Australia | Bright red flowers, dark foliage | 4–6 feet | Bold foliage-focused landscapes |
| Cannova Series | Red, orange, yellow, pink, or peach | 2–4 feet | Containers and smaller gardens |
| Canna ‘Cleopatra’ | Yellow and red mixed blooms | 3–4 feet | Unique flower displays |
| Yellow King Humbert | Golden yellow flowers with red markings | 4–5 feet | Large borders and tropical designs |
These varieties suit different garden styles, from compact containers to tall landscape displays with dramatic foliage and flowers.
Best Companion Plants for Canna Lilies
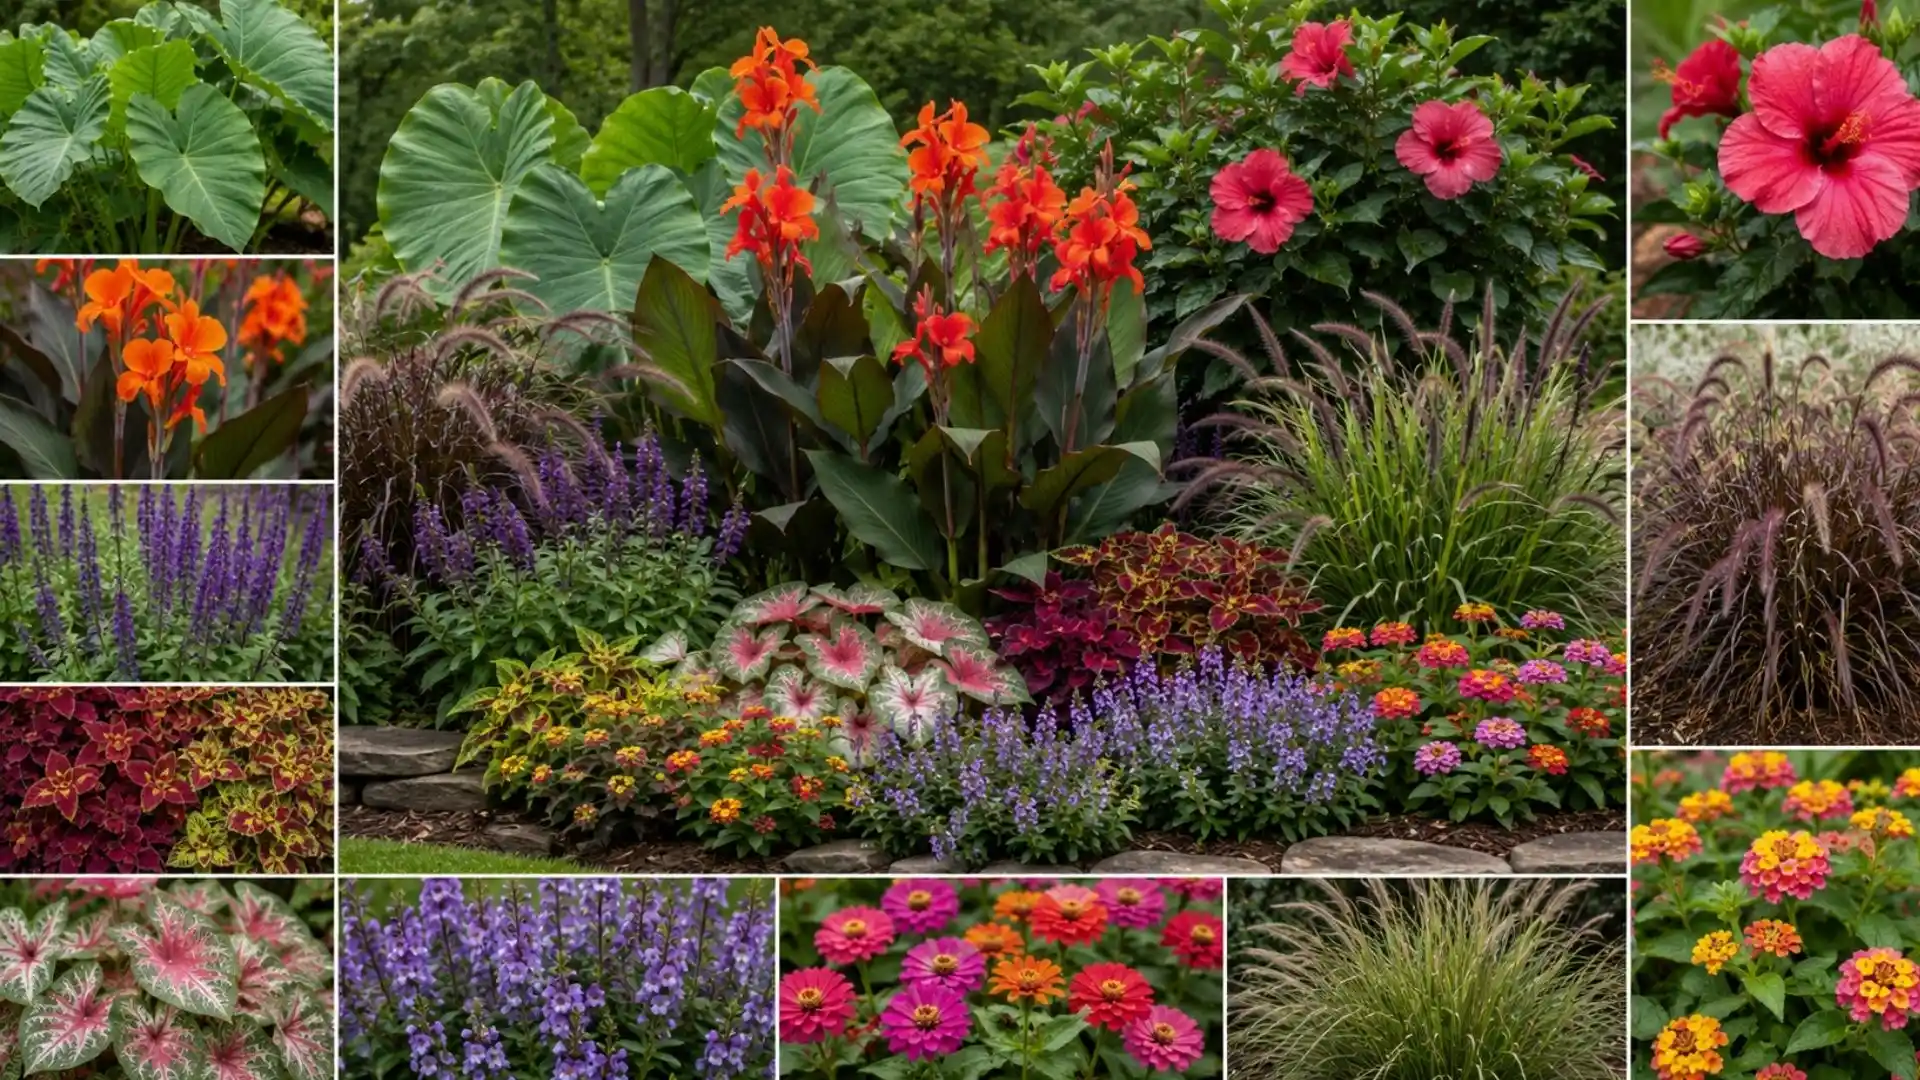
Pair canna lilies with plants that enjoy similar conditions, including warm temperatures, sunlight, and consistently moist soil. Combining different heights, foliage textures, and bloom periods creates a balanced planting area while supporting the growing needs of each plant.
- Elephant Ears: Their large leaves pair well with canna foliage, creating a tropical look through similar moisture and light requirements.
- Coleus: Colorful leaves add contrast beneath taller cannas and provide visual interest even when flowers are not blooming.
- Salvia: Upright flower spikes complement canna blooms, attract pollinators, and extend the flowering season.
- Lantana: Low-growing clusters of flowers work well in front of tall cannas and provide continuous seasonal color.
- Caladium: Heart-shaped leaves create a foliage contrast and thrive in warm, humid conditions alongside cannas.
- Purple Fountain Grass: Its narrow, arching leaves add height variation and movement around upright canna stems.
- Hibiscus: Large tropical flowers pair with cannas for a bold summer display and similar sunny growing conditions.
- Ornamental Grasses: Their fine textures balance broad canna leaves and provide structure throughout the season.
- Angelonia: Compact flowering plants work well as front-border companions and bloom alongside cannas during warm months.
- Zinnias: Bright flowers fill open spaces around cannas and help extend color through the growing season.
The same spacing logic behind companion planting layouts for vegetable beds works just as well when you’re arranging flowering companions around cannas.
Frequently Asked Questions (FAQs)
Are Canna Lilies Toxic to Pets?
Canna lilies are generally considered non-toxic to dogs and cats. However, chewing large amounts of plant material may still cause mild stomach upset, so it is best to discourage pets from eating the leaves, flowers, or rhizomes.
Can You Grow Canna Lilies From Seed?
Yes, cannas can grow from seed, but the process is slower than planting rhizomes. The hard seed coat usually needs scarification and soaking before sowing. Seed-grown plants may differ from the parent variety in flower color or size.
When Should You Divide Canna Rhizomes?
Divide canna rhizomes every three to four years or when the clump becomes crowded and flowering declines. Complete the division during dormancy, then keep firm sections with at least one healthy growth point for replanting.
Can Canna Lilies Grow Near Ponds?
Canna lilies can grow near ponds because they tolerate consistently moist soil. However, the planting area should not leave the rhizomes submerged for long periods unless the variety is suited to aquatic conditions.
Why are Canna Lily Leaves Turning Brown?
Brown leaf edges may result from dry soil, hot wind, fertilizer buildup, or intense afternoon heat. Check moisture first, then review feeding and exposure. Brown spots within the leaf may indicate pest damage or disease instead.
Ending Note
Successful cannas begin with warm soil, healthy rhizomes, full sun, and steady moisture throughout active growth.
Learning how to plant canna bulbs correctly also means using the right depth, spacing plants to their mature size, and feeding without adding too much nitrogen.
Regular weeding, mulching, leaf checks, pruning, and support for tall stems help the plants stay healthy through the season.
The answer to can you leave canna lilies in the ground depends on the local hardiness zone, winter drainage, and freeze duration. Lift tender rhizomes where necessary, or protect hardy plants with mulch.
Tell us in the comments which canna variety or overwintering method has worked best in your garden.