There has never been a better time to take car repairs into your own hands. The combination of freely available tutorial videos, accessible diagnostic tools and the ability to source quality second-hand components at a fraction of new prices has opened up a world of weekend repair projects to drivers who might previously have assumed that anything beyond a tyre change required a professional. The satisfaction of completing a repair yourself, understanding how your vehicle works and keeping more money in your pocket in the process is a combination that is hard to beat. Here are five DIY car repair projects that are genuinely achievable over a weekend for a motivated driver with basic tools, a methodical approach and the right second-hand parts sourced in advance.
Before You Start: Preparation Is Everything

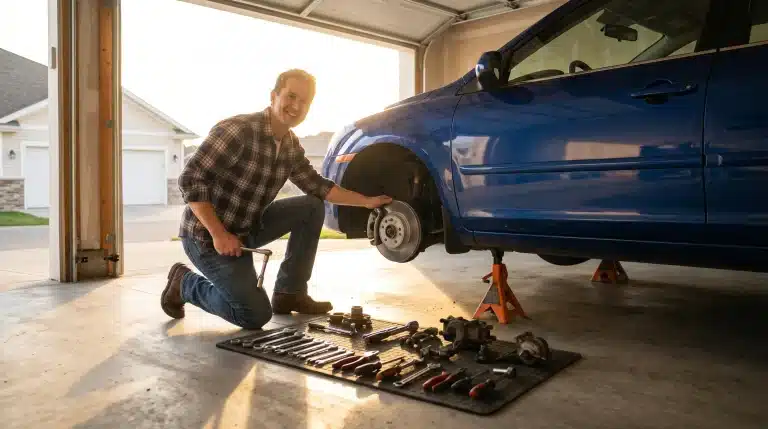
Source: https://unsplash.com/photos/a-blue-car-parked-in-front-of-a-blue-building-qNqCmwXaHeQ
Before diving into the specific projects, it is worth spending a moment on the principles that apply to all of them, because good preparation is what separates a smooth and satisfying weekend repair from a frustrating experience that ends with a call to a recovery service.
The single most important preparation step is sourcing the right part before you start. This sounds obvious, but many DIY repairs run into trouble because the wrong part was ordered, the part arrived in worse condition than expected or the delivery was delayed and the vehicle was left off the road longer than planned. Taking the time to verify compatibility carefully, choose a reputable seller and allow sufficient delivery time before your planned repair weekend eliminates these risks entirely.
For all five projects listed below, sourcing your parts through a well-established online marketplace is the recommended approach. Quality Ovoko used car parts and similar platforms offer the combination of vast inventory, compatibility search tools and buyer protection that makes it possible to source exactly the right second-hand component with confidence. Order your parts at least a week before your planned repair weekend to allow comfortable delivery time and the opportunity to address any issues before you need the part.
Invest in a basic set of tools if you do not already have one. A comprehensive socket set, a set of combination spanners, a torque wrench, a set of screwdrivers, pliers, a jack and axle stands, and a good quality work light will cover the requirements of all five projects below and will pay for themselves many times over in future repair savings. A basic OBD2 diagnostic scanner, available for 20 to 30 euros, is also a worthwhile investment that will prove useful for several of these projects and for general vehicle monitoring going forward.
Finally, before starting any repair, read the procedure through from start to finish, watch at least one video tutorial specific to your vehicle model and gather all the tools and materials you will need before you begin. Stopping halfway through a repair to find a missing tool or a forgotten consumable adds frustration and time to a process that should be enjoyable and methodical.
Project 1: Brake Pad and Disc Replacement
Difficulty level: Moderate Time required: Three to five hours for both axles Tools needed: Socket set, spanner set, C-clamp or brake piston tool, torque wrench, jack and axle stands
Brake pad and disc replacement is one of the most valuable DIY repairs you can undertake, both in terms of safety and financial saving. At a garage, a full brake service covering both axles can cost 300 to 600 euros in parts and labour depending on the vehicle. With second-hand discs and quality new or used pads sourced independently, the parts cost can be reduced substantially, and the labour saving of doing the work yourself adds further to the financial benefit.
The procedure itself is well within the capabilities of a methodical DIY mechanic. Begin by safely lifting the vehicle and supporting it on axle stands, never relying solely on a jack for support while working underneath. Remove the wheel to access the brake assembly. The brake calliper is typically held by two bolts at the rear, which once removed allow the calliper to be swung or slid away from the disc. Hang the calliper from the spring with a piece of wire or cord to avoid straining the brake hose.
With the calliper removed, the old pads can be extracted and the disc unbolted and removed. Clean the hub face thoroughly before fitting the new disc, as surface rust and debris on the mating face is one of the most common causes of brake judder after a disc replacement. Fit the new disc, compress the calliper piston using a C-clamp or dedicated brake piston tool, install the new pads and reassemble the calliper with the bolts torqued to the manufacturer’s specification. Repeat on the other side of the same axle before moving the vehicle, and always replace brakes in axle pairs.
After reassembly, pump the brake pedal firmly several times before moving the vehicle to restore brake pedal pressure. Bed in the new components with a series of progressive stops from moderate speed before subjecting them to heavy braking loads.
According to the National Highway Traffic Safety Administration (NHTSA), brake system maintenance is one of the most critical aspects of vehicle safety, and a correctly executed DIY brake service using quality components is fully equivalent in safety terms to the same service carried out professionally.
Project 2: Headlight Assembly Replacement
Difficulty level: Easy to moderate depending on vehicle Time required: One to three hours Tools needed: Socket set, screwdriver set, trim removal tools
Headlight assembly replacement is one of the most popular and rewarding DIY projects for weekend mechanics, and it is an area where second-hand parts offer exceptional value. New headlight assemblies, particularly for modern vehicles with LED or projector technology, can cost 300 to 800 euros per unit from official suppliers. A quality used unit sourced from a low-mileage donor vehicle of the same specification can typically be found for 50 to 150 euros, representing a saving that makes the project financially compelling even before the labour saving is considered.
The procedure for most vehicles involves removing a series of fasteners that secure the headlight unit to the front body structure, disconnecting the electrical connectors and bulb holders from the rear of the assembly and withdrawing the unit from the vehicle. The reverse procedure installs the new unit, with careful alignment of the headlight to the body panels being the detail that most significantly affects the finished appearance of the repair.
Before ordering your replacement unit, verify carefully that it matches your vehicle’s specification, including the side, the lighting technology and any specific features such as self-levelling motors or integrated daytime running lights. These details are critical for a plug-and-play replacement that requires no adaptation or modification.
After fitting, check and if necessary adjust the headlight beam alignment. Most vehicles have adjustment screws on the rear of the headlight unit that allow the beam angle to be set correctly. Misaligned headlights are both a safety hazard and a MOT or contrôle technique failure point, so taking the time to set the alignment correctly before putting the vehicle back into regular use is an important final step.
Project 3: Side Mirror Replacement

Source: https://unsplash.com/photos/a-rear-view-mirror-on-a-car-mPmlnpJalRo
Difficulty level: Easy Time required: One to two hours Tools needed: Trim removal tools, screwdriver set, socket set
A damaged or broken door mirror is one of the most common cosmetic repairs needed on everyday vehicles, and it is also one of the most straightforward DIY projects available, making it an ideal starting point for drivers who are new to self-servicing. At a garage or bodyshop, even a simple mirror replacement can cost 150 to 300 euros including parts and labour. With a second-hand mirror unit sourced online, the parts cost can be reduced to 20 to 80 euros depending on the vehicle and specification, and the fitting can be completed in an hour or less.
The procedure begins with removing the interior door trim panel to access the mirror mounting bolts and electrical connections. Most door mirrors are secured by three or four bolts and connected to the vehicle’s electrical system through a multi-pin connector that clips apart easily. Note the routing of the wiring harness before disconnecting it, as routing the replacement correctly is important for a clean and professional finish.
With the old mirror removed, offer up the replacement unit and verify that the mounting pattern and connector match before committing to the installation. Connect the electrical connector and test all mirror functions before reinstalling the door trim panel. This sequence avoids the frustration of reassembling the door only to discover that one function of the mirror is not working correctly and the trim needs to come off again.
Pay attention to colour matching if the mirror housing is body-coloured on your vehicle. A used mirror in the correct body colour is available on most popular models but requires careful specification at the ordering stage, while an uncoloured housing will need to be painted before fitting for a factory-correct appearance.
Project 4: Alternator Replacement
Difficulty level: Moderate Time required: Two to four hours depending on vehicle Tools needed: Socket set, spanner set, belt tension tool if required, multimeter
The alternator is the component responsible for generating the electrical power that charges your vehicle’s battery and runs its electrical systems while the engine is running. When an alternator begins to fail, the symptoms typically include a battery warning light on the dashboard, dimming of lights and electrical accessories, and eventually a flat battery that leaves the vehicle unable to start. Alternator replacement is a moderately challenging but entirely achievable DIY project that offers significant savings over a garage repair.
A new alternator for a typical family car costs between 150 and 350 euros from a parts supplier, while a quality used unit from a low-mileage donor vehicle can typically be sourced for 40 to 100 euros, a saving of 100 to 250 euros on the part alone. With garage labour for this job typically running to one to two hours, the total saving from a successful DIY alternator replacement can be 200 to 400 euros or more.
Begin by disconnecting the battery negative terminal before starting any work on the electrical system. Locate the alternator, which is typically mounted at the front of the engine and driven by the auxiliary drive belt. Slacken the belt tensioner to release tension on the drive belt and slide the belt off the alternator pulley. Disconnect the electrical connections from the alternator, noting which cable connects to which terminal if they are not uniquely shaped. Remove the mounting bolts and withdraw the alternator from the engine bay.
Before fitting the replacement, compare it carefully against the original to verify that the pulley diameter, the mounting hole pattern and the electrical connections are identical. Install the replacement unit, reconnect the electrical connections and refit the drive belt with the correct tension. Reconnect the battery and start the engine, checking with a multimeter that the charging voltage across the battery terminals is in the correct range of approximately 13.8 to 14.4 volts with the engine running.
According to the UK’s Institute of the Motor Industry (IMI), alternator replacement is one of the most commonly performed independent repairs by competent home mechanics, and with the right preparation and methodical execution it is well within the capabilities of a driver with basic mechanical aptitude and a good set of tools.
Project 5: Interior Trim and Dashboard Component Replacement
Difficulty level: Easy Time required: One to four hours depending on scope Tools needed: Trim removal tools, screwdriver set, plastic pry tools
Interior trim and dashboard component replacement may lack the mechanical drama of brake or alternator work, but it is one of the most satisfying DIY projects available in terms of the visible transformation it can deliver to the driving environment. Cracked dashboards, broken centre console components, worn door card panels, damaged seat coverings and non-functional switches or controls are all common issues on older vehicles that can dramatically affect the comfort and perceived quality of the interior, and all can be addressed with second-hand parts sourced from a donor vehicle of the same model.
The availability of interior components through the second-hand market is excellent for most popular models, because many vehicles are dismantled with their interiors largely intact, providing a supply of good-condition components at very accessible prices. A replacement door card for a popular hatchback might cost 15 to 40 euros second-hand compared to 100 euros or more for a new equivalent. A dashboard centre console section might be available for 20 to 60 euros used compared to several hundred euros new, if a new equivalent is available at all.
The procedure for most interior trim replacements involves carefully removing the damaged component using plastic trim removal tools that avoid scratching surrounding panels, disconnecting any electrical connectors for illuminated or powered components, and fitting the replacement in the reverse sequence. Patience and methodical technique are more important than technical skill for this type of work, as the main risk is cracking or scratching surrounding trim through hasty or forceful removal rather than any genuine mechanical complexity.
When sourcing interior components, pay careful attention to colour and trim grade matching. Interior trim is often available in multiple colour variants and quality grades for the same vehicle model, and a replacement that does not match the existing interior will be visually obvious. Provide the seller with as much detail as possible about your vehicle’s interior specification, including any trim codes that may be listed on a sticker inside the door jamb or in the vehicle documentation.
The Weekend Ahead
These five projects represent a spectrum of DIY repair opportunities that deliver real value in terms of financial saving, mechanical knowledge and personal satisfaction. None of them requires professional training or specialist equipment beyond a well-stocked basic tool kit, and all of them are well-supported by the wealth of vehicle-specific tutorial content available online.
The key to a successful repair weekend is preparation, specifically sourcing the right parts in advance, reading the procedure thoroughly before starting and having all the necessary tools and consumables to hand before the vehicle comes apart. With that preparation in place, these projects are achievable, rewarding and genuinely empowering for any driver willing to invest a weekend in getting to know their vehicle a little better.