
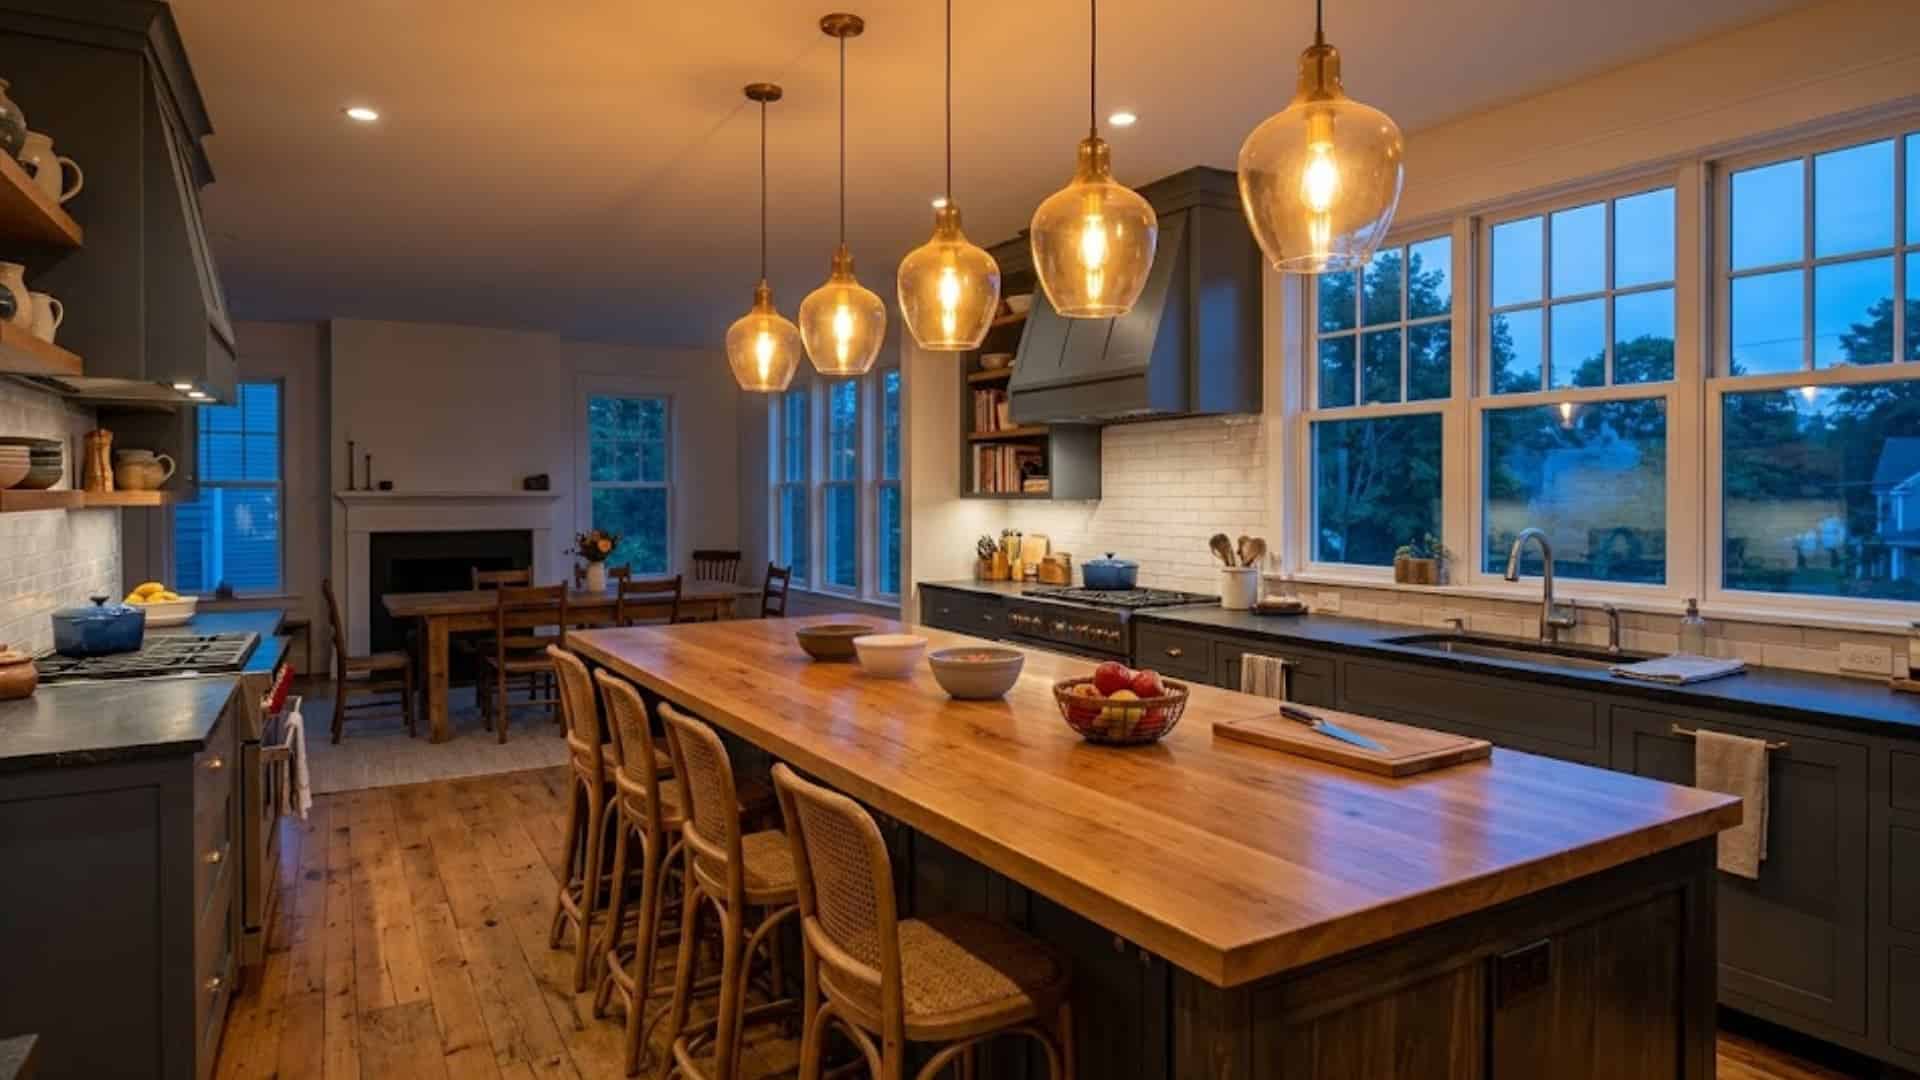
A beautiful kitchen island can still feel unfinished when the lighting looks too small, hangs awkwardly, or provides little useful illumination.
The right kitchen island lighting ideas bring together practical brightness, balanced proportions, and a fixture style that complements the surrounding space.
Pendant lighting for kitchen island areas remains a popular choice, but linear chandeliers, flush mounts, sculptural fixtures, and layered lighting can work equally well. Island length, ceiling height, countertop use, and existing finishes all influence the final choice.
Thoughtful lighting can make the island more functional for food preparation, dining, entertaining, and everyday activities while creating a balanced focal point within the kitchen.
Kitchen Island Lighting Ideas at a Glance
Kitchen island lighting combines task illumination with decorative impact. Pendant lights are the most common option because they focus light on the countertop and visually define the island.
Linear chandeliers suit long islands, while one oversized fixture can balance a smaller surface. Flush and semi-flush lights work well beneath low ceilings.
Fixture size, quantity, spacing, and hanging height should match the island’s dimensions. The shade material also affects performance: clear glass spreads light, metal directs it downward, and fabric or frosted glass creates a softer glow.
Dimmable bulbs and separate lighting controls allow the island to support food preparation, dining, homework, and entertaining at different brightness levels.
Kitchen Island Lighting Quick Selection
Island length and ceiling height help narrow the fixture type, size, and arrangement. This table provides a practical starting point before comparing individual lighting ideas.
| Kitchen Island Type | Best Lighting Choice |
|---|---|
| Island under 5 feet | One large pendant |
| Island 5–7 feet | Two medium pendants |
| Island 7–10 feet | Three pendants or one linear light |
| Island over 10 feet | Long linear chandelier |
| Small island | Clear glass or slim pendants |
| Low ceiling | Flush or semi-flush lights |
| Vaulted ceiling | Adjustable or tiered pendants |
| Island with cooktop | Pendants with recessed task lights |
| Island with seating | Soft, diffused pendant lights |
These suggestions can be adjusted according to pendant diameter, countertop activities, electrical-box locations, and nearby fixtures to maintain comfortable sightlines and balanced illumination.
Classic and Natural Kitchen Island Lighting
Classic fixtures use familiar shapes, warm finishes, and natural materials to create a comfortable atmosphere. These choices suit traditional, farmhouse, coastal, and transitional kitchens.
1. Hang Clear Glass Globe Pendants
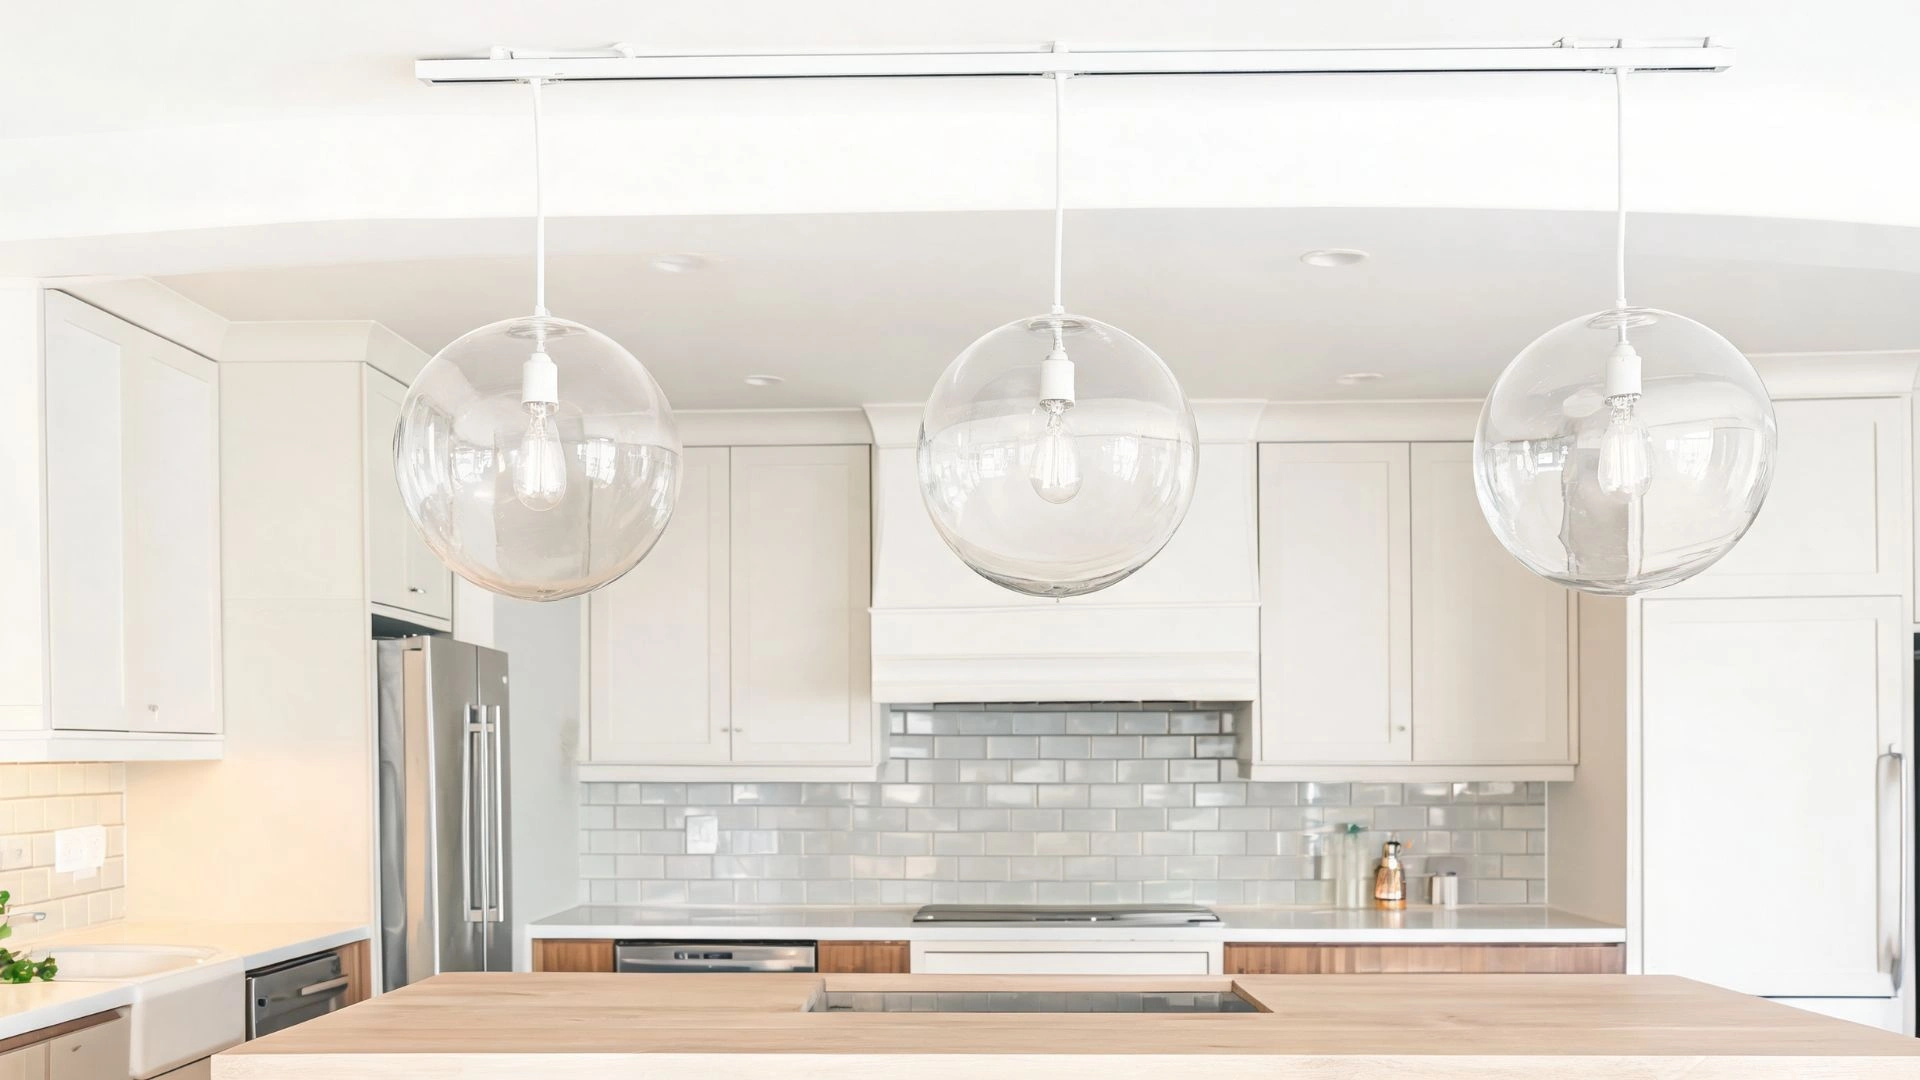
Clear glass globe pendants keep the kitchen open while adding a soft, rounded shape above the island. Their transparent shades allow light to spread broadly without blocking views across the room.
They work especially well in small kitchens or spaces with detailed cabinetry and backsplashes.
Choose simple bulbs for a clean finish, since the glass exposes everything inside. Regular cleaning prevents fingerprints, grease, and dust from reducing their clarity.
2. Add Vintage Lantern-Style Pendants
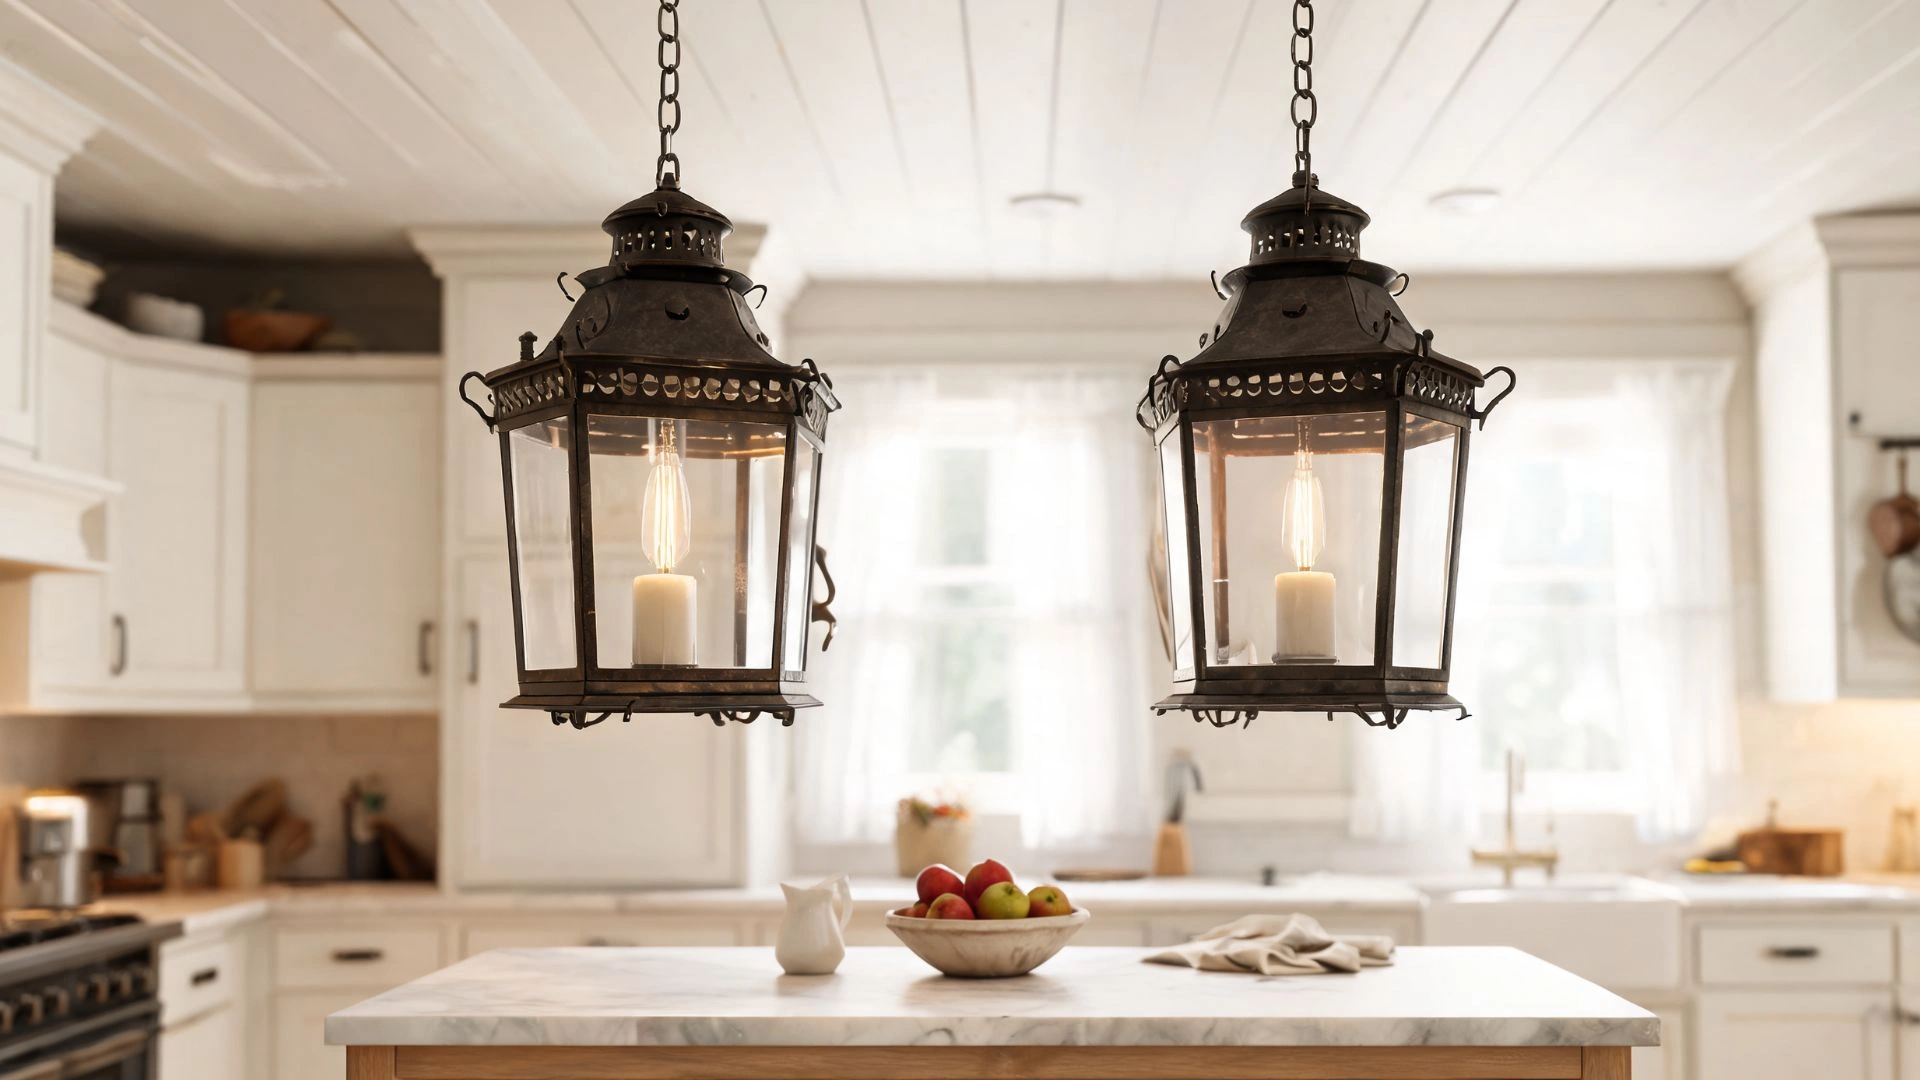
Vintage lantern-style pendants bring structure and traditional character to a kitchen island.
Their open metal frames provide visual definition without creating the heaviness of solid shades. Black, bronze, or aged brass frames complement farmhouse, transitional, and classic interiors.
Candle-style bulbs enhance the vintage appearance, while clear glass panels protect the bulbs. Install two lanterns over a medium island or three smaller fixtures above a longer countertop for balanced coverage.
3. Bring Warmth with Woven Rattan Shades
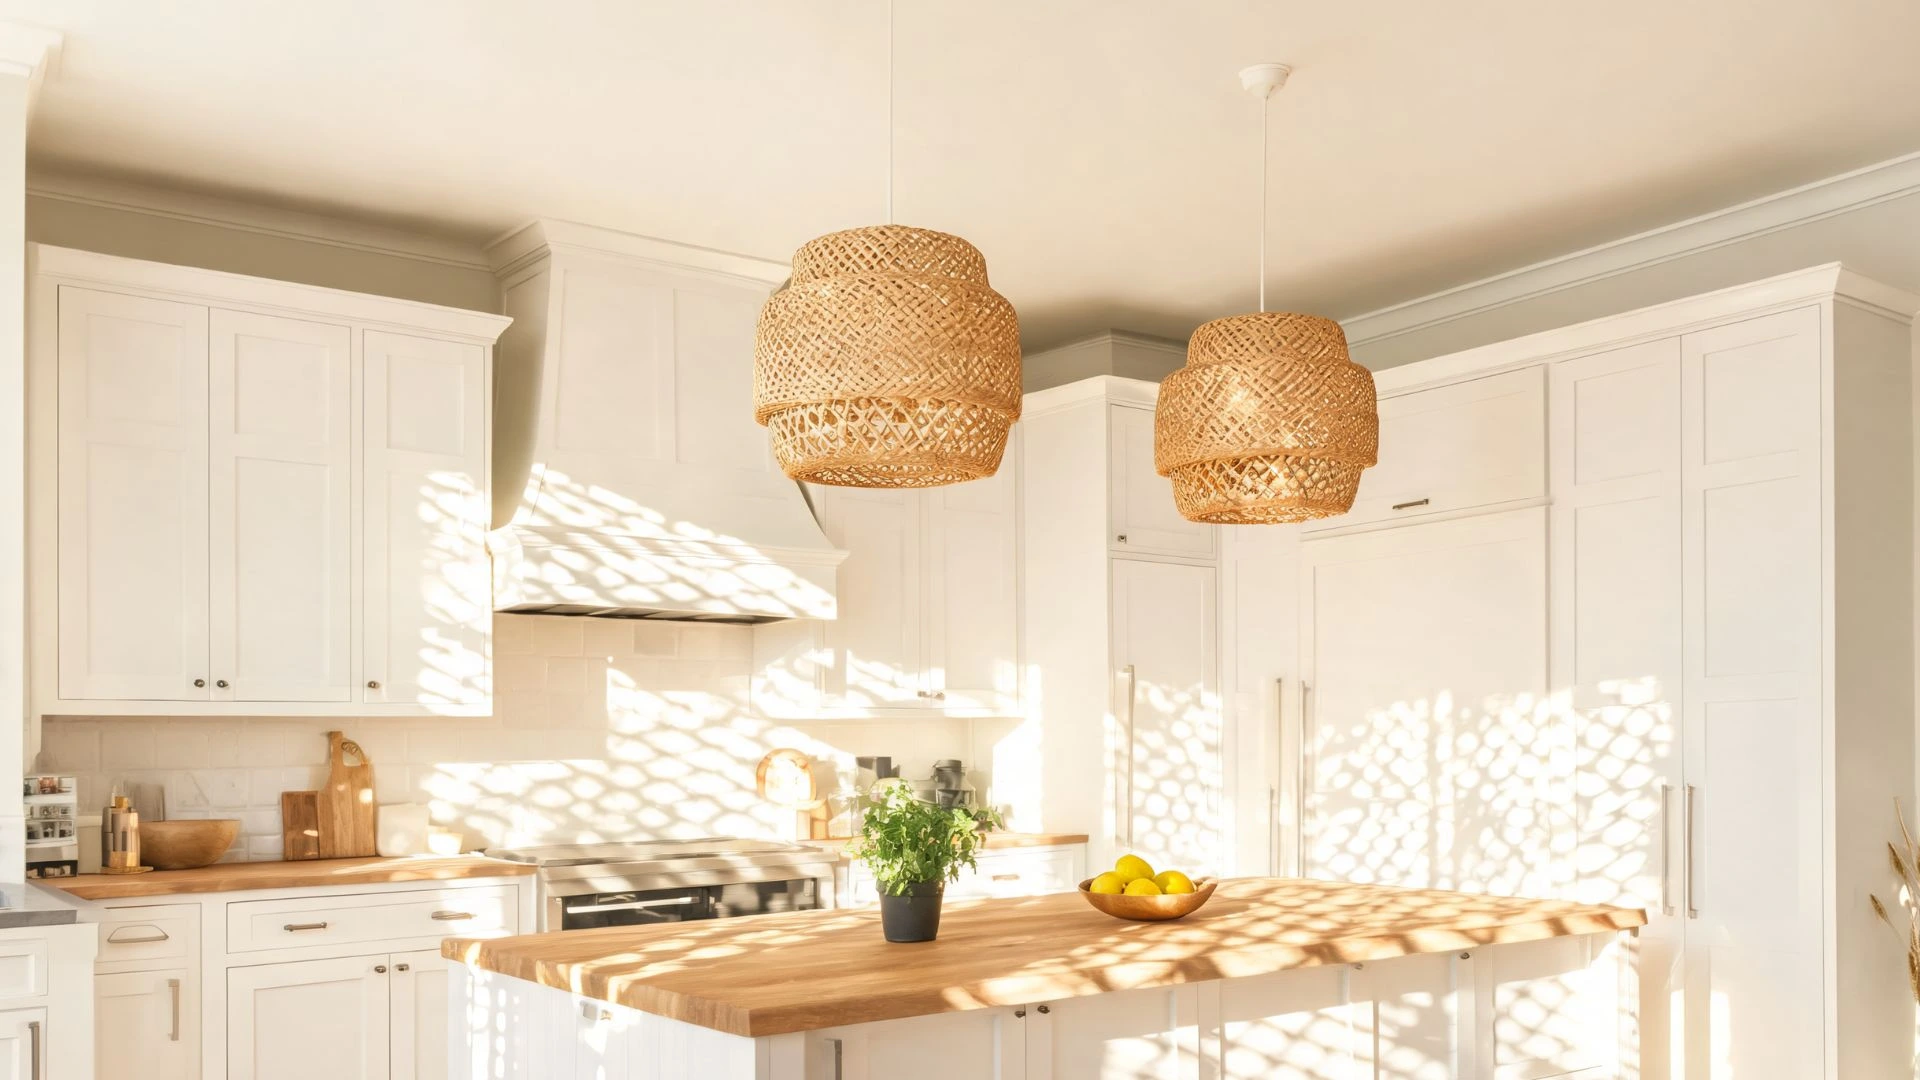
Woven rattan shades introduce natural texture and a relaxed atmosphere above the island.
Small openings in the weave cast gentle patterns while allowing warm light to filter through. These fixtures fit coastal, bohemian, organic modern, and casual farmhouse kitchens.
Their lightweight appearance works particularly well with white cabinets and wood accents. Choose a lined shade when softer, controlled illumination is preferred, since an open weave may create distracting shadows during food preparation.
4. Use Polished Brass Bell Pendants
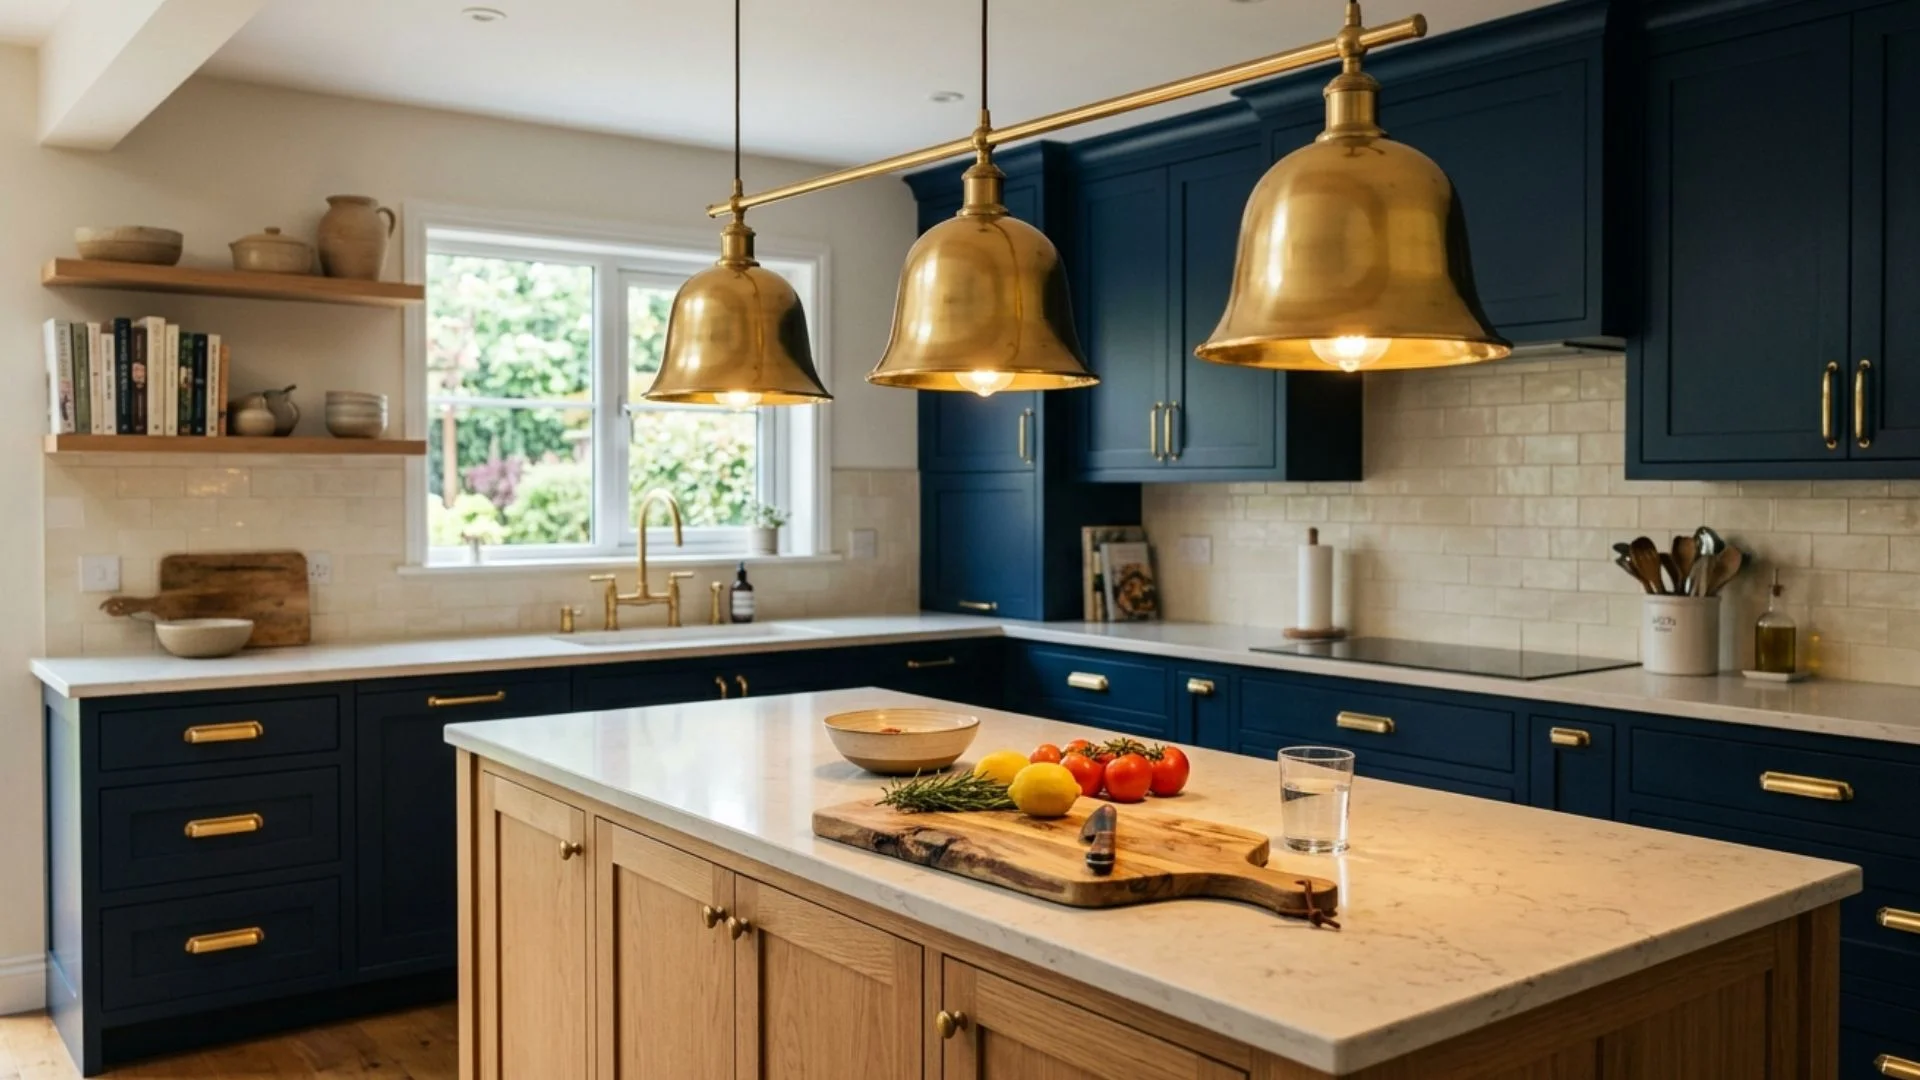
Polished brass bell pendants combine a warm metallic finish with a practical downward-facing shade.
Their reflective interiors direct focused light onto the countertop, making them suitable for food preparation and dining. Brass works beautifully with navy, green, cream, or natural wood cabinetry.
Repeating the finish in cabinet pulls or faucets creates continuity without requiring an exact match. Use dimmable warm-white bulbs to prevent the polished surface from appearing overly bright or harsh.
5. Add Character with Schoolhouse Pendants
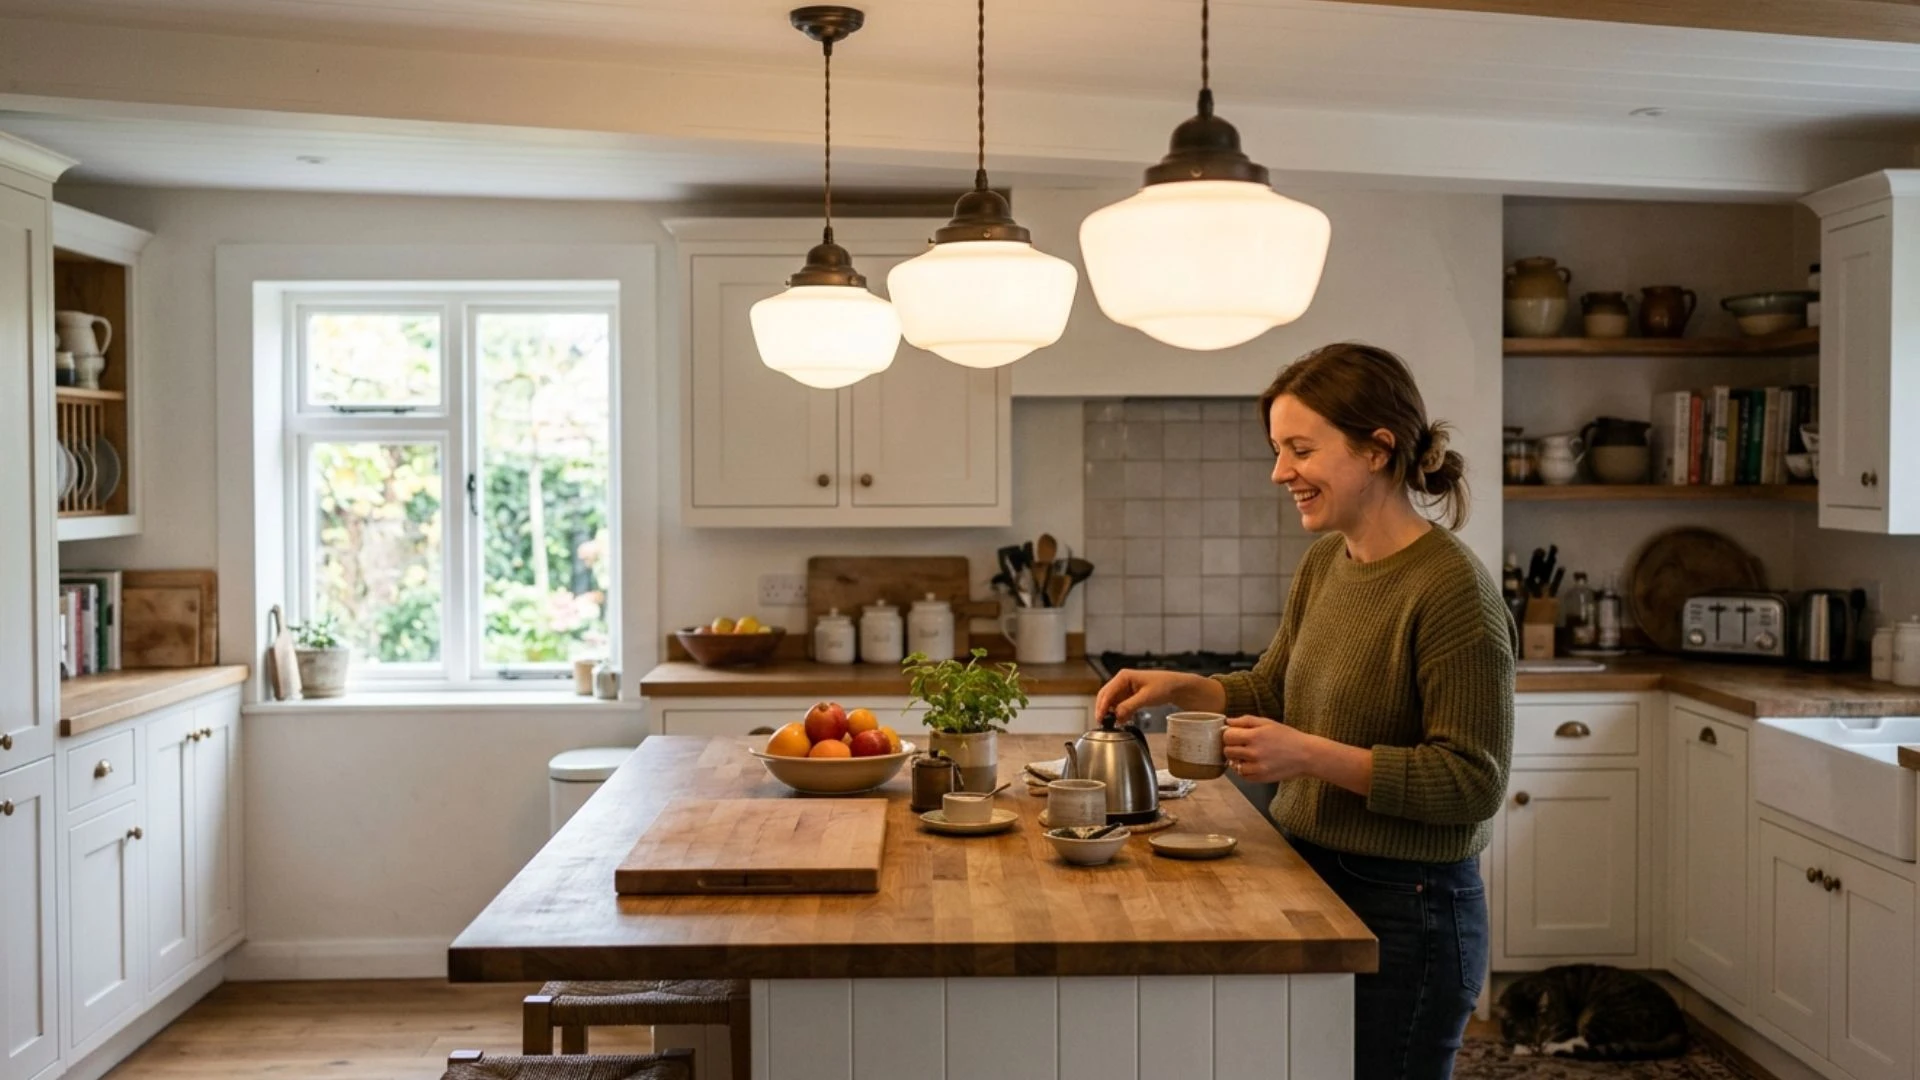
Schoolhouse pendants feature rounded glass shades inspired by early public-building fixtures.
Their familiar silhouette gives kitchens a timeless appearance without looking overly formal. White or milk-glass shades produce an even, comfortable glow, while black, bronze, or brass fittings add contrast.
These pendants complement cottage, traditional, farmhouse, and transitional interiors. A row of three works well above a long island, although larger versions can be used in pairs to avoid visual crowding.
6. Hang One Oversized Drum Shade
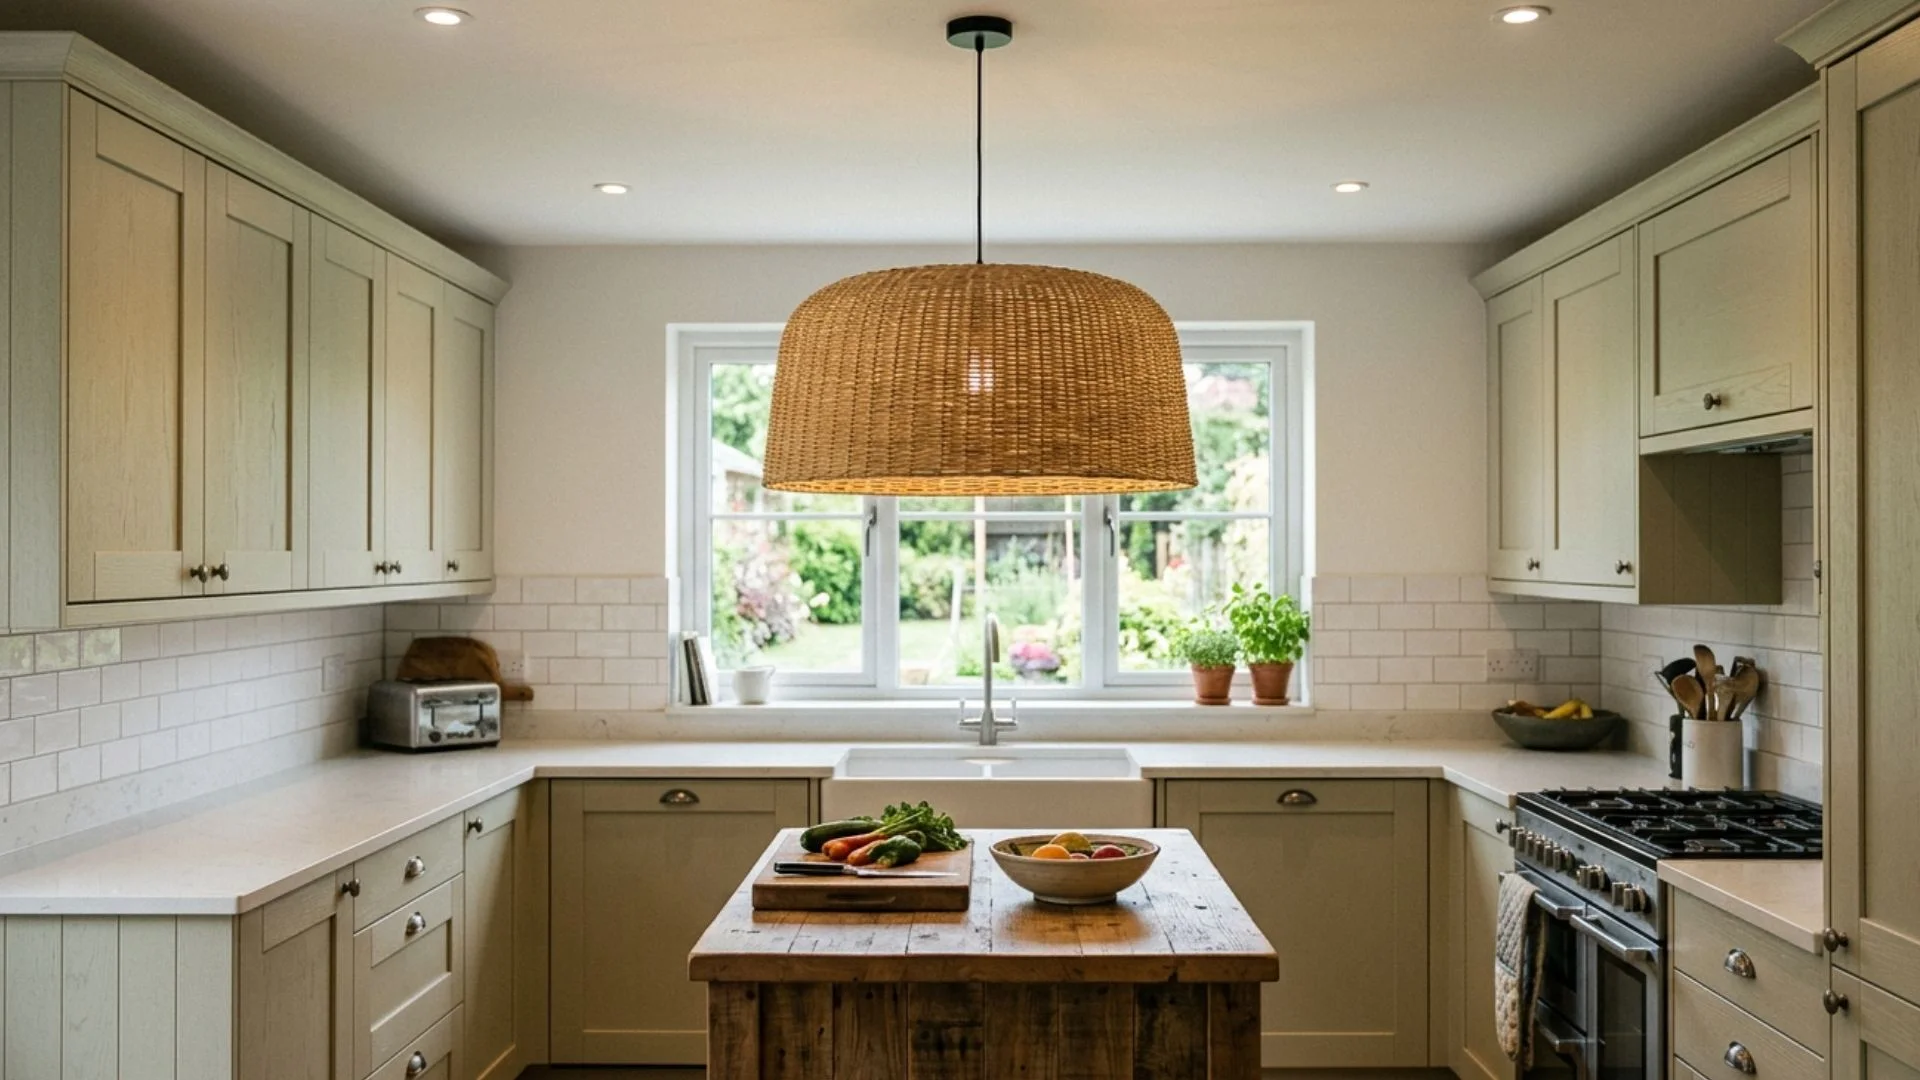
One oversized drum shade creates a strong focal point without filling the ceiling with several fixtures.
Its broad circular form balances a square or compact island and softens kitchens dominated by straight cabinetry. Fabric shades diffuse light gently, while metal or woven versions produce stronger visual contrast.
Check the shade diameter and hanging height carefully so it does not block sightlines. This approach works best when recessed lights already provide sufficient task illumination.
7. Choose Milk Glass Orb Pendants
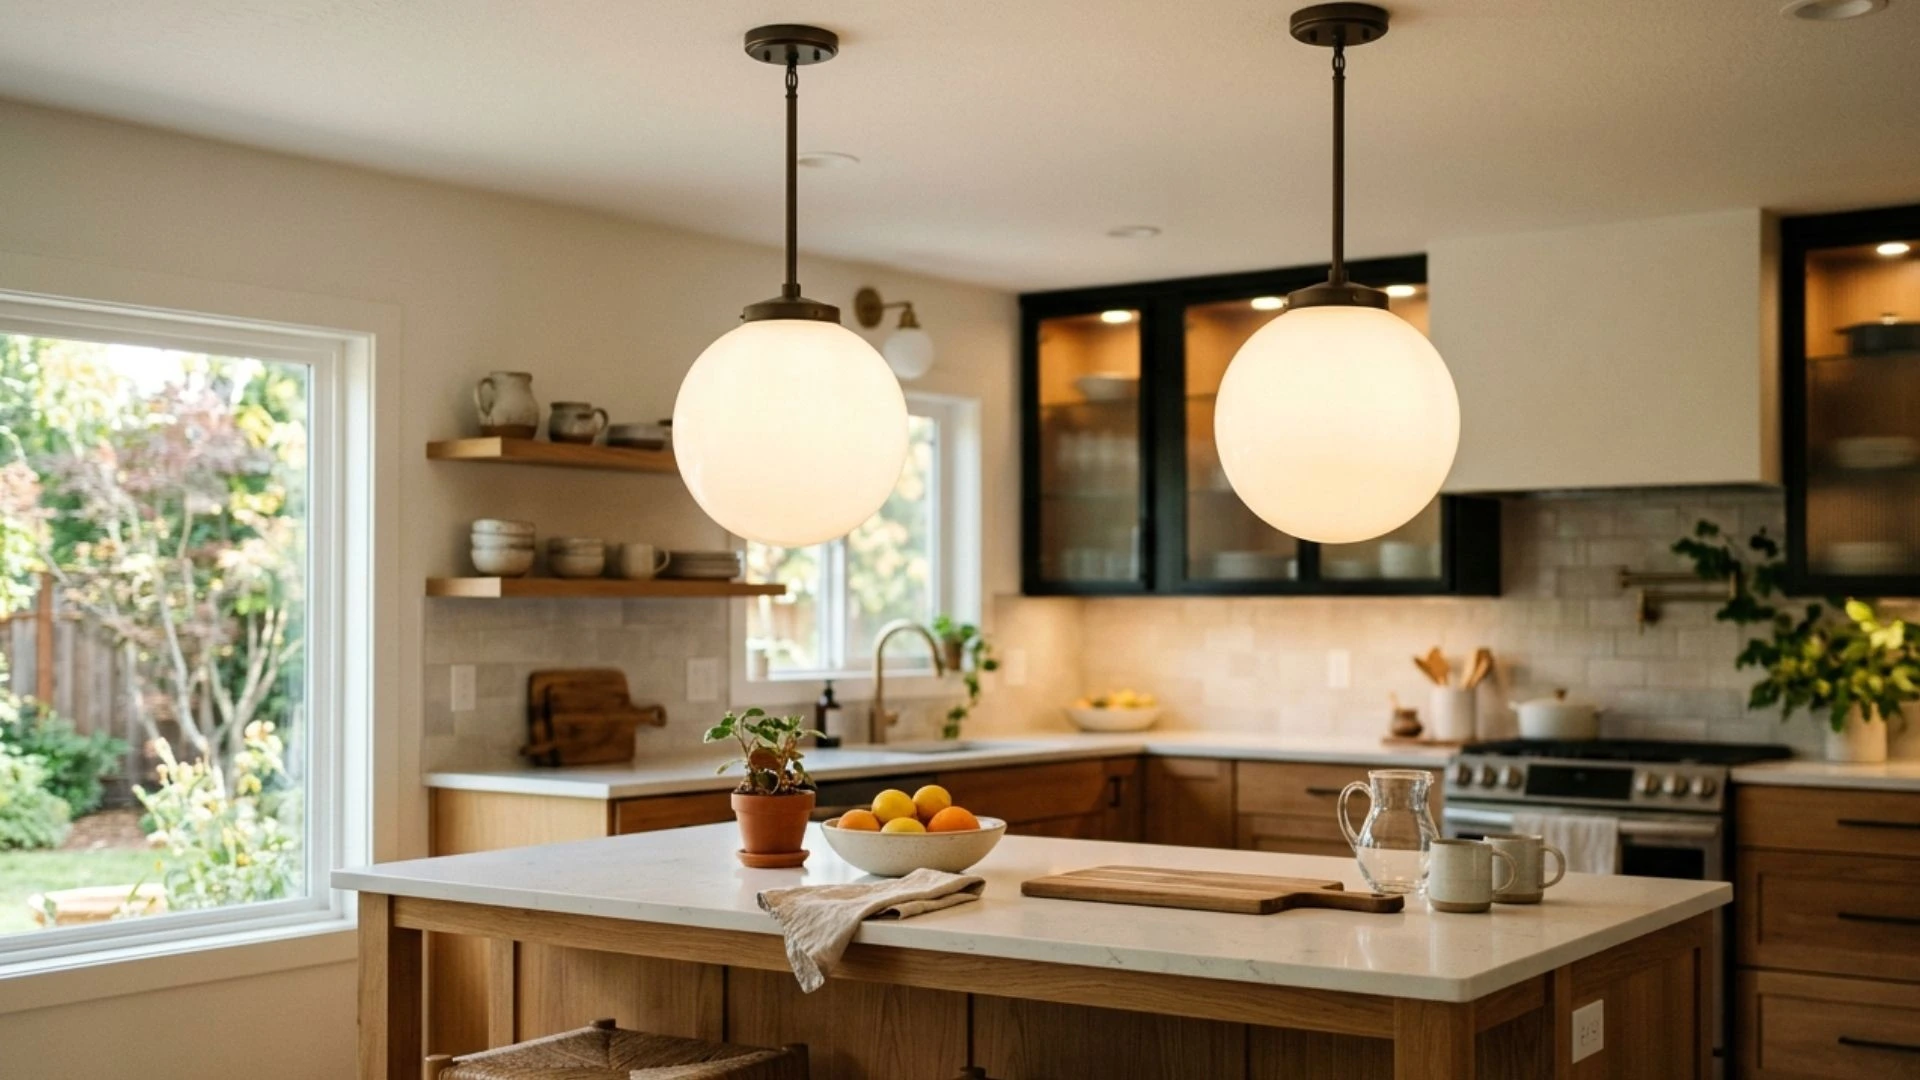
Milk glass orb pendants provide soft, diffused light without exposing the bulb inside.
Their smooth spherical shape introduces curves that balance rectangular islands, cabinets, and tile patterns. White glass pairs easily with brass, black, chrome, or bronze fittings, making the design adaptable to several kitchen styles.
Smaller globes can form a neat row, while two larger orbs create stronger impact. Select fully enclosed LED-compatible bulbs to prevent excessive heat inside the shades.
8. Install Adjustable Pulley Pendants
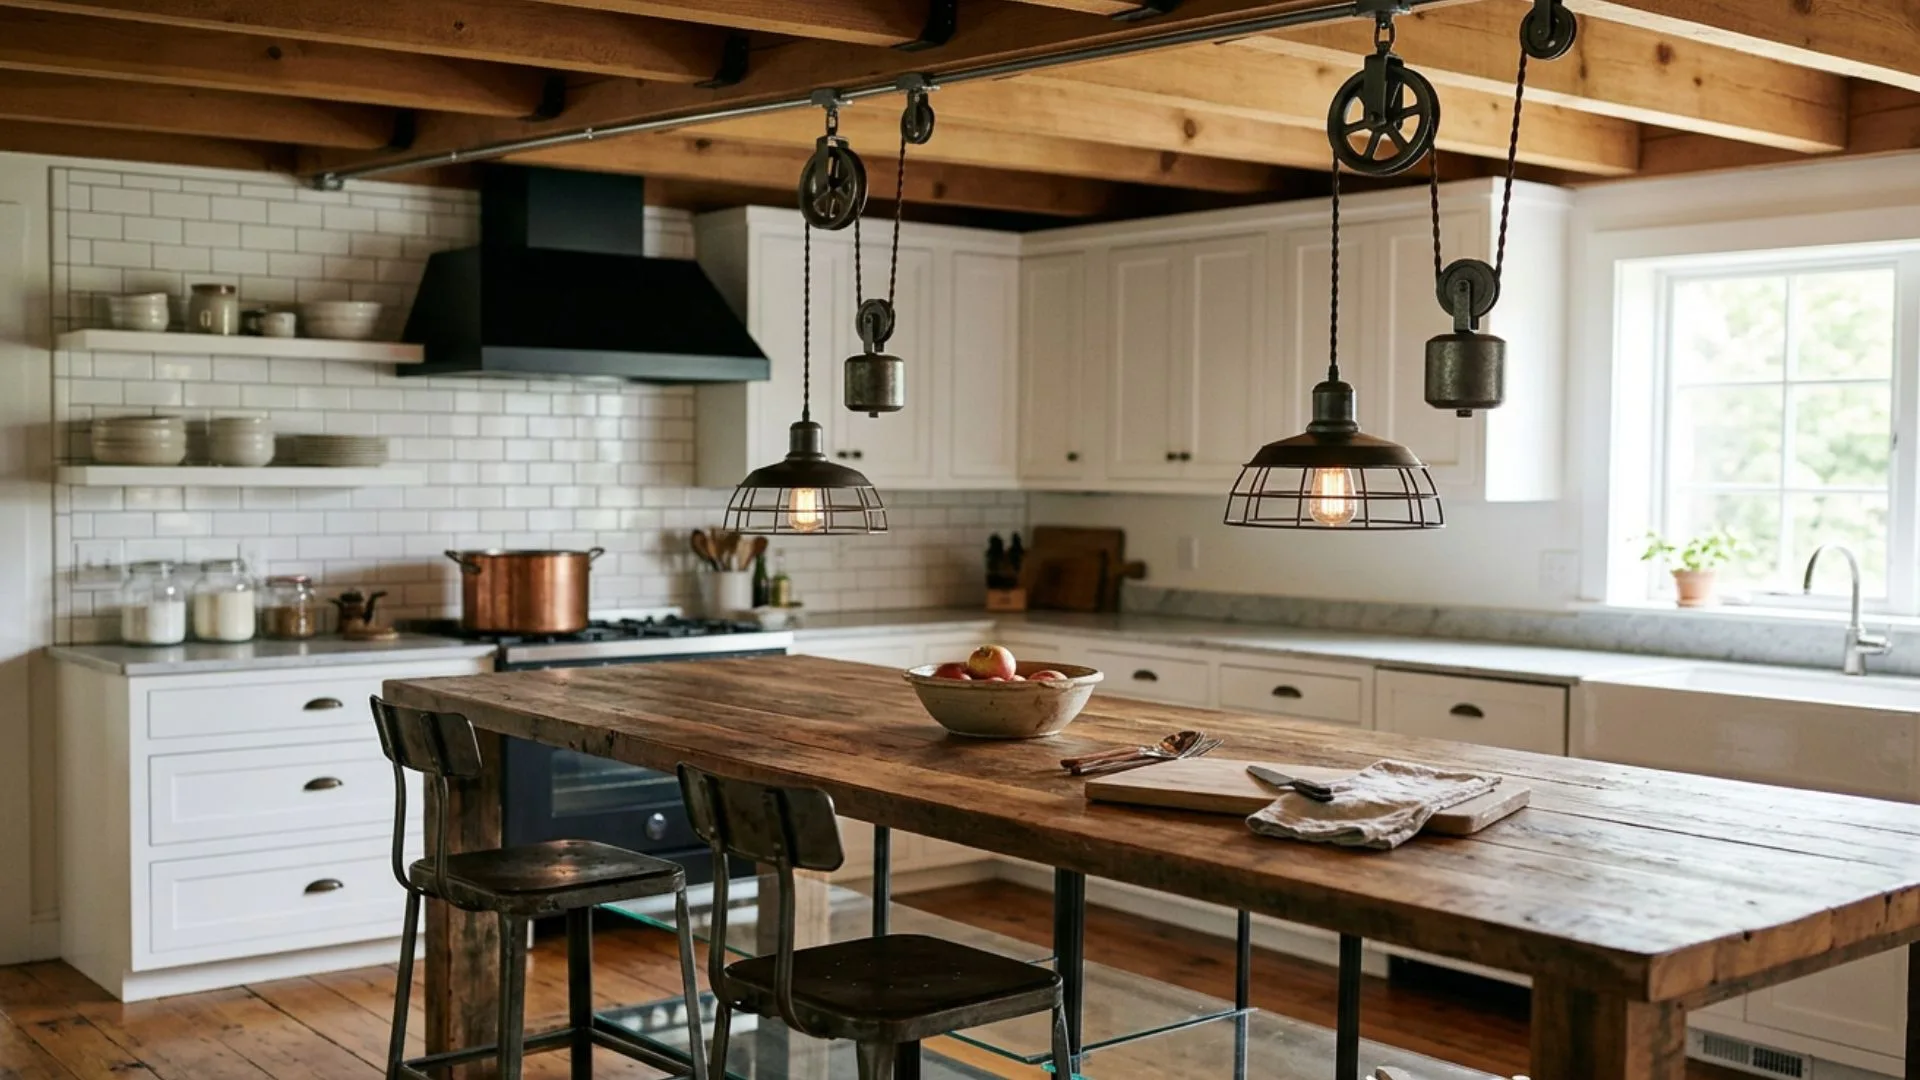
Adjustable pulley pendants combine industrial mechanics with flexible hanging height.
Their counterweight system allows each shade to move closer to the countertop for focused work or higher for broader illumination. Metal shades suit rustic, farmhouse, and industrial kitchens, especially when paired with wood or exposed beams.
The moving components need adequate ceiling clearance and secure mounting. Position the cords carefully so adjustments remain smooth and the fixtures stay aligned above the working surface.
9. Add Coastal Style with Rope Pendants
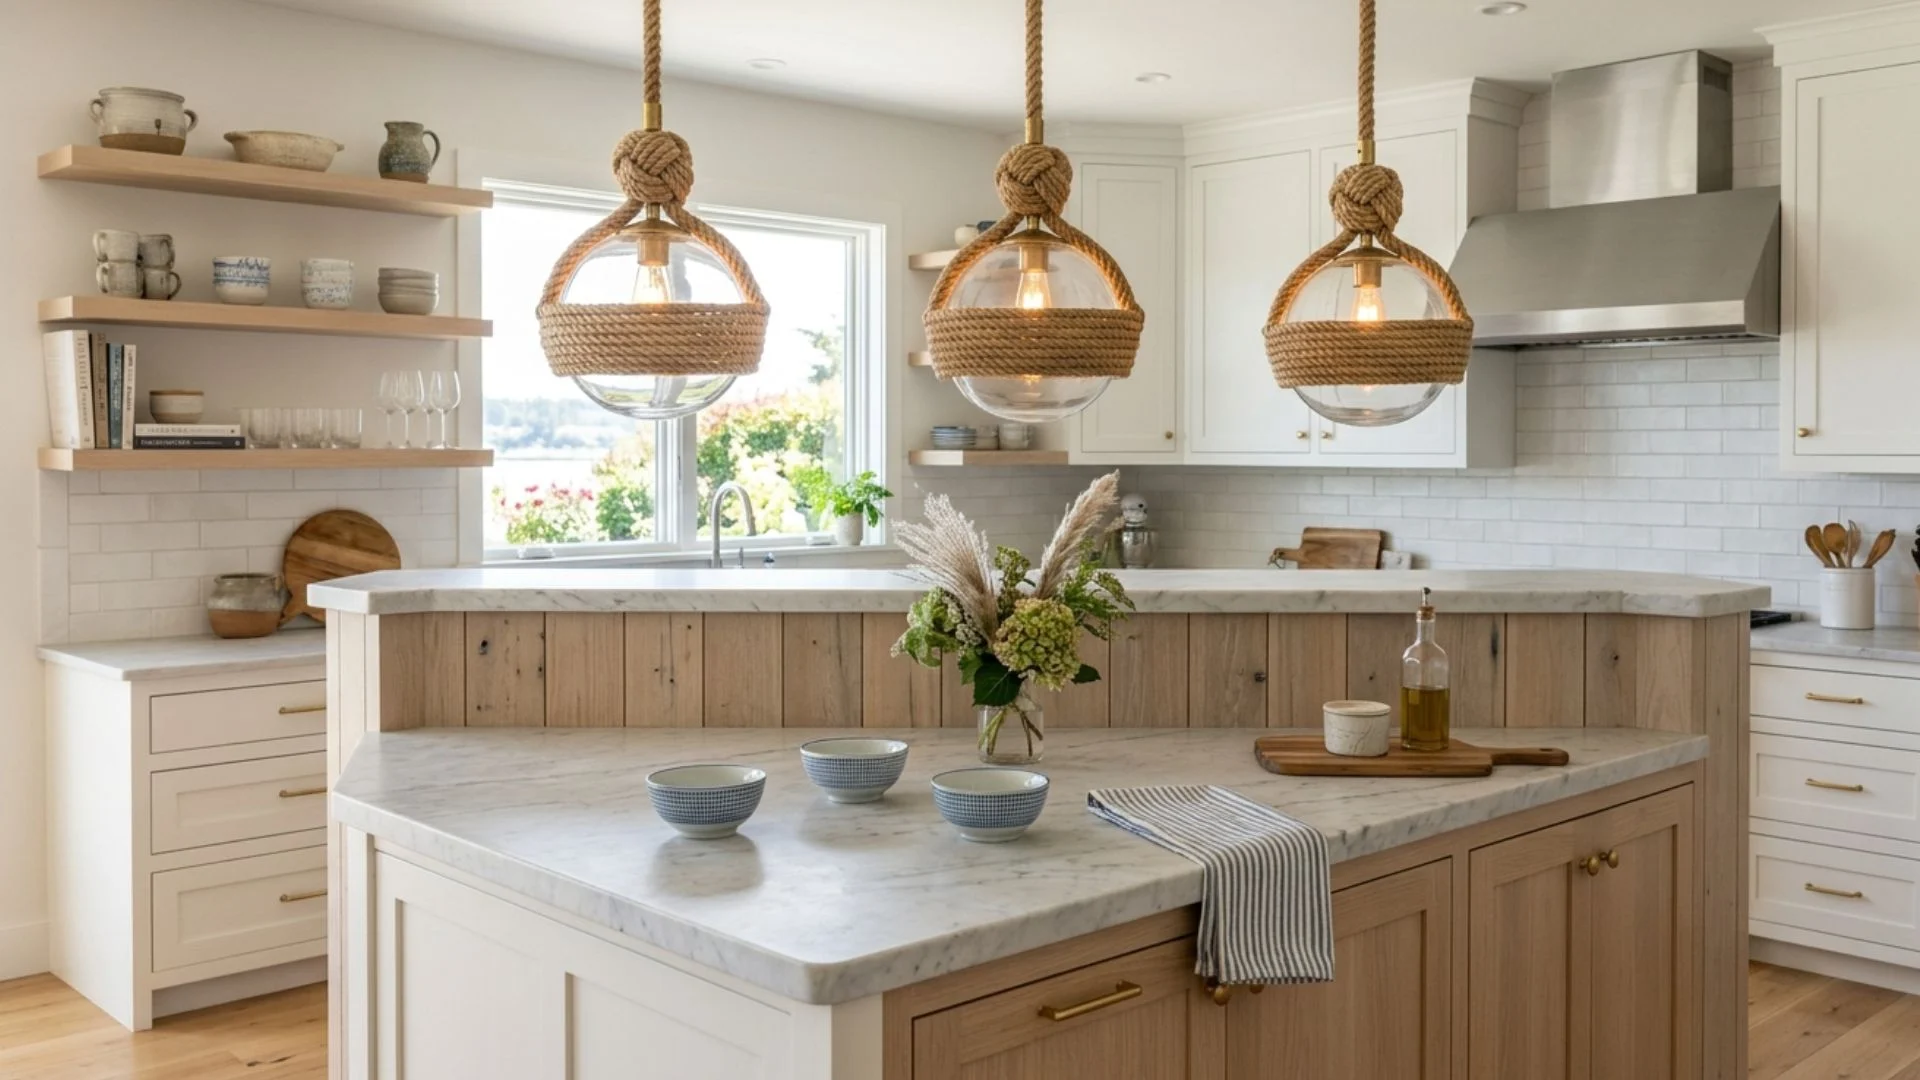
Rope pendants introduce casual coastal character through wrapped cords, knotted details, or rope-framed shades. The natural fiber adds texture without relying on bright nautical colors or themed decorations.
These fixtures complement white cabinetry, pale wood, blue accents, and stone countertops.
Choose tightly woven rope for a refined look or thicker knots for stronger rustic character. Keep the material away from cooking splatter and select a design that can be dusted easily.
10. Choose Pleated Ceramic Pendant Shades
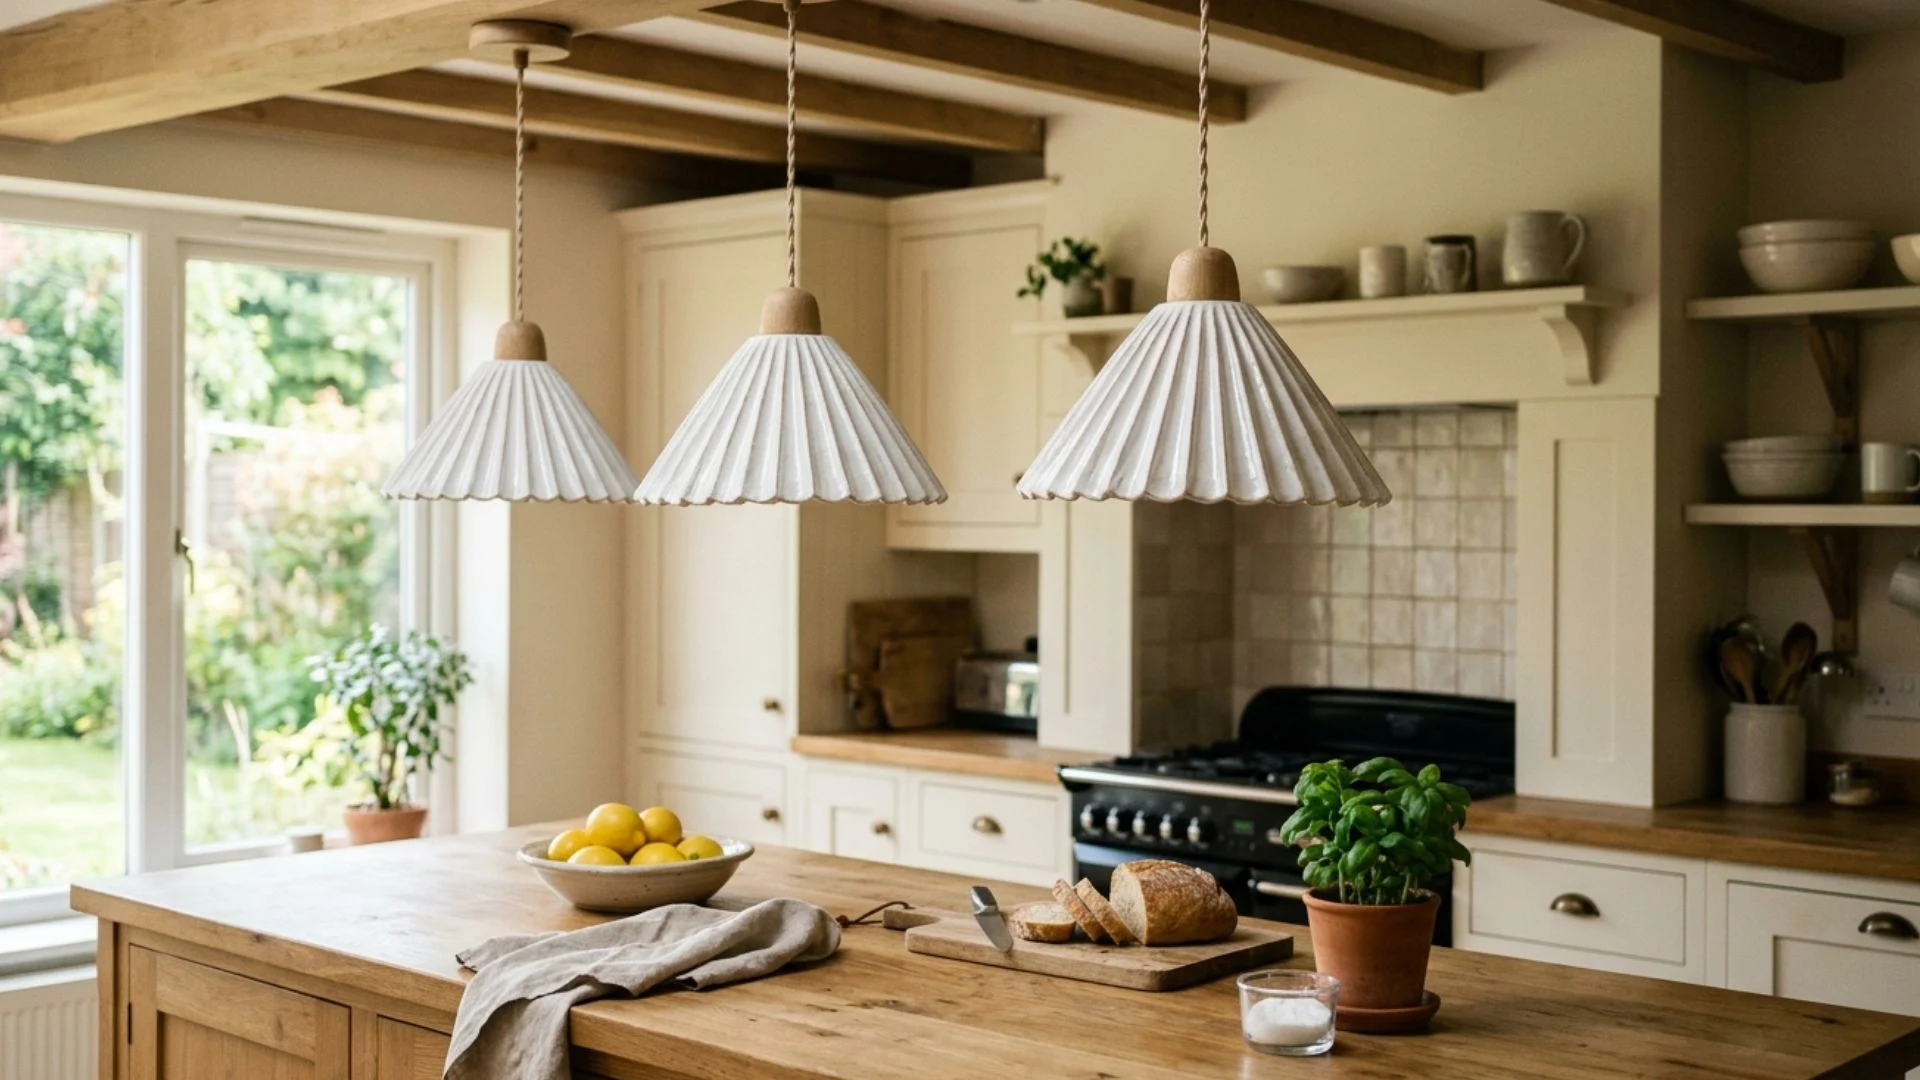
Pleated ceramic pendant shades add subtle craftsmanship through their ridged surfaces and handmade appearance.
The folds catch light and shadow, giving a simple fixture greater visual depth. Neutral white, cream, or clay finishes work well in Scandinavian, cottage, Japandi, and contemporary kitchens.
Because ceramic shades direct light downward, they are useful above food-preparation areas. Check the fixture weight before installation and use reinforced ceiling boxes when the shades are particularly large or dense.
11. Install a Rustic Wood-Beam Chandelier
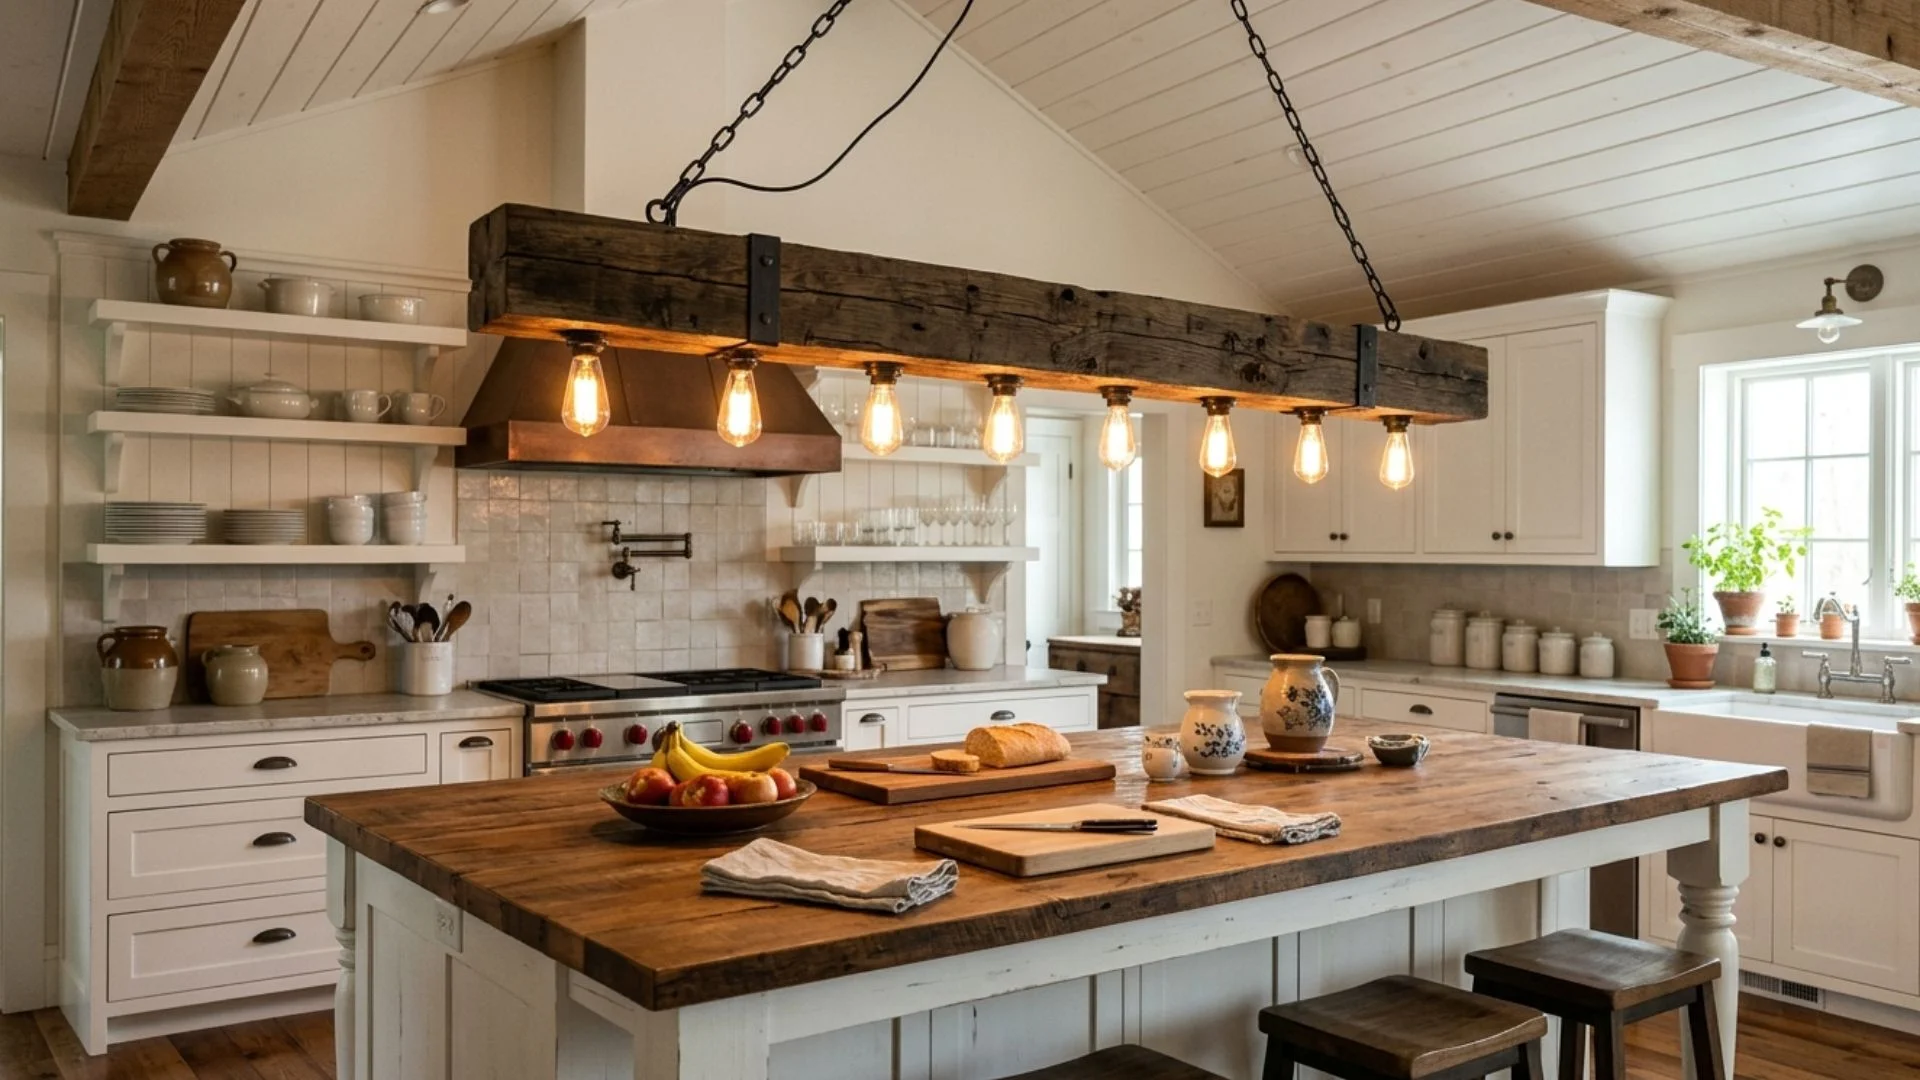
A rustic wood-beam chandelier follows the island’s horizontal shape and brings warmth to a large kitchen.
Bulbs mounted along the beam distribute light across a broad countertop, reducing the need for several separate pendants. Reclaimed or distressed wood complements farmhouse interiors, while smooth timber suits cleaner transitional spaces.
The fixture should be shorter than the island and centered carefully. Secure installation is essential because solid wood designs can be heavier than standard linear chandeliers.
12. Add Elegance with Alabaster Pendants
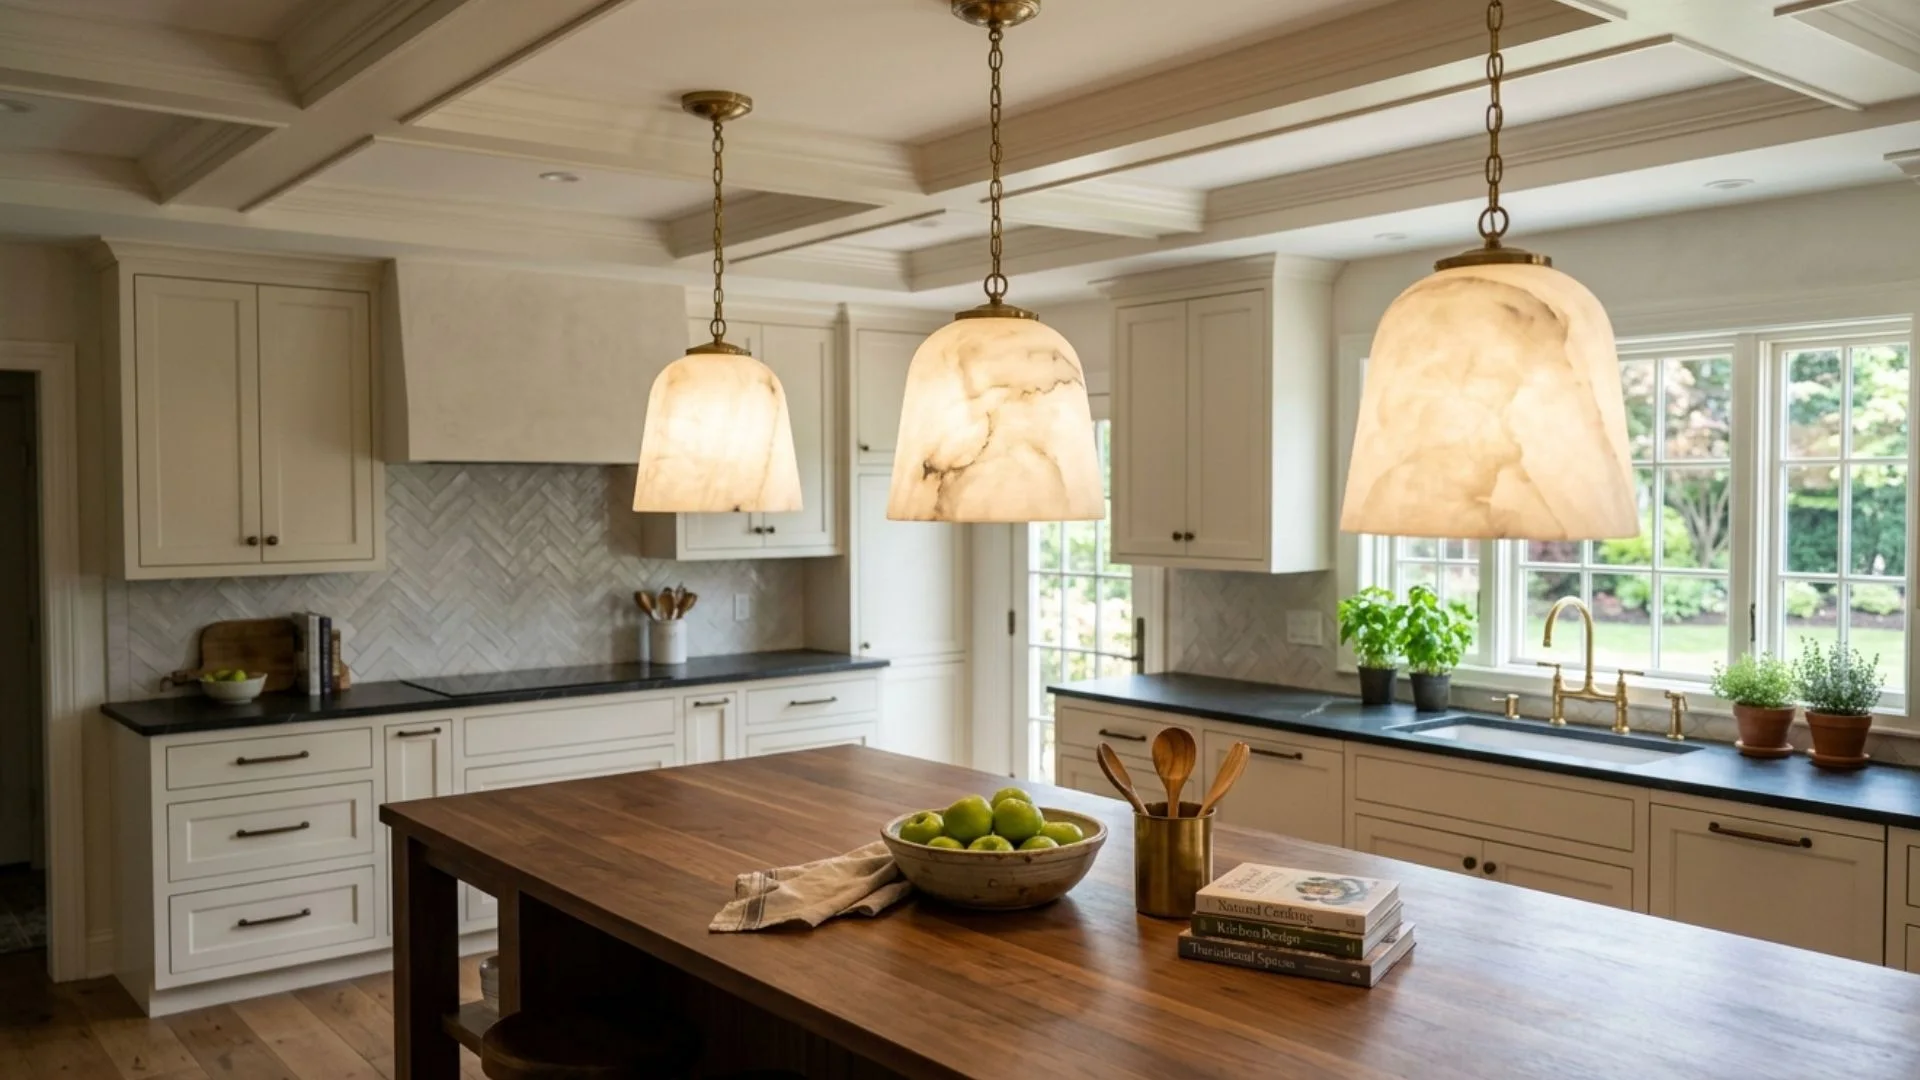
Alabaster pendants create a soft glow as light passes through the stone’s natural veining.
Every shade has slight variations, giving the fixture an individual character that suits refined modern or transitional kitchens. Creamy tones pair comfortably with brass, bronze, and warm wood finishes.
Since alabaster can be heavy and delicate, secure ceiling support and careful handling are important. Use lower-heat LED bulbs to protect the material and preserve its gentle, luminous appearance.
Modern and Statement Kitchen Island Lighting
Modern island fixtures use strong silhouettes, unusual materials, and contrasting finishes to command attention. Their scale should complement the island without competing with other major kitchen features.
13. Choose Oversized Matte Black Domes
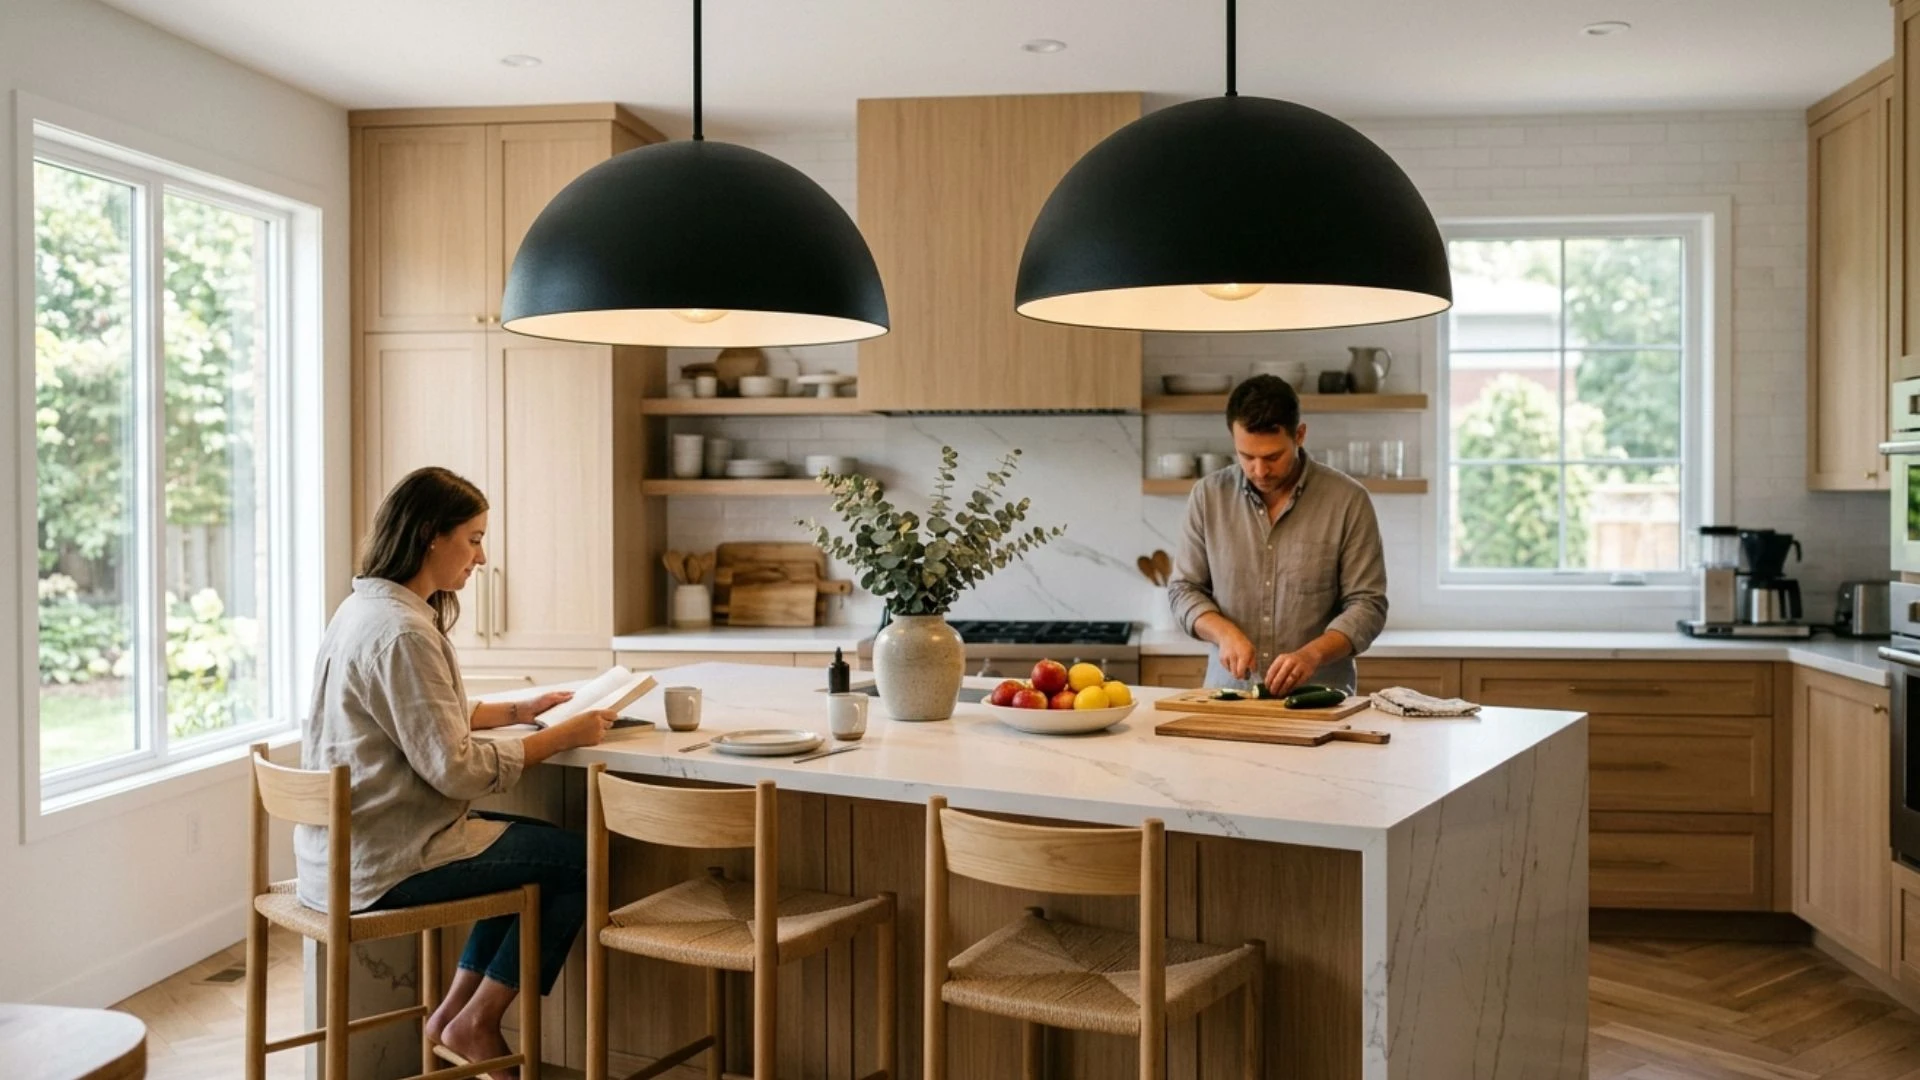
Oversized matte black domes create bold contrast and direct a wide pool of light onto the island.
Their solid shades conceal the bulbs, reducing glare when viewed from nearby seating or living areas. Black works especially well against pale cabinetry, natural wood, or veined stone.
Two large domes often look cleaner than several small pendants. Choose light-colored interiors to improve reflection and prevent the work surface from appearing darker than the surrounding kitchen.
14. Install a Slim Linear LED Pendant
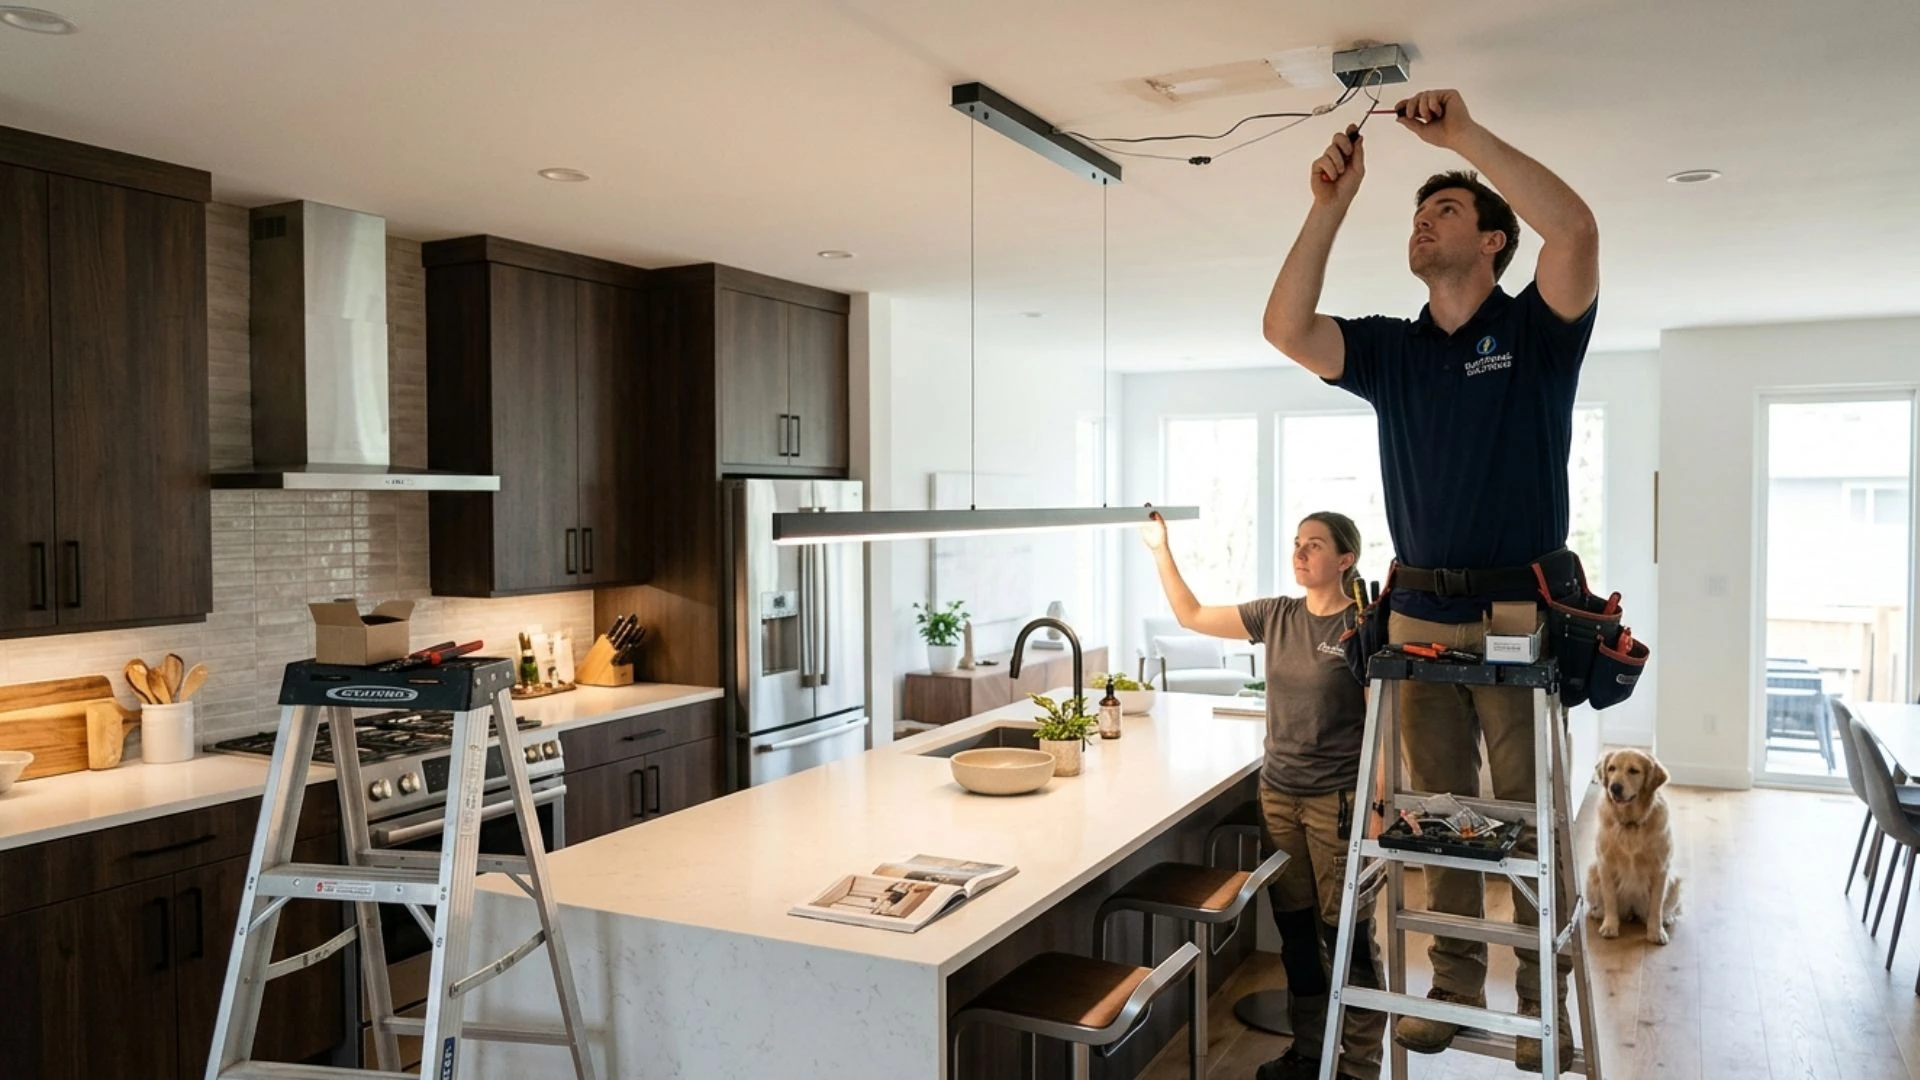
A slim linear LED pendant provides even illumination while maintaining a clean, architectural appearance.
Its narrow horizontal profile mirrors a long island without adding bulky shades or repeated hanging cords. This fixture works particularly well in minimalist, modern, and open-plan kitchens.
Select a dimmable model with replaceable components or a reliable warranty, since many integrated LEDs lack standard bulbs. The fixture length should remain shorter than the countertop to maintain balanced proportions.
15. Feature a Sculptural Branch Chandelier
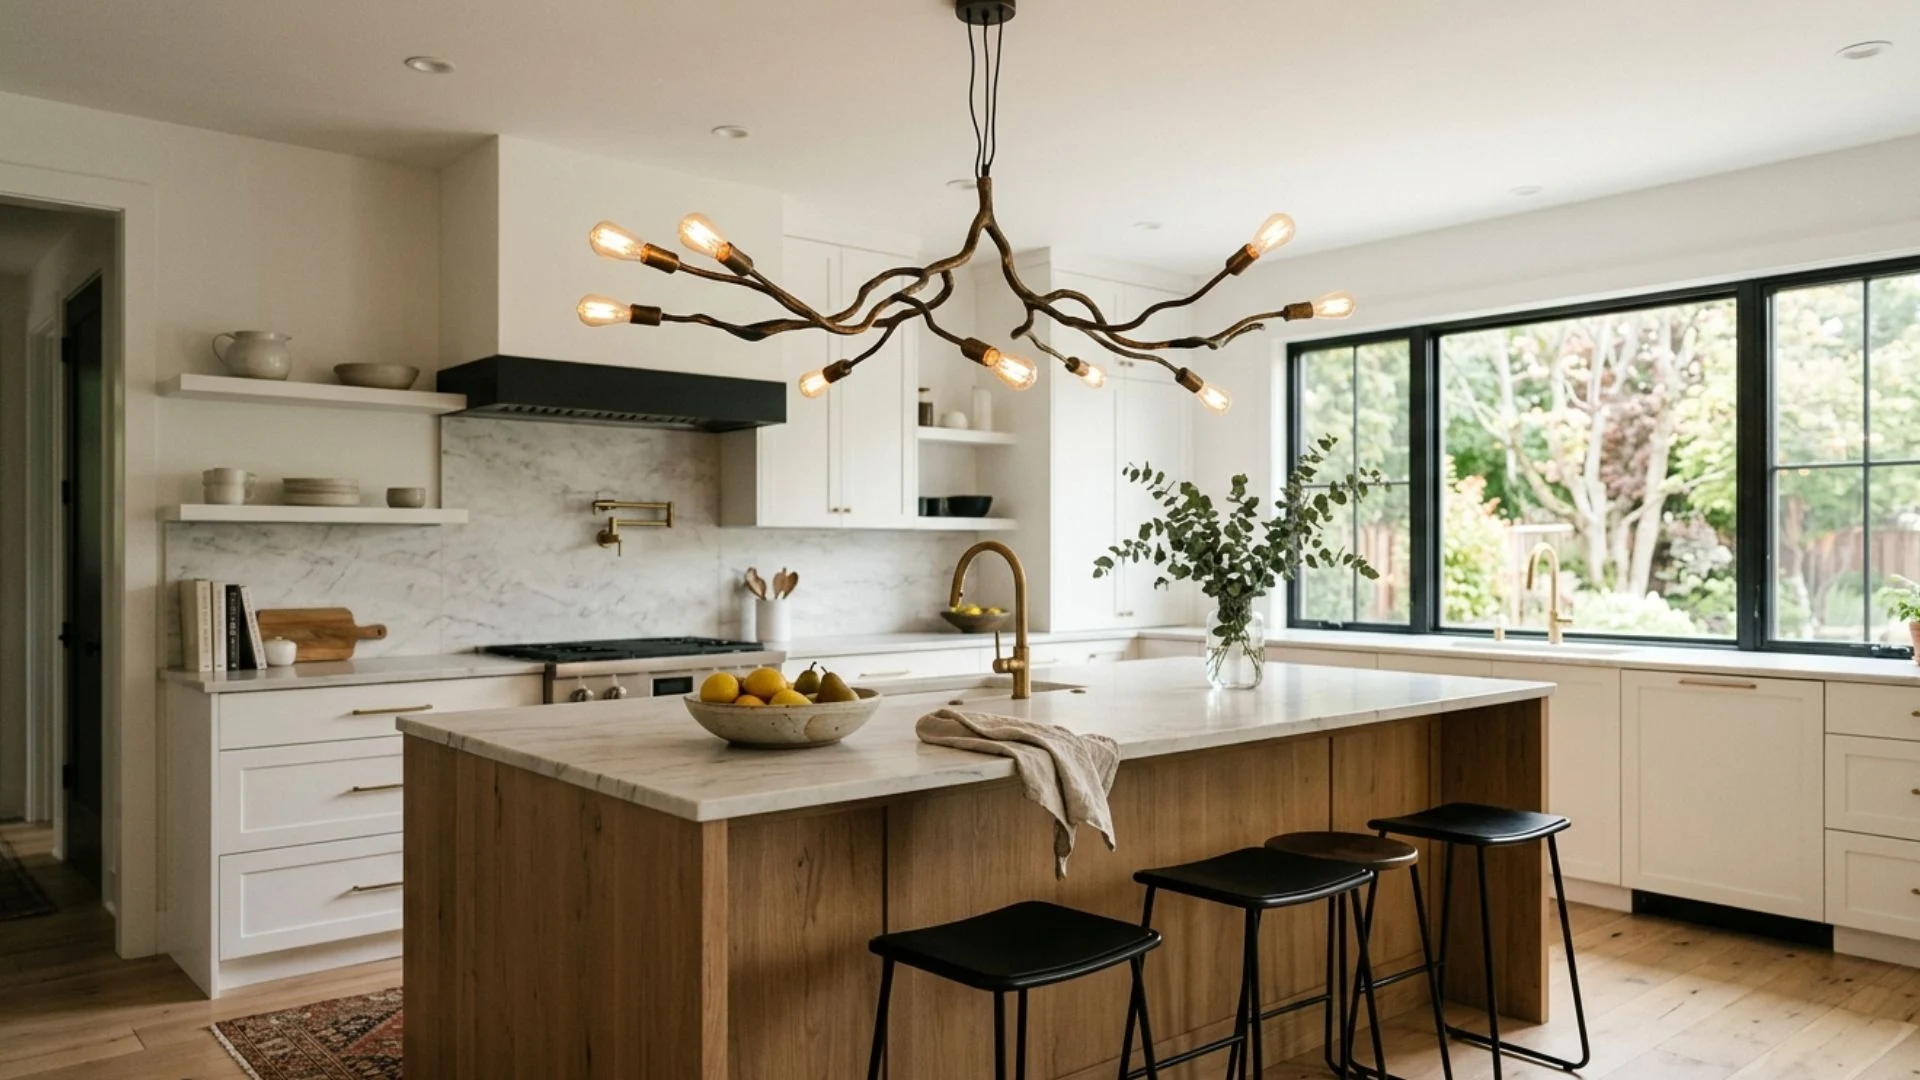
A sculptural branch chandelier treats island lighting as a piece of functional art. Branching arms spread bulbs in different directions, filling vertical space and creating an expressive silhouette.
Brass, black, or mixed-metal finishes suit contemporary and eclectic kitchens with simple surrounding surfaces.
Because the fixture already attracts attention, nearby pendants and decorative elements should remain understated. Check its width, height, and bulb positions carefully to prevent glare or interference with cabinets and walkways.
16. Create Contrast with White Cone Pendants
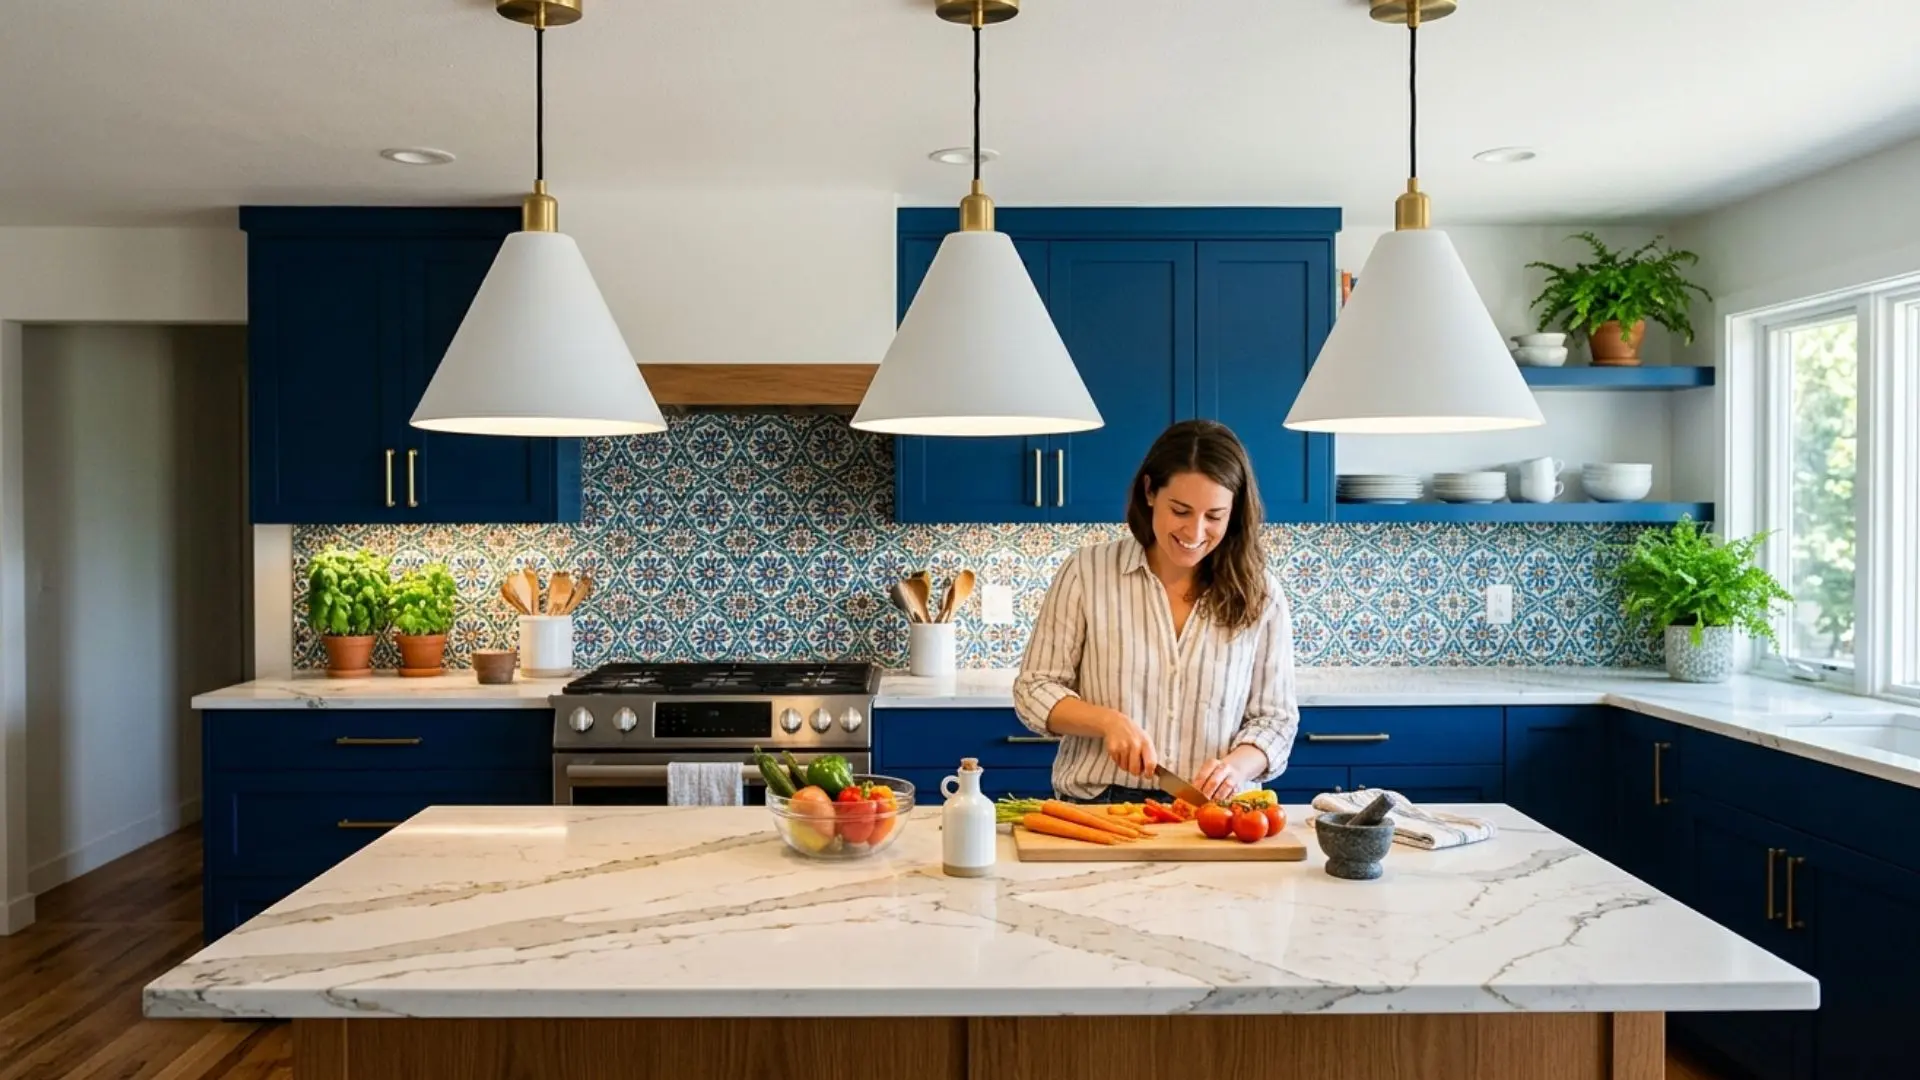
White cone pendants offer a crisp alternative to darker metal fixtures while maintaining strong downward task lighting.
Their tapered shape feels simple and modern, allowing colorful cabinetry, stone countertops, or patterned backsplashes to remain prominent.
White shades blend into pale ceilings and make compact kitchens feel less crowded. Dark cords or brass fittings can add definition. Select washable finishes because cooking residue and dust tend to appear more quickly on clean white surfaces.
17. Introduce Colorful Hand-Blown Glass Lights
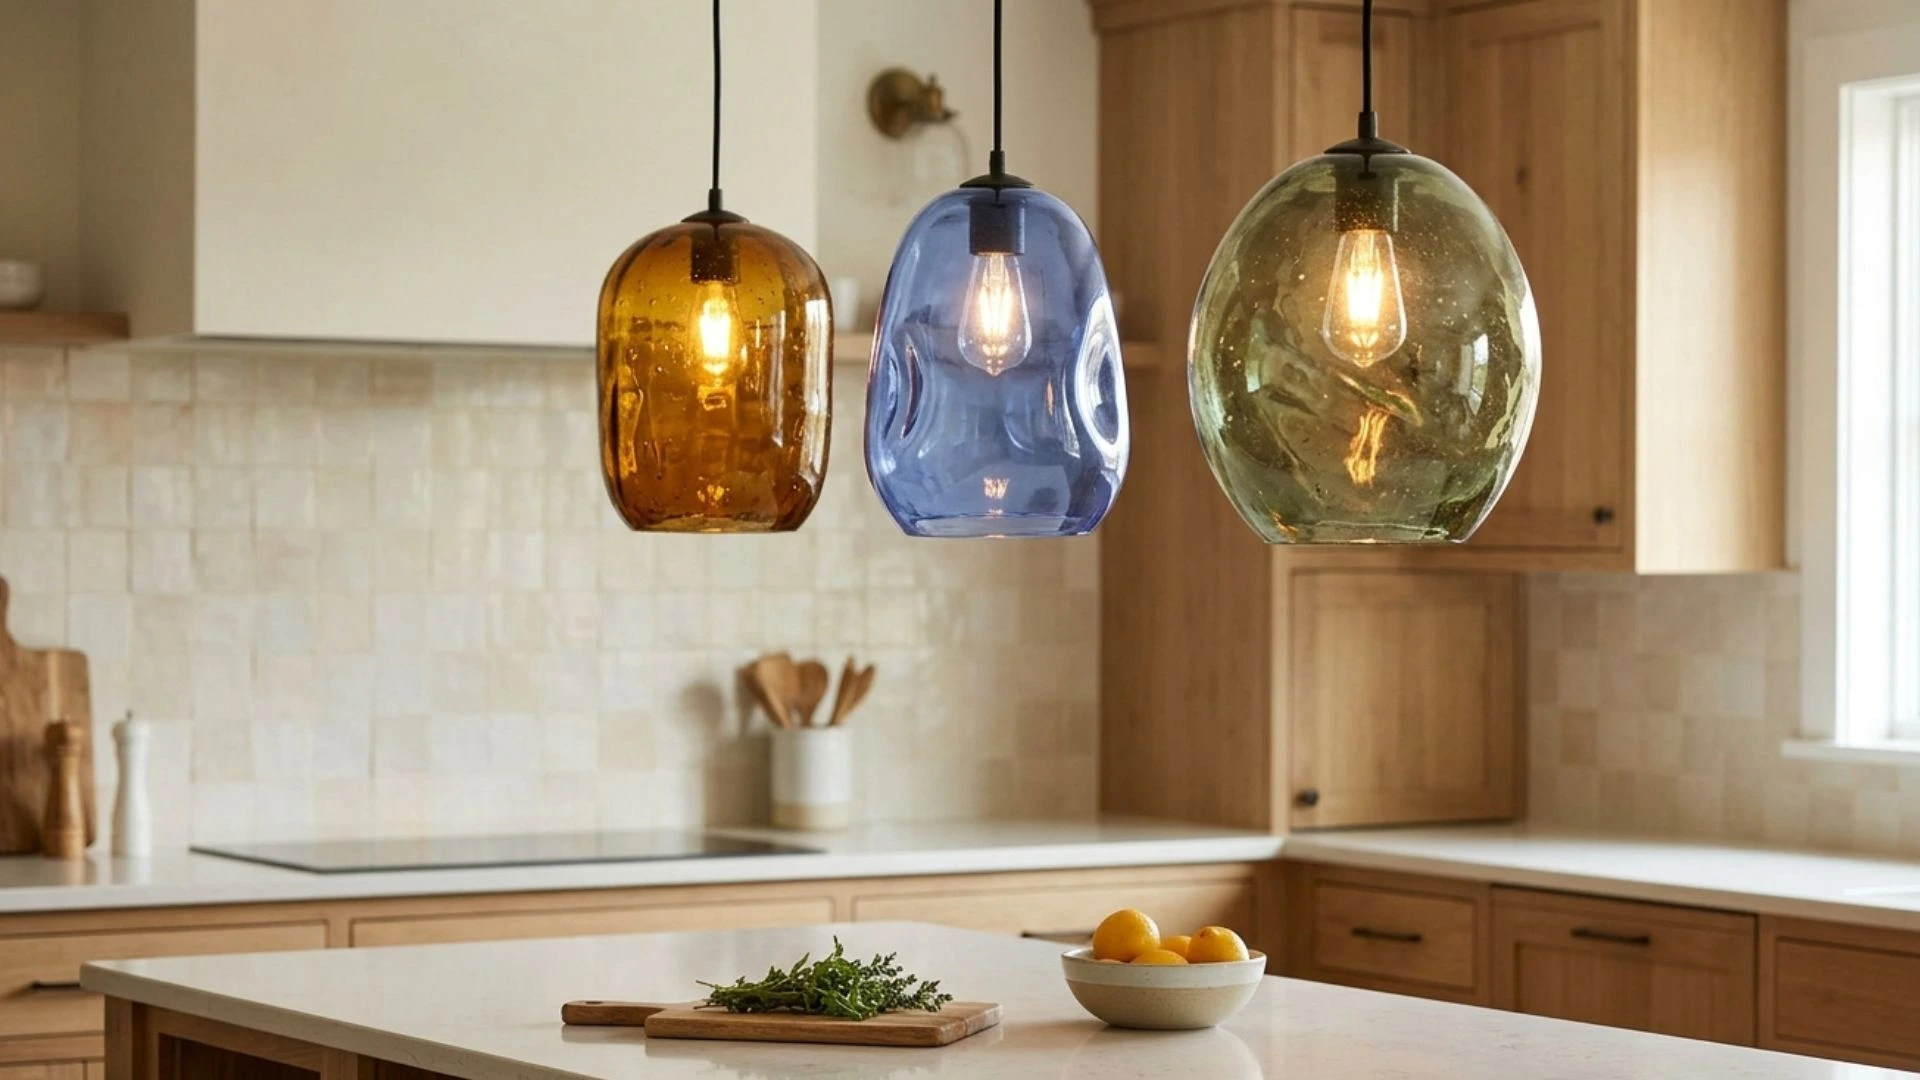
Hand-blown glass pendants add color, irregular texture, and artisan character above the island. Subtle variations in shape and tone prevent a group of fixtures from looking mass-produced.
Amber, blue, green, or smoky glass can repeat colors found in cabinetry, artwork, or backsplash tiles. Keep the remaining palette controlled so the glass remains the focal feature.
Transparent colored shades may alter the countertop’s appearance, making separate neutral task lighting helpful for cooking.
18. Try Industrial Cage Pendant Lights
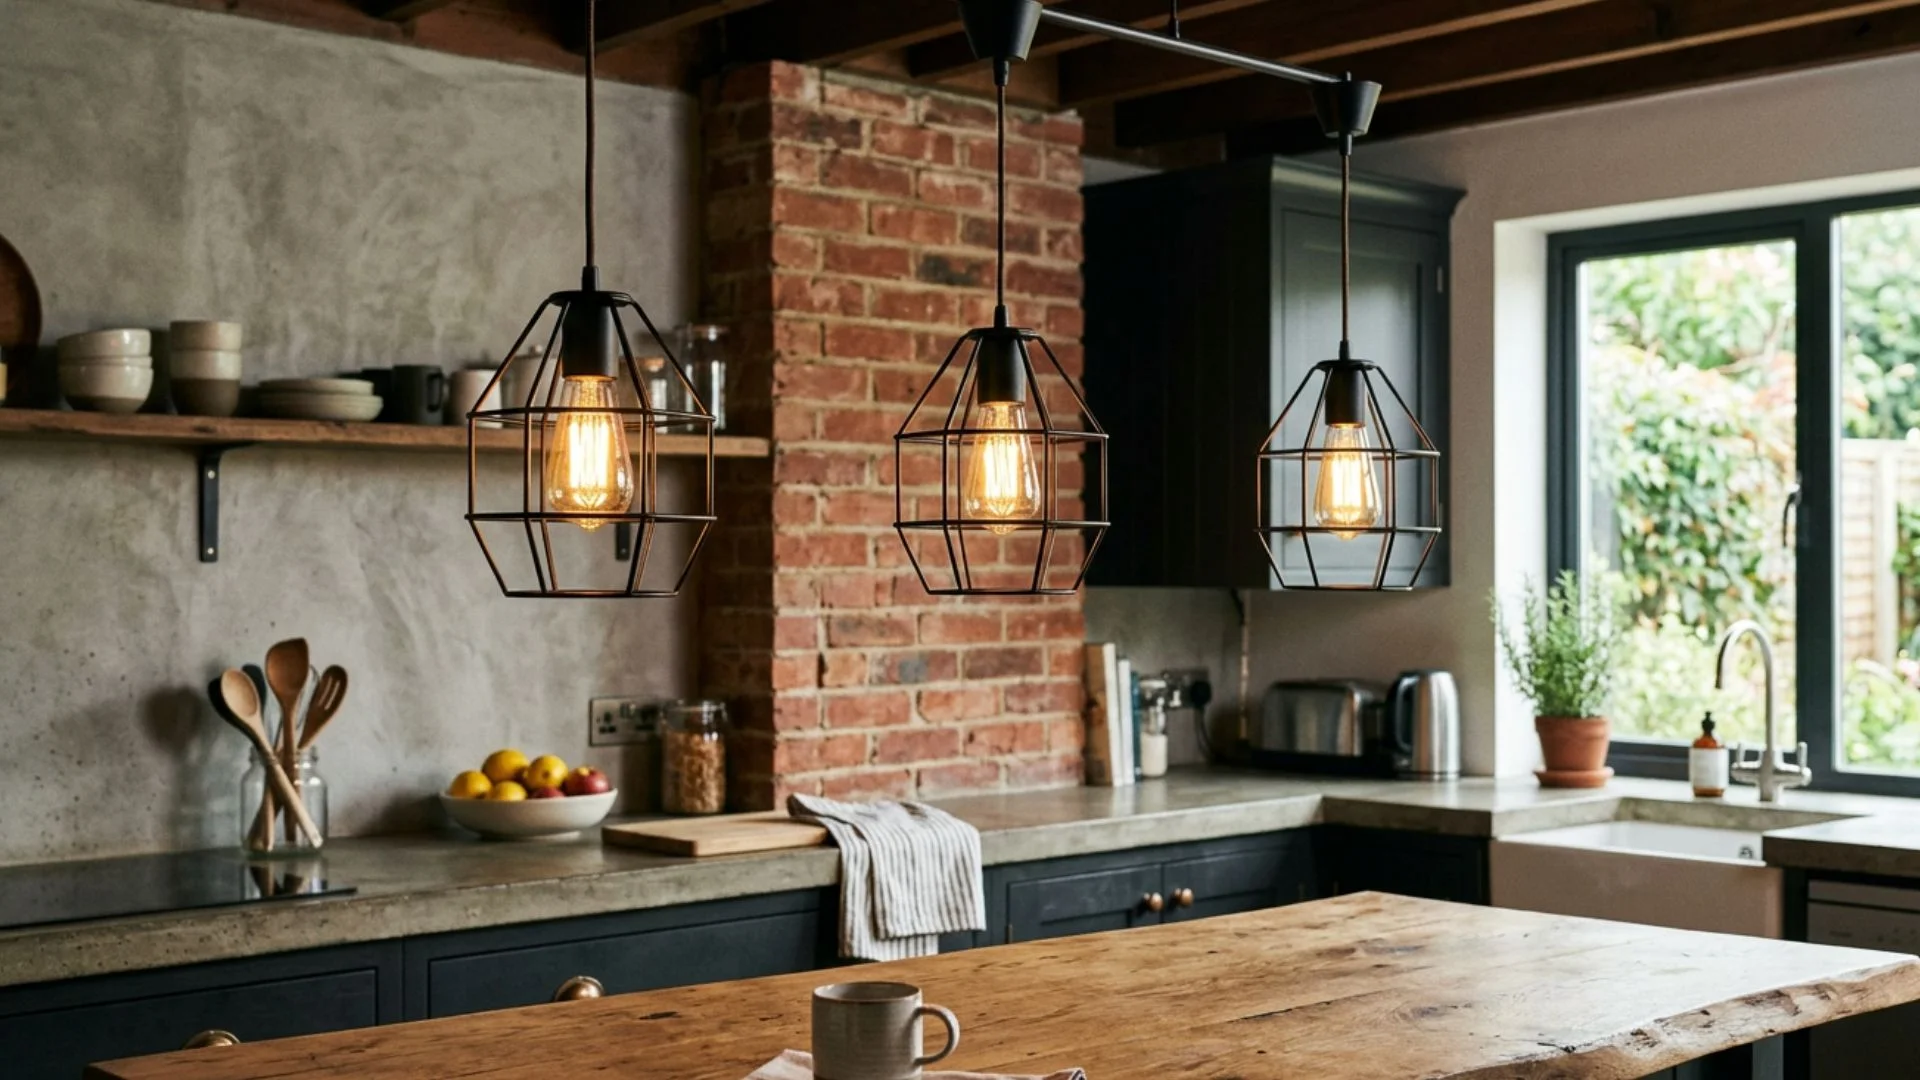
Industrial cage pendants use open metal frames to expose the bulb and create a strong graphic outline.
Their airy construction suits kitchens that need visual definition without heavy shades. Matte black, aged steel, or bronze finishes pair naturally with brick, concrete, wood, and dark cabinetry.
Decorative bulbs strengthen the industrial effect, although high-output exposed bulbs may produce glare. Frosted or low-lumen dimmable bulbs provide a more comfortable result above island seating.
19. Display a Cluster of Teardrop Pendants
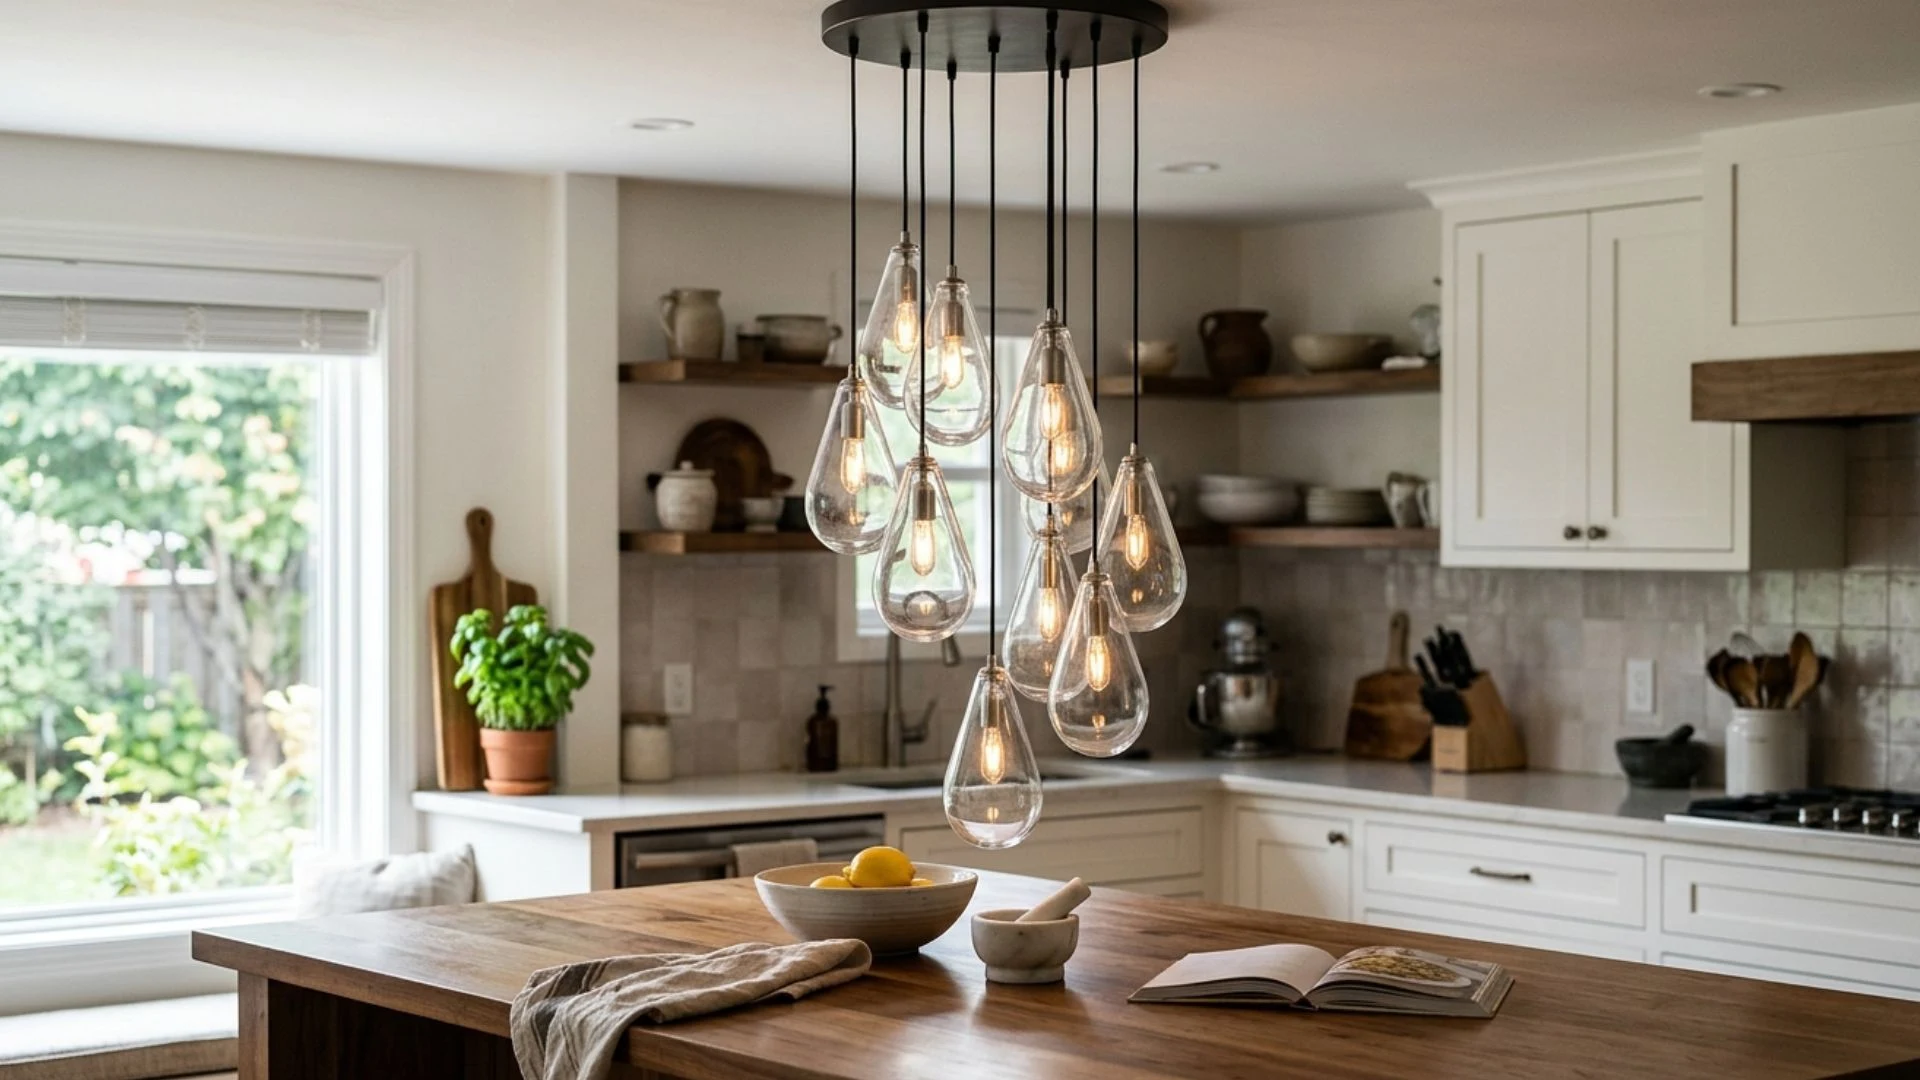
A cluster of teardrop pendants creates movement by suspending several narrow fixtures at varied heights.
The arrangement works well above a compact island or at one end of a larger countertop where a sculptural accent is needed. Glass drops feel light and elegant, while metal versions produce stronger contrast.
Plan the cluster before installation so the lowest pendant clears sightlines. Keep enough space between shades to prevent contact when air moves through the kitchen.
20. Add Sparkle with a Crystal Chandelier
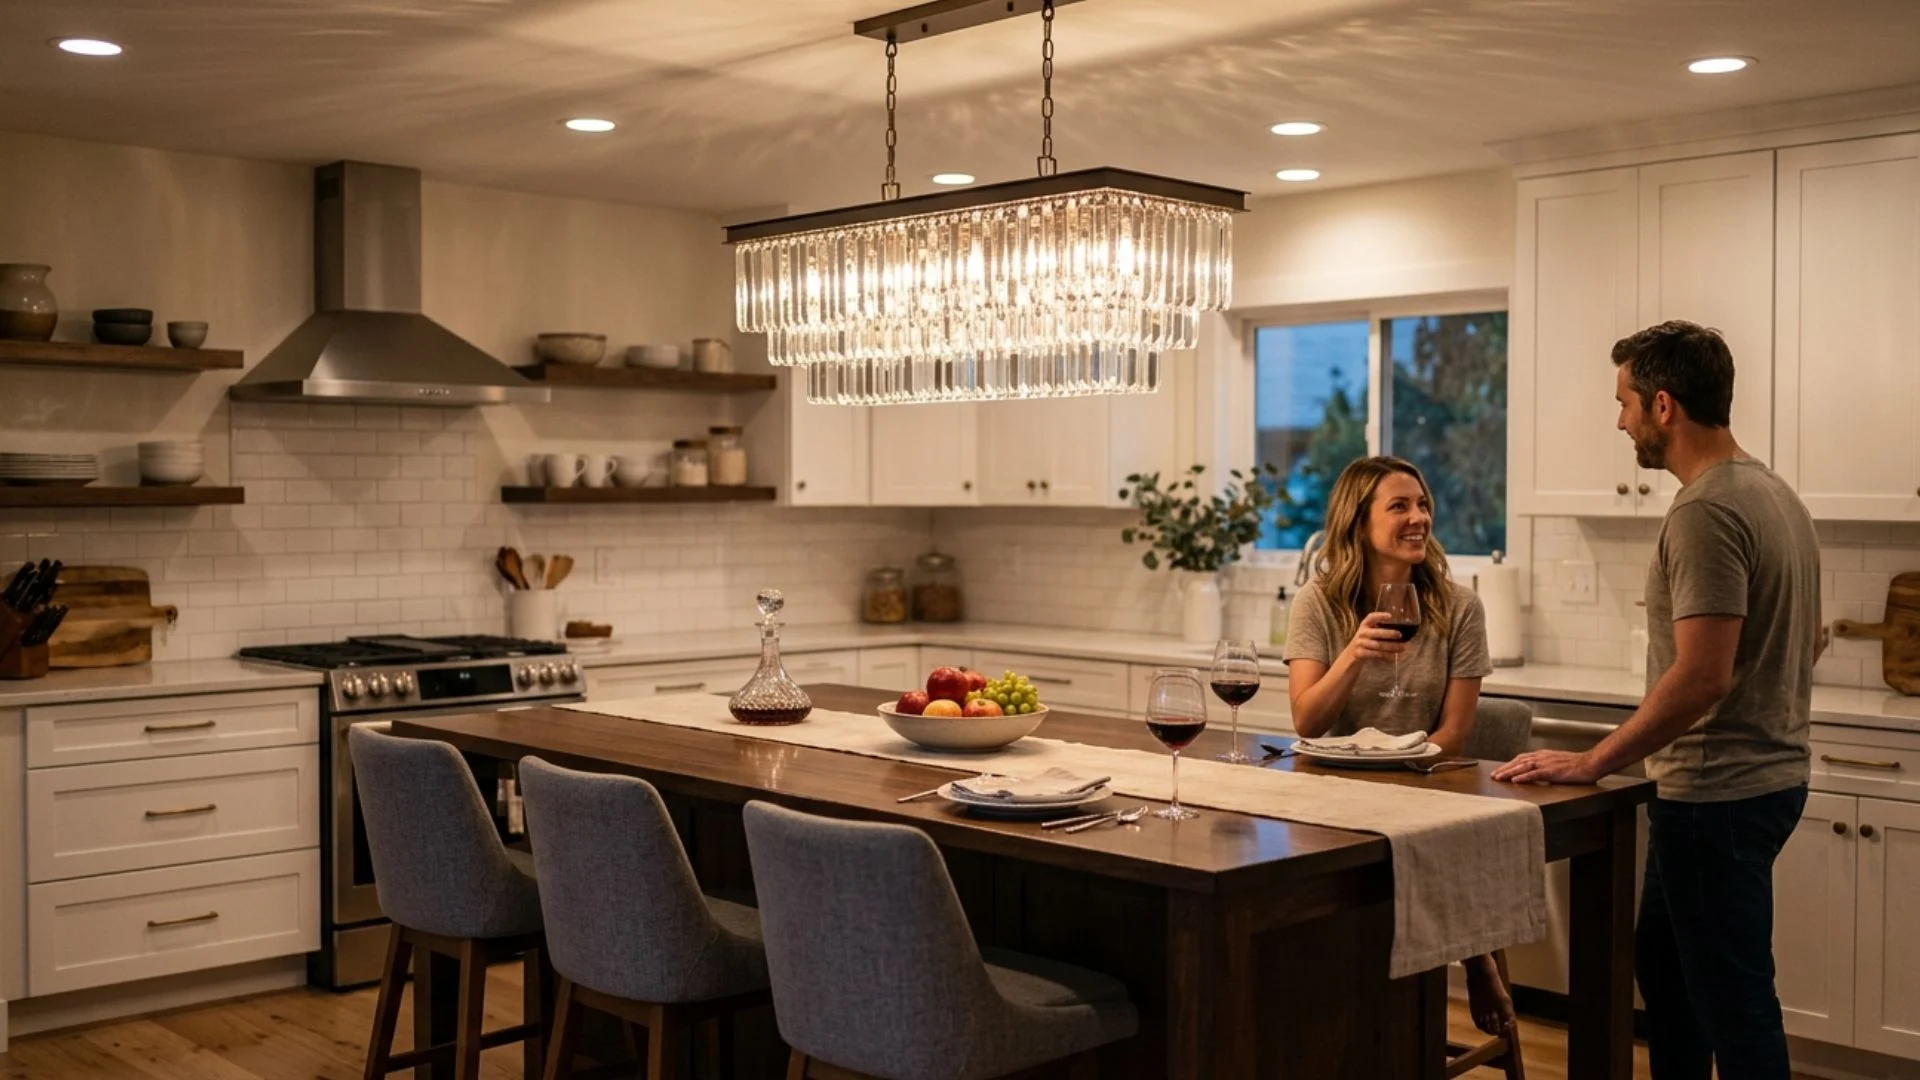
A crystal chandelier introduces reflection and glamour to an island that also serves as an entertaining or dining area.
Faceted pieces scatter light across nearby surfaces, creating greater visual depth after dark. Streamlined rectangular or tiered designs feel more suitable for kitchens than highly ornate traditional chandeliers.
Keep the fixture away from active cooking splatter and select removable crystal components for easier cleaning. Recessed lights can provide the stronger task illumination needed for food preparation.
21. Use Copper Pendants Over a Green Island
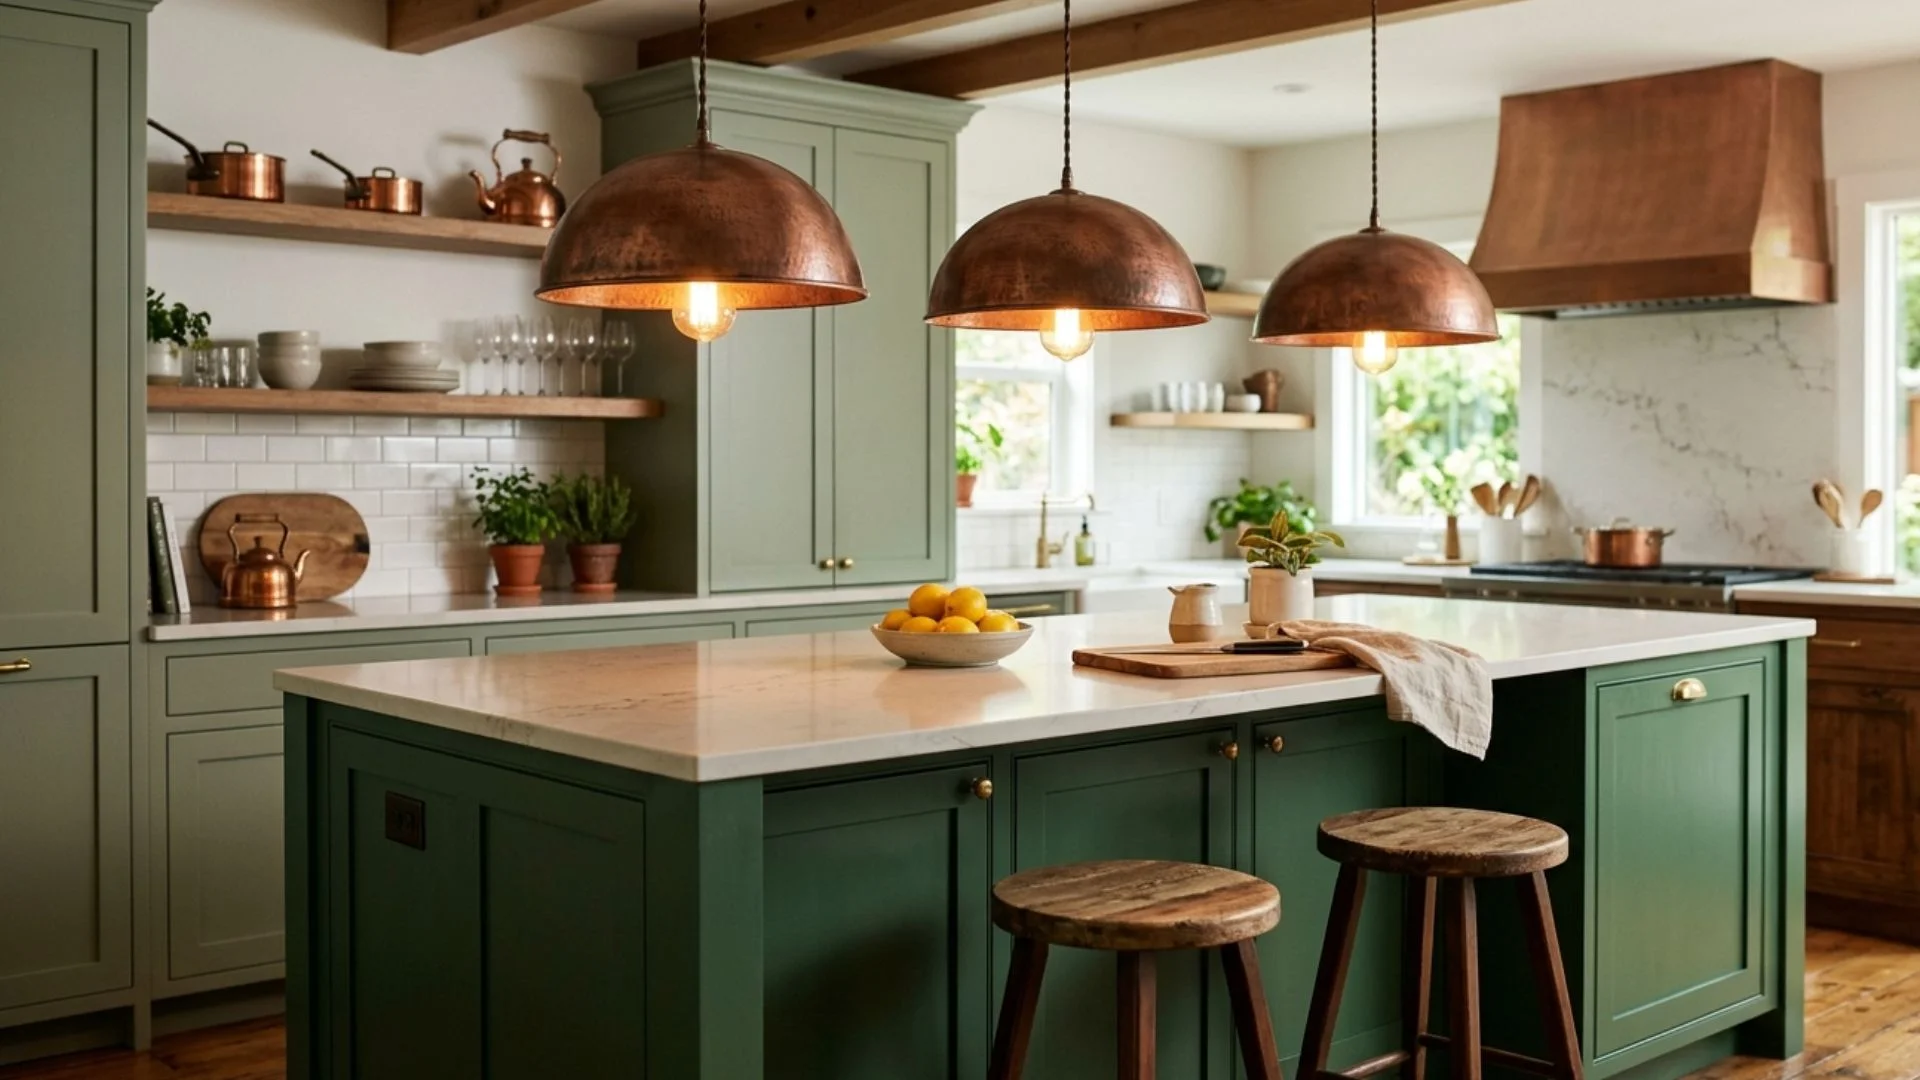
Copper pendants create a rich, warm contrast against green cabinetry, especially sage, olive, forest, or emerald tones.
The metal develops natural character over time, although sealed finishes retain a brighter appearance. Dome or cone shades focus light on the countertop while reflecting a warm glow inside.
Repeat copper sparingly through cookware or small accessories rather than matching every fitting. Warm-white bulbs support the color relationship and prevent green surfaces from appearing dull.
22. Pair Black Frames with Gold Accents
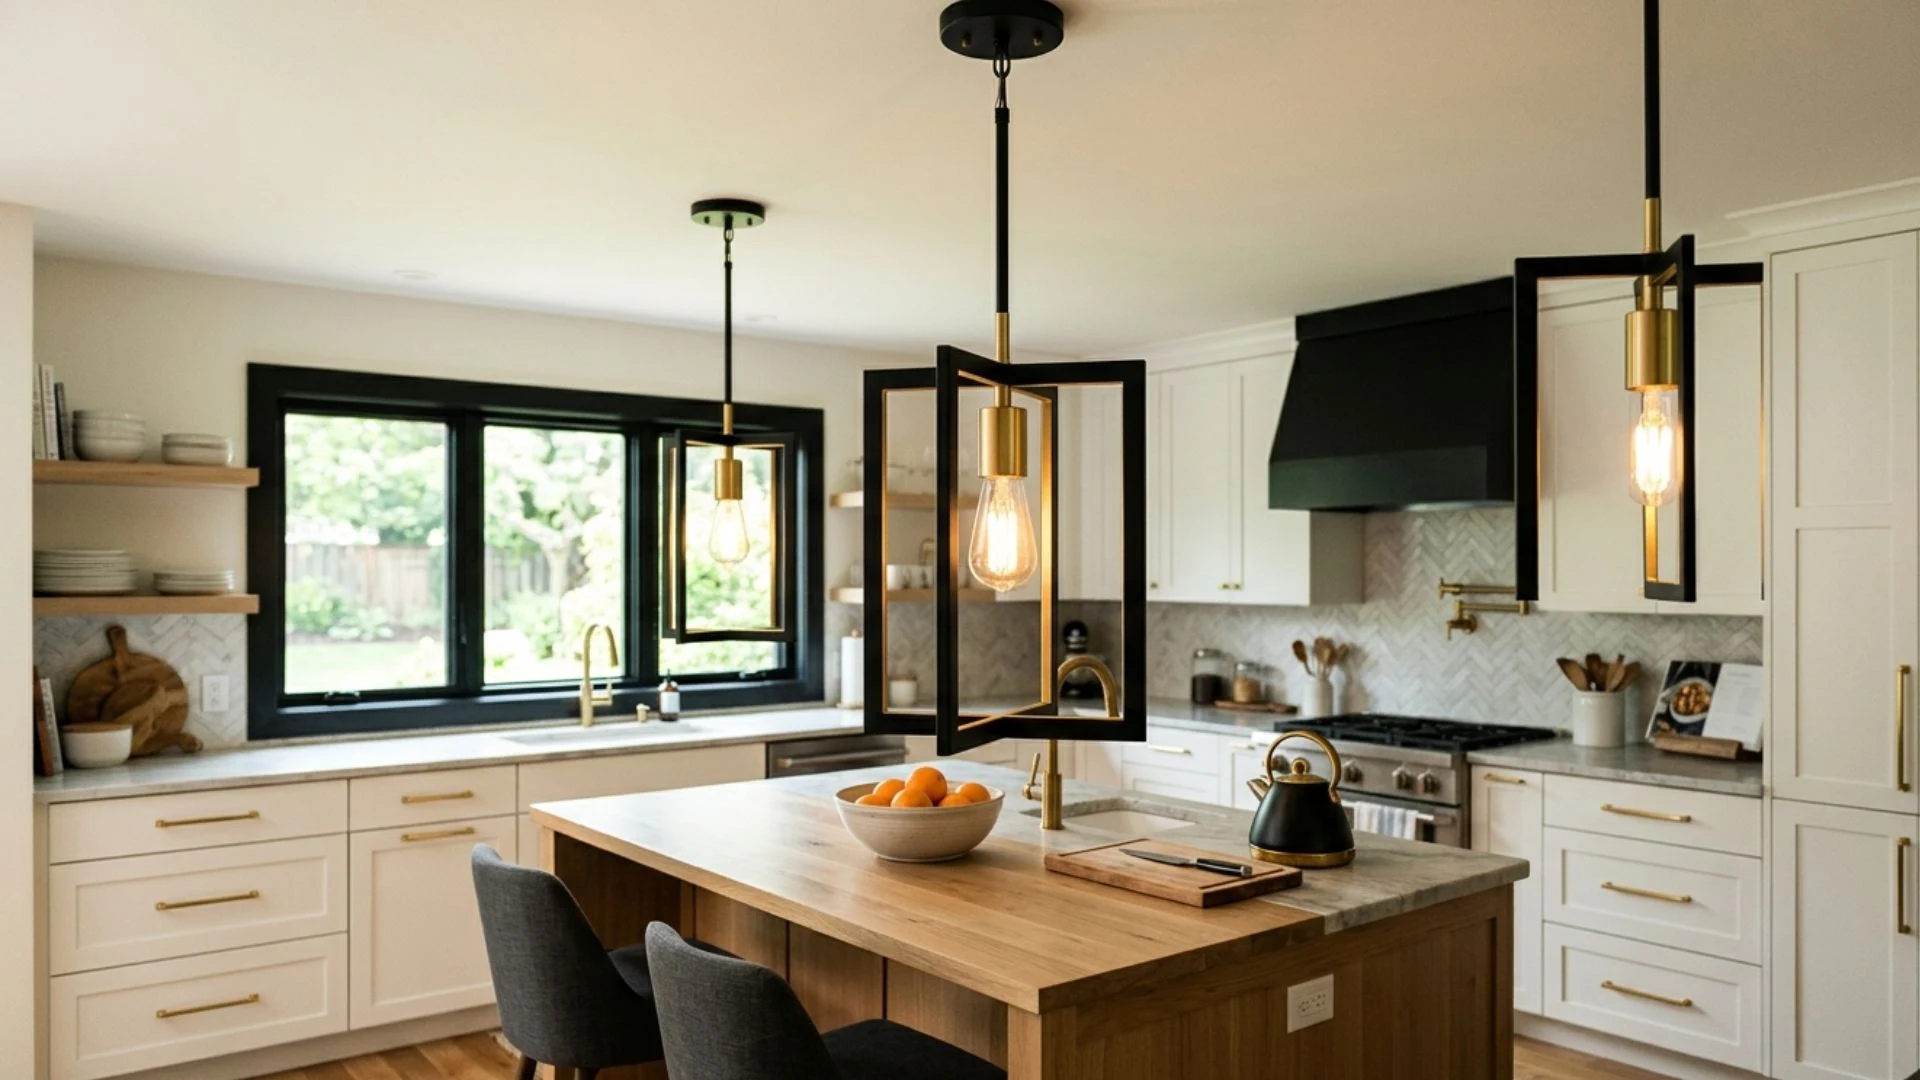
Black frames with gold accents combine sharp definition and warmth in one fixture. The dark outline anchors the lighting against pale ceilings, while gold sockets, rods, or interior surfaces connect with brass hardware.
This mixed-metal approach suits transitional, modern, and Art Deco-inspired kitchens. Repeating both finishes elsewhere can make the pairing feel deliberate.
Avoid adding several unrelated metals nearby, since too many competing finishes may weaken the fixture’s clear graphic appearance.
23. Try Minimalist Cylinder Pendant Lights
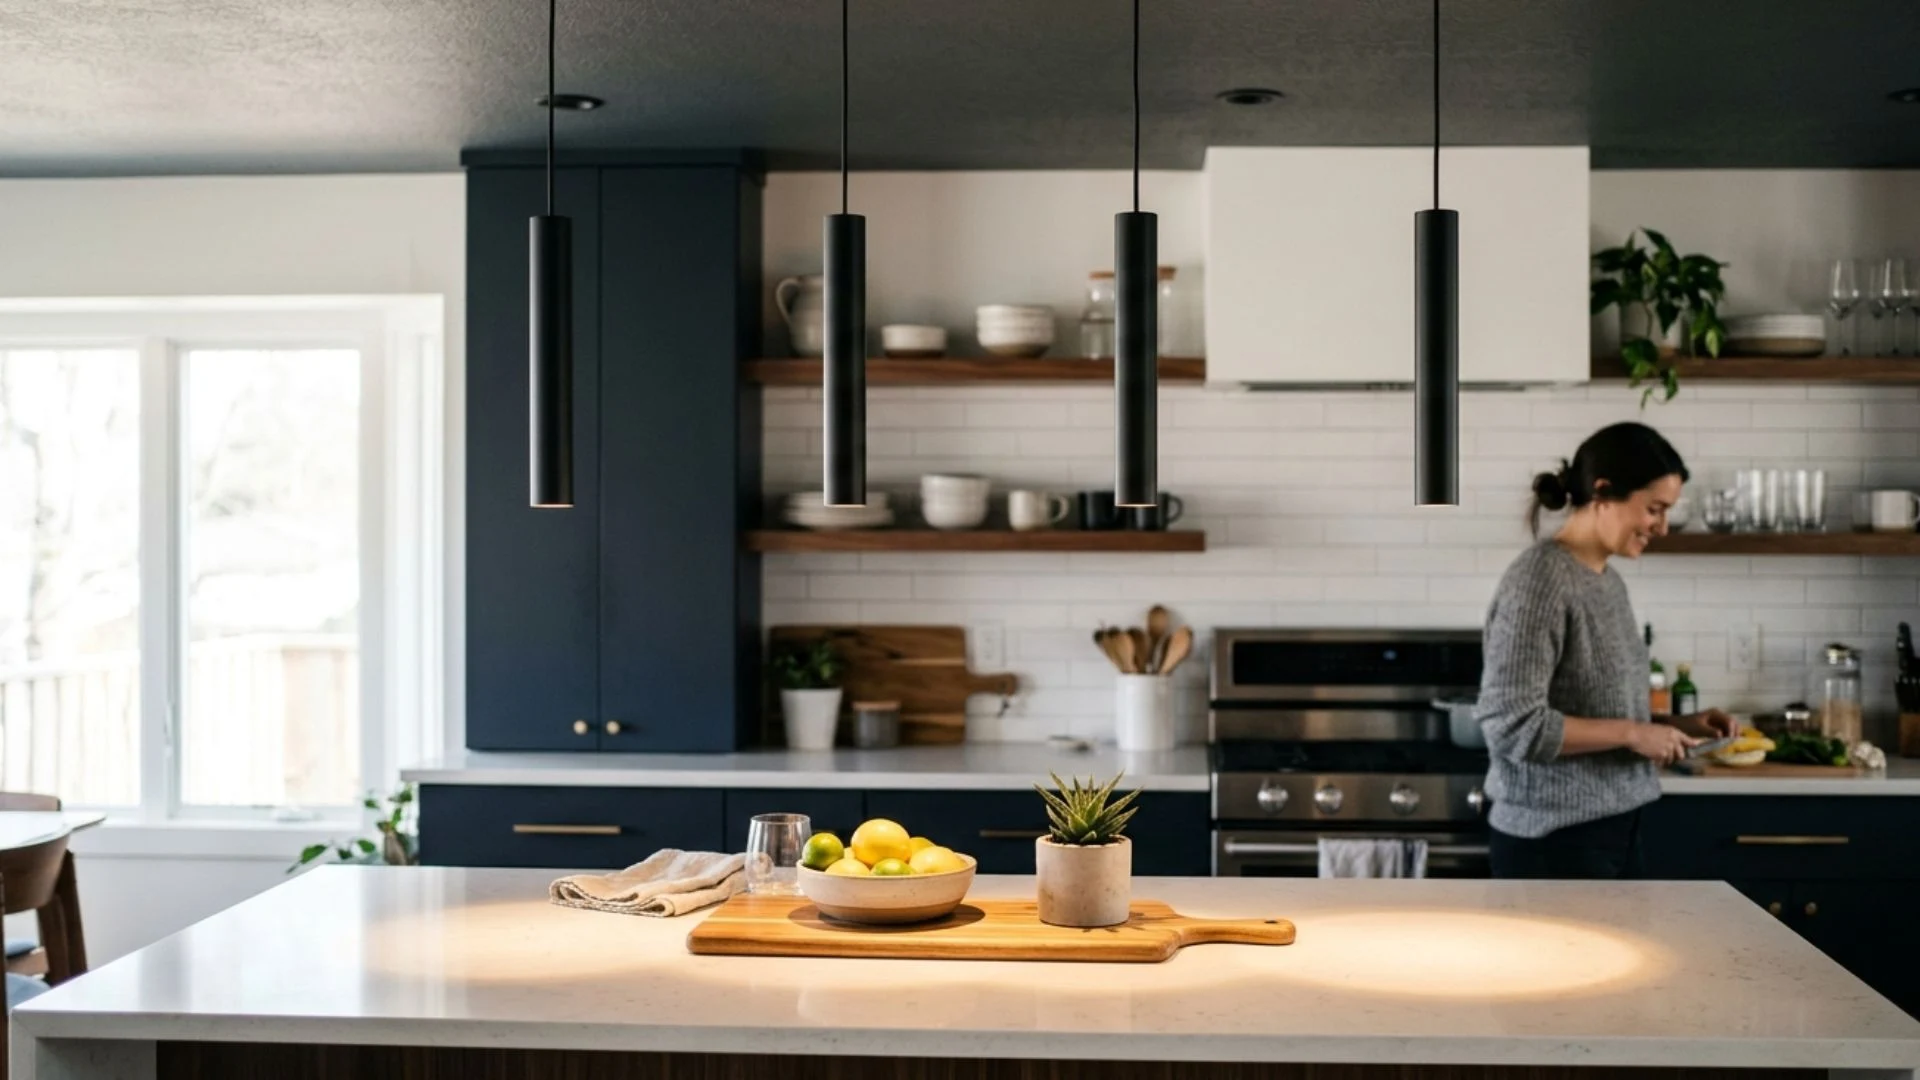
Minimalist cylinder pendants use narrow vertical forms to provide focused light without overwhelming the island.
Their compact diameter makes them useful in small kitchens or arrangements requiring several fixtures. Black, white, brass, or concrete cylinders complement contemporary and minimalist interiors.
Because their beams can be narrow, spacing must support even coverage across the countertop. Choose adjustable models when possible, and check the beam angle before installation to avoid bright spots separated by dark sections.
24. Add Art Deco Fluted Glass Pendants
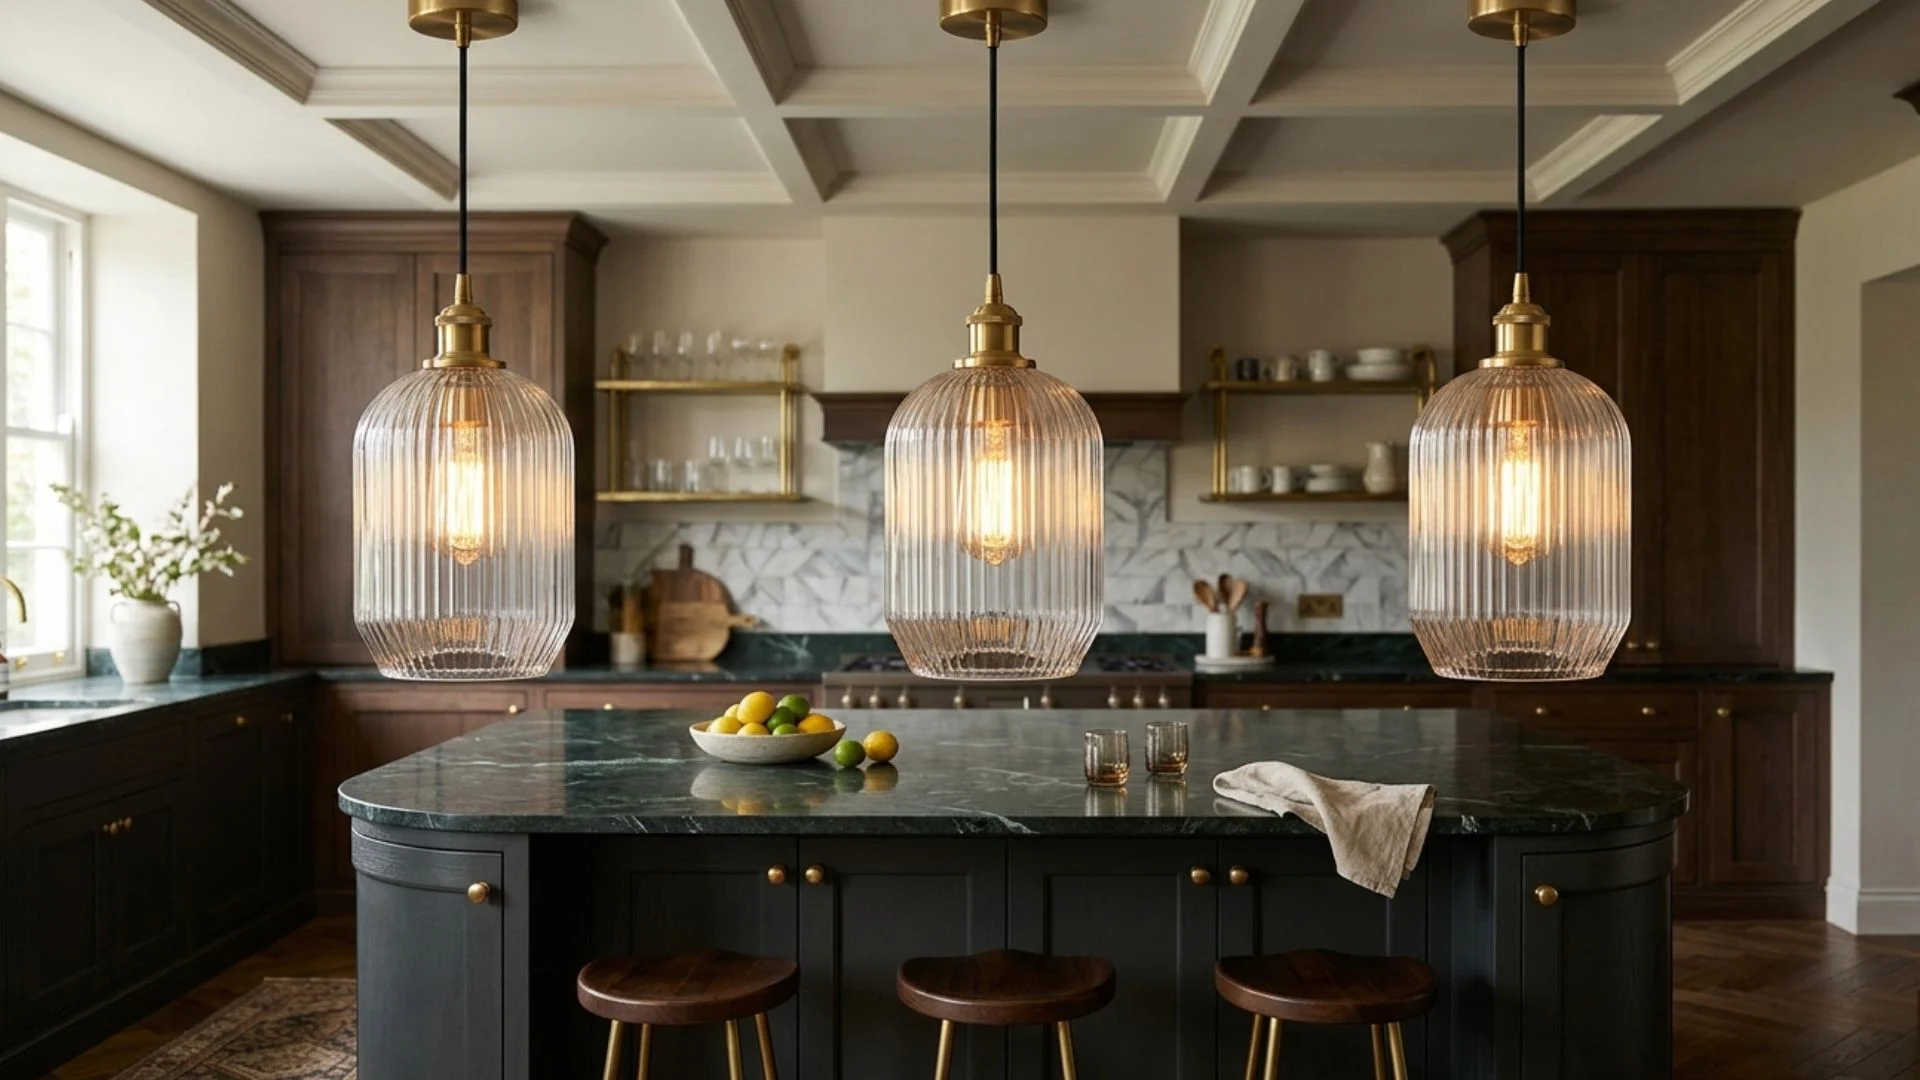
Art Deco fluted glass pendants combine geometric detailing with a polished, elegant finish.
Vertical grooves soften the exposed bulb and produce attractive highlights without hiding the shade’s structure. Brass or bronze fittings strengthen the period influence, while black hardware creates a more contemporary interpretation.
These pendants pair well with marble, dark cabinetry, and curved island edges. Use matching fixtures in a symmetrical row to preserve the orderly balance associated with Art Deco design.
Creative and Functional Lighting Arrangements
Functional arrangements consider ceiling conditions, countertop activities, and viewing angles alongside appearance. These solutions improve flexibility and help distribute useful light across islands of different shapes and sizes.
25. Use Semi-Flush Lights for Low Ceilings
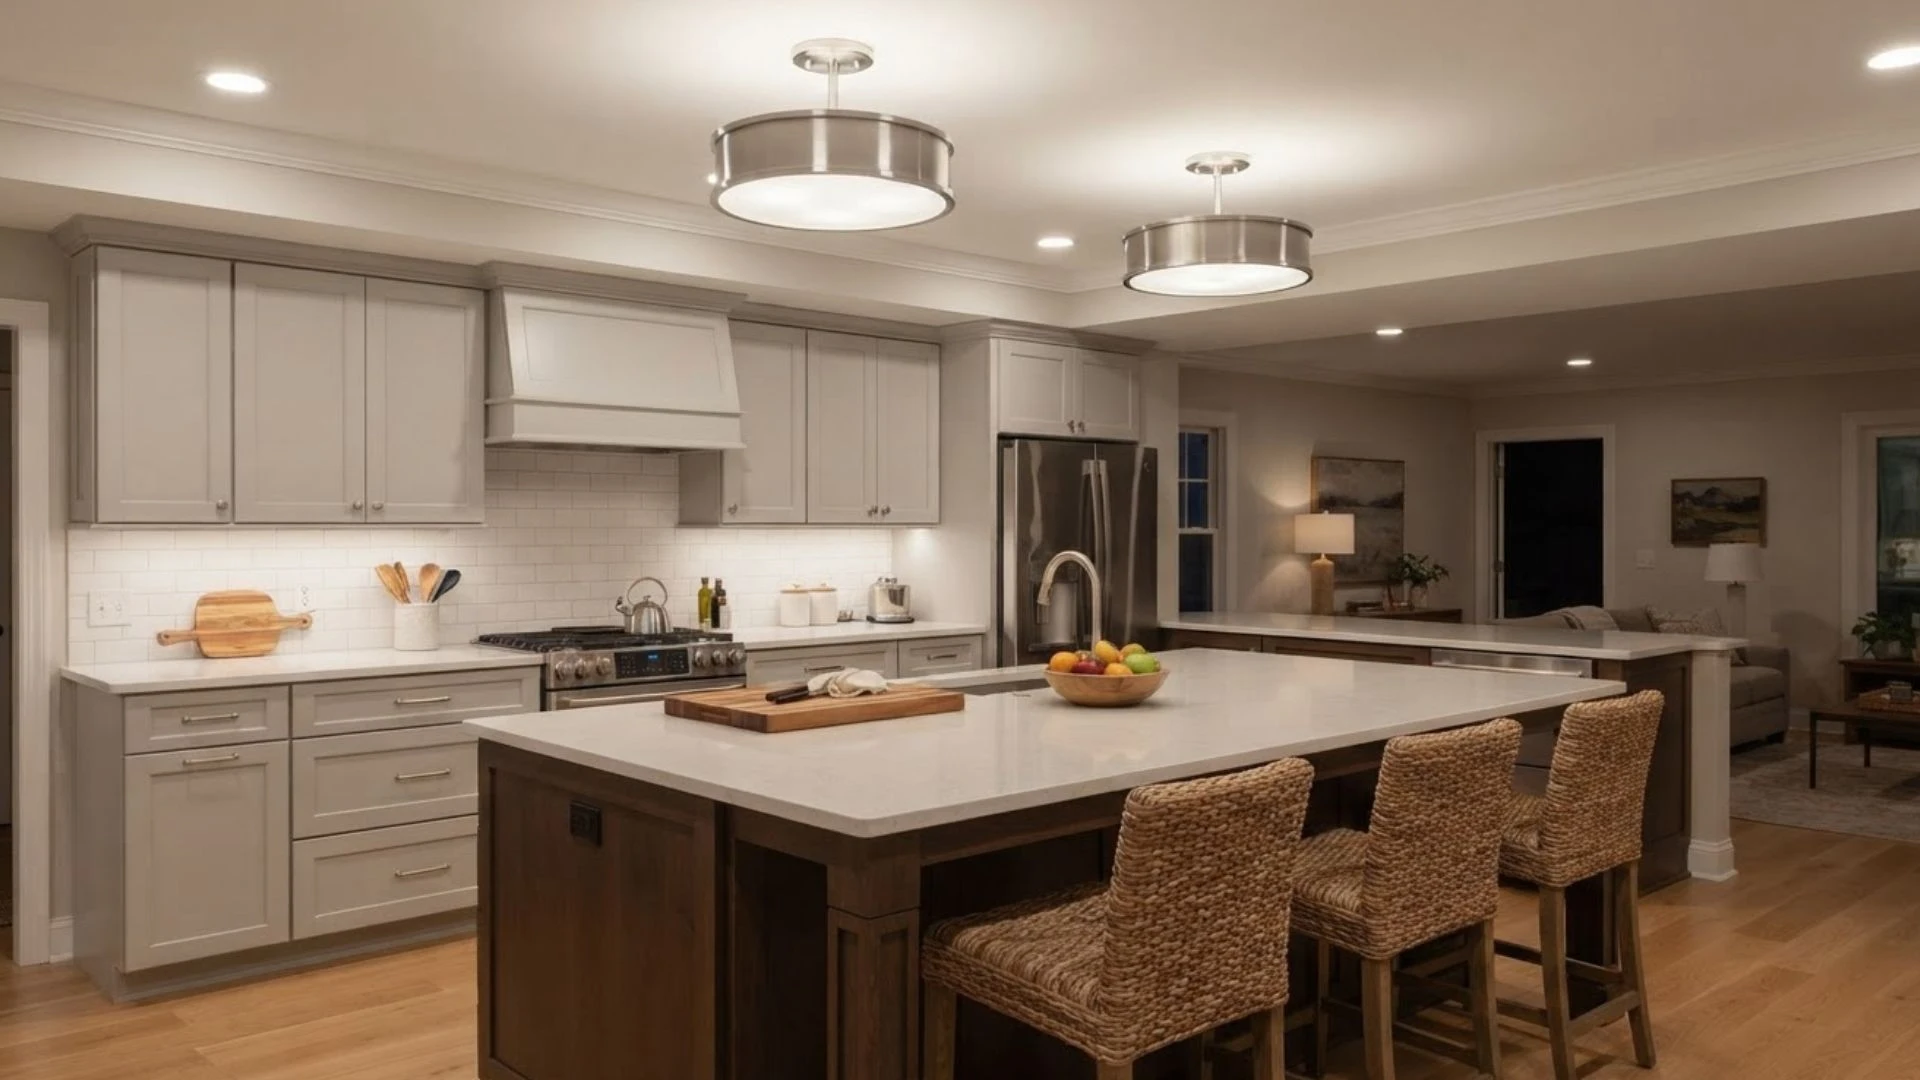
Semi-flush lights provide decorative detail without the long drop required by standard pendant lighting.
A short stem leaves a small gap below the ceiling, allowing light to spread upward and downward. This arrangement works well beneath eight-foot ceilings or in kitchens where hanging fixtures could interrupt sightlines.
Select wide fixtures that distribute light across the island rather than creating narrow spots. Low-profile globes, drums, and multi-light frames provide several suitable design options.
26. Mount Adjustable Track Lighting Above the Island
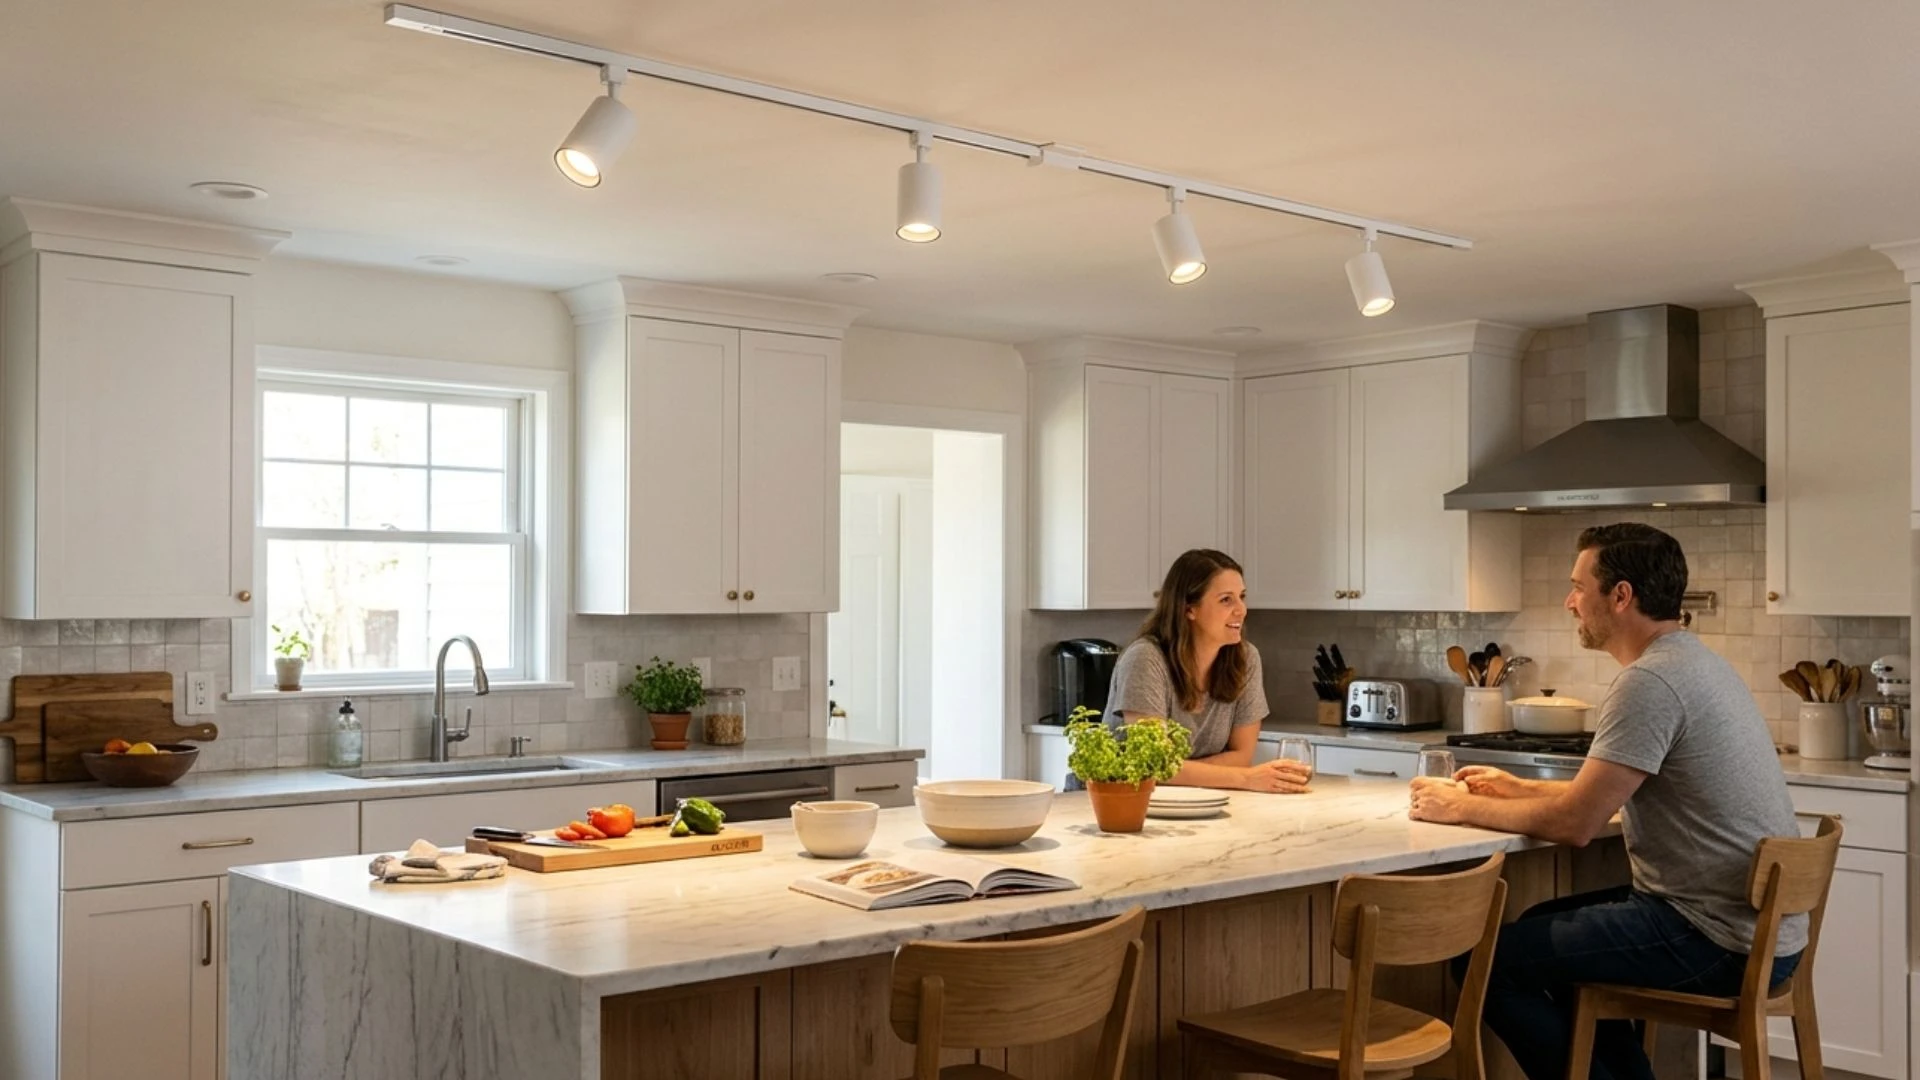
Adjustable track lighting allows individual heads to point toward preparation zones, seating areas, or decorative features.
It is particularly useful when the island sits off-center beneath existing electrical wiring. Straight, curved, or recessed tracks can follow the countertop’s shape while providing flexible coverage.
Choose streamlined heads and a finish that blends with the ceiling to reduce visual clutter. Dimmable LED bulbs make it easier to shift between focused work and softer evening illumination.
27. Create Rhythm with Mini Pendant Lights
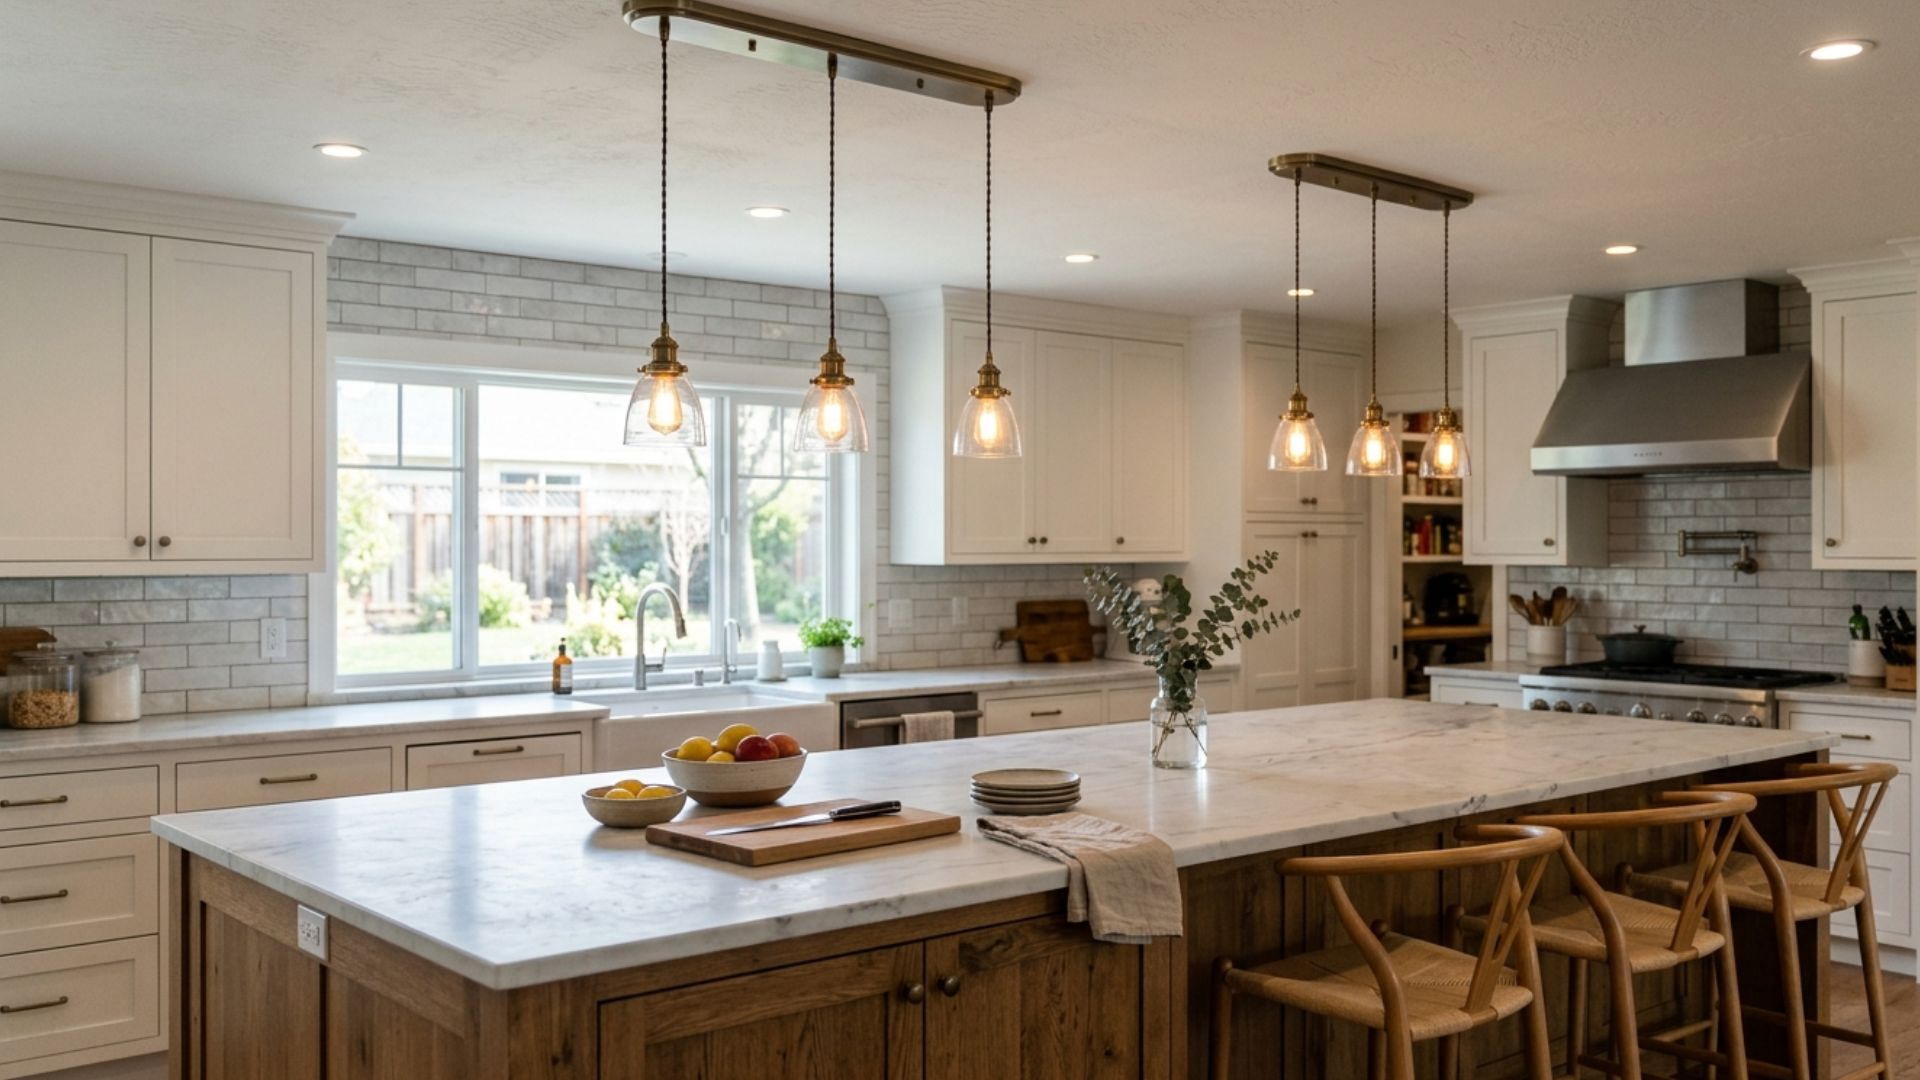
A row of mini pendants creates visual rhythm across a long island while keeping each fixture lightweight. Repeated shapes work best when spacing is consistent, and the entire grouping remains within the island’s edges.
Small shades suit narrow countertops and kitchens where oversized fixtures would dominate. However, mini pendants may not provide enough illumination alone.
Combine them with recessed lighting and use coordinated ceiling canopies to keep multiple cords looking orderly rather than cluttered.
28. Hang Two Large Pendants Instead of Three
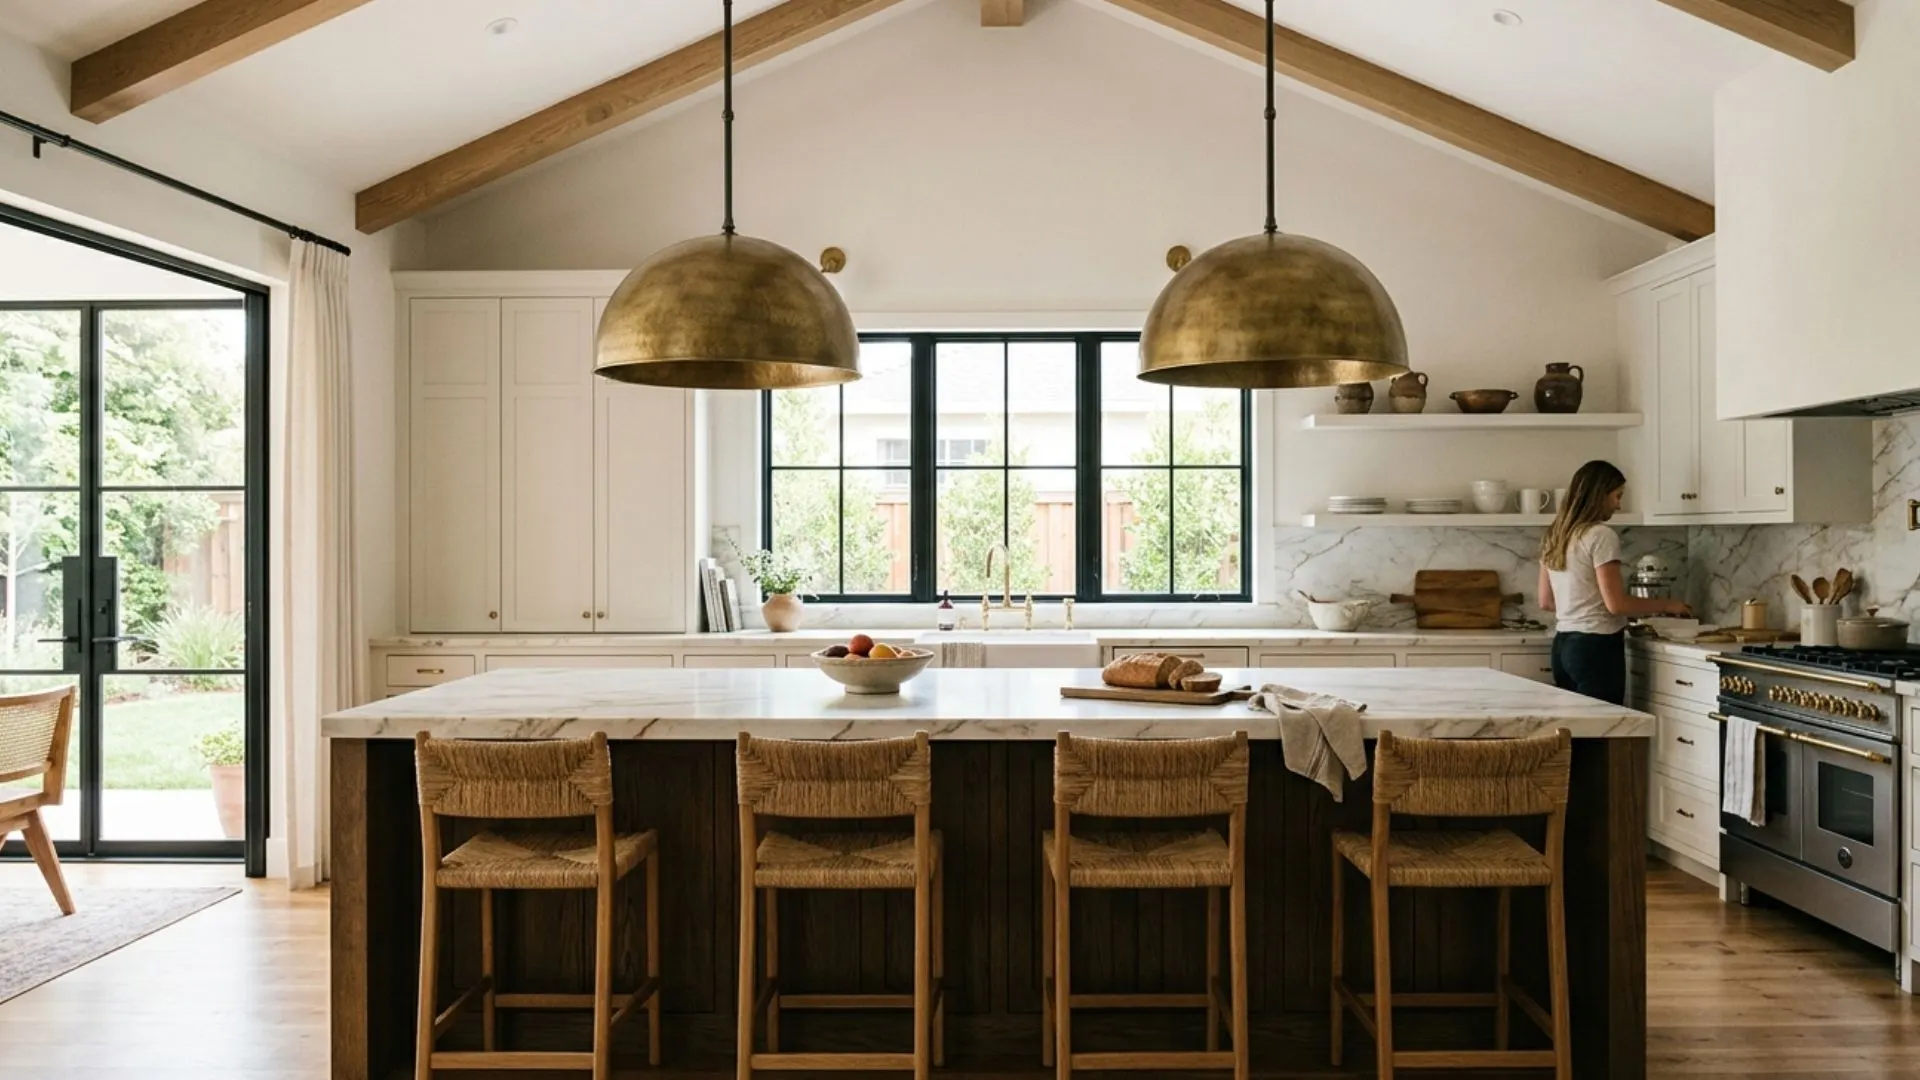
Two large pendants often create a stronger and calmer composition than three smaller fixtures. This arrangement suits medium and long islands where substantial shades can provide broad illumination without excessive repetition.
Position each pendant over one-third of the island’s length for balanced spacing. The larger scale works particularly well in open kitchens with tall ceilings.
Check shade width and sightlines carefully, since oversized fixtures need sufficient space between seating positions and nearby cabinet doors.
29. Choose a Candle-Style Linear Chandelier
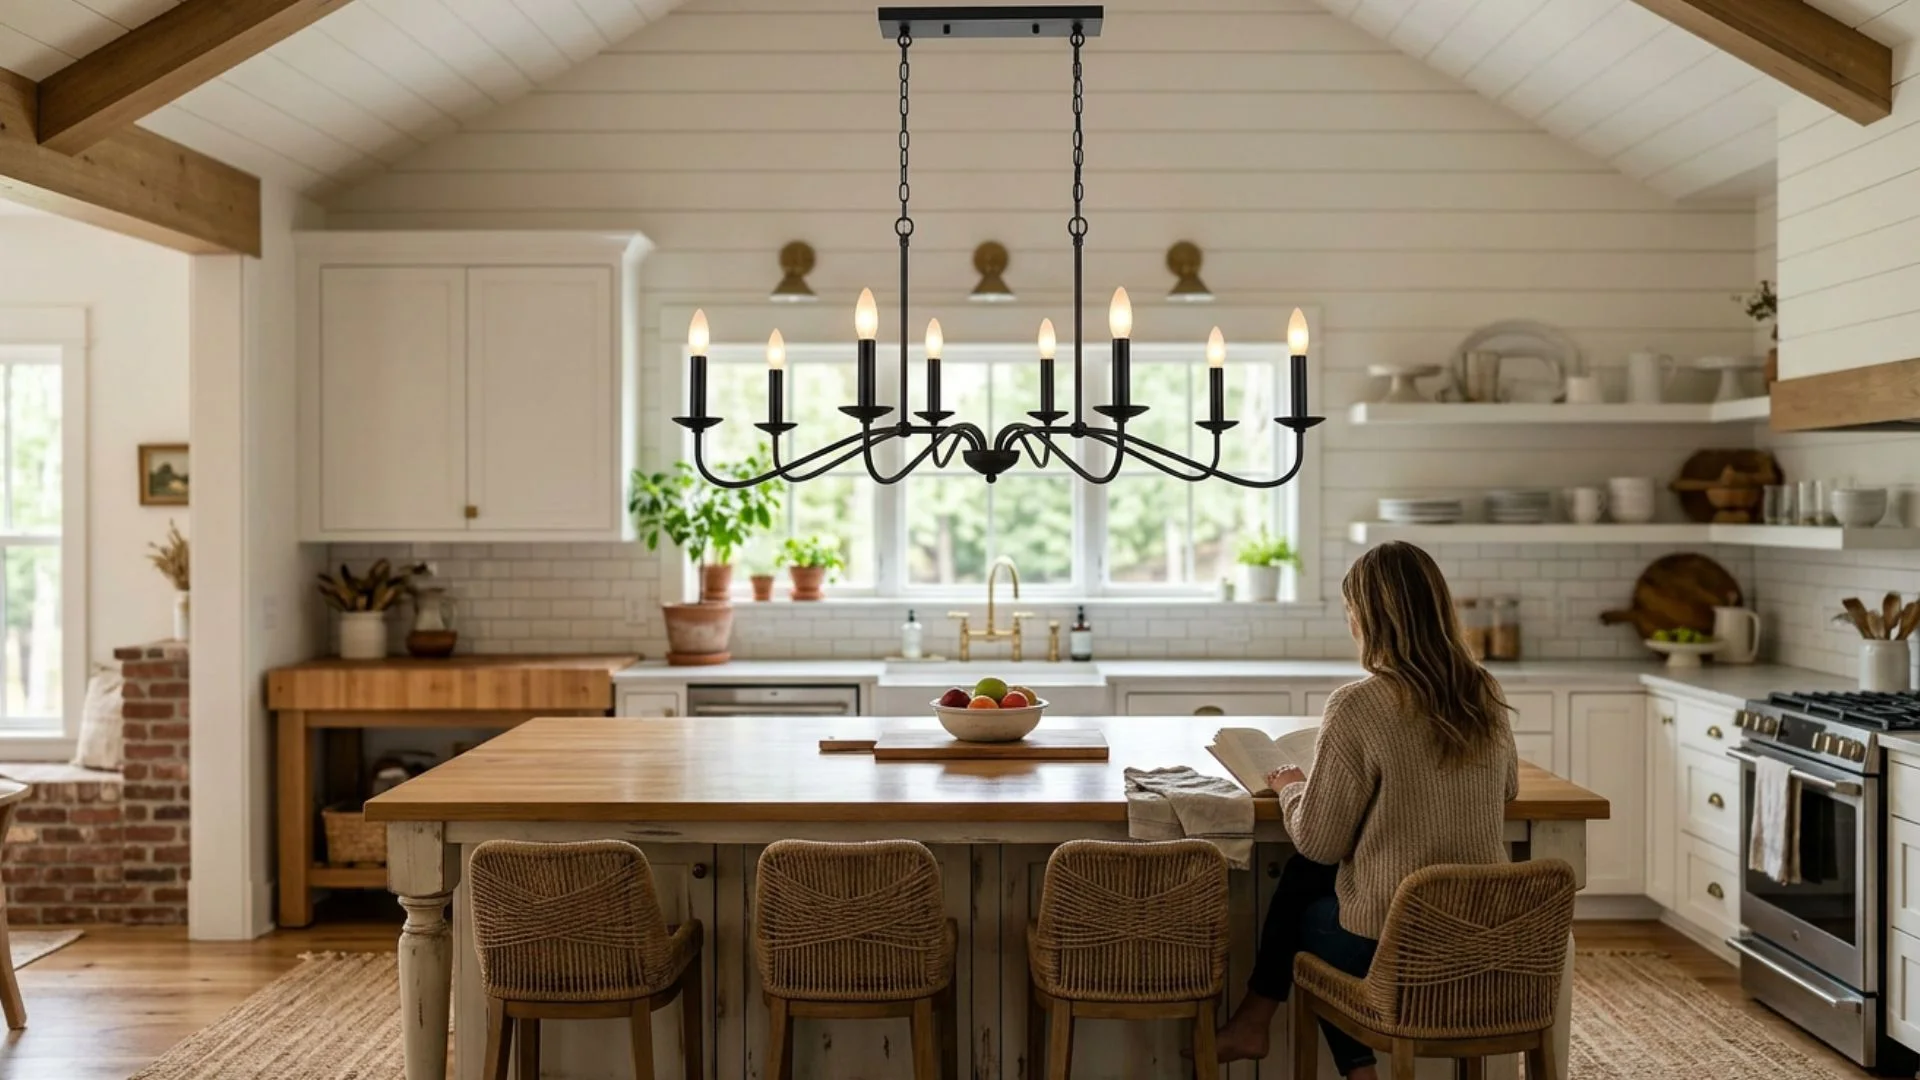
A candle-style linear chandelier combines the coverage of a horizontal fixture with the elegance of exposed candle-shaped bulbs.
Its elongated frame follows rectangular islands and helps distribute light evenly across the surface. Black metal creates a farmhouse or industrial feel, while brass produces a refined transitional appearance.
Select frosted bulbs to control glare, particularly above seating. The chandelier should remain shorter than the island and high enough to preserve clear views across the kitchen.
30. Mix Pendant Shapes in One Finish
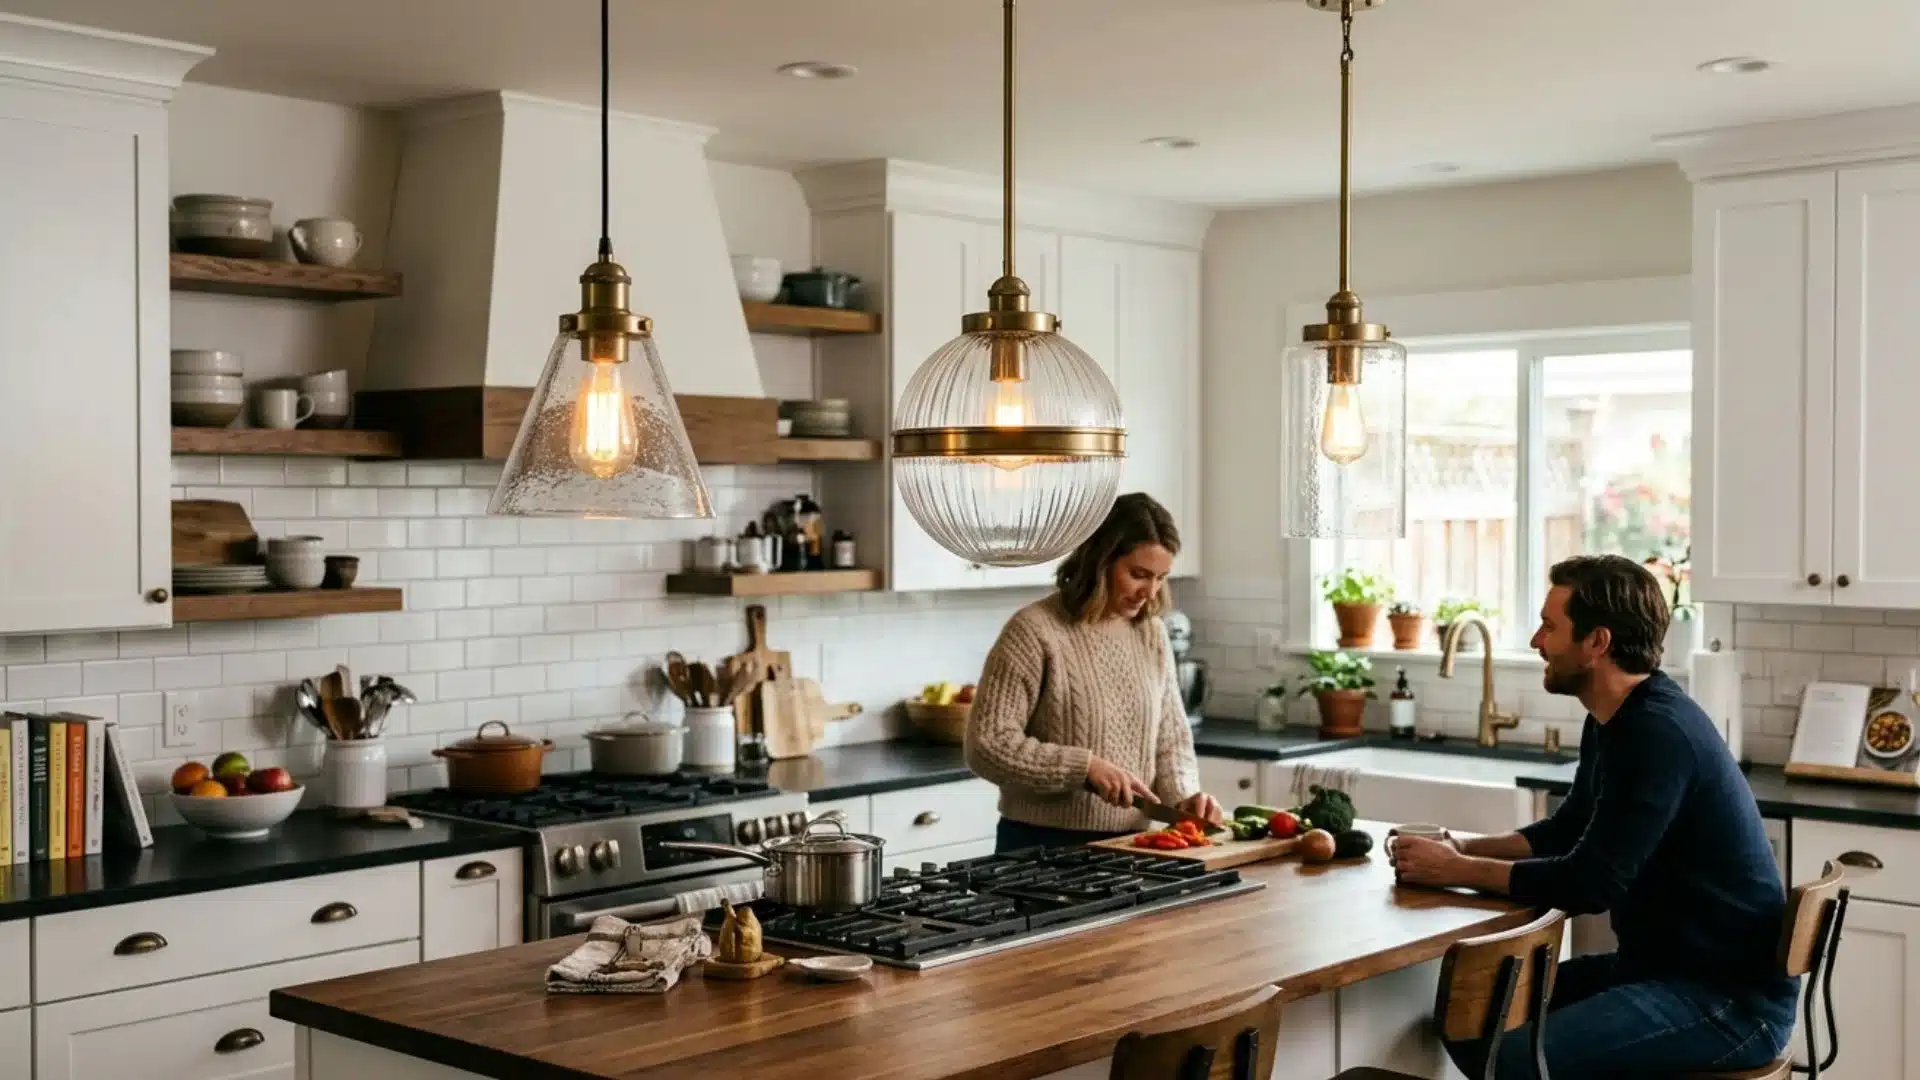
Mixing pendant shapes adds individuality without making the lighting arrangement feel disconnected.
Globes, cones, or cylinders can work together when they share the same metal finish, glass color, or design detail. This approach suits eclectic kitchens and islands divided into separate cooking and seating zones.
Maintain a consistent hanging height or visual centerline to create order. Limit the arrangement to two complementary shapes, since too many variations can make the ceiling appear unplanned.
31. Offset Pendants for an Asymmetrical Arrangement
Offset pendants replace a predictable centered row with a more relaxed, design-led arrangement. Fixtures can gather above the seating end, follow an angled island, or respond to a nearby sink or cooktop.
The placement should still relate to specific countertop activities rather than appearing randomly scattered. Use matching pendants or a restricted material palette for cohesion.
Confirm illumination levels across the full surface, since asymmetry can leave working areas darker without supporting recessed lights.
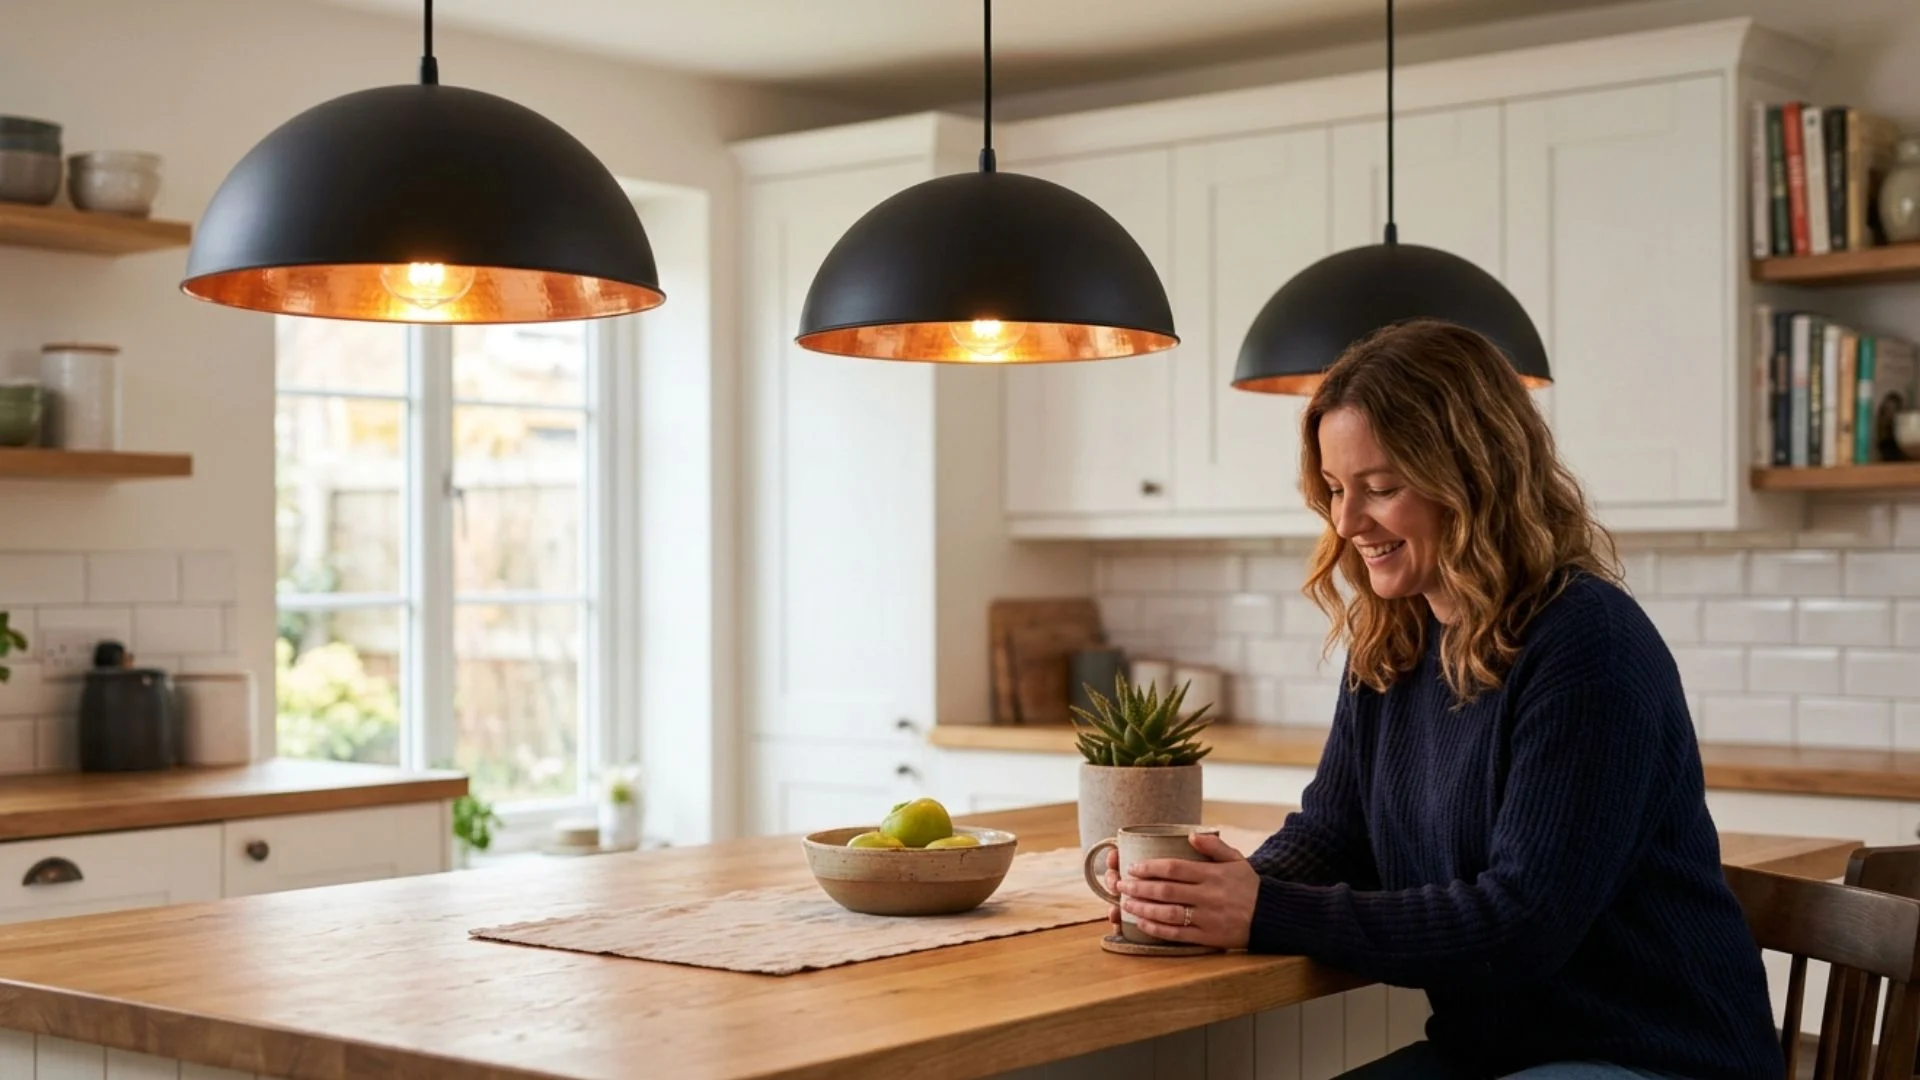
32. Use Dome Pendants with Metallic Interiors
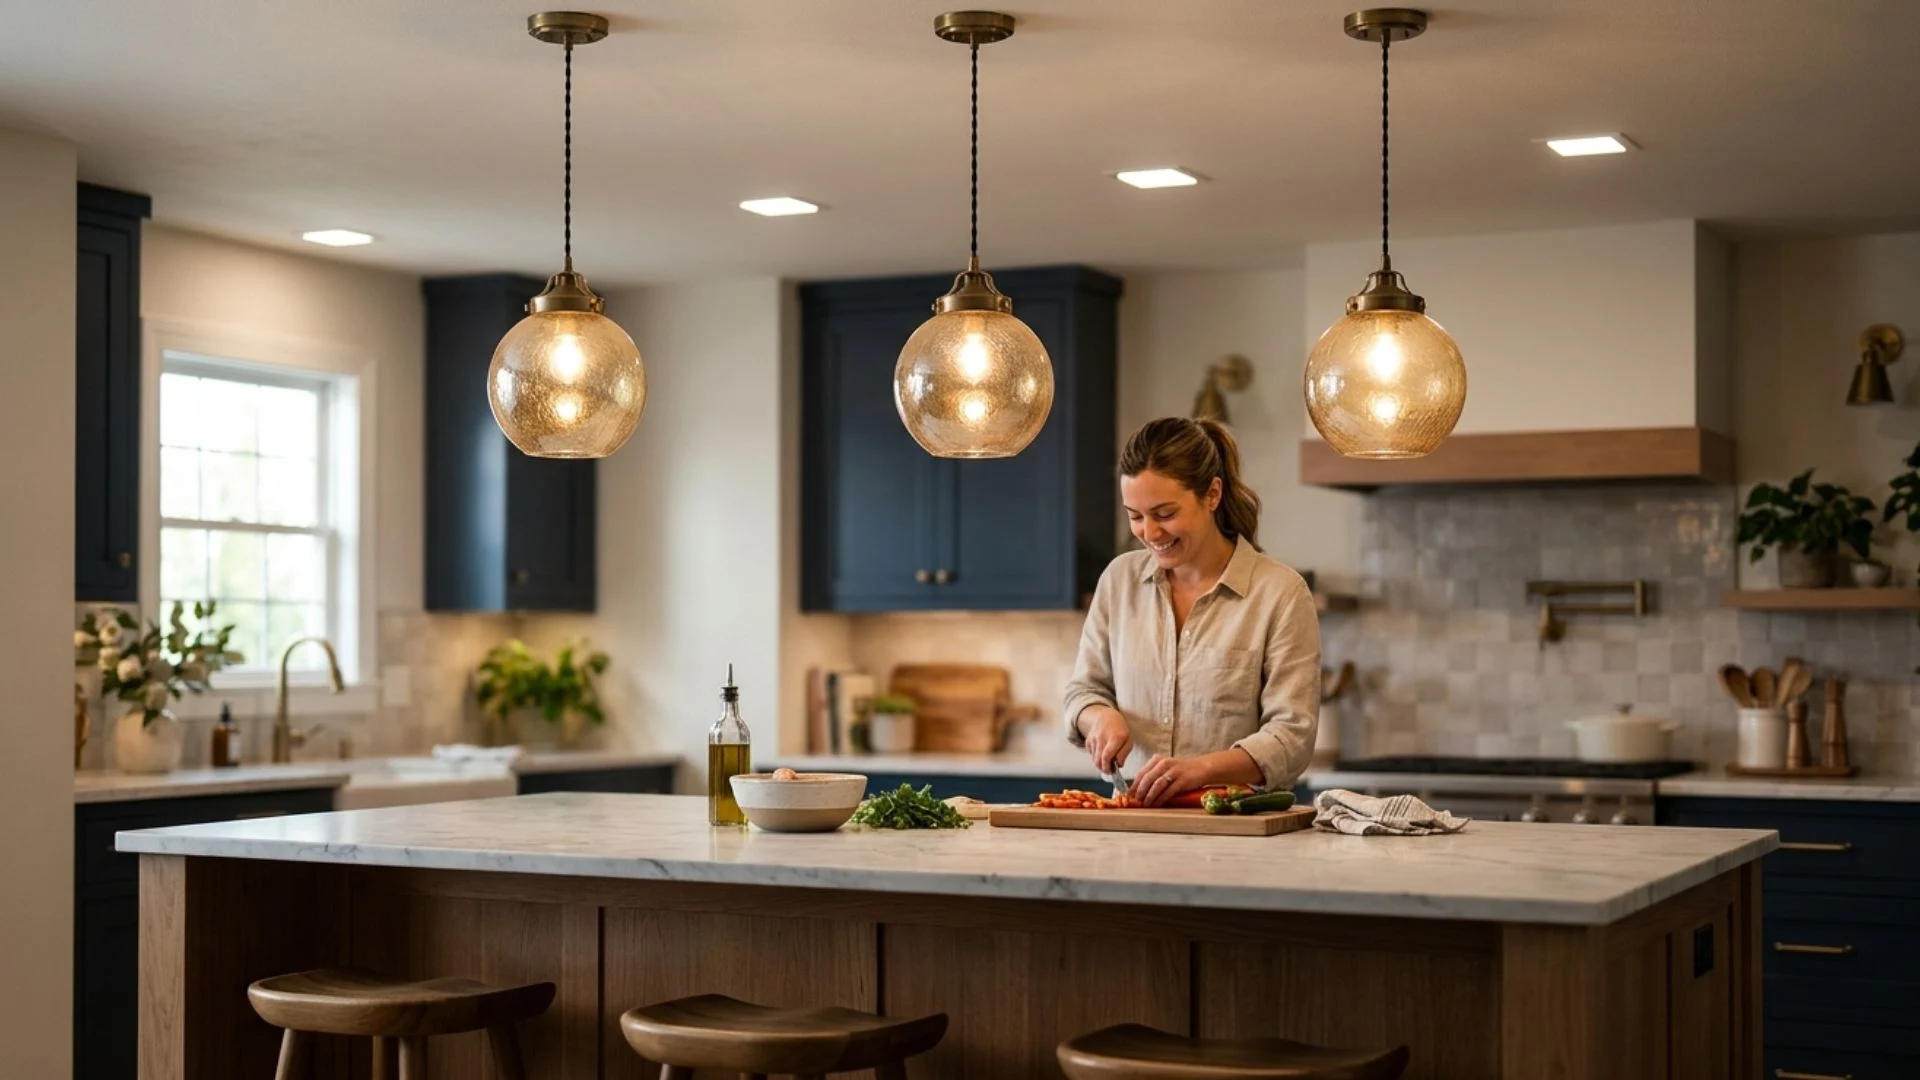
Dome pendants with metallic interiors direct light downward while adding a warm reflective glow.
A matte exterior keeps the fixture controlled, while gold, copper, or silver lining becomes visible from beneath. This contrast works especially well above island seating, where the interior can be appreciated at eye level.
Metallic linings may make bulbs appear brighter, so dimmable warm-white LEDs are helpful. Wide domes generally provide better countertop coverage than narrow, deeply recessed shades.
33. Highlight a Vaulted Ceiling with Tiered Pendants
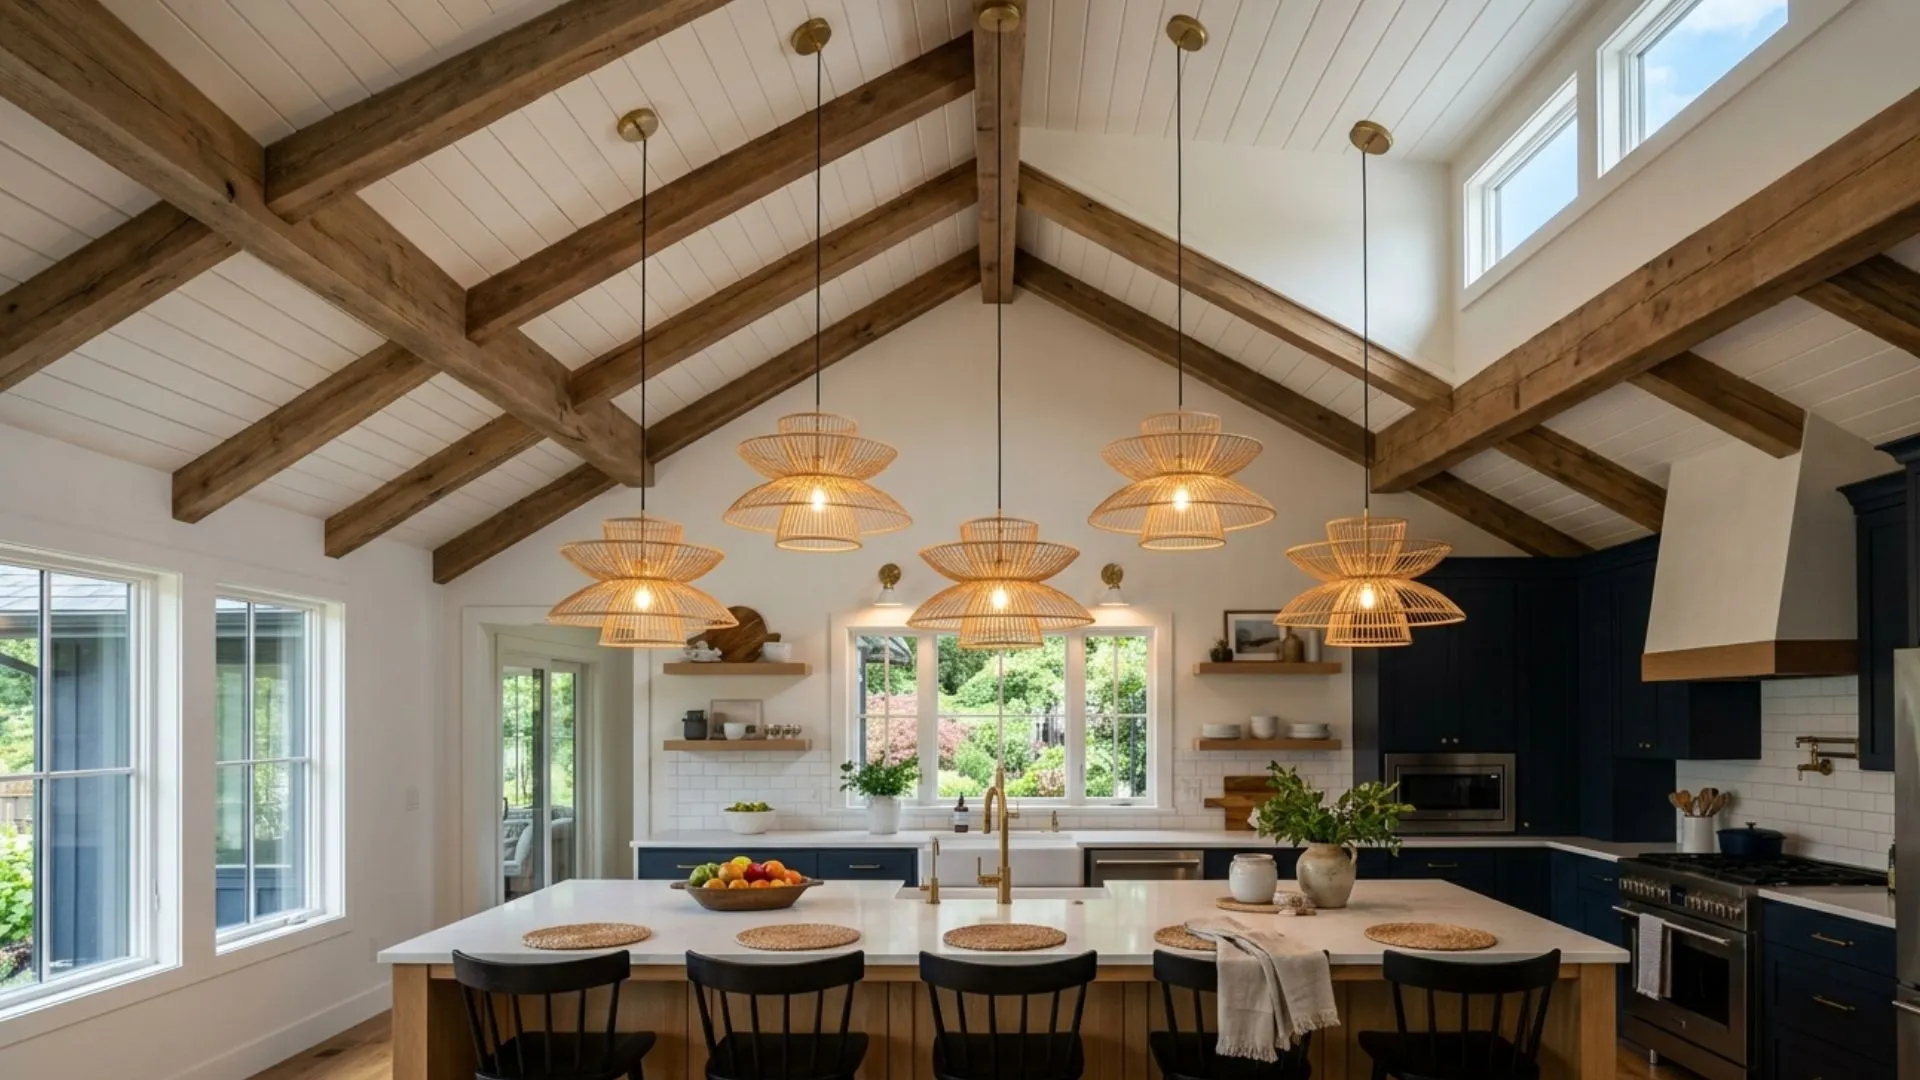
Tiered pendants fill the vertical space beneath a vaulted ceiling without leaving the island visually disconnected. Multiple lights suspended at varied lengths draw attention upward while keeping their lowest points aligned above the countertop.
Adjustable cords or rods help compensate for sloped mounting surfaces. Choose open, lightweight shades to prevent the arrangement from appearing heavy.
A sloped-ceiling canopy and professional installation may be required to keep every fixture secure, level, and properly positioned.
34. Install Smart Color-Changing Island Lighting
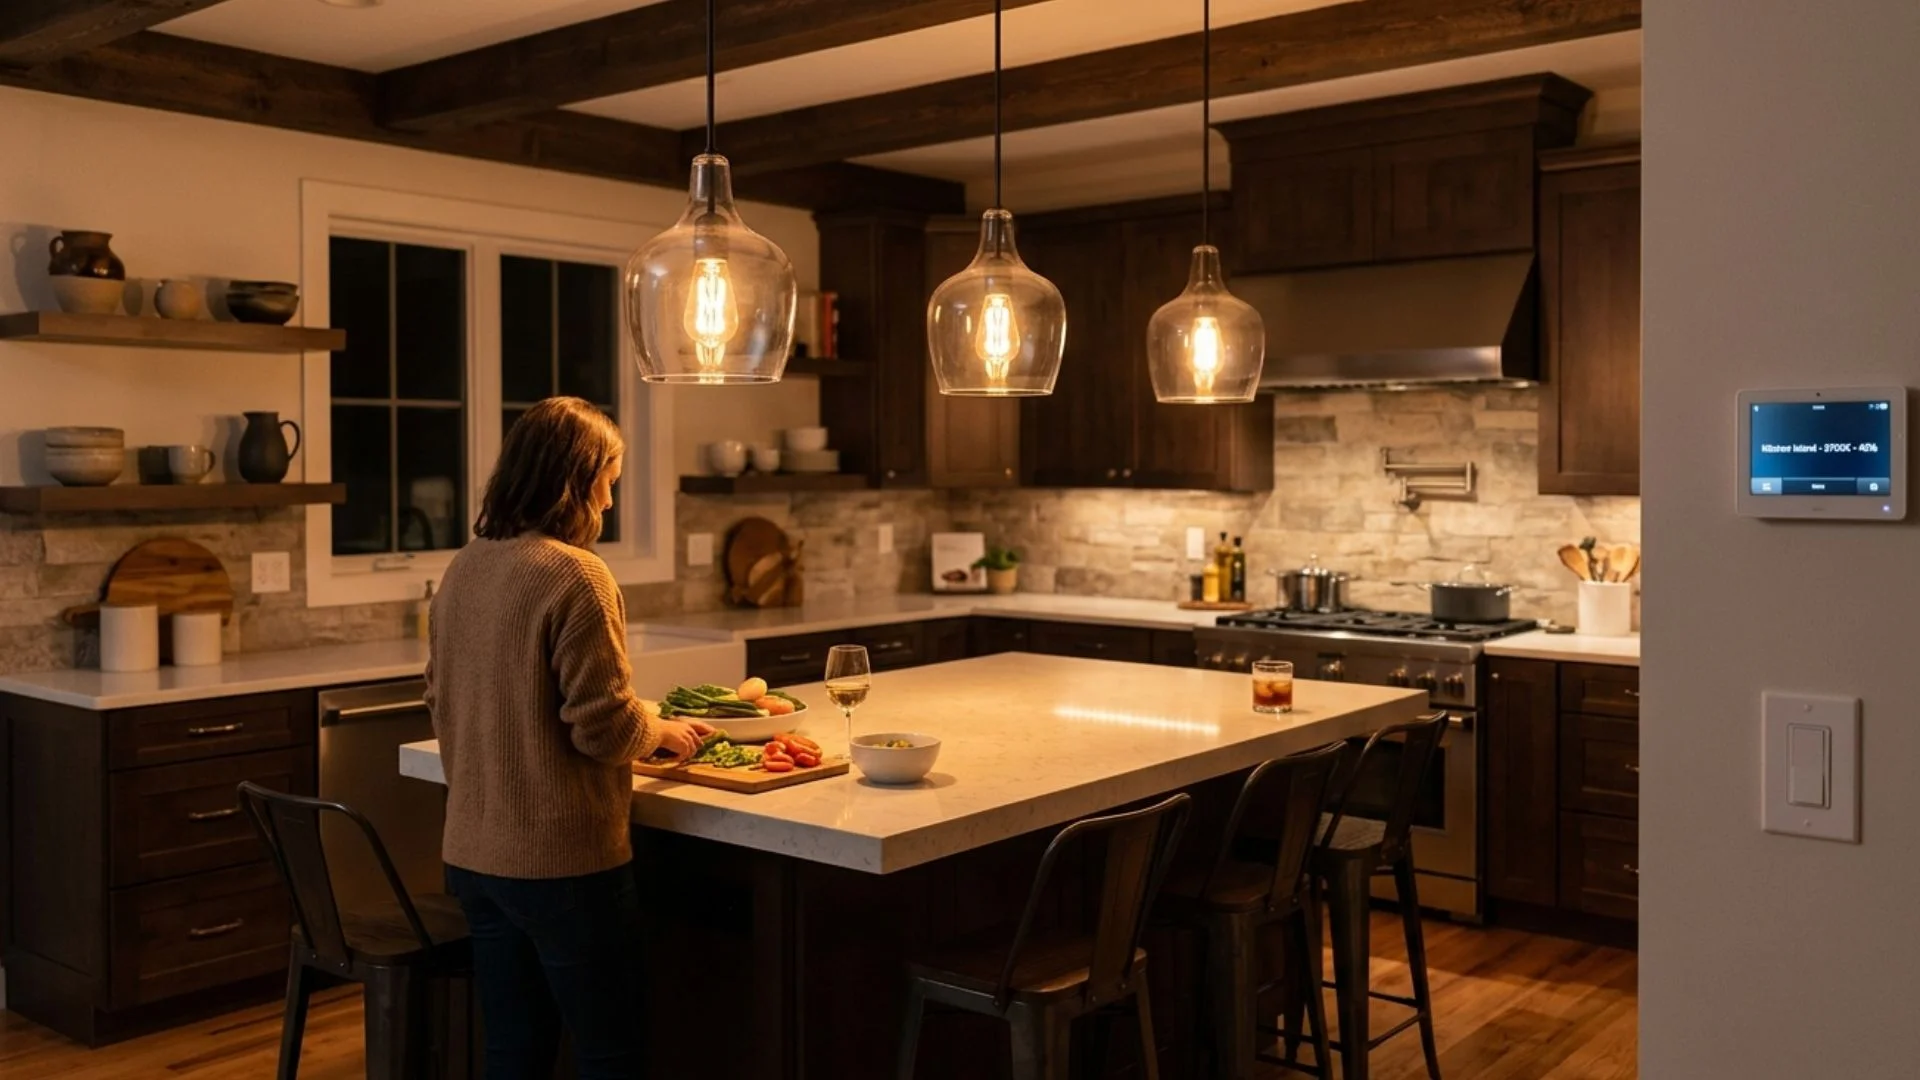
Smart color-changing lighting allows brightness and white tone to adjust for cooking, dining, entertaining, or late-night use.
Neutral white improves visibility during preparation, while warmer settings create a softer atmosphere after meals. Colored effects should remain subtle so food and countertop finishes do not appear unnatural.
Select compatible dimmers, bulbs, and control systems before installation. Manual wall controls remain useful when phones, apps, or voice assistants are unavailable or inconvenient for guests.
35. Layer Decorative Pendants with Recessed Lights
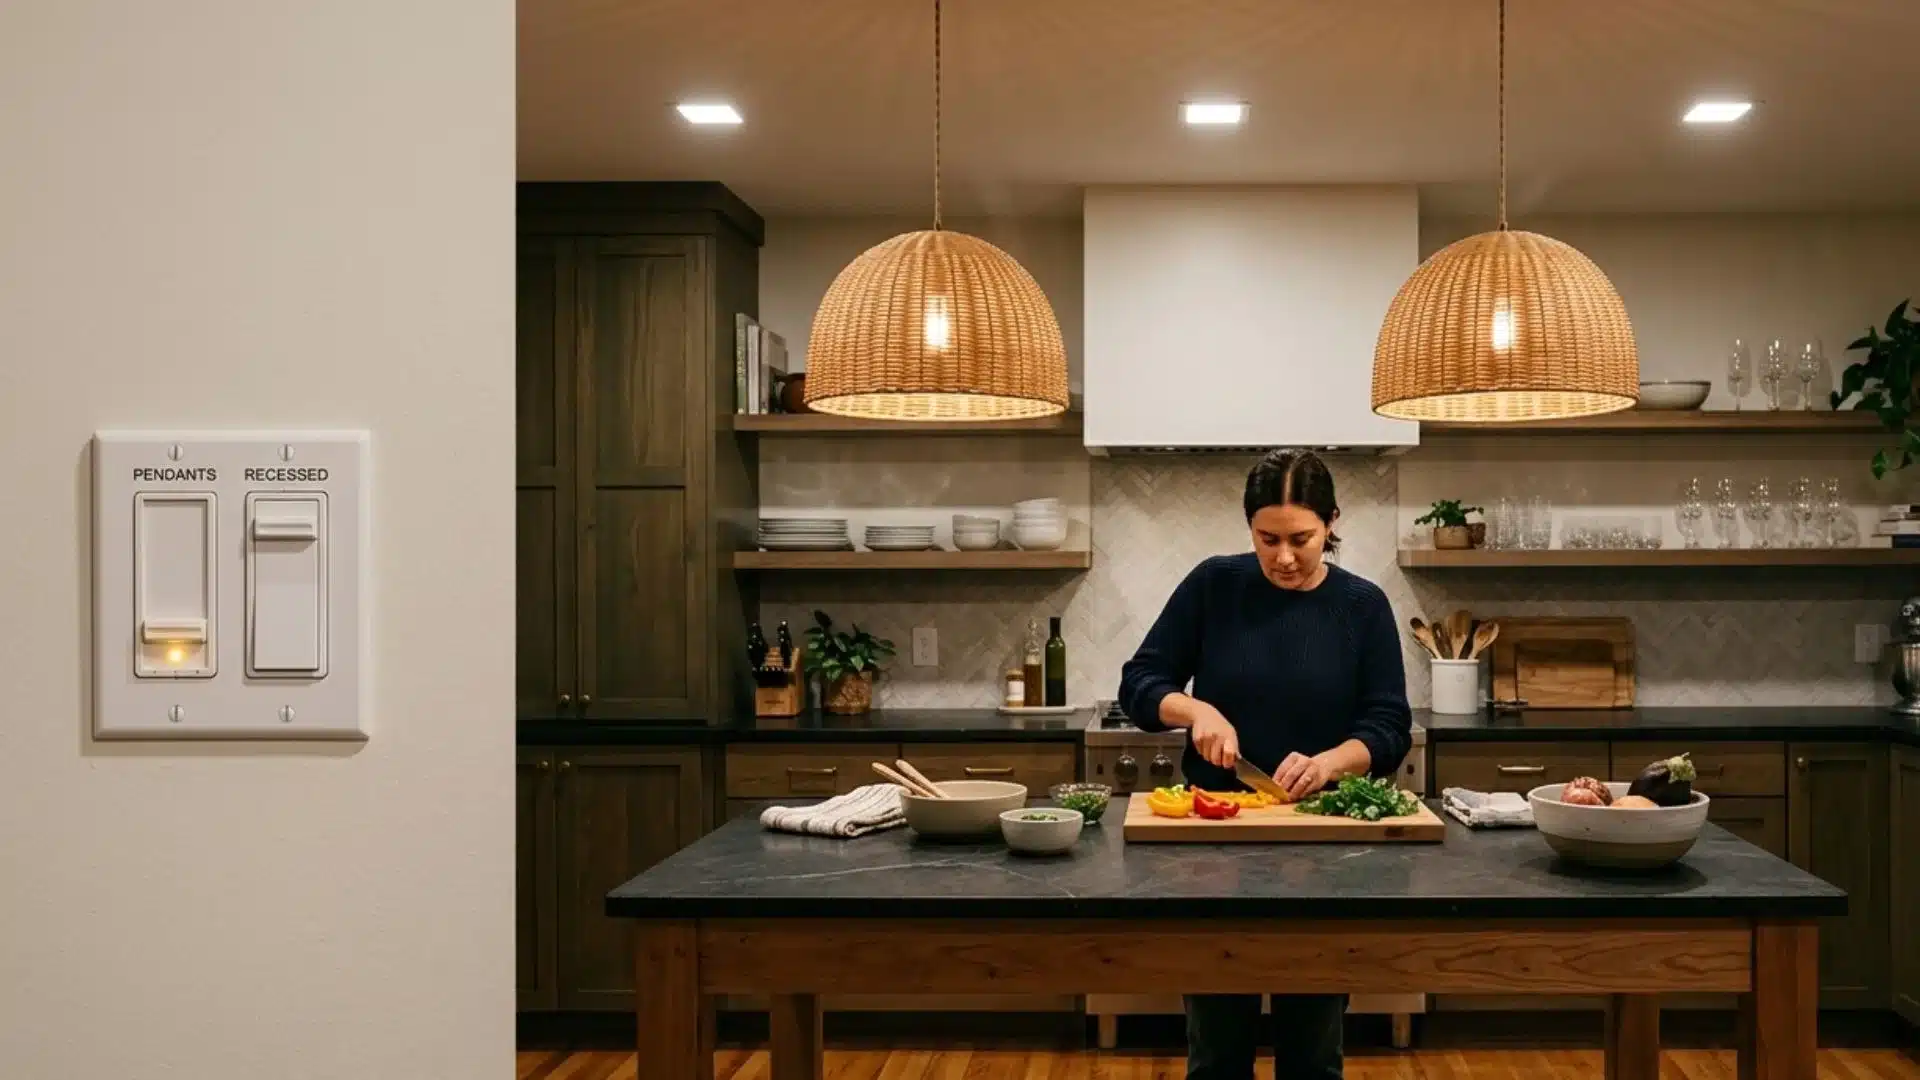
Layering decorative pendants with recessed lights separates visual style from practical illumination. Pendants define the island and create atmosphere, while recessed fixtures deliver stronger, more even light for chopping, reading, and cleaning.
Place both layers on separate dimmers so each can operate independently. Recessed beams should illuminate the countertop without casting pendant shadows.
This combination works particularly well when decorative shades are opaque, woven, colored, or too low-powered to support detailed tasks alone.
Common Kitchen Island Lighting Mistakes to Avoid
Even attractive fixtures can perform poorly when scale, placement, or brightness is overlooked. Avoiding these mistakes helps create balanced and practical island lighting.
- Choosing undersized fixtures: Small pendants can look lost above a wide or long kitchen island.
- Hanging lights at the wrong height: Fixtures placed too low block views, while overly high lights provide weak task illumination.
- Using too many pendants: Crowding several fixtures above a short island creates visual clutter and uneven proportions.
- Ignoring glare: Clear shades and exposed bulbs may feel uncomfortable above seating without dimmers or frosted bulbs.
- Relying only on decorative lighting: Pendants may require support from recessed lights for chopping, cooking, and cleaning.
Careful measurements, suitable bulbs, and layered lighting prevent most design problems. Confirm the arrangement before installation to avoid expensive electrical adjustments later.
Kitchen Island Lighting Size, Spacing, and Ceiling Height
Island length, fixture size, and ceiling height determine how balanced the lighting appears. Use these measurements as a practical starting point before installation.
| Factor | General Recommendation |
|---|---|
| Island under 5 feet | One large pendant |
| Island 5–7 feet | Two medium pendants |
| Island 7–10 feet | Three pendants or one linear fixture |
| Island over 10 feet | One long linear chandelier |
| Pendant spacing | About 24–30 inches between fixture edges |
| Countertop clearance | 30–36 inches above the island |
| 8-foot ceiling | Hang near the 30-inch clearance range |
| 9-foot ceiling | Hang about 32–36 inches above the island |
| 10-foot ceiling | Hang about 36–42 inches above the island |
| Vaulted ceiling | Use adjustable cords or downrods |
| Low ceiling | Choose flush or semi-flush fixtures |
Final measurements should account for fixture diameter, sightlines, seating, and nearby cabinets. A cardboard template can help confirm scale and spacing before electrical installation.
Choosing Bulb Brightness and Color Temperature
Kitchen island bulbs should provide enough brightness for food preparation without causing glare above seating.
Warm white light between 2700K and 3000K creates a comfortable atmosphere and suits most open-plan kitchens. A neutral 3500K tone offers clearer visibility for detailed tasks while remaining less harsh than cool daylight bulbs.
Choose dimmable LEDs so brightness can shift between cooking, dining, and entertaining. Bulbs with a color rendering index of 90 or higher show food, cabinetry, and countertop finishes more accurately.
Clear shades may need lower-lumen or frosted bulbs, while opaque shades often require brighter bulbs to direct sufficient light onto the island.
Frequently Asked Questions (FAQs)
What type of lighting works best over a kitchen island?
Pendant lights provide focused illumination, decorative impact, and flexible placement.
Are pendant lights still popular for kitchen islands?
Yes, pendant lights remain popular because they suit almost every kitchen style.
Should island lights match cabinet hardware?
Exact matching is unnecessary, but the finishes should complement the overall kitchen palette.
Can one light work over a kitchen island?
One oversized pendant or linear fixture can balance a small or medium island.
Do kitchen island lights need a dimmer?
A dimmer provides bright task lighting and softer illumination for dining or entertaining.
Bring the Kitchen Island Lighting Plan Together
The right lighting can turn a kitchen island into a brighter workspace, a comfortable dining spot, and a well-balanced focal point.
Start by matching the fixture size and number to the island’s length, then check ceiling height, sightlines, and spacing. Materials and finishes should support the surrounding kitchen, while dimmable LEDs provide flexibility for cooking, dining, and entertaining.
These kitchen island lighting ideas offer options for classic, modern, natural, and statement interiors without sacrificing everyday function.
Before installation, confirm measurements, bulb compatibility, electrical-box placement, and cleaning needs.
Choose the arrangement that fits the room, consult a licensed electrician, and create lighting that feels intentional every day. Compare preferred designs against the island before making the final purchase or installation.


