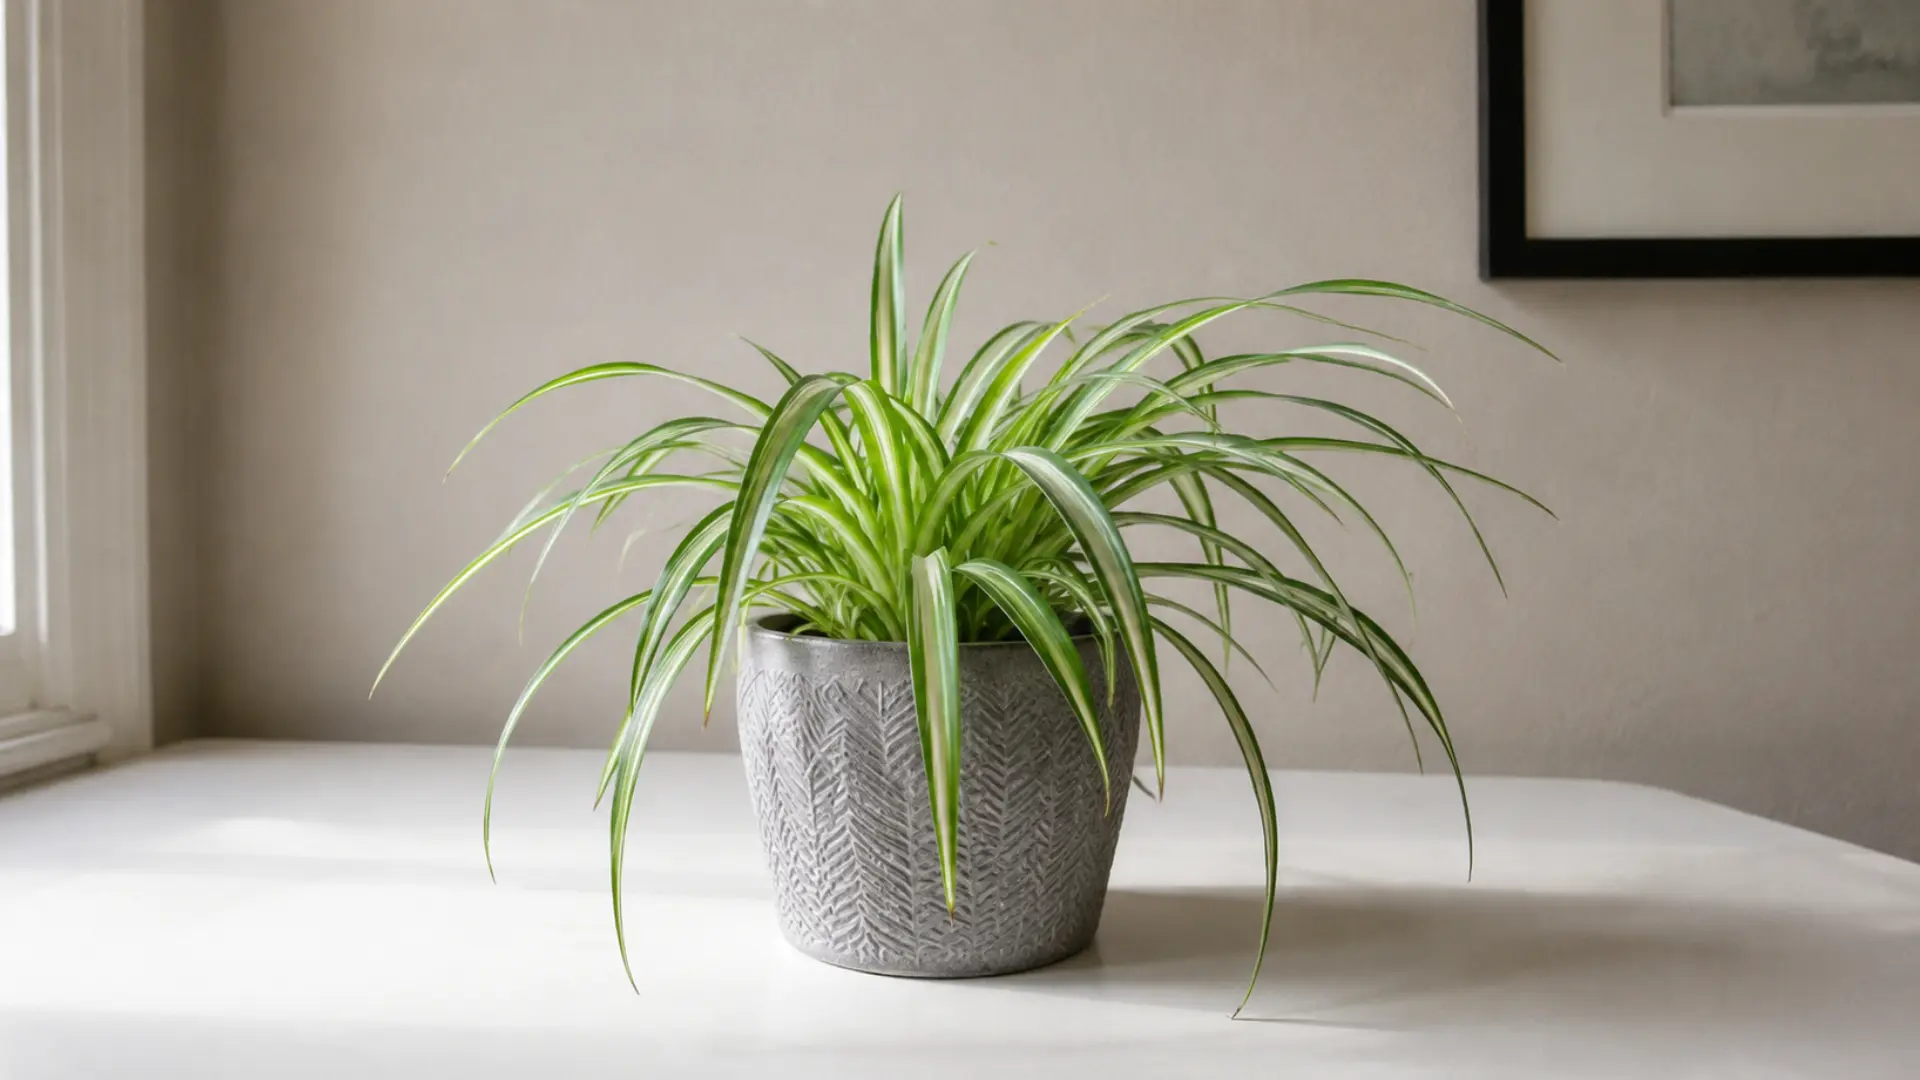
Spider plant babies start growing roots while they are still attached to the mother plant. You just have to know where to look.
Those small white nubs at the base of each plantlet are the real signal, not the size of the leaves or how long it has been hanging there.
Cut too early, before the roots show up, and the plantlet stalls. It won’t die right away, but it won’t grow either.
That is really what propagating spider plant babies comes down to: reading the plantlet correctly and picking a method that matches where it’s at.
Some root faster in water. Others do better going straight into soil. A few are easiest to handle by dividing the mother plant instead of dealing with individual babies at all.
None of these methods are difficult. Knowing which one to use, and when, is the part that actually saves time.
How Do Spider Plants Reproduce Naturally?
In the wild, spider plants use two strategies at once.
Small white flowers self-pollinate or attract insects, then set seed pods that scatter and grow into new plants.
This is sexual reproduction, and it’s slow. Their faster strategy is asexual. Long stolons stretch out from the base, and tiny plantlets form along them, complete with their own leaves and roots.
No pollination is needed.
This happens most in their native South African grasslands, where spreading quickly matters more than genetic variety, and it’s why a single plant can colonize a wide patch on its own.
When is the Best Time to Propagate a Spider Plant?
Timing hinges on the plant’s growth cycle, not the calendar alone.
Plantlets appear most heavily right after flowering, often triggered by shorter autumn days.
Waiting until active growth resumes gives those babies the best odds.
Avoid cutting during deep winter dormancy, when even healthy-looking plantlets root slowly or stall completely.
Overcast, humid stretches also help, since cuttings lose less moisture while forming roots. If your climate stays warm year-round, watch the plant’s growth rhythm instead of the season.
New leaf growth on the mother plant is the real signal that conditions favor successful propagation.
How to Tell When a Plantlet is Ready to Propagate?
Not every plantlet is ready to be snipped right away, and cutting one too soon often means it struggles to root.
Here is how to tell when a baby spider plant is actually ready to come off the mother plant.
- Wait until the plantlet’s leaves are at least 2 to 3 inches long before cutting it off.
- Look for small white or yellowish root nubs at the base, since these speed up rooting after cutting.
- Pick plantlets that look plump and green, and avoid any that seem shriveled or discolored.
- Leave rootless plantlets attached a bit longer, or plant them while still connected to the mother plant.
- Established mother plants with a full root system, usually a year or older, produce the healthiest babies.
What You’ll Need Before You Start
Before propagating your spider plant, gather basic supplies to ensure a smooth process.
| Item | Purpose |
|---|---|
| Clean scissors or shears | Cut plantlets cleanly without damage |
| Small containers or jars | Hold water for rooting plantlets |
| Pots with drainage holes | Prevent soggy soil and root rot |
| Well-draining potting mix | Balance moisture and airflow for roots |
| Filtered or distilled water | Avoid fluoride and chlorine sensitivity |
| Rooting hormone (optional) | Speed up root growth |
How to Propagate Spider Plant in Soil?
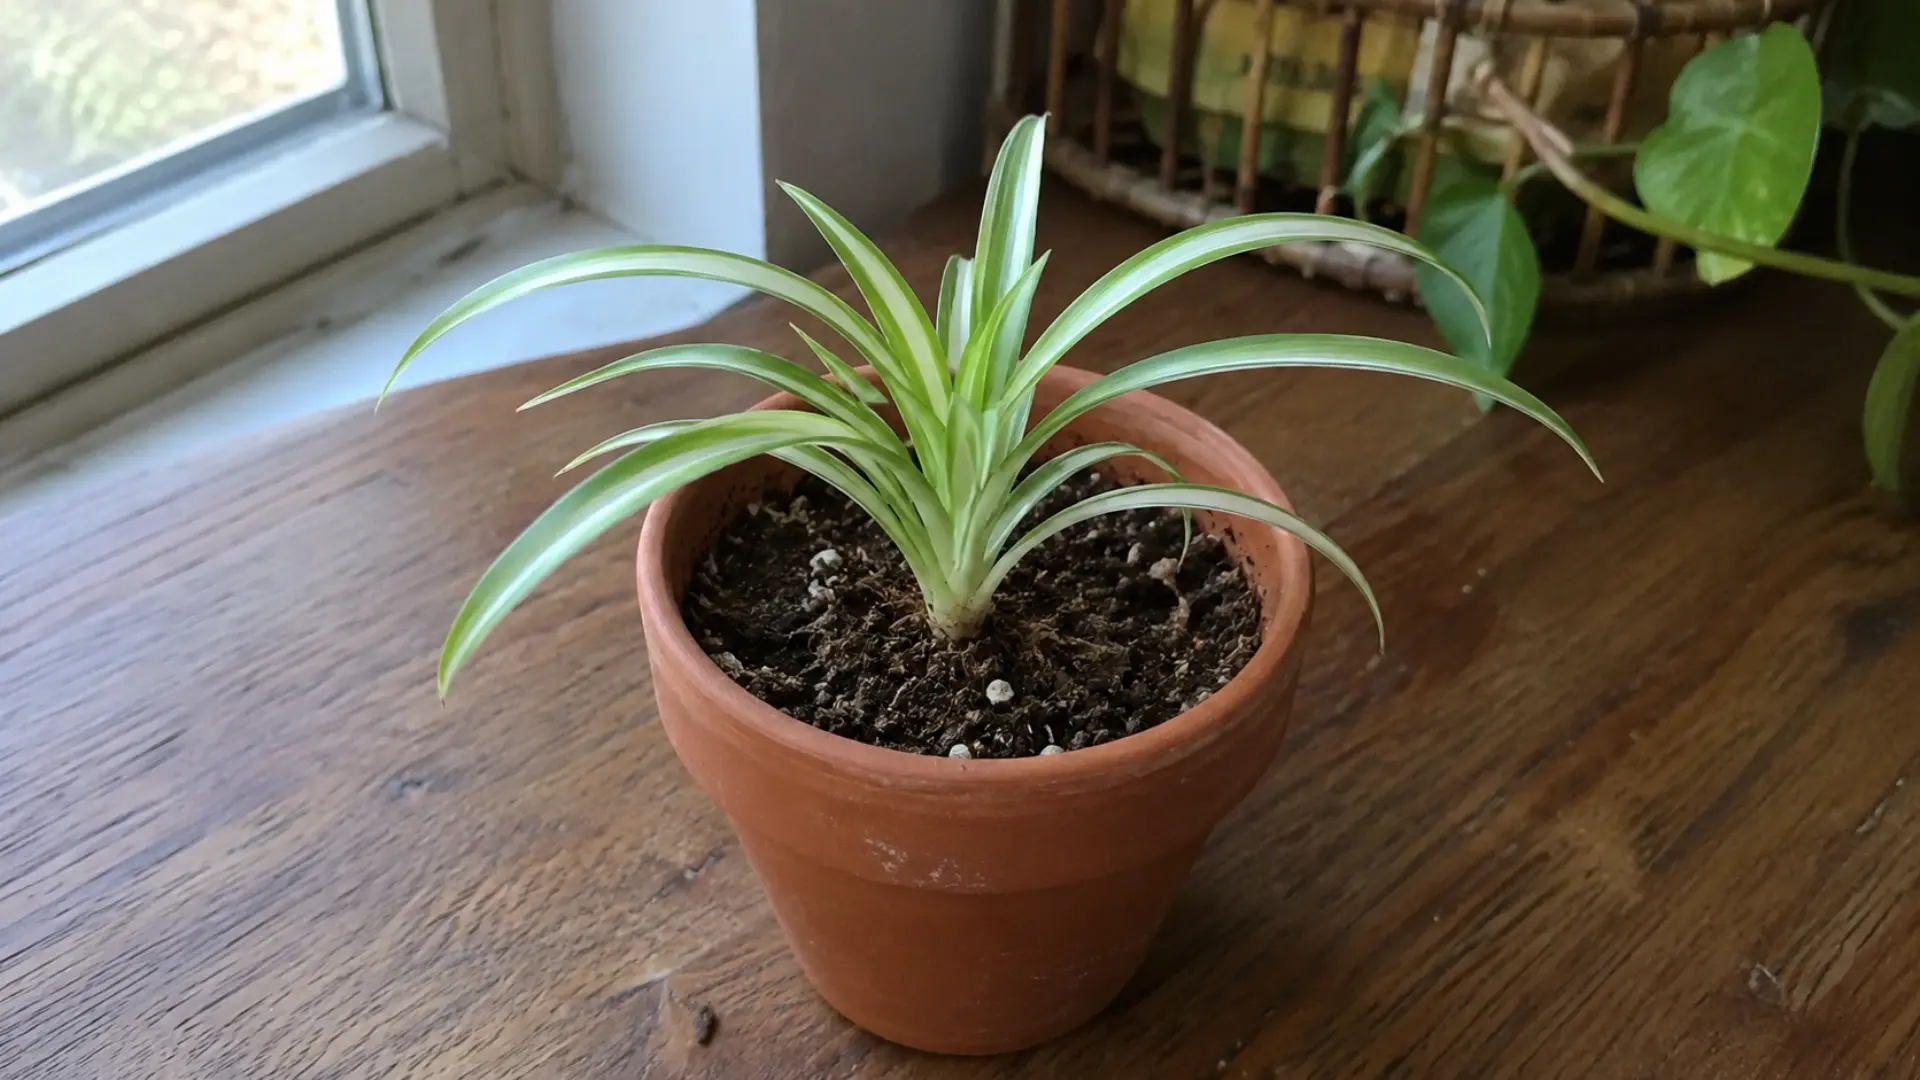
Soil propagation skips the water stage entirely. Many growers prefer it for that reason.
Roots form stronger and more resilient from the start, and the plantlet never has to go through the shock of moving from water to soil later.
Step 1: Prepare the Pot and Soil
Getting the pot and soil ready beforehand means the plantlet can go straight into its permanent growing medium.
Choose a small pot with drainage holes to prevent waterlogging. Fill it with a well-draining potting mix suited for houseplants.
Moisten the soil lightly before planting so it’s damp, not dry.
Step 2: Cut the Plantlet and Apply Rooting Hormone
Select a plantlet with visible root nubs and cut it close to the base without damaging the runner.
Rooting hormone is optional, but it can help the plantlet establish roots faster and more evenly. Cut with clean, sharp scissors for a precise, damage-free cut. Dip the cut base in rooting hormone powder, tapping off any excess.
Insert the base into the soil right away, since exposed cut ends dry out quickly.
Step 3: Care for the Cutting During Rooting
The first few weeks after planting are when the plantlet is most vulnerable, so consistent conditions matter more than regular handling. Keep the soil evenly moist by checking every 2–3 days, watering only when the top feels dry.
Place the pot in bright, indirect light, away from direct sun or cold drafts.
Avoid tugging or disturbing the plantlet during this period, since it can damage forming roots.
Step 4: Check for Signs of Root Establishment
Roots taking hold indicates the plantlet is ready for regular watering, not close monitoring.
Look for new leaf growth emerging from the center. Gently tug the base to feel for resistance, a sign roots have anchored.
Once you feel resistance, water only when the topsoil dries out.
How to Propagate Spider Plant in Water?
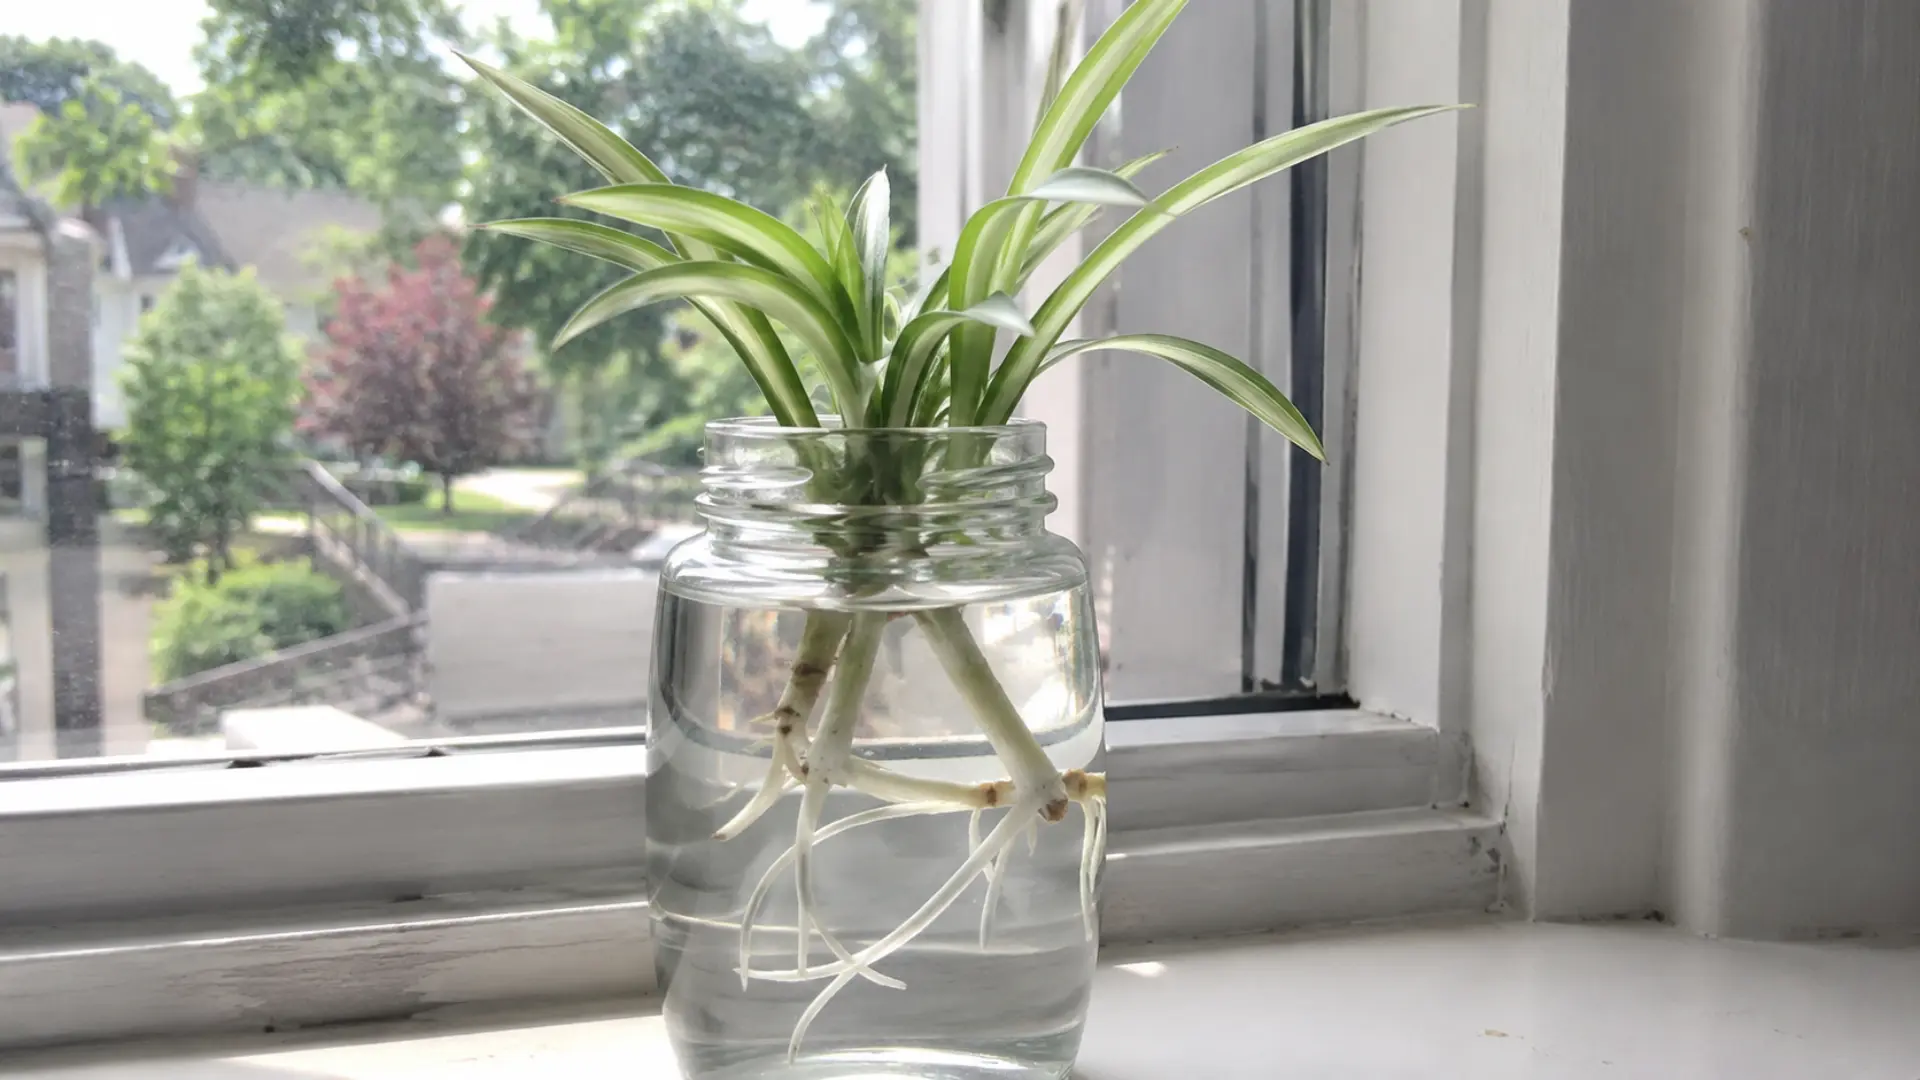
Water propagation is one of the easiest ways to root a spider plant, since you can watch the roots grow at every stage. It works best when you follow a few simple steps in the right order.
Step 1: Snip the Plantlet From the Runner
Select a plantlet with visible aerial roots and cut it close to the base without damaging the runner.
Using clean tools at this stage helps prevent rot later on. Use clean, sharp scissors for a precise cut.
Leave a small stub of stem attached to the plantlet. Skip plantlets with soft or discolored bases.
Step 2: Choose the Right Container
The container shape directly affects how well the plantlet roots and stays healthy. A narrow opening keeps the leaves dry while the roots stay submerged.
Choose a jar with a narrow neck to keep leaves above the water.
Avoid wide, open containers that let leaves touch water. Use a clear container to monitor root growth easily.
Step 3: Position for Bright, Indirect Light
Light exposure affects both rooting speed and the plantlet’s overall health.
The right spot keeps growth steady without added stress. Place the jar near an east- or north-facing window.
Avoid direct afternoon sun, which can overheat the water. Rotate the jar occasionally for even light exposure.
Step 4: Let Roots Develop to Potting Size
Roots need to reach a certain length before the plantlet can handle the move to soil. Fresh water and steady conditions speed this up. Change the water every 3–4 days.
Expect visible roots within 1–2 weeks. Wait until roots reach 1–2 inches before potting.
Step 5: Transfer the Rooted Plantlet Into Soil
Moving the plantlet at the right time reduces transplant shock and helps it settle in faster.
A gentle transition keeps the roots from drying out. Plant in well-draining soil once roots are 1–2 inches long. Water immediately after transplanting.
Keep in indirect light for the first week.
Propagating by Division
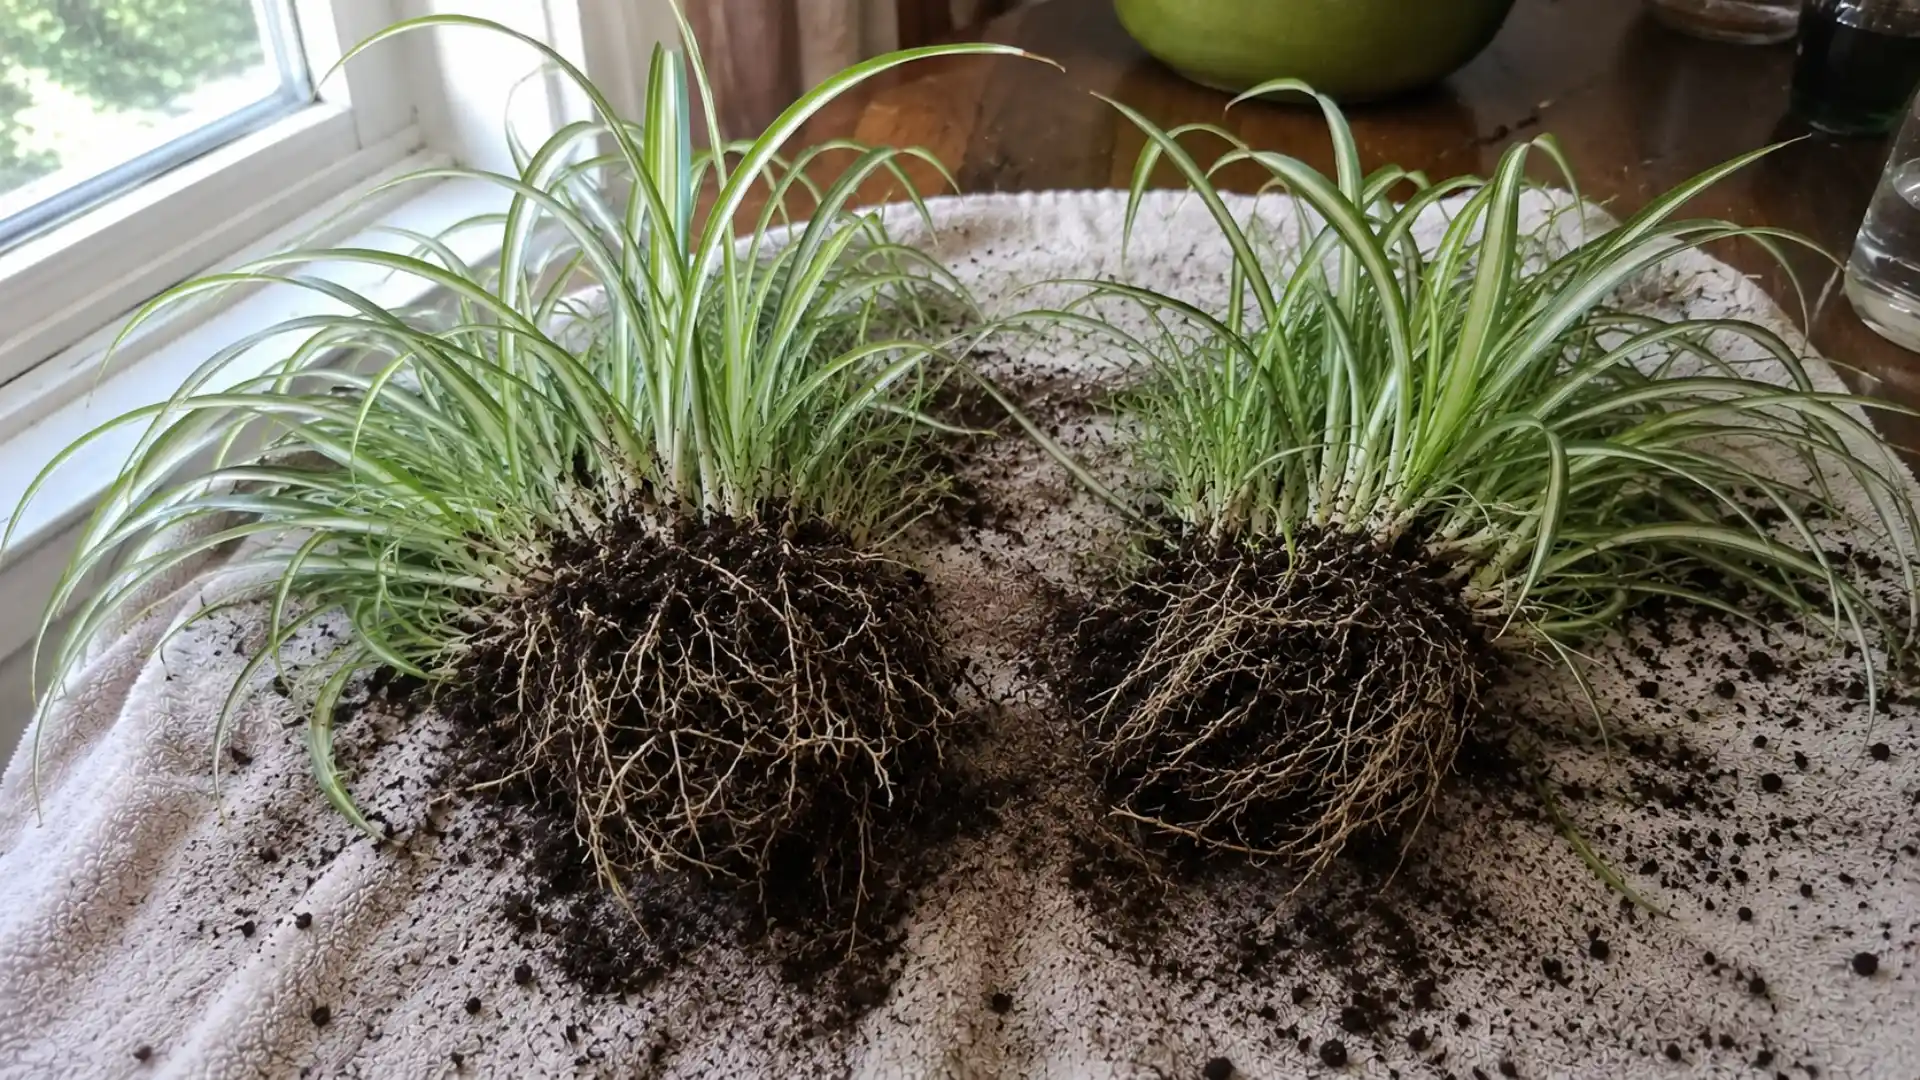
Division is suitable for mature plants that haven’t produced offspring or are overcrowded in their pots.
It creates fully formed new plants right away, without waiting on plantlets to root.
- Check if Division Suits Your Plant: Best for mature, overcrowded plants or ones without any plantlets yet.
- Remove the Plant from Its Pot: Gently loosen the rootball, shaking off excess soil to see the roots clearly.
- Separate Into Sections: Divide the rootball by hand, or use a sterile knife if roots are tightly tangled.
- Replant Each Section: Place divided sections into their own pots with fresh, well-draining soil.
- Water Thoroughly After Replanting: Soak the soil right after planting to help roots settle in quickly.
Note: Spring is the best time to divide, since the plant is entering its active growing season and recovers faster.
Propagating While Still Attached to the Mother Plant
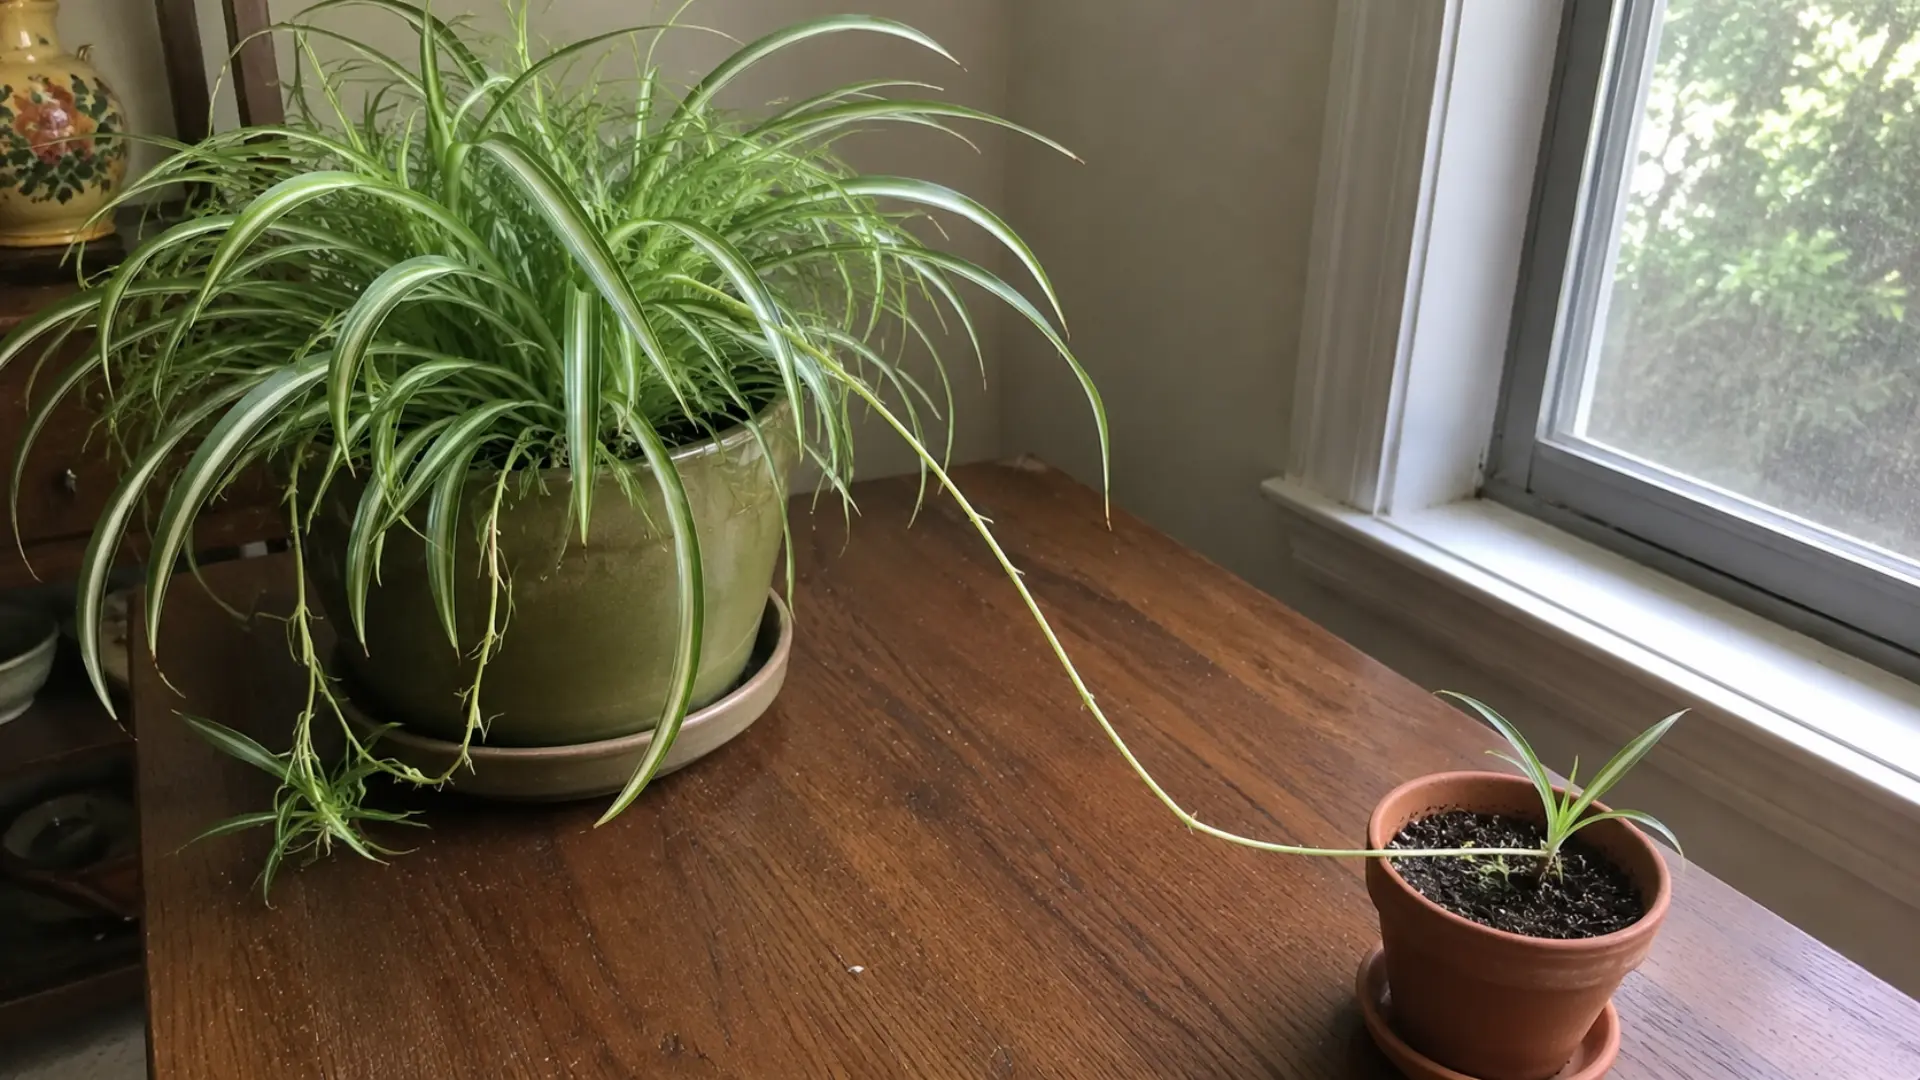
This method allows the plantlet to root while still obtaining nutrients from the mother plant via its runner, reducing the risk of failure. It’s ideal for growers who’d rather not cut anything until roots are confirmed.
Pin the plantlet down while it’s still attached to its runner, choosing one with visible root nubs already forming.
Set a small pot of moist, well-draining soil close by, just within the runner’s reach.
Rest the plantlet’s base on the soil surface and hold it there with a bent paperclip. Leave the runner intact for three to four weeks, keeping the soil lightly moist the whole time.
Roots form gradually while the plantlet still draws nutrients from the mother plant, which lowers the risk of failure.
Tug gently to check for resistance, and only snip the runner once roots have clearly anchored into the soil.
Which Spider Plant Propagation Method Works Best?
Each propagation method has strengths; the best depends on your priorities like speed, reliability, or convenience.
| Method | Speed | Difficulty | Best For |
|---|---|---|---|
| Water | Moderate (2-4 weeks) | Easy | Watching root growth visually |
| Soil | Moderate (3-4 weeks) | Easy | Stronger, long-term root development |
| Stolon (attached) | Slower, but low-risk | Very easy | Beginners avoiding transplant shock |
| Division | Instant (new plant right away) | Moderate | Mature, overcrowded plants |
| Seed | Slowest (weeks to sprout) | Harder | Patient growers wanting something different |
If you want quick, reliable results, soil or water propagation are the easiest ways to start. For a mature plant that is overcrowded or has not produced offsets yet, dividing it is preferable to waiting for new plantlets.
What Community People Say About Propagating Spider Plant
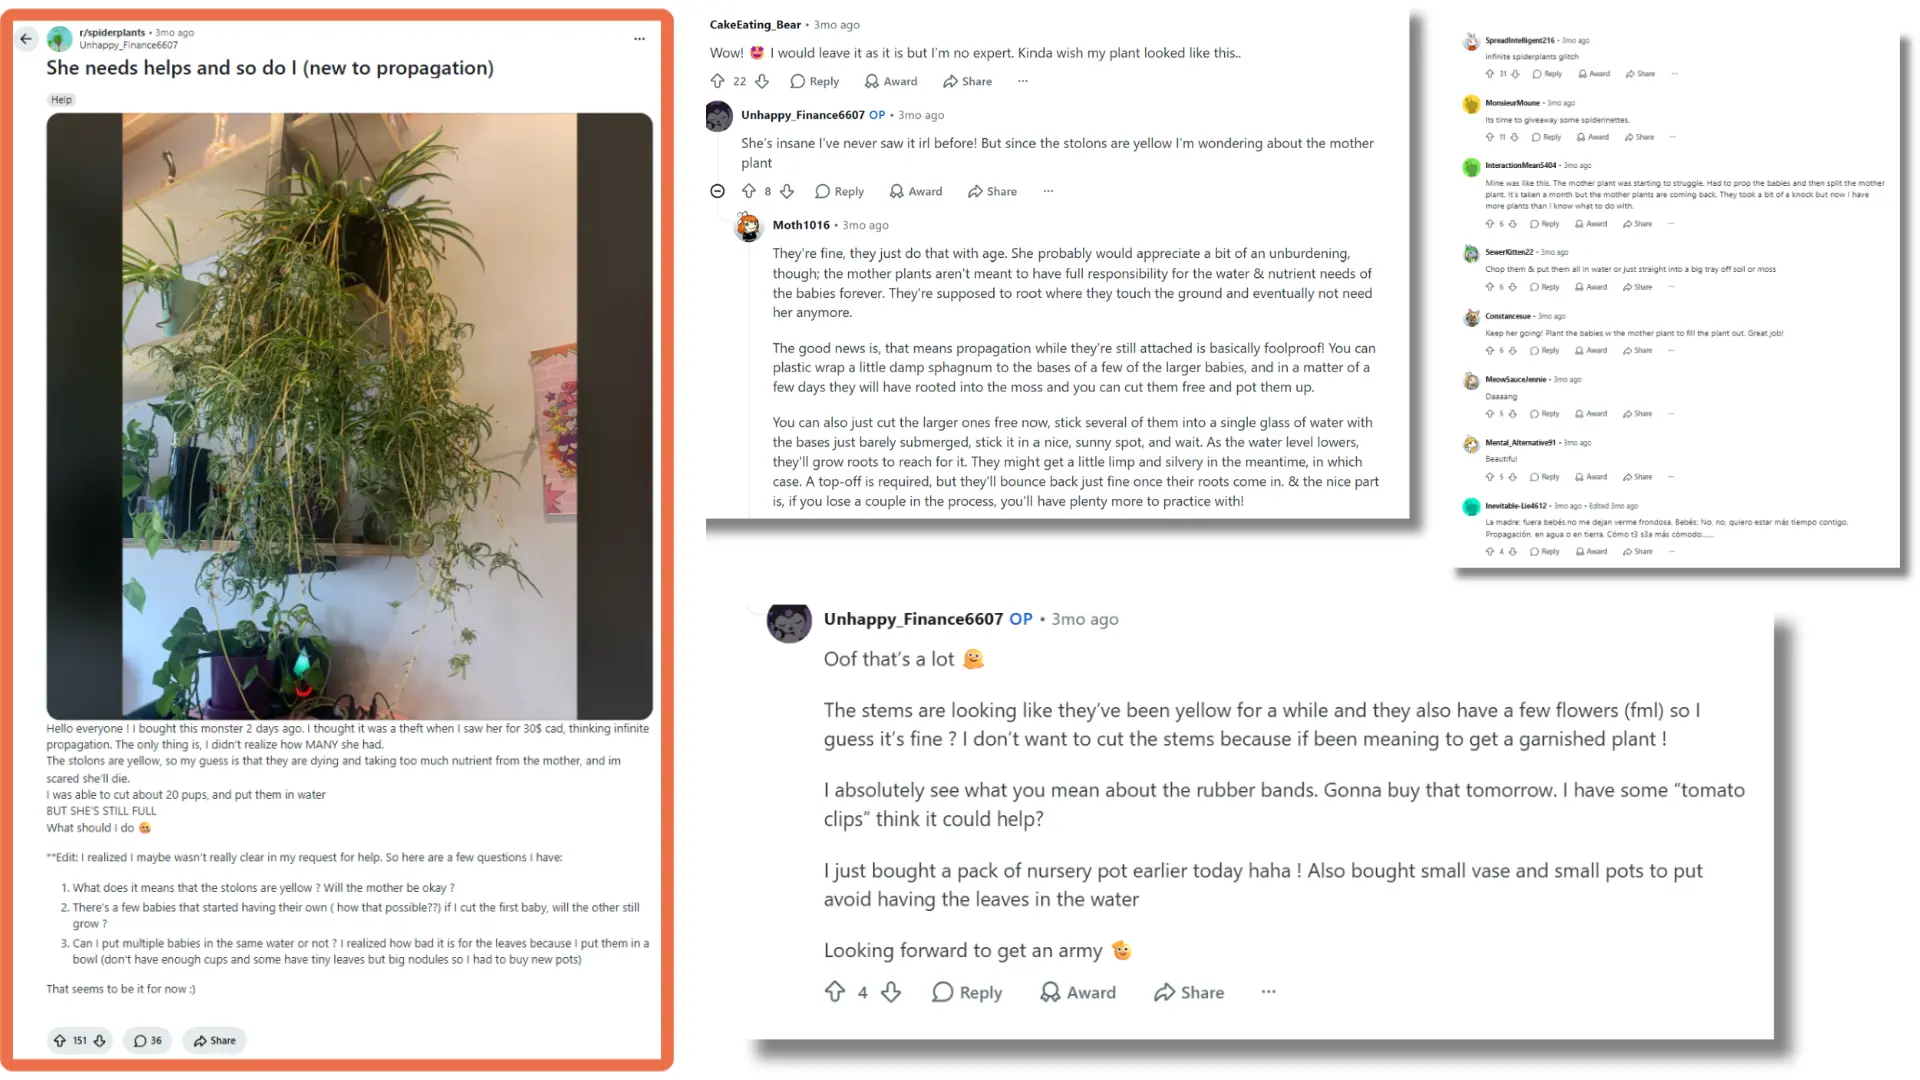
On Reddit, a new spider plant owner found dozens of babies on a single plant, with yellowing stolons and a mother plant seemingly overwhelmed by how many pups she’d produced.
Commenters reassured her that the yellowing is normal aging, not distress, and that the mother plant is not meant to support pups forever.
Suggested fixes: root babies in damp sphagnum while still attached, or cut larger ones into water with bases just submerged, topping off as levels drop.
Others suggested thinning babies guiltlessly, replanting some with the mother for a fuller look, or selling extras for a few dollars.
Consensus: Propagation is nearly foolproof once nubs or roots appear.
How to Repot Spider Plant Babies?
Once a spider plant baby has rooted and started showing new growth, it’s ready to move into a slightly larger, permanent pot.
Repotting at the right time helps it keep growing steadily without getting rootbound too soon.
- Make sure the plantlet has a few inches of roots before repotting.
- Pick a pot just one size larger than its current container.
- Fill the new pot with fresh potting mix instead of old soil.
- Set the plantlet at the same soil level it was growing at before.
- Soak the soil right after planting to help roots settle in.
Consistent light and watering support their growth into robust, healthy plants.
How to Care for Newly Propagated Spider Plants?
Consider the first month as a period for adjustment rather than a rapid growth phase.
Skip fertilizer entirely until you see a new leaf emerge from the center.
That new leaf is the clearest sign the plantlet has truly taken hold. Avoid moving the pot around or placing it near heating vents, since young roots stress easily under shifting conditions.
If you plant babies together, separate them once they develop their own roots. Rather than having them compete in a single crowded pot. Resist repotting again too soon.
One stable spot, steady moisture, and patience matter more than extra attention right now.
Getting Your Spider Plant to Produce More Babies
Spider plants produce plantlets when under mild stress, not from constant pampering.
A few small adjustments can encourage more of them. Let the plant get slightly rootbound.
A snug pot pushes runners faster than a roomy one. Give it a dormant winter rest.
Cooler temperatures and shorter days often trigger spring runners. Feed the mother plant monthly, but don’t overwater. Soggy soil pulls energy toward root repair instead of babies.
Be patient with young plants.
Those under a year old rarely produce plantlets yet. If nothing appears after a year of steady care, division works as a reliable backup.
Common Spider Plant Propagation Problems
Most propagation problems come down to water quality, light, or timing, so small adjustments usually fix them fast.
With some patience, your spider plant babies are likely to recover and grow consistently.
| Problem | Likely Cause | Fix |
|---|---|---|
| Plantlet not rooting or rotting | Stagnant water or early cutting | Change water often; cut mature plantlets only |
| Brown leaf tips | Fluoride, chlorine, or direct sun | Use filtered water and indirect light |
| Yellowing or wilting after transplant | Transplant shock | Keep light and watering steady for a week |
| Mushy, blackened roots | Overwatering | Trim rotted roots and repot in dry soil |
| Mother plant not producing babies | Plant too young or low light | Wait a year; increase indirect light |
Wrapping Up!
Multiplying a spider plant isn’t a gamble once you know what each plantlet is telling you.
A little patience, the right container, and consistent light do most of the heavy lifting.
Whichever method drew you to water, soil, division, or letting nature run its course, you now have what you need to see it through. Learning how to propagate spider plant babies isn’t a one-time skill either.
Every mature plant continues to produce more each season.
Snip a few, pot them up, and give the extras to someone who could use a little green in their space.
Frequently Asked Questions (FAQ’s)
How Long Does It Take for Spider Plant Babies to Root in Water?
Roots typically appear within one to two weeks under bright, indirect light.
Can I Propagate a Spider Plant From a Leaf Cutting?
No, spider plants don’t root from leaves; only plantlets or divisions work reliably.
Do I Need Rooting Hormone to Propagate Spider Plants?
No, it is optional; spider plants root easily in plain water or soil.
Why are My Spider Plant’s Roots Thick and Tuberous?
Those are healthy water-storage roots, common in mature, well-established spider plants.
Should I Remove All the Babies From My Spider Plant At Once?
No, snip a few at a time so the mother plant stays strong.