

There’s a quiet joy in watching your garden thrive at just the right height; no more bending until your back aches or wrestling with stubborn clay soil that refuses to drain.
Raised garden beds have become the go-to solution for home gardeners who want healthier plants without the headaches, offering better drainage, richer soil you can actually control, and fewer weeds creeping into your vegetables.
What makes them even better? You don’t need a hefty budget or advanced carpentry skills to create beautiful, productive beds that’ll last for years.
With a weekend afternoon and some basic materials, you can turn even the trickiest yard into a thriving, growing space that feels like it was always meant to be there.
Why Choose Raised Garden Beds?
Raised garden beds give you complete control over what goes into your soil, which means you’re not stuck dealing with whatever compacted or nutrient-poor earth happens to exist in your yard.
The elevated design naturally improves drainage, preventing that soggy, waterlogged soil that drowns roots and invites disease.
You’ll spend less time weeding and bending over since everything’s contained and accessible at a comfortable height.
They’re perfect for patios, balconies, or awkward corners where traditional gardens won’t fit.
Plus, the soil in raised beds warms up faster in spring, giving you a head start on the growing season and often extending your harvest well into fall.
How Much Does It Cost to Build Raised Garden Beds?
Building your own raised garden beds is surprisingly affordable, with most DIY projects ranging anywhere from $20 to $200, depending on size and materials.
Store-bought kits can cost 2-3 times more than building from scratch, though they do save you some assembly time.
You can slash costs even further by using reclaimed wood, repurposed cinder blocks, or even stacked stones you already have lying around.
Look for lumber at salvage yards or ask local construction sites if they have scraps available.
While the upfront investment might give you pause, raised beds last 5-10 years or more and pay for themselves through better yields, less water waste, and soil that doesn’t need constant amendments, unlike traditional in-ground gardening.
Best Affordable Materials for Raised Garden Beds
Finding the right materials for your raised garden beds doesn’t mean draining your wallet. The key is balancing durability with cost while making sure whatever you choose is safe for growing food.
Here’s a breakdown of the most budget-friendly options and what you need to know about each one.
| Material | Cost Per Bed | Lifespan | Key Benefits | Watch Out For |
|---|---|---|---|---|
| Cedar | $150-$300 | 15-20 years | Naturally rot-resistant, no chemicals | Higher upfront cost |
| Pine (untreated) | $50-$100 | 3-5 years | Very affordable, easy to find | Rots quickly |
| Reclaimed wood | $0-$50 | Varies | Eco-friendly, nearly free | Check for chemical treatments |
| Cinder blocks | $30-$80 | 20+ years | Durable, no tools needed | Heavy, industrial look |
| Metal panels | $80-$150 | 10-15 years | Sleek, excellent drainage | Heats up in the sun |
| Pallets | $0-$20 | 2-4 years | Often free, quick setup | Must be heat-treated only |
| Corrugated steel | $100-$200 | 15-20 years | Weather-resistant, modern | Sharp edges |
| Composite boards | $120-$250 | 25+ years | Won’t rot, low maintenance | Pricier initially |
Tools You’ll Need
You don’t need a professional workshop to build raised garden beds.
Most projects require just a handful of basic tools you might already have in your garage, and if you’re missing something, they’re easy to borrow from a neighbor or pick up inexpensively at any hardware store.
- Drill (1 cordless or corded)
- Screws or fasteners (24-32 for a standard 4×8 bed)
- Saw (hand saw or circular saw)
- Measuring tape (25-foot recommended)
- Level (2-4 foot length)
- Work gloves (1 pair)
- Safety glasses (1 pair)
Step-by-Step: How to Build Raised Garden Beds?
Building raised garden beds is more straightforward than it looks, and you’ll be amazed at how quickly it comes together.
Follow these steps to create a sturdy, productive bed that’ll serve your garden for years.
Step 1: Choose the Right Location
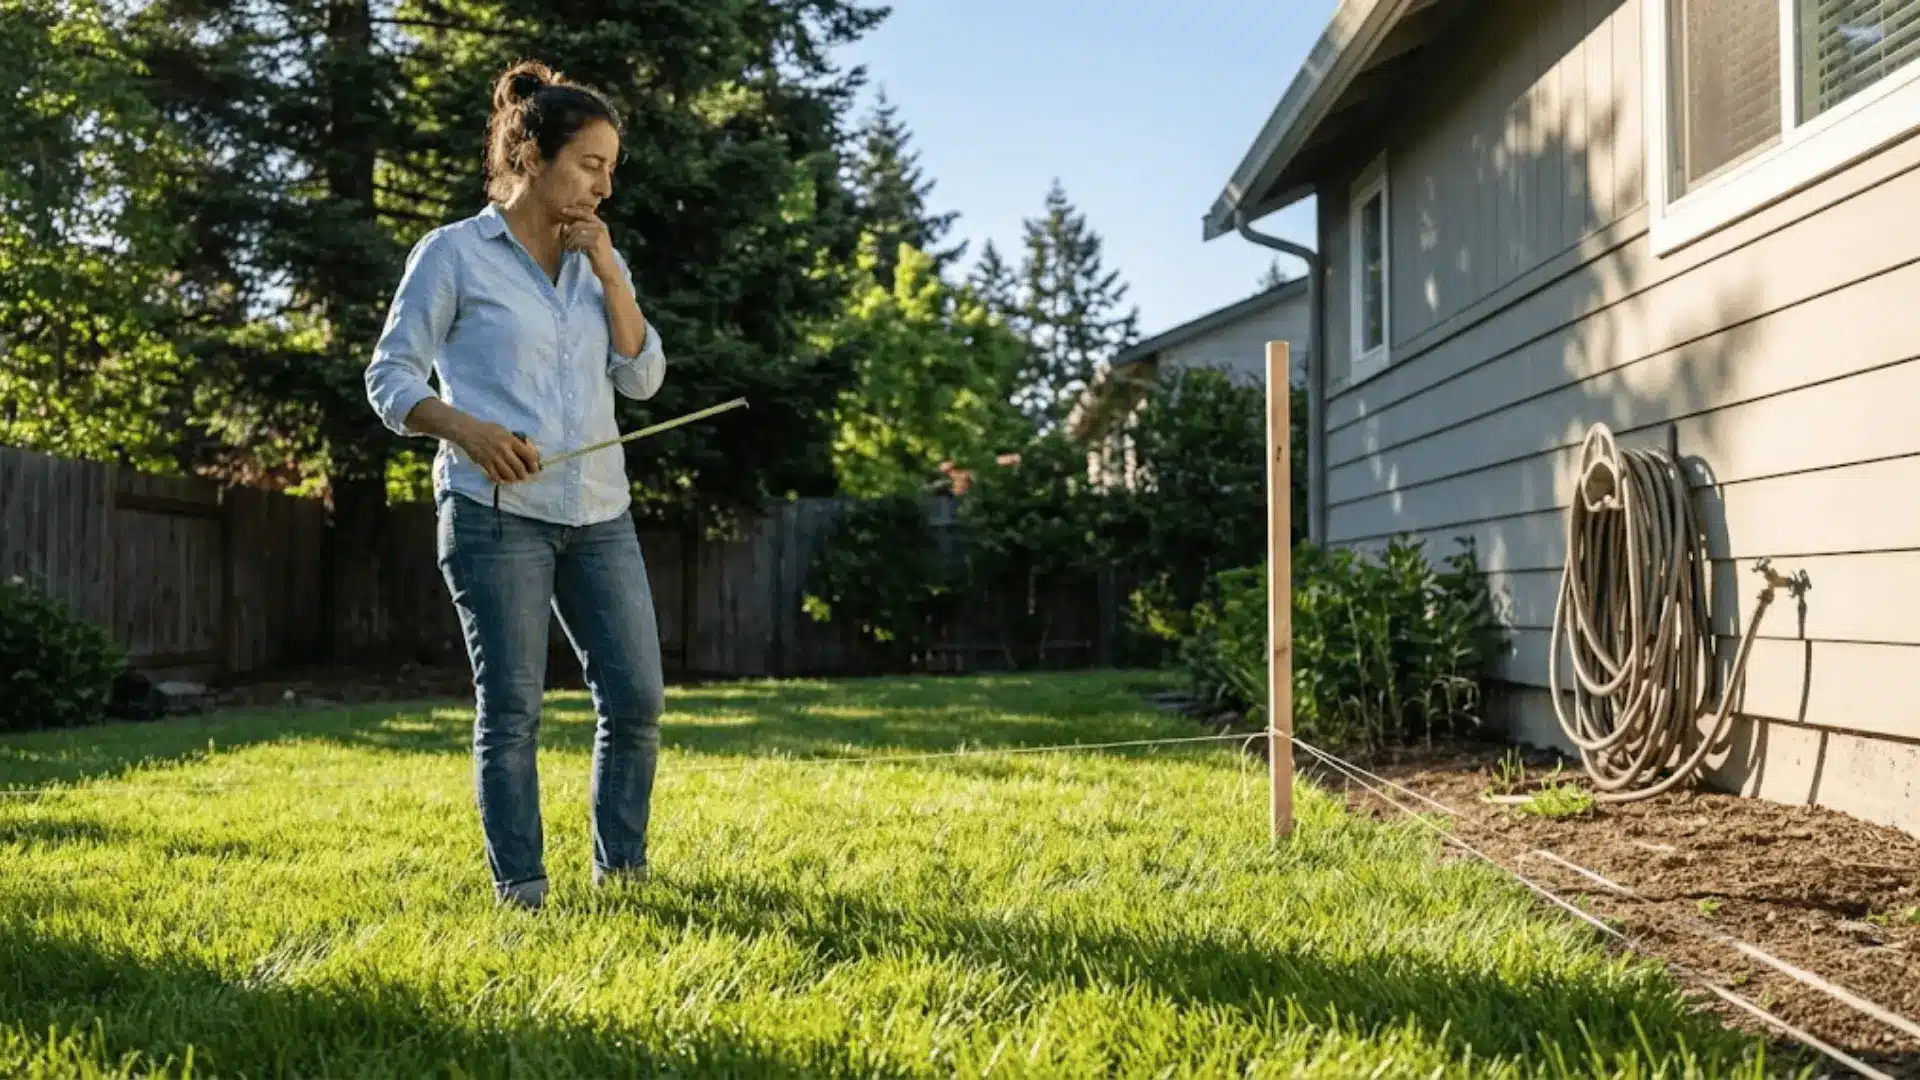
Pick a spot that gets at least 6-8 hours of direct sunlight daily, especially if you’re growing vegetables or herbs. Good drainage is crucial, so avoid low-lying areas where water pools after rain.
Keep your bed within easy reach of a water source, and if possible, orient it north to south so plants get even sun exposure throughout the day.
Step 2: Decide on Size and Height
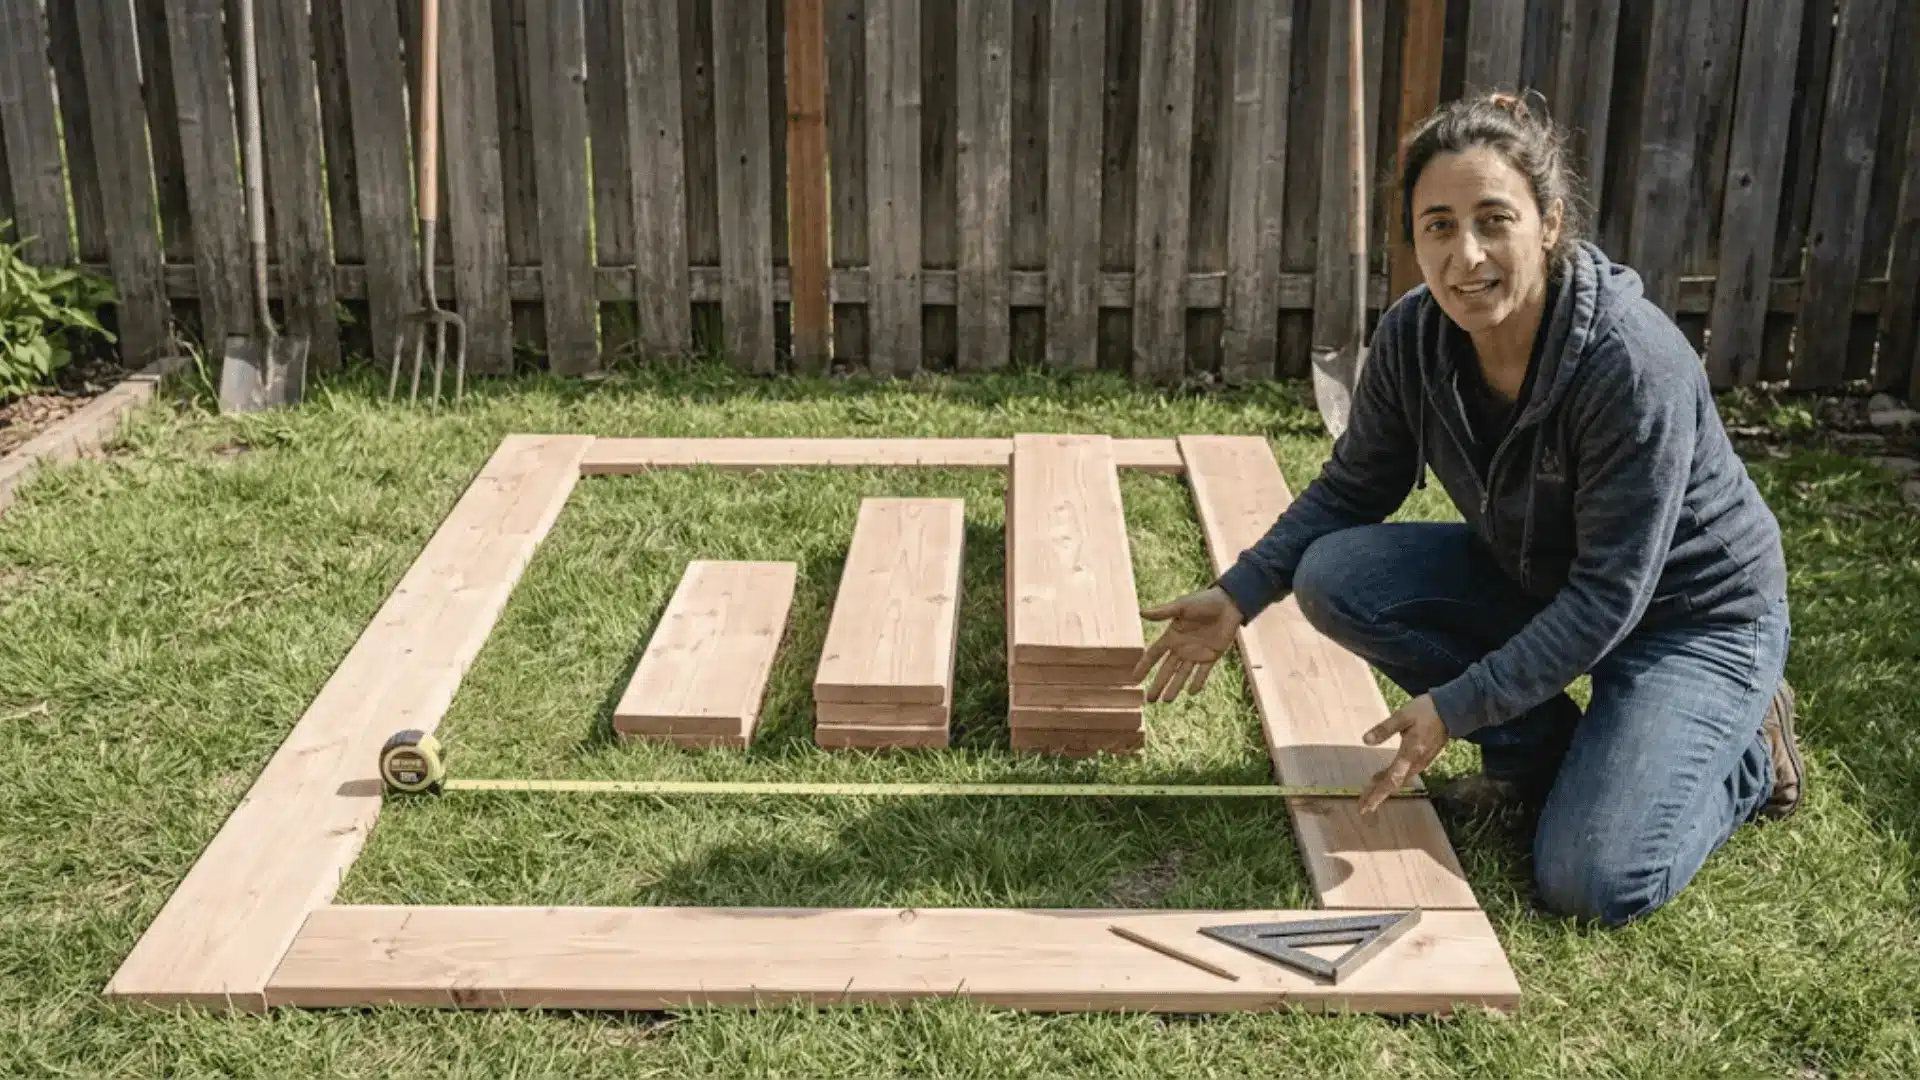
A 4×8-foot bed is the sweet spot for most gardeners, letting you reach the center from either side without stepping on the soil.
Height matters too: 6-12 inches works for shallow-rooted crops, while 12-18 inches gives deeper roots room to thrive. If you have mobility concerns, consider building 24-30 inches high for comfortable standing access.
Step 3: Prepare the Ground
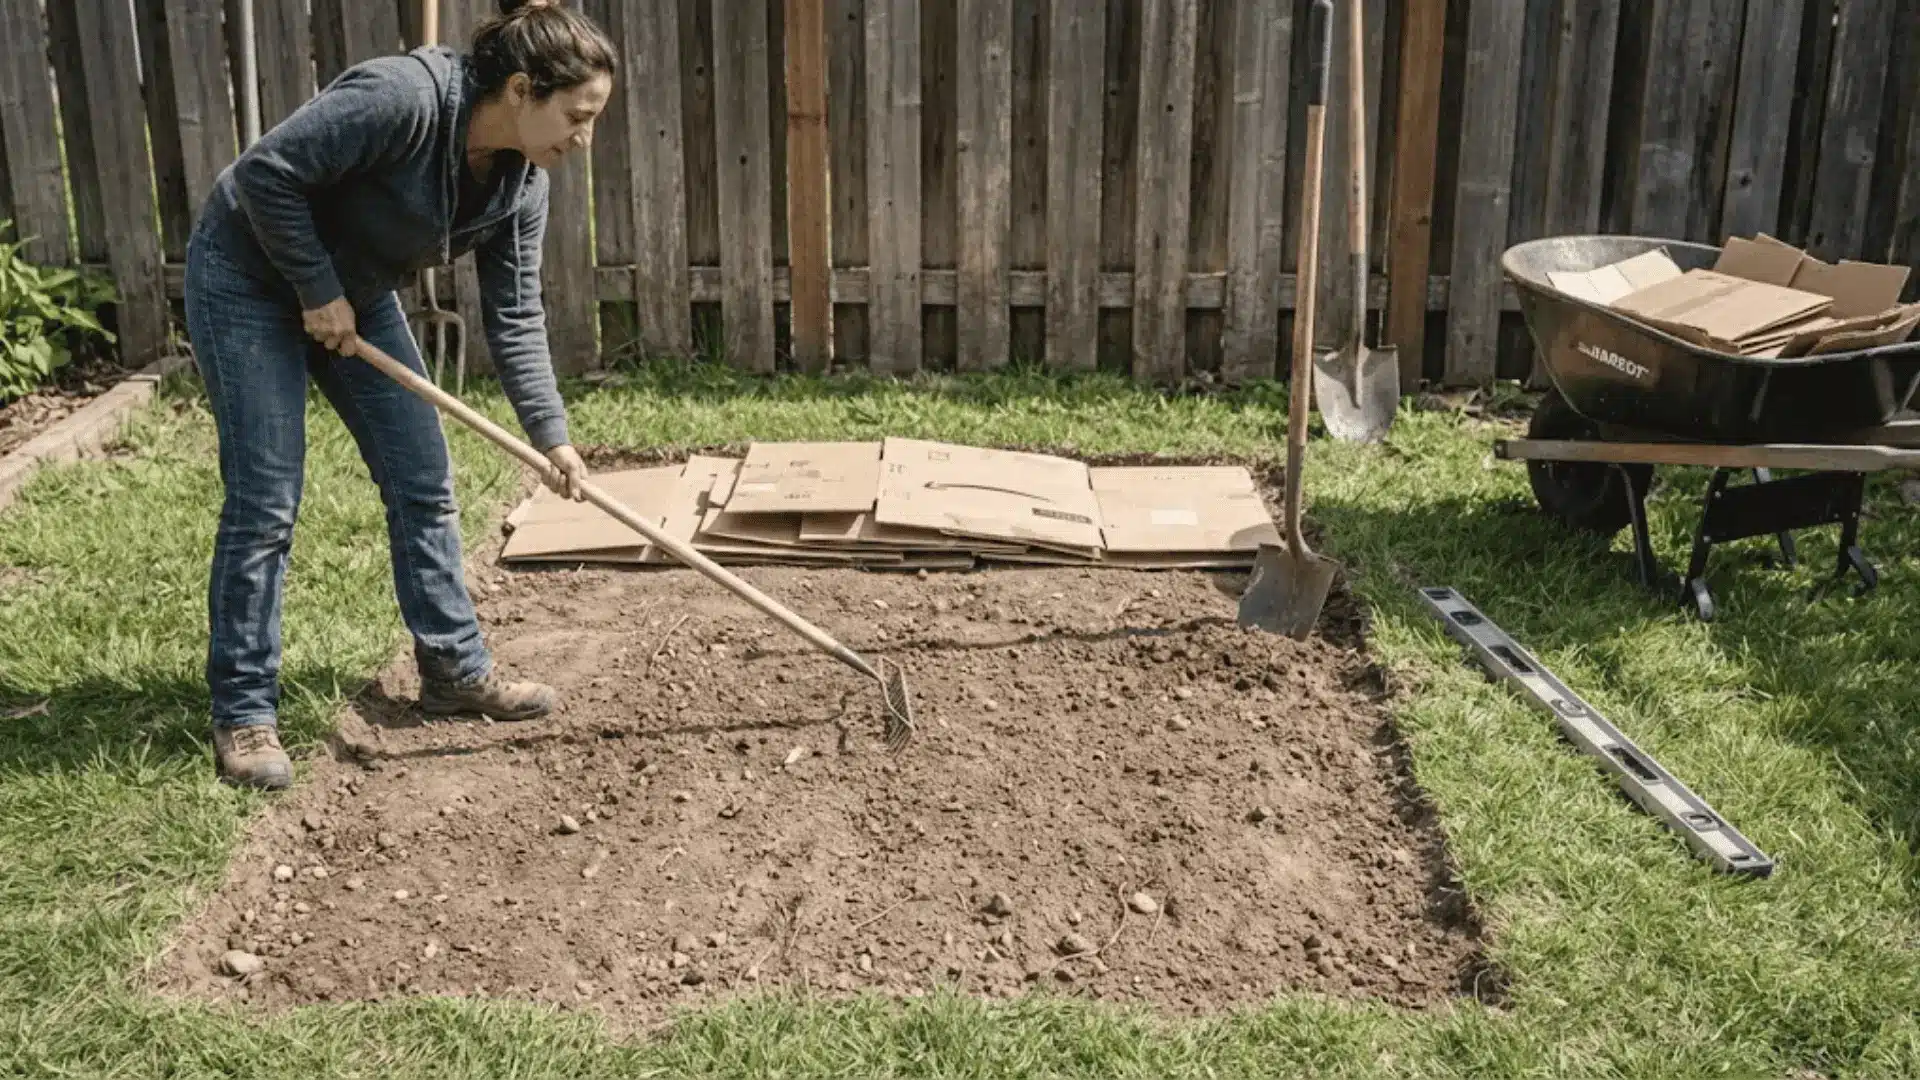
Clear away grass and weeds where your bed will sit, either by digging them out or laying down cardboard to smother them. Level the ground as much as possible so your frame sits evenly and doesn’t rock.
You can add landscape fabric or cardboard as a weed barrier at the bottom, though it’s optional if you’re filling the bed deep enough.
Step 4: Assemble the Frame
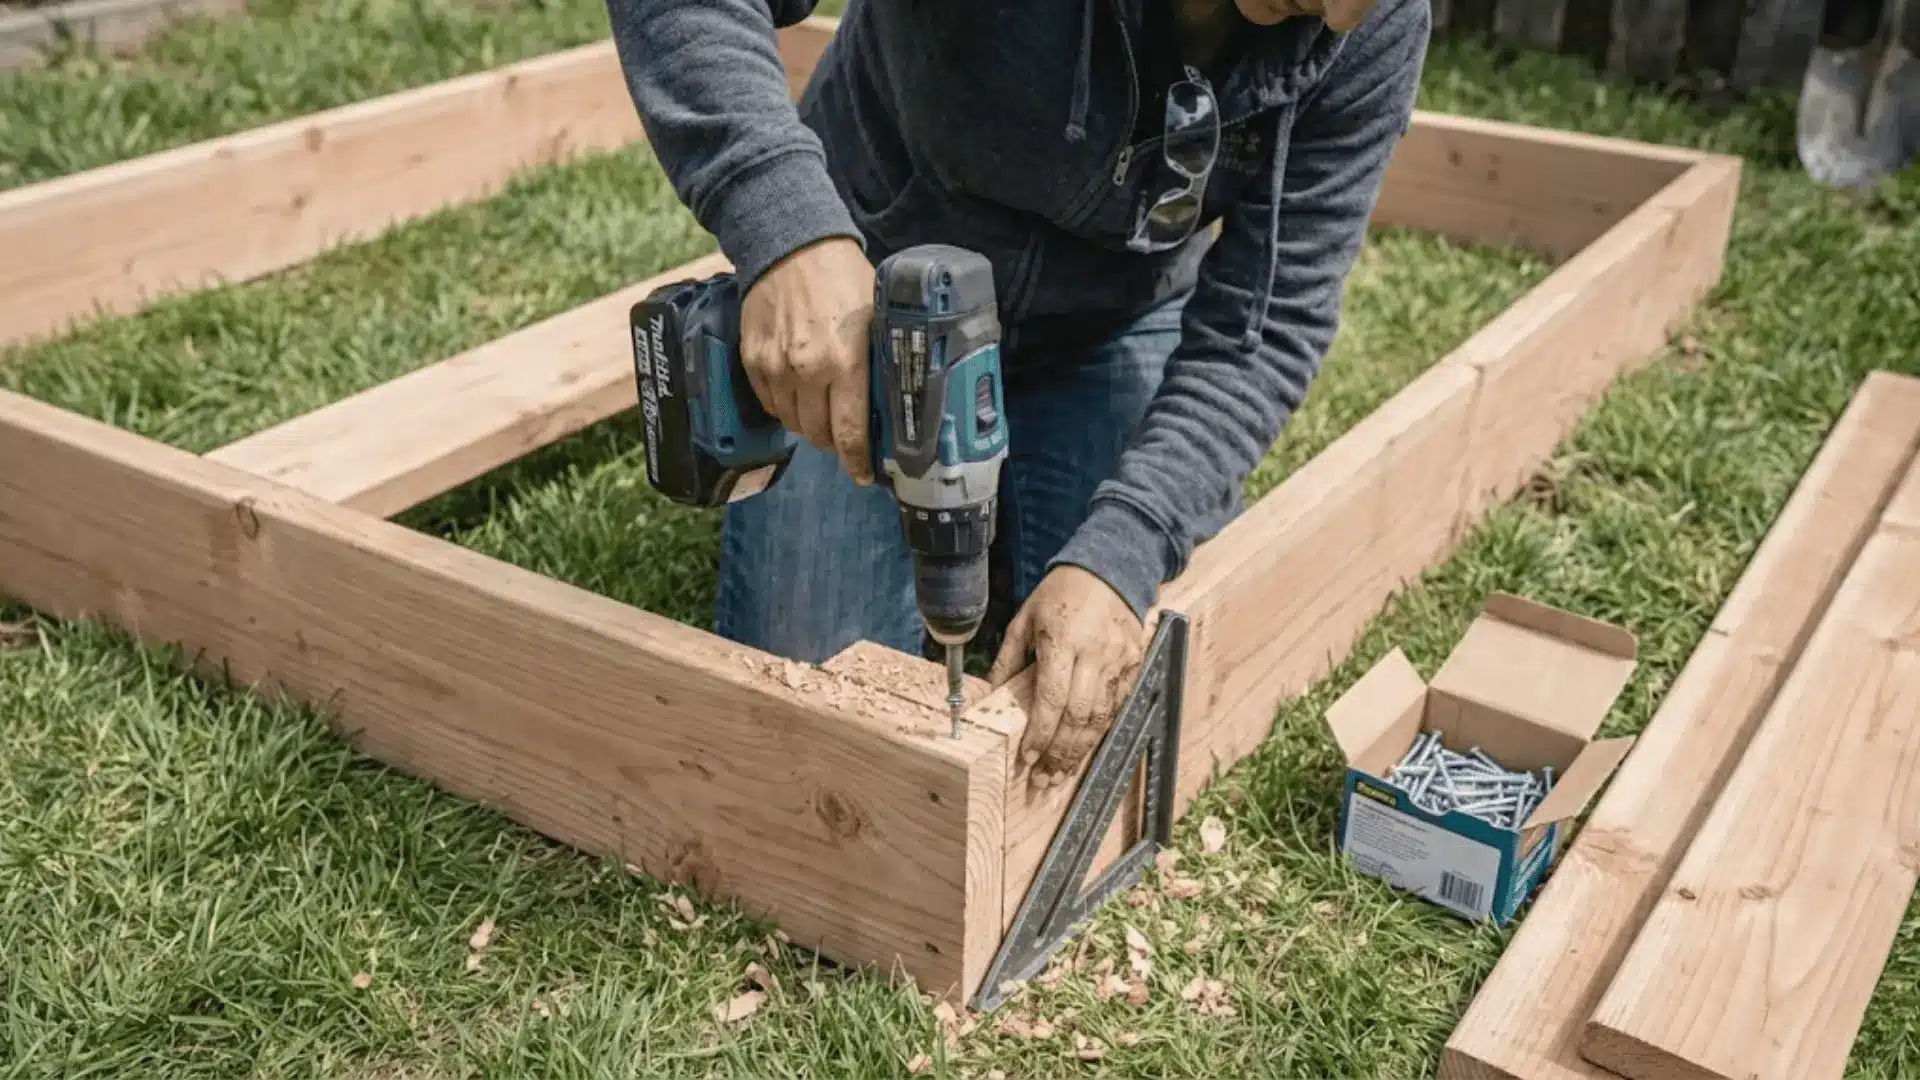
Cut your boards to length, then attach the corners using 3-inch exterior screws, driving at least two per corner for stability. Pre-drill holes to prevent splitting, especially near board ends.
For beds longer than 6 feet, add a support board across the middle to keep sides from bowing outward once you fill them with heavy, wet soil.
Step 5: Position and Level the Bed
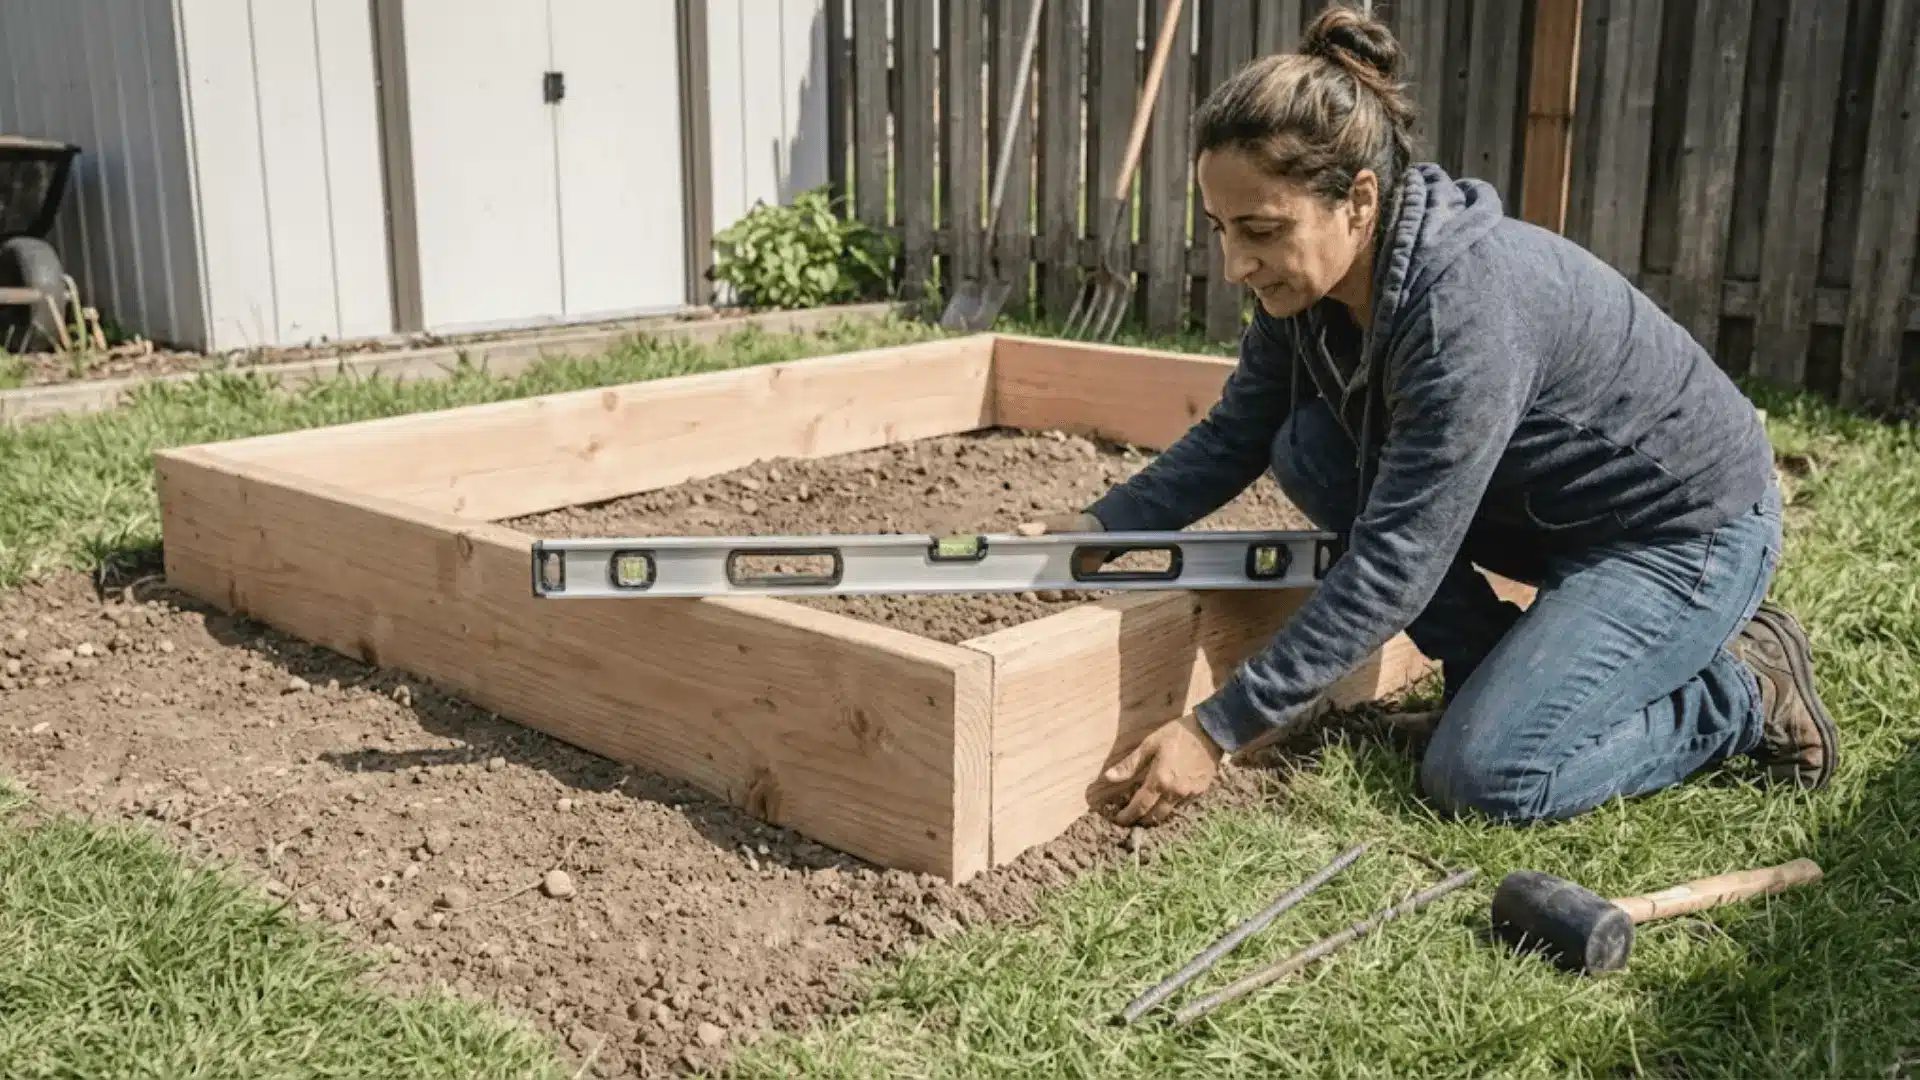
Move your assembled frame to its final spot and use a level to check that it sits evenly. Adjust by adding or removing soil beneath the frame until it’s balanced.
If you’re on a slope or worried about shifting, anchor the bed with rebar stakes driven through pre-drilled holes in the corners and into the ground below.
Step 6: Add Soil Layers
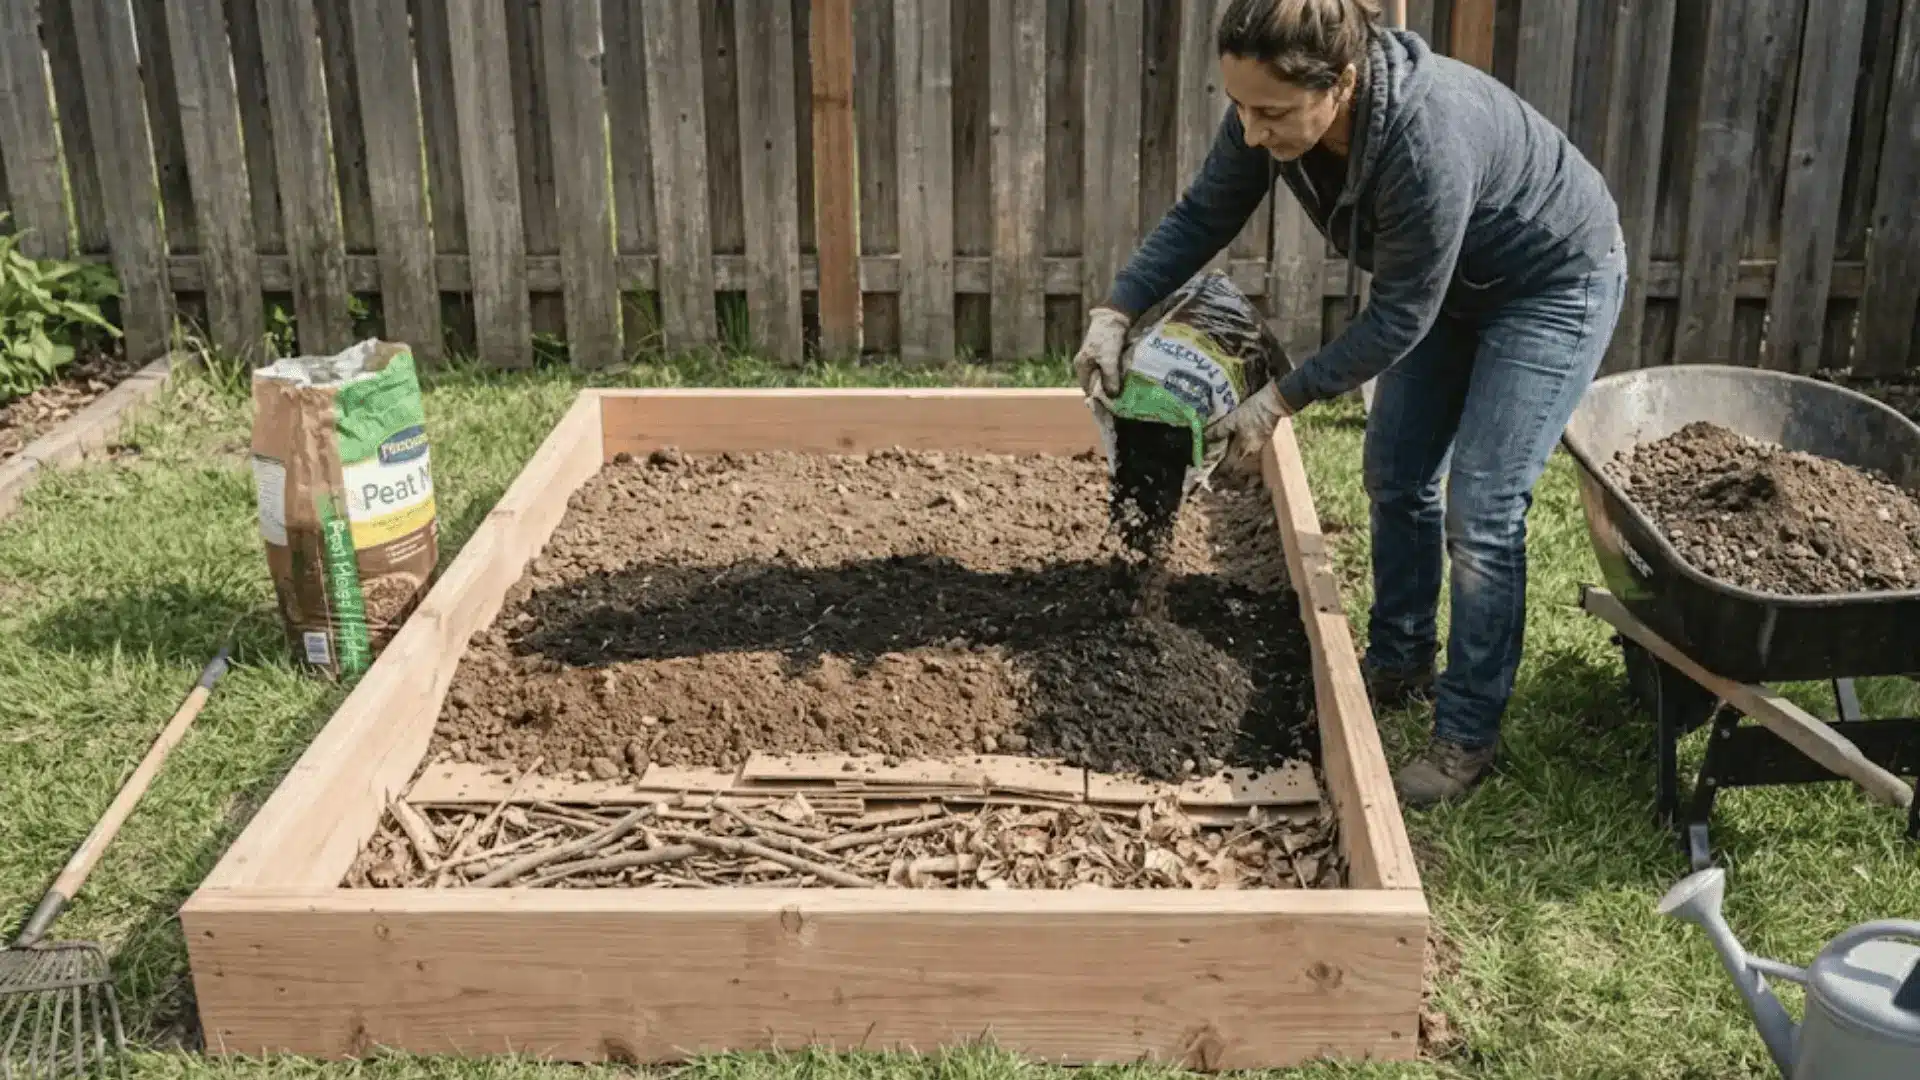
Start with a base layer of sticks, leaves, or cardboard if you’re trying the hugelkultur method, which breaks down over time and feeds your plants while cutting soil costs.
Fill the rest with a mix of topsoil, compost, and peat moss or coconut coir in roughly equal parts. This blend drains well while holding enough moisture and nutrients to keep plants happy without breaking your budget.
Best Soil Mix for Raised Garden Beds
The soil you choose makes or breaks your raised bed garden, but you don’t need expensive bagged mixes to grow thriving plants.
Here’s everything you need to know about creating the perfect blend while keeping costs down.
| Component | Ratio | Purpose | Budget Tips |
|---|---|---|---|
| Topsoil | 40-50% | Provides structure and bulk | Buy in bulk from landscaping suppliers instead of bags |
| Compost | 30-40% | Adds nutrients and beneficial microbes | Make your own from kitchen scraps and yard waste |
| Peat moss or coconut coir | 10-20% | Improves water retention and drainage | Coconut coir is cheaper and more sustainable |
| Vermiculite or perlite | 10% | Improves aeration and prevents compacting | Optional but helpful for heavy soils |
Money-Saving Strategies:
- Order soil in bulk (by the cubic yard) rather than bags, saving 50% or more.
- Start composting now for free, nutrient-rich material next season.
- Layer yard waste at the bottom (hugelkultur method) to reduce the soil volume needed.
- Ask neighbors or local farms for aged manure or compost.
How to Build Raised Garden Beds Cheaply?
Keeping costs down doesn’t mean sacrificing quality. With a few smart strategies, you can build beautiful, functional raised beds for a fraction of what you’d spend on kits or premium materials.
- Scout for reclaimed wood from construction sites, pallet yards, or online marketplaces where people give away materials for free
- Buy lumber in bulk during off-season sales or split orders with neighbors to get wholesale pricing
- Build multiple beds at once to maximize material use and minimize waste from cutting
- Skip fancy corner brackets and use simple butt joints with long screws, which work just as well
- Make DIY drip irrigation with soaker hoses or perforated garden hoses instead of expensive systems
Your plants care far more about good soil and consistent watering than whether your beds have decorative trim or cost three times what they needed to.
Raised Garden Bed Design Ideas
Your raised bed layout should work with your space, not against it.
If you’re dealing with a sprawling backyard or a compact urban patio, there’s a design that’ll maximize your growing area while looking intentional and beautiful.
| Design | Best For | Dimensions | Key Advantages |
|---|---|---|---|
| Single long bed | Beginners, simple layouts | 4×8 feet or 4×12 feet | Easy to build, efficient use of materials, classic look |
| Multiple smaller beds | Crop rotation, variety | 3×3 or 4×4 feet each | Organize by plant type, easier to manage, and flexible placement |
| U-shaped layout | Accessible gardening | Three beds forming a U | Reach everything from outside, perfect for mobility needs |
| Tiered raised beds | Slopes, visual interest | Varies by terrain | Maximizes sloped yards, creates a focal point |
| Narrow beds | Side yards, tight spaces | 2×8 feet or 2×10 feet | Fits along fences or pathways, still productive |
How to Maintain Raised Garden Beds?
Once your raised beds are built and planted, a little ongoing care keeps them productive and sturdy for years.
These simple maintenance habits take minimal effort but make all the difference in how long your beds last.
- Add 1-2 inches of compost each spring to replenish nutrients that plants used up the previous season
- Layer 2-3 inches of mulch around plants to retain moisture, suppress weeds, and regulate soil temperature
- Check corners and joints annually for loose screws or signs of wood rot, tightening or replacing as needed
- Keep wood dry at the base by avoiding soil piled against the sides and ensuring good drainage underneath
Treat your raised beds well, and they’ll return the favor season after season. A few minutes of attention each year means you won’t be rebuilding from scratch when you could be harvesting instead.
Wrapping Up
Building raised garden beds changes how you grow food, and the best part is that you’ve just learned how accessible it really is.
With basic tools, affordable materials, and a free afternoon, you can create growing spaces that’ll produce fresh vegetables and herbs for years to come.
Start with one simple bed this weekend and see how quickly it becomes the most productive spot in your yard.
Have questions about your specific setup or want to share your raised bed success story? Drop a comment below and let’s keep the conversation growing.


