Most gardeners wing it when planting tulip bulbs, then wonder why their blooms flop or vanish after one season. Turns out, depth matters way more than you’d think.
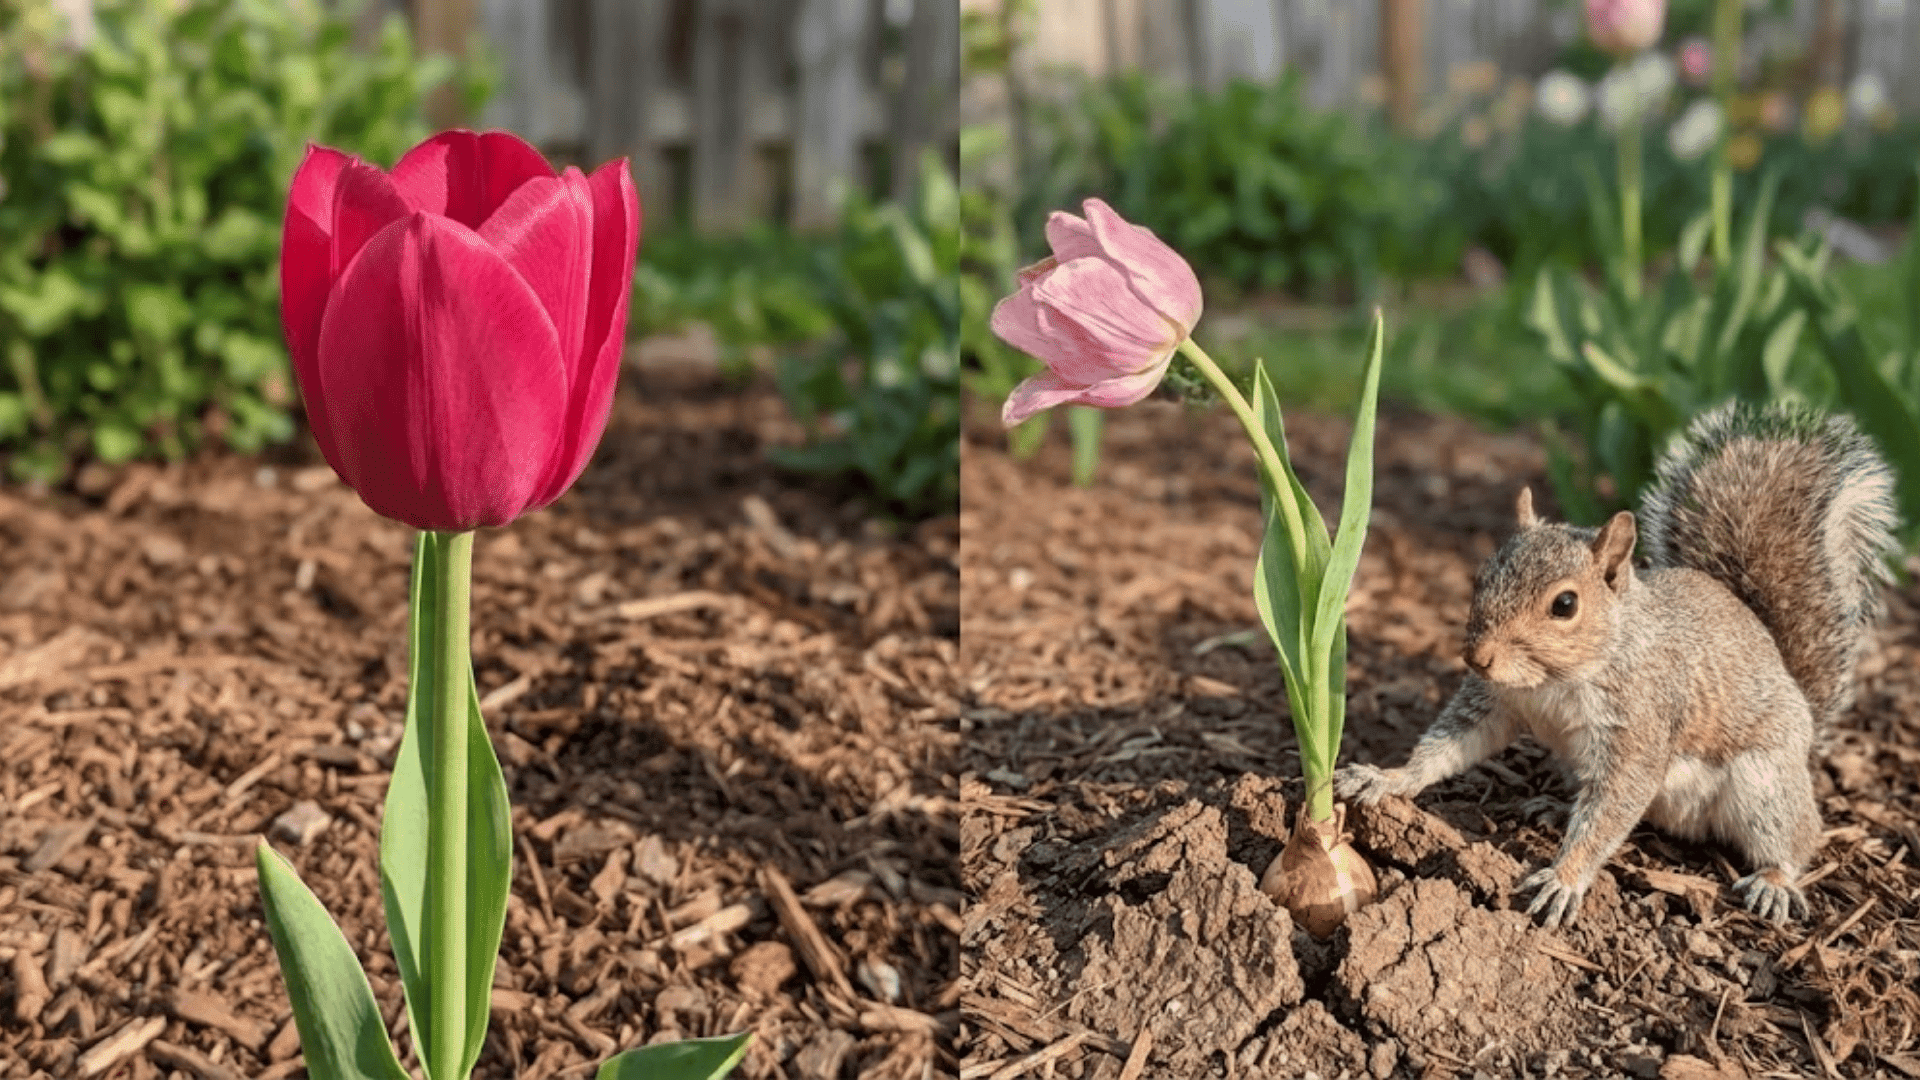
Plant too shallow and you’re basically setting out a buffet for squirrels. Go too deep, and your tulips burn all their energy just trying to surface.
There’s a simple rule that takes the guesswork out of it. Get the depth right, and you’ll see sturdier stems, longer-lasting blooms, and bulbs that actually return.
Let’s break down exactly how deep to plant for tulips that thrive.
Quick Rule: “Plant 3× the Bulb Height”
The golden rule for tulip planting is simple: dig down three times the bulb’s height.
Measure your bulb from base to tip, multiply by three, and that’s your planting depth. This usually lands you somewhere between 4 and 8 inches deep, depending on bulb size.
Smaller Species Tulips: ~4 inches (10 cm) deep
Standard Tulip Bulbs: 6 to 8 inches (15 to 20 cm) deep
Why does this work? The extra soil acts like a blanket, insulating bulbs from temperature swings and making it harder for pests to reach them.
It also gives roots plenty of room to anchor, so your stems stay upright when spring winds kick in.
Why Planting Depth Makes or Breaks Your Tulip Blooms?
Planting depth isn’t just about following rules. It’s about giving your bulbs the best shot at survival and blooms.
Go too shallow, and you’re asking for trouble. Frost can damage bulbs when they’re close to the surface, especially during late-winter thaws.
Shallow bulbs also make easy targets for squirrels and chipmunks. Plus, without enough soil anchoring them, your tulips might topple over in the wind or produce stems that can’t support the flowers.
Plant too deep and your bulbs struggle to push through all that soil. They’ll burn energy just reaching sunlight, which means smaller blooms or delayed flowering. Sometimes they won’t emerge at all.
The right depth gives bulbs stable temperatures, protection from critters, and enough space for roots to develop.
Adjust Planting Depth Based on Your Soil Type
Your soil changes the game. Sandy soil drains fast and doesn’t hold bulbs as securely. Clay soil holds water and can drown bulbs if they sit too deep.
Here’s how to adjust:
| Soil Type | Depth Adjustment | What This Does |
|---|---|---|
| Sandy soil | Plant 1 to 2 inches (2.5 to 5 cm) deeper than standard | Keeps bulbs stable and prevents them from drying out too quickly |
| Clay soil | Plant 1 to 2 inches (2.5 to 5 cm) shallower than standard | Prevents bulbs from sitting in waterlogged soil and rotting |
Improve drainage in clay: Mix coarse sand or grit into your planting holes before setting bulbs. Or skip the hassle and plant in raised beds where drainage happens naturally.
Planting Tulip Bulbs in Pots or Containers
Containers give you flexibility but need a different approach. You can plant slightly shallower than in-ground tulips, but drainage and spacing matter more in confined spaces.
Container Depth and Soil Setup
Aim for 4 to 6 inches (10 to 15 cm) deep, depending on your pot size and bulb type. Use a fast-draining potting mix and keep bulbs at least 2 inches from the pot rim to protect them from temperature swings.
Make sure your container has drainage holes, or bulbs will rot in standing water.
Layering Bulbs for Fuller Displays
Try the “lasagna method” by planting bulbs in layers at different depths. Put larger bulbs deepest, then add soil and place smaller bulbs or earlier bloomers above them.
This creates a staggered bloom schedule and denser flower display. In warm climates, pre-chill bulbs in the fridge for 8 to 12 weeks before planting to mimic winter.
Planting Tulips in Trenches and Groups for Maximum Impact
Mass plantings create those sweeping displays that look effortless but require smart technique. Trenches simplify bulk planting, and proper mulching protects bulbs without trapping moisture that can harm them.
1. Digging Trenches for Large Drifts
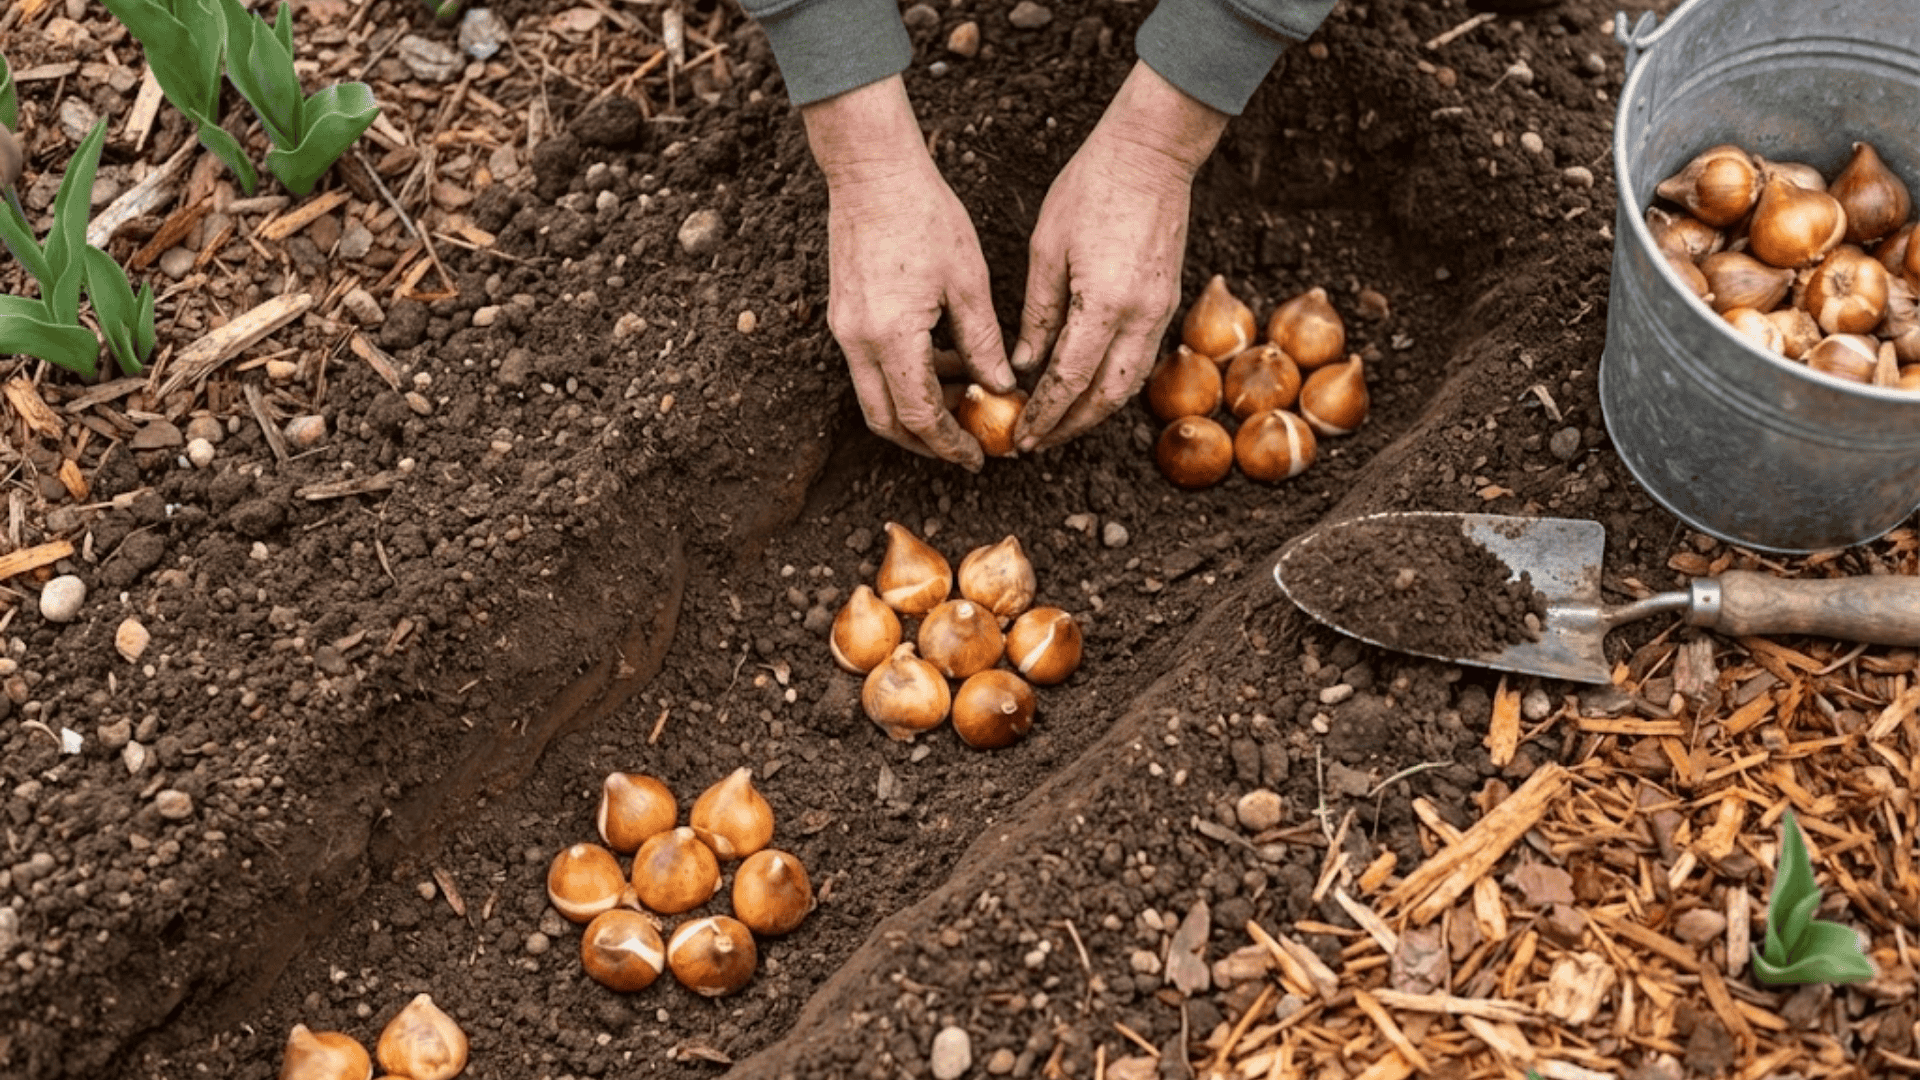
Skip individual holes when planting dozens of bulbs. Dig a trench 6 to 8 inches (15 to 20 cm) deep and as wide as needed for your layout.
Space bulbs about 4 to 6 inches apart in the trench, then backfill with soil. This method ensures consistent depth across your entire planting area, which translates to synchronized blooming and a more cohesive display.
2. Using Mulch to Protect without Problems
Apply 2 inches of shredded leaves or bark after planting to moderate soil temperature swings through winter. Mulch prevents freeze-thaw cycles from heaving bulbs out of the ground.
Avoid thick layers that trap water against bulbs and cause rot. Pull mulch back slightly in early spring when green shoots start poking through, so they aren’t smothered.
3. Designing with Natural Clusters Instead of Rows
Plant tulips in irregular groupings of 5, 7, or 9 bulbs rather than straight lines. Odd numbers arranged in loose clusters mimic natural growth patterns and deliver a stronger visual punch.
This approach lets you layer different bloom times and colors within each grouping, creating depth and interest that single-file rows can’t match.
Spacing, Orientation, and Fertilizing at Planting Time
Getting bulbs positioned correctly and fed from the start sets them up for strong growth. Small details like spacing and which end goes up matter more than you’d think.
Spacing Bulbs and Planting Orientation
Space standard tulip bulbs 4 to 6 inches (10 to 15 cm) apart. Larger bulbs or showy varieties need the full 6 inches to prevent crowding and let each flower develop fully.
Always plant with the pointed end facing up and the flatter, root end down. Press soil firmly over bulbs to eliminate air pockets, but don’t pack it down so hard that roots can’t penetrate.
Feeding Bulbs at Planting
Mix a balanced bulb fertilizer or bone meal into the soil at planting time if your local extension service recommends it. This gives bulbs a nutrient boost as roots develop through fall and winter.
Sprinkle fertilizer in the planting hole or trench before setting bulbs, then cover with a thin layer of soil so bulbs don’t sit directly on concentrated fertilizer, which can burn them.
Timing: When to Plant Tulips
Plant tulip bulbs in the fall before the ground freezes hard. Bulbs need time to grow roots and go through a cold period to bloom properly in spring.
Timing depends on your climate. In colder zones, plant from late September through October. Moderate climates can plant through November.
Warmer areas should wait until December when the soil cools down, or pre-chill bulbs in the refrigerator for 8 to 12 weeks before planting.
The goal is to get bulbs in the ground about 6 weeks before your first hard freeze. This gives roots time to establish while temperatures drop gradually.
Common Problems and How to Fix Them
Even with careful planting, tulips can run into issues. Most problems trace back to depth, drainage, or pests.
Here’s what to watch for and how to solve it:
- Bulbs Rotting in Soil: Poor drainage is the culprit. Mix coarse sand or grit into heavy clay soil, or plant in raised beds where water drains naturally.
- Squirrels Digging up Bulbs: Plant at the full recommended depth (6 to 8 inches) to make digging harder, or cover planting areas with wire mesh or use bulb cages.
- Bulbs Pushing Out of the Ground: Frost heaving happens when bulbs are planted too shallowly. Replant at proper depth and add 2 inches of mulch to stabilize soil temperature.
- Delayed or Weak Blooms: Bulbs planted too deep waste energy reaching the surface. Dig up and replant at the correct depth for next season.
- Tulips Toppling over: Shallow planting means weak root systems. Ensure bulbs are deep enough for roots to anchor properly and support stems.
Most tulip troubles come down to getting depth right the first time. Fix these issues now, and your spring display will thank you.
How to Plant Tulips: Step-by-Step Checklist
Use this quick reference guide to plant tulips correctly every time. Follow these steps in order for the best results.
| Step | What to Do | Quick Tip |
|---|---|---|
| 1. Gather tools | Bulb planter or trowel, ruler or measuring tape, fertilizer, mulch | A bulb planter with depth markings saves time |
| 2. Measure depth | Dig holes 3 times the bulb height (6 to 8 inches for standard tulips) | Use your ruler to check depth before placing bulbs |
| 3. Space bulbs | Set bulbs 4 to 6 inches apart, pointed end up | Odd-numbered clusters look more natural than rows |
| 4. Add fertilizer | Sprinkle bone meal or bulb fertilizer in the hole, and cover with a thin layer of soil | Prevents direct contact that can burn bulbs |
| 5. Cover and water | Backfill with soil, press gently, water thoroughly | Initial watering settles the soil and starts root growth |
| 6. Mulch and label | Apply 2 inches of mulch, mark planting areas | Labels help you avoid digging up bulbs by accident |
Note: Plant on a dry day when the soil isn’t muddy. Wet, heavy soil compacts easily and makes it harder for roots to spread, which can stunt growth and reduce flowering.
Final Thoughts
Getting how deep to plant tulips right is honestly one of those small things that makes a huge difference in your garden.
You’ve got the depth formula, the soil adjustments, and the spacing down now.
No more guessing or crossing your fingers when spring rolls around. Just bulbs planted at the right level, doing exactly what they’re supposed to do. Your tulips are going to look incredible next season.
Got questions about planting or want to share what worked in your garden? Drop a comment below and let’s chat about it.