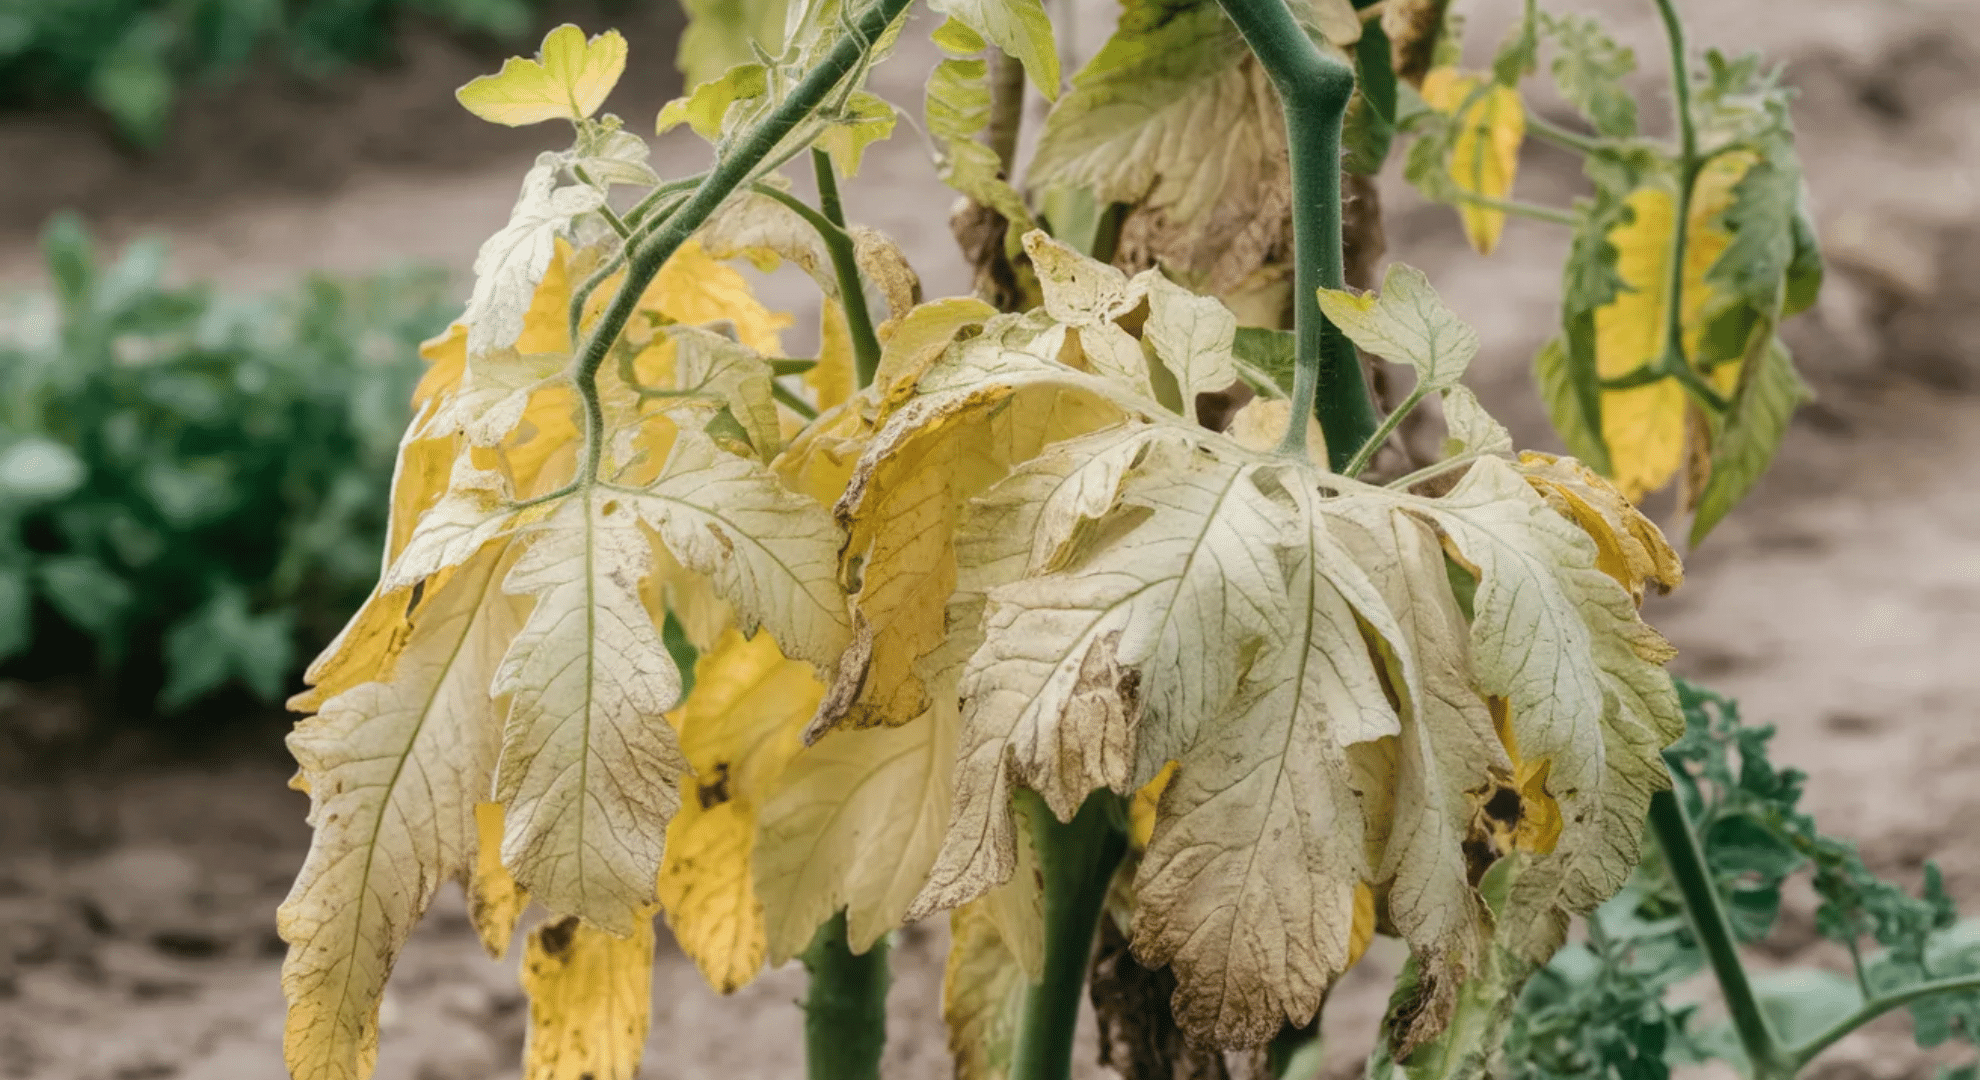
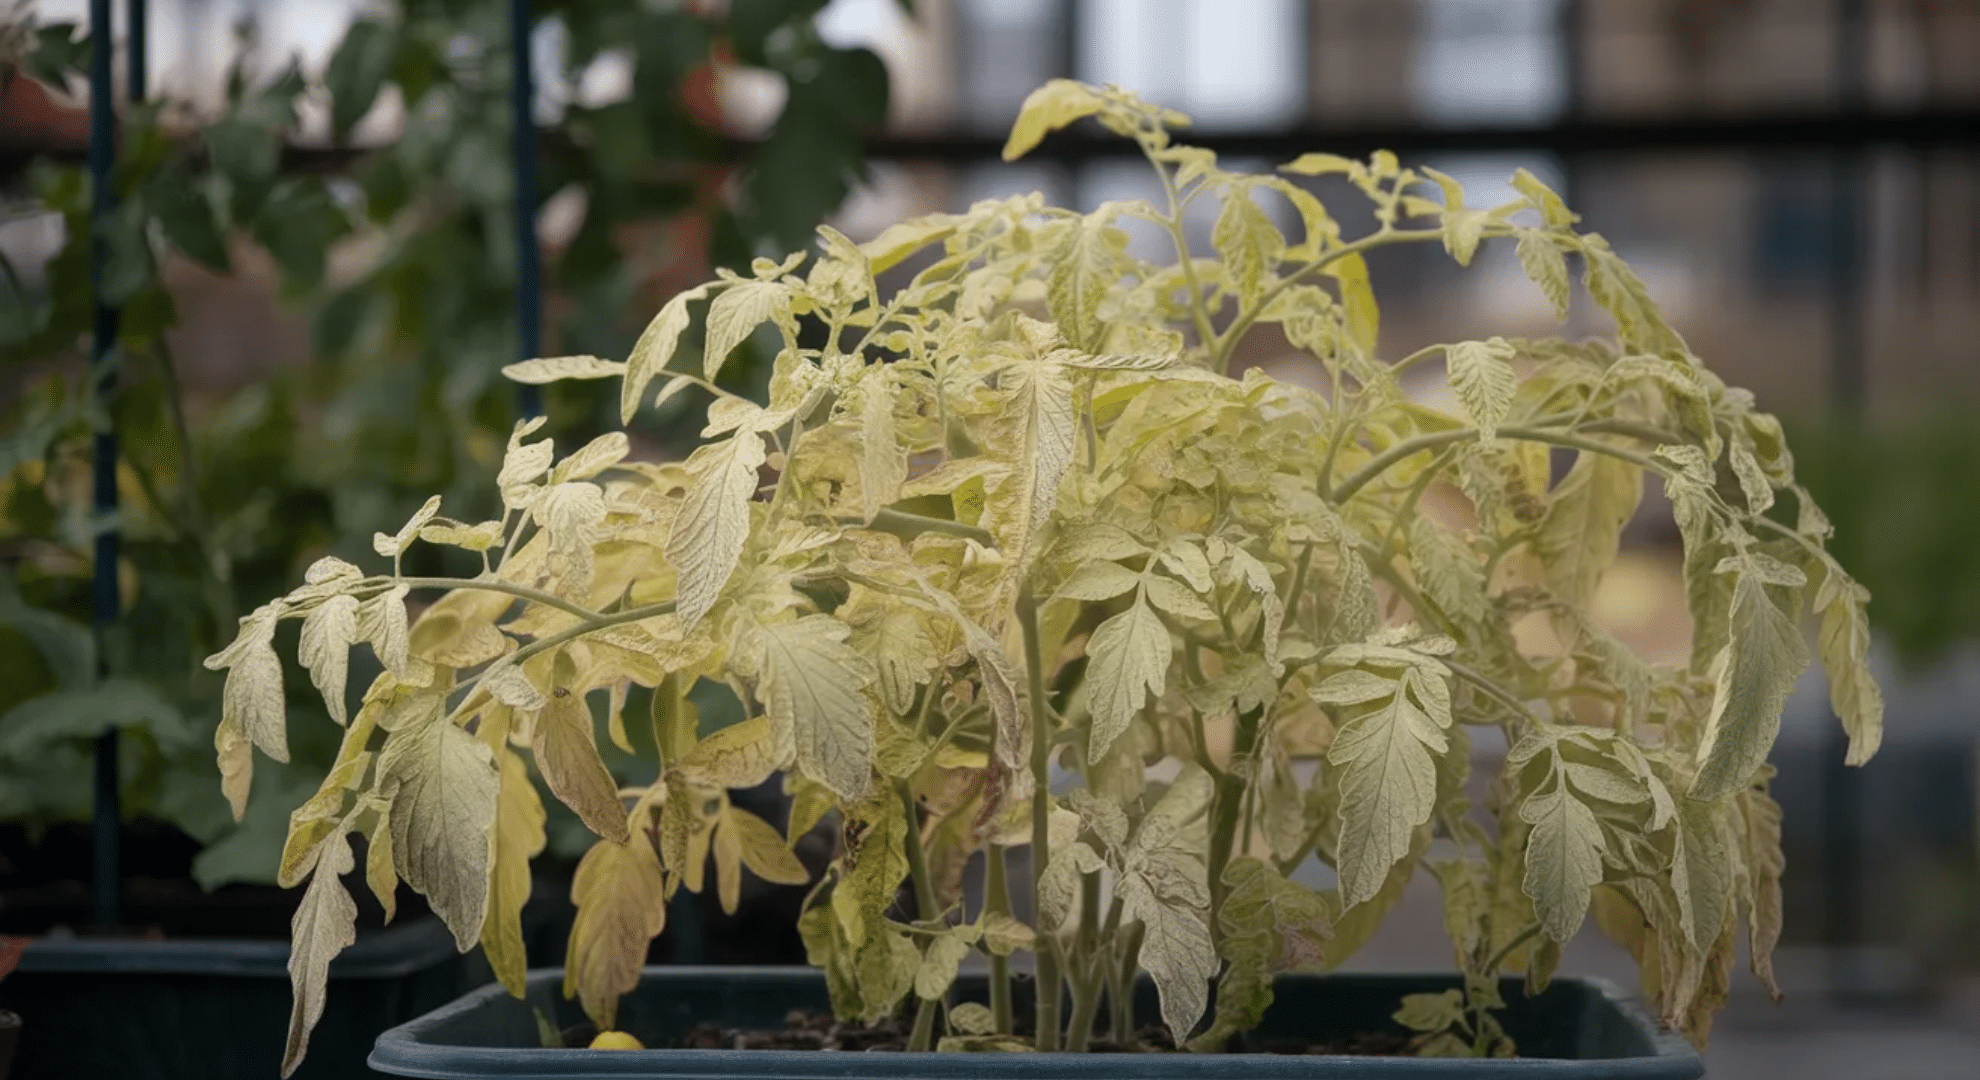
My tomato plants looked perfect one day, then suddenly half the leaves turned yellow. I thought I was doing everything right, but clearly something was off. The truth is, tomato leaves turning yellow happens more often than you’d think, and it’s rarely just one thing causing it.
Could be nutrients, watering habits, pests, or even where your plant sits.
The frustrating part? Each cause looks slightly different, and treating the wrong one wastes time. You’ll learn how to spot what’s actually going on with your plant.
I’ll tell you about the most common reasons leaves turn yellow out, what each one looks like up close, and how to fix it fast.
You’ll know exactly what your tomato needs to bounce back and start thriving again.
What Yellow Leaves Tell You About Your Tomato Plant
Your tomato plant can’t talk, but it definitely knows how to send signals. Yellow leaves are one of the clearest ways it tells you something’s not right.
I’ve learned to read these signs over time, and honestly, they’re more specific than you’d think.
The color change isn’t random. It’s your plant’s stress response, a way of showing that it’s struggling with something in its environment. Maybe it’s missing a nutrient, dealing with too much water, or fighting off a pest you haven’t spotted yet.
Here’s what matters most: where the yellowing shows up. Bottom leaves turning yellow? That’s usually one type of problem. Top leaves going pale? Completely different issue. The location gives you a massive clue about what’s going wrong.
You can’t fix what you don’t understand, so learning to read your plant’s signals is the first step.
Once you know what yellow leaves mean and where they’re happening, you’ll be able to pinpoint the cause fast. From there, the solution becomes much clearer.
Why Tomato Leaves Turning Yellow Starts at the Bottom
When yellowing creeps up from the bottom, your plant’s trying to tell you something specific. It’s not random—it’s actually a pattern that points to what’s going wrong beneath the surface.
Nitrogen Deficiency in Lower Leaves
Nitrogen is what keeps your tomato leaves green and growing strong. When your plant doesn’t get enough, it starts pulling nitrogen from the oldest leaves at the bottom to feed new growth up top.
That’s why those lower leaves turn pale yellow first, they’re literally being drained to keep the rest of the plant alive.
The older leaves are always the first sacrifice. Your plant prioritizes survival, so it takes what it needs from leaves that have already done their job. You’ll notice the yellowing starts at the leaf edges and works inward.
The veins might stay slightly green while the rest of the leaf fades. Eventually, those leaves dry up and fall off if you don’t step in.
It’s a clear visual. The bottom third of your plant looks sickly and yellow while the top still looks decent. That contrast is your biggest clue.
Natural Leaf Aging vs. Problem Yellowing
Sometimes a few bottom leaves turning yellow is just normal aging. Tomato plants shed older leaves as they grow; it’s part of their life cycle. I’ve seen this plenty of times, and it doesn’t mean disaster.
Here’s how you tell the difference. Natural aging happens slowly, maybe one or two leaves at a time over weeks. The rest of the plant looks healthy and vigorous. New growth comes in strong and green.
Problem yellowing moves faster. You’ll see multiple leaves changing color within days, and the plant looks weaker overall.
If it’s just aging, the plant keeps producing flowers and fruit without slowing down. When it’s a real issue, growth stalls. You’ll notice fewer blooms, smaller leaves, and a general lack of energy in the whole plant.
The Bottom-Up Pattern
Bottom-up yellowing almost always ties back to what’s happening in the soil and roots. Your plant pulls nutrients up from the ground, so when something’s off down there, the effects show at the bottom first.
It could be nutrient depletion, poor soil drainage, or root damage you can’t see.
Maybe the soil’s compacted and roots can’t spread. Or you’re watering inconsistently and the roots are stressed. Whatever the cause, it starts below and works its way up.
This is totally different from top-down yellowing, which usually means newer growth isn’t getting what it needs right away, think iron or calcium issues. Bottom-up is about what the whole plant is starving for over time.
Common Causes of Yellowing Tomato Leaves
Now let’s get into what’s actually causing those yellow leaves. Once you know the specific culprit, fixing it becomes straightforward.
Watering Problems
Watering issues are probably the most common reason tomato leaves turn yellow. Too much or too little, both mess with your plant in different ways.
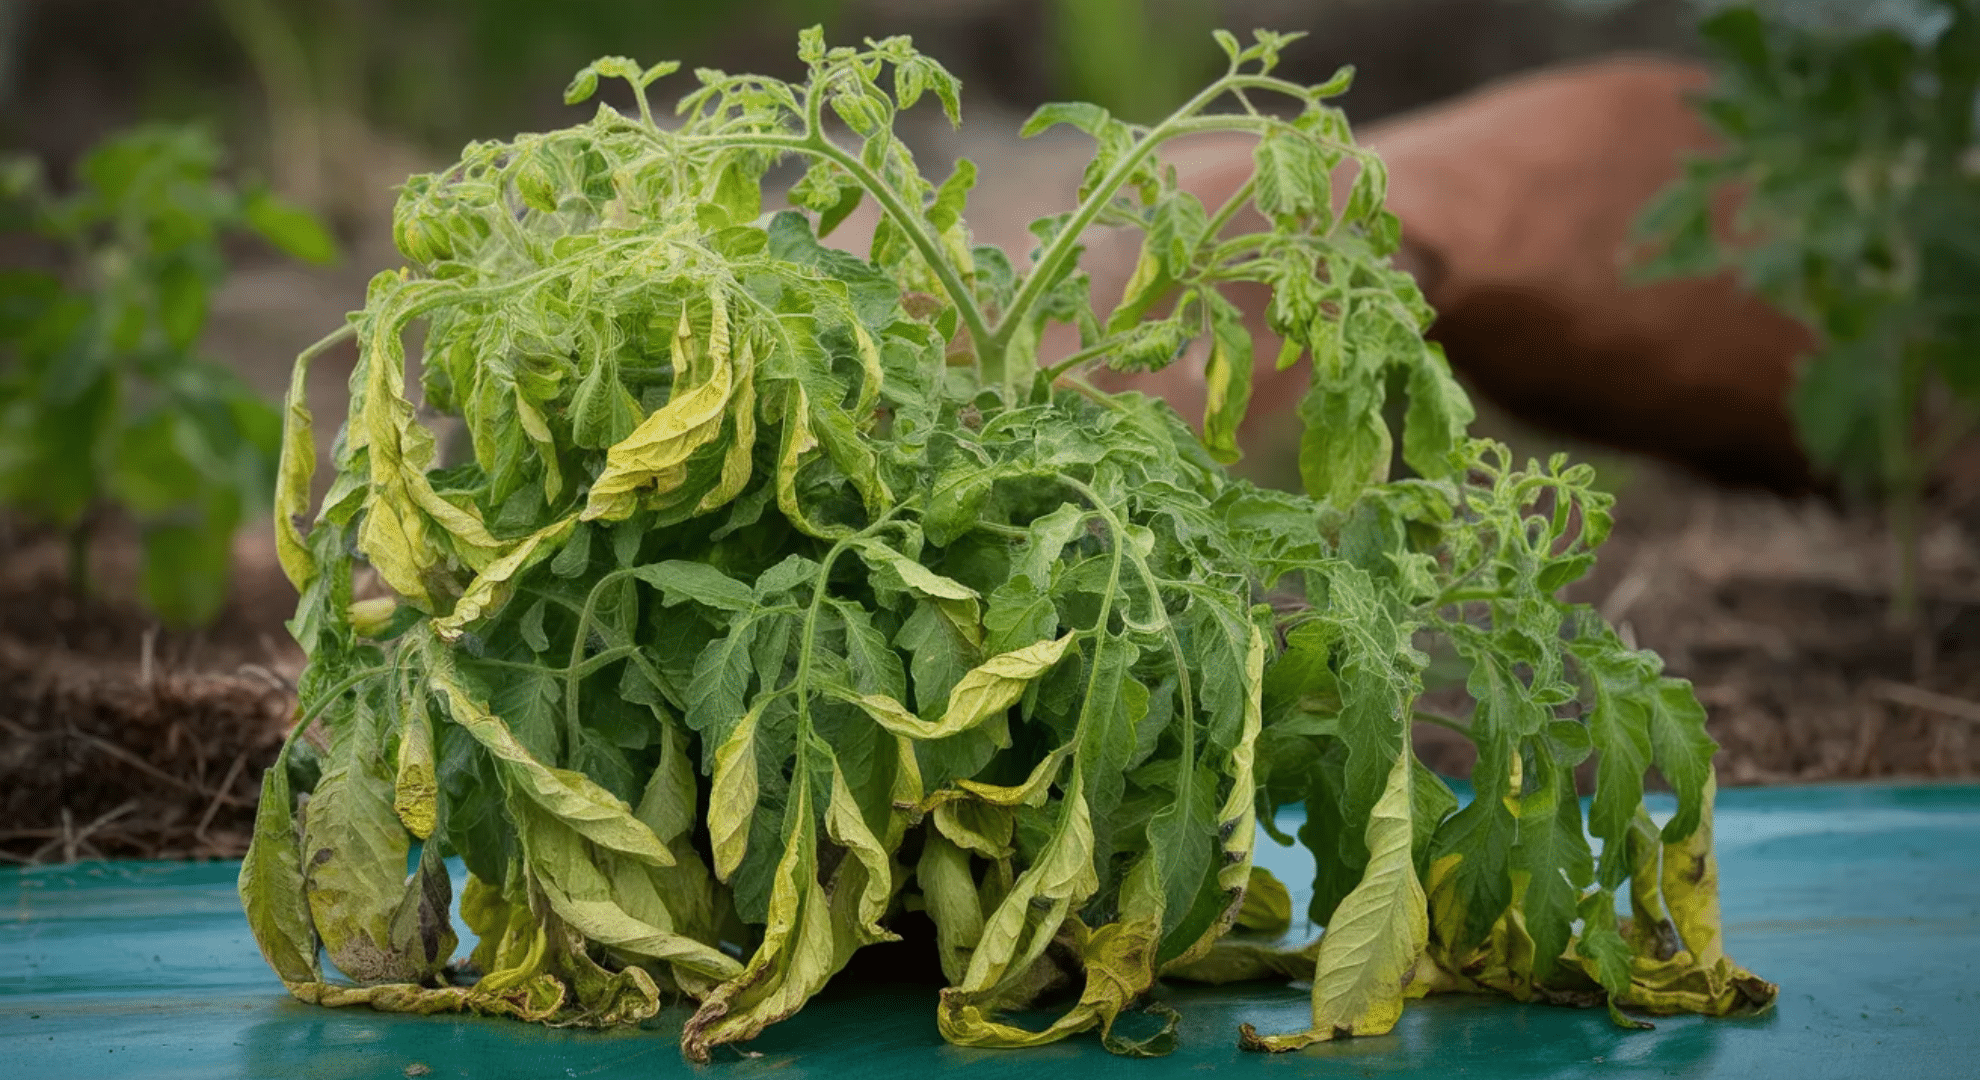
Overwatering drowns the roots. When soil stays soaking wet, roots can’t breathe, and they start rotting. You’ll see leaves turning yellow all over the plant, not just in one spot.
The soil feels soggy even a day or two after watering. Leaves might look droopy and limp despite all that moisture. In my experience, overwatered plants also develop fungal issues because the constant wetness invites disease.
Underwatering shows up differently. Leaves yellow and crisp up, especially at the edges. The soil pulls away from the sides of the pot or cracks on top. Your plant looks wilted and sad, and watering perks it up temporarily, but if you keep forgetting, the yellowing gets worse. I’ve noticed underwatered tomatoes drop leaves faster than overwatered ones.
Checking soil moisture is simple. Stick your finger two inches down into the soil. If it feels dry, water deeply. If it’s still damp, wait another day.
Nutrient Deficiencies
Different nutrients cause different yellowing patterns. Learning to spot each one helps you fix the problem fast without guessing.
Nitrogen shortage hits the bottom leaves first. They turn pale yellow-green, then fully yellow, and eventually fall off. The whole plant looks weak and growth slows way down. New leaves come in smaller and lighter than they should. This is super common in pots or soil that hasn’t been fed in a while.
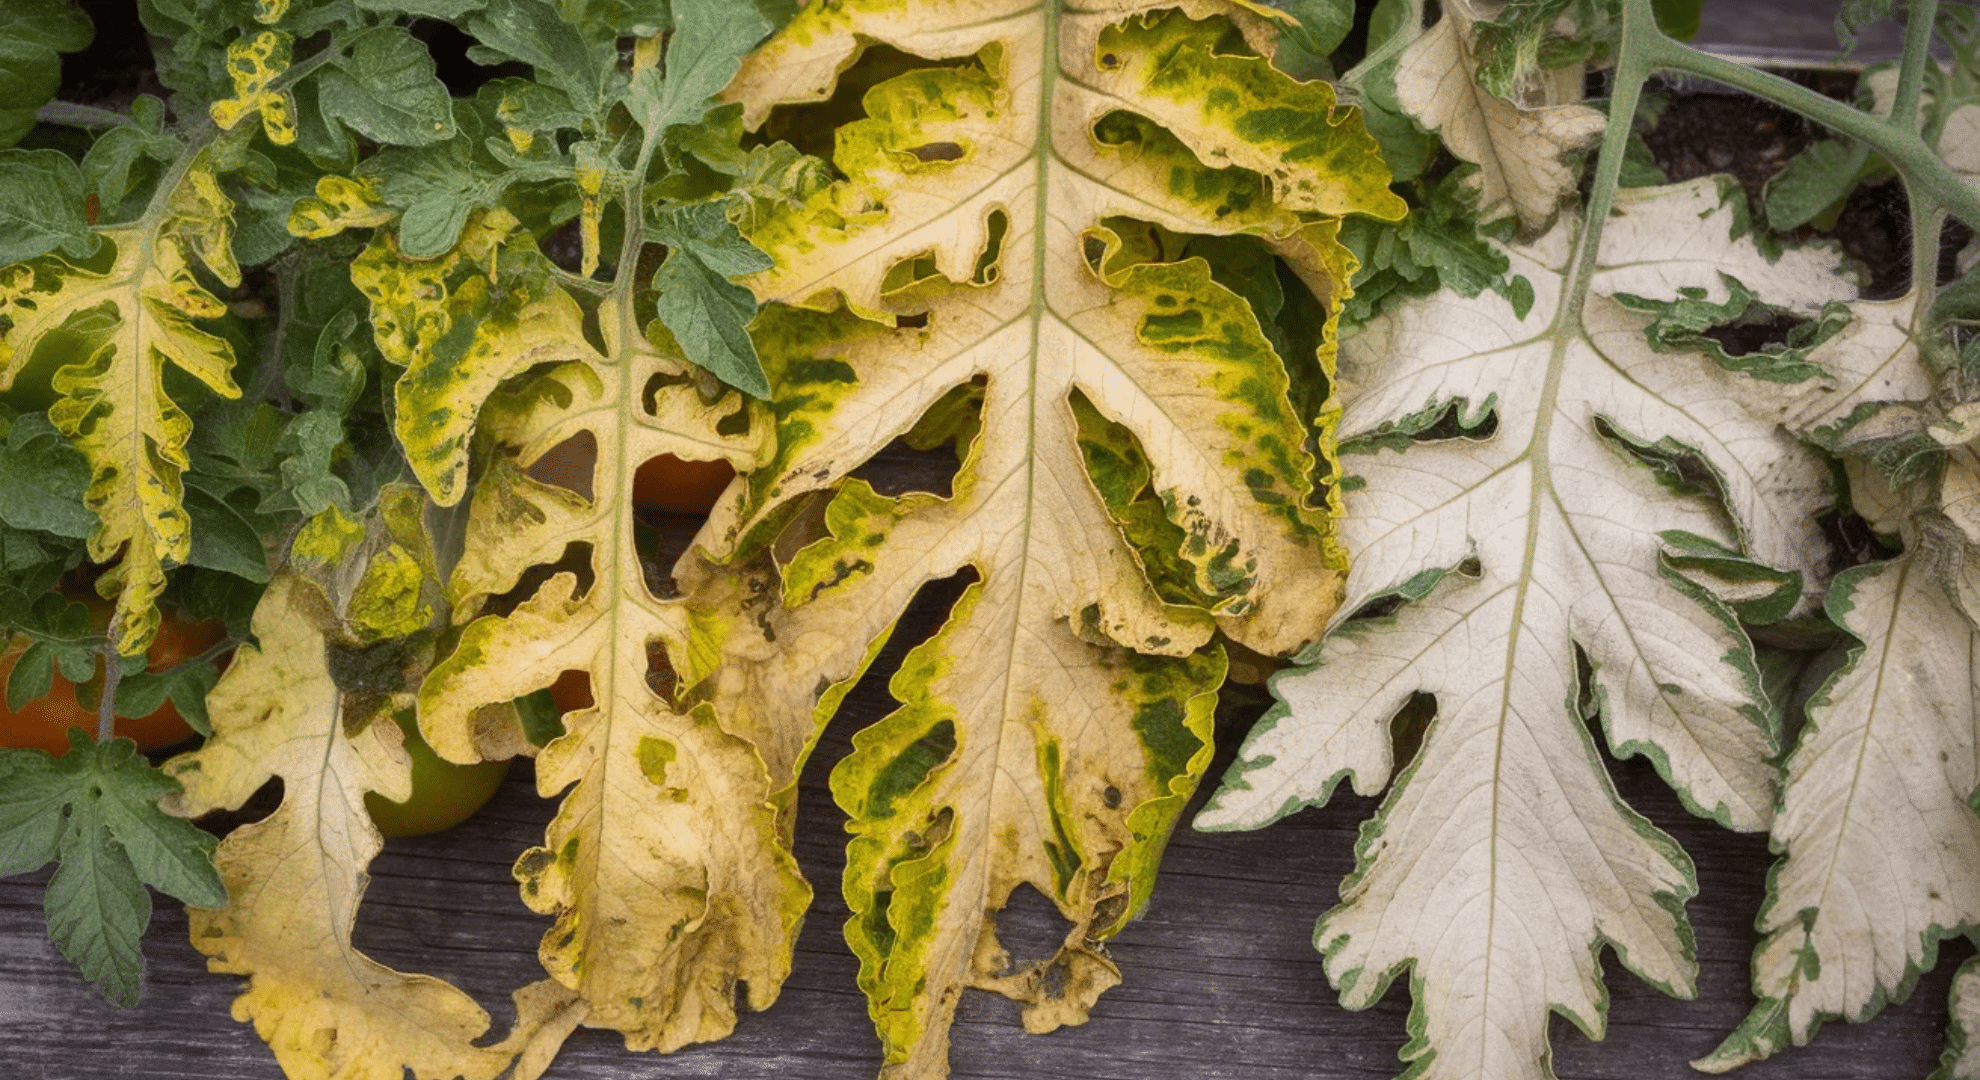
Iron deficiency targets the youngest leaves at the top. They turn yellow, but the veins stay bright green—it’s called interveinal chlorosis. You’ll see this a lot in alkaline soil where iron gets locked up and roots can’t absorb it. The contrast between yellow leaf and green veins is really obvious once you know what you’re looking for.
Magnesium deficiency shows up on older leaves, but differently than nitrogen. Yellowing happens between the veins while the veins themselves stay green. It starts at the leaf edges and works inward. I’ve seen this when soil pH is off or when there’s too much potassium blocking magnesium uptake.
Potassium deficiency causes yellowing and browning right at the leaf edges. Older leaves get hit first, and the edges look scorched or burned. The yellow spreads inward from the tips. Fruit production suffers too—you’ll get fewer tomatoes and they ripen unevenly.
Quick reference: Bottom leaves yellow all over? Nitrogen. Top leaves yellow with green veins? Iron. Older leaves yellow between veins? Magnesium. Leaf edges yellow and brown? Potassium.
Pests and Diseases
Sometimes yellow leaves mean your plant’s under attack. Pests and diseases damage tissue in ways that show up as discoloration.
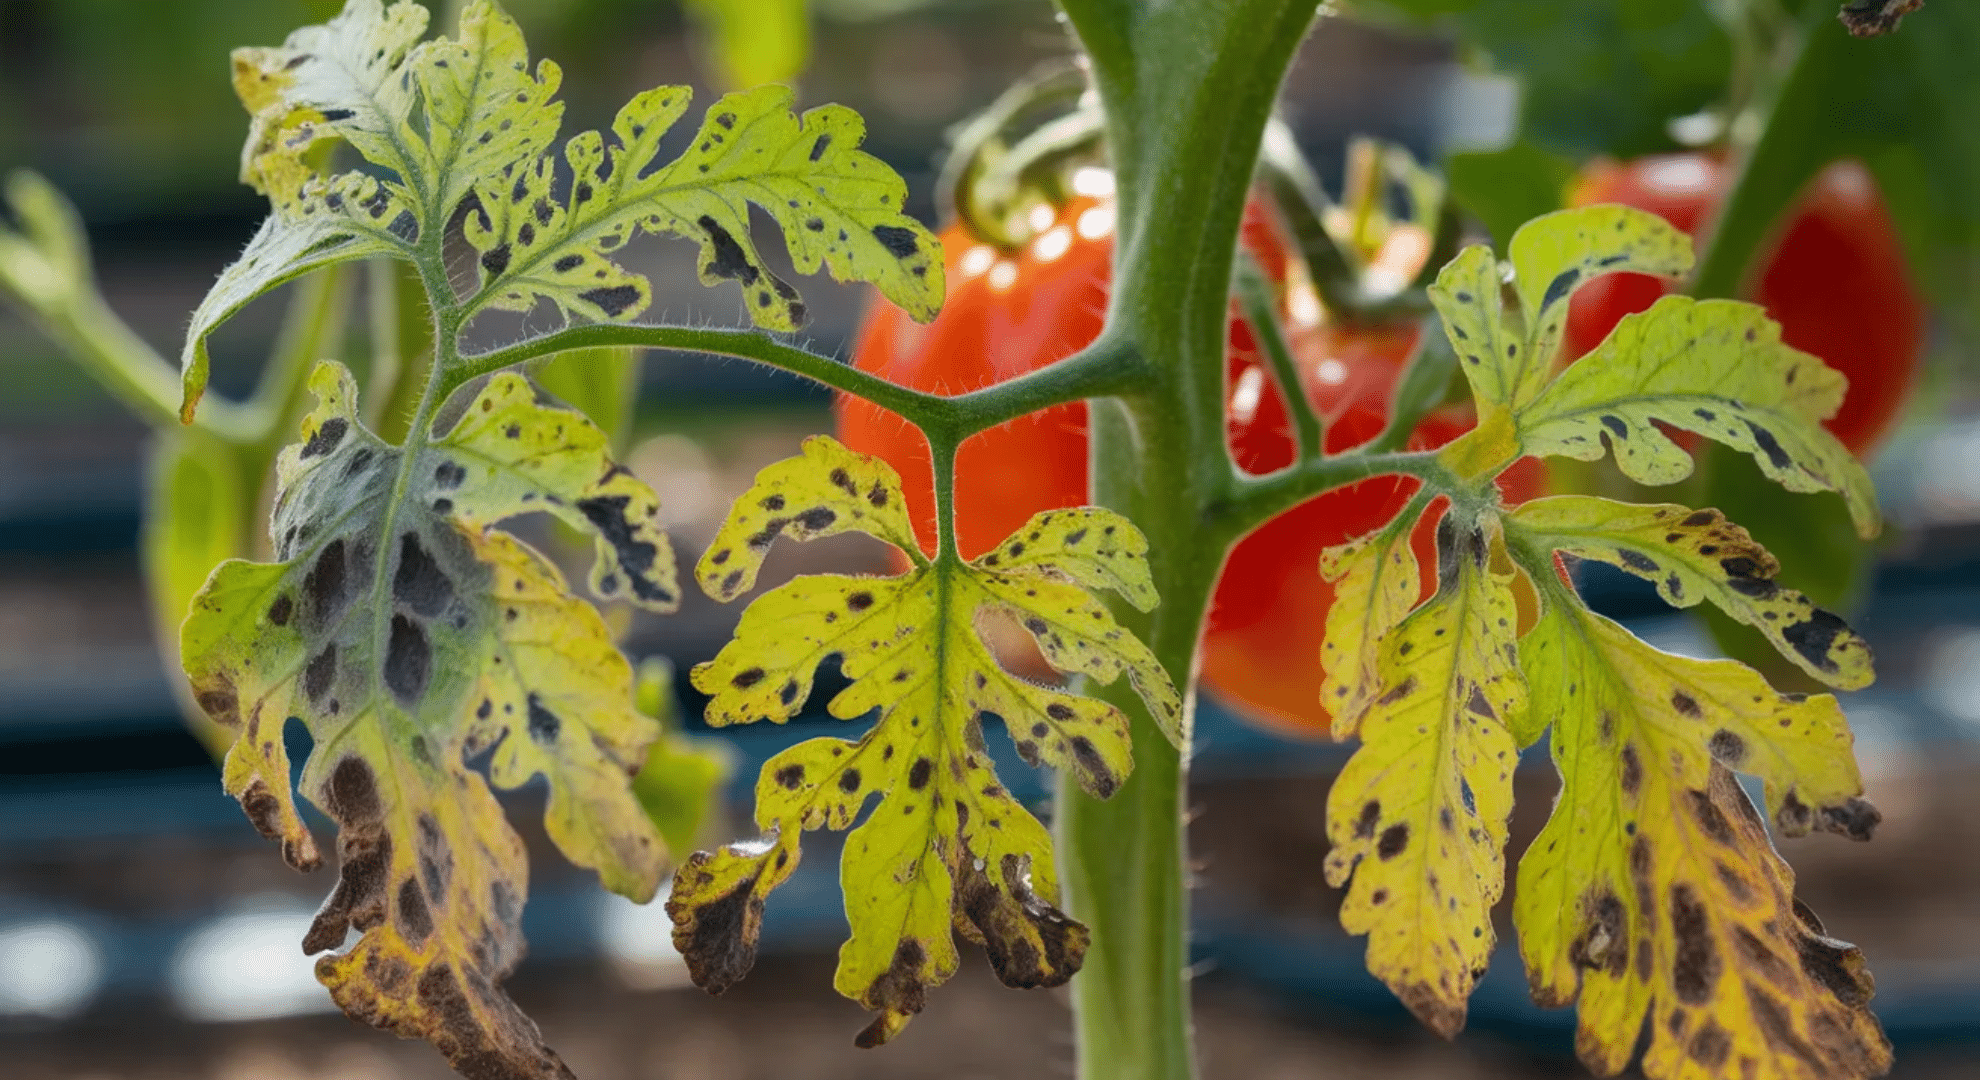
Early blight is a fungal disease that starts with yellow spots on lower leaves. Those spots develop dark brown centers with yellow halos around them. The spots grow and merge, and eventually the whole leaf turns yellow and dies. It spreads upward if you don’t catch it early. I’ve lost entire plants to this when conditions were humid and warm.
Powdery mildew looks like someone dusted your leaves with white powder. Underneath that coating, the leaf tissue turns yellow and weak. It spreads fast in dry conditions with poor air circulation. You’ll see it on both sides of the leaves, and it stunts growth if it takes over.
Aphids and spider mites suck sap from leaves, which causes yellow stippling and weak spots. Aphids cluster on new growth and undersides of leaves—you’ll actually see the tiny bugs if you look close. Spider mites are harder to spot, but they leave fine webbing and cause leaves to look dusty and yellow. Both pests weaken your plant and can spread diseases.
Fungal infections like Septoria leaf spot create small circular spots with dark edges and yellow halos. The spots multiply fast, and infected leaves turn completely yellow before dropping off. Fungal problems thrive in wet, humid conditions, especially when leaves stay damp overnight.
Environmental Stress Factors
Your plant’s surroundings affect leaf color more than you’d think. Stress from the environment can trigger yellowing even when everything else is perfect.
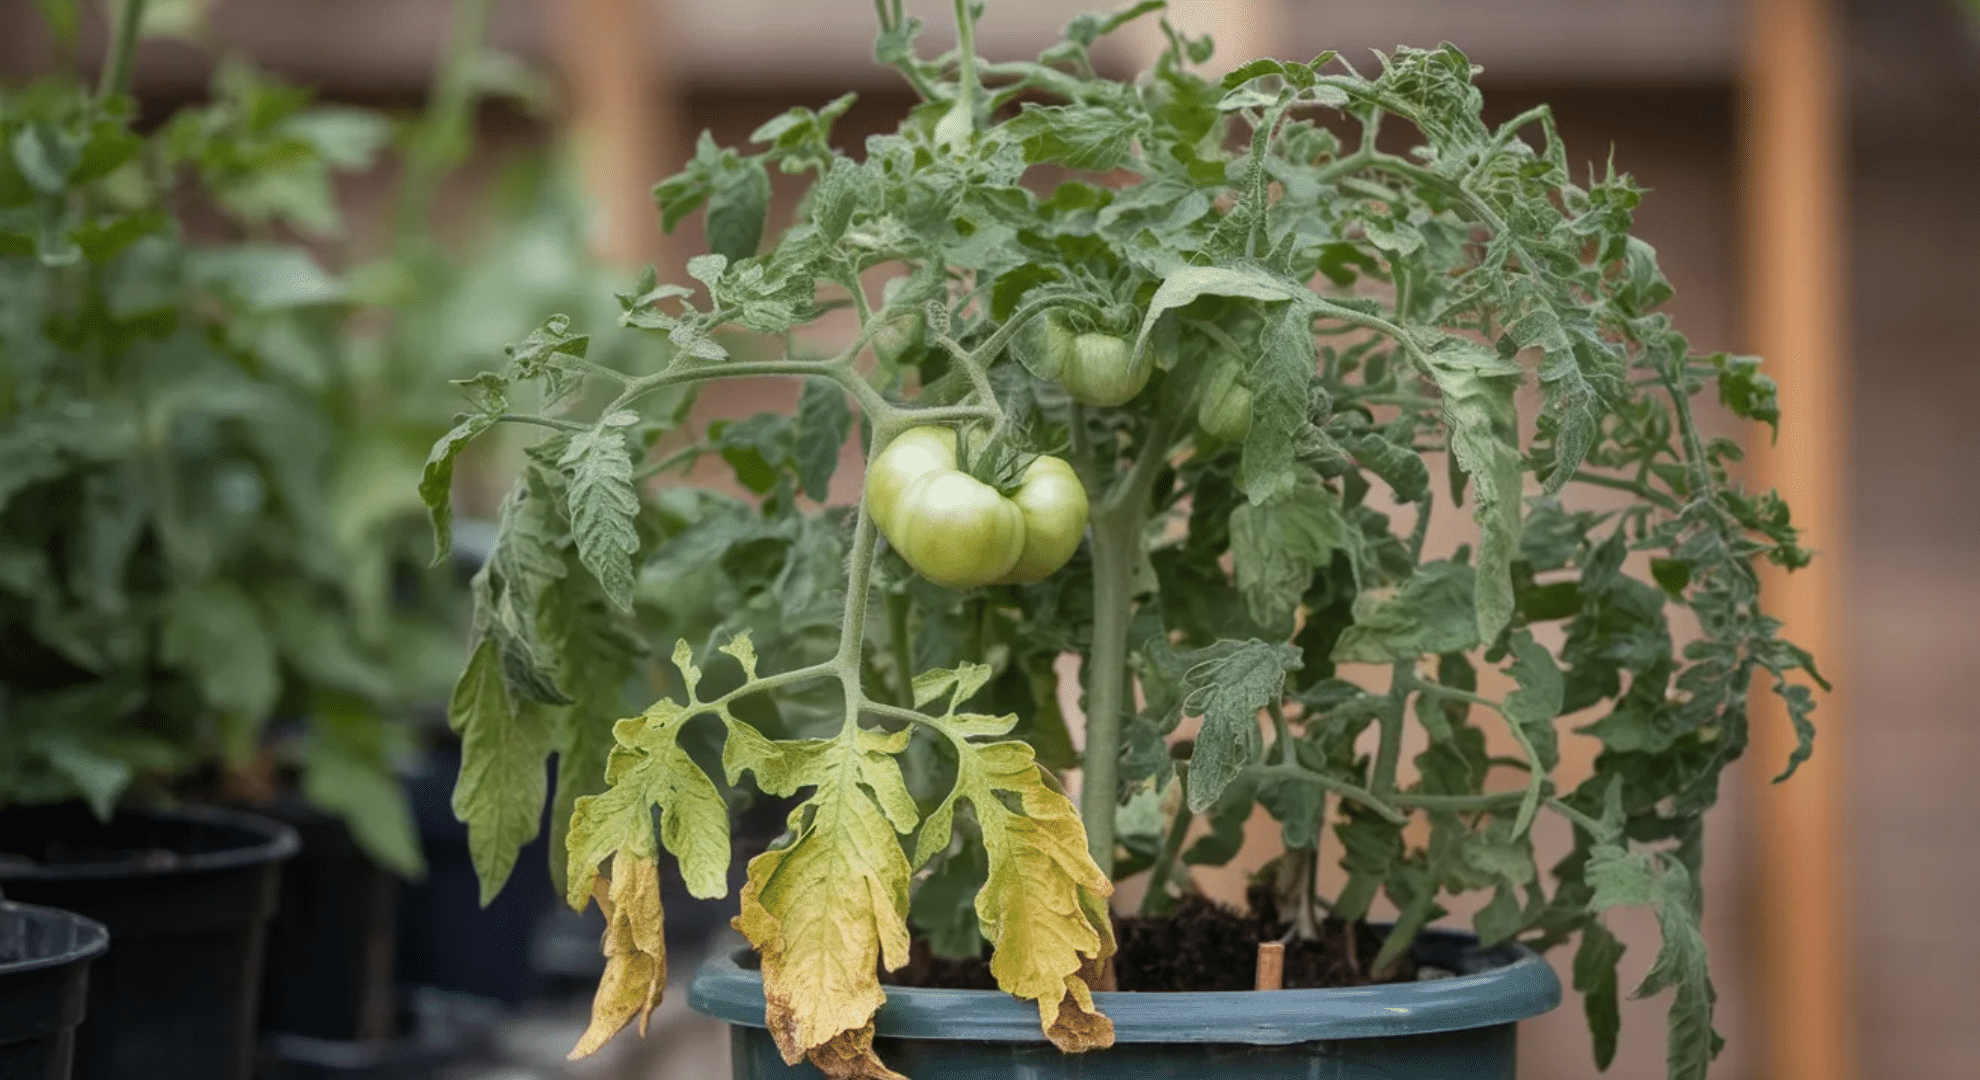
Transplant shock happens when you move a tomato plant to a new spot. Roots get disturbed, and the plant freaks out a little. Leaves may yellow temporarily while it adjusts. This usually resolves itself within a week or two as roots settle in. Don’t panic—just keep watering consistently and let it recover.
Cold weather slows everything down. Tomatoes hate temps below 50°F, and their leaves turn pale yellow when they’re too cold. Growth stalls, and the plant looks weak overall. I’ve seen this in early spring when nights are still chilly. Once it warms up, new growth comes in green again.
Insufficient sunlight causes pale, washed-out yellow leaves. Tomatoes need at least six hours of direct sun daily. Less than that and they can’t produce enough chlorophyll to stay green. You’ll notice the whole plant looks leggy and weak, stretching toward whatever light it can find.
Root damage from overcrowding happens when plants are too close together or roots hit the bottom of a pot. They can’t spread out, so they struggle to pull in nutrients and water. Leaves yellow from stress, and growth stops. Giving roots more space fixes this fast.
Your Guide to Diagnosing Your Yellow Leaf Problem

You’ve got yellow leaves, now let’s figure out exactly what’s causing them. I always start with a systematic check instead of guessing.
Check leaf location first. Bottom leaves yellowing? Think nitrogen, natural aging, or watering issues. Middle leaves turning yellow? Could be magnesium or general stress. Top leaves going pale? Usually iron deficiency or environmental problems. Location narrows it down fast.
Inspect the yellowing pattern closely. Is the entire leaf turning yellow evenly? That’s different from yellow spots with dark centers or yellowing just between the veins. Edges browning and yellow? That’s potassium. Yellow leaf with green veins? Iron or magnesium, depending on which leaves are affected. Spots spreading across leaves? Disease or pest damage.
Test your soil moisture. Stick your finger two inches into the soil near the plant base. Bone dry? You’re underwatering. Soggy and wet? Overwatering is your problem. Soil should feel slightly damp but not saturated.
Flip leaves over and look for pests. Aphids cluster on the undersides. Spider mites leave tiny webs and stippling. You’ll see the damage before you spot the bugs sometimes. Yellow speckling or weak spots mean something’s feeding on your plant.
Think about recent changes. Did you transplant recently? Cold snap last week? Skipped fertilizing for months? Changed your watering schedule? Environmental shifts and care changes trigger yellowing more often than you’d think.
Once you’ve checked these points, the cause becomes pretty obvious.
How to Fix Yellow Leaves on Tomato Plants
Once you know what’s wrong, you can actually fix it. Here’s how to tackle each cause and get your plant back to healthy green growth.
| Problem | Solution | How to Apply | Timeline |
|---|---|---|---|
| Overwatering | Reduce watering frequency | Let the top 2 inches of soil dry between waterings. Water deeply but less often. | 1-2 weeks |
| Underwatering | Establish a consistent schedule | Water when the top 2 inches feel dry. Add 2-3 inches of mulch to retain moisture. | 3-5 days |
| Nitrogen deficiency | Apply nitrogen-rich fertilizer | Use 10-10-10 fertilizer or fish emulsion. Follow package directions, don’t over-apply. | 7-10 days |
| Iron deficiency | Foliar spray or soil amendment | Spray chelated iron on leaves or add iron sulfate to the soil. Adjust pH if needed. | 1-2 weeks |
| Magnesium deficiency | Epsom salt application | Dissolve 1 tbsp Epsom salt per gallon of water. Apply to the soil monthly. | 1-2 weeks |
| Potassium deficiency | Potassium-rich fertilizer | Use 5-10-10 fertilizer or add wood ash to the soil. Water in thoroughly. | 2-3 weeks |
| Early blight/fungal disease | Remove infected leaves, apply fungicide | Cut off diseased leaves. Spray copper fungicide every 7-10 days. | 2-4 weeks |
| Aphids/spider mites | Neem oil or insecticidal soap | Spray leaf undersides thoroughly every 5-7 days until pests are gone. | 1-2 weeks |
| Cold stress | Protect with row covers | Cover plants when temps drop below 50°F. Remove covers during warm days. | 3-7 days |
| Insufficient sunlight | Relocate or prune shade sources | Move containers to a sunny spot (6+ hours of sun). Trim nearby plants blocking light. | 1-2 weeks |
| Transplant shock | Consistent care and patience | Water regularly, avoid fertilizing for 2 weeks. The plant will adjust naturally. | 1-2 weeks |
Most fixes show improvement within one to two weeks if you’re consistent. The key is sticking with the solution long enough for your plant to recover—don’t switch approaches too quickly or you’ll stress it more.
Should You Remove Yellow Leaves From Tomato Plants?
Yellow leaves don’t always need to come off. Sometimes they should stay, sometimes they need to go, it depends on what’s causing the yellowing.
Remove yellow leaves when they’re diseased, heavily damaged by pests, or completely dead and crispy. Diseased leaves spread problems to healthy parts of the plant, so cutting them off stops that.
Leaves covered in spots, mold, or pest damage should go immediately. Fully dead leaves just drain energy without helping the plant, so they’re safe to remove.
Leave them alone if only one or two bottom leaves are slightly yellow from natural aging and the rest of the plant looks healthy. Also leave them if the yellowing just started and you’re treating the cause, those leaves might green up again once you fix the problem.
Removing too many leaves at once stresses your plant and reduces its ability to photosynthesize.
Proper removal means using clean, sharp pruners or scissors. Cut the leaf stem close to the main stem without tearing. Disinfect your tools with rubbing alcohol between cuts, especially if disease is involved. Never rip leaves off by hand, that damages the stem.
Removing yellow leaves redirects energy to healthy growth and fruit production. Your plant stops trying to save dying tissue and focuses on what’s working. Just don’t go overboard; leave enough healthy foliage for photosynthesis.
Why Are My Tomato Plants Turning Yellow After Transplanting?
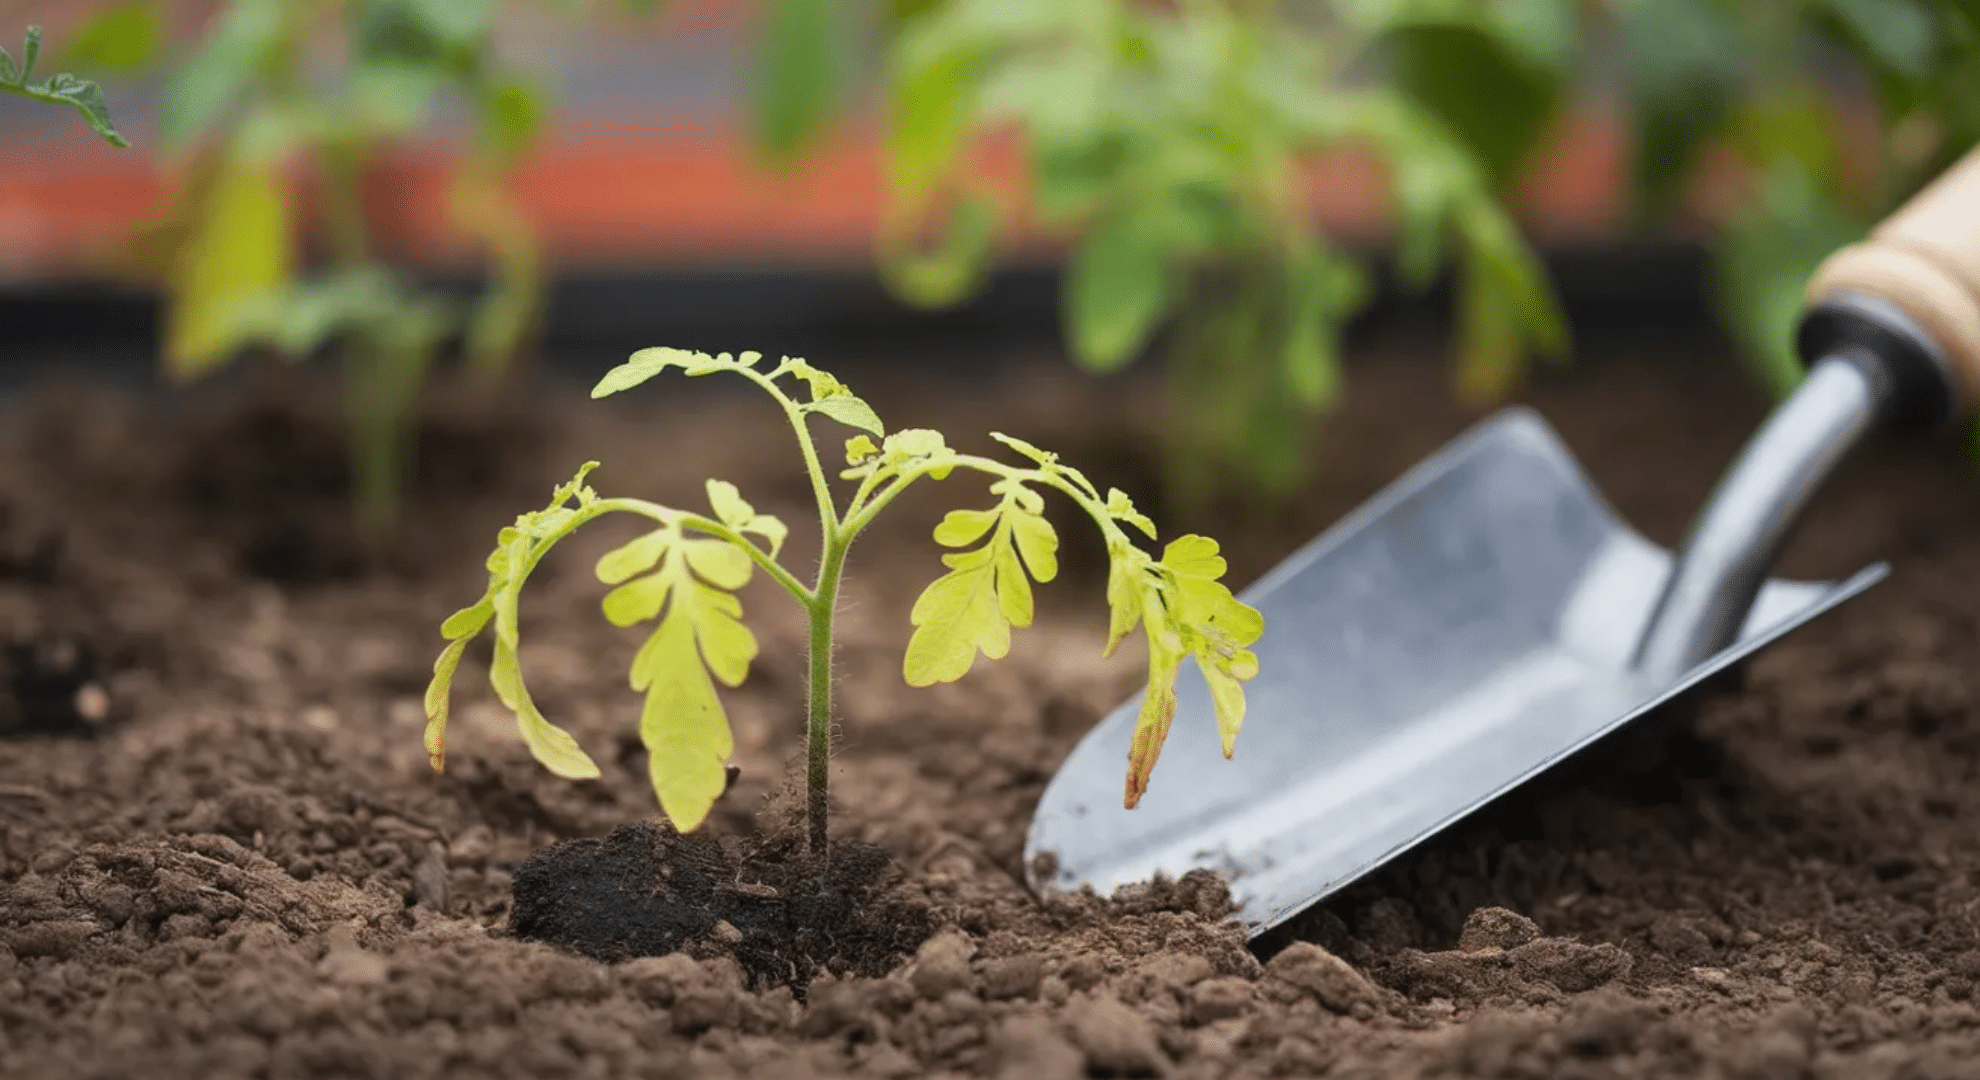
Transplant shock is probably the most common reason tomato plants yellow out right after moving them. It’s temporary, but it freaks people out every time.
Transplant shock happens when roots get disturbed during the move. Your plant was comfortable in its old spot, and suddenly everything changed—new soil, different moisture levels, temperature shifts.
The roots need time to settle in and start absorbing nutrients again. During that adjustment period, leaves turn pale or yellow because the plant’s stressed and not functioning at full capacity.
Root disturbance is the main culprit. Even careful transplanting damages tiny root hairs that absorb water and nutrients. The plant can’t pull in what it needs right away, so leaves suffer first. Recovery usually takes one to two weeks. You’ll see new green growth once roots establish themselves in the new location.
Minimize stress by watering thoroughly before and after transplanting. Keep as much soil around the root ball as possible when moving. Transplant on a cloudy day or in the evening to avoid heat stress. Don’t fertilize immediately; wait two weeks, so you’re not overwhelming an already stressed plant.
Prevention starts with properly hardening off seedlings. Gradually expose them to outdoor conditions over seven to ten days before planting. This prepares them for the shock and significantly reduces yellowing.
Preventing Yellow Leaves: Long-Term Plant Care
The best way to deal with yellow leaves is to stop them before they start. Consistent care keeps your tomato plants healthy and green all season long.
- Feed regularly with balanced fertilizer: Use a tomato-specific fertilizer every 2-3 weeks during the growing season. This prevents nutrient deficiencies before they turn into yellow leaves.
- Water consistently, not erratically: Establish a routine based on weather and soil moisture. Inconsistent watering stresses plants and causes yellowing to occur quickly.
- Mulch around plants to stabilize soil conditions: A 2-3 inch layer of organic mulch keeps moisture even, regulates temperature, and prevents soil-borne diseases from splashing onto leaves.
- Monitor for pests weekly: check the undersides of leaves every few days. Catching aphids or mites early stops damage before leaves start yellowing.
- Prune for air circulation: Remove lower branches and thin out dense foliage. Good airflow prevents fungal diseases that cause leaf yellowing.
- Test soil pH annually: Tomatoes need a pH between 6.0 and 6.8. If soil’s too acidic or alkaline, nutrients get locked up and leaves yellow even when fertilizer’s present.
- Space plants properly from the start: Give each plant 24-36 inches of space. Crowding leads to competition for nutrients, poor airflow, and stressed yellow leaves.
These practices work together to create an environment where your tomato plants thrive naturally. You’ll spend way less time troubleshooting problems when prevention becomes your default approach.
Conclusion
I’ve dealt with tomato leaves turning yellow more times than I can count, and honestly, it gets easier once you know what to look for. The location of the yellowing, the pattern it follows, and what’s happening in your soil; all of these tell you exactly what your plant needs.
You’ve got the tools now to diagnose the problem fast and fix it before it gets worse.
No matter if it’s adjusting your watering, feeding with the right nutrients, or just giving your plant time to recover from transplant shock, you can handle it.
Keep an eye on those leaves and stay consistent with care. Your tomatoes will bounce back stronger.
Want more tips on growing healthier plants? Check out other blogs on the website for expert advice that actually works!