Small laundry rooms often get overlooked, tucked away like forgotten spaces that barely deserve a second thought.
But what if yours could be the prettiest, most hardworking corner of your home?
With a few clever DIY small laundry room ideas, you can turn even the tiniest nook into a bright, organized retreat that actually makes you smile when it’s time to tackle the wash.
Think open shelving draped with hanging greenery, vintage baskets brimming with fresh linens, and light-filled corners that feel more like a cozy studio than a utility closet.
Ready to roll up your sleeves and create something beautiful?
How to Design a Small Laundry Room That Works?
Start by mapping out your laundry workflow from dirty hamper to folded stack.
Notice where you naturally move and place items, then build your design around that rhythm. In compact spaces, vertical storage is your best friend, drawing the eye upward while keeping floors clear and breathable.
Soft whites, warm creams, or pale sage greens bounce light around and make tight quarters feel surprisingly spacious.
Tuck cleaning supplies behind cabinet doors or inside pull-out drawers to maintain that clean, uncluttered vibe.
The goal? A room that looks like it belongs in a design magazine but actually works for your real, everyday life.
Smart Layout Ideas for Small Laundry Rooms
Every small laundry room has potential; you just need to find the layout that fits your specific footprint.
Working with a narrow closet, an awkward hallway nook, or a tiny dedicated room? There’s a configuration that’ll maximize every precious inch.
| Layout Type | Best For | Key Benefits |
|---|---|---|
| Stacked Washer & Dryer | Tight spaces, closets | Frees up floor space for shelving or a folding station |
| Side-by-Side with Counter | Wider walls (5+ feet) | Creates a folding surface; allows under-counter storage |
| Closet Laundry | Rentals, hidden setups | Conceals appliances; maximizes nearby wall space |
| Corner Layout | L-shaped spaces | Uses dead corners; fits utility sink or drying rack |
| Hallway Setup | Narrow pass-throughs | Blends into home flow; works with sliding doors |
Storage & Organization Ideas
Small laundry rooms need smart storage solutions that work as hard as you do. These DIY projects keep supplies accessible, surfaces clear, and chaos at bay.
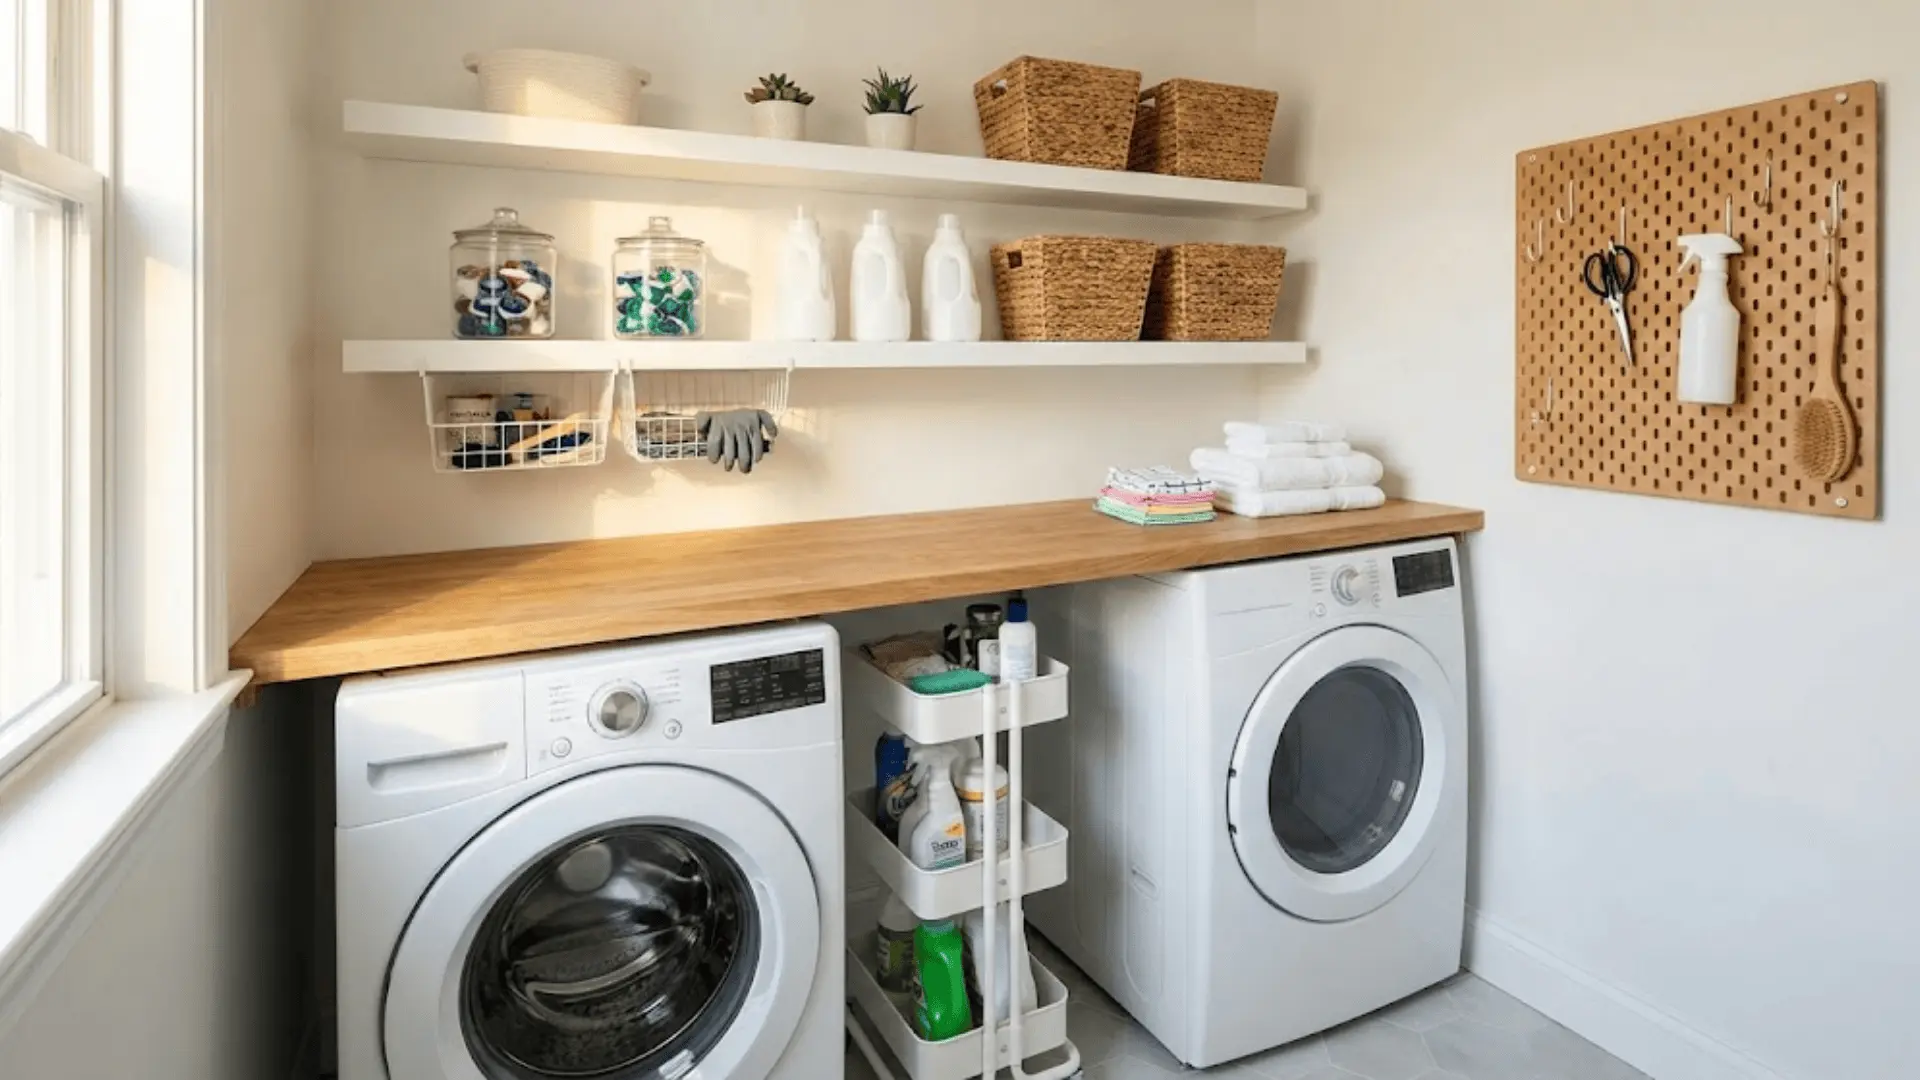
1. Install Floating Shelves Above the Washer
Mount sleek floating shelves in that awkward gap between your appliances and the ceiling. They’re perfect for holding detergent bottles, fabric softener, and pretty storage jars filled with dryer balls or clothespins.
Choose wood for warmth or white shelves for a clean, airy feel. This simple weekend project instantly adds function without eating up floor space.
2. Add a DIY Over-the-Washer Countertop
Build a sturdy countertop that spans your washer and dryer to create an instant folding station. Use a butcher block for a farmhouse vibe or a laminate for easy cleaning.
Secure it with brackets attached to wall studs, making sure it’s level and stable. This surface becomes your command center for sorting, folding, and treating stains.
3. Build Custom Cabinets for Tight Spaces
Standard cabinets rarely fit odd nooks perfectly, but custom DIY cabinets can fill every gap. Measure carefully, then construct simple boxes with plywood and trim.
Paint them to match your walls or go bold with a contrasting hue. Add doors or leave them open with baskets inside for a cottage-core aesthetic.
4. Use Open Shelving with Stylish Baskets
Swap closed cabinets for open shelves lined with woven baskets or wire bins. Label each basket for towels, cleaning cloths, or delicates.
The open design keeps everything visible and within reach while the baskets hide visual clutter. Mix natural textures like seagrass and rattan for that effortlessly curated look.
5. Install a Slim Rolling Storage Cart
Tuck a narrow rolling cart into the sliver of space between your washer and the wall. These carts typically measure just six inches wide but offer multiple tiers for stain removers, lint rollers, and dryer sheets.
Roll it out when you need supplies, then slide it back to reclaim your floor space.
6. Add Wall-Mounted Drying Racks
Install fold-down drying racks that tuck flat against the wall when not in use. They’re ideal for delicates, sweaters, and clothes that can’t handle the dryer’s heat.
Choose metal for an industrial edge or wooden accordion-style racks for vintage charm. Position them above a utility sink if you have one.
7. Create a Built-In Laundry Nook
Frame out a recessed nook around your stacked washer and dryer using basic lumber and drywall. Add shelving on both sides and a rod across the top for hanging clothes.
Paint the interior a soft color to make the nook feel intentional rather than an afterthought. This project elevates builder-grade appliances into a custom feature.
8. Hang Pegboards for Tools and Supplies
Mount a pegboard panel on any empty wall section for endlessly customizable storage. Hang hooks, small baskets, and clips to hold everything from scissors to spray bottles.
Paint the pegboard in a fun color or keep it natural wood. Rearrange hooks as your needs change throughout the seasons.
9. Install Hooks for Ironing Boards
Free up closet space by hanging your ironing board on the back of the laundry room door or an empty wall. Heavy-duty hooks or a simple over-door hanger work beautifully.
Add another hook nearby for your iron and a small basket for spray starch. Everything stays together and accessible.
10. Add Under-Shelf Storage Bins
Slide wire baskets or clip-on organizers beneath existing shelves to double your storage capacity.
These clever additions hold small items like stain sticks, sewing kits, or cleaning gloves without requiring any drilling. They’re especially useful for renters who can’t modify walls but still need more storage.
Style & Décor Upgrades
A beautiful laundry room makes the chore feel less like work. These design-forward DIY touches bring personality and polish to your space.
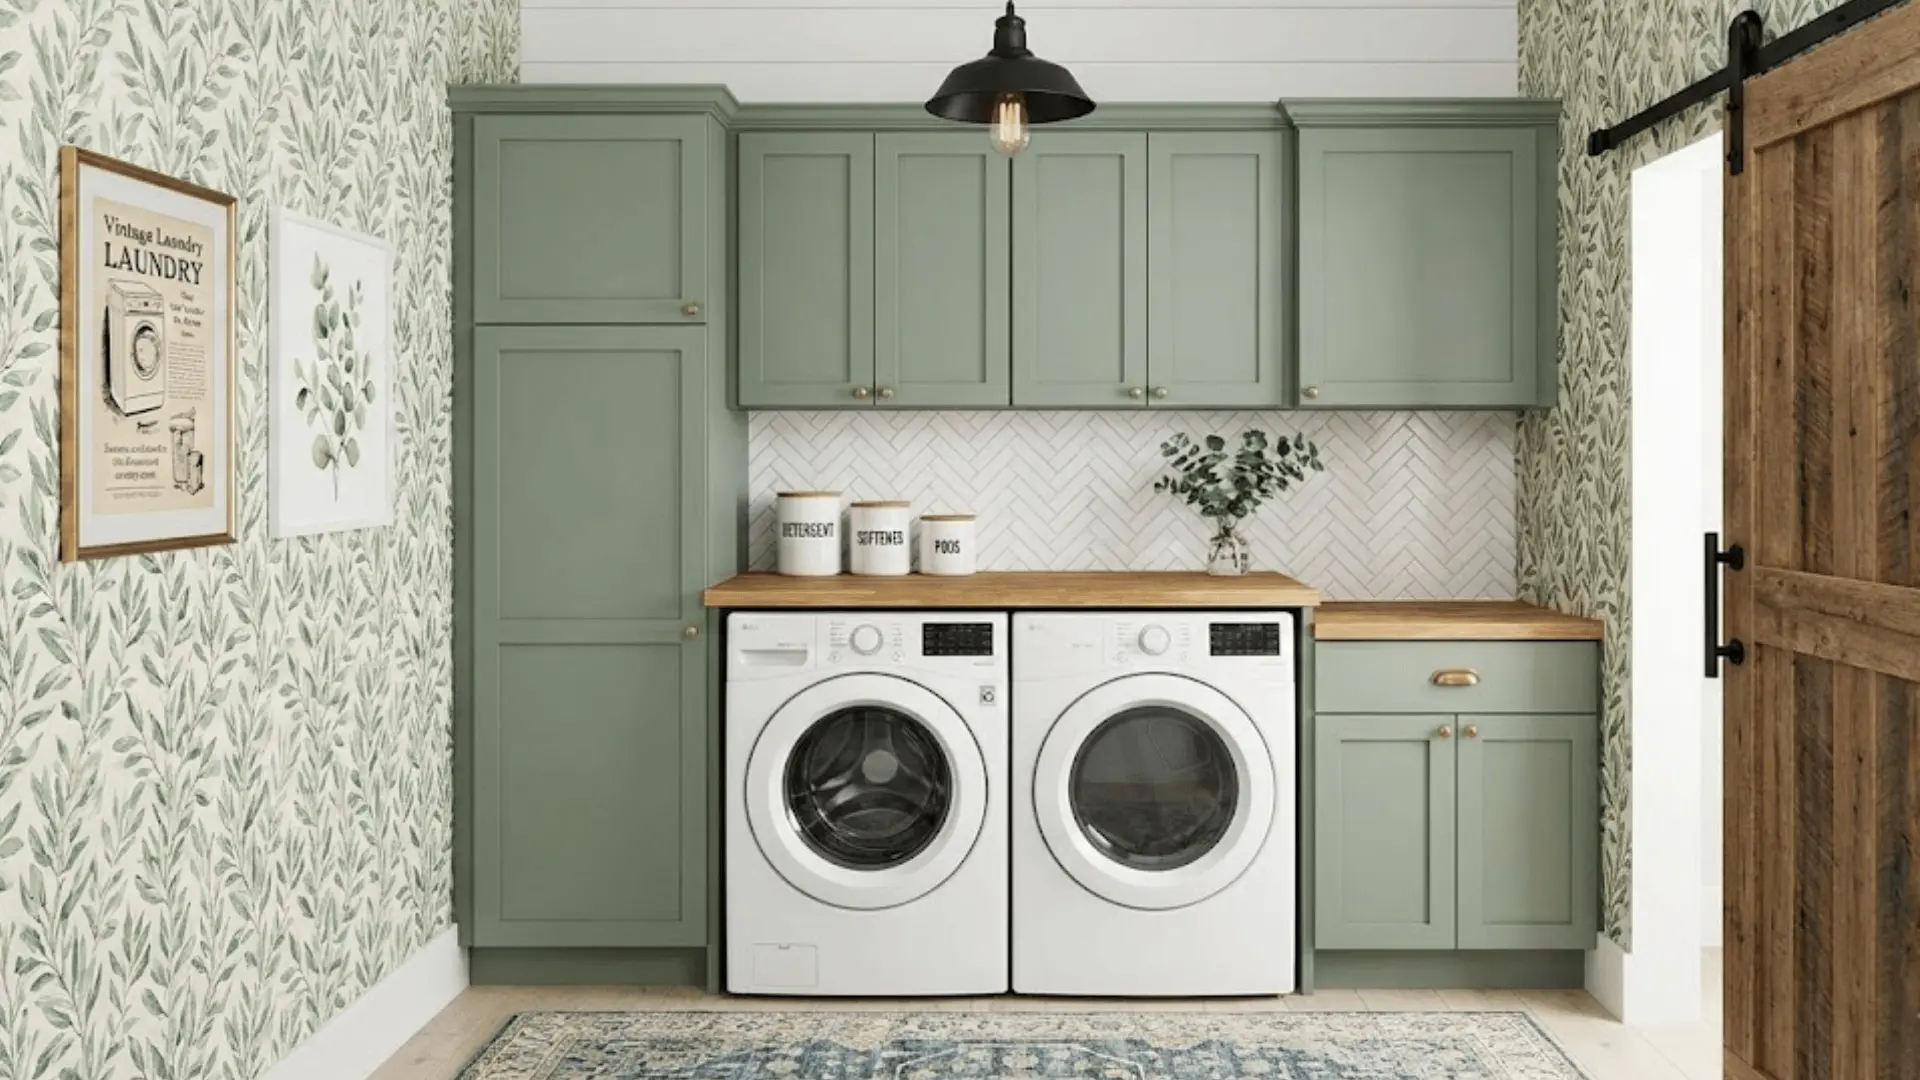
11. Add Peel-and-Stick Wallpaper
Transform plain walls in minutes with removable wallpaper in botanical prints, geometric patterns, or soft florals. It’s renter-friendly, easy to apply, and instantly adds character.
Focus on one accent wall behind your appliances or wrap the entire room for maximum impact. Choose washable vinyl options for easy maintenance.
12. Paint Cabinets a Bold Accent Color
Give tired cabinets new life with a fresh coat of paint in sage green, navy blue, or dusty rose. Lightly sand, prime, and apply two coats for a smooth finish.
Swap out old hardware for brass pulls or matte black knobs. This simple update completely shifts the room’s mood.
13. Install a Statement Light Fixture
Replace that boring builder-grade fixture with a pendant light, mini chandelier, or modern cage light. Good lighting makes laundry tasks easier while adding unexpected classiness.
Choose LED bulbs for bright, energy-efficient illumination. This upgrade takes less than an hour but delivers a major visual impact.
14. Add Decorative Tile Backsplash
Protect walls from splashes while adding pattern with peel-and-stick tile or traditional subway tile. Arrange tiles in herringbone, vertical stack, or classic brick patterns.
Extend the backsplash from the counter to the cabinets for a cohesive look. Grout in contrasting colors adds an extra dimension.
15. Upgrade Cabinet Hardware
Swap basic knobs for leather pulls, ceramic handles, or sleek brass bars. This five-minute update dramatically changes your cabinets’ personality.
Match metals throughout the room for a polished designer look, or mix finishes for eclectic charm. Hardware is jewelry for your cabinetry.
16. Use Coordinated Storage Containers
Decant detergents and powders into matching glass jars or ceramic canisters with wooden lids. Label each container with chalkboard stickers or printed tags.
Uniform containers eliminate visual chaos and make your shelves look curated and intentional. Group them on a tray for extra cohesiveness.
17. Add Framed Wall Art
Hang vintage laundry advertisements, botanical prints, or watercolor paintings to soften hard surfaces. Choose frames that complement your hardware finishes.
Art makes the space feel like an actual room rather than a forgotten utility zone. Even one large piece can completely shift the atmosphere.
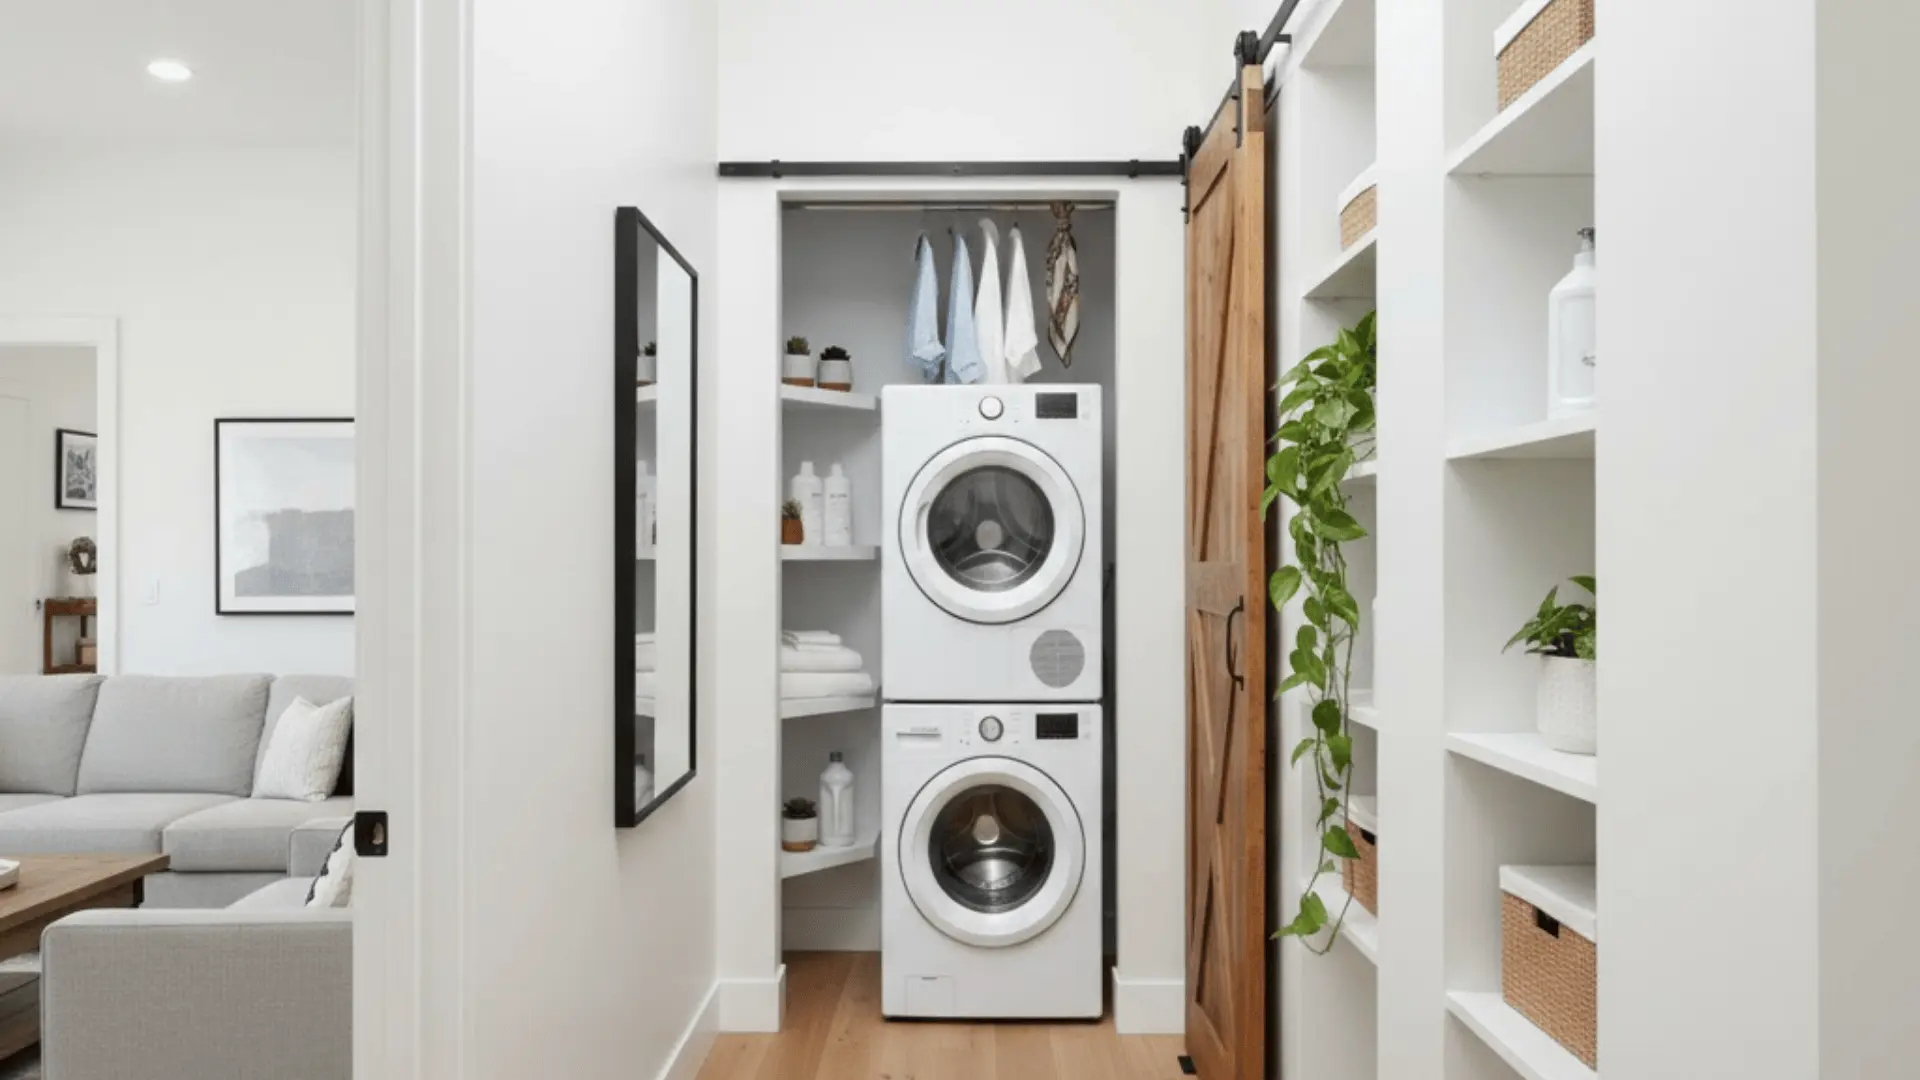
18. Install a Barn Door for Character
Replace a standard swinging door with a sliding barn door to save space and add farmhouse charm. Choose reclaimed wood for authenticity or paint new wood to match your palette.
The exposed hardware becomes a design feature. This works especially well for closet laundry conversions.
19. Add a Decorative Rug
Layer a washable cotton runner or vintage-inspired rug over tile or vinyl floors. Rugs absorb sound, add softness underfoot, and inject color or pattern.
Choose low-pile options that won’t trap lint. Machine-washable rugs from home stores make practical sense for this hardworking space.
20. Install Shiplap Accent Walls
Add texture and cottage charm with horizontal shiplap boards on one or all walls. Paint them crisp white for farmhouse vibes or a soft gray for modern simplicity.
Real wood or MDF panels both work well. The clean lines create visual interest without overwhelming a small footprint.
Functional DIY Improvements

These projects solve real laundry room frustrations while keeping your space running smoothly and efficiently.
21. Build a Folding Station
Construct a sturdy table at counter height using plywood and hairpin legs or simple brackets. Position it opposite your appliances or along an empty wall.
Add storage cubbies underneath for baskets or bins. A dedicated folding surface prevents clean clothes from piling up on appliances or furniture.
22. Create a Pull-Out Hamper Cabinet
Build a cabinet with interior shelves that hold two or three pull-out hamper bags for sorting lights, darks, and delicates.
Mount it on full-extension drawer slides so bags glide smoothly. This keeps dirty laundry contained and organized while maintaining a tidy appearance when the cabinet doors close.
23. Install a Hanging Rod for Air Drying
Mount a sturdy closet rod between two walls or under a shelf for hanging clothes straight from the washer.
Use heavy-duty brackets rated for weight. This simple addition prevents wrinkles and gives delicates a place to dry. Position it above a small rug or mat to catch water.
24. Add Stackable Appliance Risers
Lift front-loading washers and dryers onto DIY platforms built from plywood and 2x4s. The added height reduces back strain and creates hidden storage underneath for detergent bottles or cleaning supplies.
Paint or stain platforms to match your décor. Make sure they’re level and stable before loading appliances.
25. Install Motion Sensor Lighting
Wire in motion-activated LED strips under cabinets or inside closet laundry spaces. Lights turn on automatically when you enter, making it easy to work hands-free.
Battery-operated options work for renters. Bright task lighting prevents mistakes like missing stains or mismatched socks.
26. Build a Slim Utility Sink Station
Frame in a narrow console for a small utility sink using basic lumber. Add a shelf underneath for supplies and a small faucet for pre-treating stains or hand-washing delicates.
Even a compact 12-inch sink makes a difference. Tile the surrounding area for easy cleanup.
27. Add a Countertop Over Front Loaders
Build a removable wood countertop that rests on top of front-loading machines, creating workspace without permanent installation.
Cut plywood to size, sand smooth, and finish with polyurethane. Add felt pads underneath to protect appliance surfaces. Lift it off when you need washer or dryer access.
28. Install Vertical Laundry Sorting Bins
Mount a triple-bin sorter on the wall or tuck it into a narrow cabinet. Each compartment holds a different laundry category.
Wall-mounted versions keep floors clear while canvas bag sorters offer portability. This system prevents the dreaded laundry pile explosion on the floor.
29. Create a Hidden Storage Door Shelf
Attach shallow wire racks or fabric pockets to the back of your laundry room door. Store cleaning brushes, dryer sheets, stain removers, and scissors in these hidden organizers.
When the door closes, everything disappears from view. This maximizes overlooked vertical real estate.
30. Add a Fold-Down Ironing Board
Build a wall-mounted ironing board that folds flat when not in use. Hinge a board to the wall inside a shallow cabinet or behind a decorative panel.
Add a small hook inside for the iron. This keeps your ironing station accessible but invisible until you need it.
Space-Saving Hacks
When square footage is limited, these clever tricks help you stretch every inch and create breathing room.
31. Convert a Closet into a Laundry Room
Convert an underused coat closet or hallway closet into a compact laundry station. Install stackable appliances, add shelving along the sides, and hang a tension rod for air-drying.
Keep the doors or replace them with a curtain for easy access. This works beautifully in apartments and small homes.
32. Add Corner Shelving Units
Utilize awkward corner spaces with triangular floating shelves or a tall corner tower unit. These dead zones become productive storage for supplies, plants, or decorative accents.
Corner shelves draw the eye upward and make the room feel more spacious rather than cramped.
33. Use Mirrors to Make the Room Feel Bigger
Hang a large mirror on the wall opposite a window or light source to bounce light around and create the illusion of depth.
Mirrored cabinet doors work too. This classic designer trick makes tight quarters feel surprisingly open and airy without any construction required.
34. Install Sliding Doors Instead of Hinged
Replace swinging doors with pocket doors or barn-style sliders that glide along the wall. This frees up the clearance space a traditional door requires, letting you position shelves or hampers closer to the entrance.
Sliding doors also add architectural interest and modern appeal.
35. Use Light Colors to Expand the Space Visually
Paint walls, cabinets, and trim in soft whites, pale grays, or warm creams to reflect light and make boundaries feel less confining.
Light colors recede visually, tricking the eye into perceiving more space. Add texture through wood tones and greenery to keep the palette from feeling sterile.
Budget-Friendly DIY Small Laundry Room Makeover Tips
You don’t need a massive budget to create a laundry room that feels fresh and functional. With a little creativity and some strategic shopping, you can pull off a stunning makeover without breaking the bank.
- Repurpose old bookshelves or dressers as laundry storage by adding baskets, paint, and new hardware for a custom look at thrift store prices.
- Paint everything in sight, from walls to cabinets to outdated fixtures, using leftover paint from other rooms or discounted oops paint from hardware stores.
- Hunt flea markets and estate sales for vintage jars, wire baskets, wooden crates, and framed prints that add character without the boutique price tag.
- Tackle simple weekend upgrades like peel-and-stick tile, contact paper drawer liners, or DIY floating shelves using basic materials from the hardware store.
The best makeovers aren’t about how much you spend but how thoughtfully you use what you have.
Start small, build as you go, and watch your laundry room evolve into a space that feels both personal and polished.
Color Ideas That Make Small Laundry Rooms Look Bigger
The right color palette can visually double your square footage without knocking down a single wall. These proven combinations work with light and shadow to open up even the tiniest laundry spaces.
| Color Palette | Why It Works | Best Combinations |
|---|---|---|
| Light Neutrals | Reflects light, creates seamless flow | Soft white with oak shelving and linen accents |
| Soft Pastels | Adds personality while maintaining airiness | Pale sage, blush, or powder blue with white trim |
| High-Contrast Black & White | Creates depth, draws the eye through space | White walls with black hardware and graphic tile |
| Warm Minimalist Tones | Cozy without closing in | Creamy beige or warm greige with brass accents |
Lighting Tips for Small Laundry Rooms
Good lighting converts a cramped utility closet into a bright, functional workspace where you can actually see what you’re doing.
Layer different light sources to eliminate shadows and make the room feel twice its actual size.
- Combine overhead fixtures with task lighting near your folding station and appliances to create depth and eliminate harsh shadows throughout the space.
- Install LED strips under cabinets and shelves to illuminate work surfaces while adding a soft ambient glow that makes the room feel professionally designed.
- Maximize mirrors, glossy tile, and light-colored surfaces that bounce illumination around the room and amplify whatever natural or artificial light you have.
- Add dimmable LED strips along baseboards or behind floating shelves for adjustable mood lighting that transitions from bright task mode to soft evening ambiance.
The right lighting doesn’t just help you spot stains and match socks better. It completely shifts how the space feels, turning what could be a dark afterthought into one of the most inviting corners of your home.
Common Small Laundry Room Design Mistakes to Avoid
Even the best DIY intentions can go sideways if you fall into these common design traps. Knowing what to avoid saves you time, money, and the frustration of having to redo things later.
- Leaving walls bare while cramming everything onto counters instead of installing shelves, hooks, and pegboards that utilize all that unused vertical real estate.
- Packing shelves so tightly that nothing’s accessible, and the visual clutter makes the room feel even smaller than it actually is.
- Painting walls charcoal or navy without adding sufficient lighting, which creates a cave-like atmosphere rather than the cozy vibe you were hoping for.
- Forgetting about airflow and moisture control by skipping exhaust fans or vents can lead to mildew, musty smells, and peeling paint down the line.
- Placing appliances too close together or against walls without leaving enough clearance for doors to open fully or for you to comfortably load and unload laundry.
Avoid these pitfalls from the start, and your laundry room will function beautifully for years without needing constant adjustments or fixes.
That’s a Wrap
Your small laundry room doesn’t have to stay stuck in builder-grade limbo.
With these DIY small laundry room ideas in your back pocket, you can tackle one project at a time until you’ve created a space that’s equal parts hardworking and beautiful.
Start with the upgrades that solve your biggest frustrations first, then layer in the pretty details as you go.
Soon enough, laundry day might actually become something you look forward to.
Have a favorite DIY trick or makeover you’ve tried? Drop a comment below and share what worked in your space!