I’ve been absolutely obsessed with pergolas lately, and honestly, so many of us are feeling the same way. There’s something magical about how they turn a plain backyard into this dreamy, Instagram-worthy retreat.
I love that building one yourself isn’t just about saving money (though that’s definitely a bonus), it’s about creating something uniquely yours.
Even if you’re brand new to power tools or already comfortable with weekend projects, a pergola is surprisingly approachable.
I’m here to walk you through everything: the design choices that’ll make your space shine, the materials you’ll need, and an honest talk about when DIY makes sense versus calling in the pros.
Building a Pergola: Types of Pergolas You Can Build
I’ve noticed that choosing the right pergola style can feel a bit overwhelming at first. The good news? Once you understand the basic types, the decision becomes so much clearer.
Here’s a simple breakdown of the most popular pergola styles to help you find your perfect match.
| Pergola Type | Best For | Key Features |
|---|---|---|
| Freestanding Pergola | Open yards, poolside, garden focal points | Four posts, movable placement |
| Attached Pergola | Patios, decks, home extensions | Connects to the house, seamless flow |
| Open Slat Pergola | Dappled sunlight lovers | Classic slatted roof, partial shade |
| Covered Roof Pergola | Year-round use, full protection | Solid panels or a fabric canopy |
| Modern Style | Contemporary homes | Clean lines, sleek finishes |
| Traditional Style | Classic homes, rustic settings | Curved rafters, decorative details |
Planning Your DIY Pergola
Before you pick up a single tool, let’s map out the essentials. Smart planning now saves you from headaches later and ensures your pergola becomes the outdoor oasis you’re dreaming of.
Choosing the Right Location
The perfect spot makes all the difference. Look for areas that get your ideal amount of sun throughout the day (morning shade lovers versus afternoon sun seekers, this is your moment).
Check how wind moves through your yard and make sure water drains away properly so you’re not dealing with puddles under your beautiful new structure.
If you’re leaning toward an attached pergola, consider how close to the house feels right for your lifestyle.
Permits and Local Codes:
- Most areas require permits for structures over 100 to 200 square feet
- Attached pergolas typically need approval since they connect to your home
- Check HOA rules early for restrictions on style, height, and placement
Pergola Size and Layout
Getting the dimensions right ensures your pergola feels spacious without overwhelming your yard. Here’s what works for most outdoor spaces:
| Pergola Use | Recommended Size | Post Spacing | Clearance Height |
|---|---|---|---|
| Cozy seating area | 8×8 to 10×10 feet | 8 to 10 feet apart | 8 feet minimum |
| Dining space | 10×12 to 12×14 feet | 10 to 12 feet apart | 8 to 9 feet |
| Large entertaining | 12×16 feet or larger | 12+ feet apart | 9 feet or higher |
| Walkway or pathway | 4 to 6 feet wide | 6 to 8 feet apart | 8 feet minimum |
Materials for Building a Pergola
Choosing the right materials sets the foundation for how your pergola looks, lasts, and fits your budget. Let’s break down what actually works best for different styles and climates.
Wood Options:
- Cedar
- Redwood
- Pressure-Treated Pine
Metal and Vinyl Pergolas:
- Aluminum
- Steel
- Vinyl
Hardware and Fasteners:
- Galvanized or stainless steel screws and bolts
- Heavy-duty post anchors or concrete footings
- Joist hangers and brackets
- Decorative metal accents
The material you choose shapes everything from installation ease to how often you’ll need to maintain your pergola. Pick what aligns with your aesthetic vision and the time you want to spend on upkeep down the road.
DIY Pergola Kits vs. Building From Scratch
Deciding between a kit and a custom build depends on your comfort level, timeline, and how much creative control you want. Both paths can lead to a stunning outdoor space.
Pergola Kits
Pre-packaged kits take the guesswork out of planning and make installation surprisingly straightforward.
Here are some popular options that deliver quality and style:
| Product | What’s Included | Best For | Price Range |
|---|---|---|---|
| Sunjoy Metal Pergola | Metal frame, adjustable canopy, hardware | Quick setup, flexible shade | $$ to $$$ |
| Backyard Discovery Beaumont | Cedar lumber, pre-drilled pieces, fasteners | Traditional look, beginners | $$ to $$$ |
| PURPLE LEAF Louvered Pergola | Aluminum frame, adjustable louvers | Modern design, low maintenance | $$$ |
| Outsunny Wall-Mounted | Steel frame, fabric canopy, stakes | Budget-friendly, attached | $ to $$ |
Pros and Cons:
- Everything arrives together with clear instructions for faster installation
- Limited customization and may not fit unique spaces perfectly
- Best for beginners or those wanting a quick weekend project
Custom-Built Pergolas
Building from scratch gives you total creative freedom to match your exact vision and space. You control every dimension, material choice, and design detail, making it truly one of a kind.
The trade-off? It requires more planning time, precise measurements, and a bigger time investment.
Costs can vary widely, depending on your material choices, but you often save money compared to high-end kits while getting exactly what you want.
How to Build a Pergola: Step-by-Step Overview
Ready to bring your pergola vision to life? This straightforward process breaks down into manageable stages that even weekend DIYers can tackle with confidence.
Step 1: Mark Post Locations and Prepare Footings
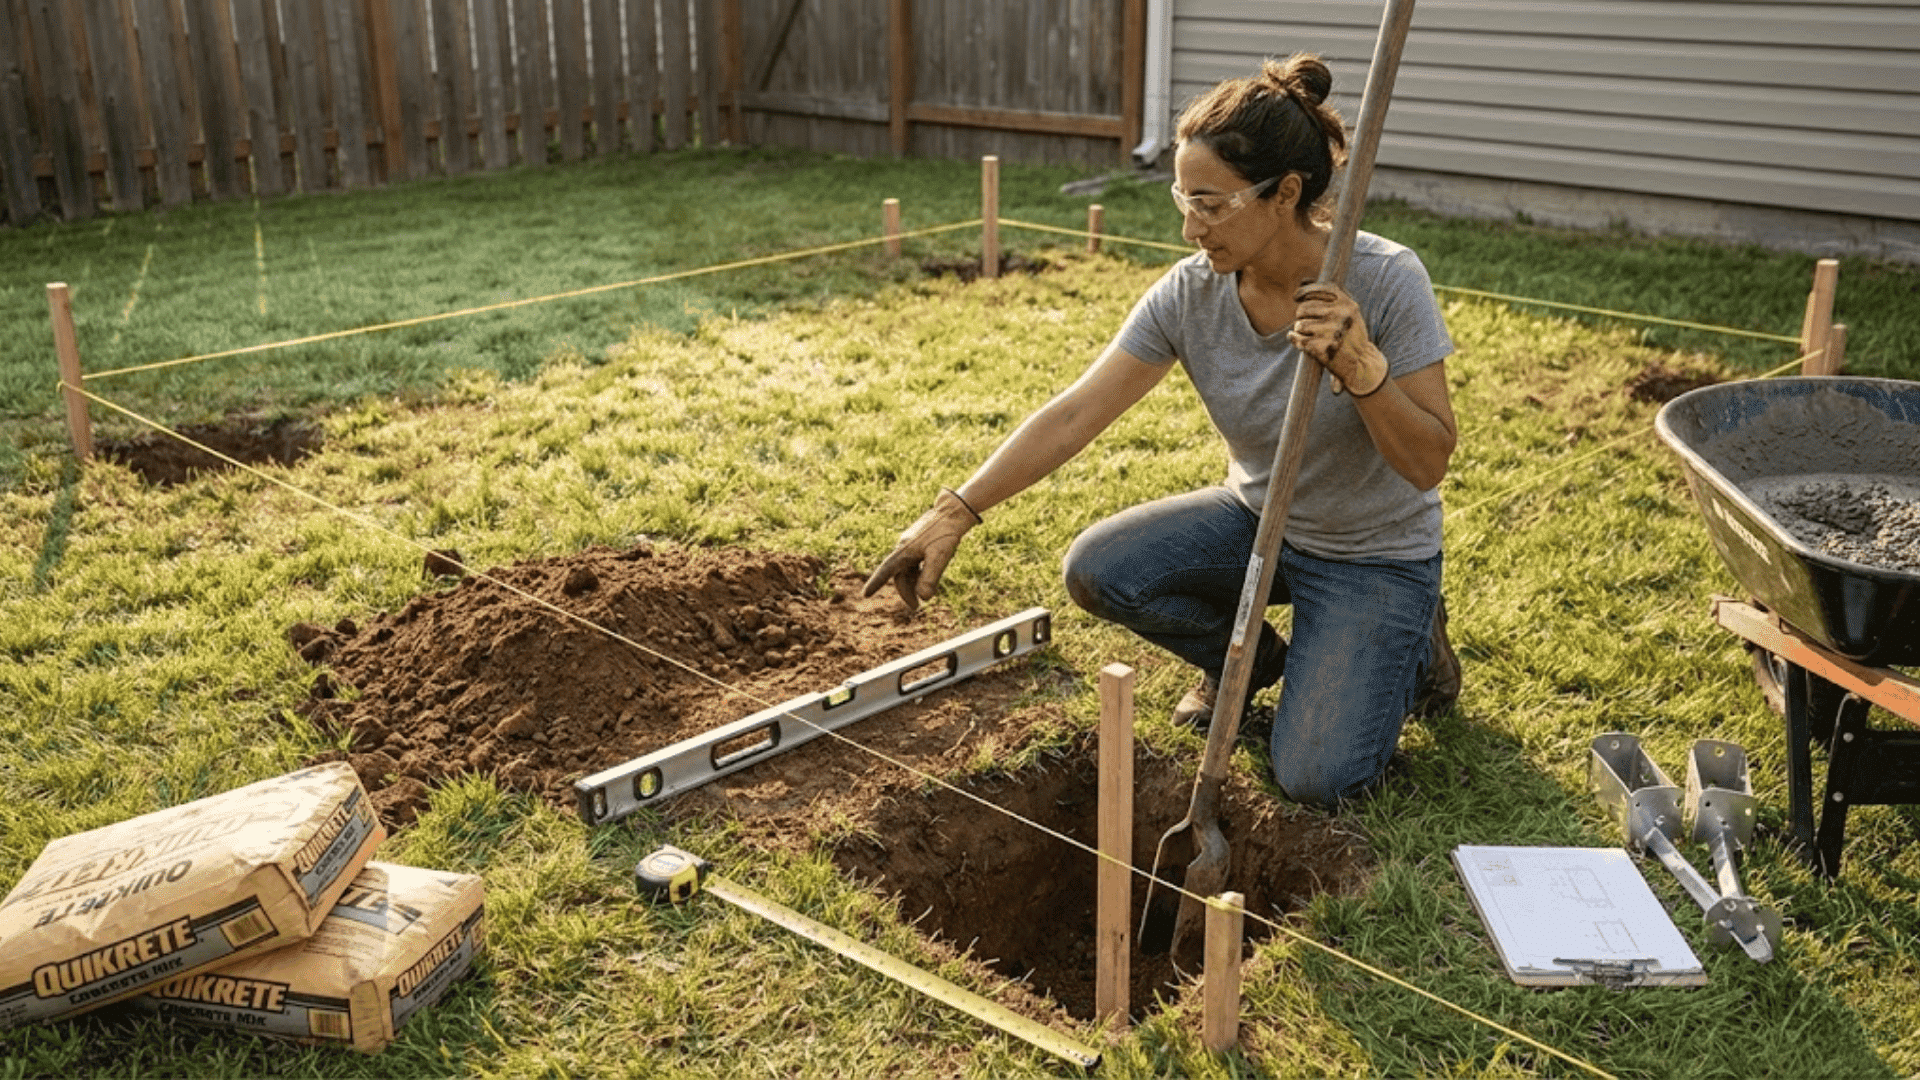
Start by marking exactly where your posts will go using stakes and string to create perfect corners. Dig holes at least 24 inches deep (or below your frost line) and 12 inches wide for each post.
Pour concrete footings or install post anchors, making sure everything is level and properly spaced. Let the concrete cure for at least 48 hours before moving forward. This foundation determines your entire structure’s stability.
Step 2: Set Posts and Install Main Beams
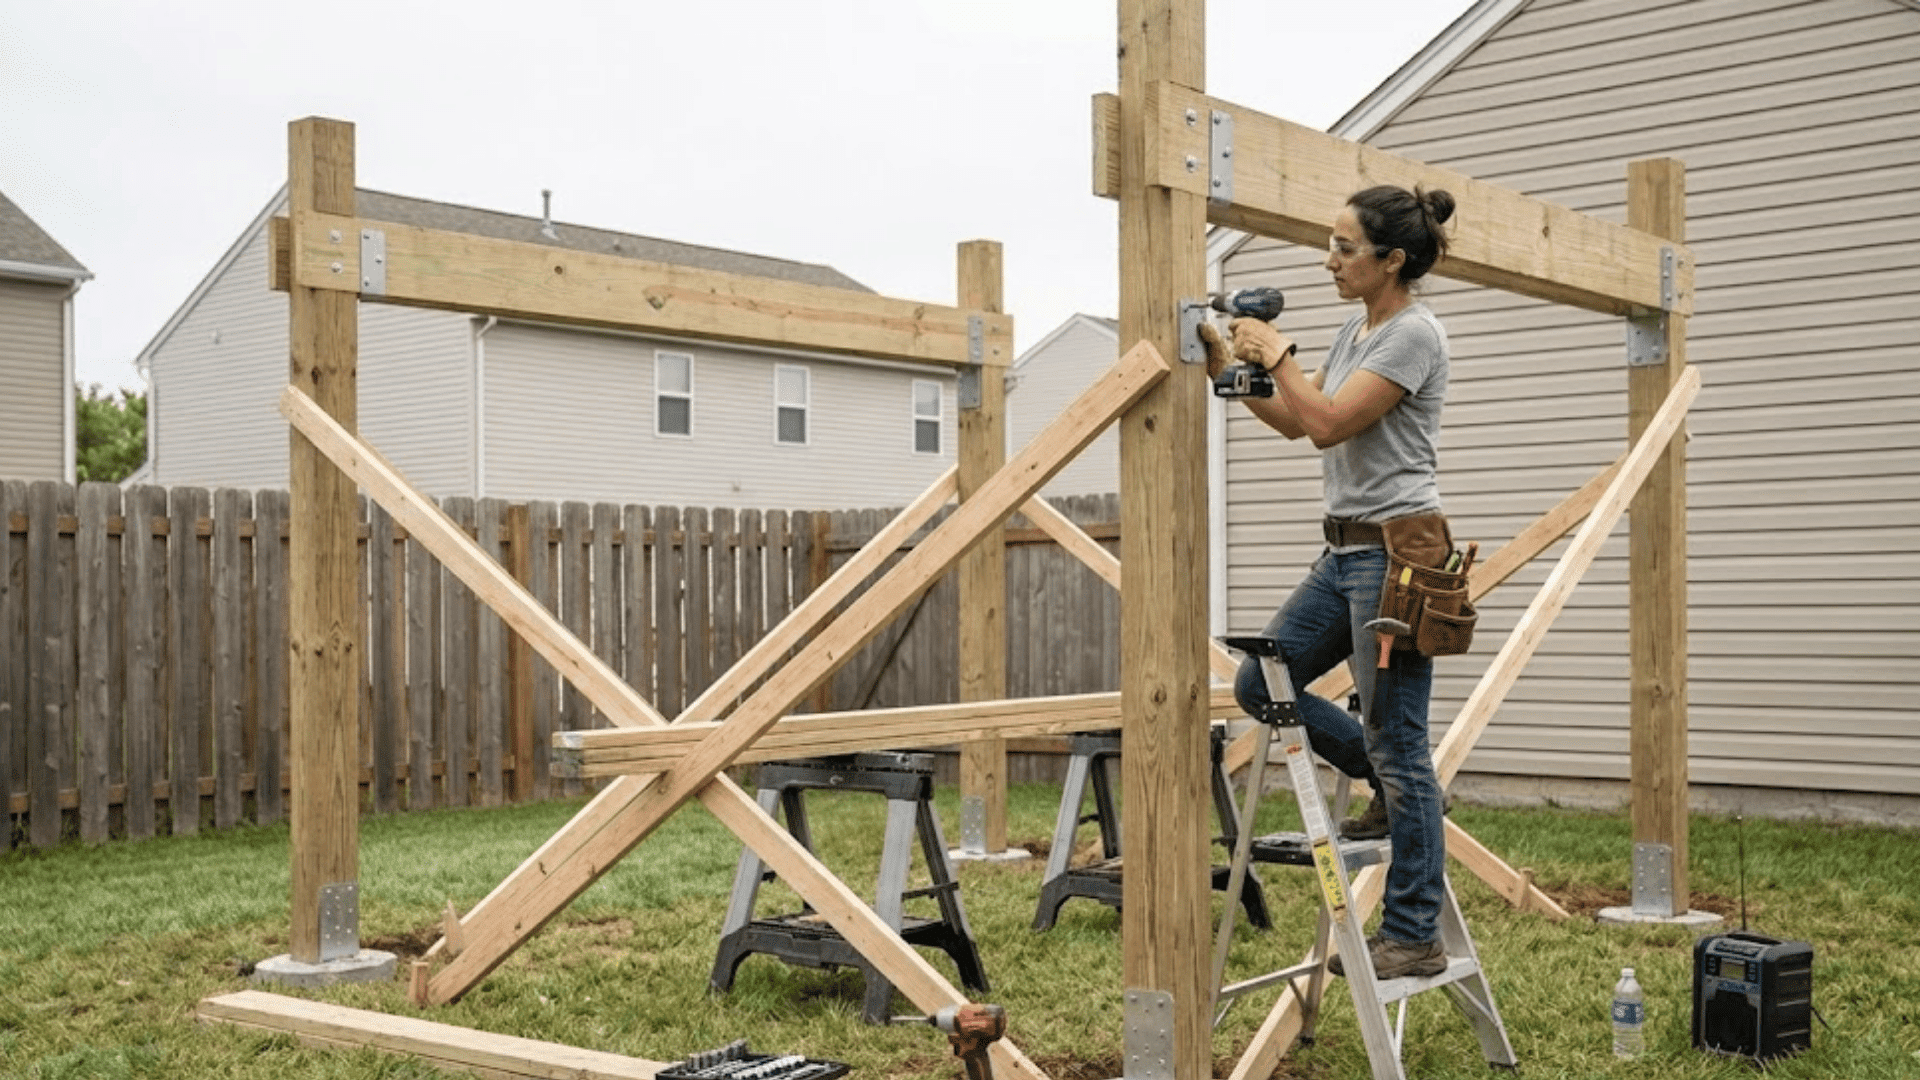
Position your posts vertically in the footings, using temporary bracing to keep them plumb while the concrete sets. Double-check that all posts are perfectly level and aligned with each other.
Once secure, attach your main support beams across the top of the posts using heavy-duty bolts or brackets. These beams carry the weight of your entire roof structure, so proper attachment is essential for long-term stability.
Step 3: Add Rafters and Create the Roof Structure
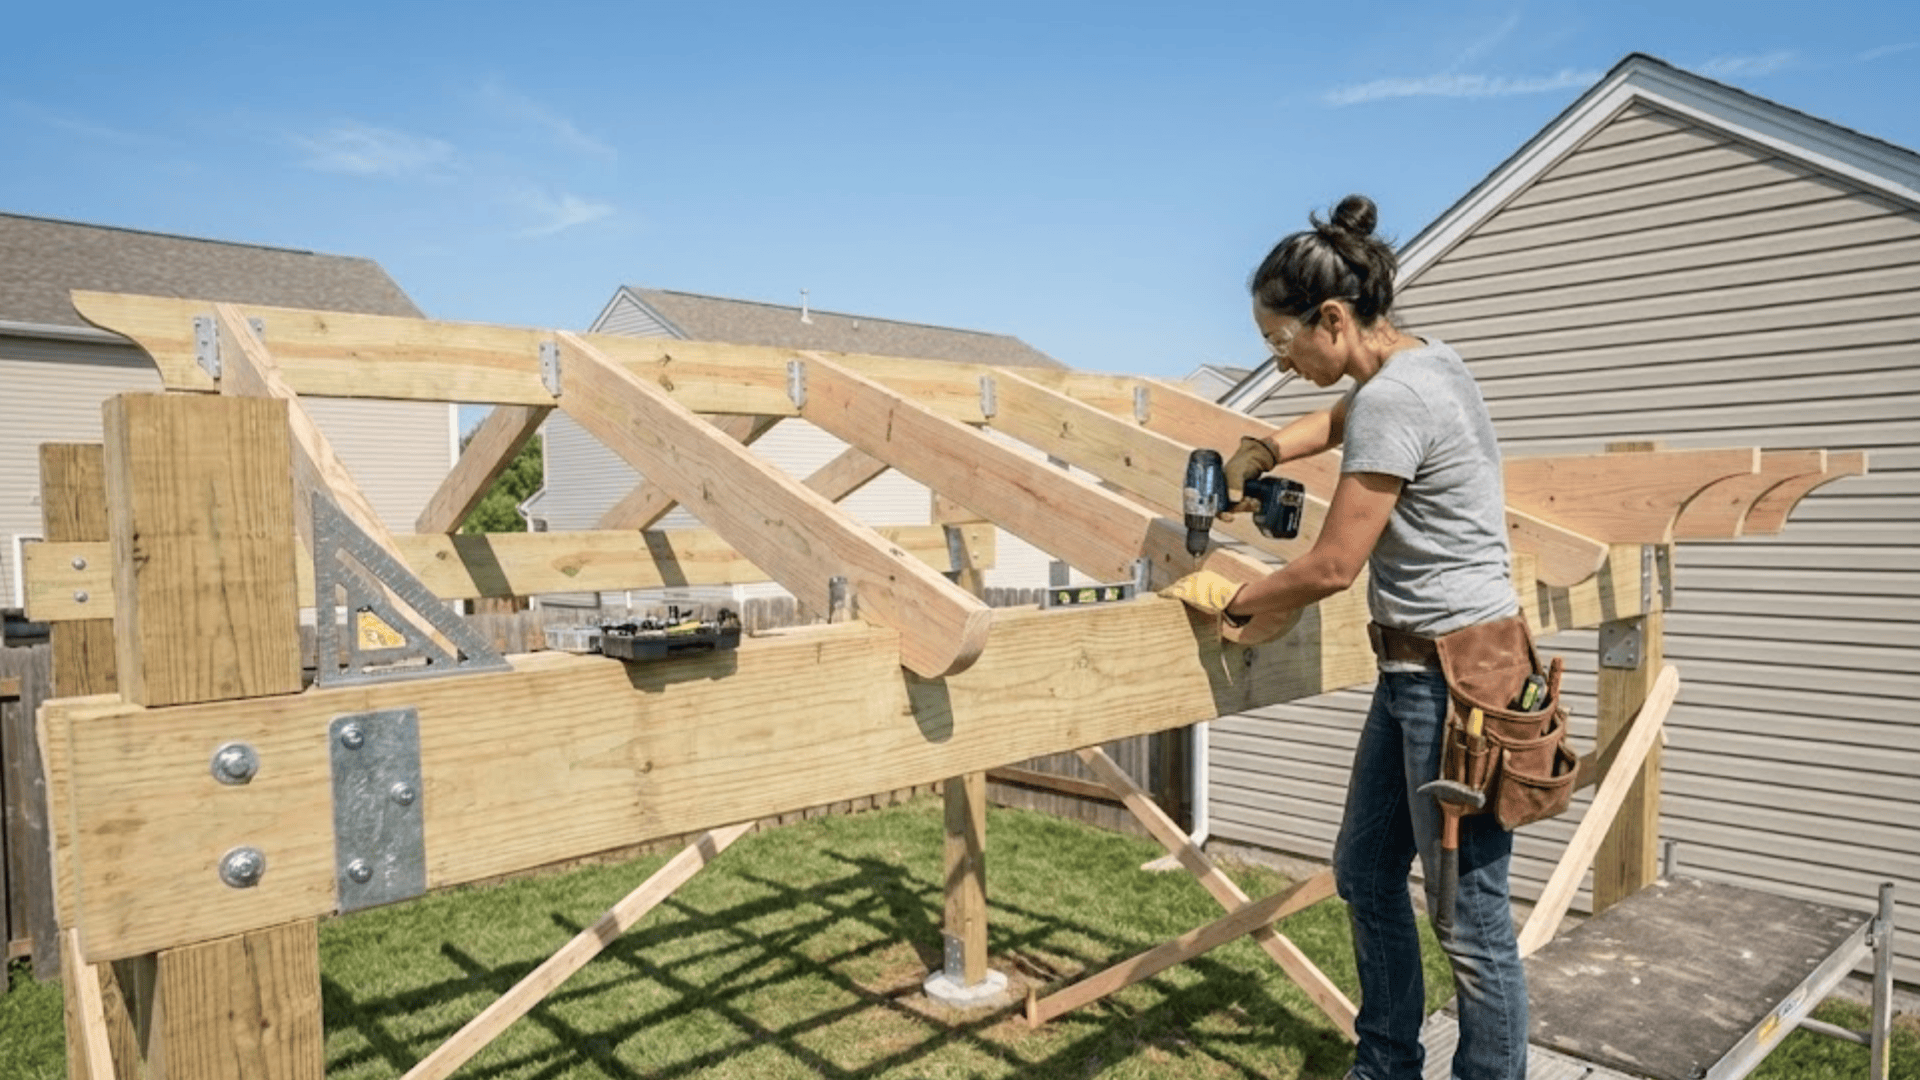
Lay your rafters perpendicular to the main beams, spacing them evenly (typically 16 to 24 inches apart) for balanced shade coverage. Secure each rafter with galvanized screws or brackets, ensuring they’re flush and level.
For decorative flair, cut decorative ends on the rafters before installation. This step transforms your frame into a recognizable pergola shape and determines your final shade pattern.
Step 4: Install Cross-Bracing and Finishing Touches
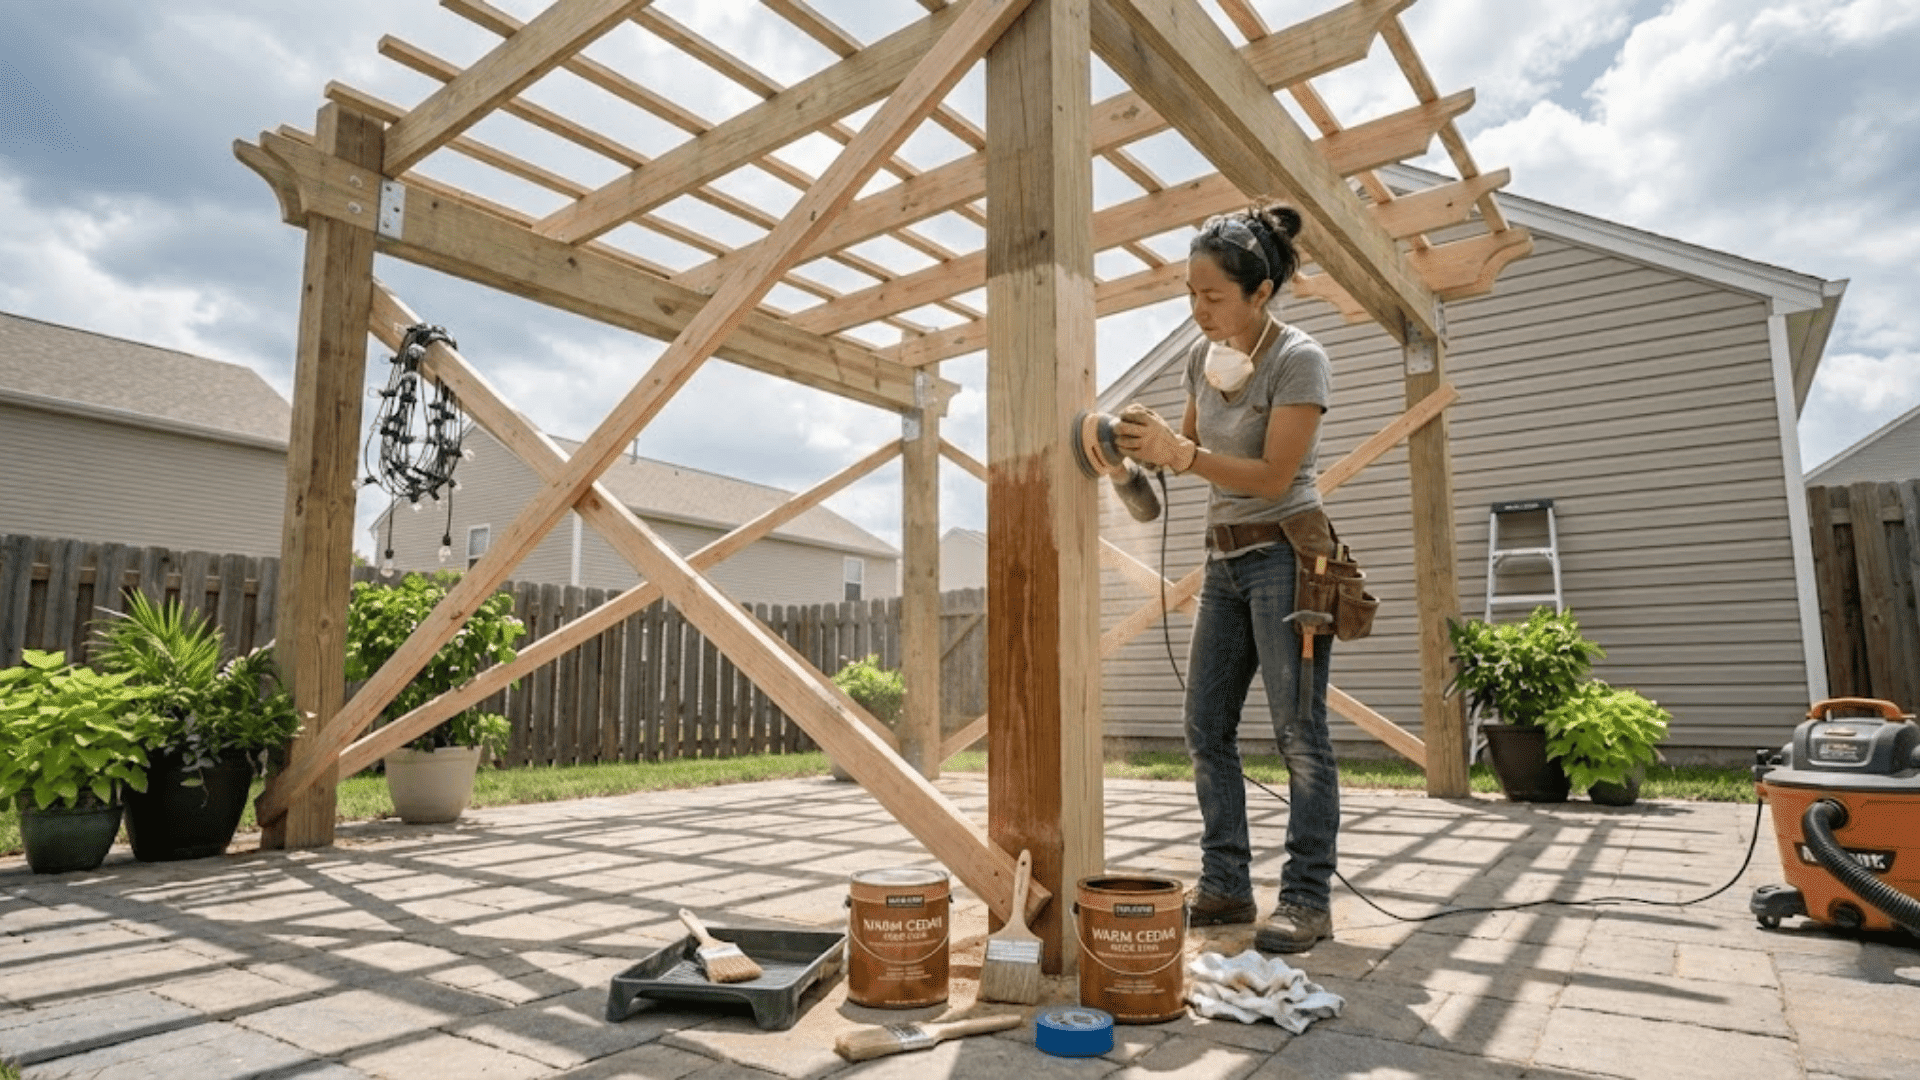
Add diagonal cross-bracing between posts for extra stability, especially in windy areas. Attach any additional decorative elements like lattice panels, climbing plant supports, or lighting fixtures.
Sand down rough edges and apply your chosen finish, whether that’s stain, paint, or weatherproof sealant. Let everything dry completely before adding furniture or plants to complete your outdoor sanctuary.
Step 5: Final Inspection and Maintenance Setup
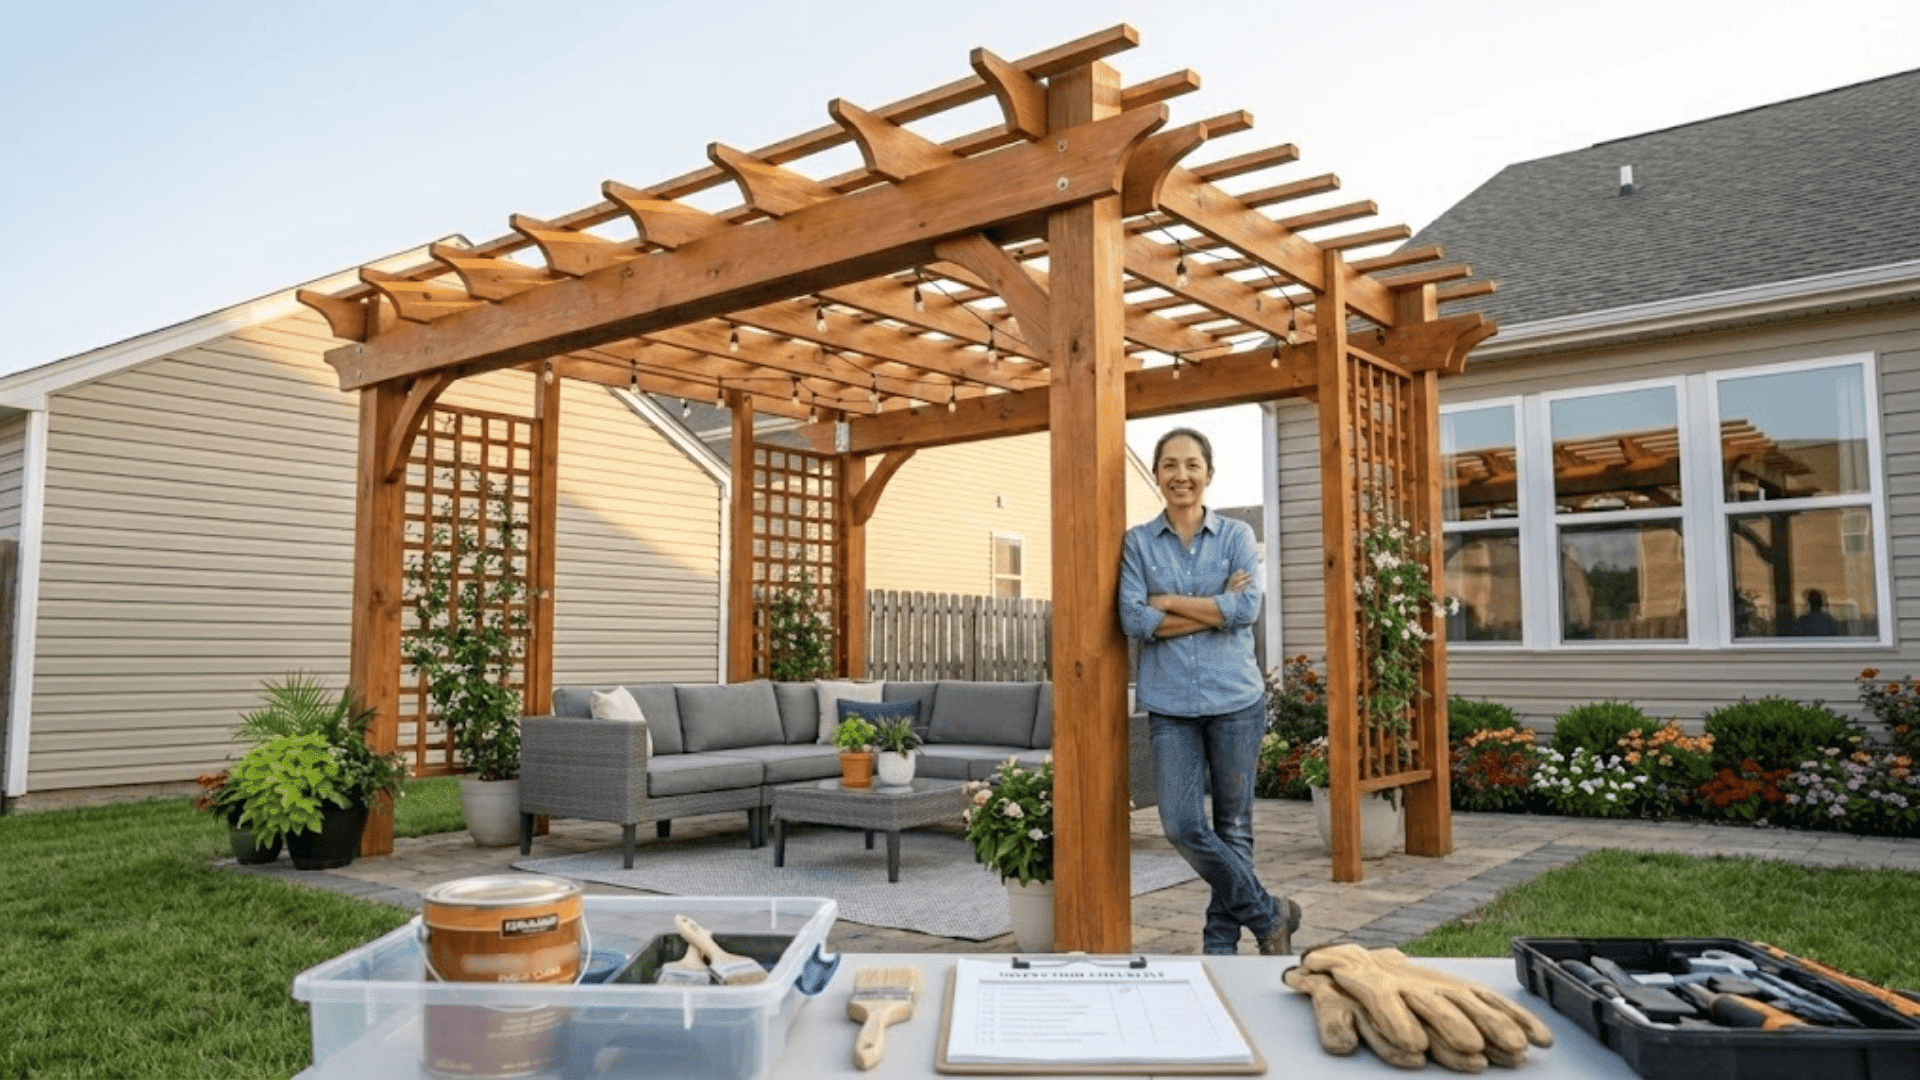
Walk around your completed pergola, checking all connections, bolts, and joints for tightness. Apply a second coat of sealant if needed, paying special attention to end cuts and joints where moisture can enter.
Set up a maintenance schedule for annual inspections and resealing. Consider adding retractable shade fabric, outdoor curtains, or string lights to personalize your space and make it truly yours.
Common DIY Pergola Mistakes
Real builders share hard-learned lessons that can save you major headaches. The biggest mistake? Skipping proper post anchoring, which leads to wobbly structures that won’t survive the first windstorm.
One builder on the LumberJocks forum learned this the hard way when the wind shifted their entire pergola despite concrete footings. Many DIYers also ignore local permits, only to face fines or teardown orders later.
Undersizing lumber is another common pitfall, creating sagging rafters and an unstable frame.
Finally, builders often forget to account for their local climate, using materials that can’t handle intense sun, heavy snow, or coastal moisture. Learn from their experiences and do it right the first time.
Cost Breakdown: How Much Does a DIY Pergola Cost?
Understanding the true cost of a DIY pergola goes beyond just lumber prices. From materials and tools to ongoing upkeep, here’s what you can realistically expect to spend on your project.
| Cost Category | Budget | Mid-Range | Premium |
|---|---|---|---|
| Materials (Custom Build) | $500 – $1,000 | $1,500 – $3,000 | $3,500 – $6,000+ |
| Pergola Kits | $300 – $800 | $1,200 – $2,500 | $3,000 – $5,000+ |
| Tools & Equipment | $100 – $200 | $300 – $500 | $600 – $1,000+ |
| Concrete & Footings | $100 – $200 | $200 – $400 | $500 – $800 |
| Finishing & Extras | $50 – $150 | $200 – $400 | $500 – $1,200+ |
| Annual Maintenance | $50 – $100 | $150 – $250 | $300 – $500+ |
| Total First-Year Cost | $1,100 – $2,450 | $3,550 – $6,050 | $8,100 – $13,500+ |
Custom builds offer more flexibility and lower costs than premium kits, but demand greater skill and time investment. Investing in quality materials and proper anchoring saves money on repairs long term.
Building a Pergola: Design Upgrades and Custom Touches
Once your pergola structure is complete, these finishing touches transform it from a basic frame into a true outdoor retreat that reflects your personal style.
- Install retractable canopies or shade sails for adjustable sun protection throughout the day.
- Train climbing plants like wisteria, jasmine, or grapevines along the beams for natural, living shade.
- Add weatherproof outdoor curtains or bamboo roll-up blinds for flexible privacy and wind protection.
- Incorporate string lights, lanterns, or recessed LED strips to create a warm ambiance for evening gatherings.
These upgrades turn your pergola into a multifunctional space that adapts to different seasons, times of day, and occasions. Mix and match elements based on your budget and lifestyle to create something uniquely yours.
DIY Pergola: Maintenance and Longevity Tips
A little regular care keeps your pergola looking gorgeous and structurally sound for decades. These simple maintenance habits protect your investment and prevent costly repairs.
- Apply fresh sealant or stain every one to two years to protect wood from moisture and UV damage
- Inspect all bolts, brackets, and connections annually, tightening any loose hardware before problems develop
- Clean debris from joints and drainage areas each spring and fall to prevent water buildup and rot
- Check posts at ground level for signs of rot or insect damage, especially after heavy rain or snow
- Power wash or hand scrub surfaces annually to remove mildew, dirt, and organic buildup
Staying on top of these tasks means your pergola will age beautifully rather than deteriorate. A well-maintained structure can easily last 20 to 30 years or more, making it a worthwhile part of your outdoor living space.
That’s a Wrap
Building your own DIY pergola is one of those projects that genuinely pays off in so many ways.
You get exactly the outdoor space you’ve been dreaming about, save a considerable amount compared to hiring contractors, and gain the satisfaction of creating something with your own hands.
Whether you choose a simple weekend kit or go fully custom with your design, the result is a beautiful structure that transforms how you enjoy your backyard.
Every step brings you closer to countless afternoons spent relaxing under your handcrafted shade.
Ready to start your pergola project? Drop a comment below sharing your design ideas or any questions you have. I’d love to hear what you’re planning and help however I can.