I still remember staring at my backyard, excited to grow vegetables but totally lost on where to start. The whole “layout” thing felt overwhelming like I needed some master plan just to plant a few tomatoes.
But here’s what I learned: a beginner basic vegetable garden layout doesn’t have to be complicated. You just need a simple setup that makes sense for your space and the veggies you want to grow.
In this guide, you’ll find straightforward layout options that actually work for beginners, plus tips on spacing, sunlight, and grouping plants so they thrive together.
No fancy blueprints required, just practical advice to get your garden growing without the guesswork or stress.
Getting Started with Your First Vegetable Garden
Picking the right spot for your garden makes all the difference. I’ve seen beginners choose shady corners or hard-to-reach areas, then wonder why nothing grows well. You want a location that gets at least 6-8 hours of direct sunlight daily—most vegetables are sun lovers. Check your soil too. It should drain well and not stay soggy after rain.
Think about accessibility. You’ll be watering, weeding, and harvesting regularly, so place your garden somewhere you can reach easily. If it’s tucked away behind the garage, you’ll likely neglect it.
Space matters, but don’t stress about having a huge area. Start small—even a 4×4 foot plot works for beginners. You can always expand later.
As for garden designs, there are tons of options out there. Don’t let that overwhelm you. Focus on simple layouts first. Master the basics, see what works in your space, then experiment. Your first garden is about learning, not perfection.
Essential Principles for a Beginner-Friendly Vegetable Garden Layout
Getting your layout right from the start saves you headaches later. I learned this the hard way after planting my first garden too big and too cramped. You don’t need a massive space or complex design. You just need a few smart principles that make growing vegetables easier and more productive.
1. Size Matters: Why starting with a 4×4 or 4×8 bed is ideal
A 4×4 or 4×8 foot bed is perfect for beginners. You can reach the center from all sides without stepping on the soil. This keeps your soil loose and healthy. Plus, smaller beds are easier to manage. You won’t get overwhelmed with weeding or watering.
2. Sunlight and Orientation: How to position your garden based on sunlight for maximum growth
Position your garden where it gets full sun, 6-8 hours daily. Orient beds north to south so plants get even sunlight throughout the day. Tall plants go on the north end so they don’t shade shorter ones.
3. Pathways for Easy Access: The importance of pathways between garden beds for easy maintenance
Leave 2-3 feet between beds for pathways. You need room to walk, kneel, and cart tools around. Pathways prevent soil compaction and make harvesting way easier.
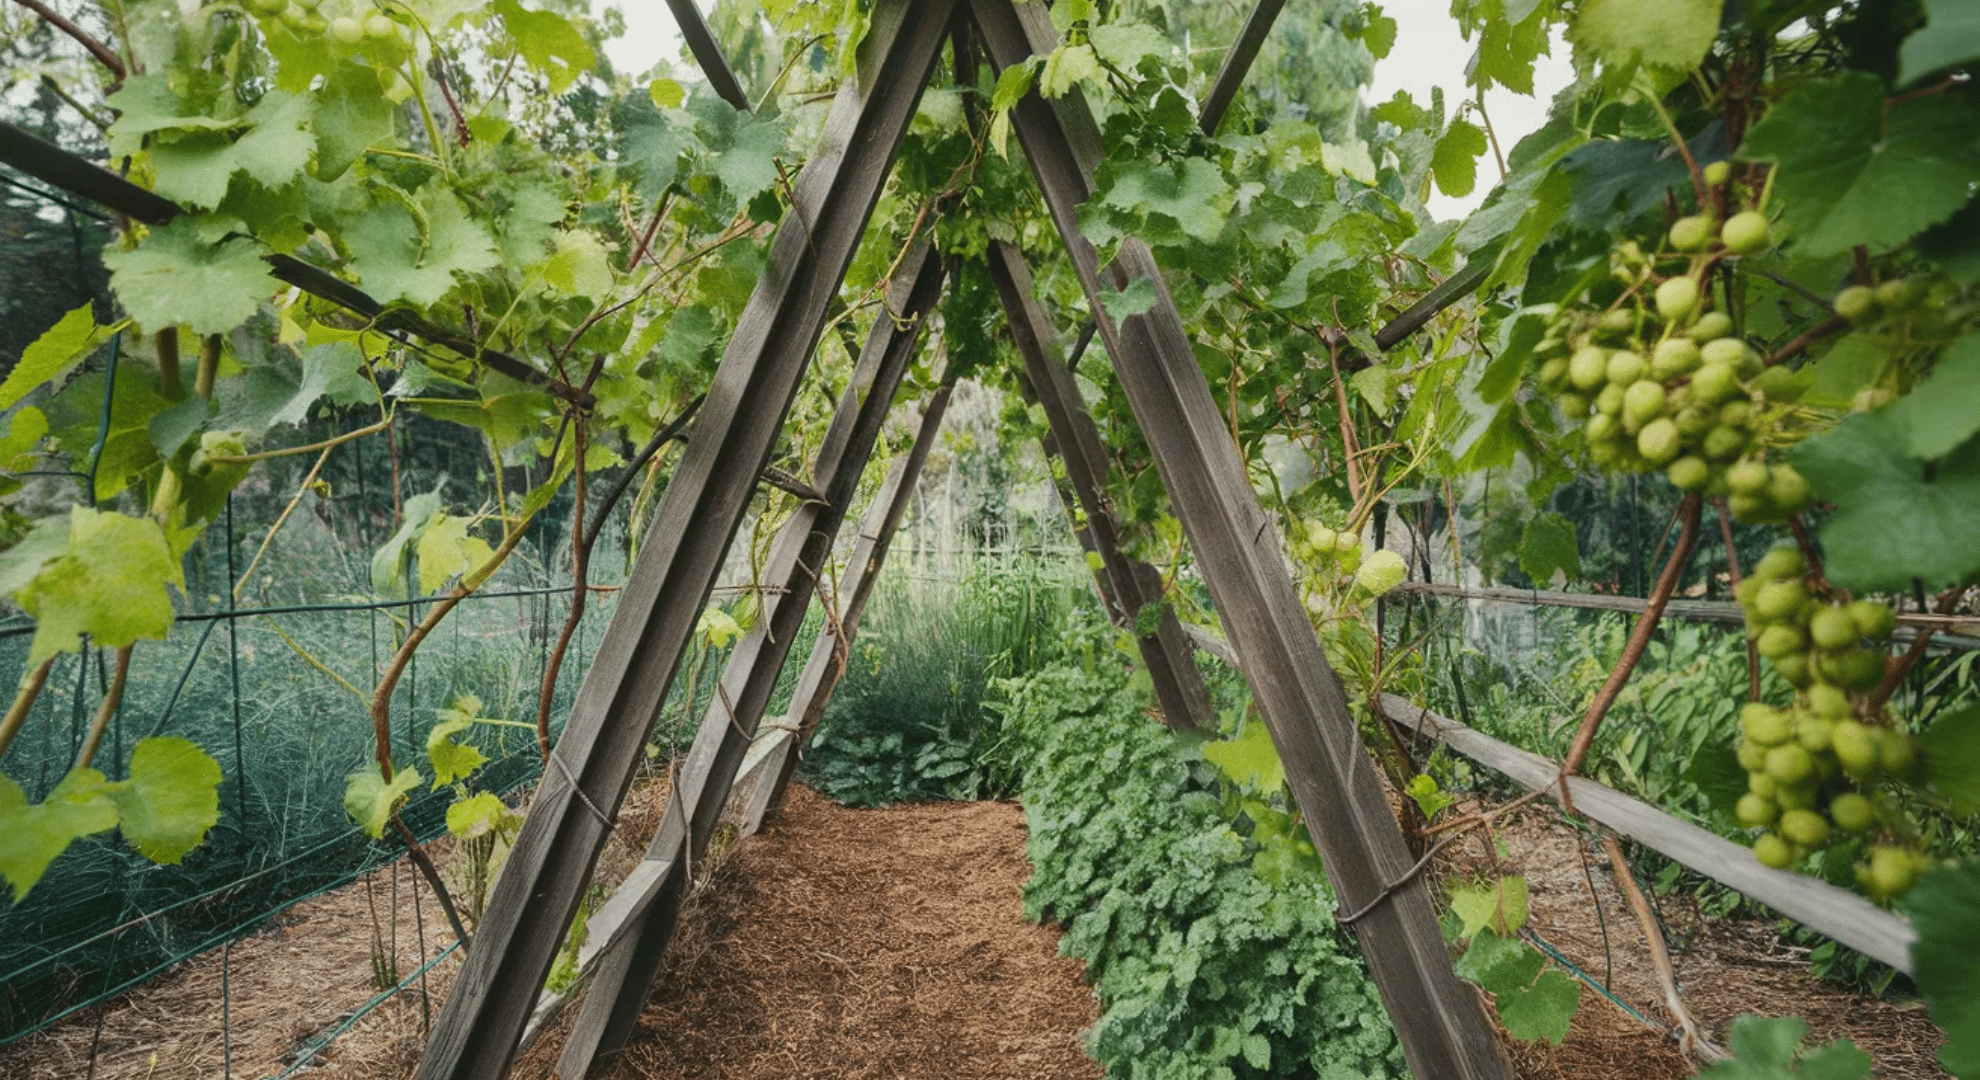
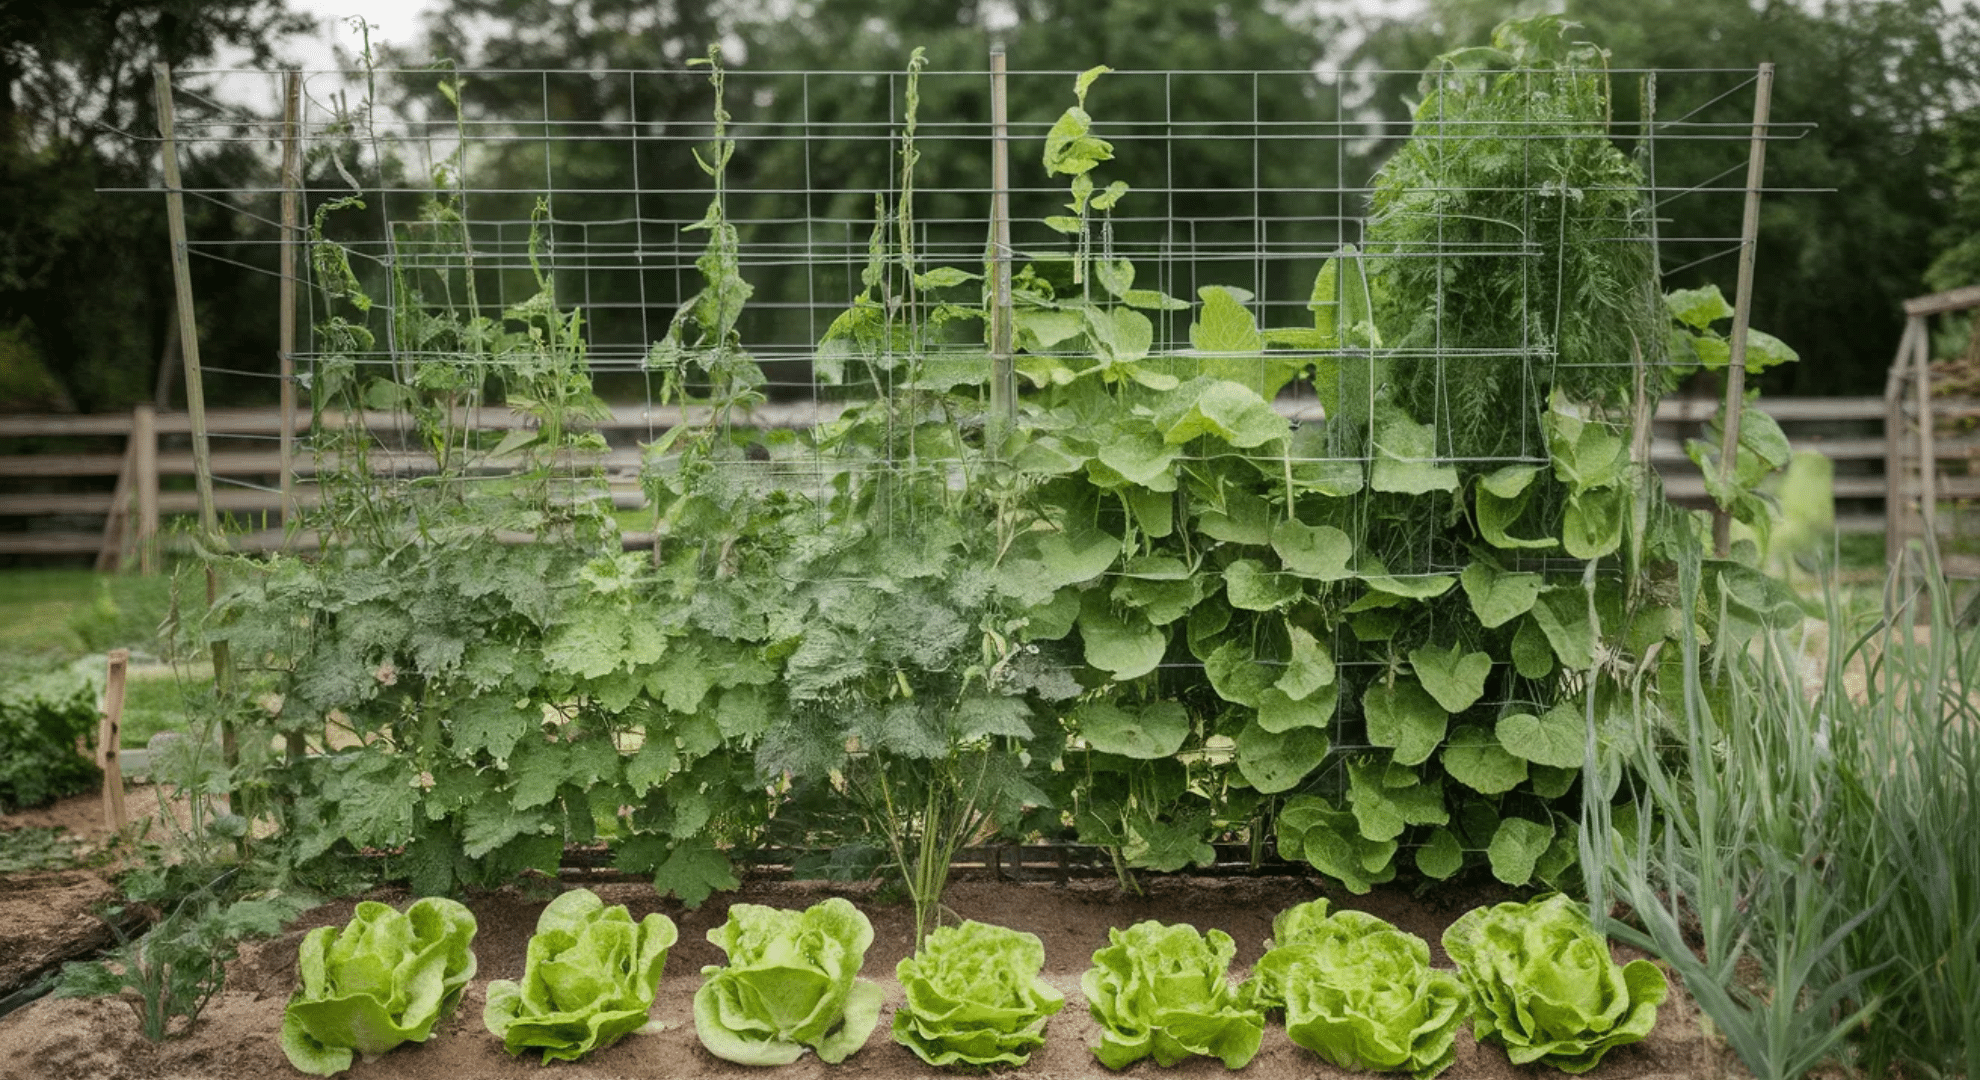
4. Vertical Gardening: Utilizing trellises and vertical structures to maximize space
Use trellises for climbers like beans, cucumbers, and peas. They save ground space and improve air circulation. Even small gardens can produce more when you grow upward.
Vegetable Garden Layout Ideas for Beginners
There’s no single “perfect” layout for everyone. Your ideal setup depends on your space, what you want to grow, and how much time you have. I’ve tried different layouts over the years, and each has its perks. Here are 30 beginner-friendly ideas to help you find what works best for your garden.
1. Classic 4×8 Raised Bed Layout
This is where most beginners start, and for good reason. A 4×8 raised bed gives you 32 square feet to work with. You can reach everything from the sides without stepping inside.
Plant taller crops like tomatoes on one end and shorter ones like lettuce on the other. It’s straightforward, manageable, and perfect for learning the basics without feeling overwhelmed by scale.
2. Square Foot Gardening Layout

Divide your bed into 1-foot squares using string or wood strips. Each square holds a different crop based on spacing needs—one tomato plant, four lettuce heads, or sixteen radishes per square.
This method prevents overcrowding and makes planning super easy. You know exactly what goes where, and there’s less waste. It’s organized, efficient, and great for beginners who want structure.
3. L-Shaped Garden Layout
If you’ve got an awkward corner or odd space, an L-shaped layout works beautifully. It hugs the edges of your yard, fence, or patio. You maximize unused areas while keeping everything accessible.
Plant taller crops on the back side and shorter ones in front. This layout looks neat, uses space wisely, and gives you more growing room than you’d think.
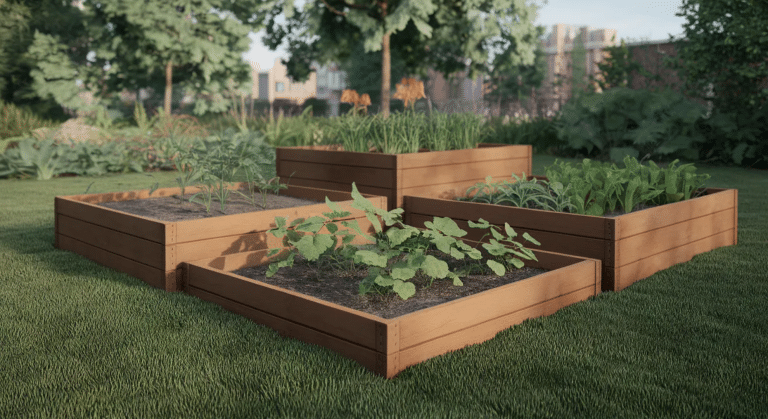
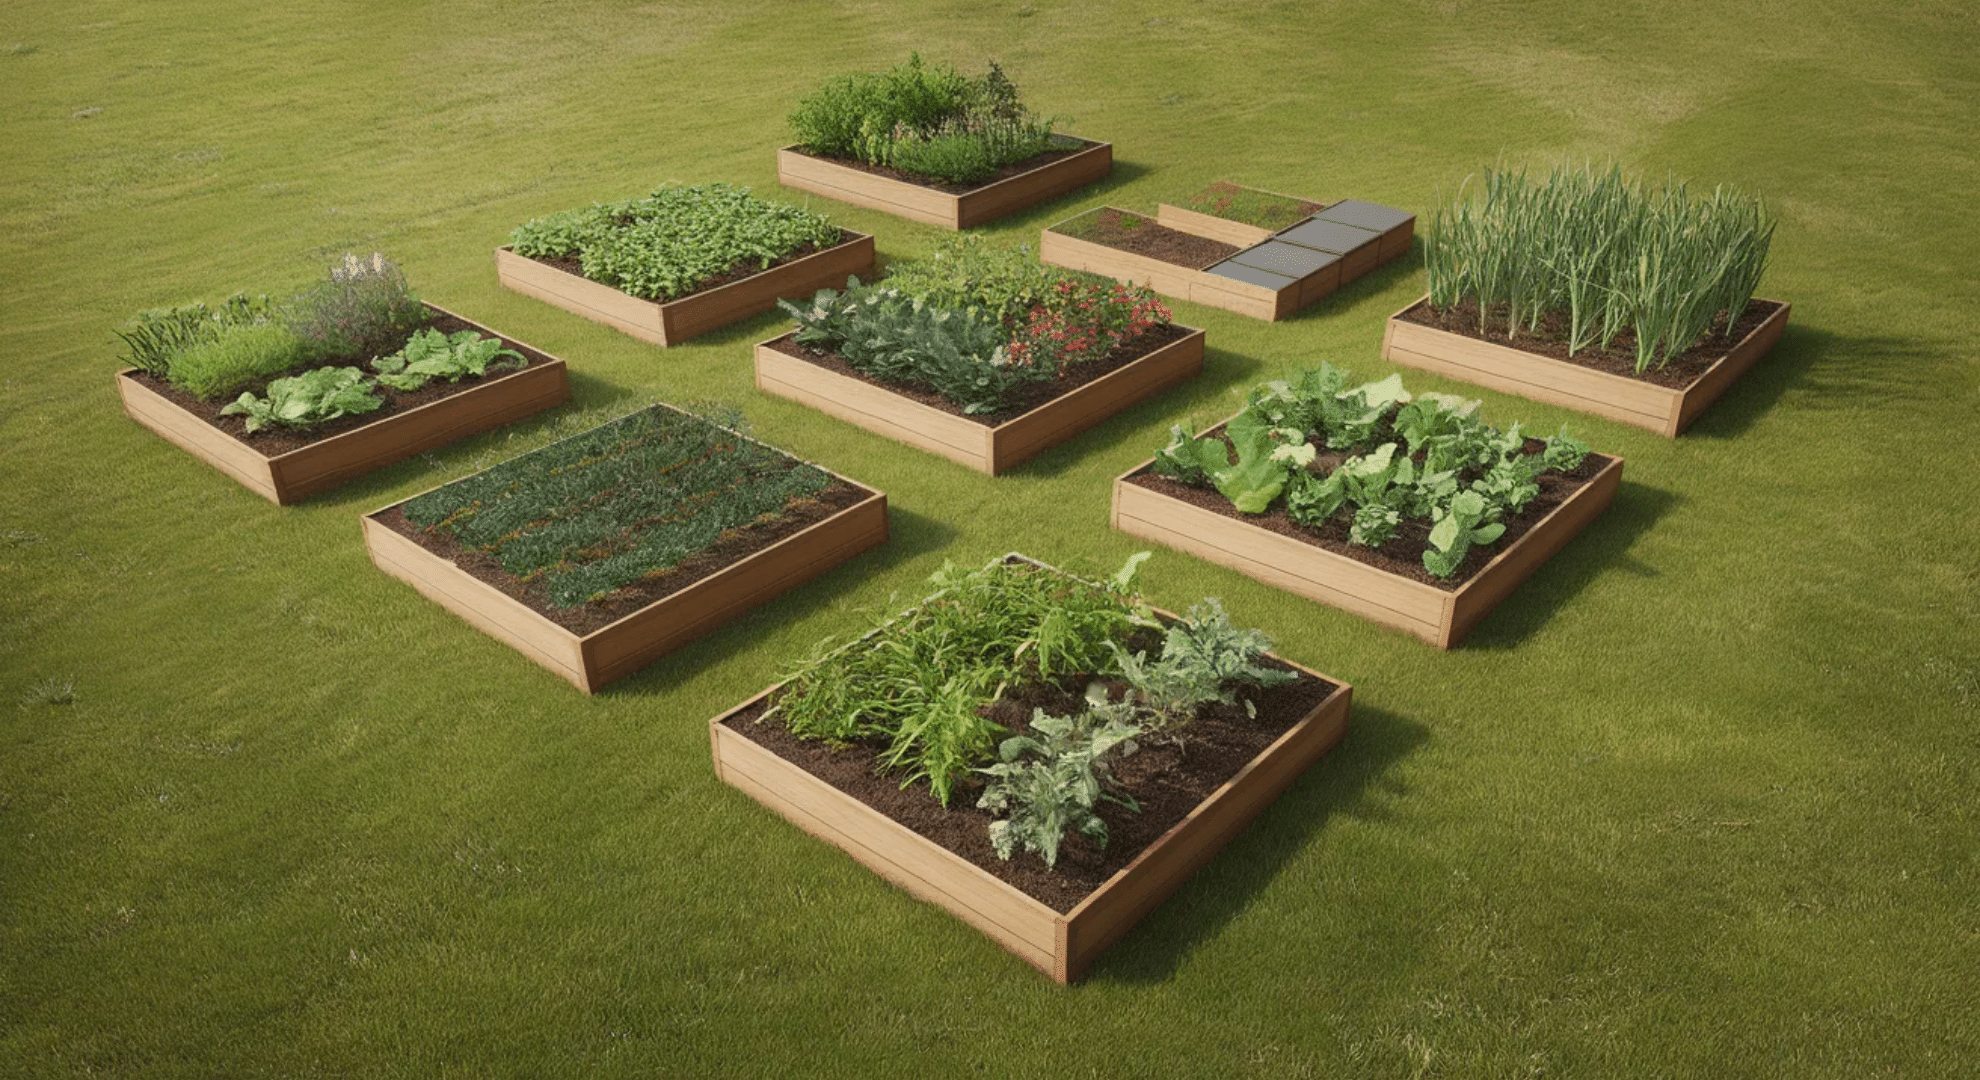
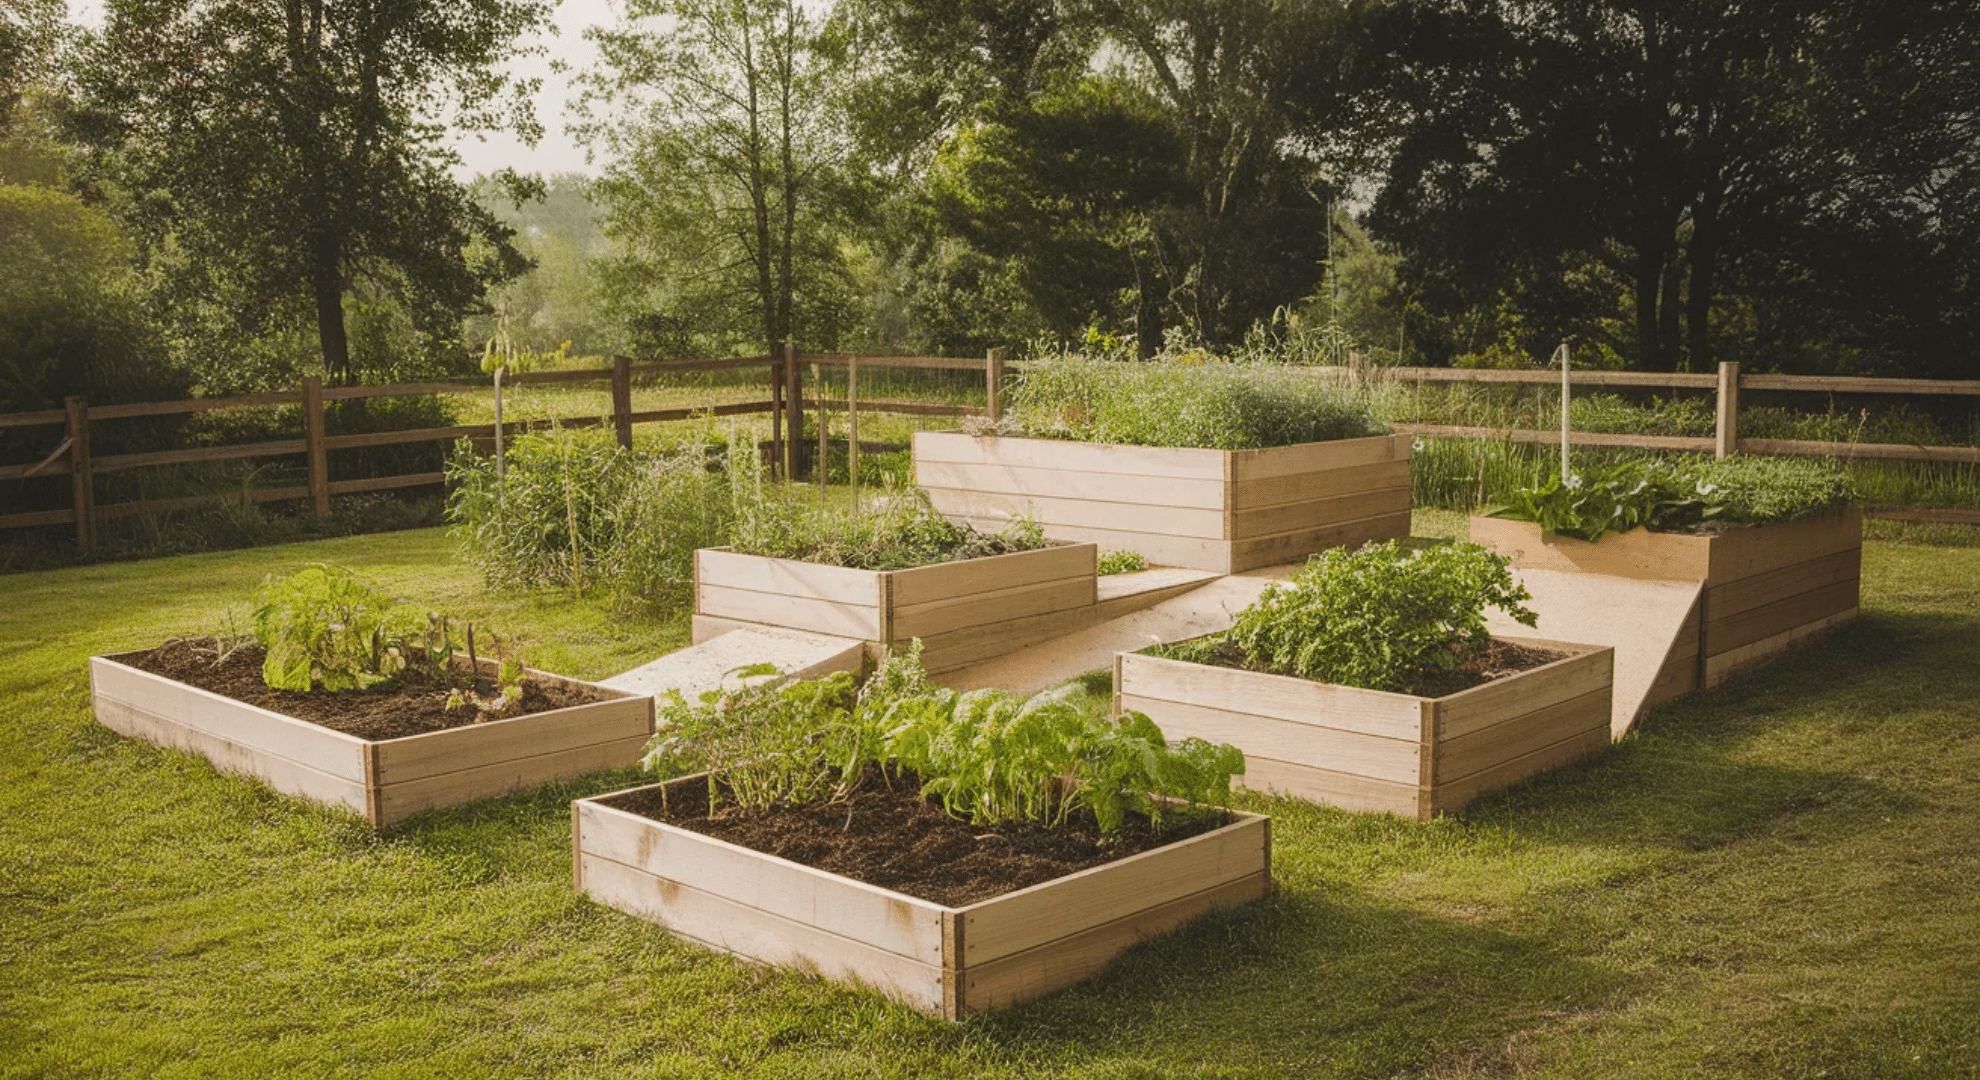
4. Multi-Bed Layout

Instead of one big bed, use multiple smaller ones. This separates heavy feeders like tomatoes from light feeders like beans. You can rotate crops more easily and manage soil health better.
Space beds 2-3 feet apart for pathways. It’s more organized, gives you flexibility, and makes maintenance less of a chore when everything’s divided up.
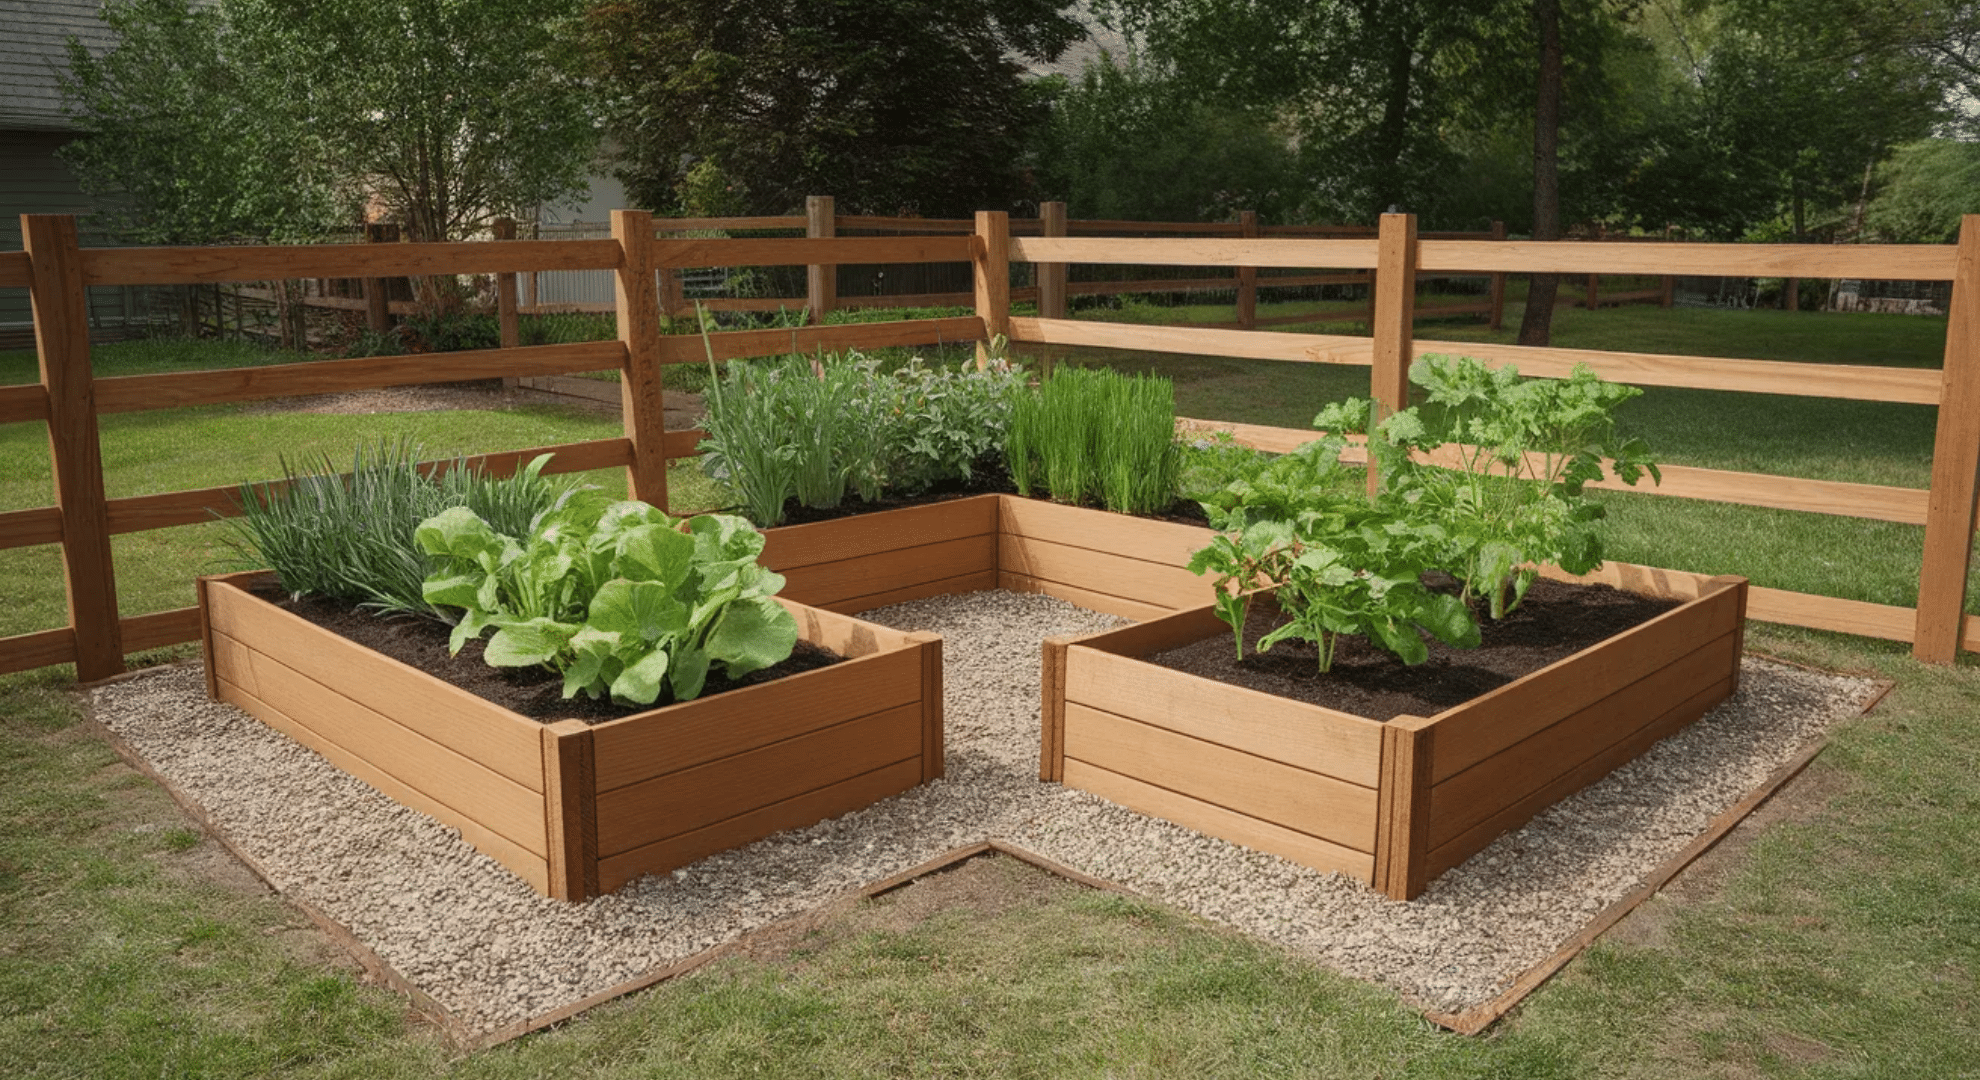
5. U-Shaped Raised Bed

A U-shaped bed wraps around you, so you’re standing in the middle with plants on three sides. Everything’s within arm’s reach. It’s perfect for smaller spaces where you want to maximize planting area without making beds too wide.
You get the benefits of multiple beds with one connected structure. Plus, it looks really tidy and intentional in your yard.
6. Spiral Layout
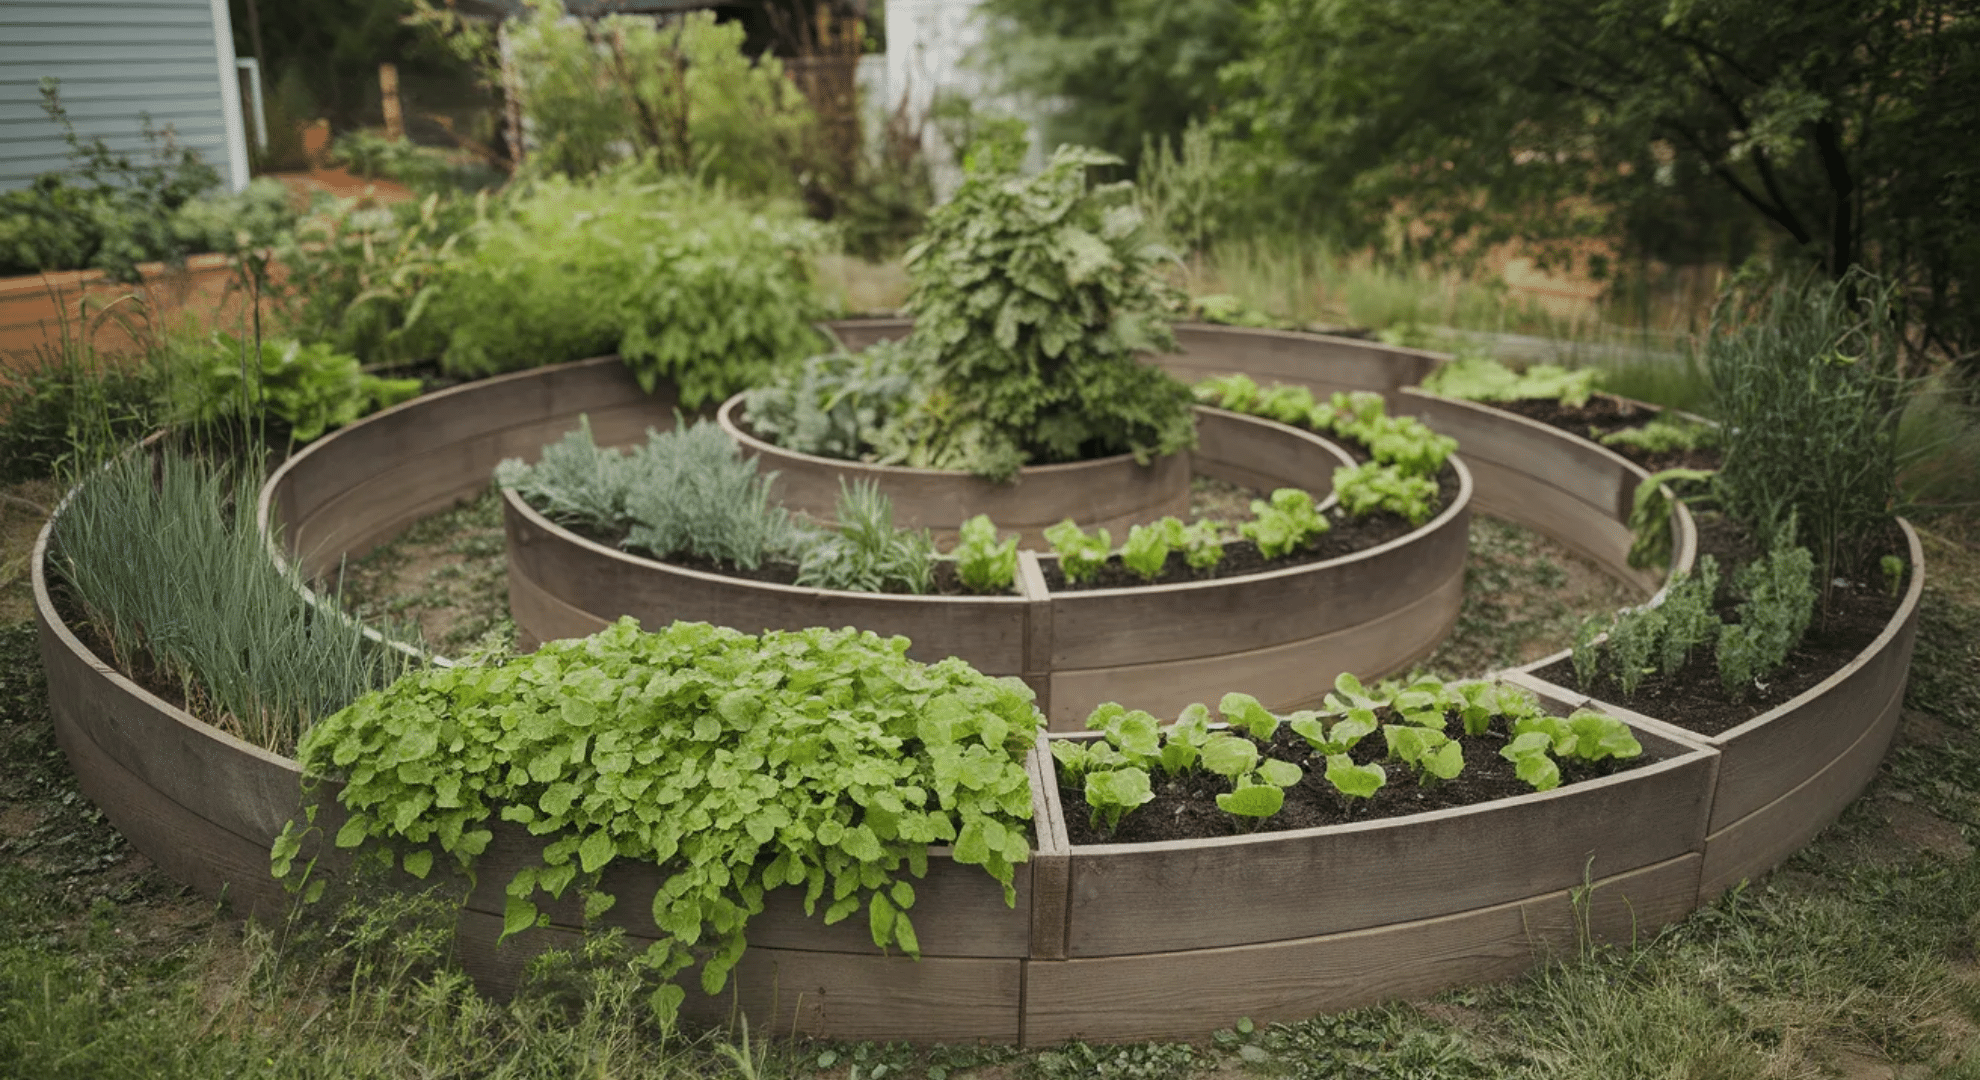
A spiral garden rises in a circular mound, creating different microclimates. The top is drier, the bottom holds more moisture. You can plant herbs, greens, and root veggies at different levels.
It’s compact, eye-catching, and makes efficient use of vertical space. I love how it looks, and it’s surprisingly functional for small yards or patios where space is tight.
7. Block Planting Layout
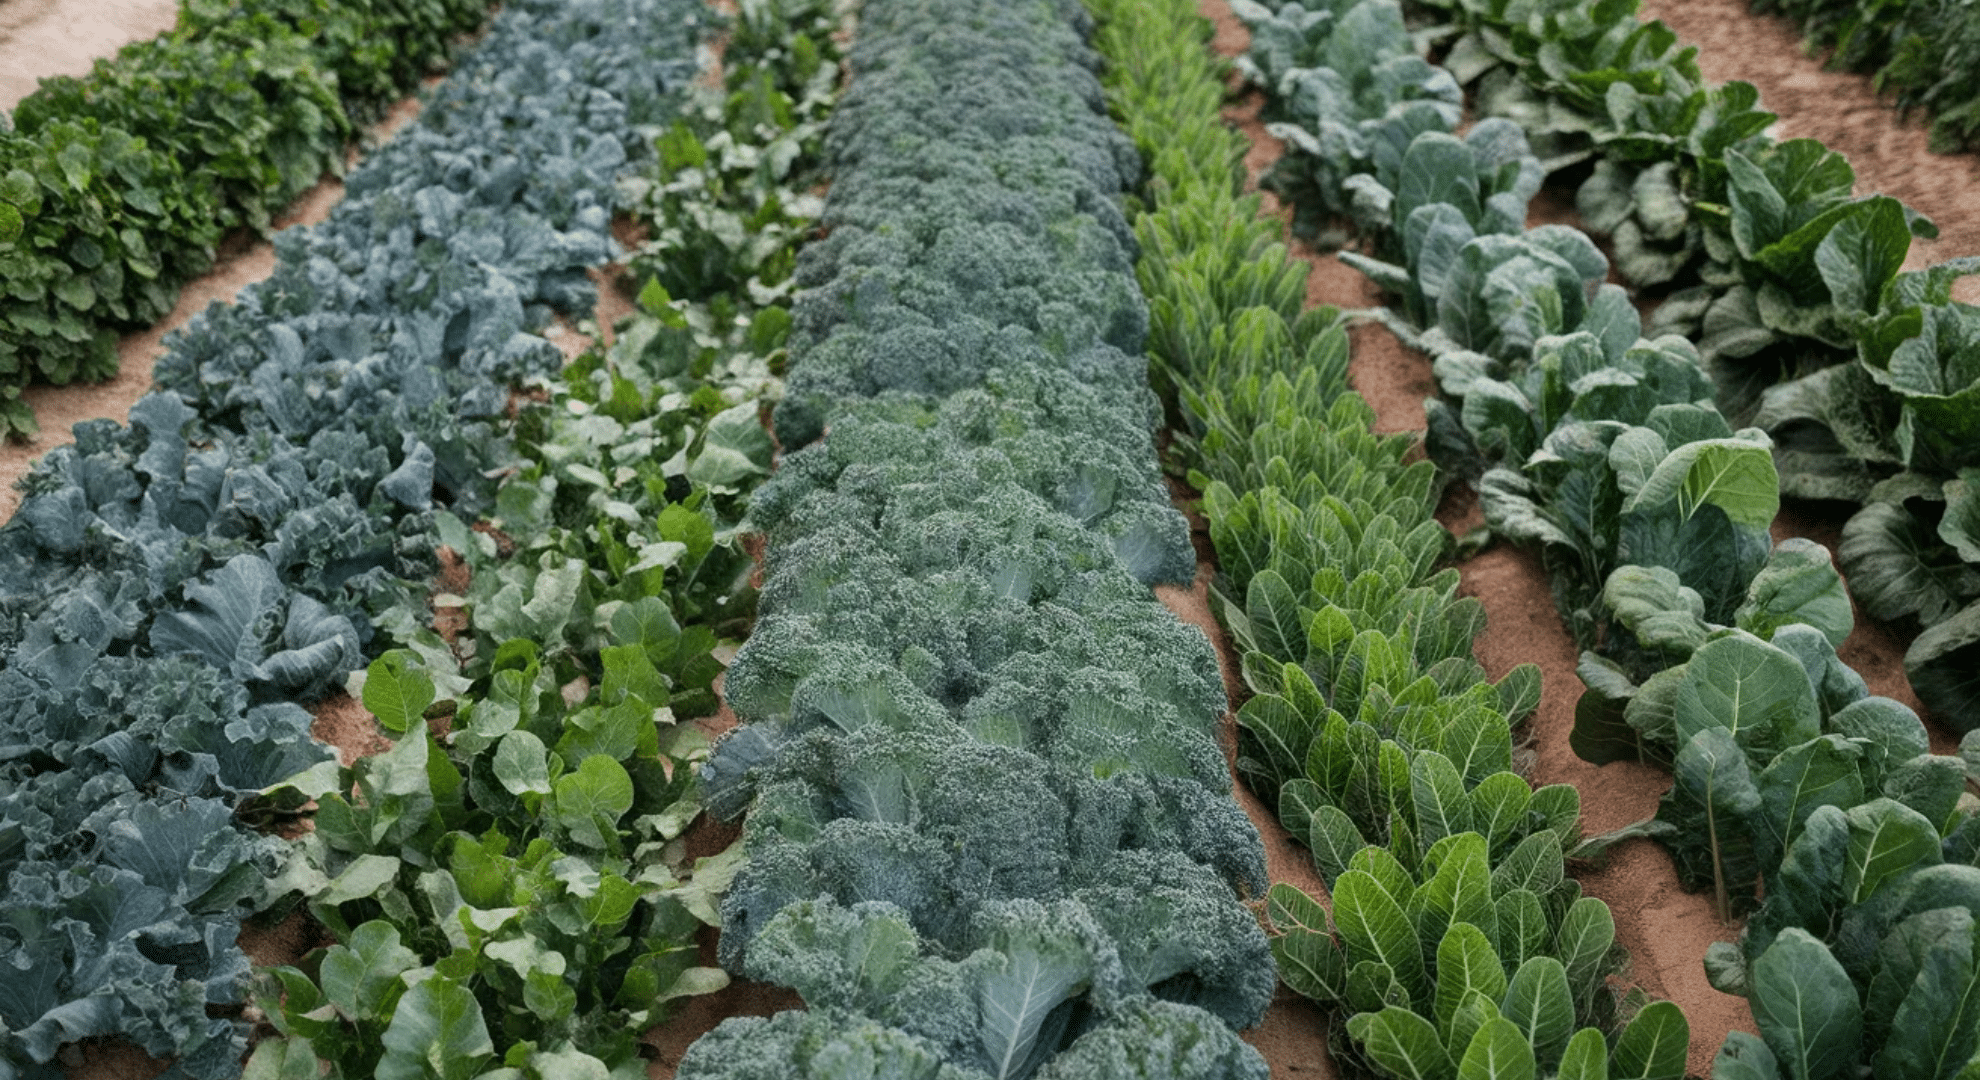
Instead of rows, plant crops in solid blocks or wide bands. This maximizes space and shades out weeds naturally as plants mature. Leaves overlap, creating a canopy that keeps moisture in and weeds down.
It works great for greens, carrots, and beets. You get higher yields per square foot, and there’s less maintenance since weeds struggle to compete with densely planted crops.
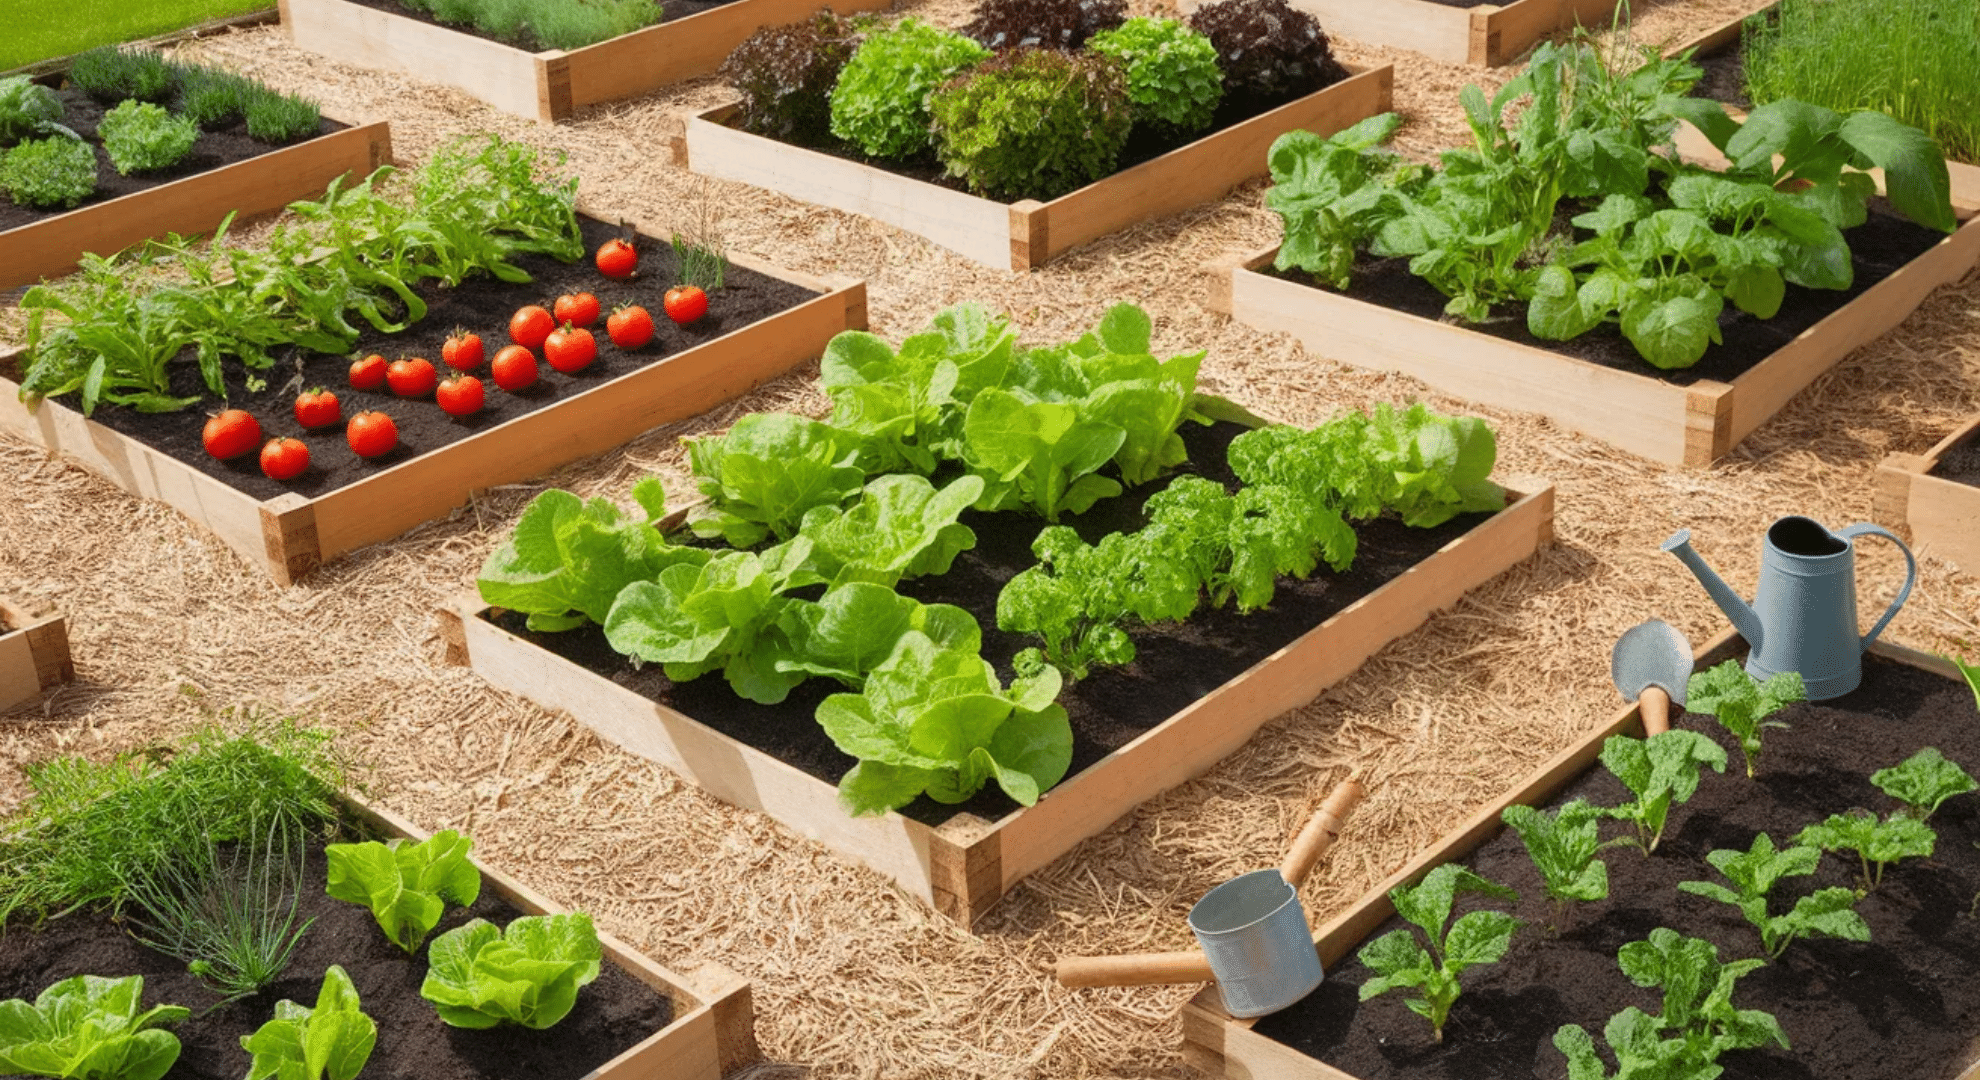
8. Row Garden Layout

If you’ve got room, traditional rows work well. Space rows 2-3 feet apart with pathways between. It’s easy to water, weed, and harvest when everything’s lined up. This layout suits in-ground gardens and gives you clear access to each crop.
It’s straightforward, familiar, and great if you’re growing larger quantities or using tools like hoes for maintenance.
9. Vertical Garden Layout
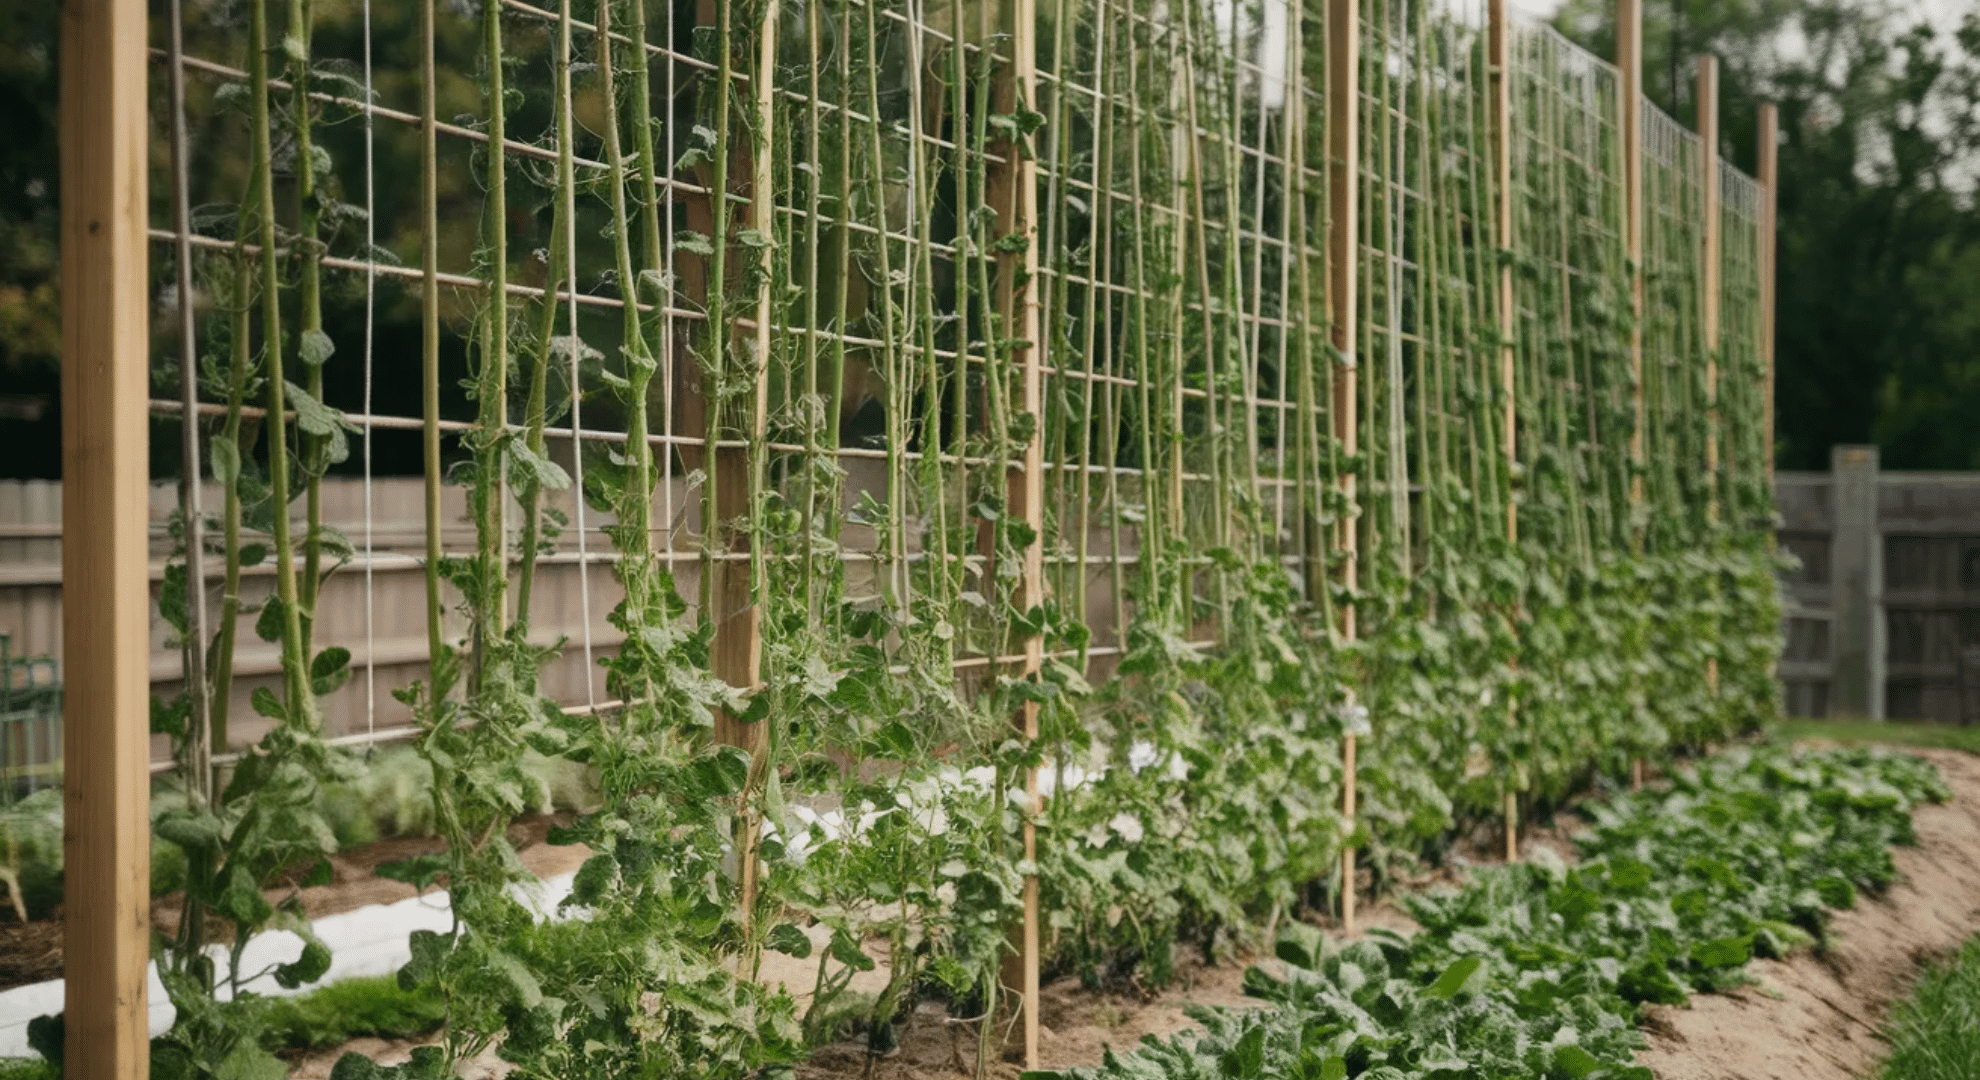
Use trellises, stakes, or cages to grow crops upward instead of outward. Beans, peas, cucumbers, and small melons thrive vertically. You save ground space for other plants and improve air circulation, which reduces disease.
Harvesting’s easier too since everything’s at eye level. Even tiny gardens can produce more when you take advantage of vertical space instead of just horizontal.
10. Companion Planting Layout
Pair plants that benefit each other. Tomatoes with basil, carrots with onions, beans with corn. Some plants repel pests or improve soil for their neighbors. This layout reduces pest problems naturally and maximizes productivity.
You’re working with nature instead of against it. Plan your layout around these partnerships, and you’ll see healthier plants and fewer issues throughout the growing season.
11. Circular Garden Layout
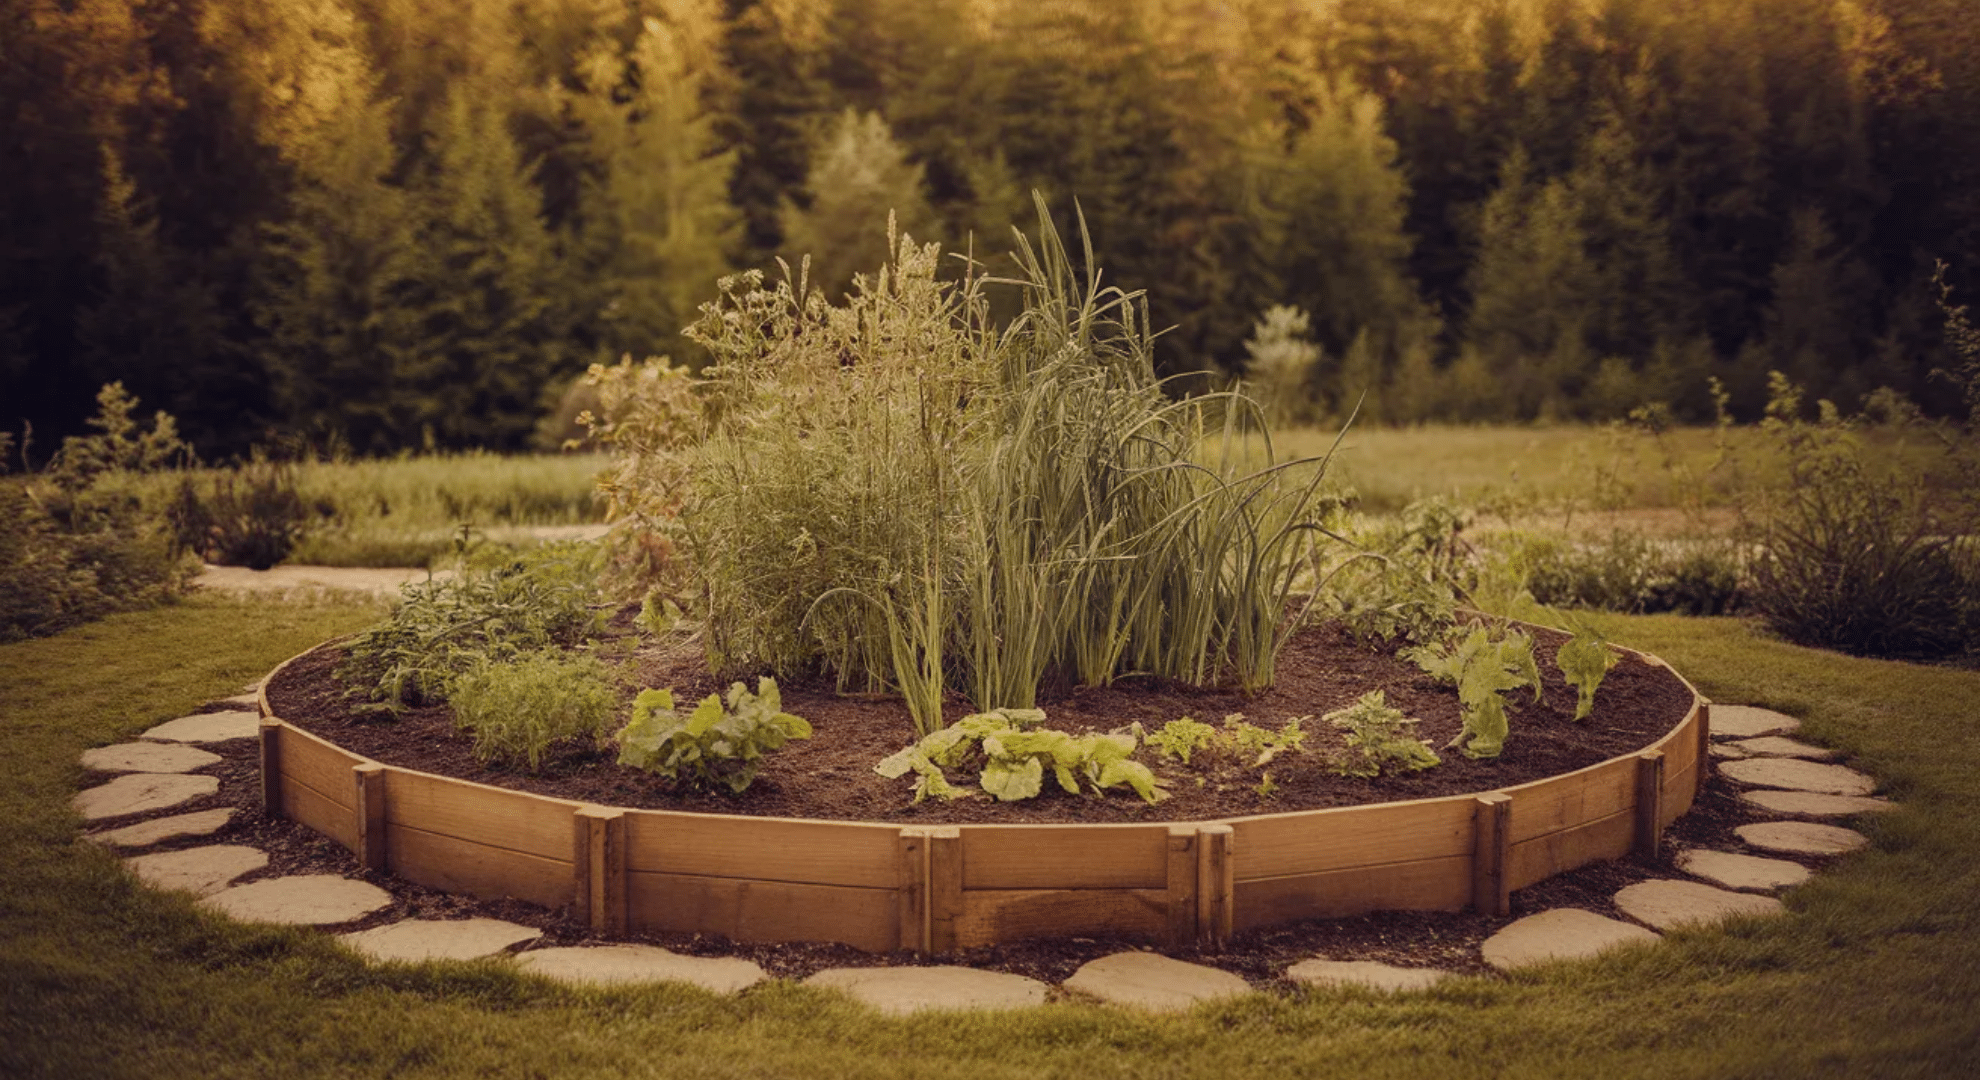
Circular beds look beautiful and break up the typical rectangle look. Plant taller crops in the center and shorter ones around the edges. You can access the bed from all sides. It’s perfect for ornamental vegetable gardens or focal points in your yard.
The shape naturally draws the eye and creates a softer, more inviting garden space that still functions well.
12. Mixed Bed Layout
Mix vegetables with flowers and herbs in the same bed. Marigolds deter pests, basil attracts pollinators, and everything looks gorgeous together. This layout mimics natural ecosystems and creates a healthier growing environment.
You get food, beauty, and pest control all in one space. It’s less rigid than single-crop beds and way more interesting to look at and tend.
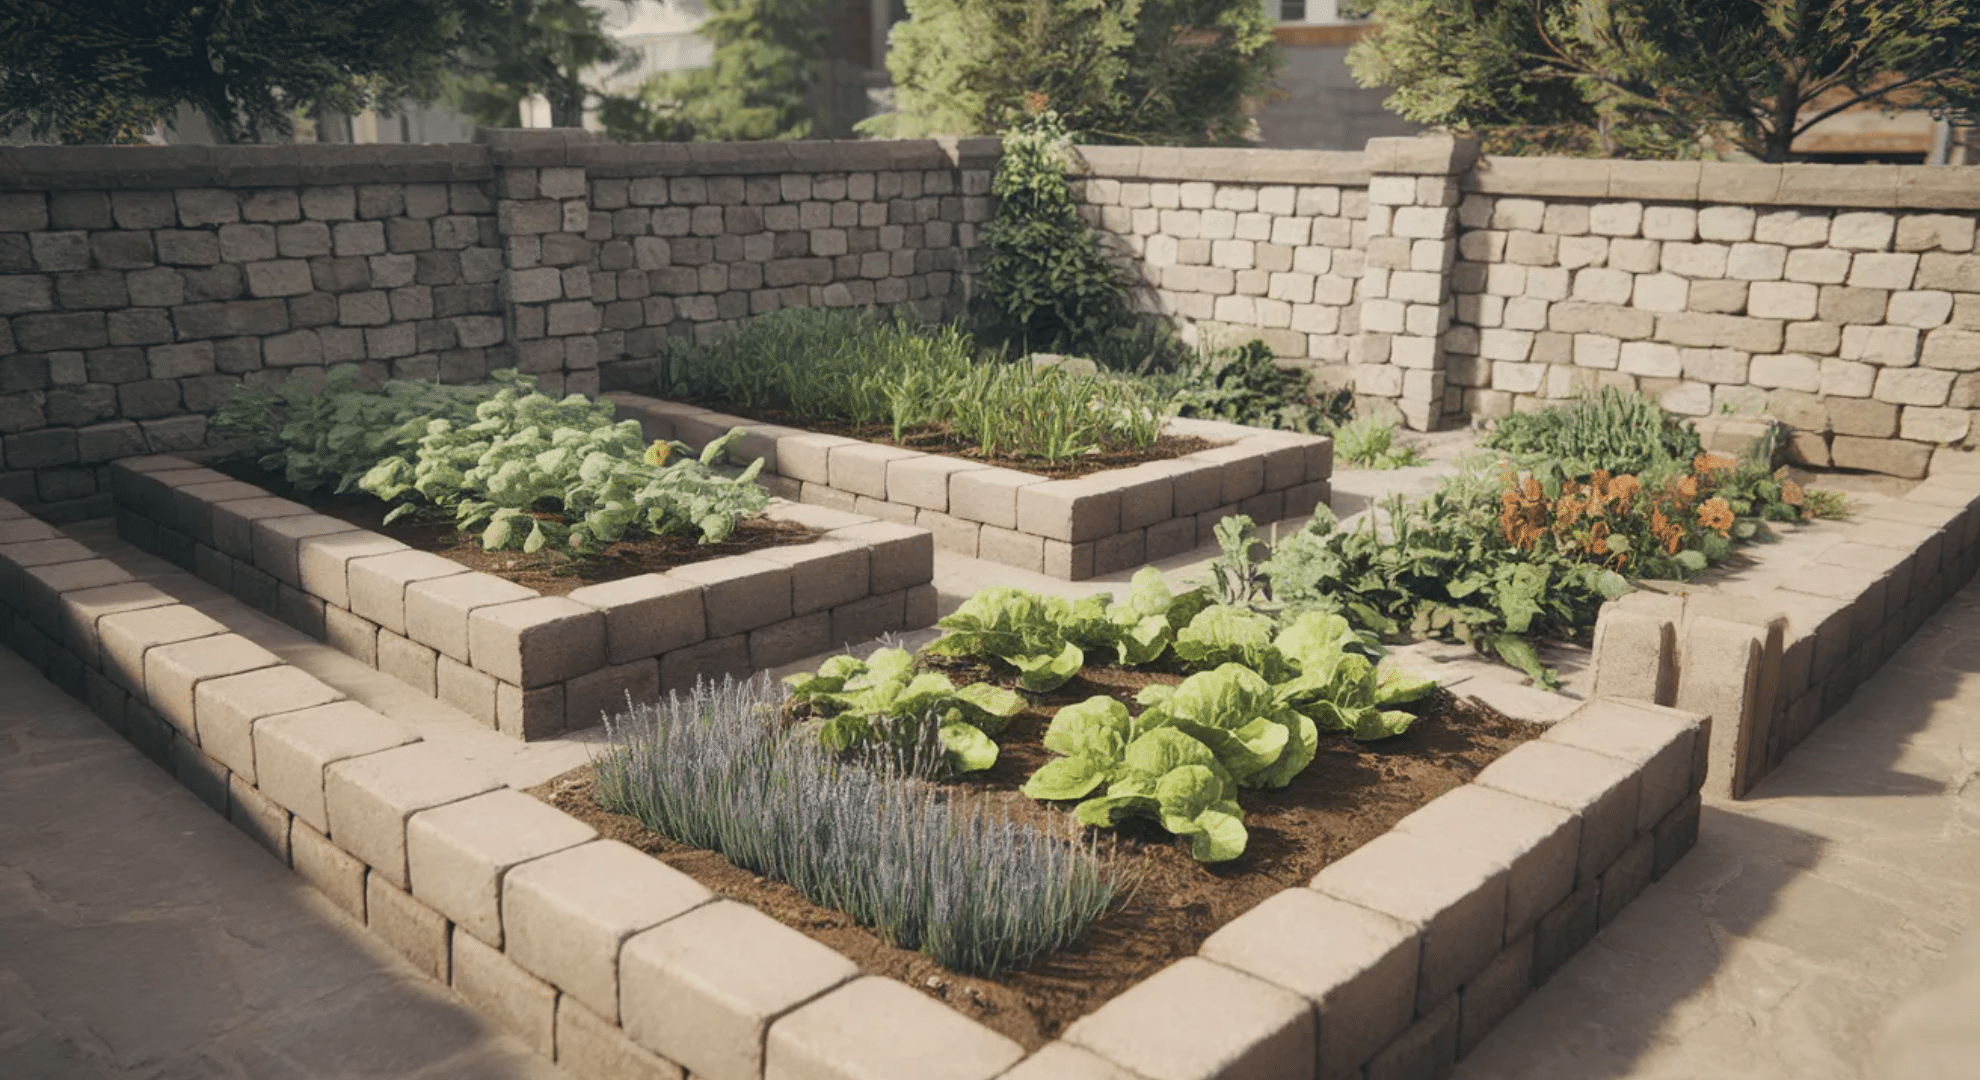
13. Raised Beds with Pathways
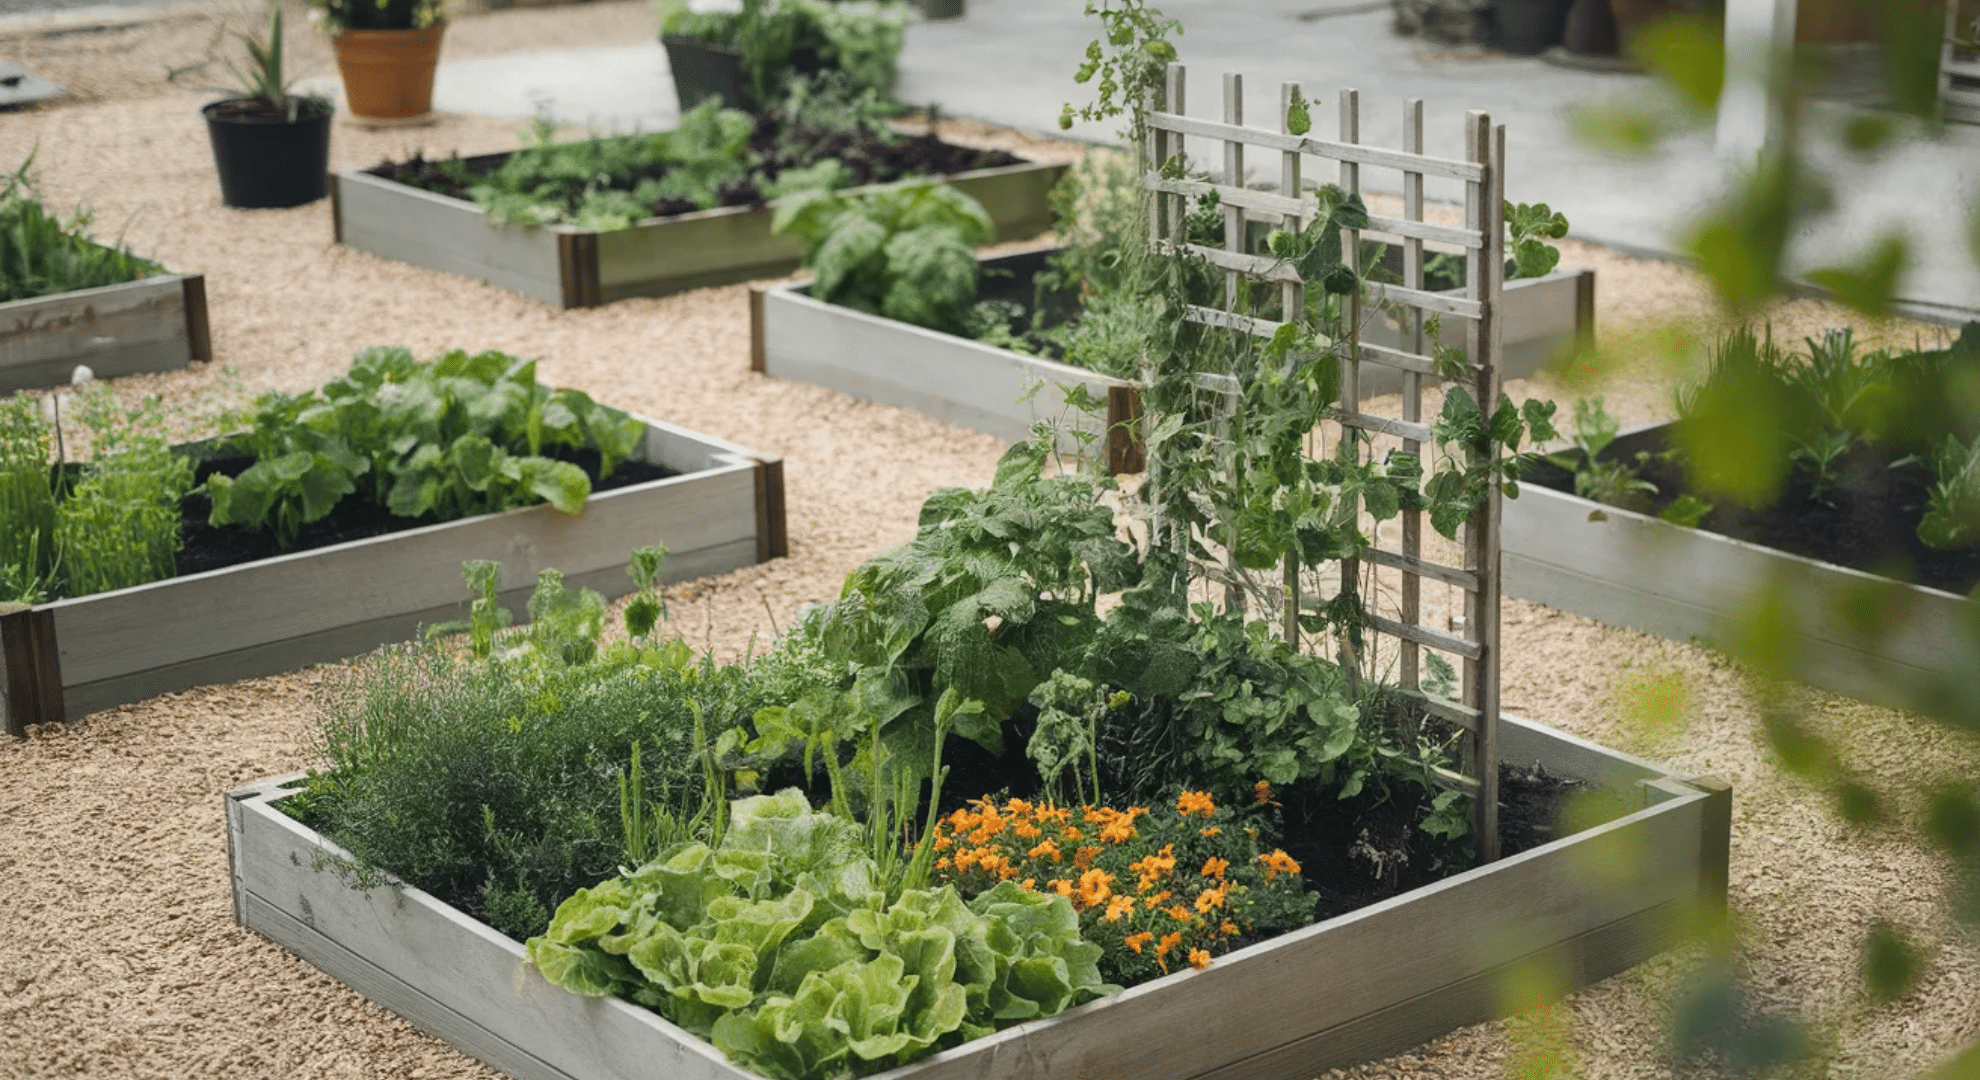
Build multiple raised beds with dedicated pathways between them. Pathways keep soil from getting compacted and make it easy to move around with tools or a wheelbarrow. Use mulch, gravel, or stepping stones for pathways.
This setup keeps everything organized, accessible, and prevents you from accidentally stepping on plants. It’s functional, looks professional, and makes gardening less physically demanding.
14. Trellis-Tower Layout
Install tall trellises or tower structures in your garden for vining crops. A-frame trellises work great in the center of beds with plants on both sides. Towers support multiple plants in a small footprint.
This maximizes your vertical space and keeps sprawling plants contained. Everything’s easier to harvest, and air flows better around plants, reducing disease and keeping your garden tidy.
15. Wicking Bed Layout
Wicking beds have a water reservoir at the bottom that pulls moisture up through the soil. You water less frequently since the bed draws from the reservoir. It’s perfect for hot climates or if you travel.
Plants get consistent moisture, which means better growth and less stress. Setup takes more effort initially, but the time you save watering makes it worth it for busy gardeners.
16. Vertical and Horizontal Mixed Layout
Mix ground-level crops with vertical ones in the same bed. Plant lettuce, radishes, or carrots at the base while beans or cucumbers climb trellises above. This layered approach doubles your harvest from the same footprint.
The vertical plants provide afternoon shade for heat-sensitive greens below. You’re using every inch ground and air efficiently. It’s smart planning that gives you variety and productivity without needing more garden space.
17. Modular Garden Design
Start with a few small beds, then add more as you gain confidence and time. Each bed is its own module; maybe 3×3 or 4×4 feet. You can rearrange them, add new ones, or remove underperforming sections without disrupting your whole garden.
It’s flexible and low-pressure. You’re not locked into one massive setup. This approach grows with you, literally, and lets you experiment without major commitment.
18. Patio Garden Layout
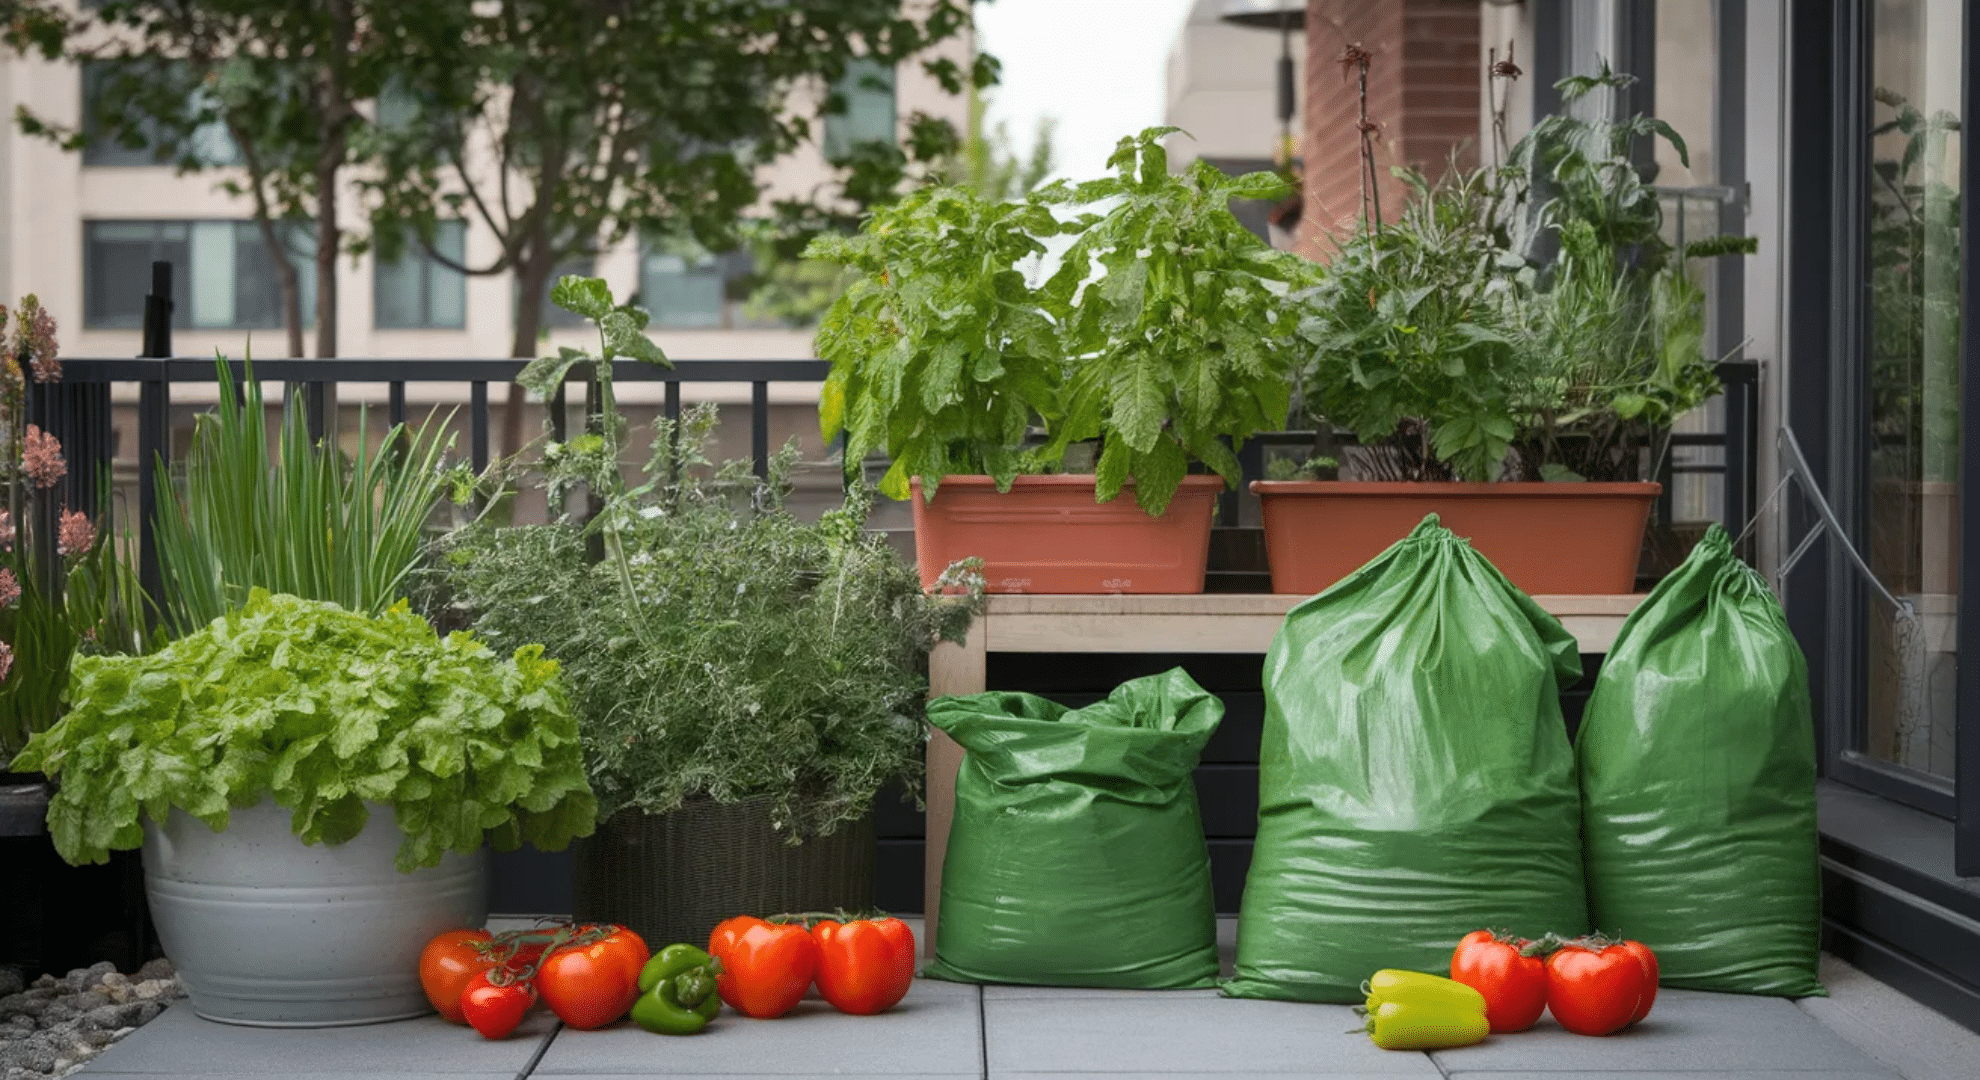
No yard? No problem. Use containers, grow bags, or small raised beds on your patio or balcony. Choose compact varieties like cherry tomatoes, peppers, and herbs. Arrange pots by height and sunlight needs.
Add a small trellis for vertical interest. Even tiny spaces can produce fresh food. I’ve grown surprising amounts in limited areas, it just takes smart container choices and regular watering.
19. Geometric Grid Layout
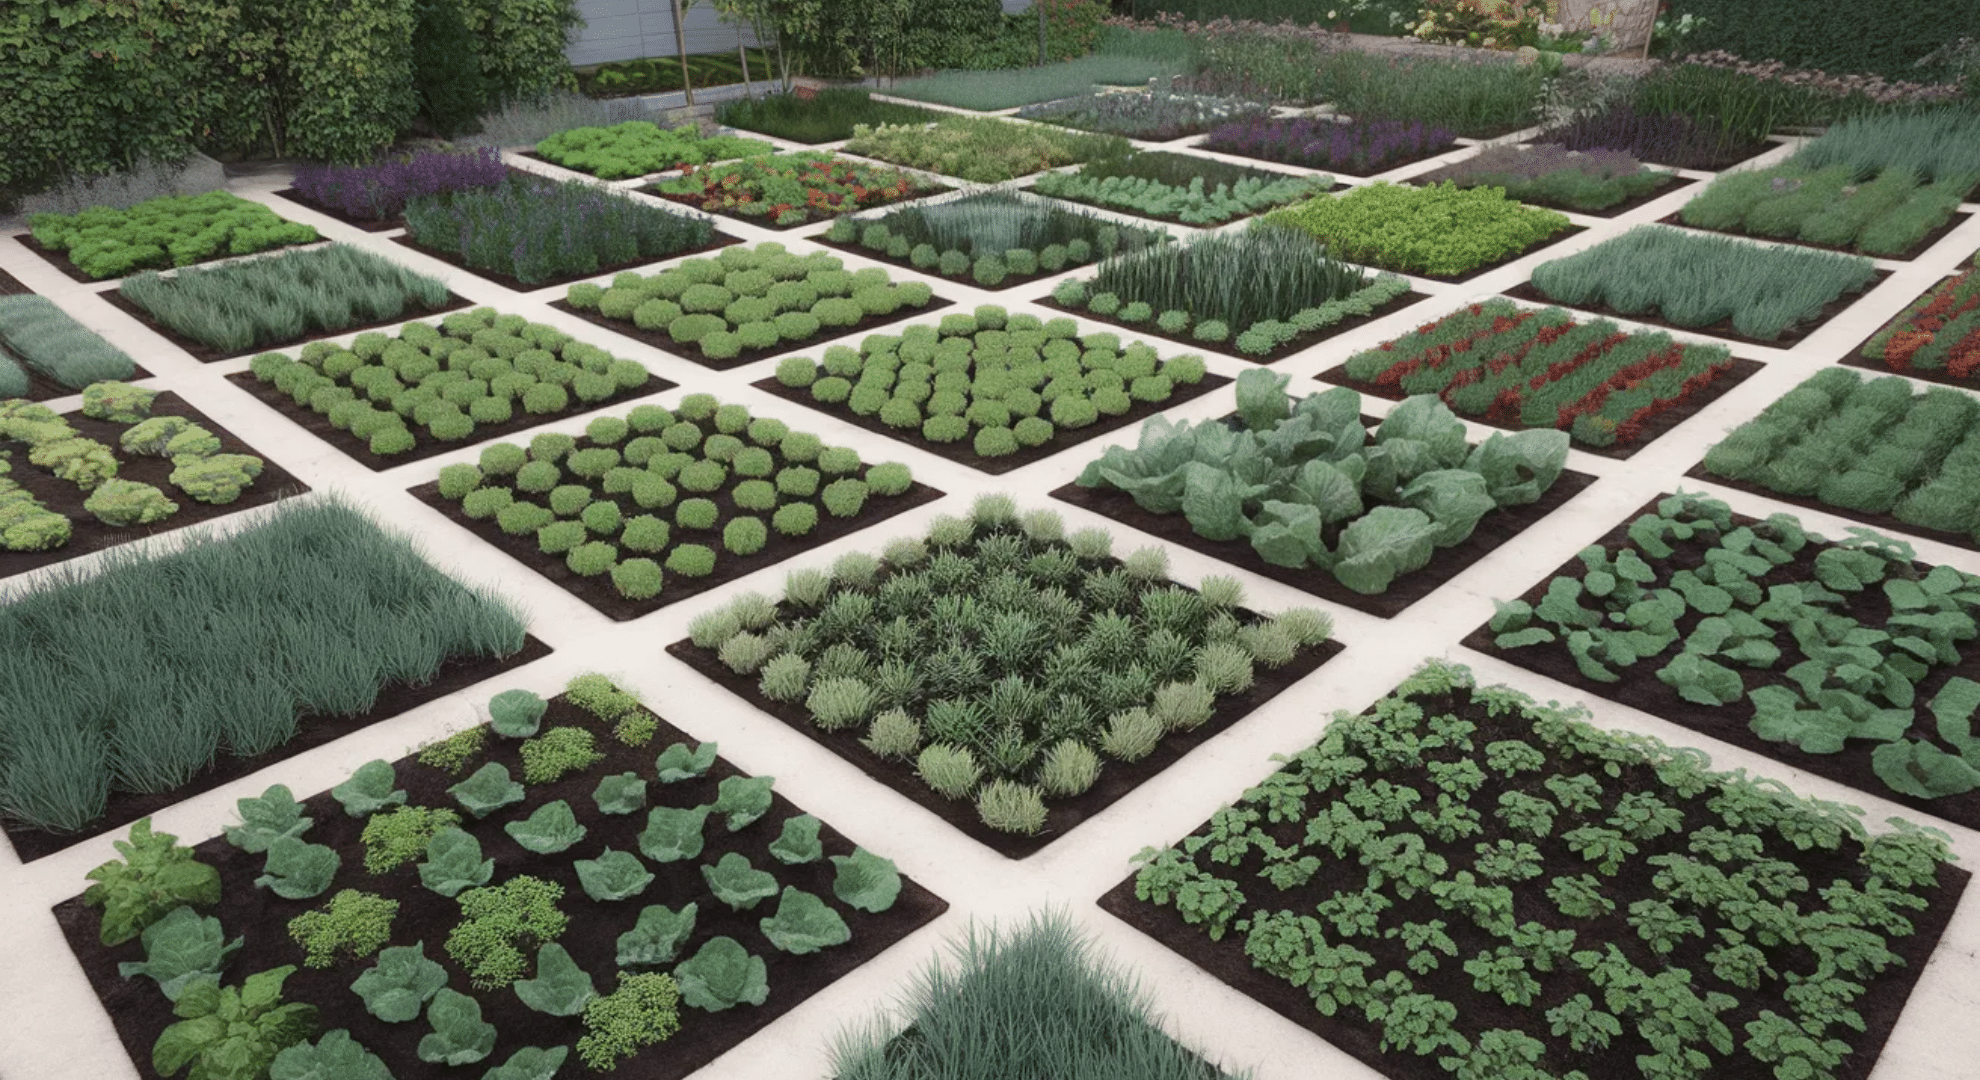
Lay out your beds in squares, rectangles, or triangles arranged in a precise grid. It looks intentional and polished while maximizing planting space. Each section can hold different crops, making rotation easy.
The symmetry helps you track what’s planted where. This layout appeals to anyone who loves order and wants their garden to look as good as it produces. Function meets visual appeal perfectly here.
20. Walled Garden Layout
Surround your beds with low walls made from stone, brick, or wood. Walls provide wind protection, retain heat, and keep critters out. They also give you a defined space that feels intentional and contained.
Plants inside benefit from the microclimate, walls absorb daytime heat and release it at night. It’s especially useful in cooler climates where extending the season matters for tender crops.
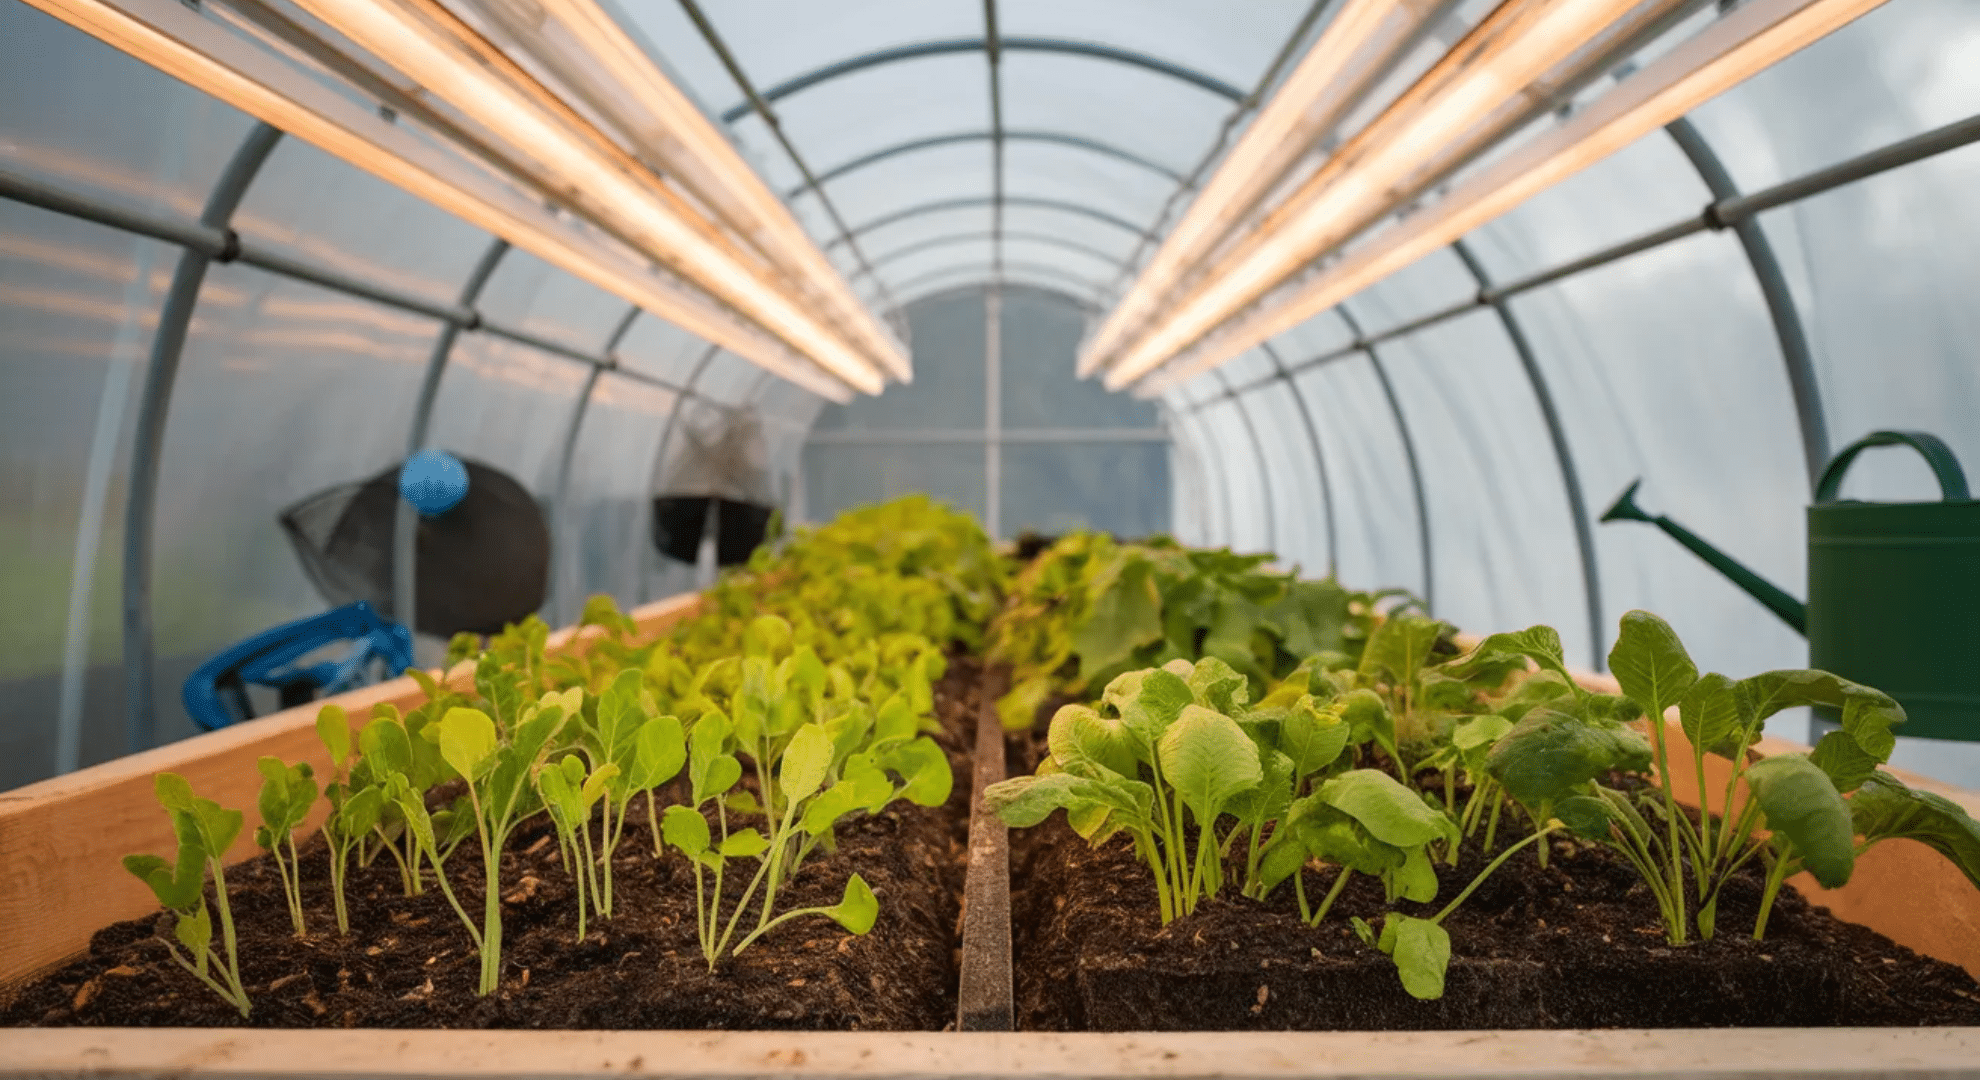
21. Greenhouse Layout
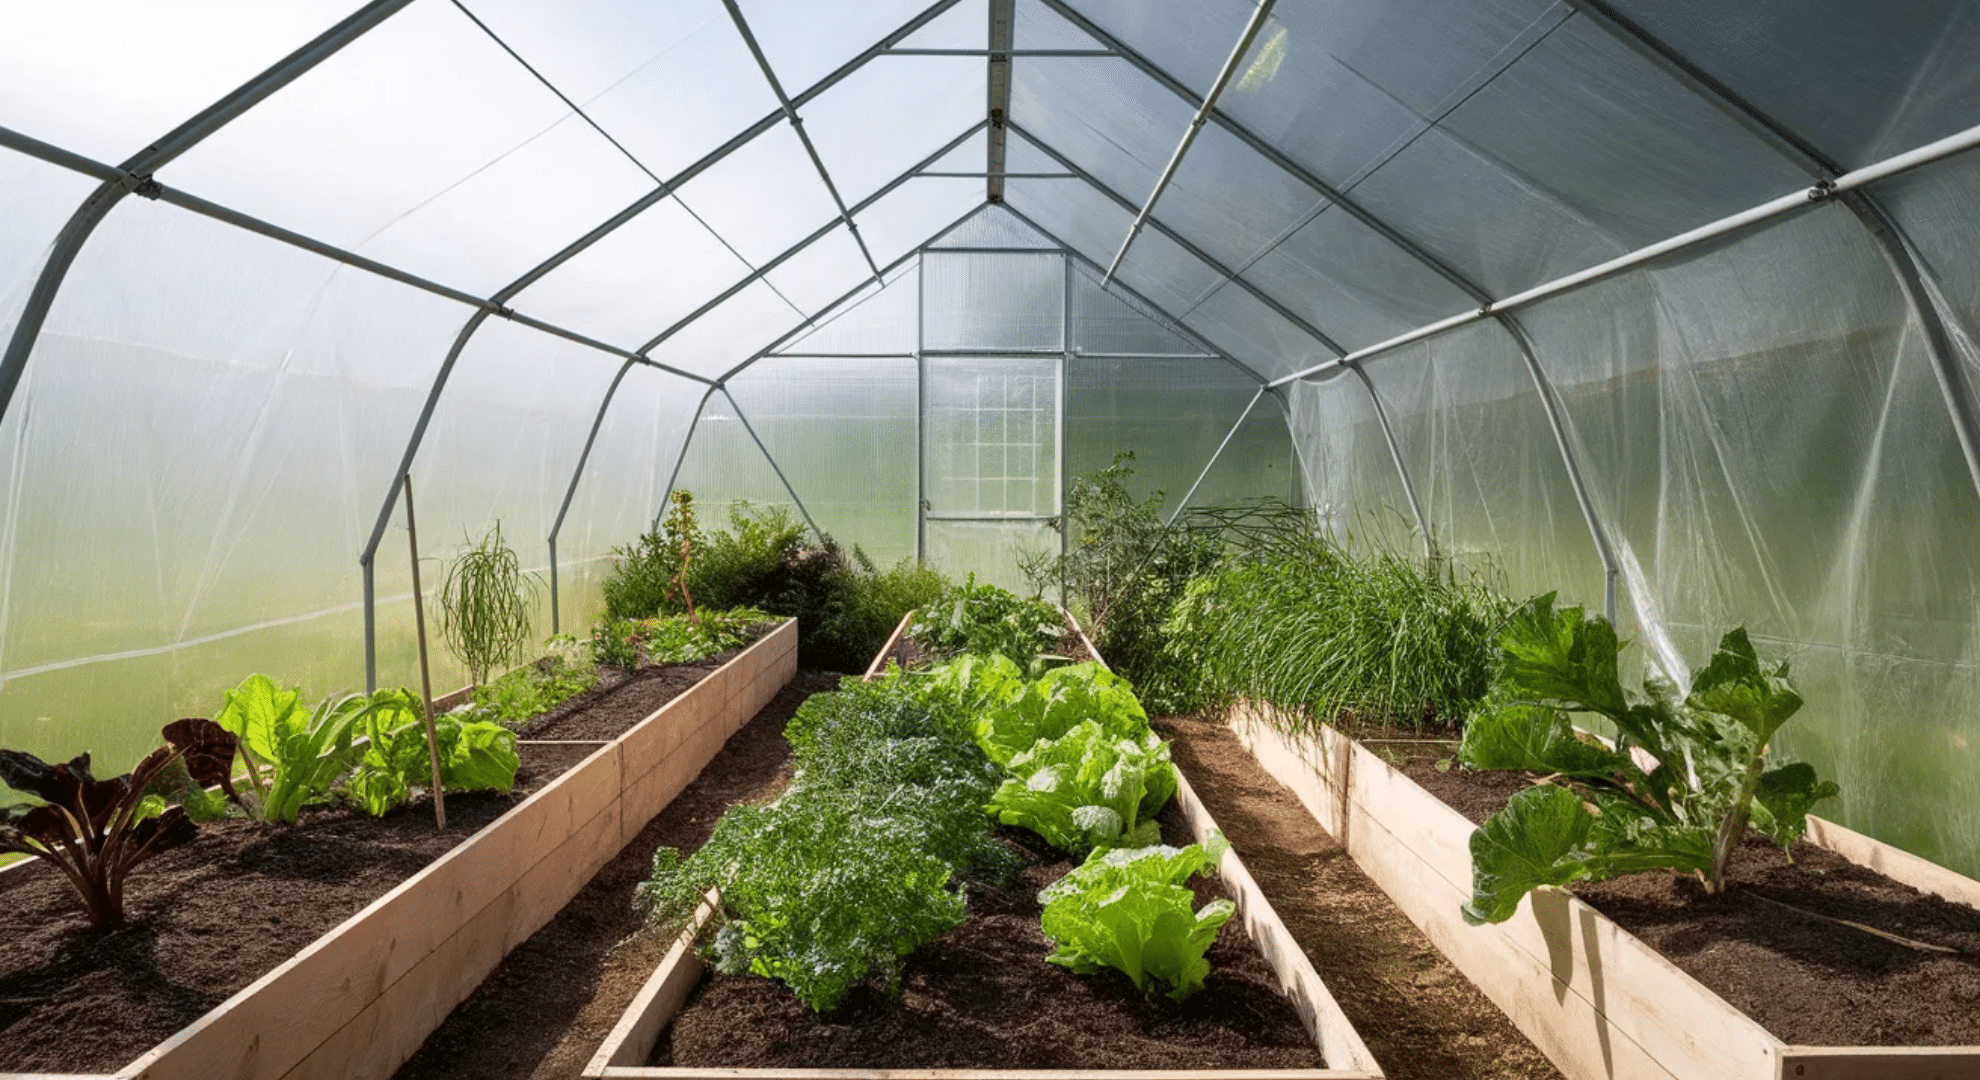
Even a small greenhouse extends your growing season dramatically. Arrange beds or benches inside for maximum light exposure. You control temperature, humidity, and pests better than outdoor gardens.
Start seedlings early, grow tender crops in cold months, or overwinter herbs. Greenhouses require investment upfront but pay off if you want fresh produce year-round or live somewhere with harsh winters.
22. Terraced Garden Layout
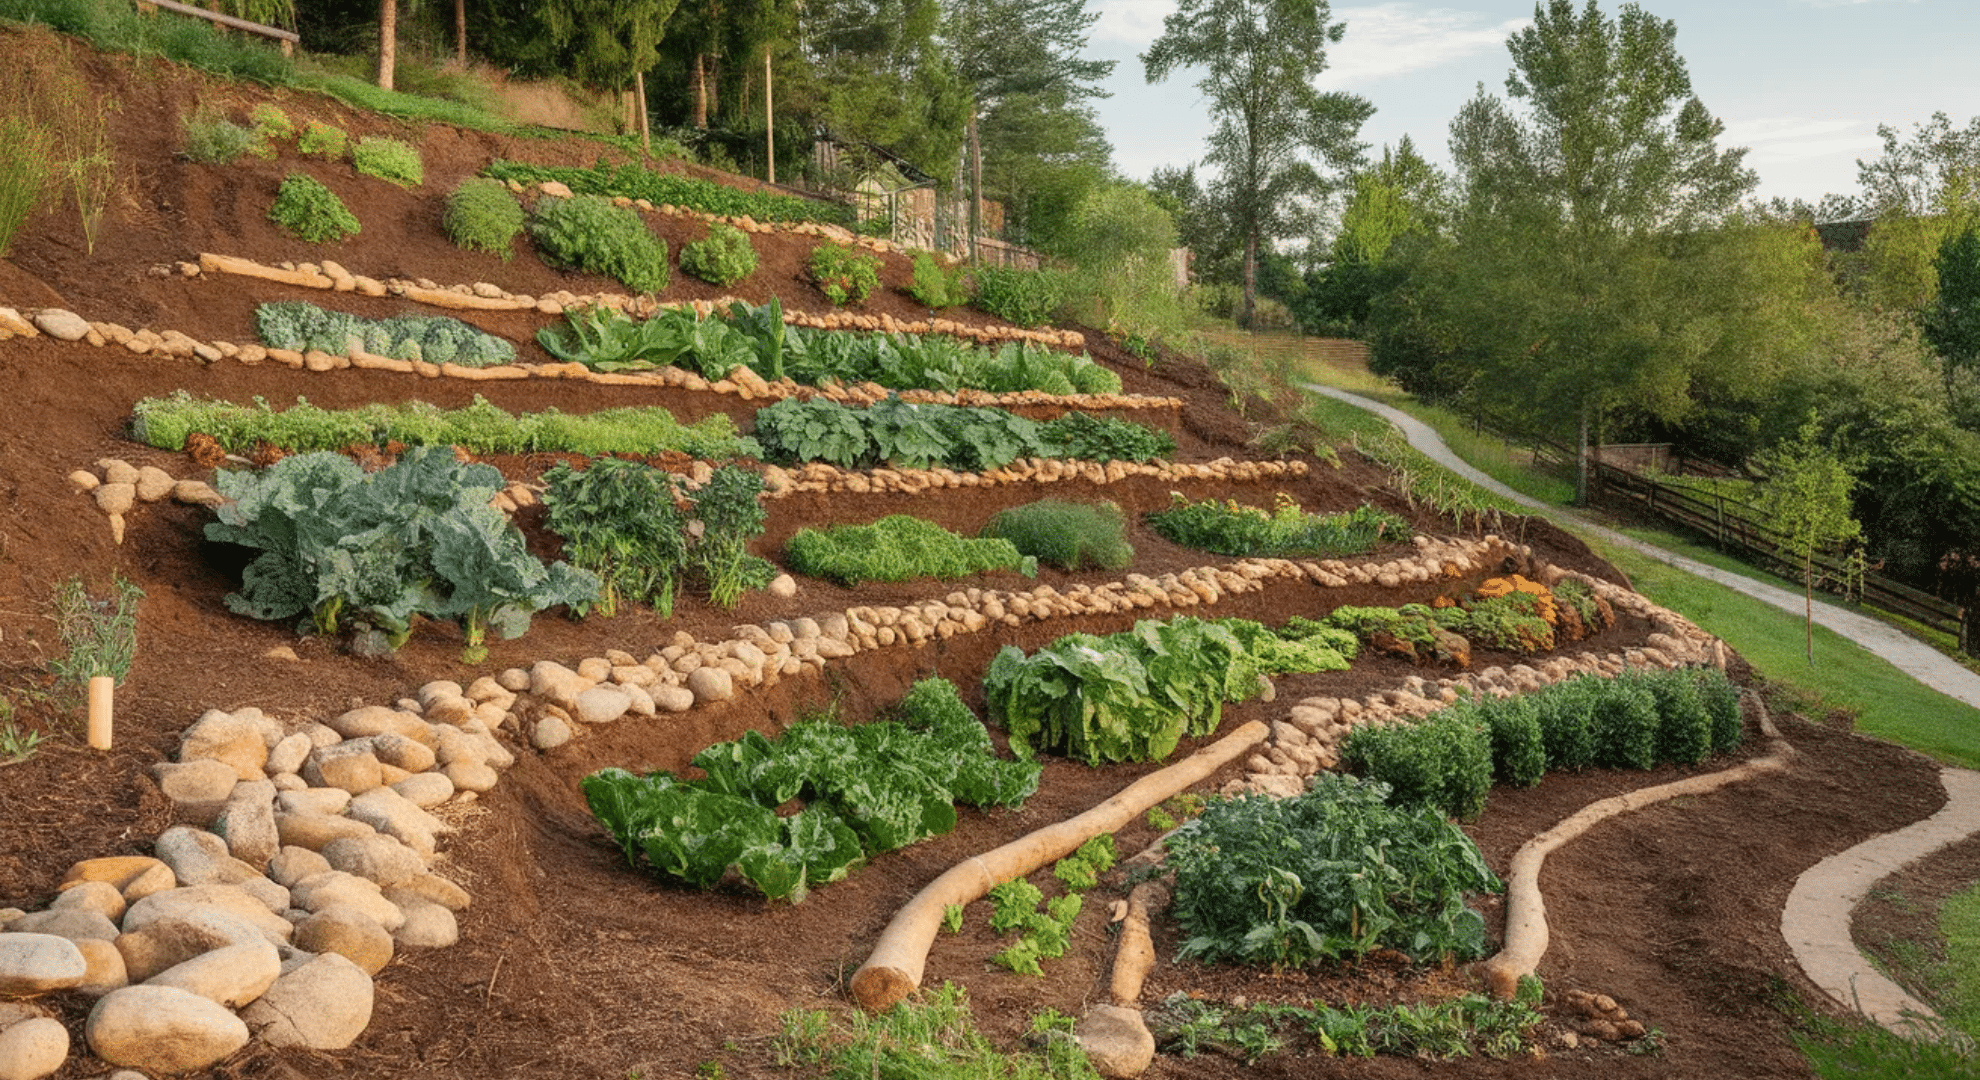
Turn a slope into productive space by building terraced beds. Each level is flat, preventing erosion and making planting easier. Water flows naturally from top to bottom. Plant thirsty crops lower and drought-tolerant ones higher.
Terracing upgrades unusable hillsides into beautiful, functional gardens. It takes work to build but solves drainage issues and gives you way more usable space than a steep slope ever could.
23. Overhead Planter Layout
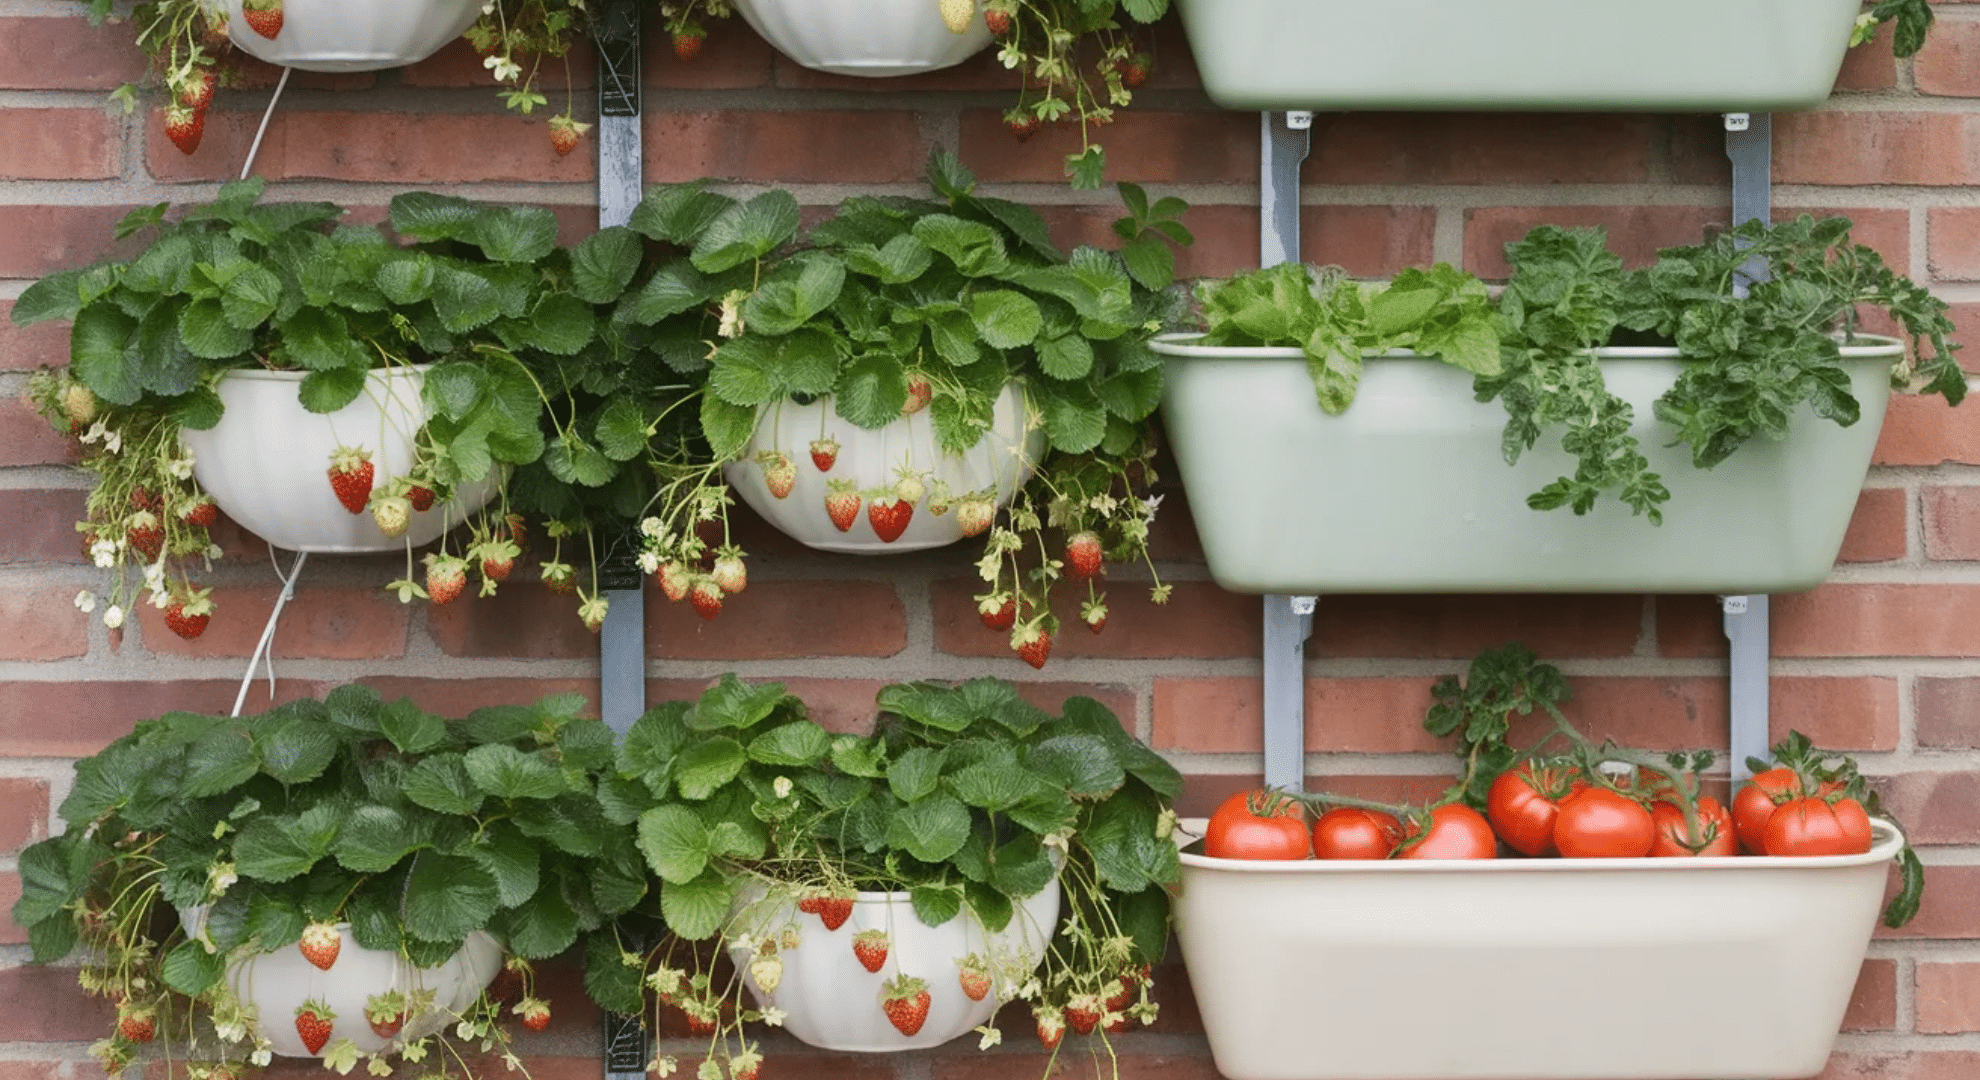
Hang baskets or wall-mounted planters for trailing crops like strawberries, cherry tomatoes, or herbs. This frees up ground space for larger plants. Overhead planters also keep produce off the ground, reducing pest and disease issues.
They’re perfect for patios, balconies, or small yards. You’re growing in three dimensions instead of two, which multiplies your harvest potential in tight spaces.
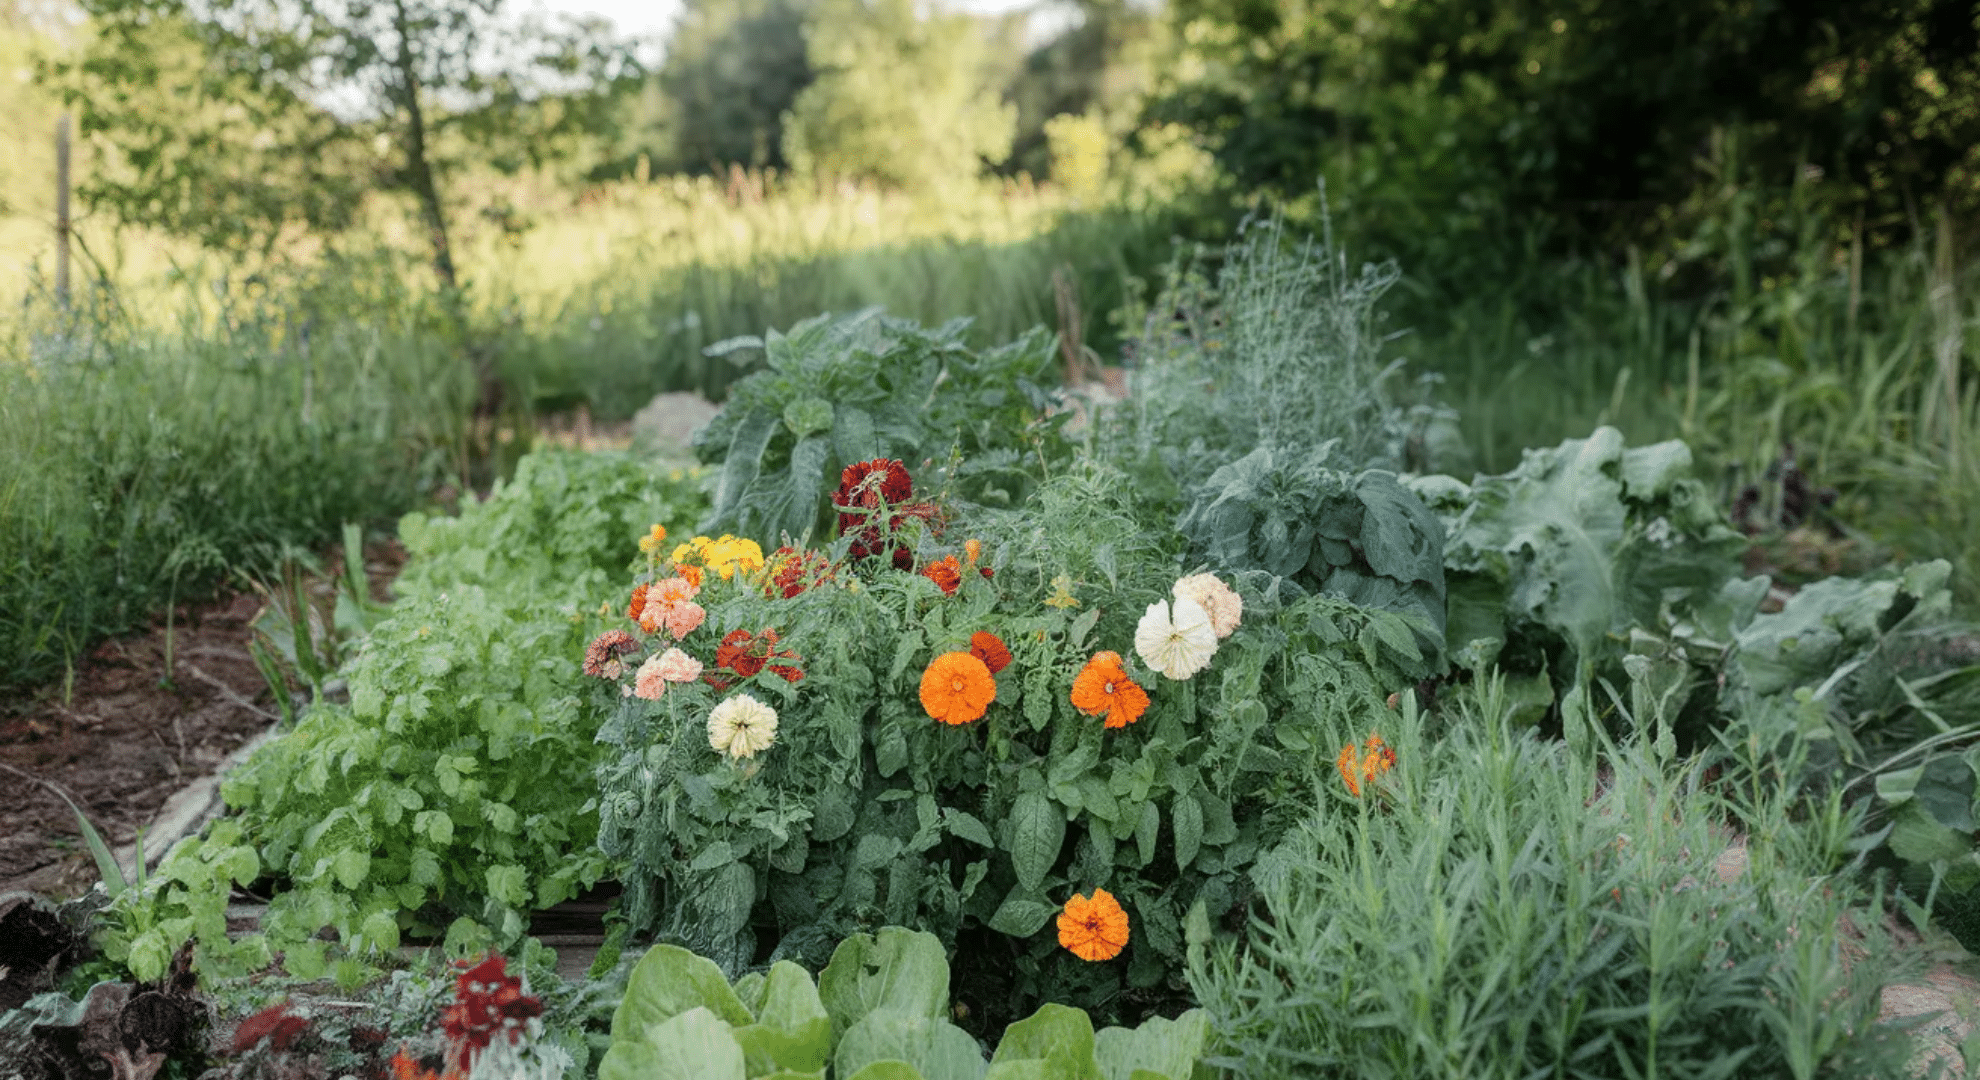
24. Raised Beds with Flower Borders
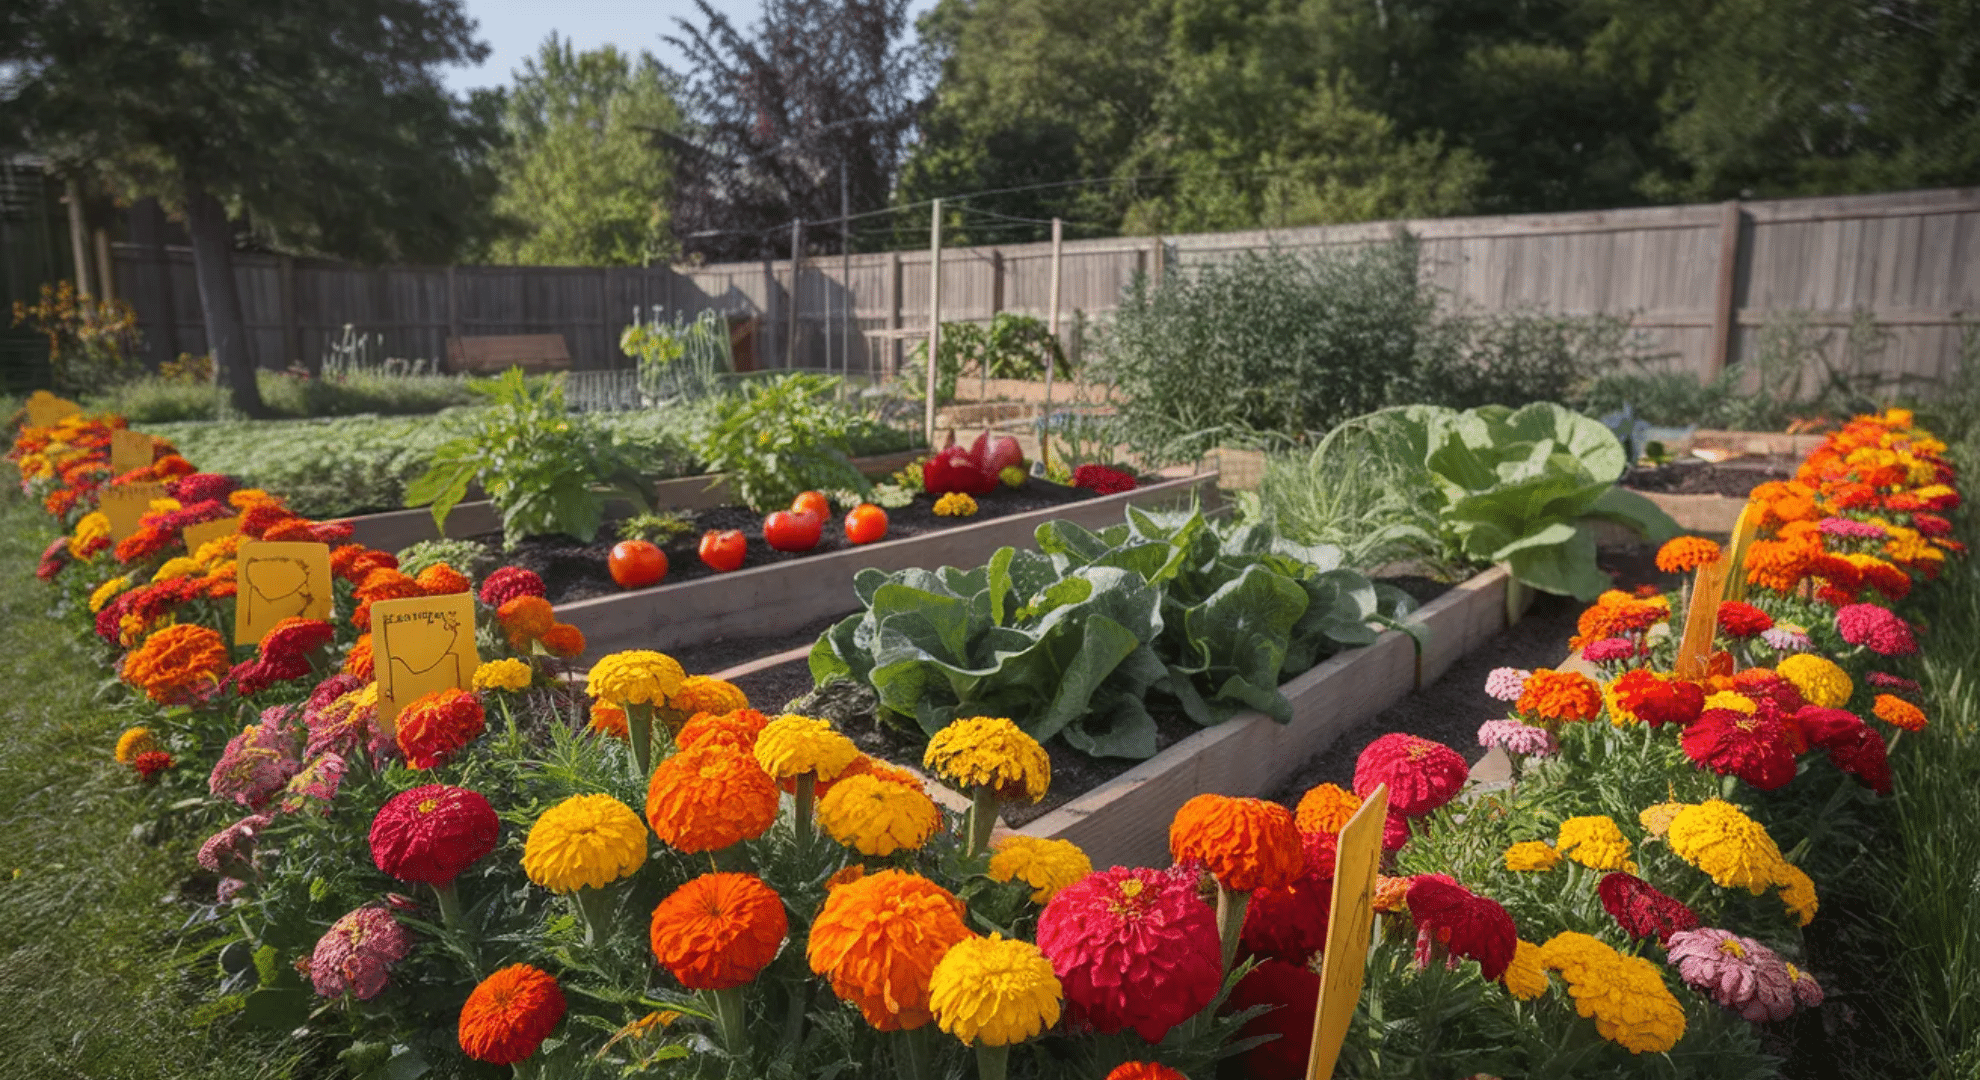
Plant flowers like marigolds, zinnias, or nasturtiums around your vegetable beds. They attract bees and beneficial insects while deterring pests. Your garden looks prettier and functions better. Pollinators improve yields on crops like tomatoes, squash, and beans.
Plus, cutting flowers for your table is a nice bonus. This layout blends beauty with productivity your vegetable garden becomes a whole ecosystem.
25. Herb Garden Layout
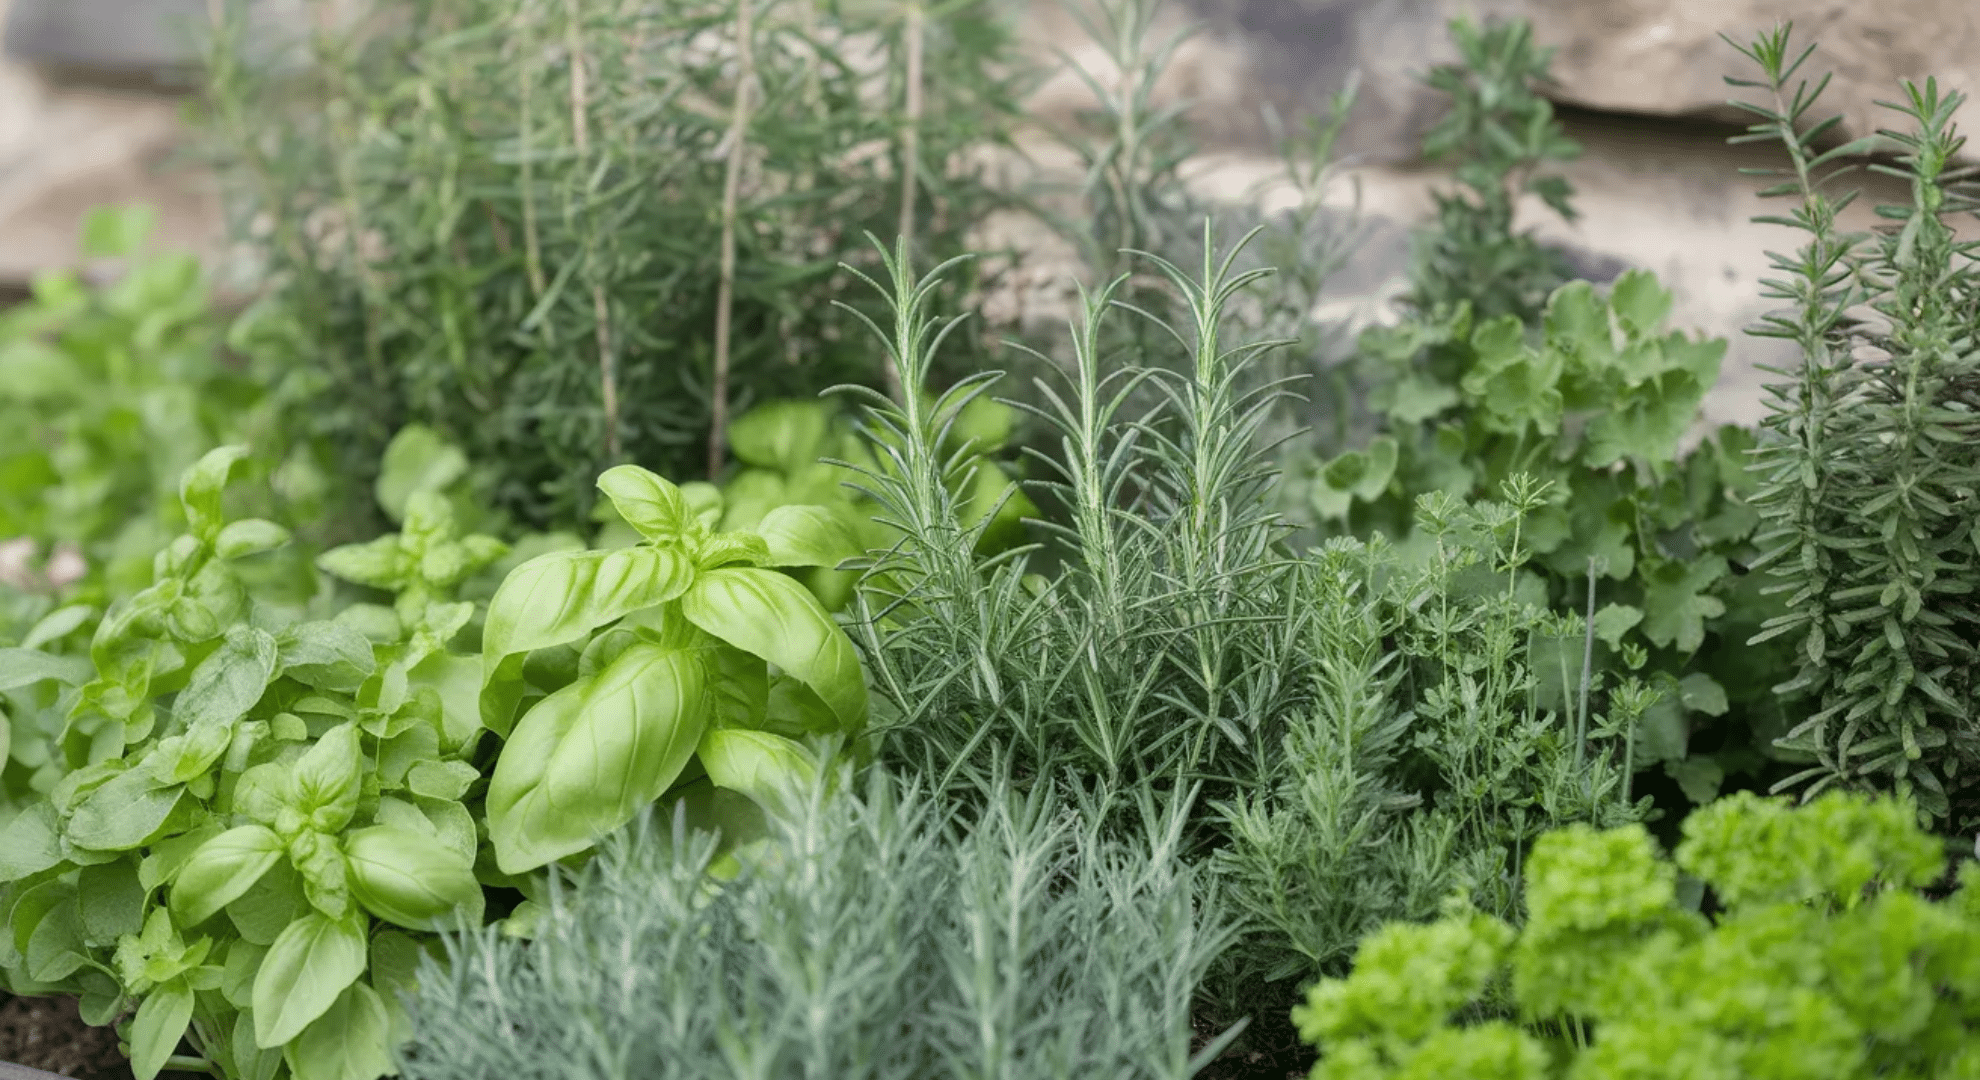
Dedicate one bed or corner to herbs. Group them by water needs. Mediterranean herbs like rosemary and thyme together, moisture-lovers like basil and parsley together. Herbs are compact, productive, and used constantly in cooking.
Having them in one spot makes harvesting quick. You can plant them densely since most stay small. This focused layout keeps your kitchen staples organized and thriving.
26. Perennial Bed Layout
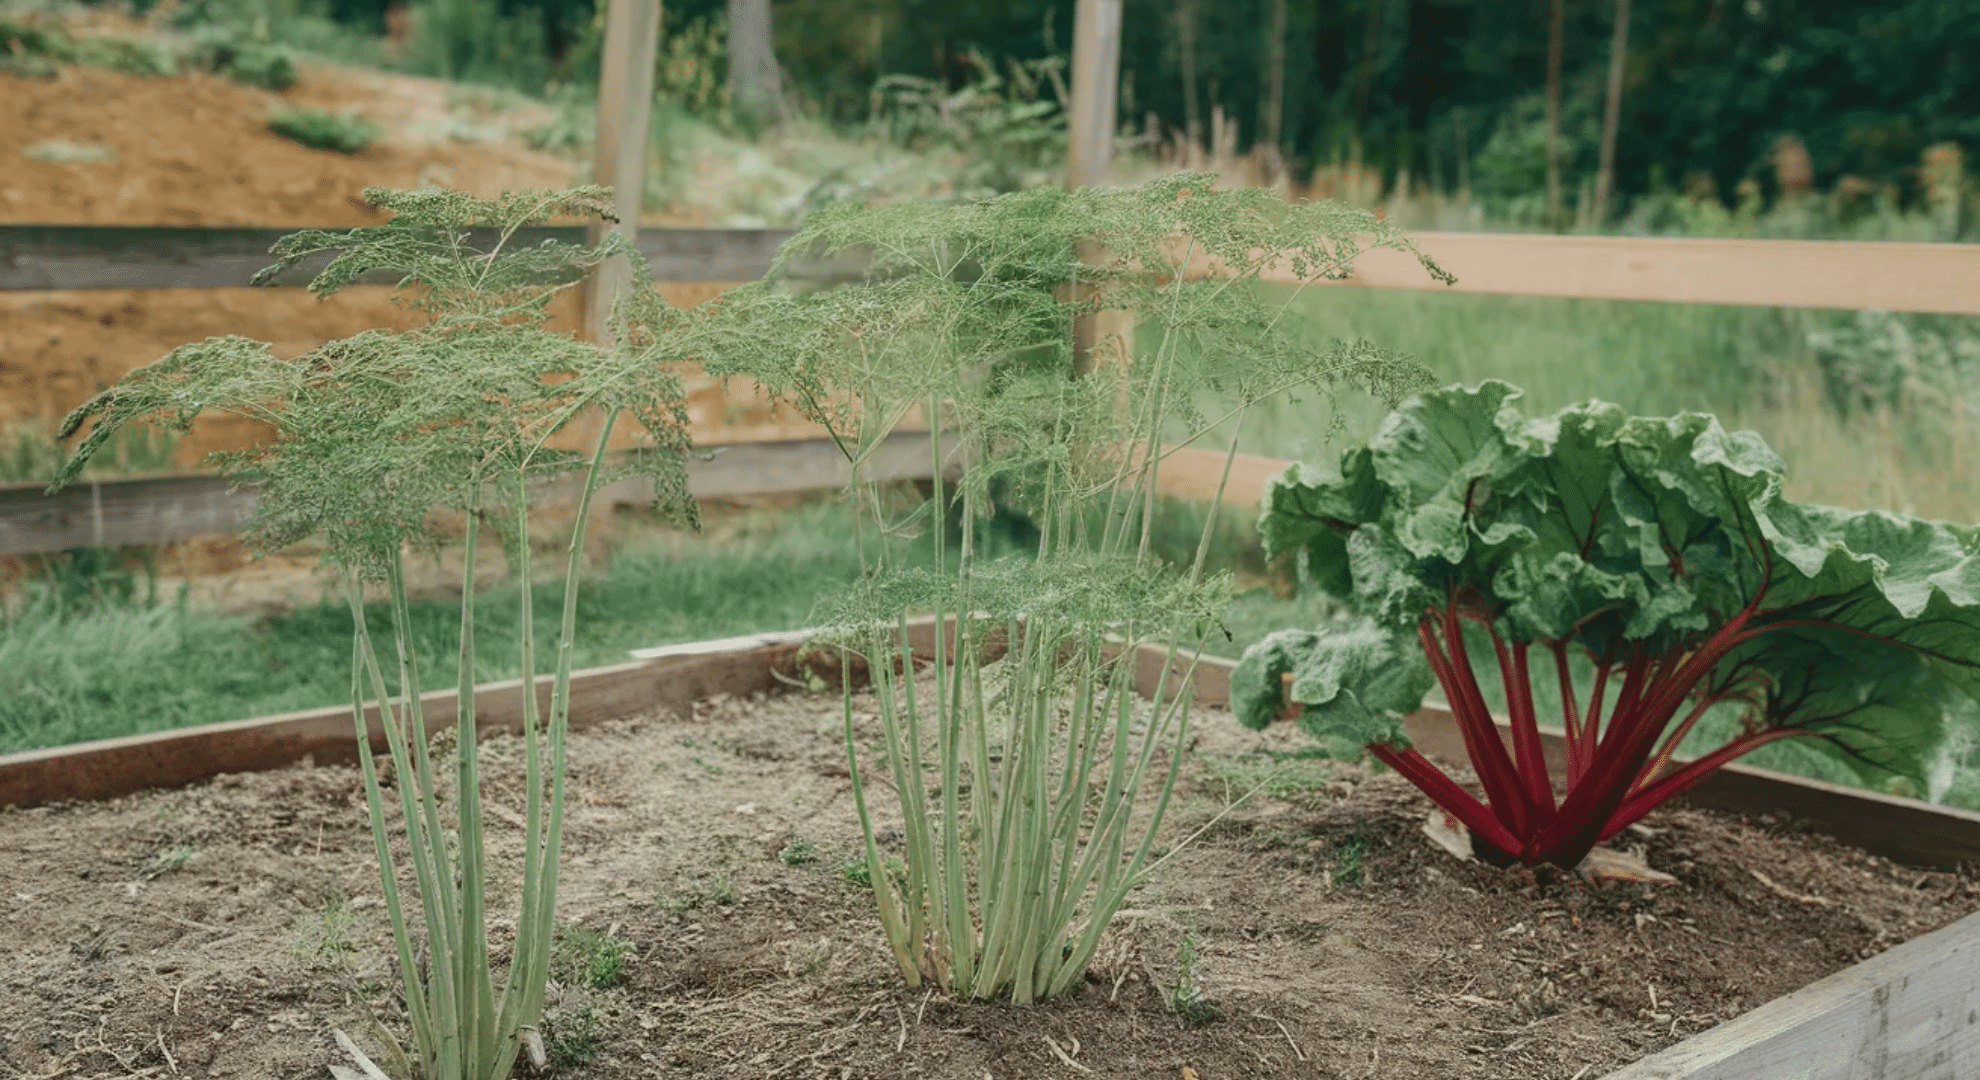
Set aside space for perennials like asparagus, rhubarb, artichokes, or berry bushes. These plants need permanent spots since they return annually. Place them where they won’t interfere with crop rotation in your annual beds.
Perennials take time to establish but reward you with harvests for years. Once planted, they require less work than replanting annuals every season, a smart long-term investment.
27. Square Layout with Nested Beds

Create a big square outline, then divide it into smaller square sections inside. Each nested square holds different crops. It’s modular within one structure, giving you organization and variety.
Pathways between nested beds let you access everything easily. This layout looks tidy, maximizes space, and makes crop rotation simple since each square is its own unit you can rotate independently.
28. Cottage Garden Layout
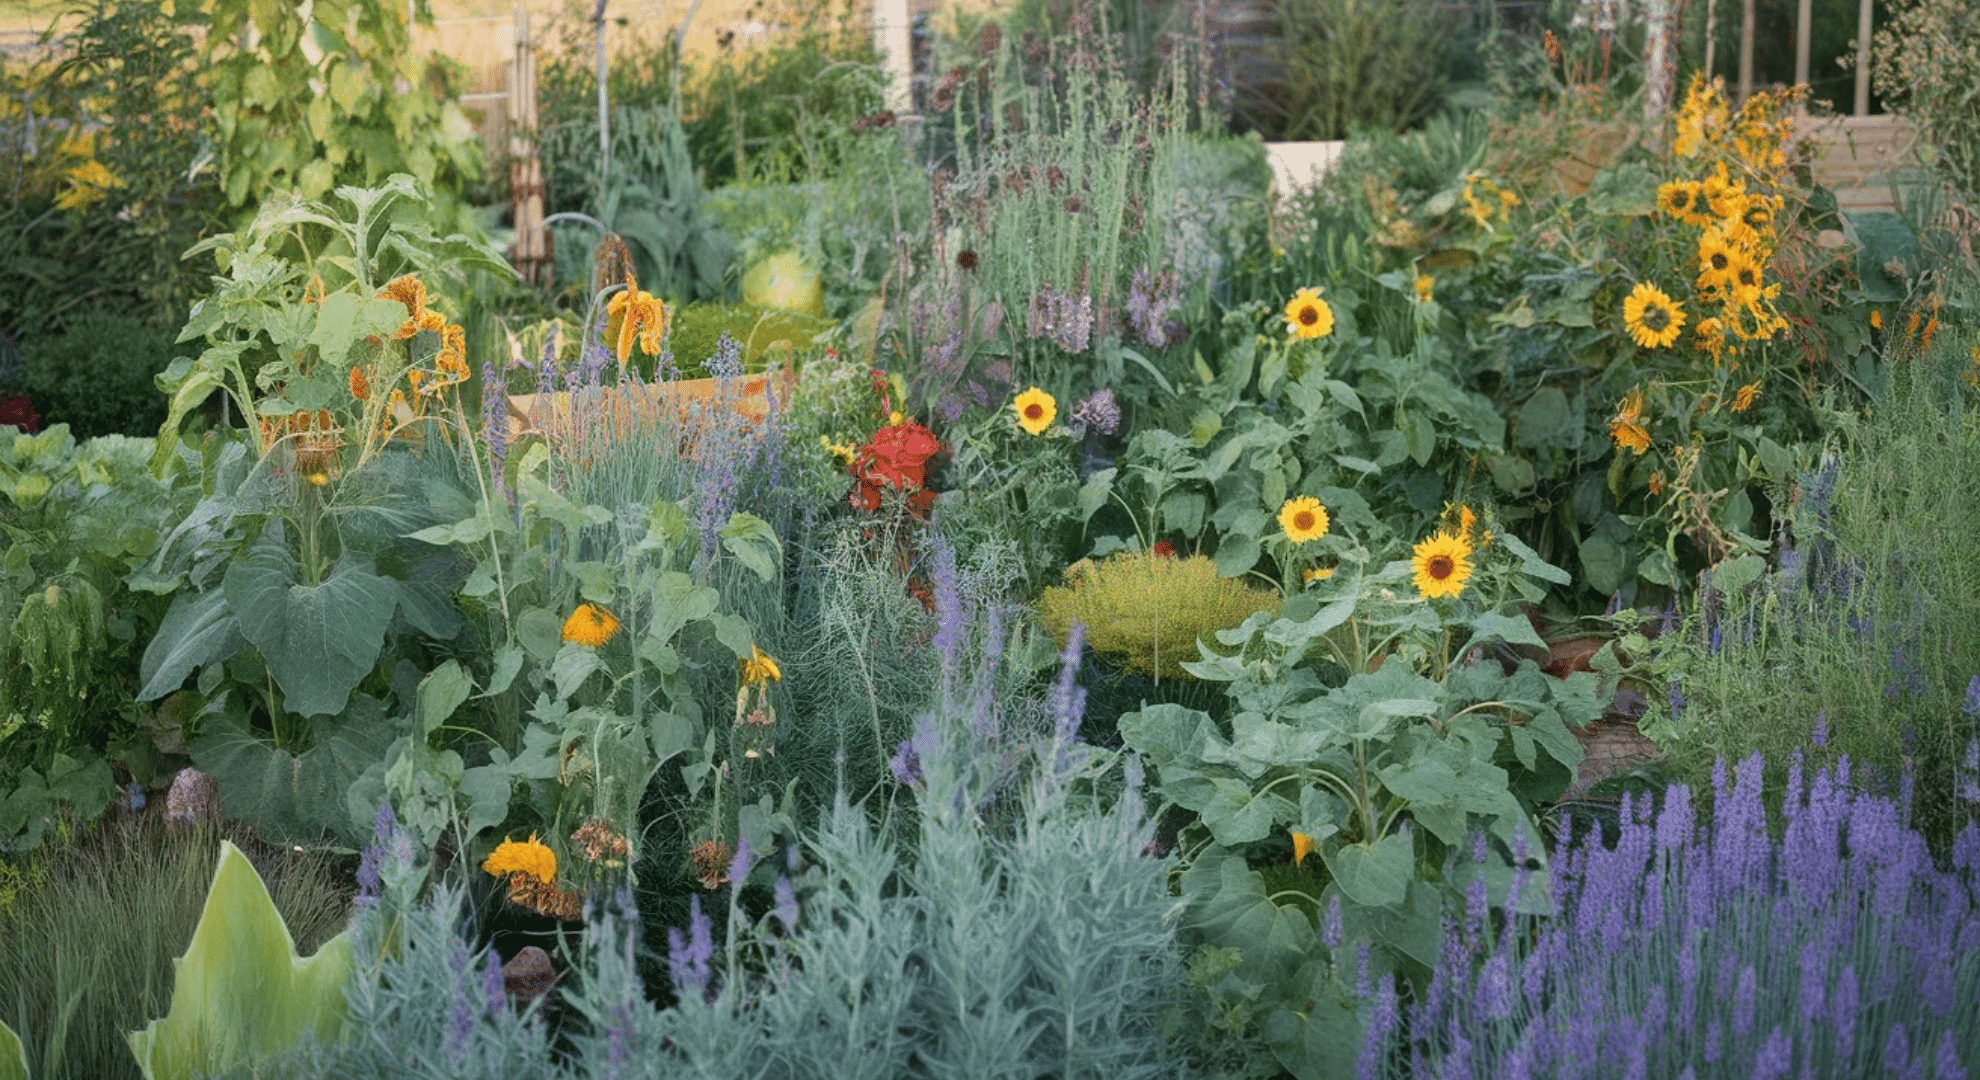
Skip rigid rows and plant vegetables, flowers, and herbs in a relaxed, flowing style. Lettuce mingles with calendula, tomatoes peek behind cosmos. It looks casual but still produces well. This layout feels less formal and more inviting.
Plants grow naturally together, creating a charming, abundant space. If you want your garden to feel like an escape rather than a chore, this approach works beautifully.
29. Hotbed Layout
Build a bed with a heat source underneath, compost, heating cables, or manure. The warmth extends your season, letting you start crops weeks earlier. Hotbeds protect tender seedlings from late frosts.
They’re perfect for gardeners in cold climates who want earlier harvests. Setup requires extra effort, but getting fresh lettuce or transplants ready sooner makes spring planting much more successful.
30. Multi-Level Raised Bed Layout
Stack beds at different heights: waist-high, knee-high, ground-level. Taller beds reduce bending, making gardening easier on your back. Different levels can hold crops with different needs. Herb or salad beds up high for quick access, root vegetables lower down.
This layout adds visual interest and functionality. It’s especially great for gardeners with mobility issues or anyone who wants ergonomic gardening options.
Essential Tips for Planning and Managing Your Vegetable Garden
Once you’ve picked a layout, the real work begins, planning what to plant and keeping everything healthy. I’ve learned that good planning prevents most garden problems before they start. Here’s a quick reference table to keep your garden on track throughout the season.
| Tip | Why It Matters | Action to Take |
| Start Small | Prevents overwhelm and burnout | Begin with 1-2 beds, expand next season |
| Plan Crop Rotation | Reduces disease and soil depletion | Move plant families to different beds yearly |
| Water Consistently | Prevents stress and uneven growth | Water deeply 2-3 times weekly, not daily |
| Mulch Your Beds | Suppresses weeds, retains moisture | Apply 2-3 inches of straw or wood chips |
| Test Your Soil | Reveals nutrient deficiencies | Test every 2-3 years, amend as needed |
| Space Plants Properly | Prevents crowding and disease | Follow seed packet spacing recommendations |
| Succession Plant | Ensures continuous harvest | Plant new crops every 2-3 weeks |
| Keep a Garden Journal | Tracks what works and what doesn’t | Note planting dates, varieties, and results |
| Add Compost Regularly | Improves soil health and fertility | Mix in 1-2 inches each season |
| Monitor for Pests | Catches problems early | Check plants weekly for damage or insects |
These tips sound simple, but they make the difference between a struggling garden and a thriving one. Stick with them, adjust as you learn what works in your space, and you’ll see better harvests each season.
Common Mistakes Beginners Make and How to Avoid Them
I’ve made plenty of garden mistakes over the years, and most were totally avoidable. Learning what not to do saves you time, money, and frustration. Here are the most common beginner mistakes and how you can sidestep them from day one.
- Planting Too Much Too Soon: Starting with a huge garden sounds exciting, but it quickly becomes overwhelming. Stick to a small bed your first year and expand only when you’ve mastered the basics.
- Ignoring Sunlight Requirements: Planting sun-loving tomatoes in shade guarantees disappointment. Observe your space for a full day before planting and match crops to the light they’ll actually receive.
- Overcrowding Plants: Cramming plants together seems efficient but leads to poor air circulation, disease, and stunted growth. Follow spacing guidelines even when seedlings look tiny—they’ll fill in fast.
- Watering Incorrectly: Daily shallow watering creates weak roots. Water deeply 2-3 times per week so roots grow down seeking moisture, making plants stronger and more drought-resistant.
- Skipping Soil Preparation: Poor soil means poor harvests no matter how much you water or fertilize. Test your soil, add compost, and ensure good drainage before planting anything.
- Not Planning for Succession: Planting everything at once gives you a harvest glut, then nothing. Stagger plantings every few weeks so you have continuous harvests throughout the season.
- Choosing the Wrong Varieties: Picking plants unsuited to your climate wastes effort. Research what grows well in your zone and choose beginner-friendly, disease-resistant varieties your first year.
- Forgetting to Weed Regularly: Letting weeds take over steals nutrients and water from your vegetables. Pull weeds when they’re small—spending 10 minutes weekly beats hours of weeding later.
These mistakes are fixable and preventable. Learn from them now instead of discovering them the hard way. Your garden will be healthier, more productive, and way less stressful when you avoid these common pitfalls.
Conclusion
I used to think garden layouts were this rigid, complicated thing only experts understood. Turns out, it’s just about finding what works for your space and keeping it simple.
You’ve got solid layouts to choose from, practical tips to follow, and mistakes to avoid, everything you need to start growing with confidence. Pick a beginner basic vegetable garden layout that feels right, plant a few easy crops, and see what happens.
Gardening teaches you as you go, and honestly, that’s the best part. There’s no pressure to nail everything perfectly your first season. Just get your hands dirty and learn what your plants need.
The more you grow, the more you’ll discover what thrives in your unique space.
Want more guidance on choosing vegetables or tackling pests naturally? Browse other gardening blogs for tips that’ll keep you growing successfully season after season!


One Response
I’m looking forward to having the best garden layout I ever had with this ready material and advice I been given in this article..Thank you for sharing your knowledge and experience with gardening.