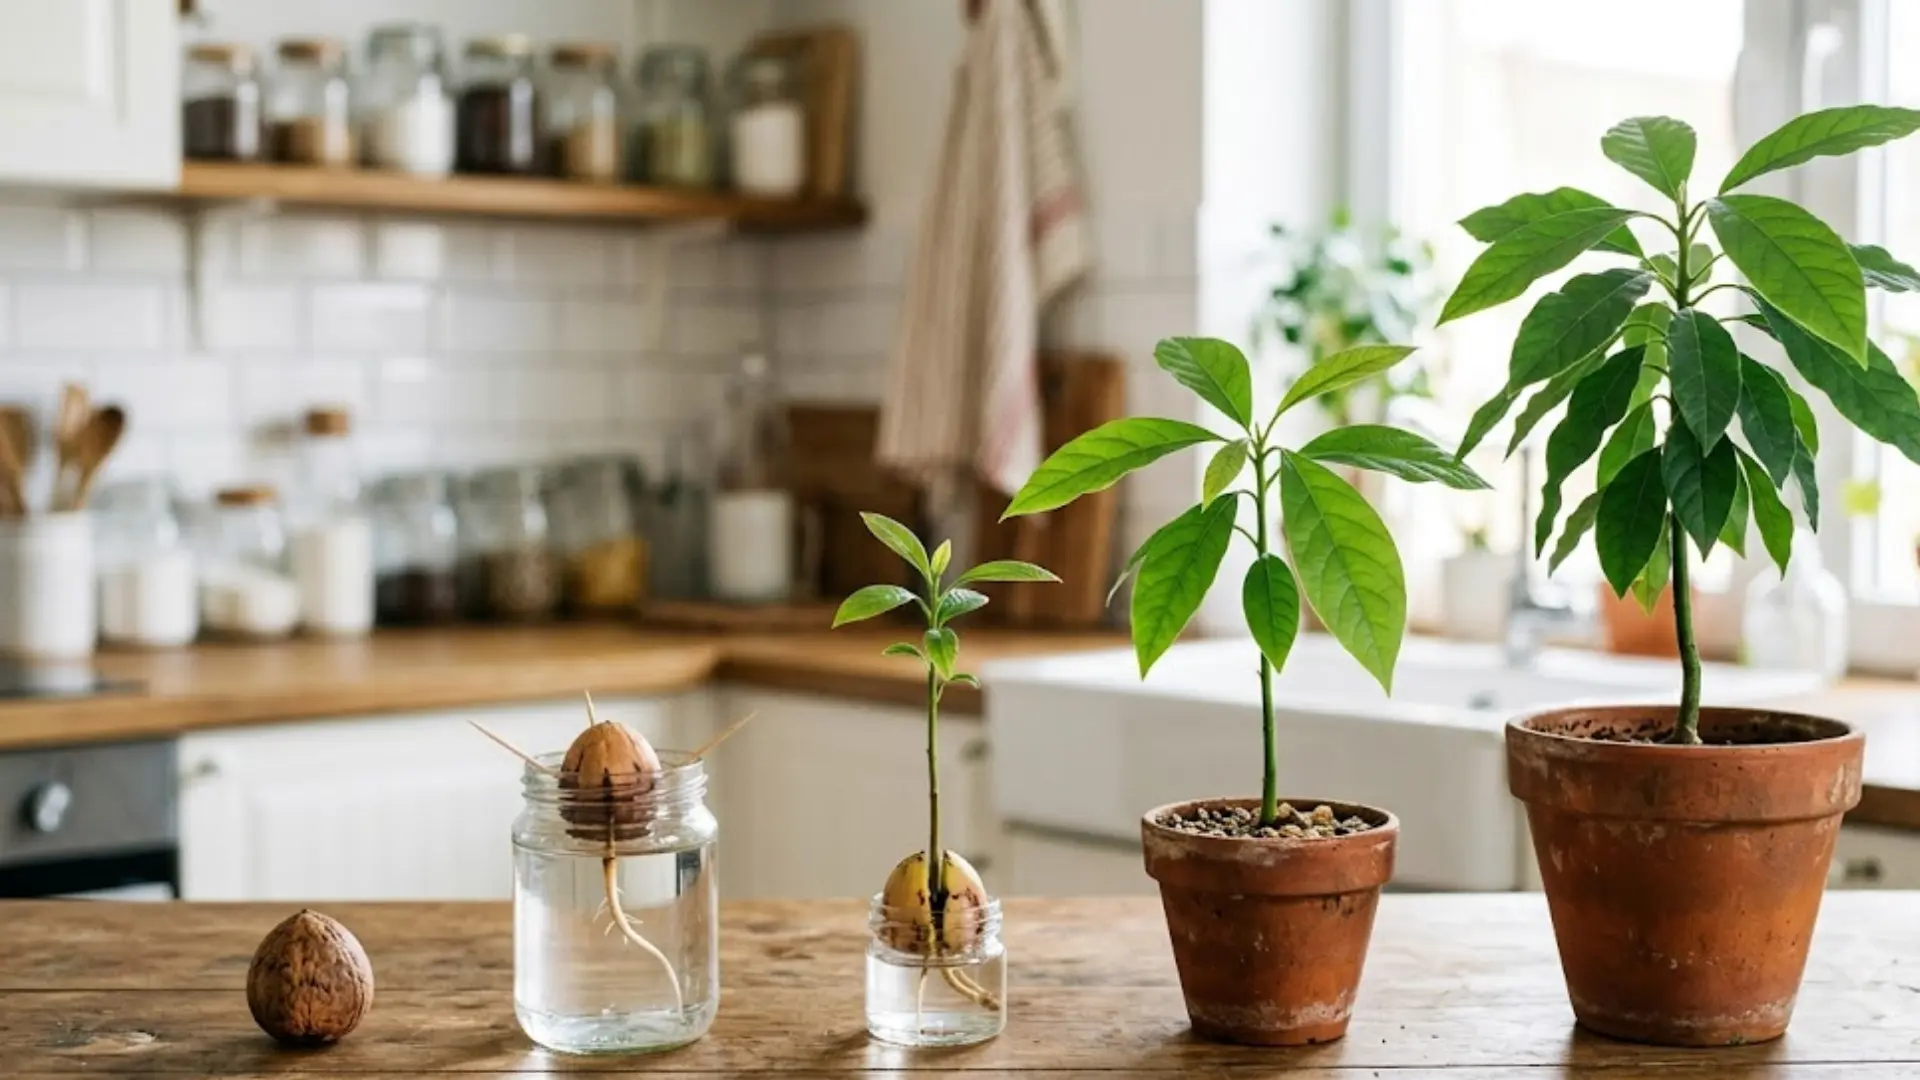
For years I tossed my avocado pits straight into the compost bin. I had no idea what I was throwing away.
Turns out growing one is simple. All you need is a glass, a few toothpicks, and a sunny windowsill. The pit already has everything packed inside to get started, it just needs the right nudge.
Most people who fail are not bad at this. They just rush it, or drown the seed in too much water.
Give it some heat, a little patience, and the right end facing up, and that pit turns into a plant worth bragging about.
Give me a chance to walk you through exactly how to plant an avocado seed to get it growing, step by step.
How Avocado Seeds Grow: Overview of Germination Process
An avocado seed holds two thick, starchy halves called cotyledons.
These store the energy the embryo needs to grow before any leaves exist to make its own food. Heat and moisture trigger the embryo inside to wake up. Cells start dividing fastest at the base, where the root tip sits.
That pressure splits the seed’s outer casing open.
Once the casing cracks, the root pushes downward first, anchoring the seed.
The stem follows, drawing on the same stored starch until true leaves unfurl and take over.
Can You Grow an Avocado Tree From a Seed?
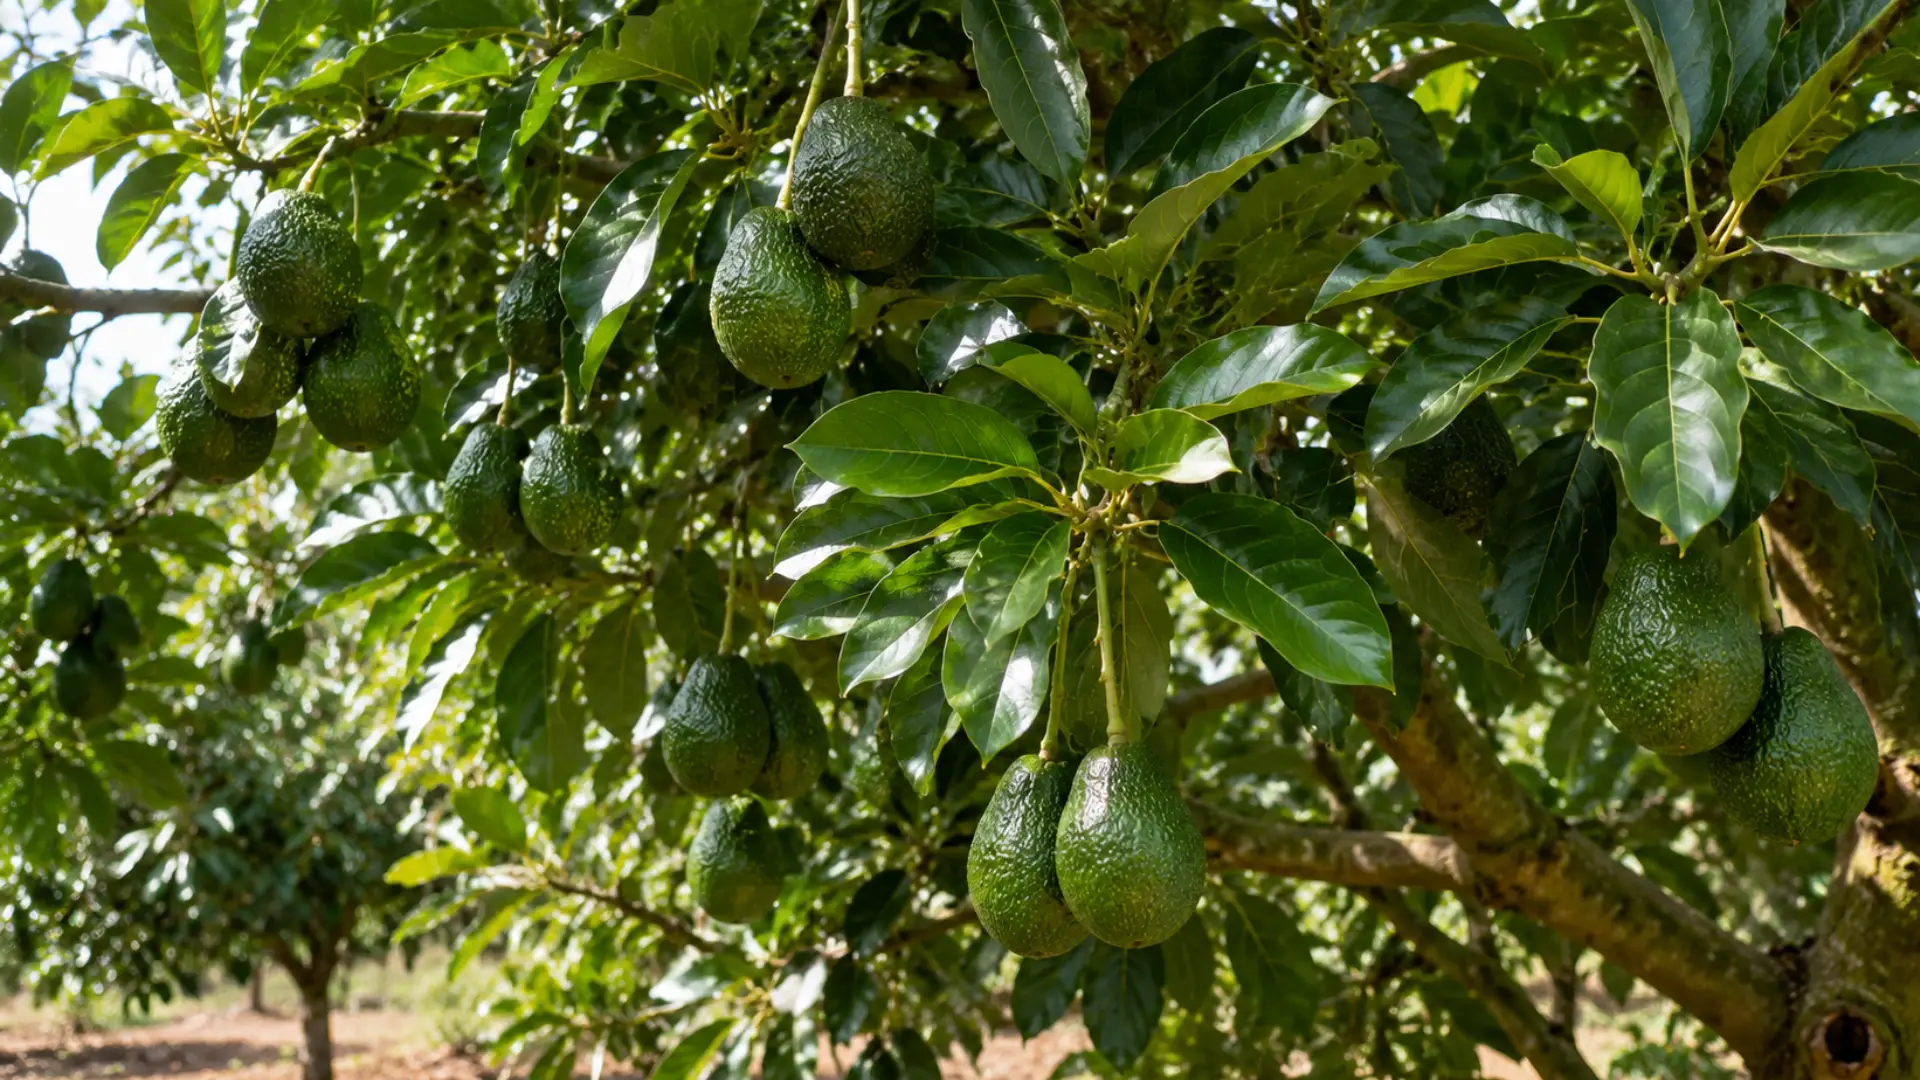
Yes. Any avocado pit works, regardless of variety. No gardening background is needed.
The seed already contains a dormant embryo, ready to activate under the right conditions. You don’t need a nursery, tools, or special soil to start. A kitchen counter and a bit of attention are enough.
This makes it a popular first project for new plant owners.
Success rates are high compared to most seed-starting projects, since the embryo is large and well protected.
Failure usually comes from handling mistakes, not from the seed itself being unreliable.
What You’ll Need Before You Start
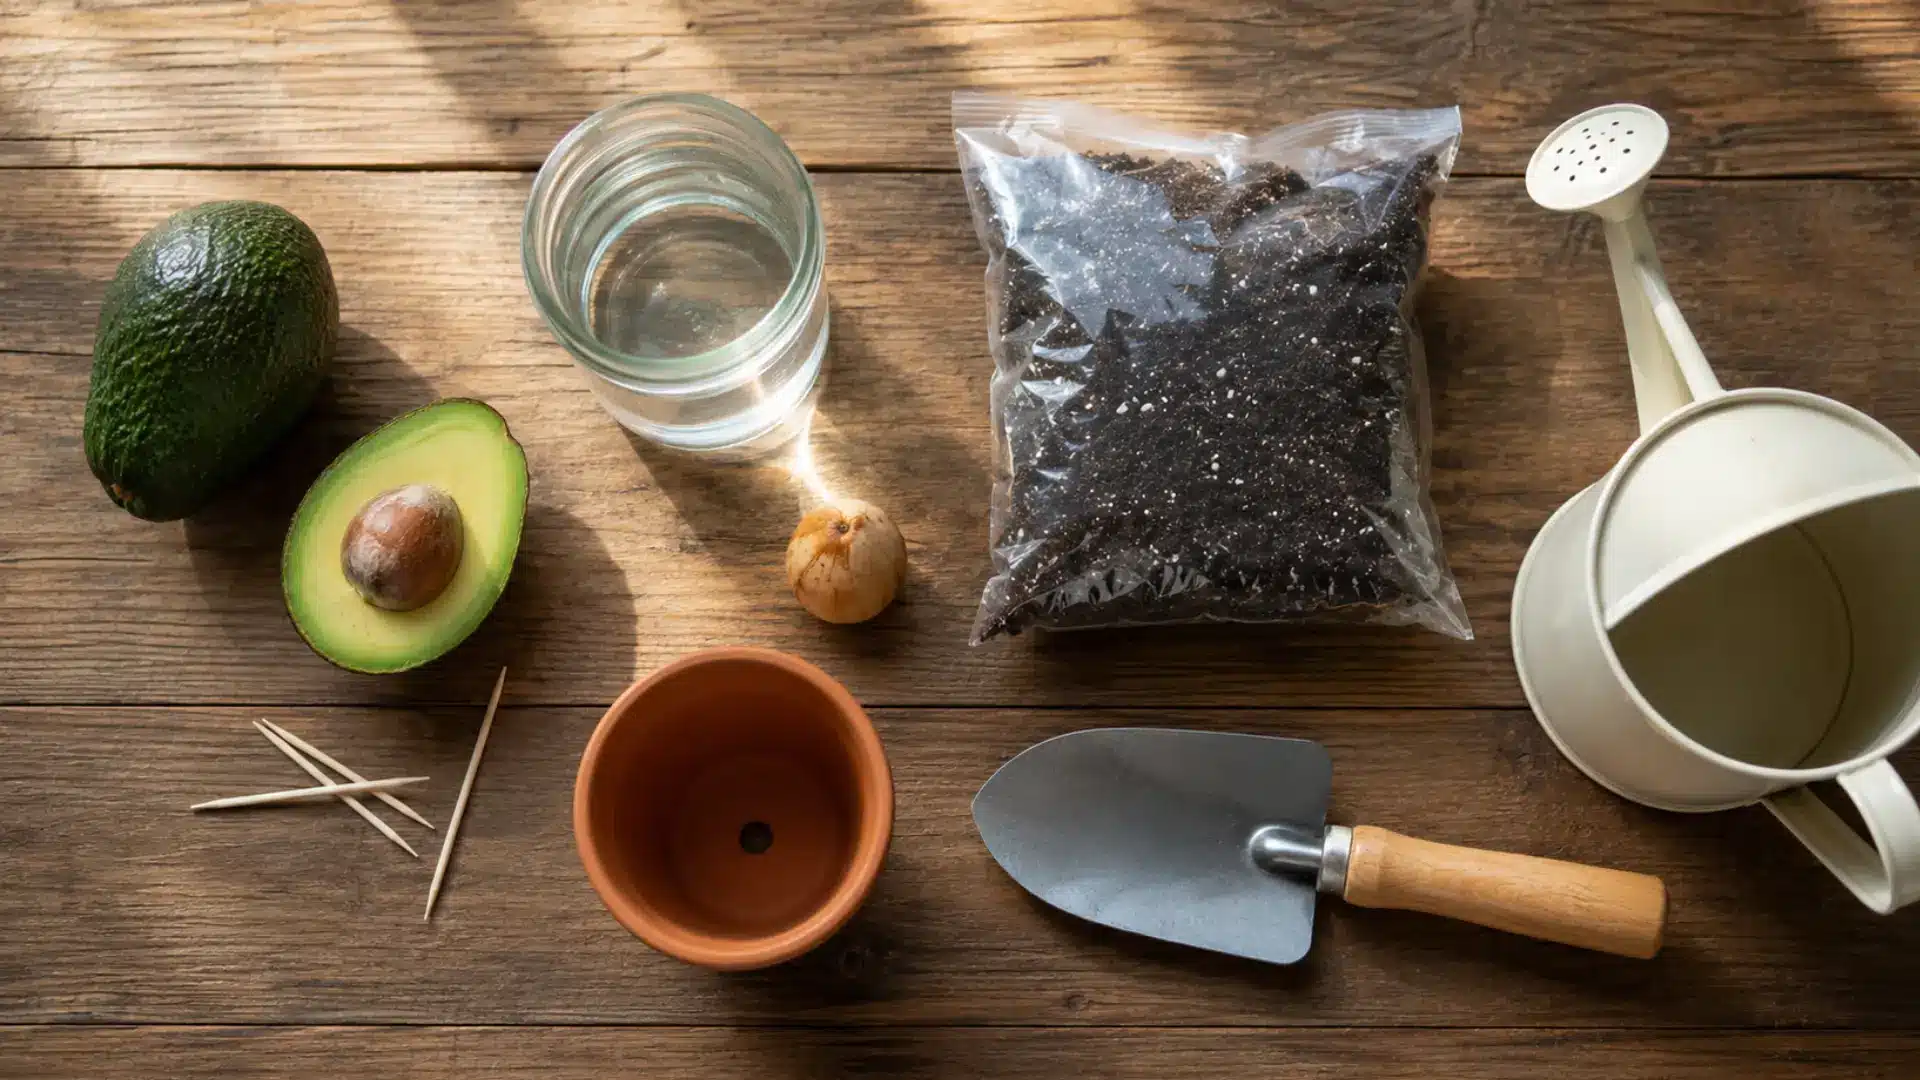
Everything on this list is already sitting in most kitchens:
- A ripe avocado pit
- A glass or jar with a narrow-ish rim
- 3–4 toothpicks (or a damp paper towel and sealed bag)
- Room-temperature water
- A pot with drainage holes and well-draining potting mix, for later
How to Remove and Prepare the Avocado Seed Correctly?
Slice the avocado lengthwise around the pit, then twist to separate the halves.
Scoop the seed out with a spoon instead of prying it loose with a blade, since nicks or cuts can prevent germination. Rinse the seed under warm water and rub off any remaining fruit flesh with your fingers.
Let it air dry briefly before identifying the pointed top and flatter bottom.
A healthy, intact seed provides the best chance for successful growth.
Popular Ways to Germinate an Avocado Seed
Both methods work; the difference is the step and the upkeep.
The toothpick method below is really just a specific case of growing plants in water, so a lot of the same troubleshooting tricks apply here too.
| Method | Setup | Upkeep |
|---|---|---|
| Toothpick & water | Seed suspended over a glass, half submerged | Change water every 2–3 days |
| Paper towel | Seed wrapped in a damp towel, sealed in a bag | Re-dampen towel weekly |
| Direct in soil | Seed buried tip-up in potting mix | Water when top inch feels dry |
Step-by-Step: How to Plant an Avocado Seed?
Follow these steps in order, from pit to potted plant, to grow a healthy avocado plant.
Step 1: Remove the Seed Without Damaging It
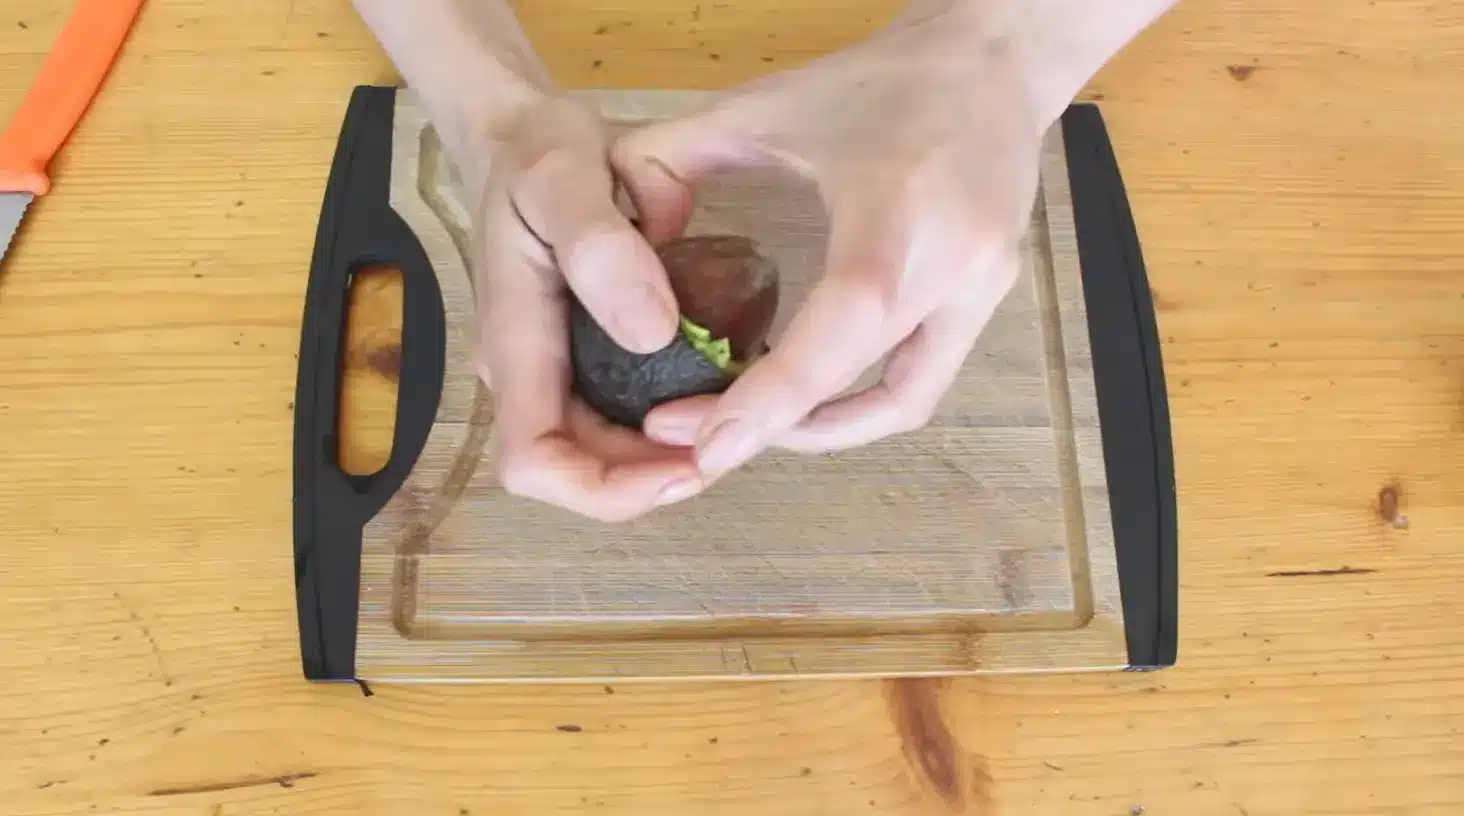
Cut the avocado in half lengthwise, working the knife around the pit rather than straight through it. Gently twist the two halves apart, then scoop the seed out with a spoon instead of prying it with a blade.
Avoid nicking or slicing into the seed itself, since damage here can stop germination before it even starts.
Rinse the pit under warm water and rub off any clinging fruit flesh with your fingers.
A clean, undamaged seed gives you the best odds of success in the steps ahead.
Step 2: Clean the Seed and Identify the Top and Bottom
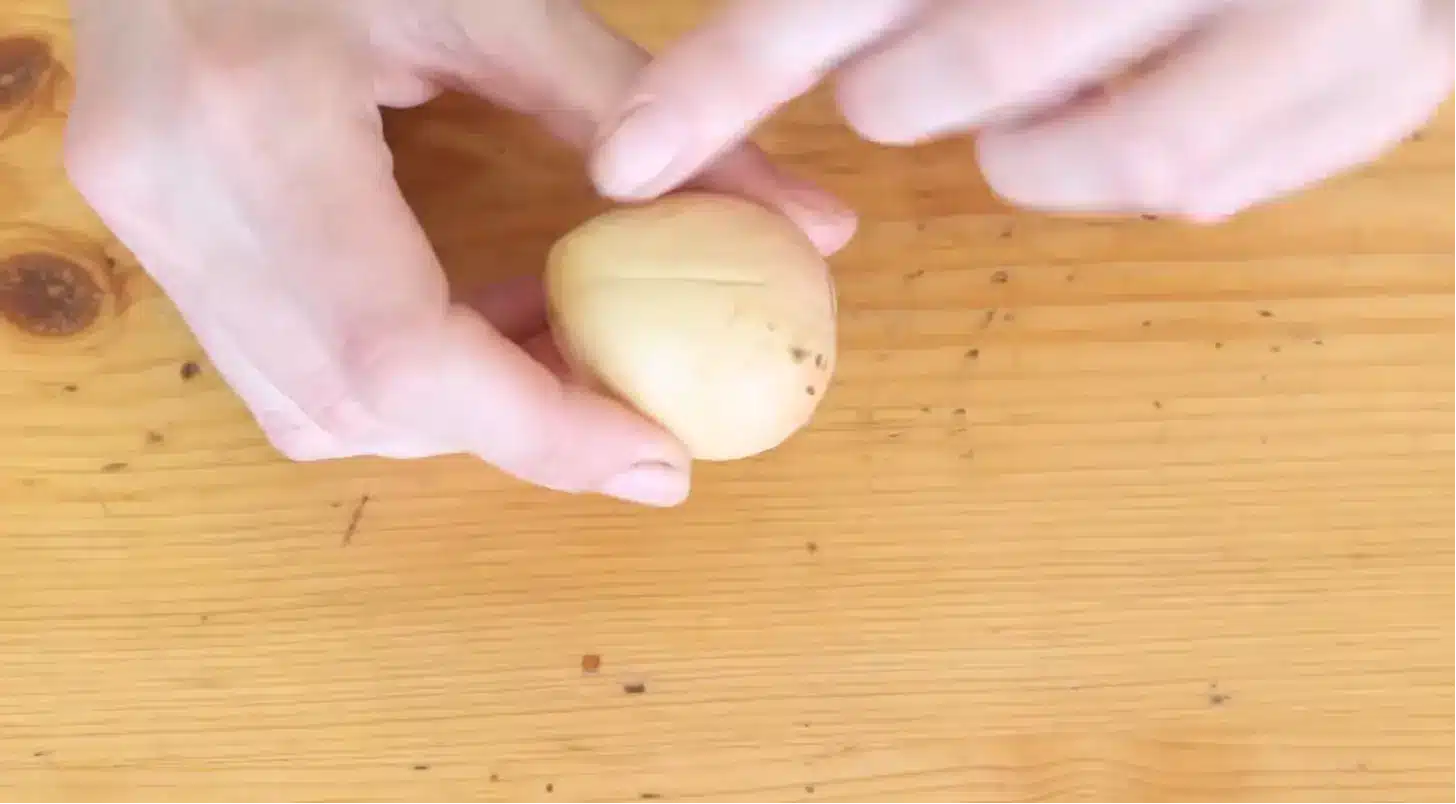
Once rinsed, dry the seed and take a close look at its shape.
One end is slightly pointed; this is the top, where the stem will eventually sprout.
The other end is flatter and rounder; this is the bottom, where roots will form. Getting this orientation right matters, since planting it upside down can delay or prevent germination.
Hold the seed with the pointed tip facing up and the flat base facing down before choosing a germination method.
Step 3: Start Germinating the Seed
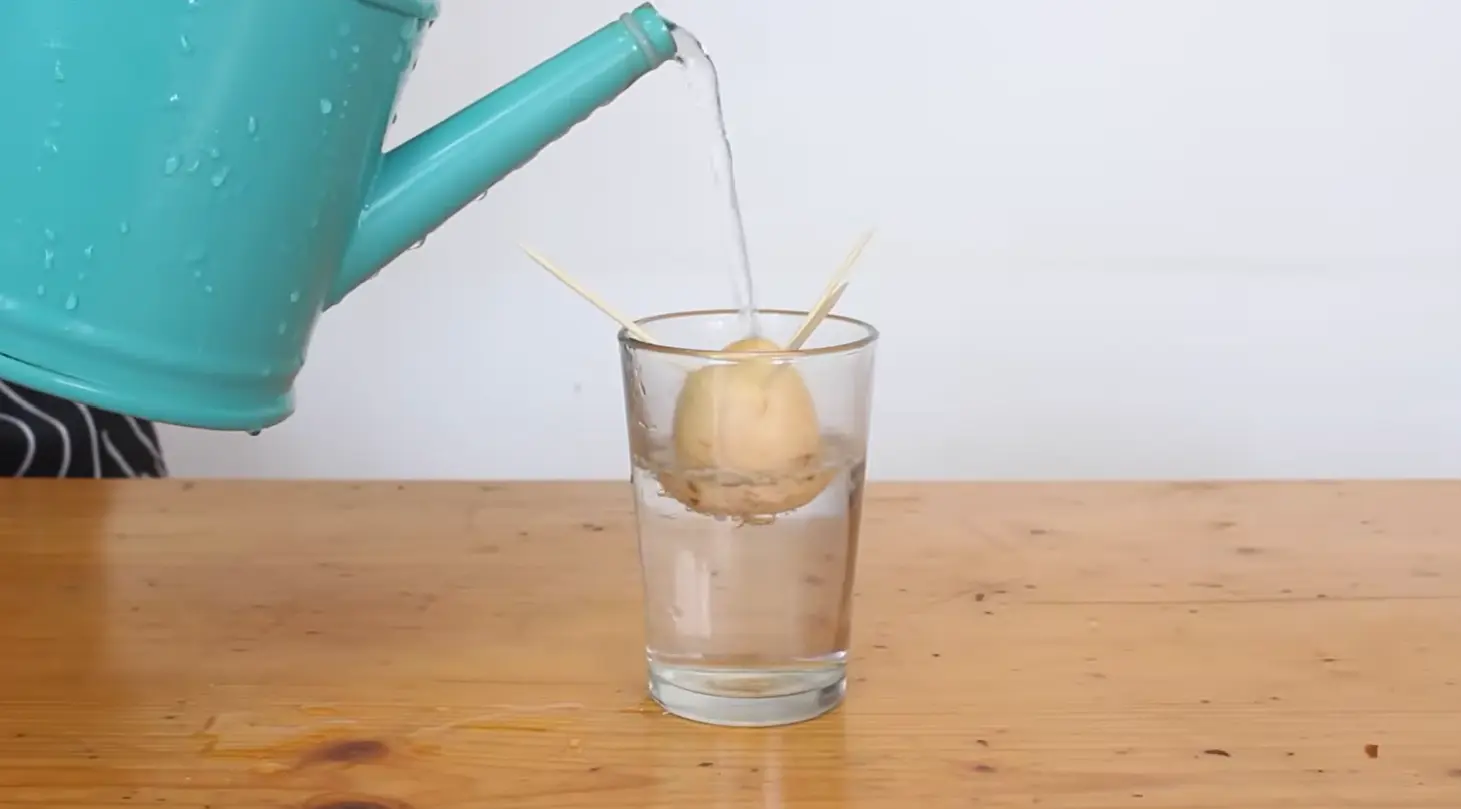
For the water method, insert three or four toothpicks around the middle of the seed, angled slightly downward.
Rest the toothpicks on a glass rim so the seed’s bottom half is submerged in water while the top stays dry.
Place the glass somewhere warm with indirect light.
Refresh the water every few days to keep it clean and prevent mold. If planting directly in soil instead, bury the seed with the pointed end up, leaving the tip slightly exposed above the surface.
Step 4: Wait for the Root and Sprout to Appear
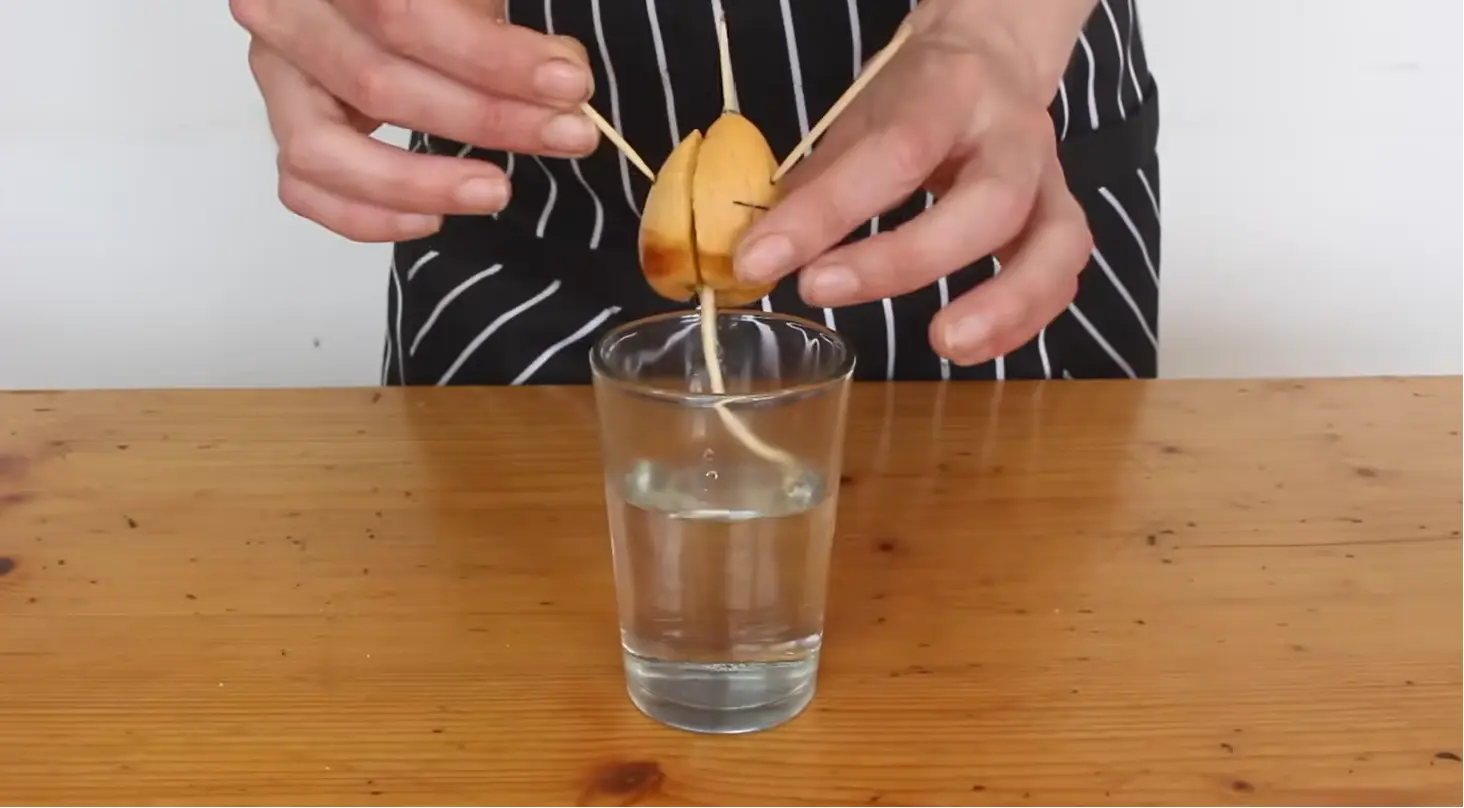
Germination takes patience, often two to six weeks before you notice real change.
The seed may crack down the middle first, which is normal and means the process is working.
A single root will emerge from the bottom, growing downward into the water.
Shortly after, a small stem sprout appears from the top. Keep the water topped up and avoid moving the glass around during this stretch, since the developing root is fragile and disruption can slow things down.
Step 5: Transfer the Sprouted Seed to Soil
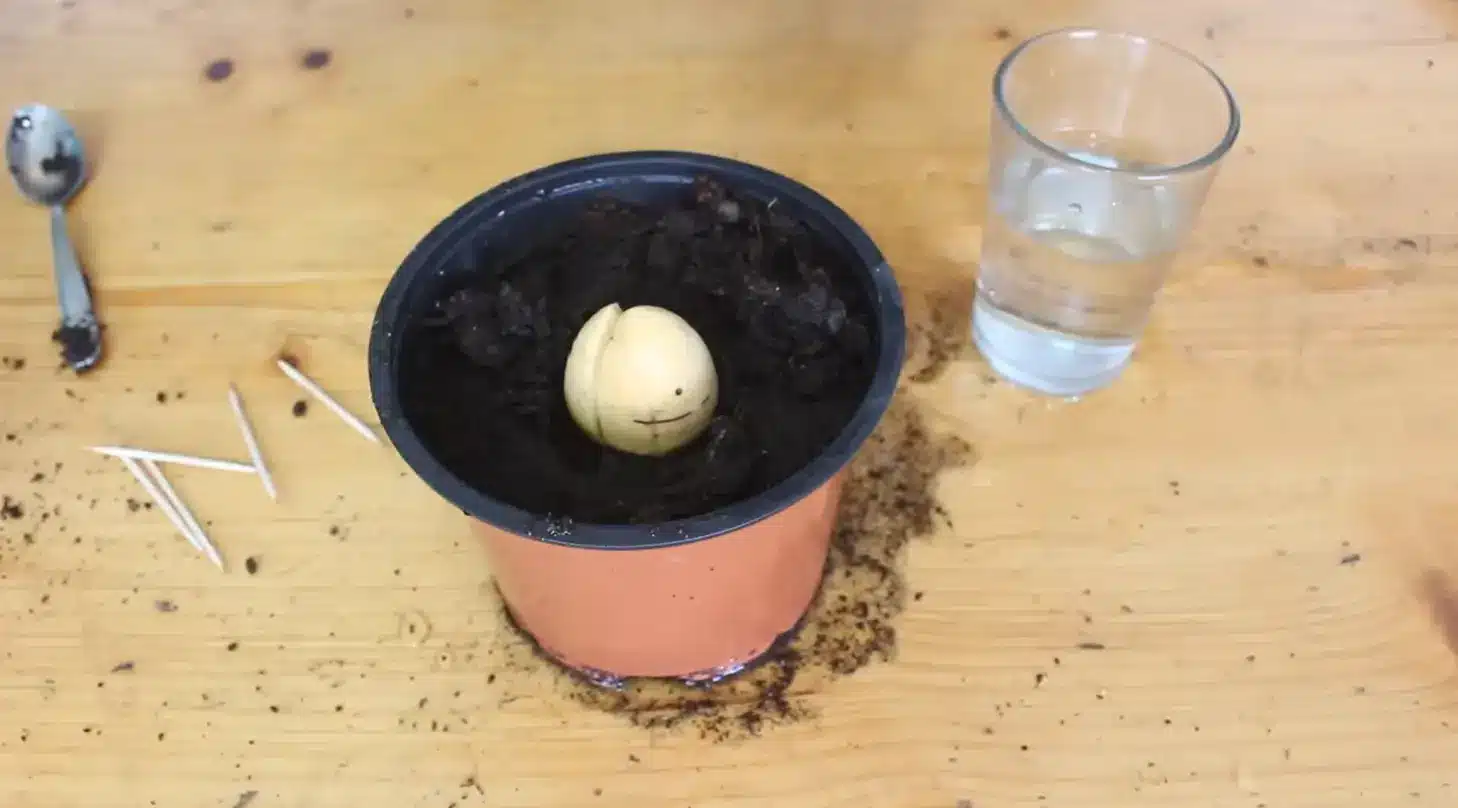
Once the stem reaches around six inches and the root system looks established, it’s time to move to soil.
Choose a pot with drainage holes and fill it with well-draining potting mix. Plant the seed so the top half remains above the soil line, similar to its position during water germination.
Gently pat the soil down around the base without packing it too tightly.
Water thoroughly right after planting to help the soil settle around the roots.
Step 6: Water Correctly After Planting
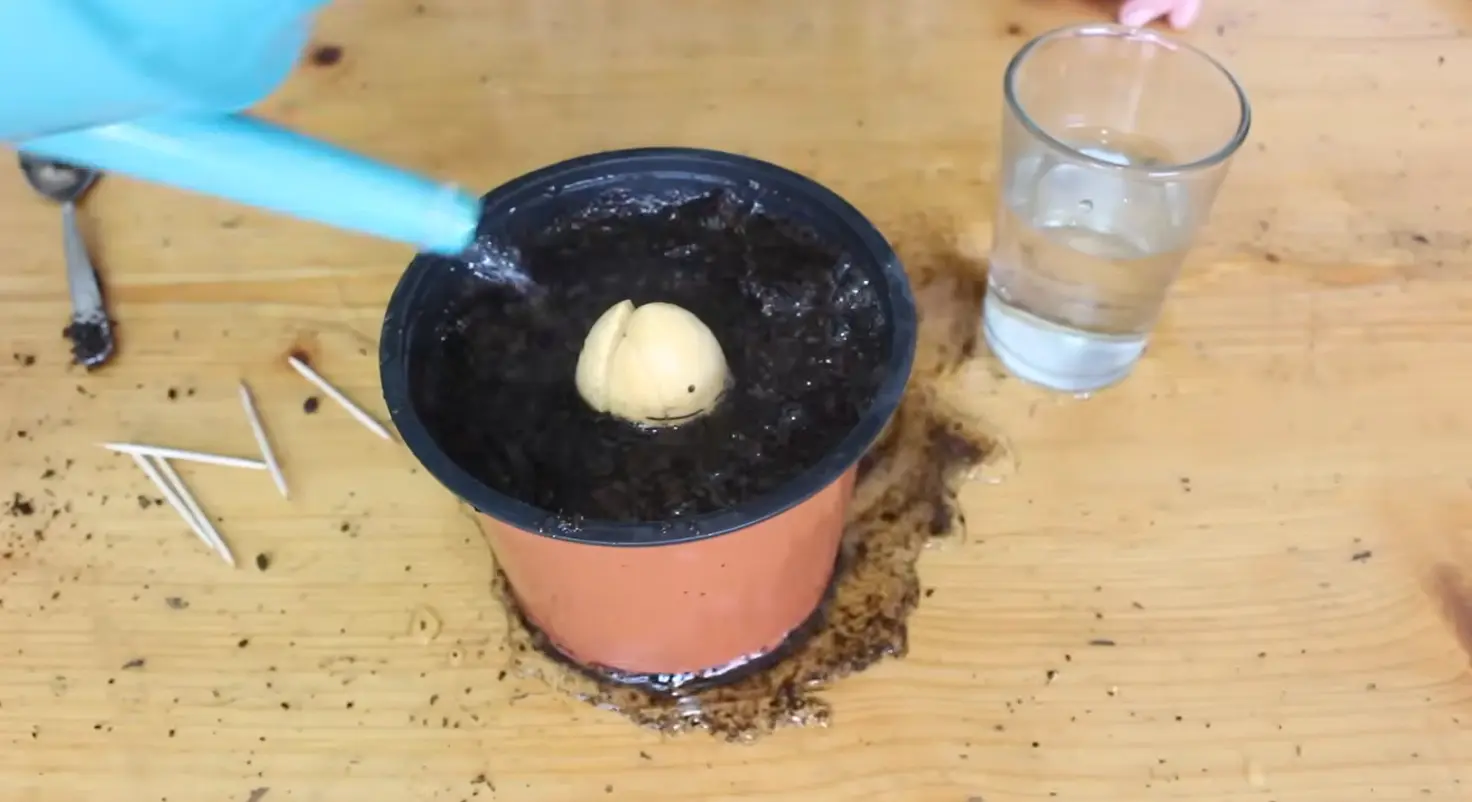
Avocado seedlings need consistent moisture, but soggy soil will cause the roots to rot quickly.
Water whenever the top inch of soil feels dry to the touch, then let excess drain out completely.
Never let the pot sit in standing water, since this suffocates the roots over time. In warmer months, this might mean watering twice a week, while cooler weather calls for less frequent watering.
Checking the soil directly with your finger is more reliable than sticking to a fixed schedule.
Step 7: Encourage Healthy Branching as It Grows
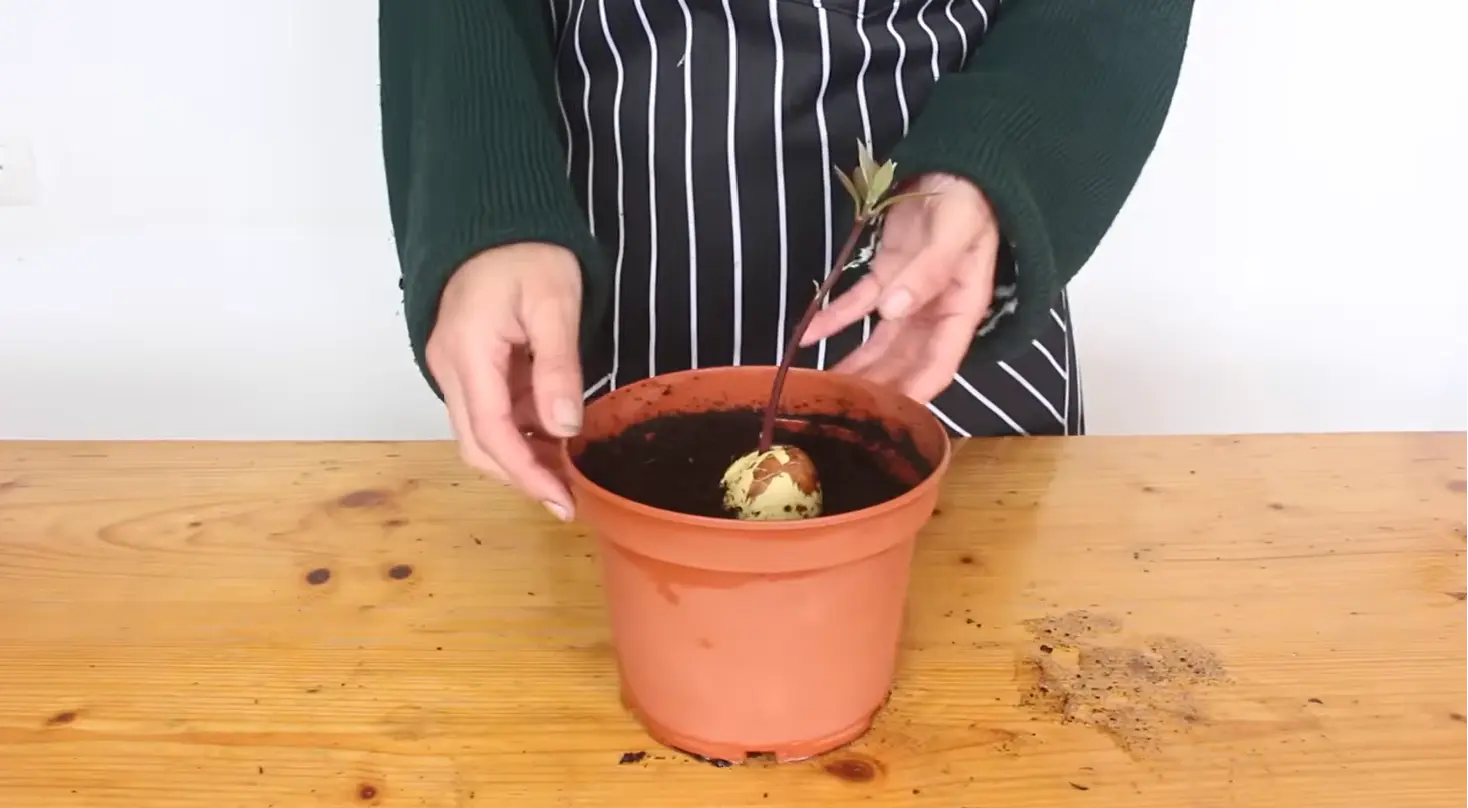
Left alone, avocado seedlings tend to grow as a single tall stem with few side branches. Once the plant reaches about twelve inches, pinch or trim off the top set of leaves to signal the plant to branch out.
This encourages a fuller, bushier shape rather than a lanky single stalk.
Repeat this trimming every time new growth adds another six inches or so.
For a visual walkthrough of the entire process, check out the video by Daisy Dawes.
What Happens During Each Growth Stage?
Each stage brings a distinct, visible change to the seed and plant.
| Stage | Seed/Plant Appearance | Key Sign |
|---|---|---|
| Dormant | Smooth, firm, brown skin | No visible change yet |
| Cracking | Casing splits down the middle | First sign of activity |
| Rooting | Pale root emerges from the base | Root thickens and lengthens |
| Sprouting | Small stem pushes from the top | Stem color shifts from pale to green |
| Leafing | First leaves unfold | Leaves start photosynthesizing |
| Woody growth | Stem hardens and browns at the base | Plant stands upright unsupported |
The Best Soil for Growing Avocado Plants
Avocado roots need loose, fast-draining soil. A cactus or succulent mix works well.
You can also blend potting soil with perlite or coarse sand, roughly 3 parts soil to 1 part perlite.
Aim for a slightly acidic pH, around 6 to 6.5. Dense soil traps water and starves roots of oxygen. Compost alone is too heavy and holds moisture too long. Always use a pot with drainage holes.
Good drainage matters more than any single nutrient.
Skip garden soil entirely; it compacts fast and invites root rot.
Where to Place Your Avocado Plant for Fast, Healthy Growth?
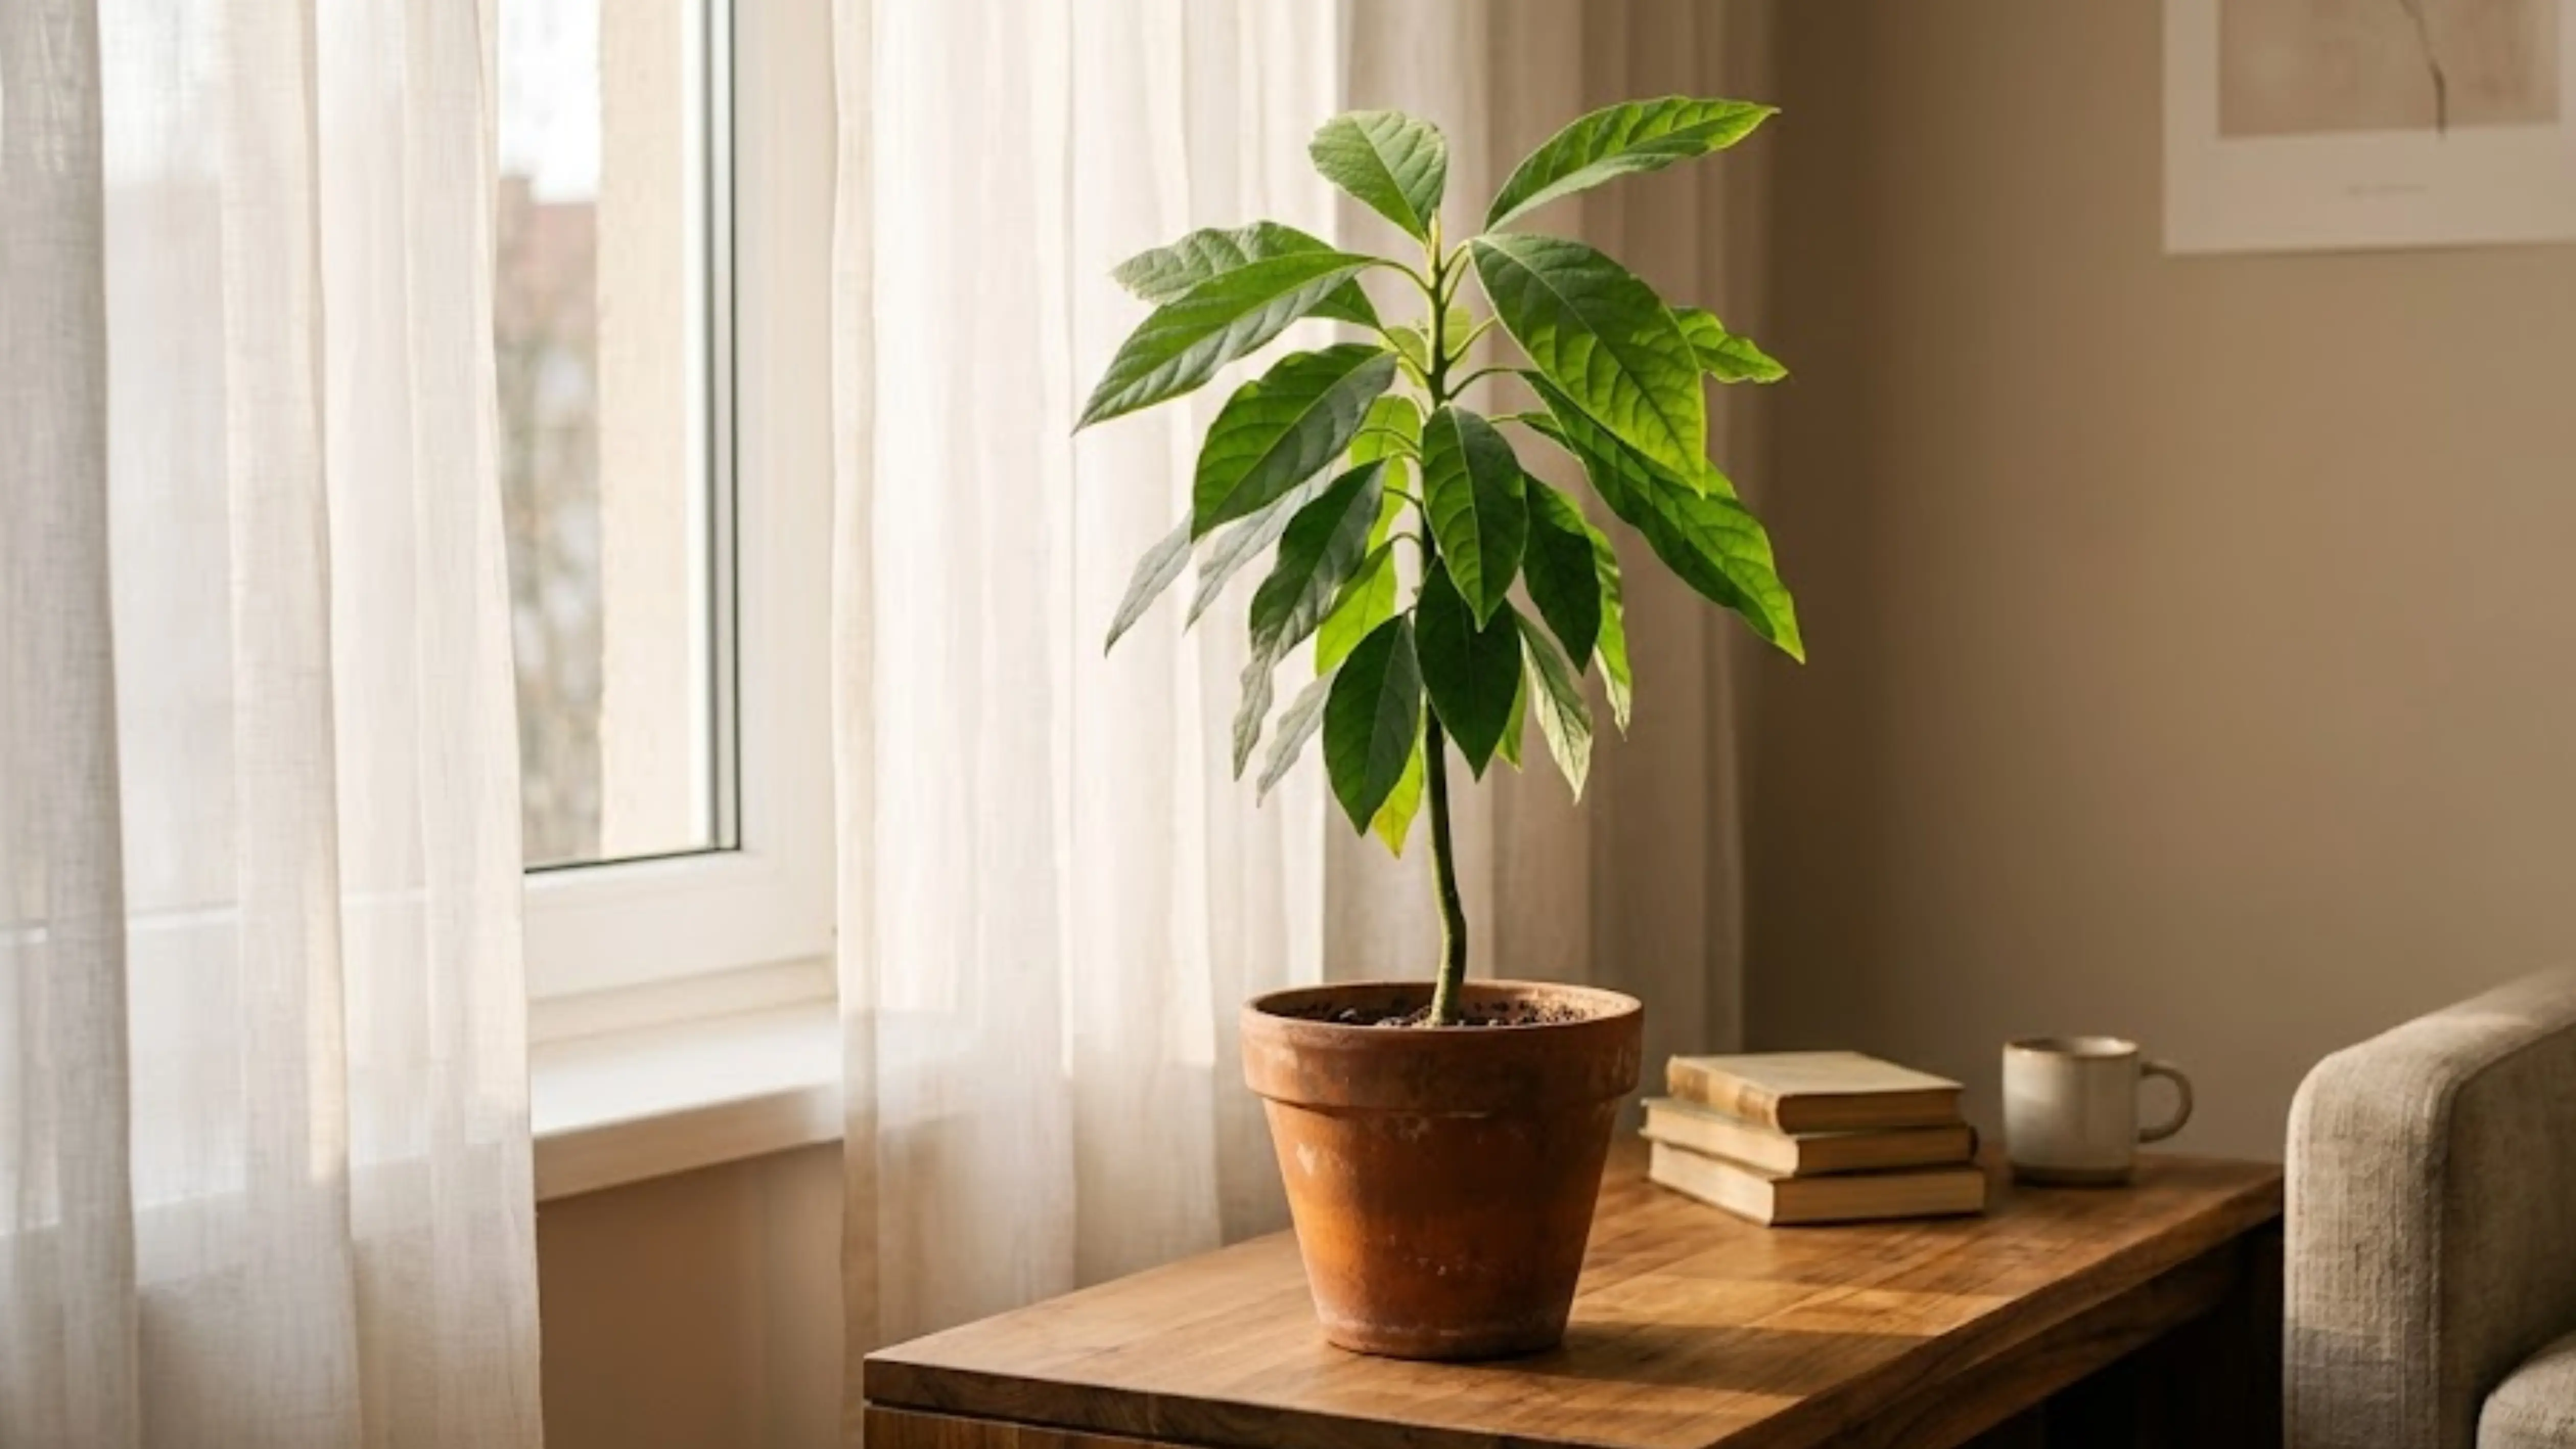
Finding the right spot for your avocado plant plays a big role in how quickly and healthily it grows.
- Choose a south- or west-facing window that gets several hours of bright, indirect light daily.
- A spot away from cold drafts, especially near winter windows or exterior doors.
- Keep it away from heating vents and radiators, which dry out the air and stress the plant.
- A location with fairly stable room temperature, ideally between 60°F and 85°F.
- Somewhere with room to rotate the pot occasionally for even growth on all sides.
- A spot away from direct, intense afternoon sun that can scorch young leaves.
Position your plant carefully from the start to make future care easier and support healthy development.
Watering an Avocado Plant Without Causing Root Rot
Roots need air as much as water. Constant moisture suffocates them fast.
Test the soil with a finger before watering; only water when the top inch feels dry.
Let excess water drain fully; never leave the pot sitting in a saucer. Fungus gnats or soggy soil often signal poor timing. The bottom watering method helps control this, since the plant draws up only what it needs.
Yellow, drooping leaves on wet soil usually mean rot, not thirst.
Fertilizing Young Avocado Plants
Young avocado plants don’t need fertilizer right away, especially while still establishing roots in soil.
Once the plant is a few months old and growing, feed it every 4-6 weeks with diluted balanced liquid fertilizer.
Apply only during spring and summer when growth is active, and skip fertilizing entirely in fall and winter as the plant slows down. Over-fertilizing can burn young roots and leaves, so it’s safer to under-feed than over-feed.
Always water the soil first before applying fertilizer to avoid stressing the roots.
Pruning and Pinching for a Fuller Avocado Plant
Left on its own, an avocado plant tends to grow as one tall, thin stem with few branches.
Pinching and light pruning encourage the plant to grow into a fuller, bushier shape.
- Pinch off the top growth once the stem reaches about twelve inches tall.
- Repeat pinching every time new growth adds another six inches or so.
- Cut just above a leaf node to encourage branching at that point.
- Remove any weak, leggy, or damaged stems to redirect energy to healthier growth.
- Avoid heavy pruning during winter months when the plant’s growth naturally slows.
- Use clean, sharp scissors or shears to avoid tearing the stem.
Pests and Diseases to Watch For
Avocado plants are fairly hardy, but a few common pests and diseases can still cause problems, especially indoors where natural predators are absent.
Knowing what to look for, from spider mites to aphids on houseplants, helps you catch issues before they spread.
| Pest/Disease | Signs to Watch For | How to Treat It |
|---|---|---|
| Spider mites | Tiny webbing and speckled, dull-looking leaves | Wipe leaves down and treat with soap |
| Aphids | Small green or black insects clustered on new growth | Rinse with water and apply neem oil, if needed |
| Mealybugs | White, cottony clusters near leaf joints and stems | Dab with rubbing alcohol on a cotton swab |
| Scale insects | Small brown bumps on stems and leaf undersides | Scrape off gently and treat with horticultural oil |
| Root rot | Mushy, dark roots and a foul smell from the soil | Trim damaged roots and repot in fresh, dry mix |
| Leaf Fungus | Dark, irregular spots spreading across leaves | Remove damaged leaves and improve air circulation |
Repotting Your Avocado Plant as It Grows
Fast growth means frequent repotting early on.
Watch for roots circling the drainage holes or pushing through the surface. Water running straight through without soaking in is another sign. Move up only 2 to 3 inches in diameter at a time.
Oversized pots hold water the roots can’t use yet. Spring is the best time to repot, right as growth picks up.
Loosen the root ball gently and keep the same planting depth.
Water well after repotting, then skip fertilizer for two to four weeks.
How Long Does It Take to Grow an Avocado Plant?
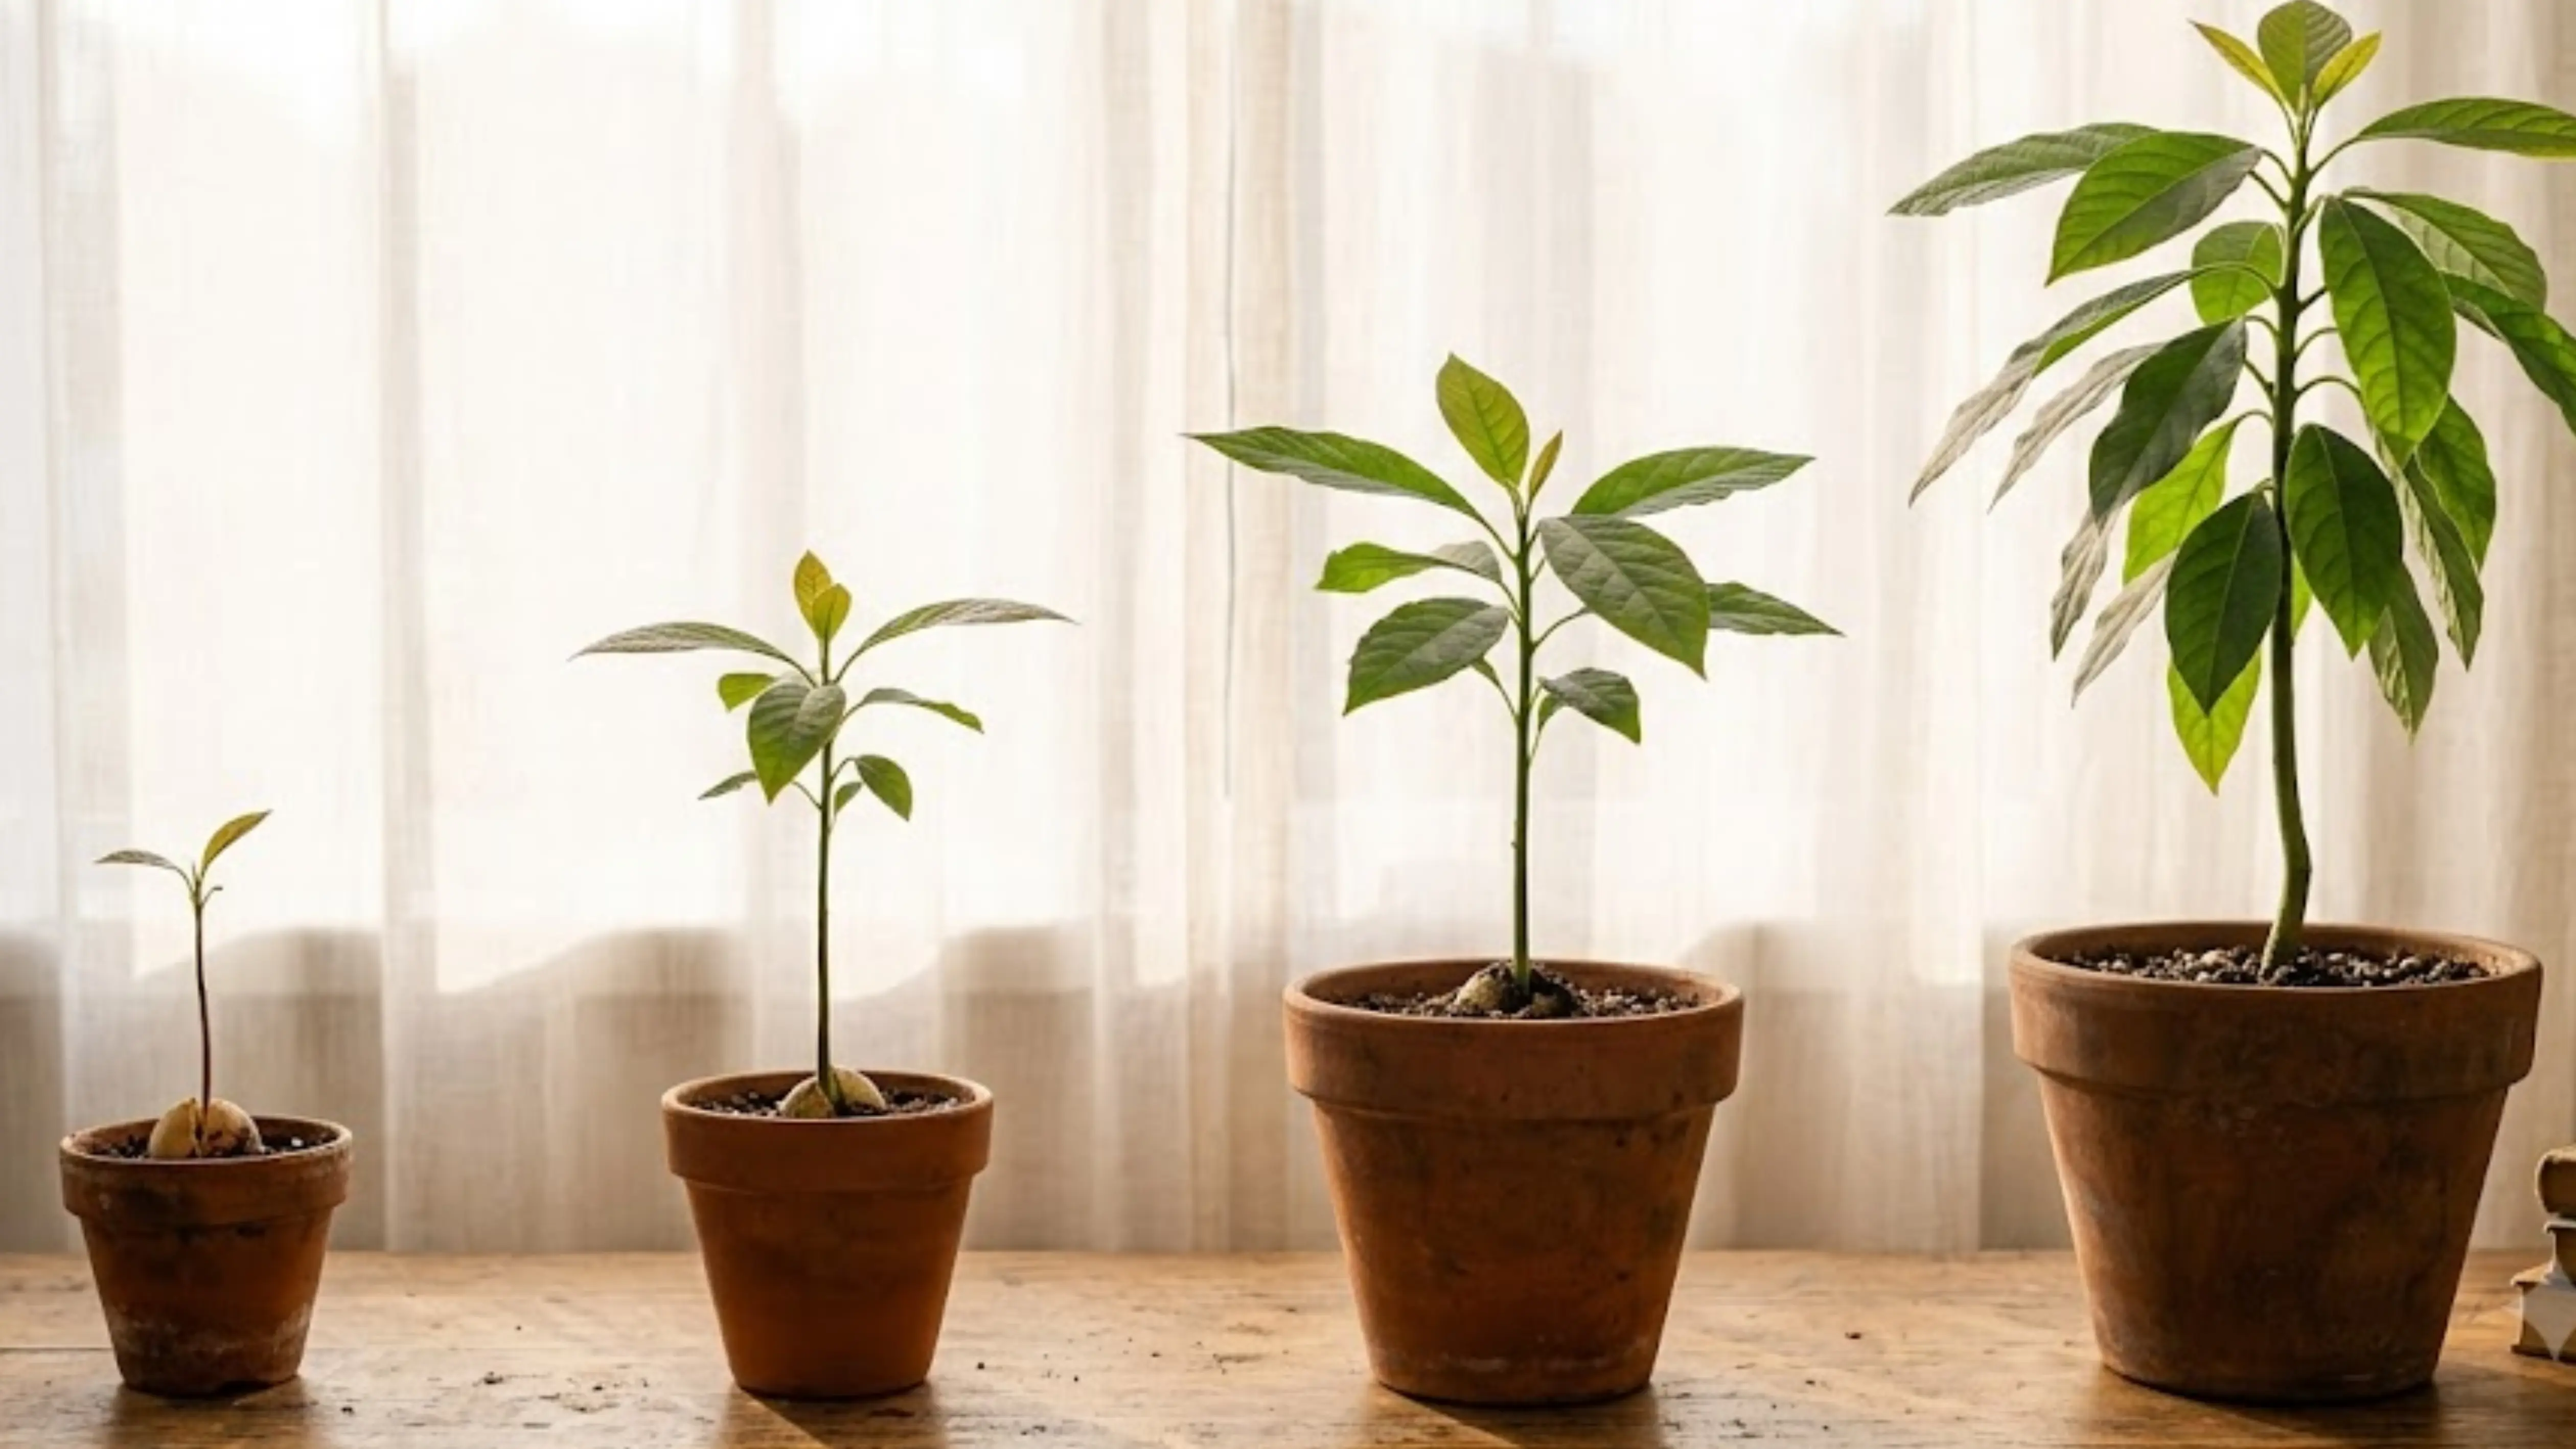
Germination takes 2 to 8 weeks. Reaching a sturdy houseplant takes about a year. Fruit is a much longer wait.
Seed-grown trees typically need 5 to 13 years to bear fruit, and some never do.
Grafted nursery trees fruit far sooner, usually within 3 to 4 years. The gap comes down to genetics; avocados don’t grow true from seed. A pit from a store-bought Hass won’t guarantee Hass-quality fruit, or any fruit at all.
Growing conditions, seed health, and even pollination access all factor into whether a seed-grown tree fruits at all.
For a plant to enjoy, seed works fine. For real fruit, buy a grafted tree.
Indoor vs. Outdoor Avocado Growing: Which is Better?
Both indoor and outdoor growing have their place, depending on climate and goals. Indoor is great for low-maintenance houseplants, but outdoor planting in the right climate offers a chance at homegrown avocados.
| Factor | Indoor Growing | Outdoor Growing |
|---|---|---|
| Climate needs | Works in any climate year-round | Needs warm, frost-free conditions |
| Growth speed | Slower due to limited light and space | Faster with full sun and more root room |
| Fruit potential | Very rare, lacks pollinators | Better odds, especially with natural pollinators |
| Space required | Minimal, suits pots and small rooms | Significant, trees grow tall and wide |
| Maintenance | Easier to control light, water, and temperature | More exposure to pests, weather, and disease |
| Best for | Ornamental houseplant growing | Long-term fruit-bearing trees |
Seasonal Care Calendar for Avocado Plants
Avocado plants’ needs vary by season, so adjusting your care routine ensures steady growth and prevents problems. Seasonal care simplifies maintaining a healthy avocado plant year-round.
- Spring: Repot if roots are crowded, resume fertilizing every four to six weeks, and begin pinching for branching.
- Summer: Water more during peak growth, continue fertilizing, and monitor for pests attracted by warmth.
- Fall: Taper fertilizer as growth slows, reduce watering, and bring outdoor plants indoors before frost.
- Winter: Skip fertilizing entirely, water sparingly, and keep the plant away from cold drafts and heating vents.
- Year-round: Rotate the pot and wipe leaves to keep them dust-free and photosynthesizing.
Beginner Mistakes that Kill Avocado Seedlings
Overwatering tops the list; soggy soil suffocates roots first.
Planting the seed upside down stops root growth entirely. Skipping water changes lets mold and bacteria take hold.
Cold drafts near windows or doors stress the plant badly.
Giving up too early is common; germination can take eight weeks. Direct, intense sun scorches young leaves fast. Knowing how often to water indoor plants prevents most of this.
Ignoring these small details causes more seedling deaths than any pest or disease ever does.
Troubleshooting Common Avocado Seed Problems
A seed that has not cracked after eight weeks likely needs more heat.
Mold usually means water sat too long without changing. A soft, mushy seed signals rot; discard it and start fresh.
A root with no sprout yet is normal; the sprout often lags behind. Yellowing leaves after transplant point to shock or overwatering, not disease. Most problems trace back to timing, moisture, or temperature.
Catching the cause early saves the seedling; waiting too long rarely does.
Final Thoughts
Knowing how to plant an avocado seed is one thing; sticking with it long enough to see a root is another.
The seed does the hard work on its own once conditions are right, and your job stays simple: keep the water fresh, keep the spot warm, and resist checking on it every hour.
Seedlings stall for one of two reasons: too much water or too little heat, and both are easy fixes.
Plant a few pits at once, since not every seed sprouts on the same timeline.
Which method are you trying, water or soil? Tell me how it goes.
Frequently Asked Questions (FAQs)
Can I Plant an Avocado Seed Straight Into Soil?
Burying the seed in well-draining potting mix works, but you won’t see roots before the stem stage.
Which End of the Avocado Seed Goes Down?
The flatter, rounder end goes down, while the slightly pointed end faces up.
How Often Should I Change the Water?
Change the water every two to three days to keep it fresh and prevent mold from forming on the seed.
Why is My Avocado Seed Cracking?
Cracking down the middle is normal and usually means a root is about to emerge, not a sign of damage.
Can I Grow an Avocado Plant without Toothpicks?
Yes, planting the seed directly in soil works as well as using toothpicks, just without the visible germination.