A pumpkin seed appears quite simple.
Buried in that shell is everything needed to produce a 20-pound fruit by fall.
Getting the basics wrong can cause germination to stall or seedlings to rot before sprouting.
In my own patch, the difference between a full vine and a handful of sad seedlings almost always came down to timing and soil temperature, not luck. This blog covers how to plant pumpkin seeds correctly.
Selecting the best location and variety while recognizing the signs that indicate your fruit is ready for harvest.
Can You Plant Pumpkin Seeds from a Carved Pumpkin?
Yes, you can plant them. A carved pumpkin doesn’t damage the seeds inside, so they still have the ability to sprout.
Remove them carefully, and you’ll have the chance to grow new plants.
Keep one thing in mind: many carving pumpkins come from hybrid varieties. Their seeds don’t grow true to the parent plant. The next pumpkin could turn out smaller, misshapen, or genetically different in noticeable ways.
To ensure consistent outcomes, buy seeds from a reputable garden supplier.
Instead, consider treating carved seeds as a low-risk experiment.
Remove the pulp, allow it to air-dry for a week, then transplant outdoors once the risk of frost is gone.
When is the Best Time to Plant Pumpkin Seeds?
Timing matters more than many gardeners realize.
Pumpkins require warm soil and an extended growing period to fully mature before harvest.
Aim for these windows depending on your goal:
- Late May to early July for a fall harvest.
- Early June for Halloween-ready pumpkins by October.
- Mid-summer for smaller, quick-maturing varieties.
Soil temperature should be above 65°F before planting, and 70°F or warmer ensures faster, more even sprouting.
Cold soil hampers germination and raises rot risk.
Plan your regional planting window by working backward from your harvest date, as frost dates vary across regions. Most varieties take 90 to 120 days to mature, which determines your planting window each season.
Choose the Right Spot and Pumpkin Type Before You Plant
Your success depends on location and variety before a seed even reaches the soil.
| Pumpkin Type | Best Spot | Best Time to Plant |
|---|---|---|
| Mini | Containers or small beds, full sun | Early June |
| Pie | Raised beds or rows, ample spreading room | Late May to mid-June |
| Carving | Open ground, 4-6 ft spacing | Early to mid-June |
| Giant | Wide-open space, 100+ sq ft, full sun | Mid-May, earliest of all types |
| White | Well-drained soil, sheltered from strong wind | Late May to early June |
| Decorative | Trellis or fence line, moderate sun | Early June |
| Kabocha-style | Compact beds, warm and sunny spot | Early to mid-June |
Prepare Pumpkin Seeds for Planting
Preparing early gives pumpkin seeds growing a competitive edge.
Soak them in water for 24 hours before planting. This softens the outer shell and speeds germination.
Some gardeners nick the seed coat slightly with a nail file. That small step lets moisture in faster. Check for firm, plump seeds. Discard any that feel hollow or look shriveled. Weak seeds rarely produce strong seedlings.
Store leftover seeds in a cool, dry envelope until you’re ready to plant them all.
How to Plant Pumpkin Seeds Directly in the Garden
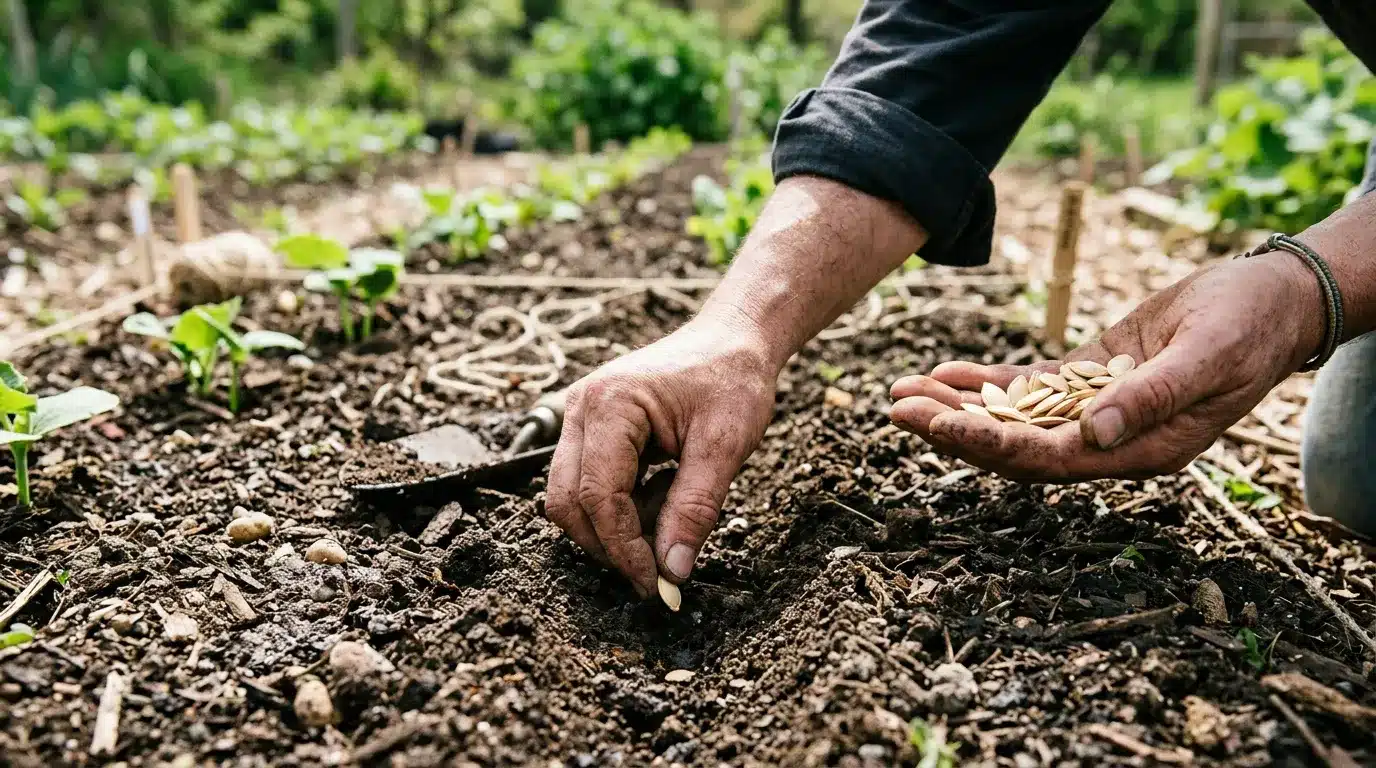
Skip the pots and plant directly in the ground. Follow these seven steps for effective results.
Step 1: Clear and Loosen the Ground
Remove weeds, rocks, and debris from your planting area.
Turn the soil with a garden fork to a depth of 10-12 inches.
Loose soil lets roots spread freely and drain excess water. Work in compost or aged manure at this stage.
This gives young roots immediate access to nutrients as they establish themselves underground. A raked, level surface afterward makes the next step much easier to manage.
Step 2: Build Small Mounds
Shape the soil into mounds, each about 12 inches wide and slightly raised.
Mounds warm up faster than flat ground, giving seeds a head start.
Space mounds according to your chosen variety. Raised soil also improves drainage, keeping seeds from sitting in soggy conditions that lead to rot before germination even begins.
Pat down the top of each mound so seeds don’t roll off once placed.
Step 3: Plant at the Right Depth
Push seeds about 1 inch into the soil, pointed end down.
Planting too shallow exposes seeds to birds and drying wind.
Planting too deep delays sprouting. This depth strikes the right balance for most garden soil types, letting seeds access warmth and moisture without struggling to push through.
Cover each seed loosely, then press the soil down with your palm.
Step 4: Sow Multiple Seeds Per Mound
Place 3-4 seeds in each mound, spaced a few inches apart.
This backup plan accounts for seeds that fail to sprout. Not every seed germinates, even under ideal conditions.
Planting extras increases your odds of at least one strong seedling per mound without requiring you to replant later. Arrange them in a small circle rather than a straight line for even spacing.
Step 5: Water Gently After Planting
Water the mounds right after planting, using a gentle spray.
Heavy watering can displace seeds or wash away topsoil.
Keep the area consistently moist, not soaked, for the first week. Consistent moisture triggers germination and supports the fragile root system forming underground during those early days.
Check the soil daily with your finger to gauge moisture before watering again.
Step 6: Thin Out Weak Seedlings
Once seedlings reach 2-3 inches tall, select the strongest one per mound.
Snip the others at soil level using scissors. Pulling them out risks disturbing the roots of your chosen seedling.
This step directs the mound’s nutrients and space toward one healthy plant instead of several competing ones.
A single strong vine per mound also grows faster and produces larger fruit.
Step 7: Apply Mulch Around Plants
Spread a layer of straw or shredded leaves around each seedling.
Mulch locks in soil moisture and blocks weed growth.
It also keeps developing pumpkins clean as they rest on the ground later. Apply mulch a few inches from the stem to avoid trapping excess moisture against it. Refresh the layer midseason as it breaks down or thins out.
How to Start Pumpkin Seeds in Pots or Seed Trays
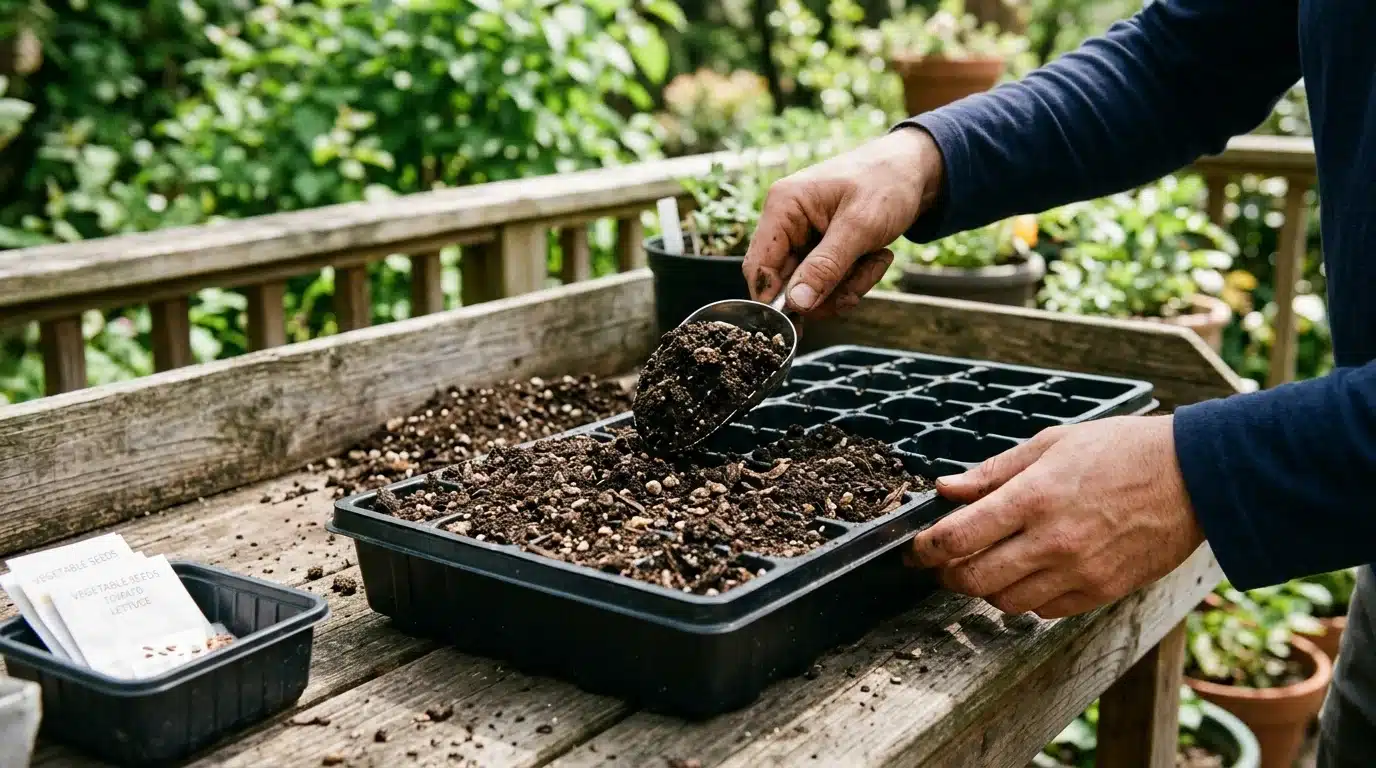
Getting an early start on the season?
Starting seeds indoors gives your pumpkins a solid head start before transplanting.
- Step 1: Fill biodegradable pots with seed-starting mix, not garden soil.
- Step 2: Plant one seed per pot, about 1 inch deep.
- Step 3: Place pots in a warm spot, ideally 70-85°F, near a heat mat if possible.
- Step 4: Keep the mix moist using a spray bottle, never soaking wet.
- Step 5: Move pots to a sunny windowsill once sprouts appear.
- Step 6: Rotate pots every couple of days for even light exposure.
- Step 7: Harden off seedlings outdoors for a few hours daily before transplanting.
- Step 8: Transplant into the garden once true leaves develop, and frost risk ends.
Pumpkin Growing: Water, Feeding, and Vine Management
Once seedlings settle in, ongoing care determines how well your vines perform through the season.
| Task | Frequency | Key Tip |
|---|---|---|
| Watering | 1-2 inches per week | Water at the base; avoid wetting leaves |
| Fertilizing | Every 3-4 weeks | Switch to phosphorus-rich feed once flowers appear |
| Vine training | Weekly check | Guide vines in one direction to save space |
| Pruning | As needed | Remove side shoots to focus energy on main fruit |
| Pollination check | During flowering | Hand-pollinate if bee activity seems low |
| Weeding | Biweekly | Pull weeds by hand near shallow roots |
How to Care for Pumpkin Seeds While They Germinate
Germination takes patience. Most pumpkin seeds sprout within 5 to 10 days under the right conditions.
Maintain steady heat throughout this window. Soil temperatures below 60°F can significantly stall the process.
A sunny spot or black plastic mulch helps trap heat near the surface.
Avoid disturbing the soil once seeds are in place. Shifting them around delays root development. Watch for a slight soil crust forming; break it gently with a fork if it hardens.
Shield young sprouts from heavy rain or strong wind during their first few days.
Fragile stems snap easily before roots anchor firmly underground.
What to Do When Pumpkin Seedlings Come Up
Seedlings emerge with two rounded leaves first. True leaves, shaped like the adult plant, follow shortly after.
Check for pests immediately. Cutworms and slugs target young stems at ground level.
Place a collar around each seedling if you see damage. Reduce watering frequency slightly once leaves unfurl.
Overwatering at this stage encourages fungal issues like damping-off. Let the top inch of soil dry between waterings. Begin light feeding with a diluted, balanced fertilizer after the second set of leaves forms.
Avoid heavy nitrogen doses, which push leafy growth over root strength.
Monitor for uneven growth among seedlings sharing a mound and tackle the issue early.
How Pumpkin Flowers Become Pumpkins
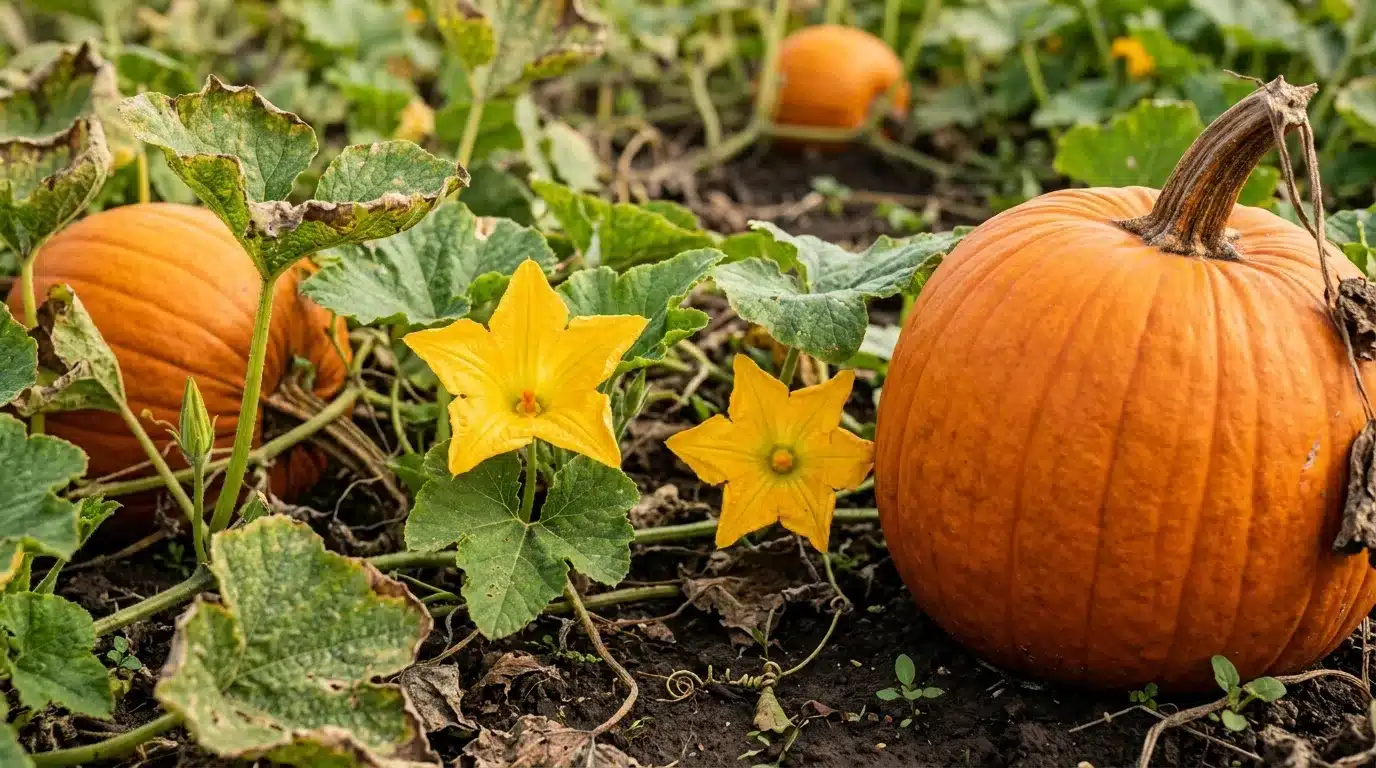
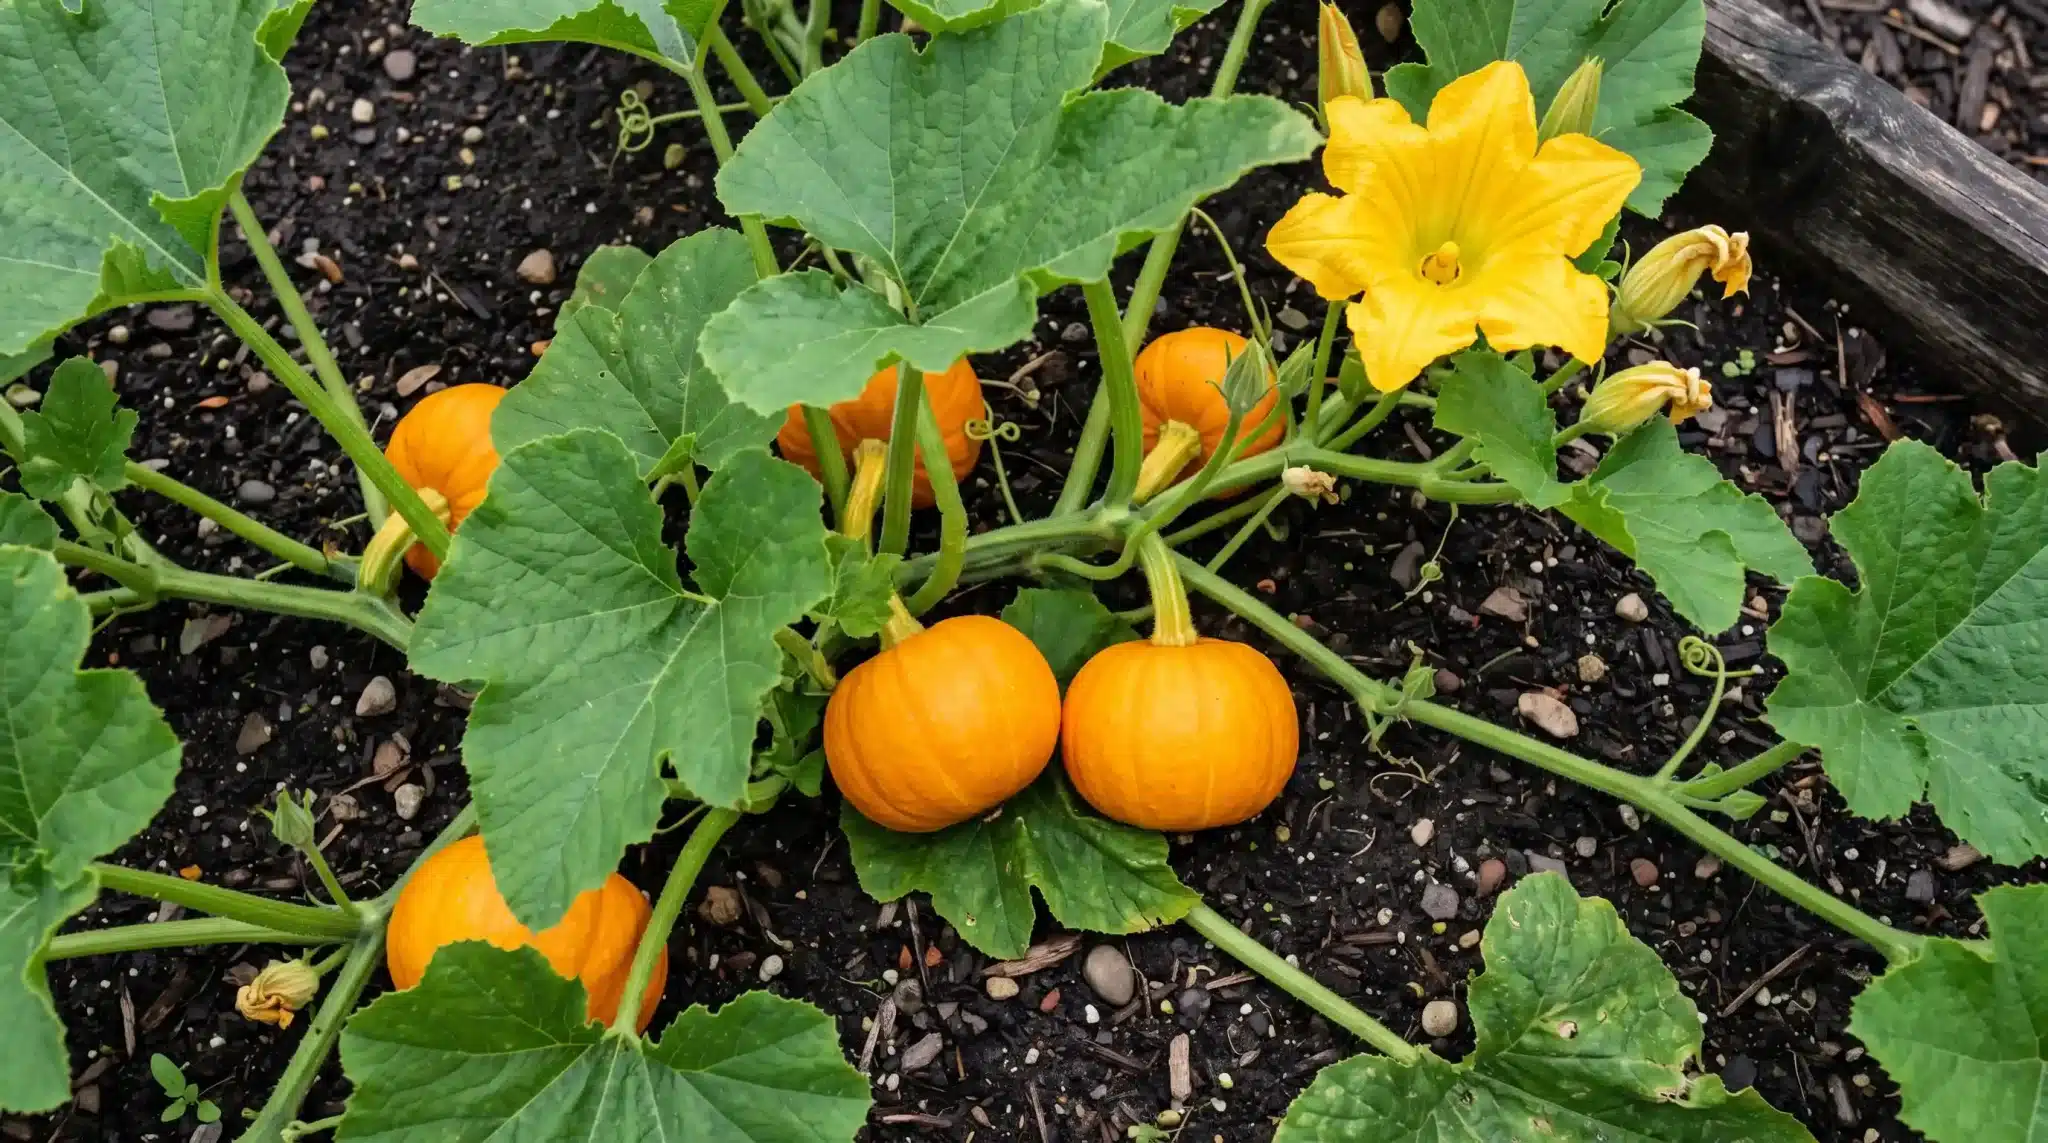
Pumpkin plants generate two types of flowers.
Male flowers appear first, sitting on thin, straight stems. Female flowers appear next, characterized by a small bulge at their base. That bulge is an unfertilized fruit waiting for pollen.
Bees carry pollen from male to female flowers, triggering fertilization.
Without this transfer, the bulge shrivels and drops off within days. Once fertilized, the bulge swells steadily.
Cell division ramps up inside, forming the flesh and seed cavity you’ll see later.
Color develops gradually, starting green and shifting as the fruit matures.
This process of changing from bloom to fruit spans several weeks, depending on the variety and climate.
Companion Plants that Help Pumpkin Seeds Thrive
Pairing pumpkins with the right neighbors reduces pest pressure and makes better use of garden space.
Nasturtiums planted at the base of mounds can draw squash bugs away from the vines.
Marigolds nearby are commonly used to discourage nematodes in the surrounding soil.
Corn and pole beans grown with pumpkins, known as the “Three Sisters,” let each plant support the others: corn provides a trellis, beans add nitrogen, and pumpkin leaves shade weeds.
Avoid planting pumpkins near potatoes, since both are heavy feeders that compete hard for the same nutrients.
How Long Do Pumpkin Seeds Take to Grow Into Pumpkins?
The full journey from seed to harvest varies widely. Timing depends heavily on the variety you’re growing.
Rough timelines by growth stage:
- Germination: 5-10 days
- Seedling to flowering: 30-55 days
- Flowering to fruit set: 7-14 days
- Fruit set to full maturity: 45-55 days
Total time ranges from 90 to 120 days for most types. Mini varieties finish faster, while giant pumpkins push toward the longer end of that range. Weather plays a bigger role than most calendars suggest.
A cool, wet season can stretch these numbers considerably, pushing harvest further out than planned.
Pumpkin Seed Planting Problems and How to Fix Them
Even careful planting can face problems. Here’s how to recognize common issues and fix them swiftly.
| Problem | Likely Cause | Fix |
|---|---|---|
| Seeds fail to sprout | Cold soil or planted too deep | Wait for warmer soil, replant shallower |
| Yellowing leaves | Nitrogen deficiency or overwatering | Adjust watering, add balanced fertilizer |
| Powdery mildew | High humidity, poor airflow | Space vines out, apply fungicide |
| Vines wilting suddenly | Squash vine borer damage | Check stem base, remove larvae, use row covers |
| Misshapen fruit | Incomplete pollination | Hand-pollinate during peak bloom |
| Stunted growth | Compacted or poor soil | Loosen soil, mix in compost |
When and How to Harvest Pumpkins You Grew from Seed
Start by inspecting the rind; a dark, firm rind indicates it’s ready to be harvested.
Press a fingernail into the skin; it shouldn’t puncture easily. The stem offers another clue. It turns brown and starts drying out near harvest time. Cut pumpkins with 3-4 inches of stem still attached, using sharp shears.
Avoid carrying pumpkins by the stem itself.
Removing the stem shortens storage and increases rot risk. Harvest before the first hard frost.
Cure pumpkins in a warm, dry spot for about two weeks.
This further strengthens the skin, increasing its longevity afterward.
Can You Save Seeds from Your Homegrown Pumpkin?
Yes, saving seeds works well for open-pollinated varieties.
Hybrids, though, rarely produce true-to-type offspring the following season.
Take seeds from a fully mature pumpkin, not one harvested early.
Immature seeds lack the developed embryo needed for germination later. Rinse off the pulp thoroughly, then spread seeds on a paper towel. Let them dry for one to two weeks in a well-ventilated space.
Keep dried seeds in a labeled envelope stored in a cool, dark area.
Properly stored seeds can remain viable for up to four years.
Frequently Asked Questions (FAQ’s)
1. Do I Need to Soak My Pumpkin Seeds Before Planting?
Soaking isn’t required, but it speeds up germination by softening the seed coat.
2. Do You Plant Pumpkin Seeds Point Up or Down?
Plant seeds pointed end down, at a slight angle, for the strongest root emergence.
3. Is There a Downside to Pumpkin Seeds?
The main drawback is overplanting in limited space, as vines tend to sprawl aggressively and crowd other plants.
4. Does 1 Pumpkin Seed Grow 1 Pumpkin?
No, one seed grows one vine, and that vine can produce several pumpkins depending on variety.
5. Does Pumpkin Grow Back Every Year?
No, pumpkins are annuals, so you’ll need to replant seeds each growing season.
Wrap Up!
A few steps, a handful of care tips, and roughly a hundred days stand between a seed and a finished pumpkin.
Watch your seedlings closely during those first few weeks; early attention prevents most issues before they spread.
Once vines take over your garden bed, feeding and pruning keep them productive, not unruly.
By harvest time, You’ll have seeds worth saving, pie filling worth baking, and proof that the process actually works.
Have a pumpkin-growing tip or a mistake you learned from the hard way?
Drop it in the comments below; it might save another gardener’s patch this season.