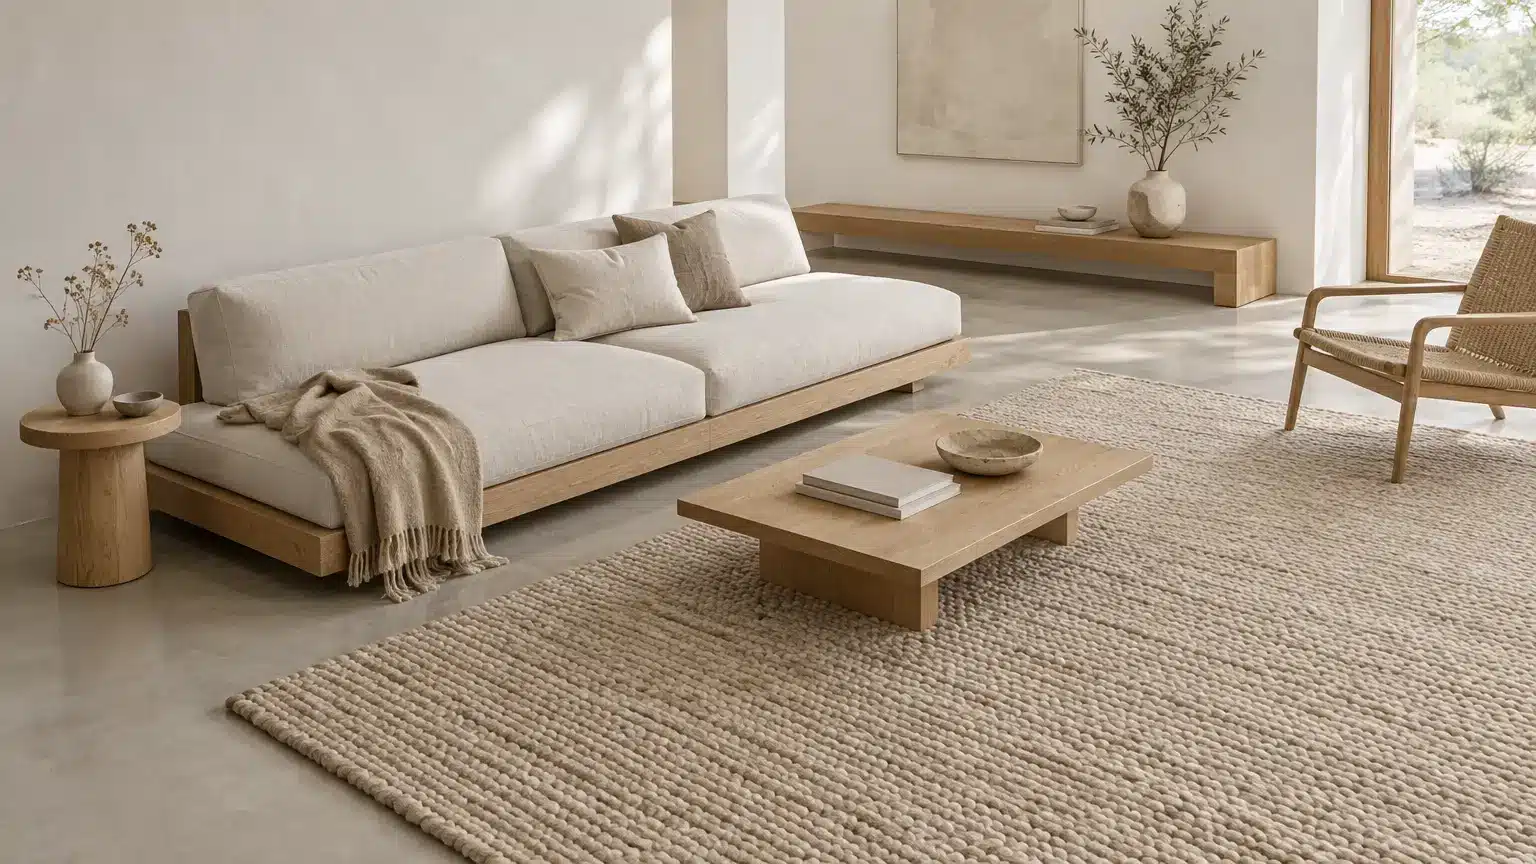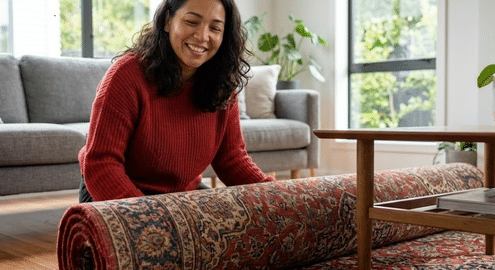
It started with one rug slipping under another. I didn’t mean to do it. But the way it looked stopped me. Something about the overlap made the room feel better, so I tried it again, on purpose this time.
That’s how I got into learning how to layer rugs. Not for style points, but because it just made the space feel more put together.
You don’t need to know a bunch of design rules. You don’t need fancy rugs either. You need to know how to place them in a way that works.
In this blog, I’ll show you how to layer rugs in simple steps: what sizes to use, where to start, and how to get it right without guessing.
What Layered Rugs Really Do For a Room
Layered rugs do more than just sit on the floor. They change how a room feels. When you put one rug over another, it adds depth.
The room doesn’t feel flat; it feels full, like it has more shape. This can make a space feel warmer and more inviting without adding more furniture.
Layering also helps break up large open areas. If your room feels too big or empty, rugs can help define smaller zones. One rug under the couch, another at an angle, suddenly the space feels more thought-out.
It’s also a smart way to fix little problems.
Have a stain or scratch on the floor? A well-placed rug covers it. Got a rug that’s too small? Add a second one underneath.
In short, layered rugs help your room feel more finished, more balanced, and more useful without doing a full makeover.
How to Layer Rugs
Layering rugs can turn a plain floor into a more interesting, comfortable space. Below, you’ll learn step-by-step approach that make the look work in any room:
Step 1: Start with a Plain Base Rug
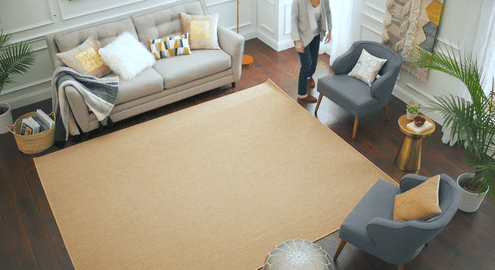
Use a rug that’s neutral or made from natural stuff like jute or flat cotton. It sets the stage without drawing too much attention. This makes it easier to add another rug on top that really stands out.
Step 2: Add a Bold or Colorful Rug on Top
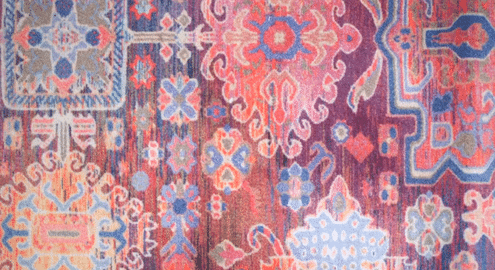
Choose a rug with strong color or a fun pattern. This is where you can show some personality. Stripes, shapes, or bright designs work well here.
Step 3: Match, but Don’t Make Them Too Close
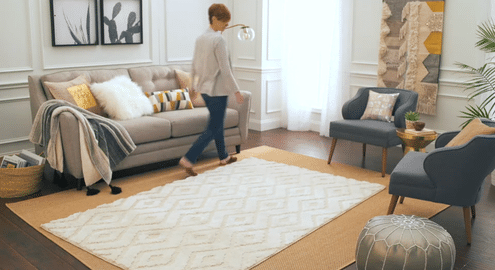
Pick colors and styles that work together, but don’t match exactly. You want the top rug to pop against the base. It should feel like it belongs, but still be the star.
Step 4: Put Thick Rugs on Top
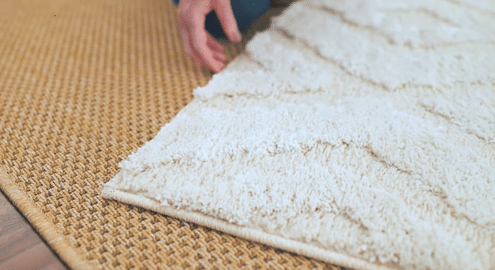
Soft rugs like shag or fluffy ones always go on top. If they’re on the bottom, they slide and wrinkle. Keeping them on top also makes the room feel cozy.
Step 5: Make Sure Sizes Are Different
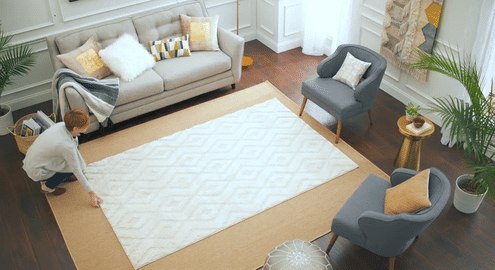
If both rugs are the same shape, the bottom one should be much bigger. This makes a border around the top rug and helps the whole thing look planned.
Need to see it in action? Here’s a quick tutorial you can follow to help you layer rugs with confidence:
Is Layering Rugs Right for Your Space?
Layering rugs works in more spaces than you might think. It’s not just for big, fancy rooms. It can help small rooms feel more full, and large rooms feel more cozy. If your space feels flat or cold, adding layers can warm it up without needing more furniture.
Got wall-to-wall carpet? You can still layer rugs. Putting a flat rug on top can help break up the look and add color or shape. On hardwood or tile, layering adds softness and helps reduce echo.
It’s also great if you have a rug that’s too small. Instead of throwing it out, place a bigger rug underneath it. Now it fits your space better and feels more balanced.
Layering can work in bedrooms, living rooms, entryways, and even under dining tables—just keep the rugs flat and safe to walk on.
The main thing is: if your space feels boring, plain, or not finished, layering might help. It adds texture, comfort, and style in a simple way.
And the best part? You can switch things around anytime. Try it, see how it feels, and don’t worry about getting it perfect.
How to Layer Rugs in Each Room
Layering rugs doesn’t work the same in every room. Here’s a simple guide to help you figure out what works best for each space in your home:
| Room | What to Keep in Mind |
|---|---|
| Living Room | With a sectional, place the base rug under the whole piece. Use a bold rug under the coffee table to center the space. In open layouts, layered rugs can help create a clear hangout zone. |
| Bedroom | The base rug should go under the bed and stick out at least 18–24 inches on each side. Try a smaller rug at the foot, off to the corner, or beside the bed. In small rooms, use a slim rug and add a runner or soft topper. |
| Dining Room | Make sure layering won’t mess with chair movement. Choose rugs that chairs can slide on easily. Keep both rugs large enough so chairs stay on top, even when pulled out. |
| Entry & Hallway | Try a runner as the base and a small rug on top. Keep rugs thin and use non-slip pads. Make sure the door can still open all the way. |
| Kids & Play Areas | Pick rugs that are washable and soft. Flat rugs work best for layering or overlapping. Sometimes, just one rug is better—less mess and easier to clean. |
Layering works best when you keep the room’s needs in mind. Always check for safety, comfort, and how much traffic the area gets.
Layering Style Ideas That Actually Work
You’ve got the basics down; now it’s time to try some layering styles that look good and feel easy.
These simple ideas can help you build a look that fits your space without doing too much. Pick one and give it a try:
Neutral Base + Bold Top Rug
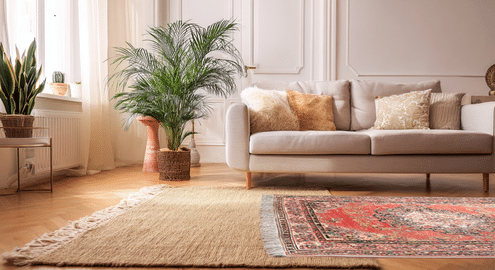
Start with a simple, solid-colored rug as your base. Then layer a colorful or patterned rug on top. This keeps things balanced while still adding interest.
The bold rug stands out without making the room feel too busy. This style works great if you want to highlight one rug but keep the space calm overall.
Same Colors, Different Patterns
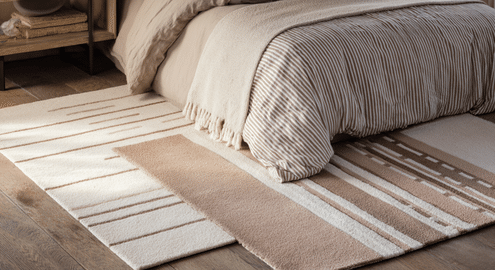
Stick to one main color, but choose rugs with different designs. For example, you could layer a striped rug over one with dots or geometric shapes.
Since the colors match, it won’t look too loud. This is a fun way to mix things up without going overboard. It adds movement while still feeling pulled together.
Mix Textures
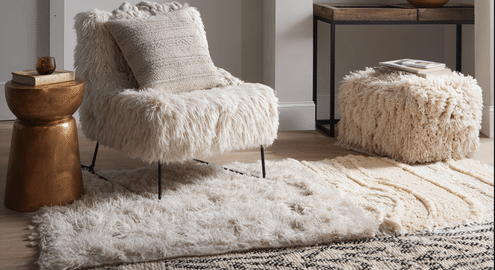
Try using rugs that feel different. Put a flat rug on the bottom and a soft one, like a fluffy or woven rug on top. The contrast between rough and smooth makes the space more interesting.
This look works well in bedrooms or cozy corners where you want things to feel warm and soft under your feet.
Angled Top Rug
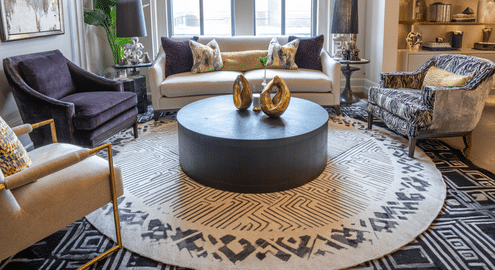
Instead of lining up both rugs perfectly, try turning the top one at an angle. This makes the room feel more relaxed and less formal.
It’s a small trick, but it changes the mood. You can use this style in living rooms or bedrooms where you want a casual, lived-in look without trying too hard.
Two Rugs Touching
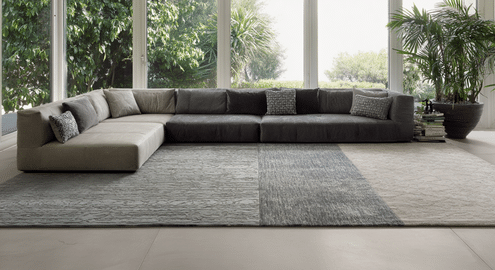
Place two rugs next to each other, just touching at the edges. This is a good idea for larger rooms where one rug isn’t big enough.
It helps stretch your floor coverage without buying a huge rug. Keep the rugs similar in color or material so they still feel like they go together.
Rug Layering Size Guide
Before you buy anything, it helps to know what sizes work best together. The right size makes layering look planned, not random.
| Room Type | Base Rug Size | Top Rug Size | Tip |
|---|---|---|---|
| Living Room | 8×10 ft or 9×12 ft | 5×7 ft or 4×6 ft | Make sure the top rug fits under the coffee table and stays centered. |
| Bedroom | 9×12 ft (queen/king beds) | 3×5 ft or runner | The base should go under the bed. Add a small rug at the foot or side. |
| Dining Room | 8×10 ft or larger | Thin flat rug in similar size | Both rugs must fit chairs, even when pulled back. |
| Entryway | Runner (2.5×8 ft) | Small rug (2×3 ft) | Place the smaller rug near the door. Use rug pads to stop sliding. |
| Kids’ Room | 5×8 ft or 6×9 ft | Flat rug or soft round rug | Go for washable, low-pile rugs to make cleanup easy. |
Rug sizes can look different in real spaces, so it helps to measure before buying. When in doubt, go bigger with the base rug and smaller on top for balance.
Common Layering Mistakes
Layering rugs isn’t hard, but a few small mistakes can make it look messy or unplanned. Watch out for these common slip-ups:
- Using rugs that are too close in size, this makes layering look awkward.
- Placing a thick rug on the bottom, which can cause wrinkles or tripping.
- Mixing patterns that clash or fight for attention.
- Forgetting a rug pad, which helps keep rugs in place and safe.
- Choosing colors that don’t match anything else in the room.
- Blocking doorways with thick rugs that stop the door from opening smoothly.
Take a step back after placing your rugs. If it feels off, something might just need a quick fix. A small change in size, angle, or color can make a big difference.
Conclusion
I didn’t expect layering rugs to make such a big difference in my space, but once I tried it, the whole room felt more pulled together.
It wasn’t about being fancy, it was just about making things feel right. Learning how to layer rugs gave me options I didn’t know I had.
Now it’s your turn. Look around your space and think about where a second rug might help. Try one small change and see how it feels. Keep it safe, keep it simple.
And remember: there’s no perfect setup.
You get to shape it your way. Want more ideas that work without making things hard? Check out the other blogs. They’re full of real tips you can actually use, just like this one!