I used to watch fresh chives break down in my fridge after only a few days. No matter how careful I was, they turned soft and unusable fast.
That pushed me to figure out how to dry chives in a way that actually works at home.
Once I learned the right steps, chives stopped feeling like a short-term ingredient and became something I could store and use anytime.
In this guide, you will learn how to prep chives before drying, which drying methods work best, and how to avoid common mistakes.
You will also learn how to tell when chives are fully dry and ready for storage. By the end, you will know exactly how to preserve chives and reduce waste in your kitchen.
Why Chives Go Bad So Fast
Chives go bad fast because they have a high water content and very delicate leaves. Each stalk is thin, hollow, and full of moisture.
Once cut or harvested, that moisture starts working against the plant. Soft leaves lose structure quickly, which leads to wilting and slime.
Moisture, air, and light make the problem worse. Extra moisture encourages mold and bacteria to grow. Air exposure causes oxidation, which dries out the tips and turns them yellow.
Light pushes the leaves to keep reacting as if they are still growing. That drains stored energy and shortens shelf life even more.
This is why preservation works better than refrigeration alone. A fridge slows spoilage but does not remove moisture or block air.
Freezing or drying chives reduces water and limits exposure. That slows bacteria growth and helps keep the flavor for longer.
Best Ways to Preserve Chives at Home
You have two main options when you want chives to last longer: drying and freezing. Each method works best in different situations.
Drying removes moisture from the leaves. This helps stop mold and bacteria. Dried chives work well for soups, sauces, and dry mixes.
They keep for several months in an airtight jar. The tradeoff is flavor and texture. Dried chives lose some of their fresh bite and turn brittle.
Freezing keeps chives closer to their fresh state. You can freeze them chopped, whole, or in oil or water cubes. Frozen chives last up to a year.
They keep more flavor than dried ones but turn soft after thawing. This makes them better for cooking, not garnishing.
If you want long shelf life with easy storage, drying works well. If flavor matters more, freezing is the better choice.
How to Dry Chives at Home
Drying is a simple way to preserve chives when you want long storage without using freezer space. It works well for cooking chives and keeps them usable for months.
You can air dry, oven dry, or use a dehydrator. Freeze drying is another option if you want better color and flavor, though it needs special equipment.
Below are the step by step methods you can use at home, including freeze drying:
Step 1. Cut the chives: Use scissors to cut the chives a short distance above the root. This helps keep the plant healthy if it regrows.
Step 2. Rinse and clean: Rinse the chives briefly to remove dirt or debris. Trim off any bruised or wilted parts.
Step 3. Dry the chives: Place the chives on a clean towel and gently dab them dry. Removing surface moisture helps prevent ice buildup.
Step 4. Chop into small pieces: Transfer the chives to a cutting board. Use a sharp knife to chop them into small, even pieces.
Step 5. Package for freezing: Place the chopped chives into a freezer-safe bag. Press out as much air as possible before sealing.
Step 6. Freeze: Lay the bag flat in the freezer. Leave it undisturbed until fully frozen.
Step 7. Use as needed: Use frozen chives directly from the freezer. Add them straight to your recipe without thawing.
If you prefer a visual guide, watching a short tutorial can make the process easier to follow. A step-by-step video also helps you see the cutting, packing, and freezing stages more clearly.
How to Prepare Chives Before Drying
Proper prep helps chives dry evenly and last longer. Start with harvest timing. Cut chives when they are bright green and firm.
Avoid harvesting after heavy rain or watering, since extra moisture slows drying and raises spoilage risk.
Decide whether to chop before drying based on your method. Whole chives work well for air drying or dehydrators.
Chopping first saves time later and helps with even drying, especially for oven or dehydrator use. If you chop, keep pieces similar in size so they dry at the same rate.
Taking time to prep properly improves flavor, texture, and shelf life.
Drying Chives at Home
There are several ways to dry chives at home, depending on the tools you have and the time available. Each method has its own strengths and limits.
Below are the most common options, with clear guidance to help you avoid common problems and get usable results.
Drying Chives in a Dehydrator
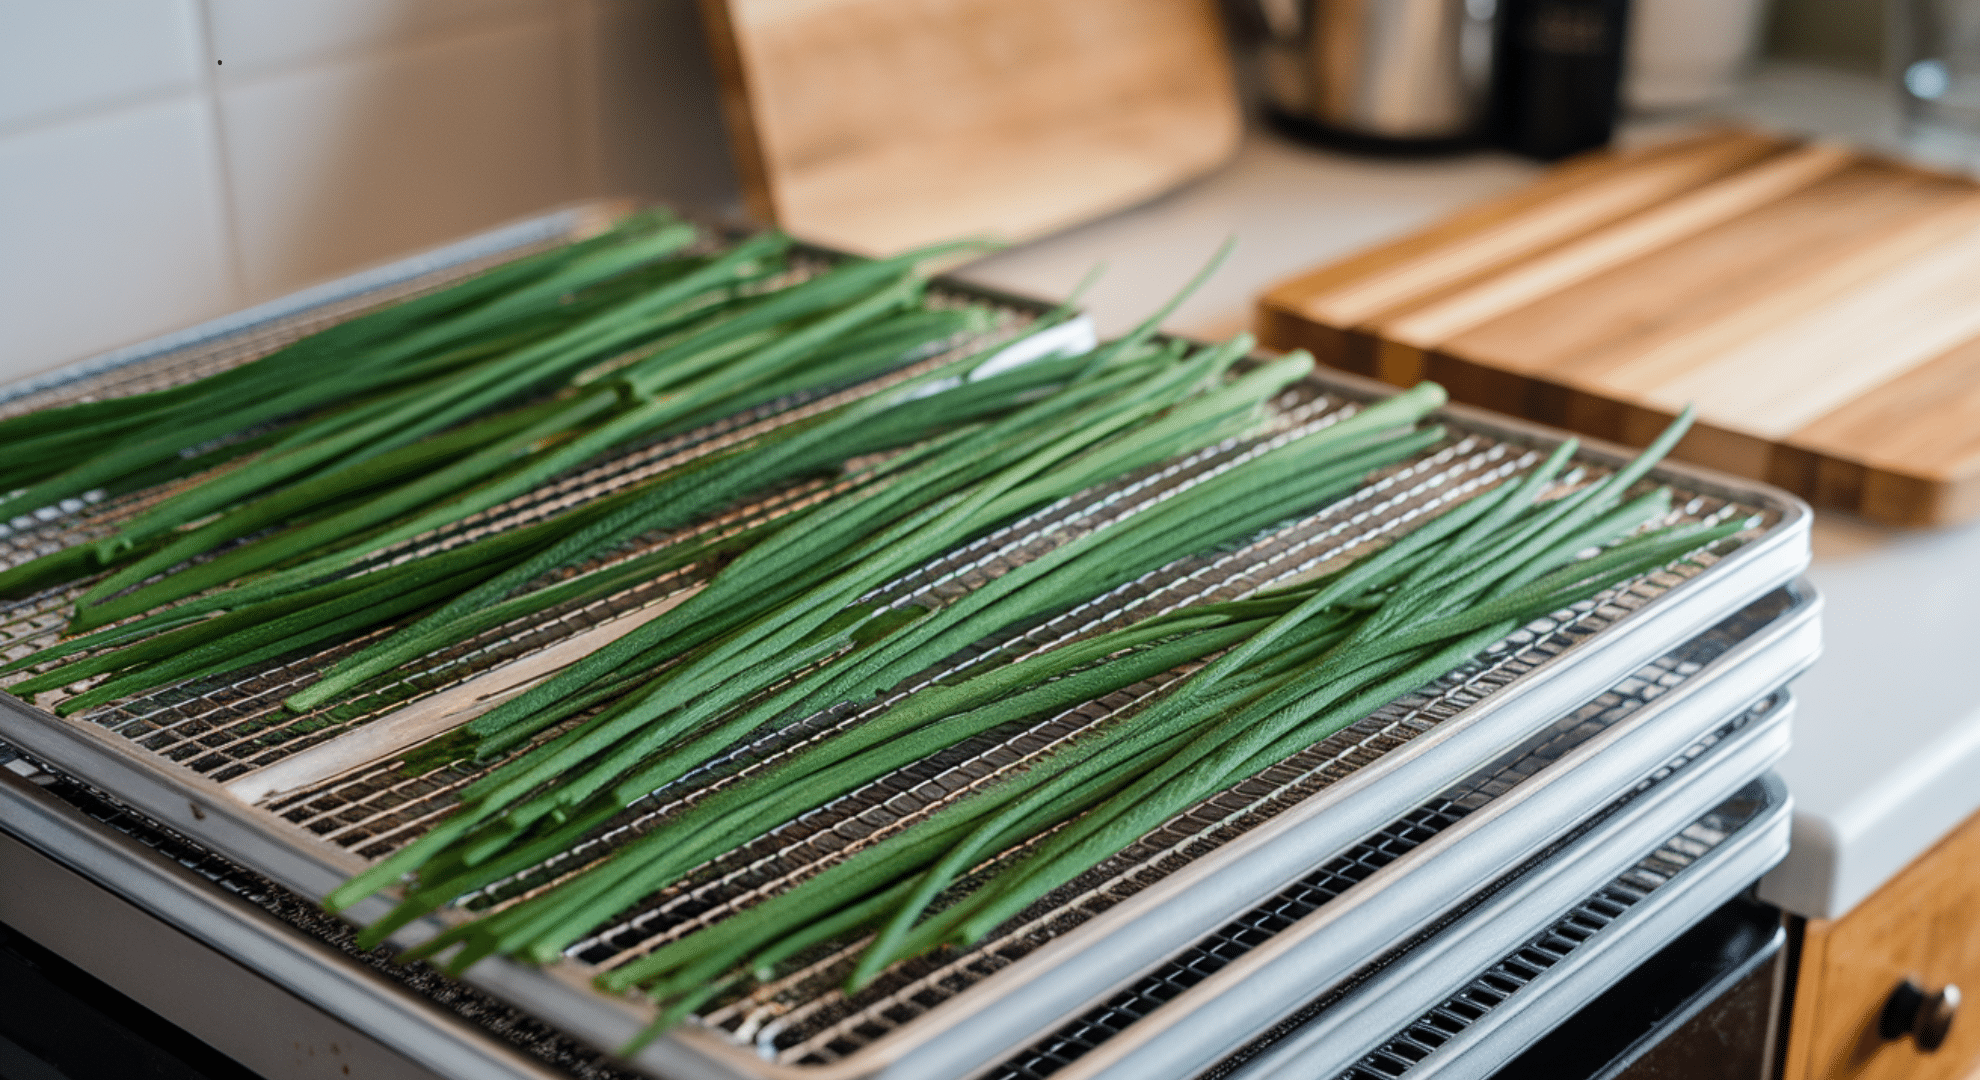
Use a low heat setting so the chives dry without browning. Spread them in a single layer with space for airflow. Drying usually takes several hours, depending on leaf size.
Chives are done when they crumble easily between your fingers. Avoid stacking pieces or using high heat, which traps moisture and leads to uneven drying.
Drying Chives in the Oven
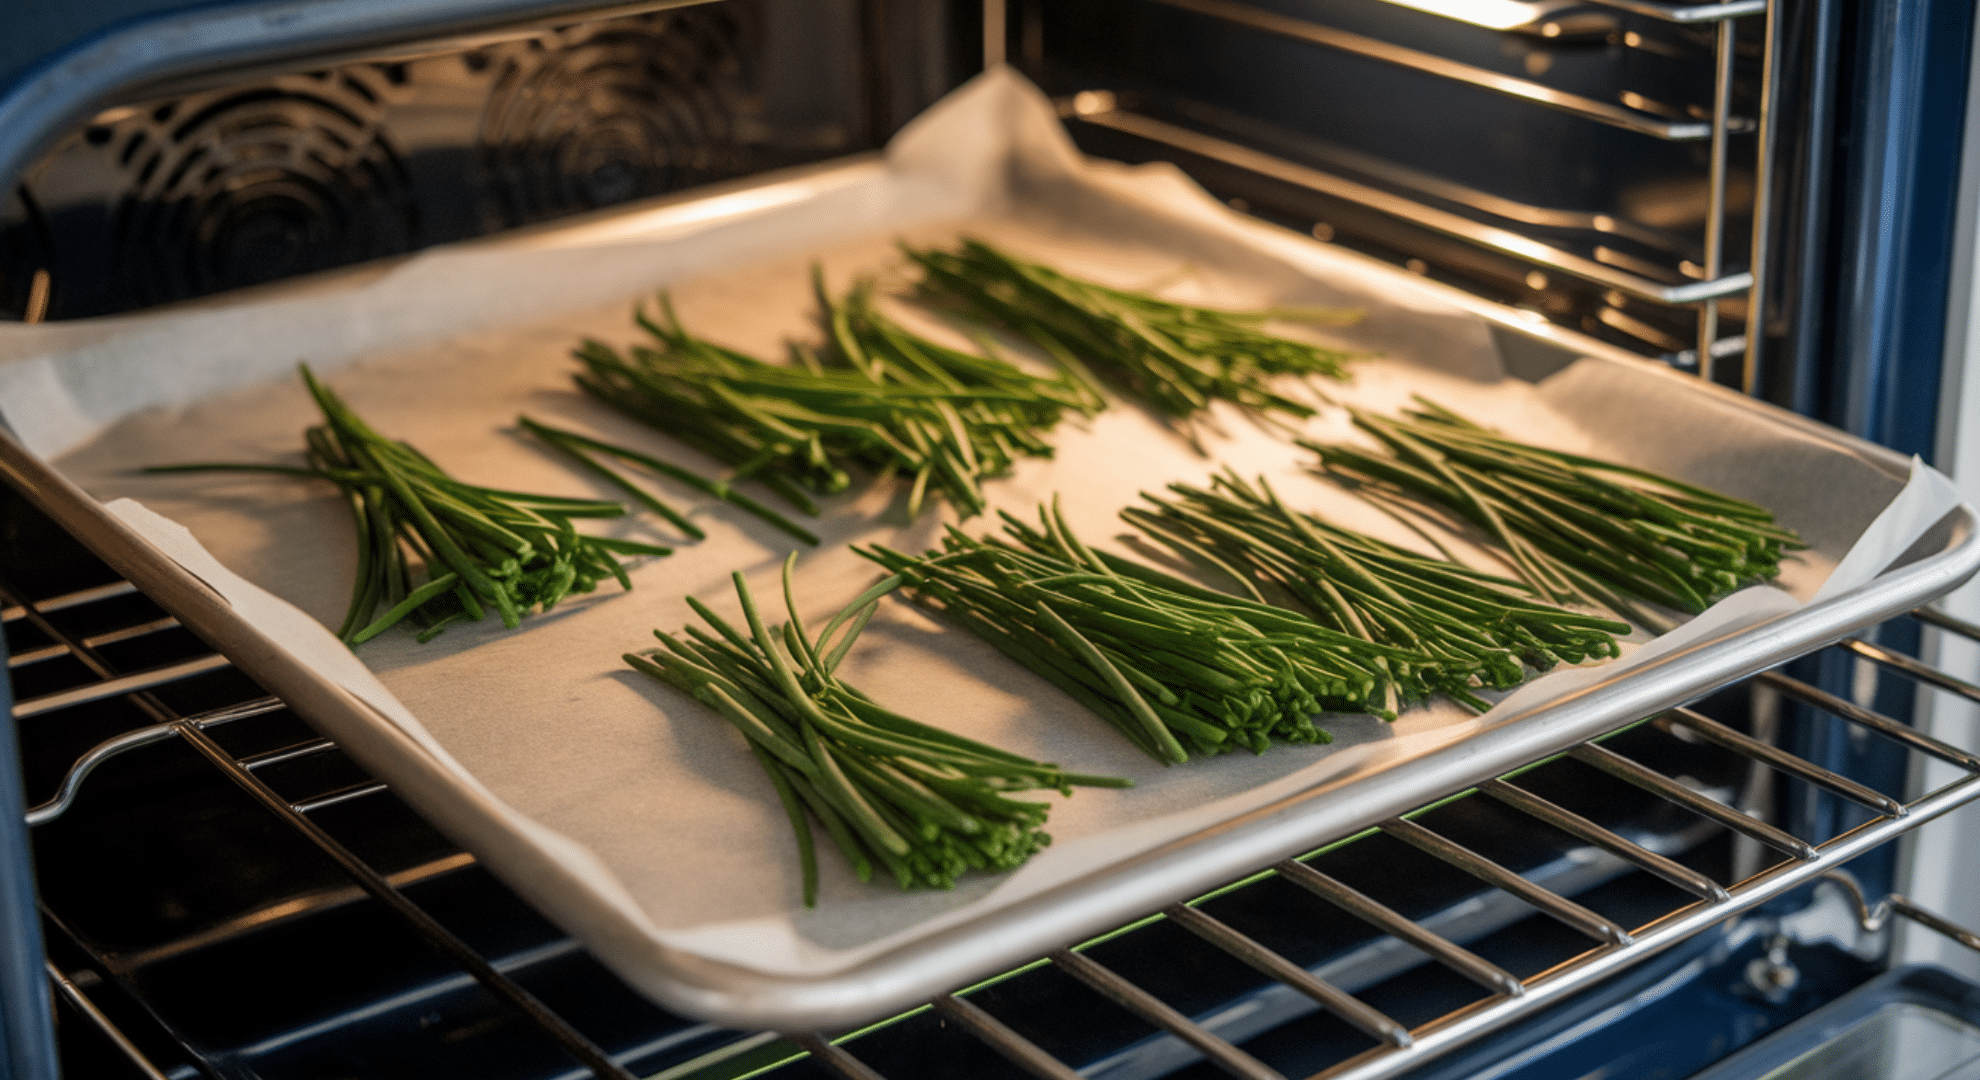
Set the oven to the lowest possible temperature. Spread chives thinly on a baking sheet lined with parchment. Keep the oven door slightly open to release moisture and lower heat buildup.
Check often and stir gently. If the oven is too hot, the chives will cook, darken, and lose flavor instead of drying.
Air-Drying or Hanging Chives
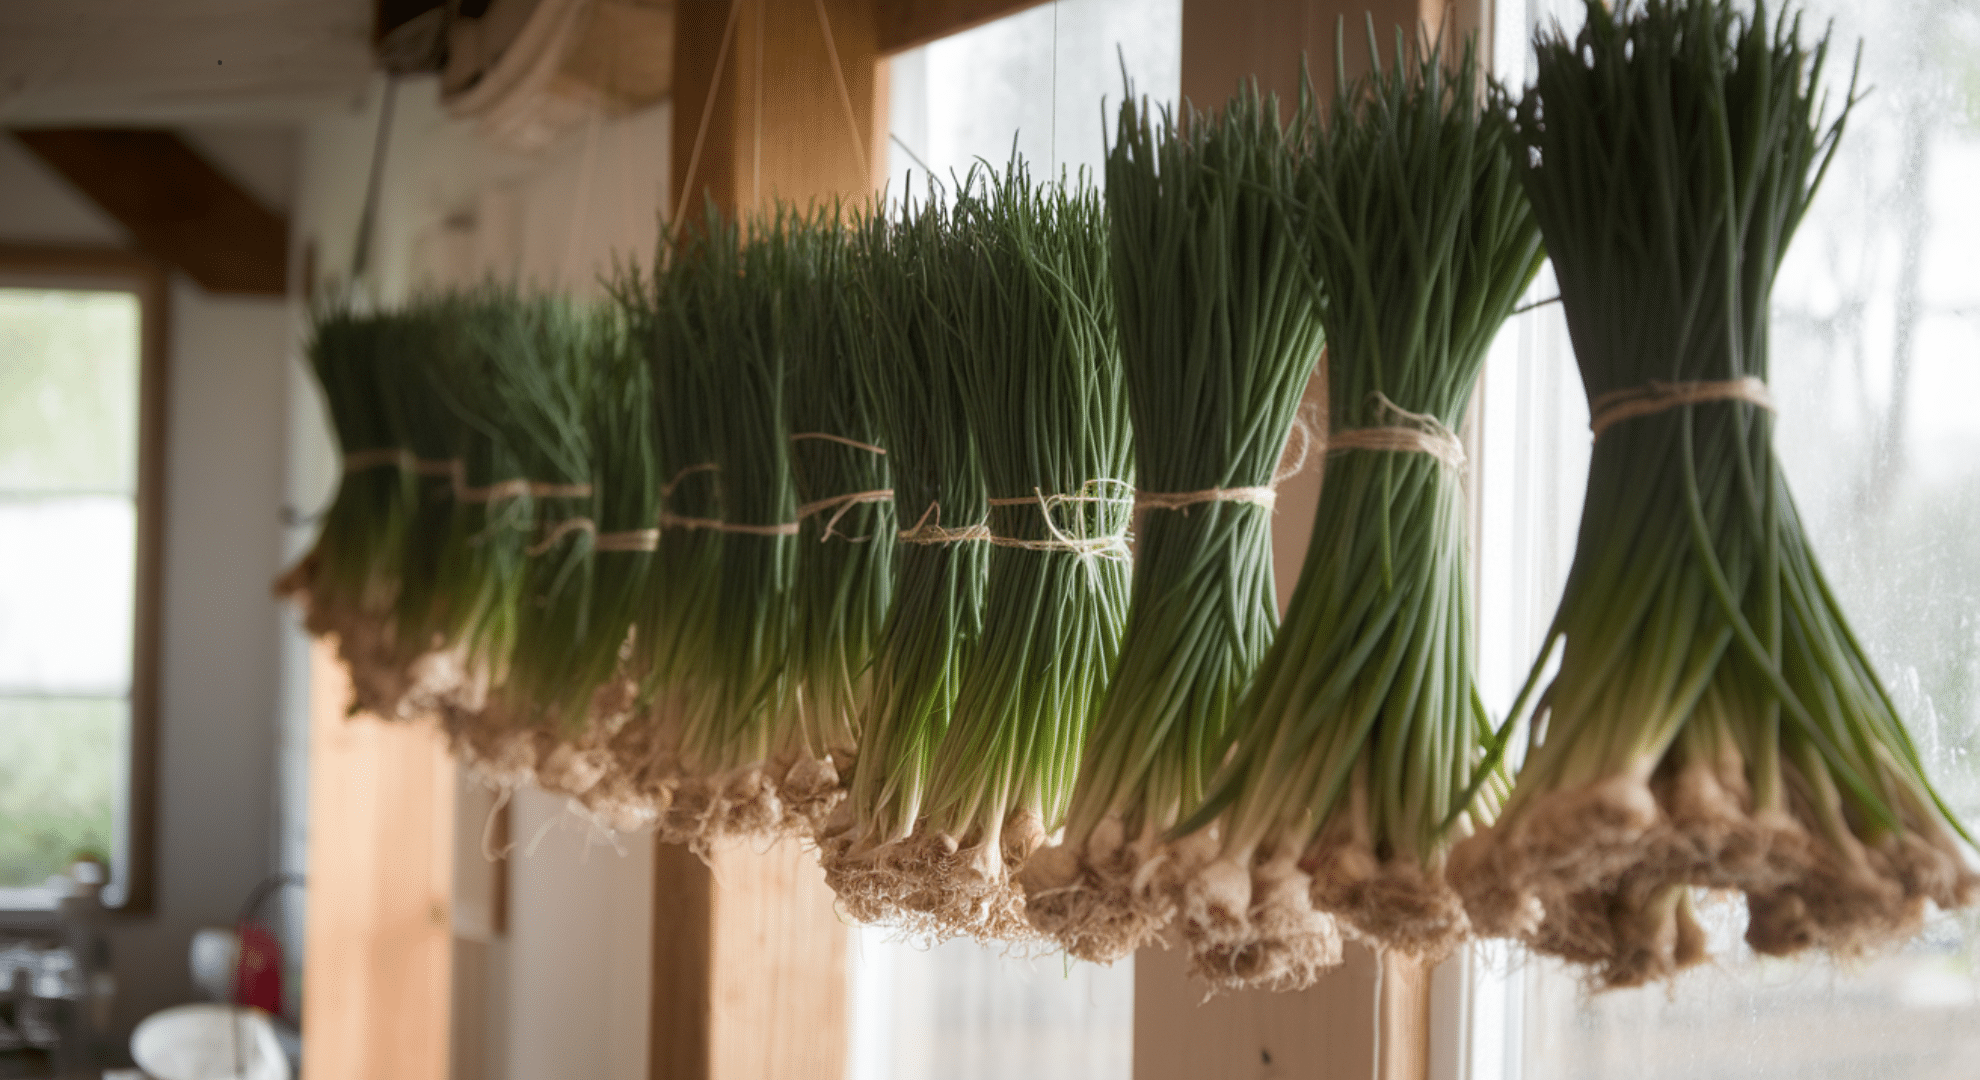
Air drying works best in warm, dry spaces with good airflow. You can tie chives into small bundles or place them inside a paper bag with holes.
Avoid humid rooms, which encourage mold. Check daily and remove any soft or dark pieces. Proper spacing and airflow are key to safe drying.
Drying Chives in the Microwave
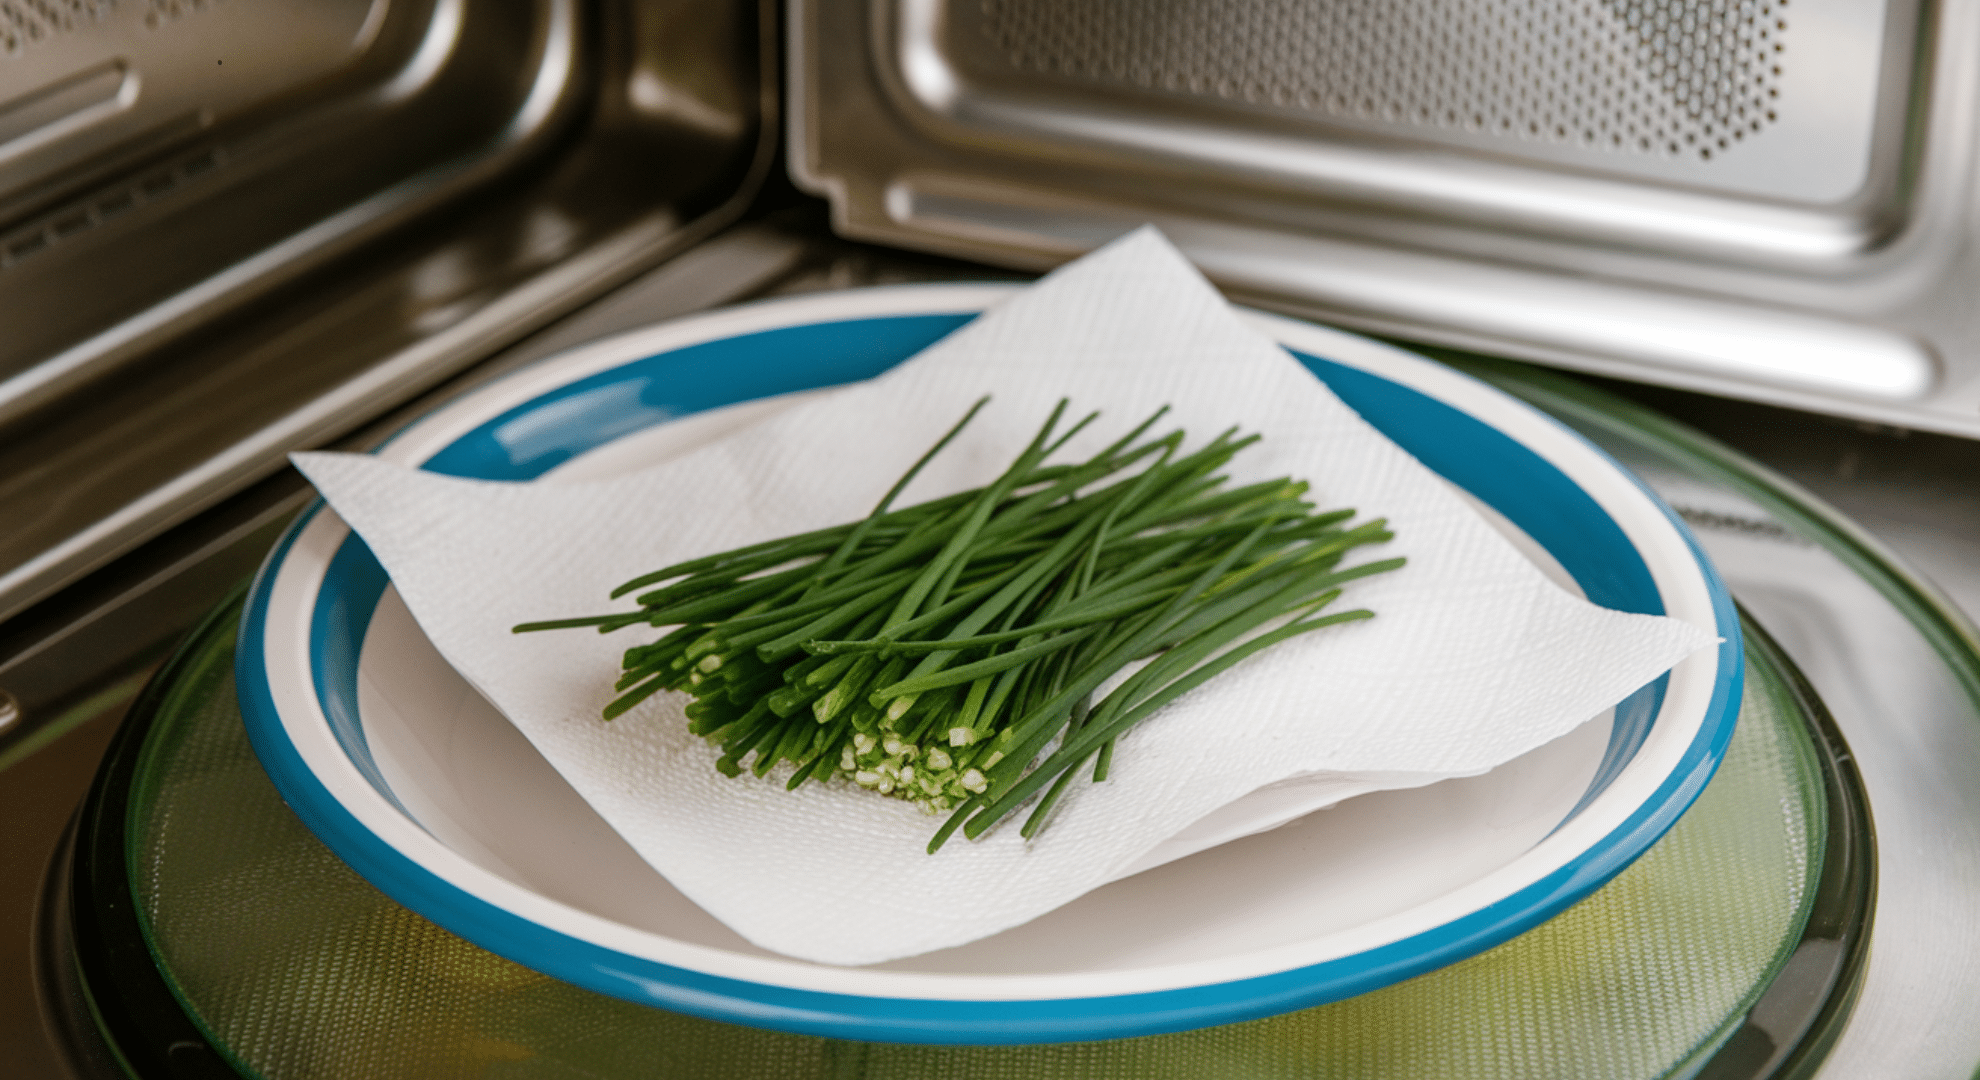
This method works for small amounts when time is limited. Place chives between paper towels and heat in short bursts. Let them cool between rounds and stop once they feel dry and brittle.
Overheating can scorch leaves or create uneven results. Watch closely and never leave the microwave unattended.
Can You Sun-Dry Chives?
Yes, you can sun-dry chives, but only in the right conditions. Sun drying works best in hot, dry climates with steady airflow. Days should be warm, with low humidity and clear skies.
Chives need several hours of direct sun, and nighttime temperatures should stay dry.
The biggest risks come from humidity and dew. Moist air slows drying and creates the perfect environment for mold. Overnight dew can reintroduce moisture, even if chives seemed dry during the day.
Insects and dust are also common issues with open-air drying.
To reduce spoilage, spread chives in a single layer on a raised screen or tray. Bring them indoors at night. Turn them often so they dry evenly.
If the leaves stay soft or bend instead of snapping, switch to indoor drying. Sun drying requires close attention to prevent waste.
How to Tell When Dried Chives Are Fully Ready
Dried chives are fully ready when all moisture is gone. Pick up a piece and gently crush it between your fingers. It should snap or crumble easily, not bend or feel soft. Any flexibility means moisture is still present.
Look at the color and texture. Properly dried chives are dull green and very light in weight. Dark spots or uneven texture can signal trapped moisture.
Smell is another clue. Dried chives should have a mild onion scent. A sour or musty smell means they need more drying or should be discarded.
Let the chives cool before testing. Warm leaves can feel dry at first but soften once cooled. Always check after cooling to avoid storage issues.
How to Freeze Chives to Keep Them Fresh Longer
Freezing chives is a good option when you want to keep more of their fresh taste. It works better than drying if you plan to use chives in cooked dishes like soups, eggs, or sauces.
Freezing is also helpful when you have a large harvest and want a quick preservation method with minimal prep.
Freezing affects flavor and texture in different ways. The flavor stays fairly strong, often closer to fresh chives than dried ones. The texture changes more.
Once frozen, chives lose their firmness and become soft after thawing. Because of this, frozen chives are not ideal as a garnish.
Even with texture changes, frozen chives remain useful for seasoning. You can add them straight from the freezer to hot dishes without thawing.
This keeps their taste intact and prevents excess moisture from forming during use.
Drying vs Freezing Chives: Which Is Better?
Both drying and freezing work well for preserving chives, but they serve different needs. The better option depends on how you plan to use chives in your cooking and how much storage space you have.
| Factor | Dried Chives | Frozen Chives |
|---|---|---|
| Flavor | Mild and less sharp | Stronger and closer to fresh |
| Texture After Use | Dry and brittle | Soft once thawed or cooked |
| Best Cooking Uses | Soups, stews, dry mixes | Eggs, sauces, cooked dishes |
| Storage Space | Pantry storage | Requires freezer space |
| Shelf Life | Several months | Up to several months |
If you want easy storage and quick seasoning, drying works well. If flavor matters more and you cook often, freezing is usually the better choice.
Common Chive Preservation Problems and Fixes
Even when you follow the steps, chive preservation can still go wrong. Most problems come from moisture, heat, or storage issues. Knowing what to watch for helps you fix small mistakes before they ruin your batch.
- Chives turn moldy because they were not fully dried before storage
- Chives lose color due to high heat during drying
- Chives taste weak after drying from long exposure to air
- Frozen chives clump together when excess moisture is left on leaves
- Freezer burn happens when air is not removed from storage bags
- Chives soften too much after freezing because they were thawed before use
- Stored chives smell off due to poor container sealing
With better drying, airtight storage, and correct handling, most of these issues are easy to prevent. Small adjustments can greatly improve shelf life and quality.
Conclusion
Learning how to keep chives from going bad has saved me time and food.
Once I understood the steps, drying chives felt simple instead of wasteful. Knowing what to look for, how to prep them, and which method works best made a real difference in how long they last and how often I use them.
Now you can take what you learned and put it to work in your own kitchen. You know how to dry chives, store them properly, and avoid common mistakes.
Start with a small batch and build confidence as you go. If you want more easy food storage tips and herb guides, check out the other blogs and keep learning what works best for you!