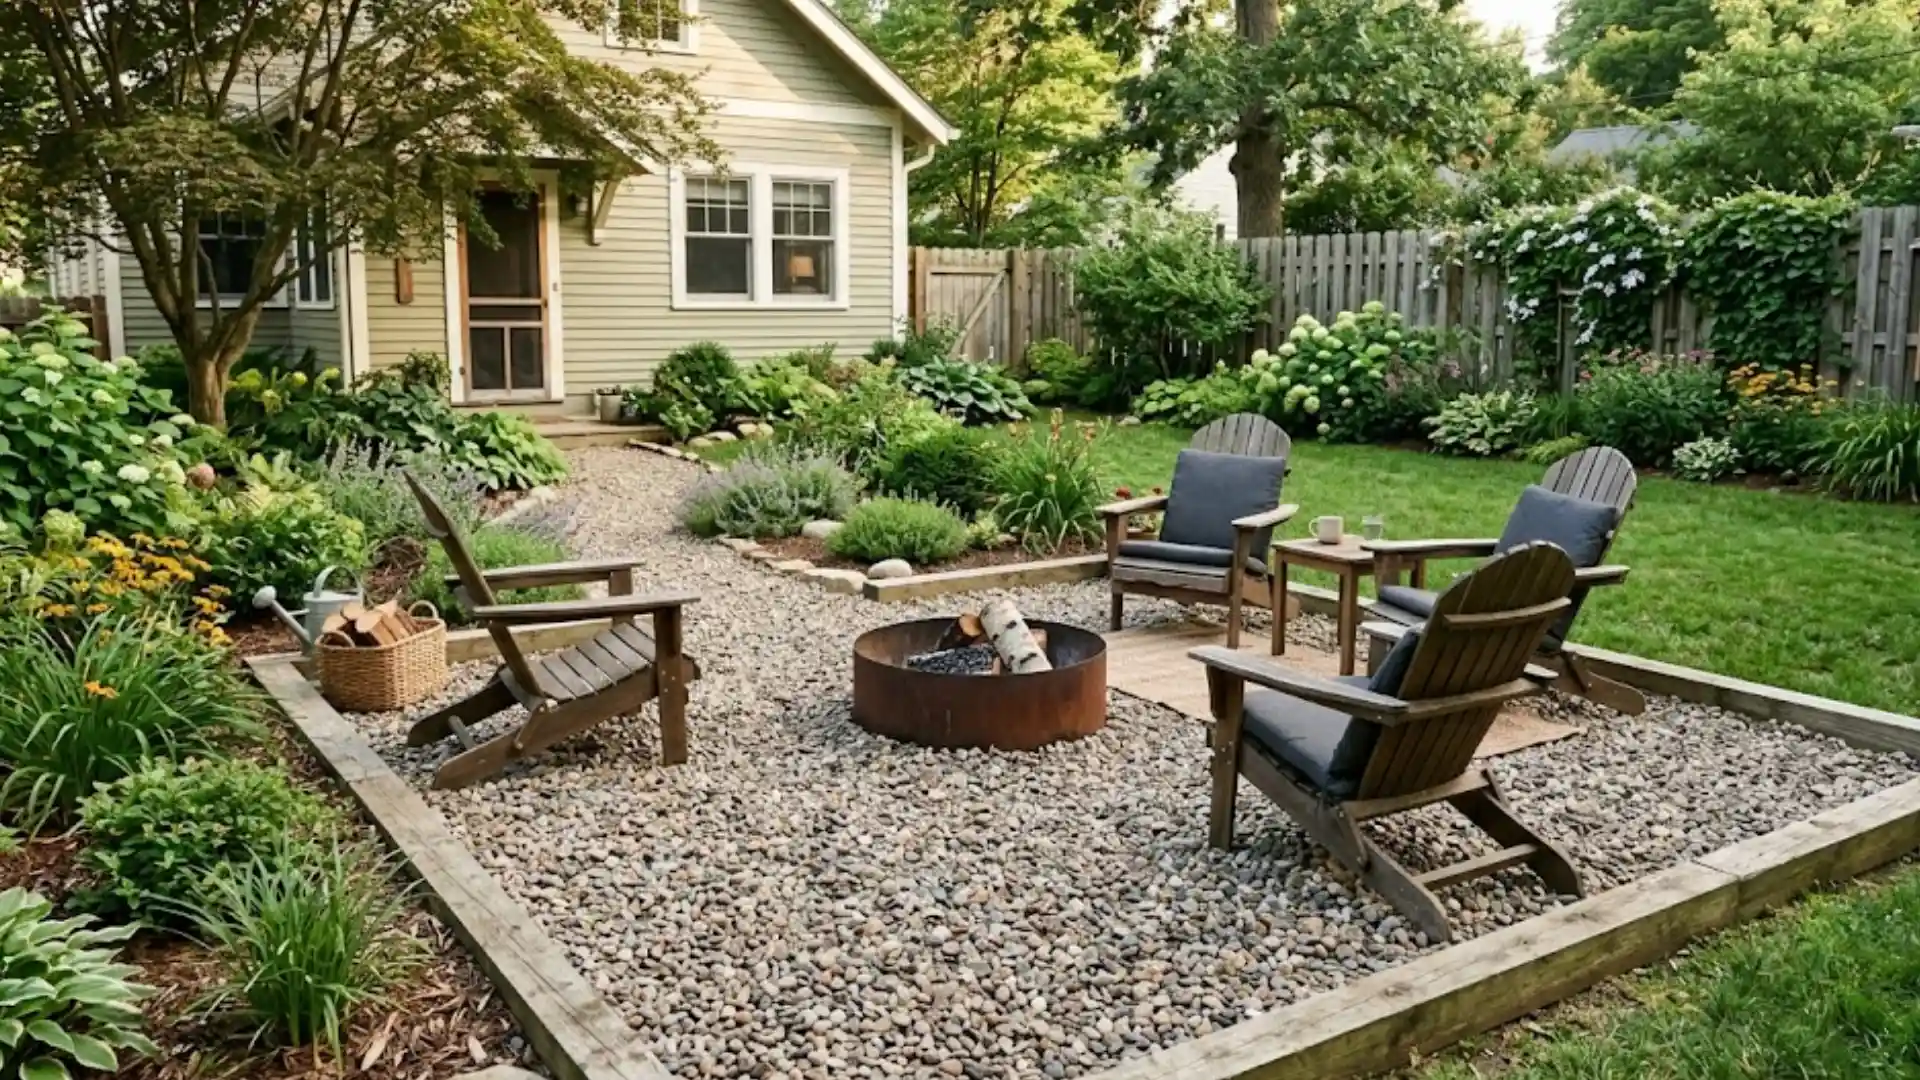
Want a backyard seating spot without the work of building a deck? Gravel is the easier route.
It’s a popular patio choice, and occasional raking is simpler than the upkeep timber decking requires.
Gravel can go in quite a few directions, from a spare Zen garden to an English cottage corner or a contemporary desert-style space, simply by changing the color, border, paving, or plants.
These gravel patio ideas range from a stepping-stone patio to a fire-pit circle, and the build notes that follow cover layer depths, stone quantities, and edging costs.
DIY Gravel Patio Ideas
For my first project, I’d lean toward the stepping-stone or simple budget versions below, because both let you start small without giving up a good sitting spot.
My basic plan stays the same: compacted crushed stone, weed membrane, edging, and about two inches of finishing gravel.
Then comes choosing what fits. A narrow side yard needs a different approach than a big garden, but either can become a weekend project with sparse planting or lush borders.
1. Classic Pea Gravel Patio with Metal Edging
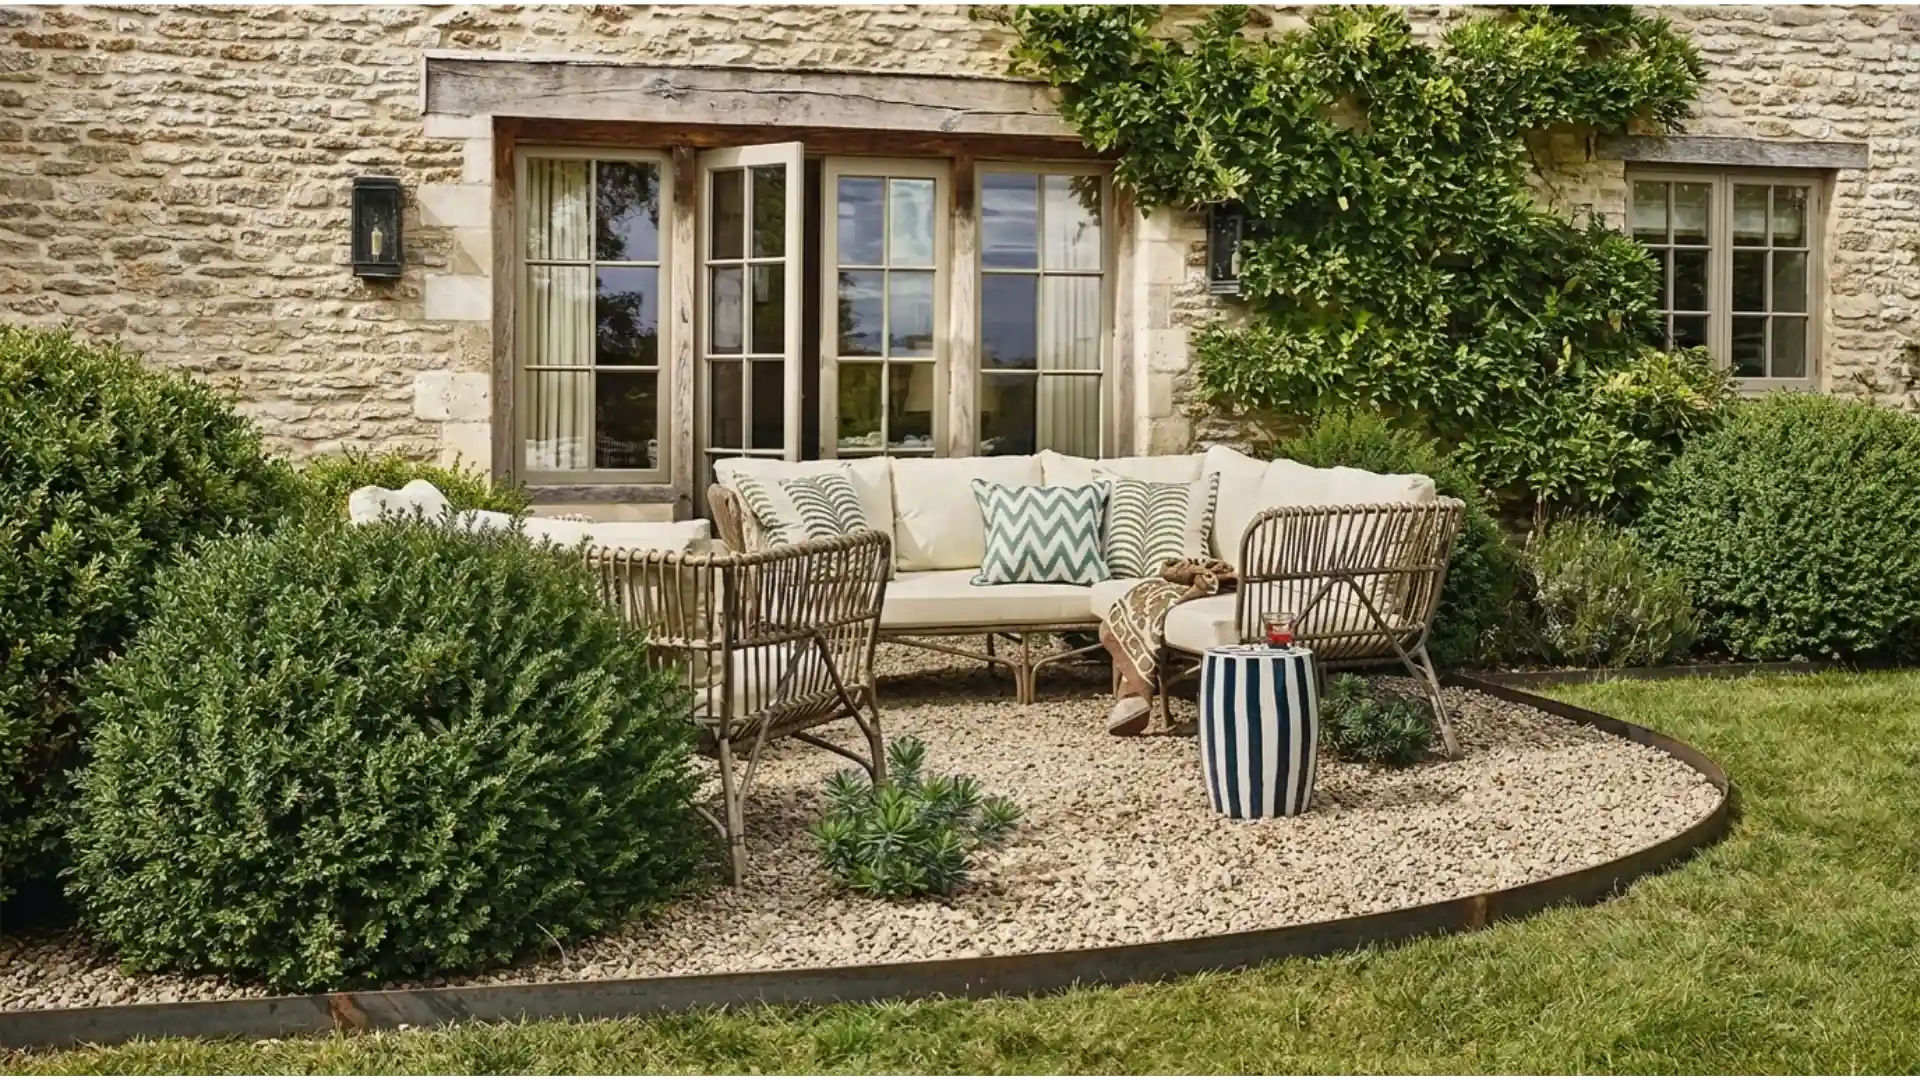
This look is clean and classic, and it fits with any home style.
Pea gravel held in place by simple metal edging makes crisp lines that stay fresh year after year.
The smooth stones feel good under bare feet, and the edging keeps things neat with little effort. Add a bistro set with wide legs and a few potted plants, and you’ll have an outdoor spot that looks polished but still relaxed.
2. DIY Gravel Patio with Stepping Stones
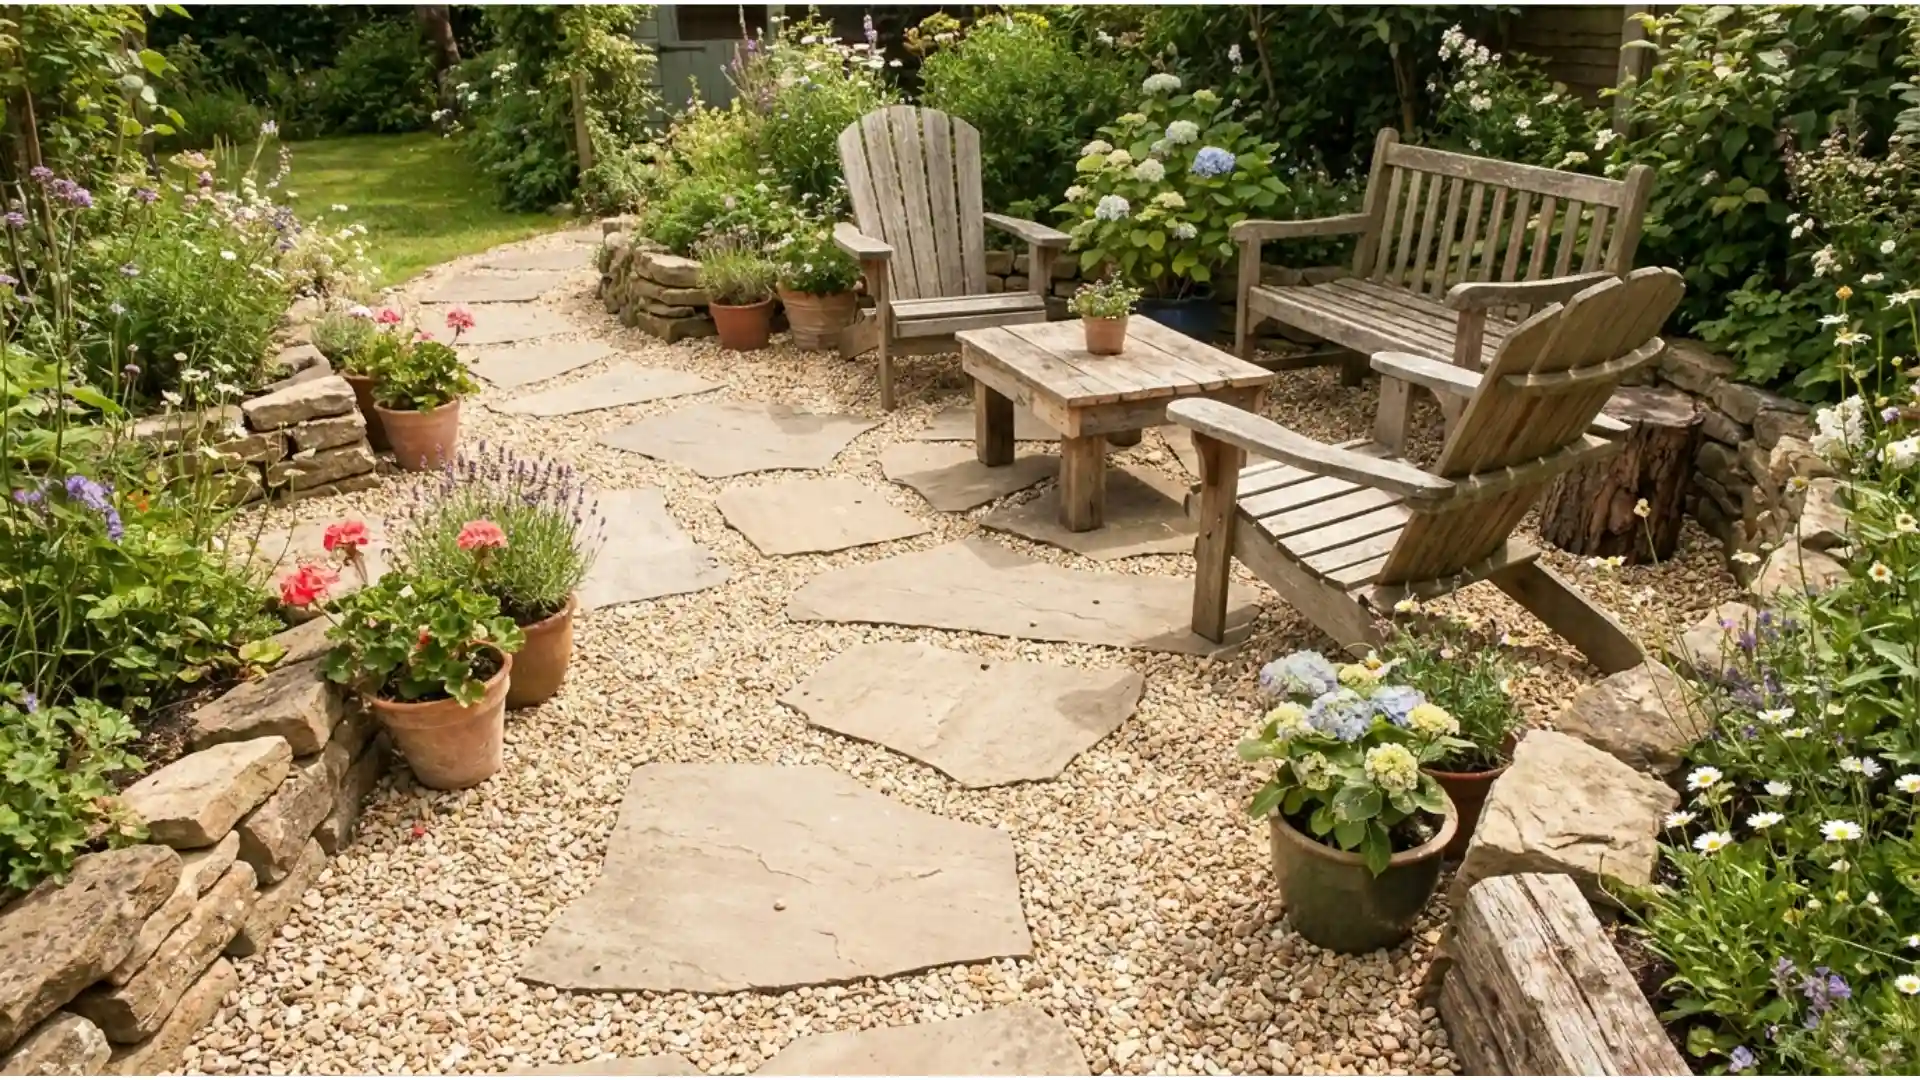
This is a great option for beginners who want something useful and attractive without much hassle.
Place stepping stones in any pattern you like, then fill the spaces with gravel to create a path that still feels like a patio.
It’s easy to put together, doesn’t cost much, and you can change the layout as you work. Make sure each stone is level with the gravel to prevent tripping. This way, you’ll have a sturdy path that still feels relaxed and fits a cottage garden style.
3. Modern Minimalist Layout
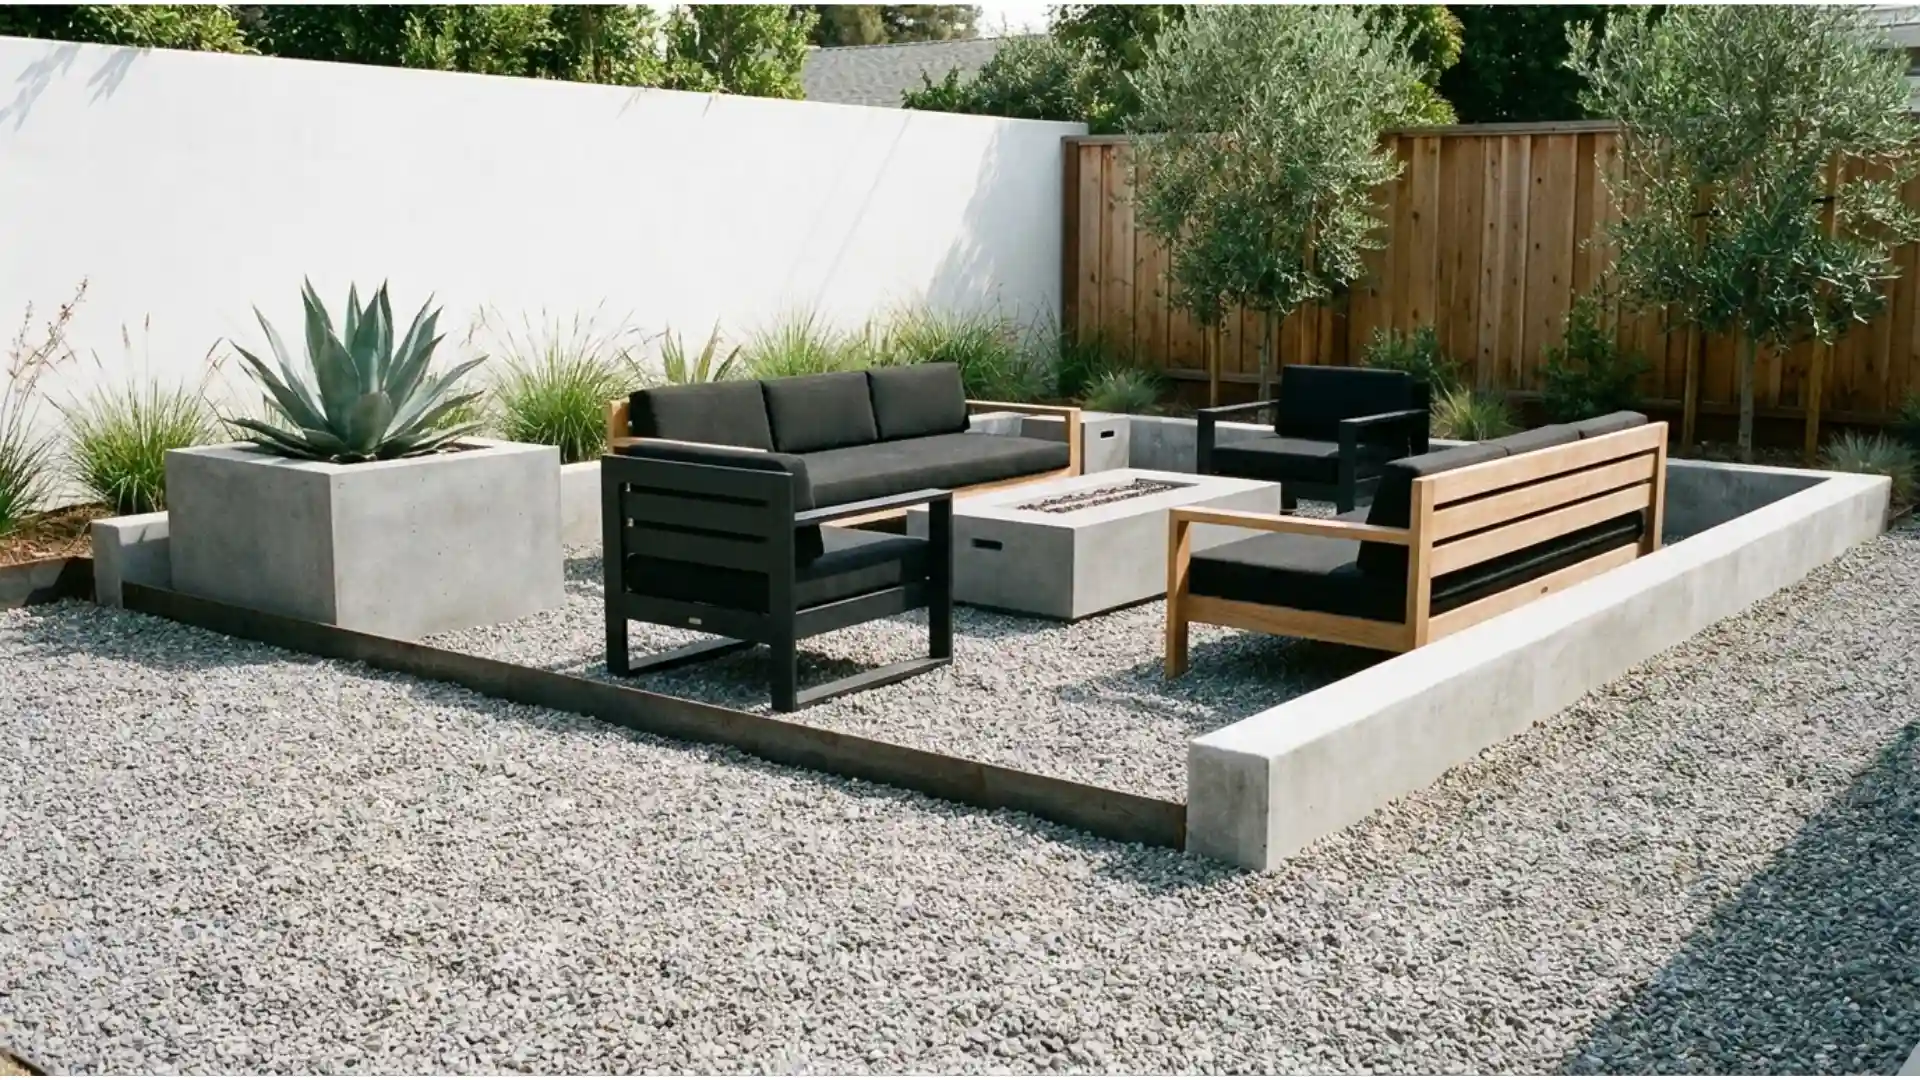
Choose uniform light gray or white gravel, keep a geometric layout, and avoid clutter.
Add low-profile furniture in black or natural wood, and consider including a single sculptural planter.
This simple approach highlights the gravel’s texture as the main feature, and maintenance is easy because there’s nothing extra to manage.
4. Small Backyard Seating Nook
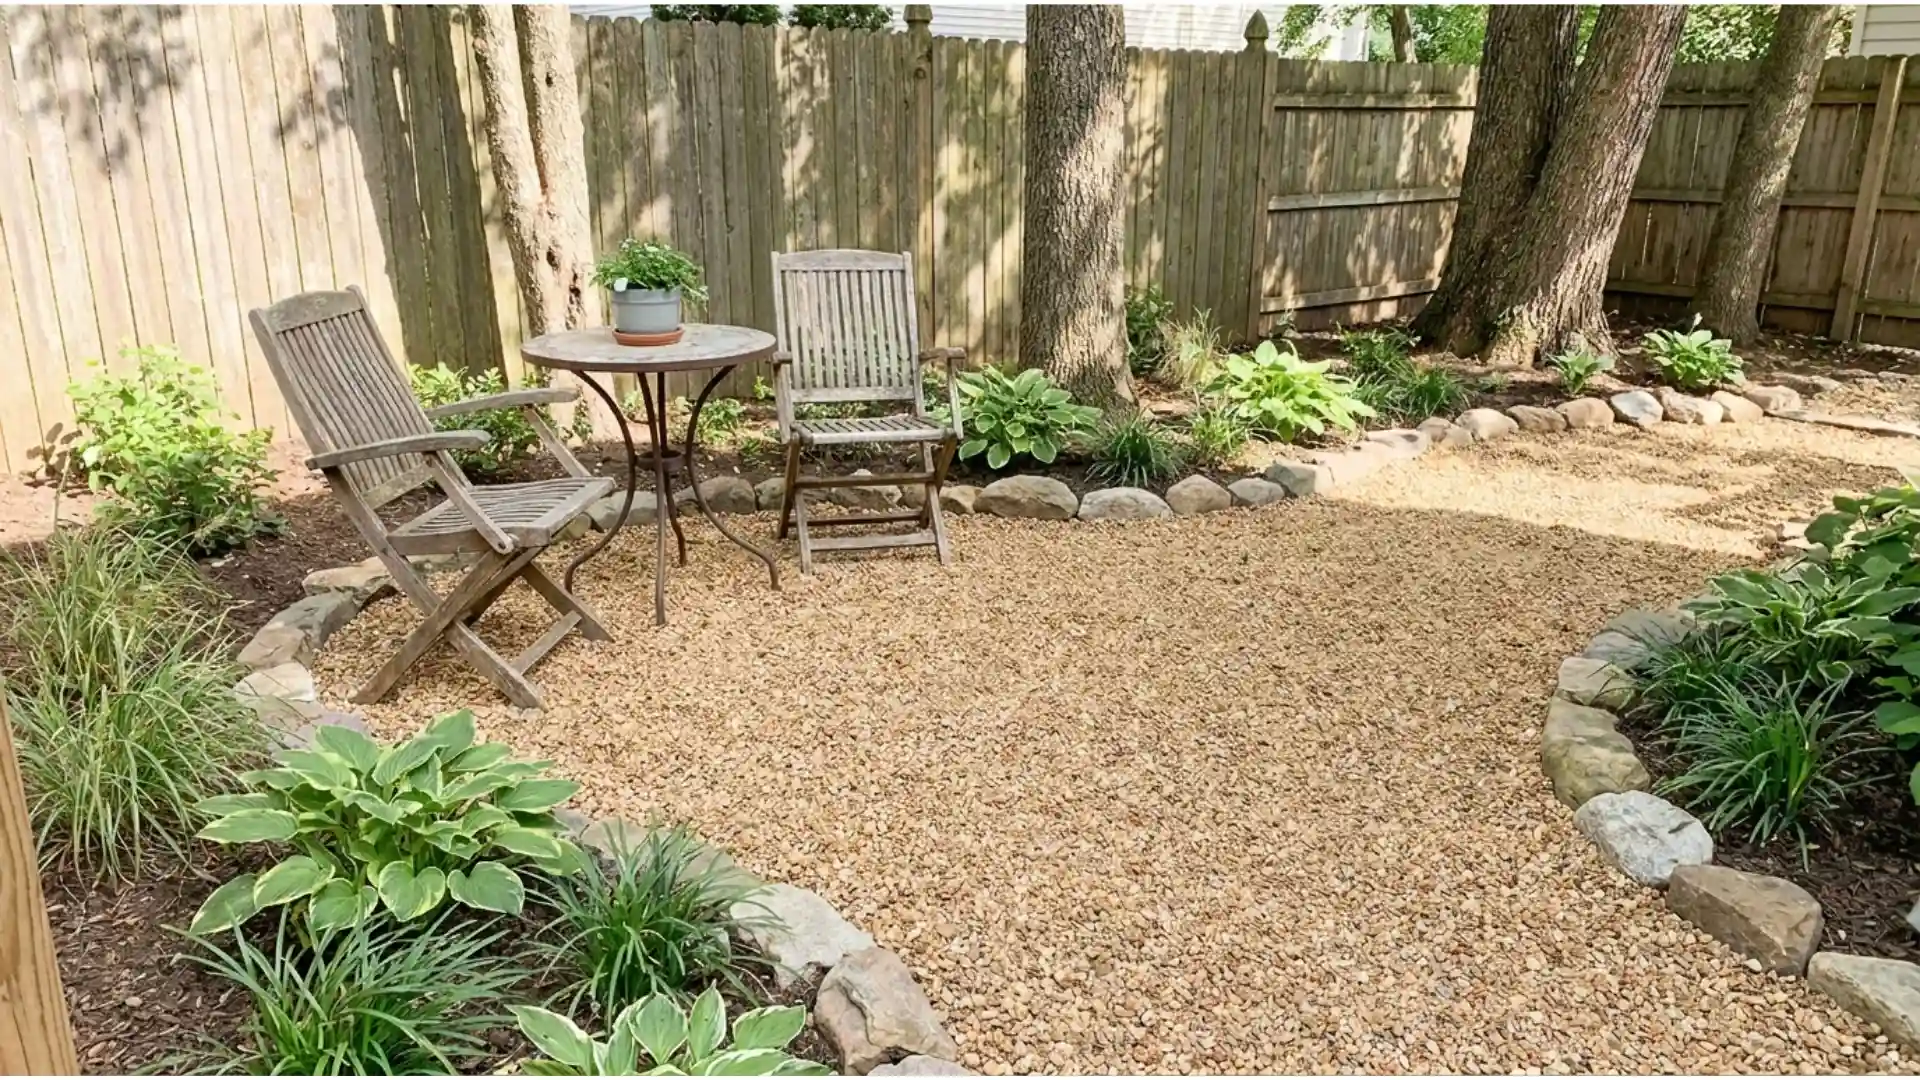
Gravel works well in small spaces because it keeps the area feeling open, unlike pavers that can break up the view. Stick to one type of gravel for a unified look, and mark the edges with low plants or stones.
Add a small seating area, and your tiny yard becomes a cozy spot to gather without feeling crowded or too busy.
5. Circular Design with a Flexible Border
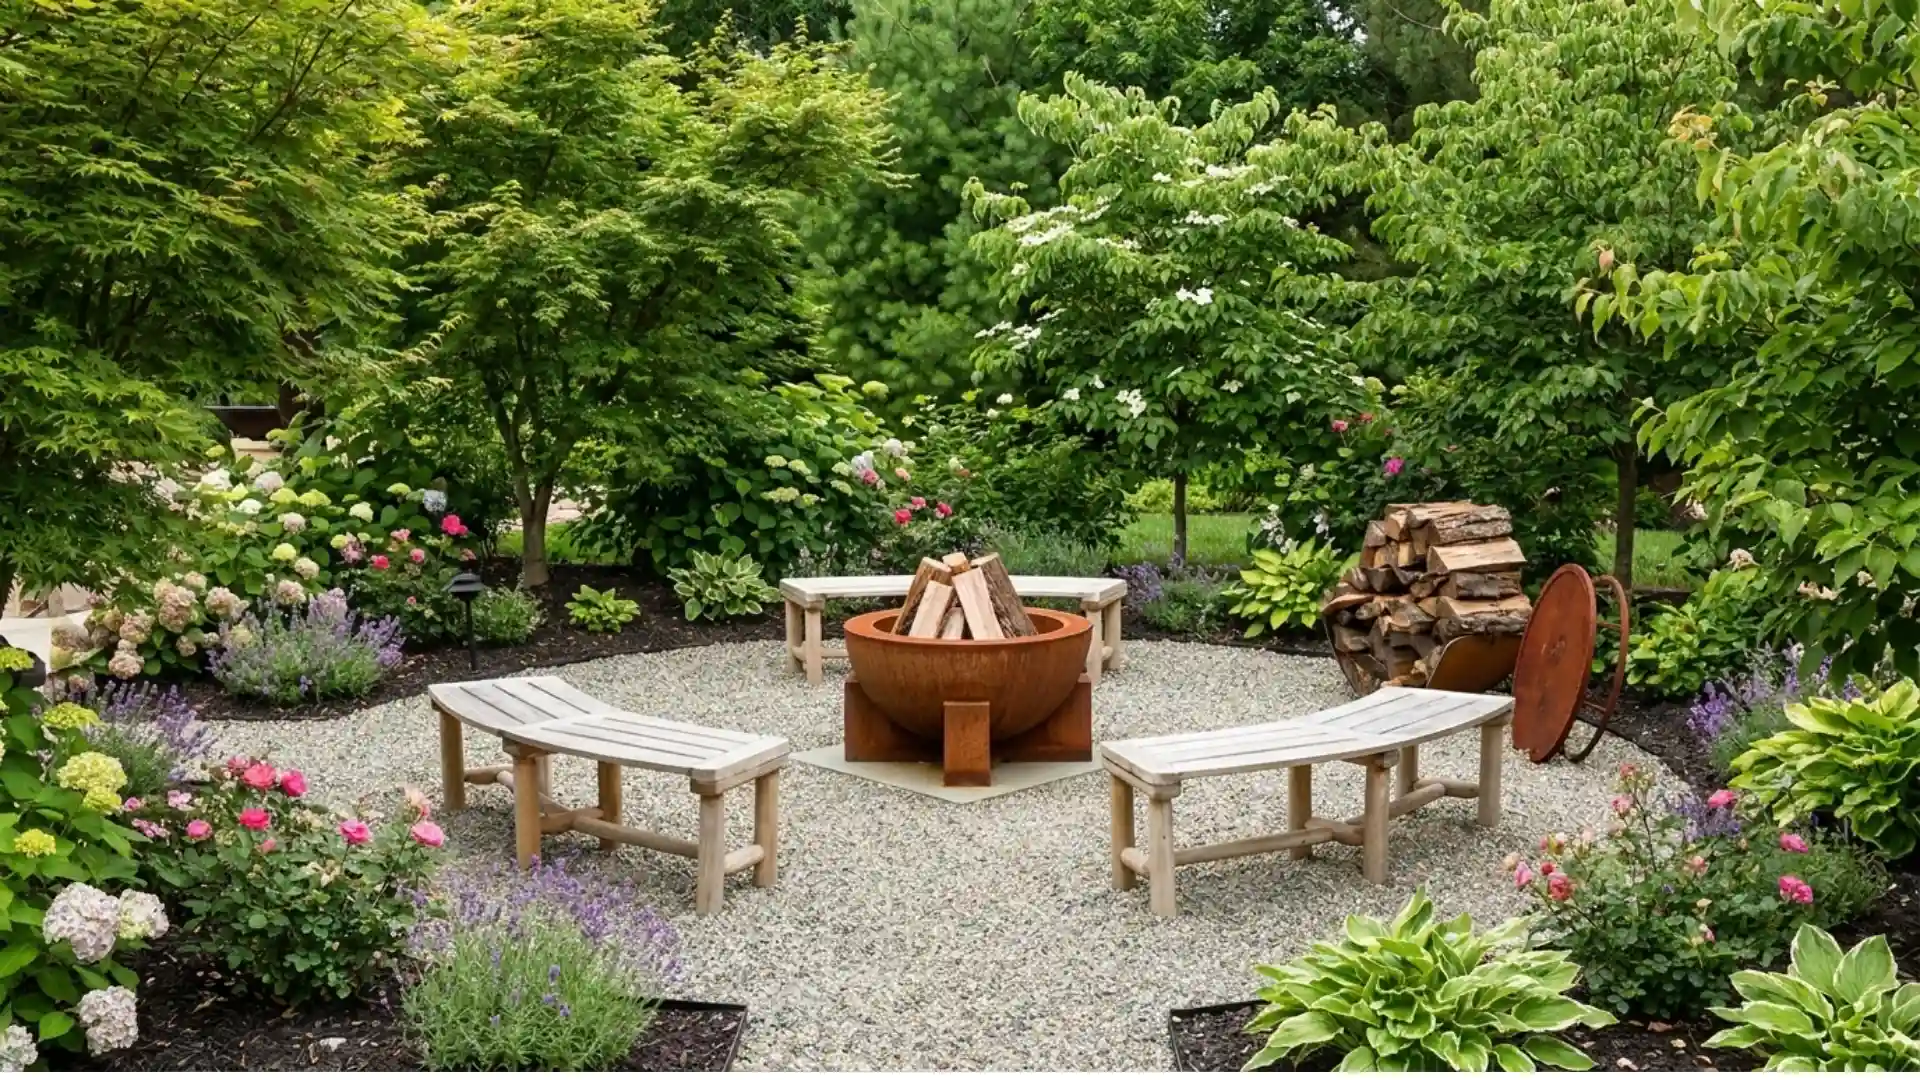
Curved patios add a gentle, flowing look that square ones can’t match.
A round gravel area feels more natural and welcoming, especially if you include a fire pit or a seating area in the center.
You only need a stake, some string, and a can of marking paint to make a perfect circle no special math skills needed.
Flexible metal or plastic edging will follow the curve easily. This shape naturally brings people together and fits perfectly in gardens where you want the patio to blend in, not look like it was just placed there.
6. Fire Pit Gravel Patio Layout
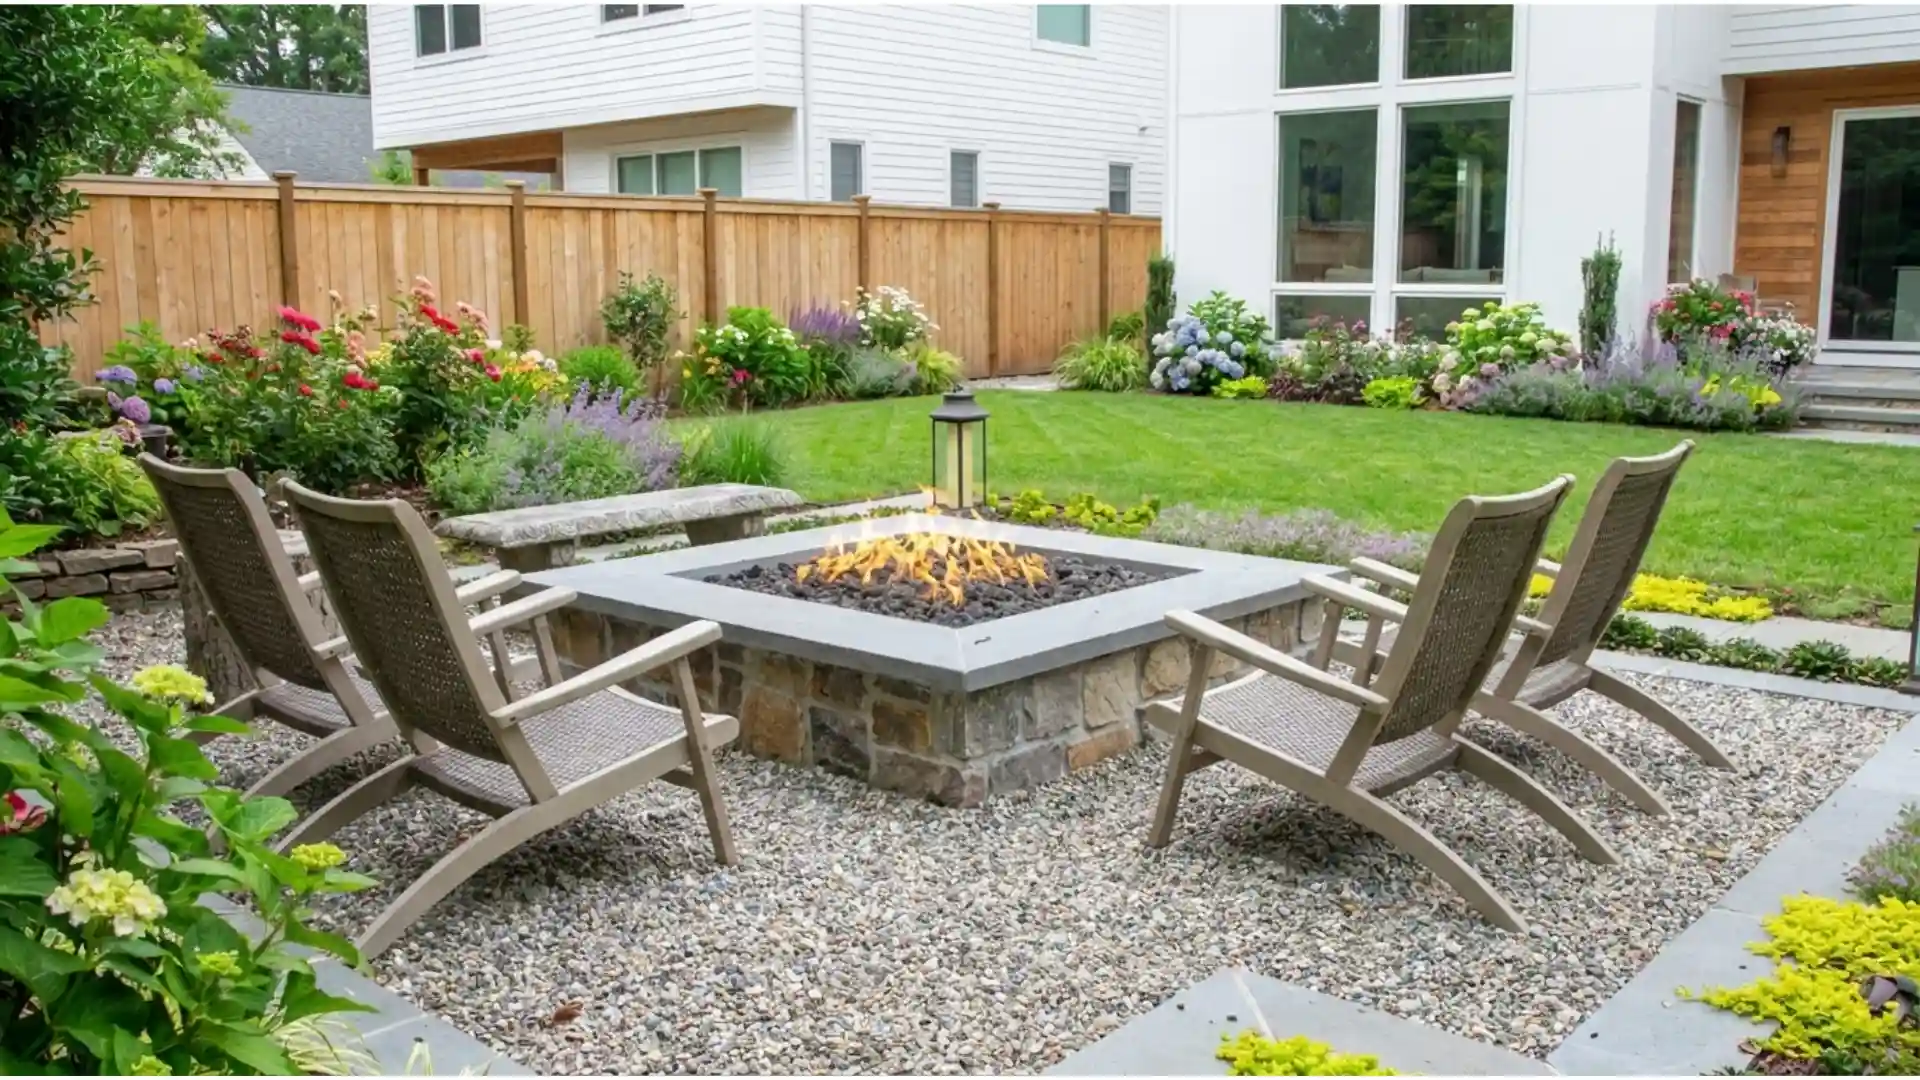
Gravel works well with fire pits because stone won’t catch fire like a wood deck might. Set up a wide gravel area around your fire pit so there’s space for chairs, and place the pit far from your house, fences, and any branches above.
Check your local fire rules for the required distance.
The sound of gravel underfoot adds to the campfire feel, and cleanup after making s’mores is easy; just rake the gravel smooth again.
7. Pergola-Covered Seating Area
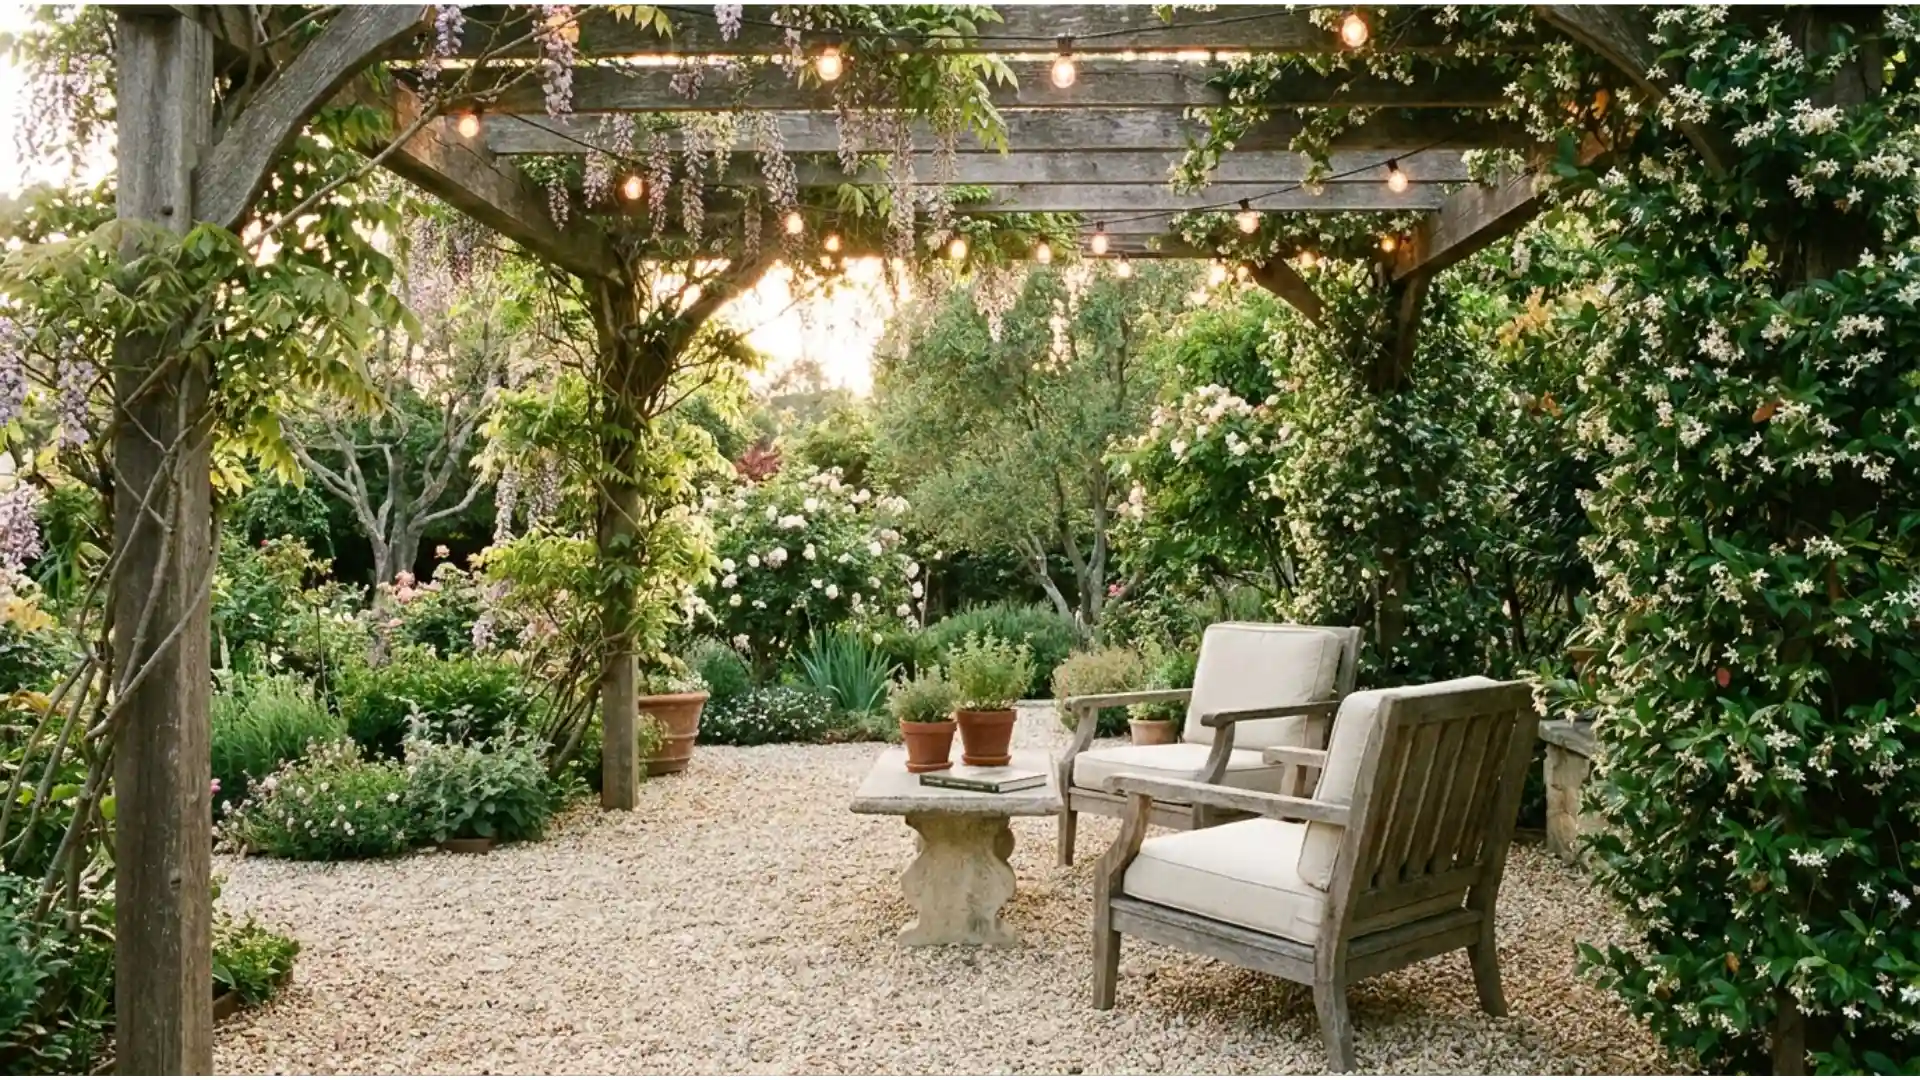
An overhead structure and a textured ground can quickly turn your yard into an outdoor room.
A pergola gives you shade and a cozy feel, while gravel underneath keeps the space airy and relaxed. Try adding climbing vines to the beams and string lights overhead. This way, your space feels sheltered but still open to the garden around it.
If you’re planning a larger or permanent structure, you may need a permit, so check your local rules before you start.
If you’re still figuring out costs, check our patio cover cost guide.
8. Rustic Gravel Patio with Wooden Furniture
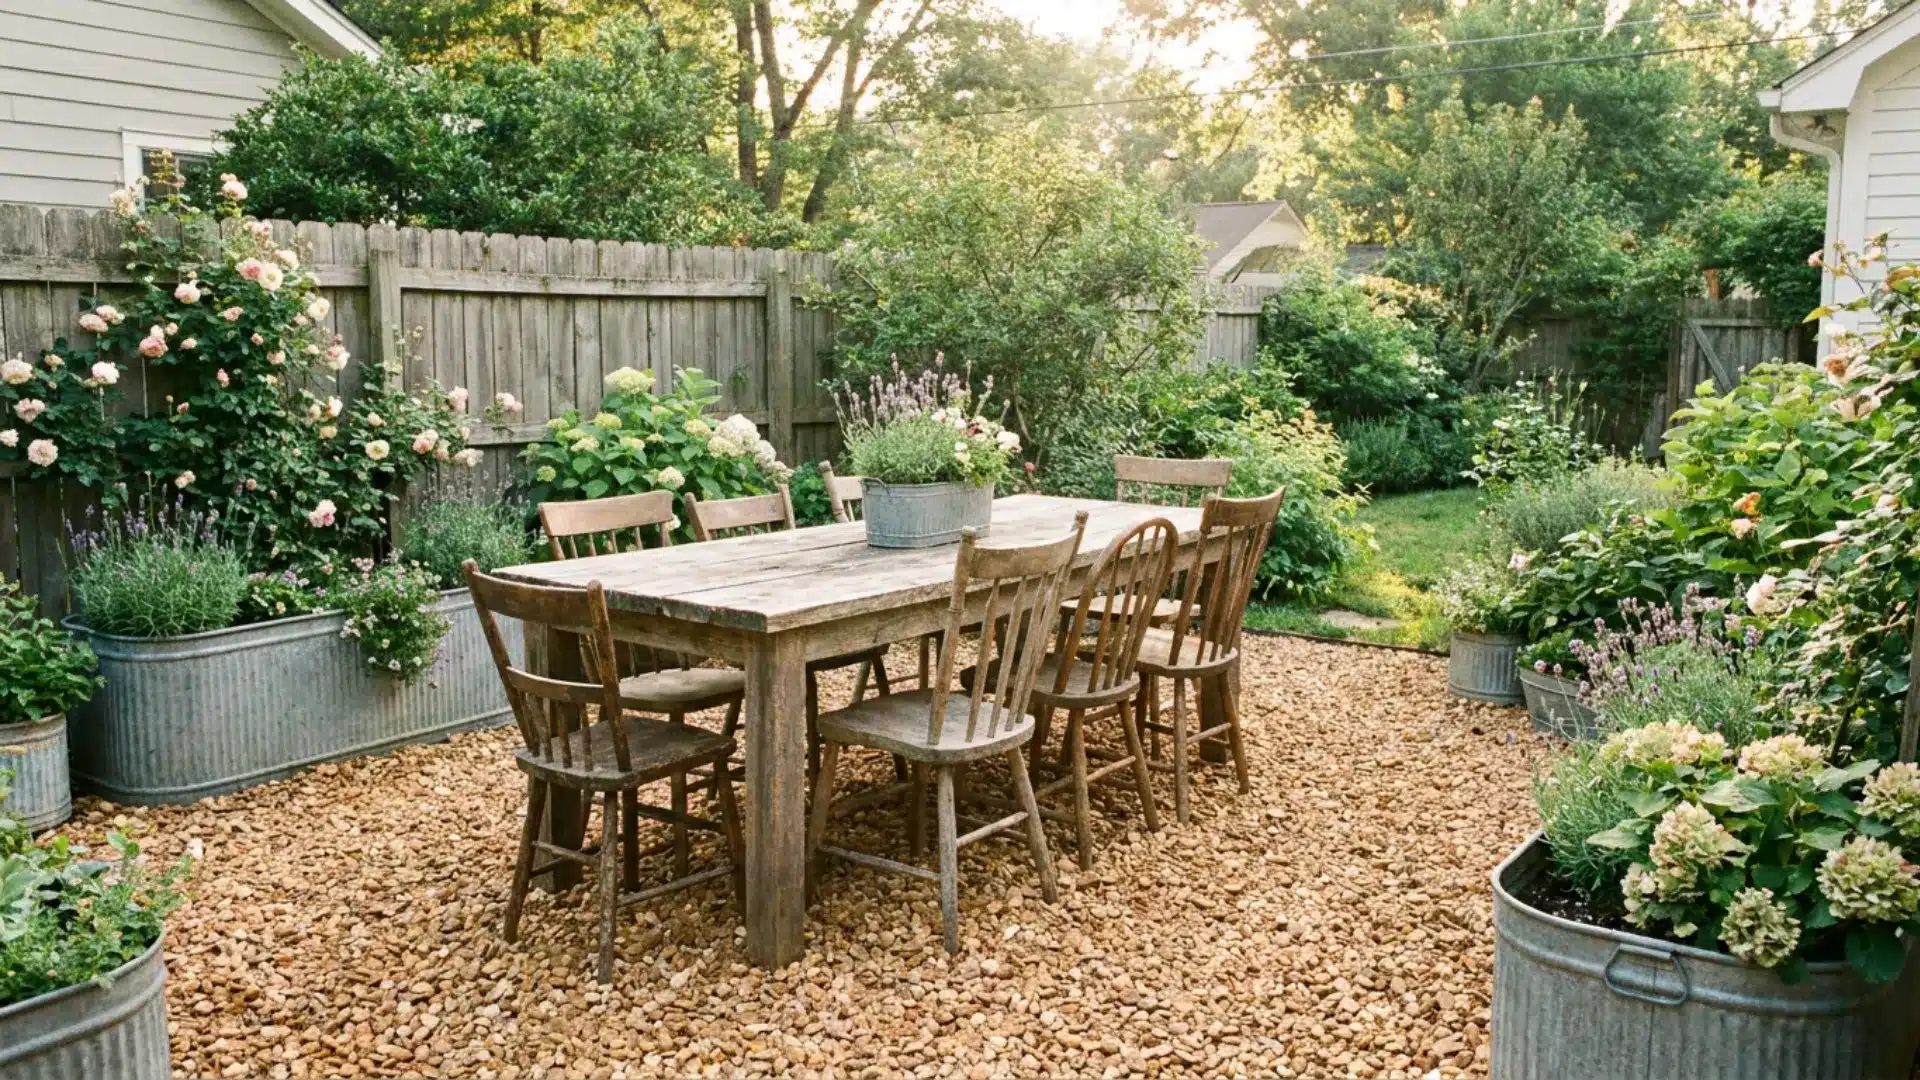
Weathered wood and natural stone gravel give you that cozy farmhouse feel without spending much.
Choose chunkier gravel in warm colors, which looks great but can feel a bit rough underfoot.
Add a reclaimed-wood table, some mismatched chairs, and a few galvanized planters. The result is a relaxed and welcoming space where everyone can feel at home and enjoy a drink together.
9. Garden Courtyard Style
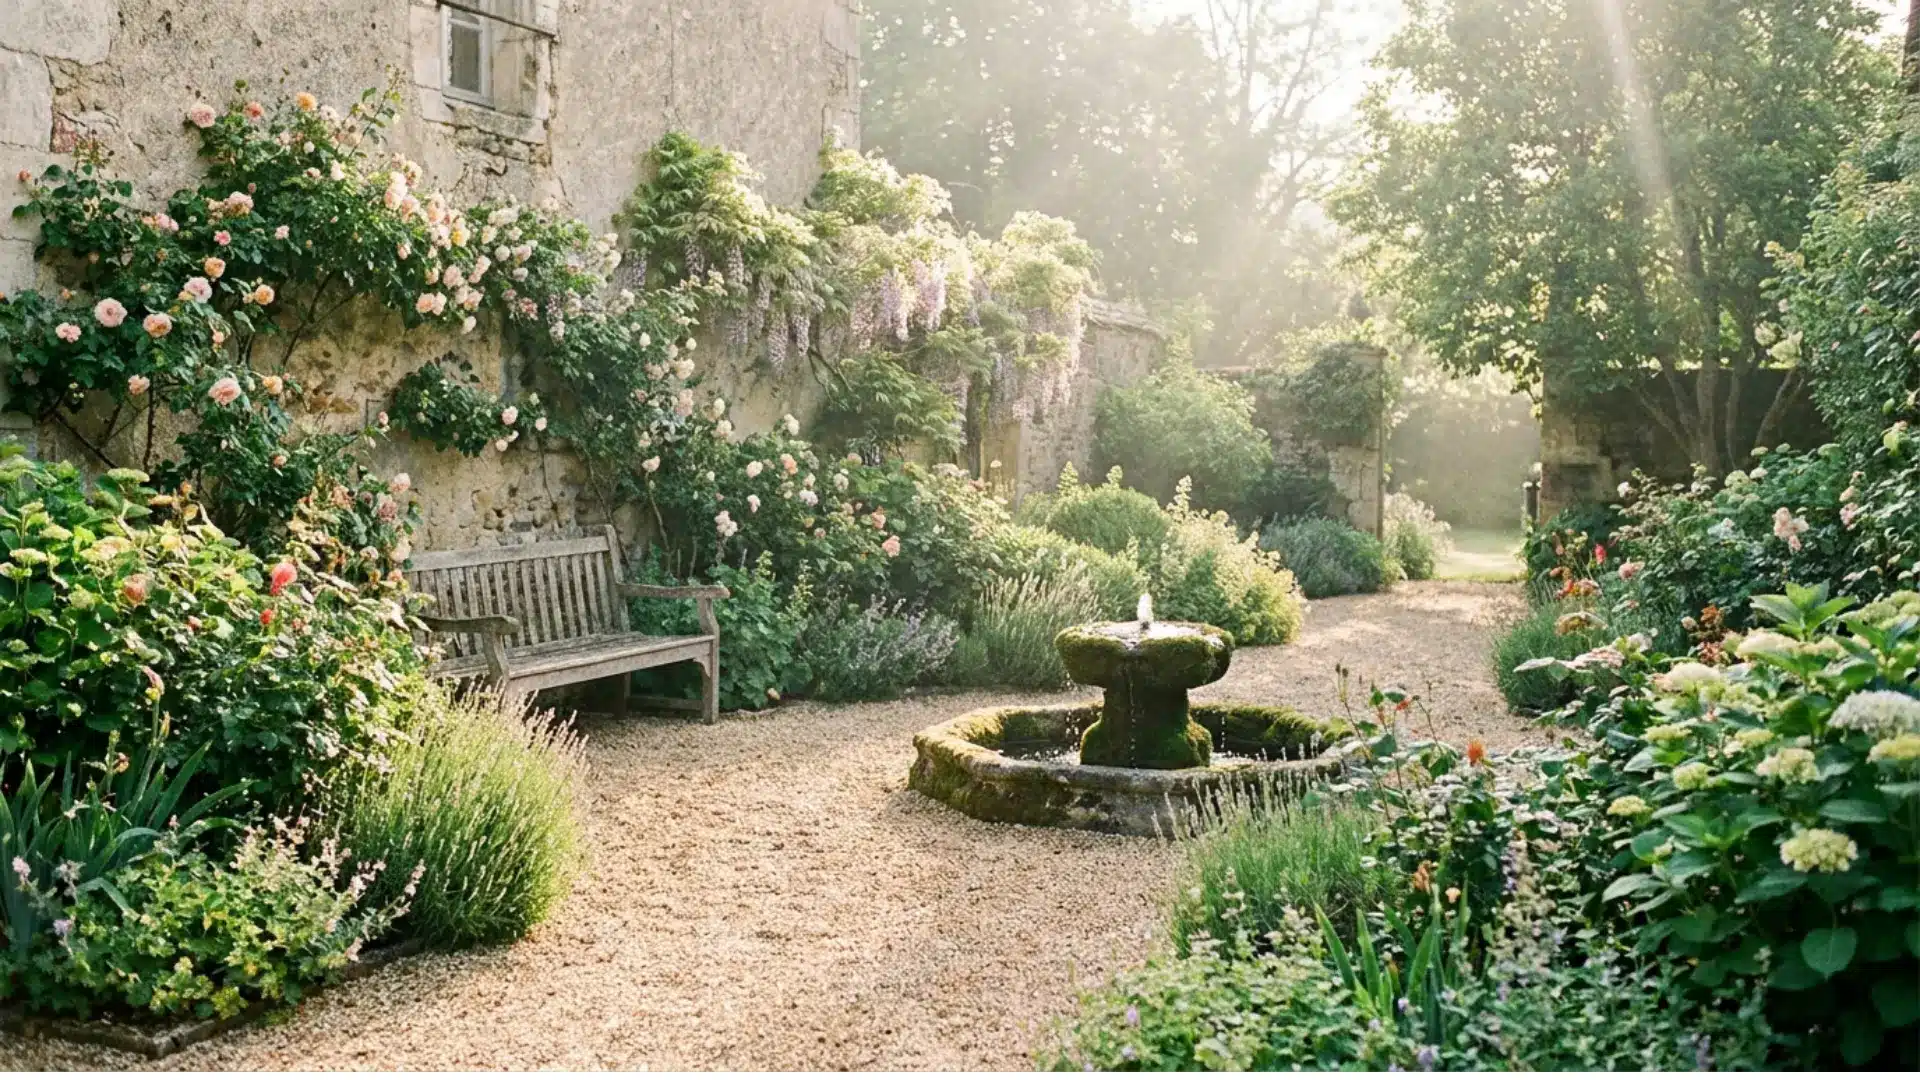
You can make your gravel patio feel like a lush retreat by adding planted beds around it and letting the greenery grow over the edges.
Try using finer gravel, such as decomposed granite, for a more polished look. Add a small fountain or birdbath, and place a bench nearby. This creates a private, peaceful spot that feels like a hidden garden.
10. Gravel Patio with Outdoor Dining Area
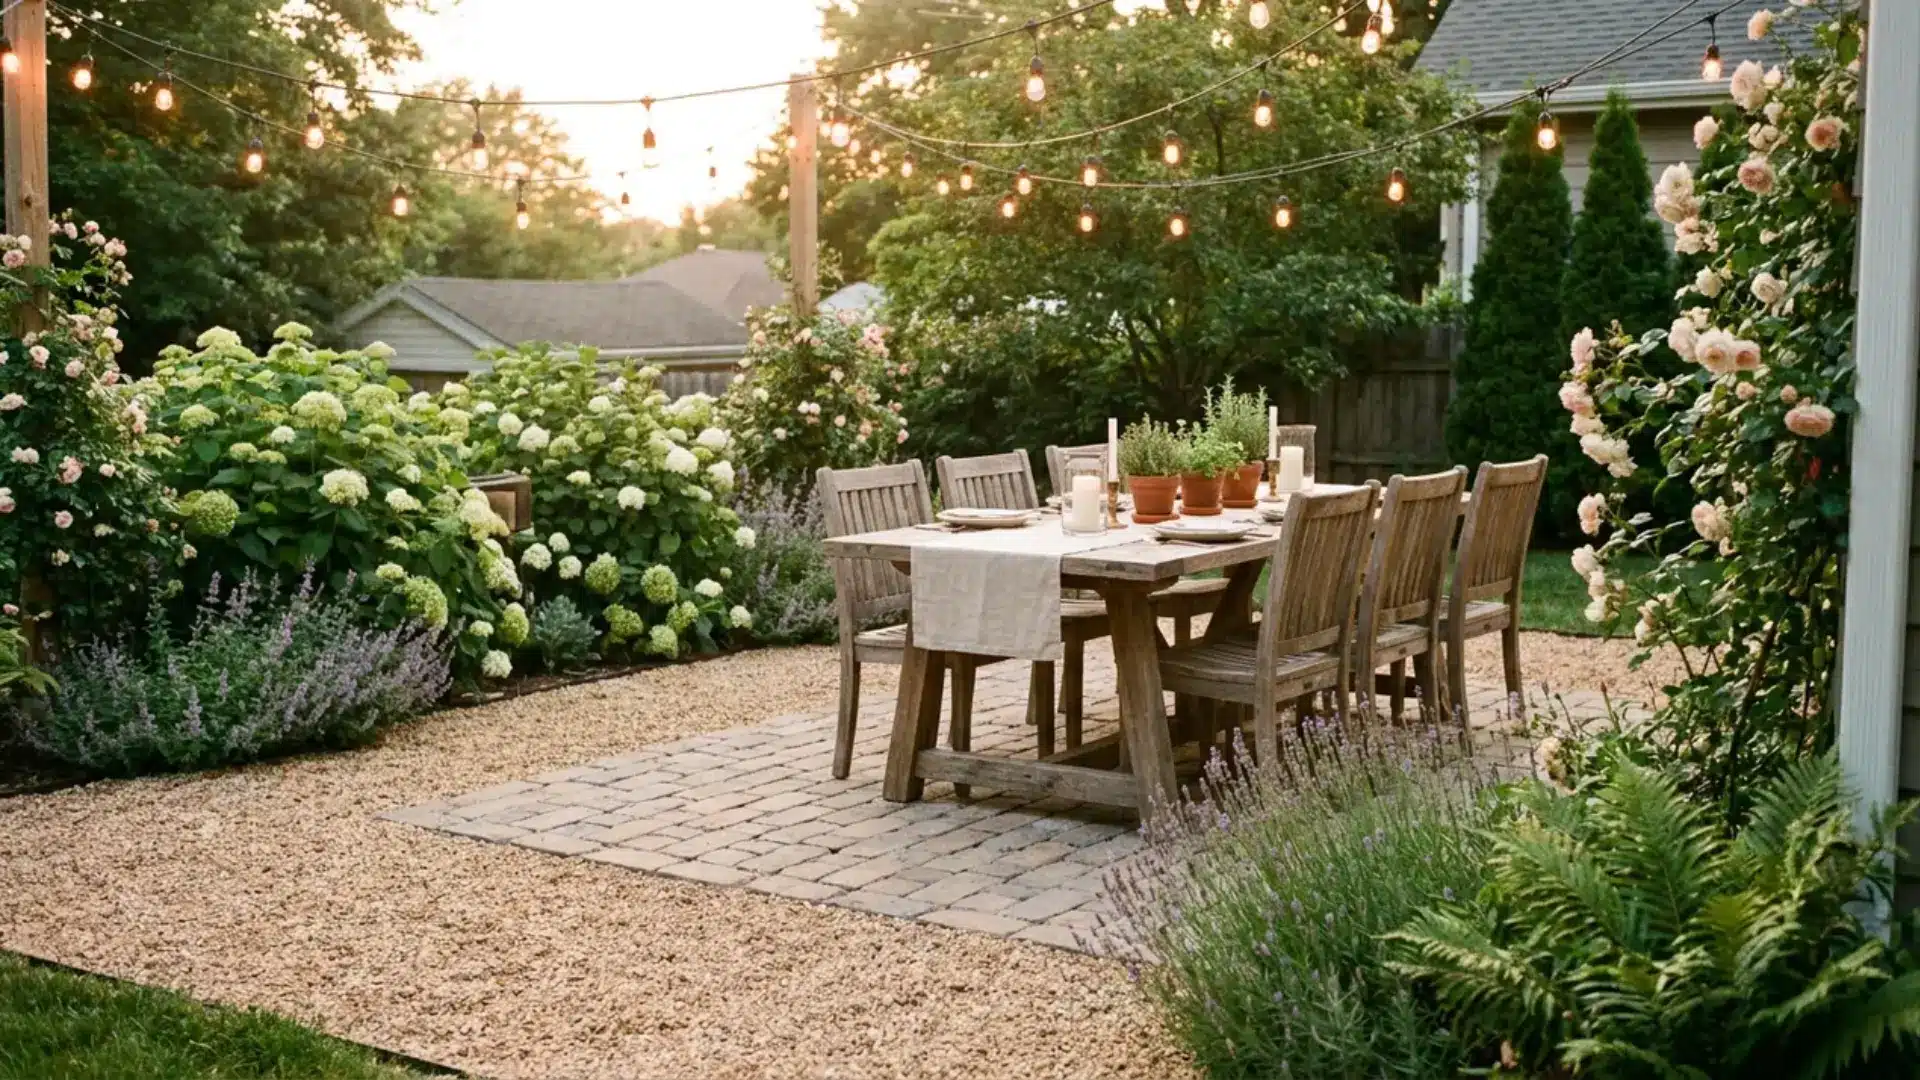
Use pavers or a compacted gravel base to create a level spot for your table and chairs. Surround this area with looser gravel. If you add plastic honeycomb grid panels under the gravel, you can keep chair legs and wheels from sinking.
This setup gives you a sturdy spot for meals but still feels relaxed.
Hang some cafe lights above, and your backyard will feel like a restaurant.
11. Zen-Inspired Gravel Patio
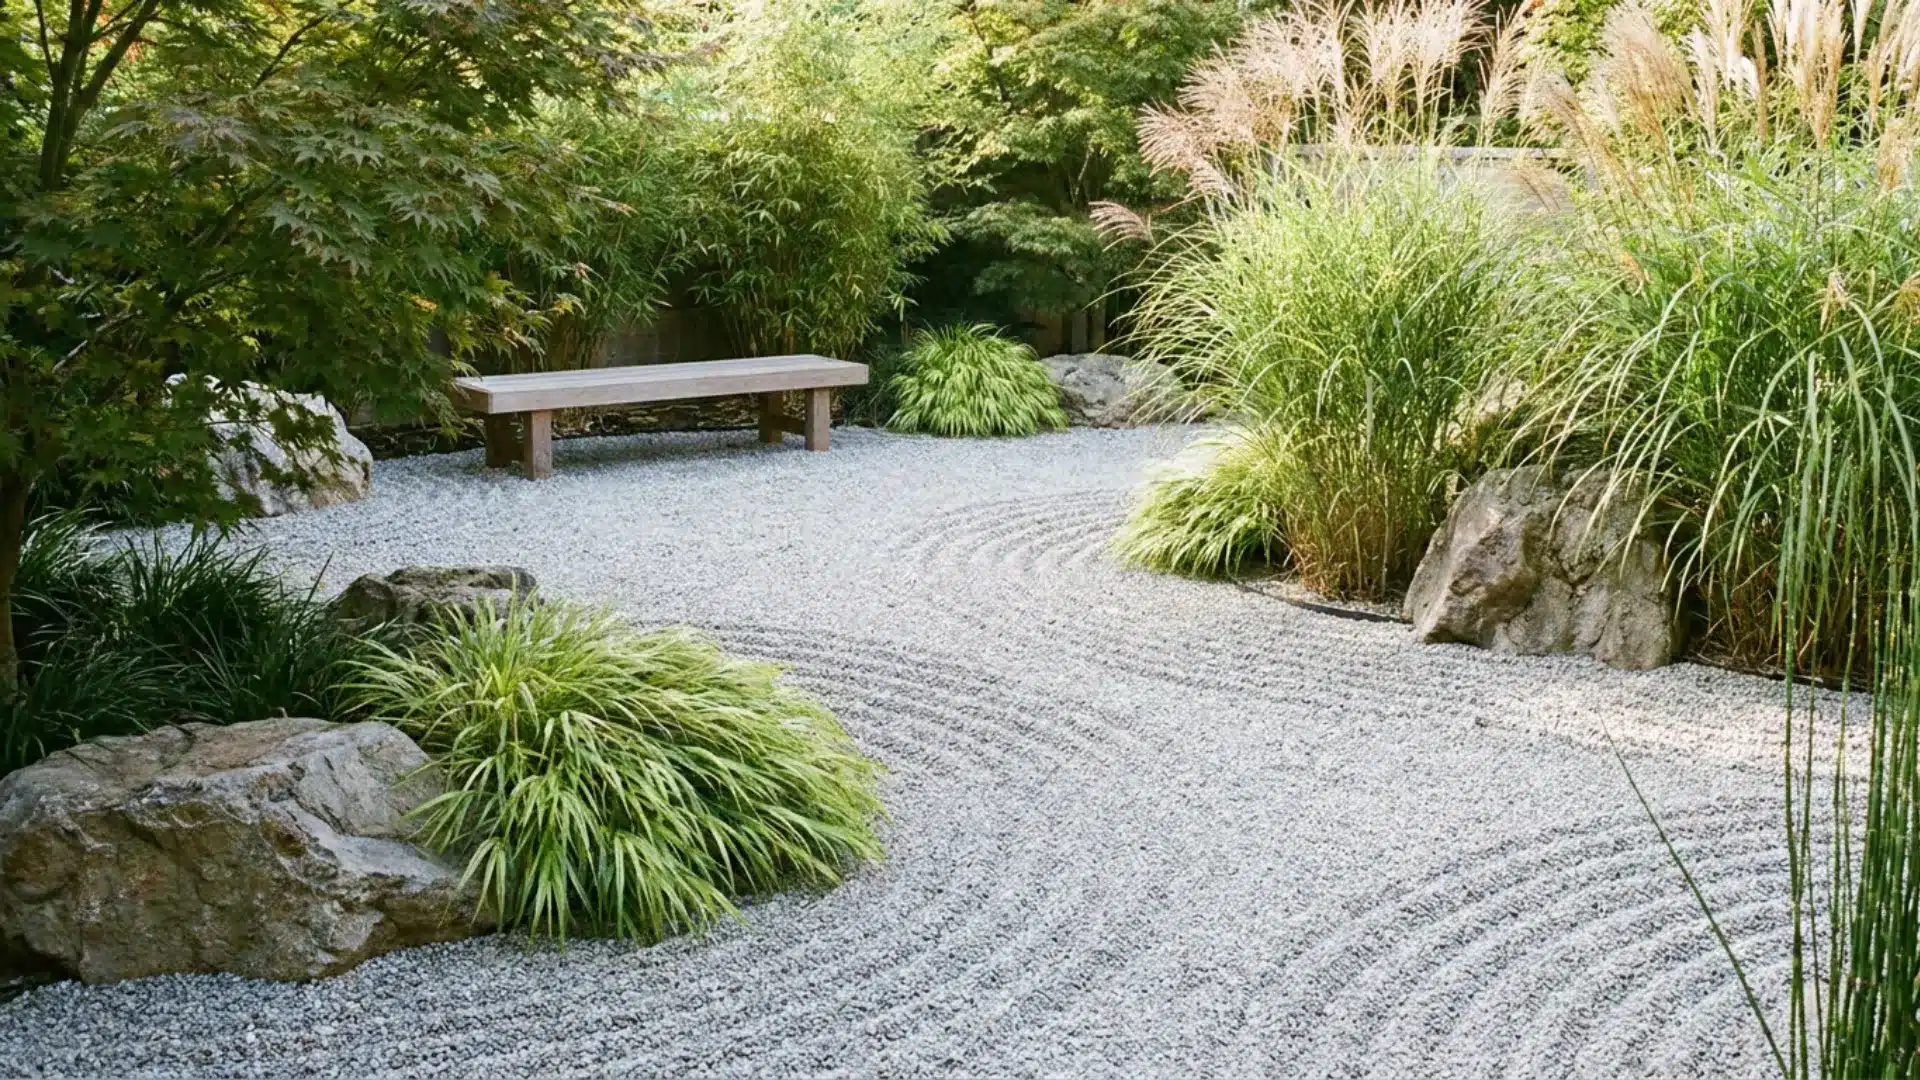
Raked gravel patterns, a few carefully placed rocks, and minimal plantings like ornamental grasses or clumping bamboo help create a peaceful atmosphere. Running bamboo spreads quickly, so it’s best to keep it in a container.
This style focuses on calm and intention. Choose low, simple furniture, such as floor cushions or a single bench.
Small, fine gravel is best for holding raked lines. The gravel acts as a meditative element, not just ground cover, and re-raking the lines after a rainstorm can be surprisingly soothing.
12. French Country Gravel Patio
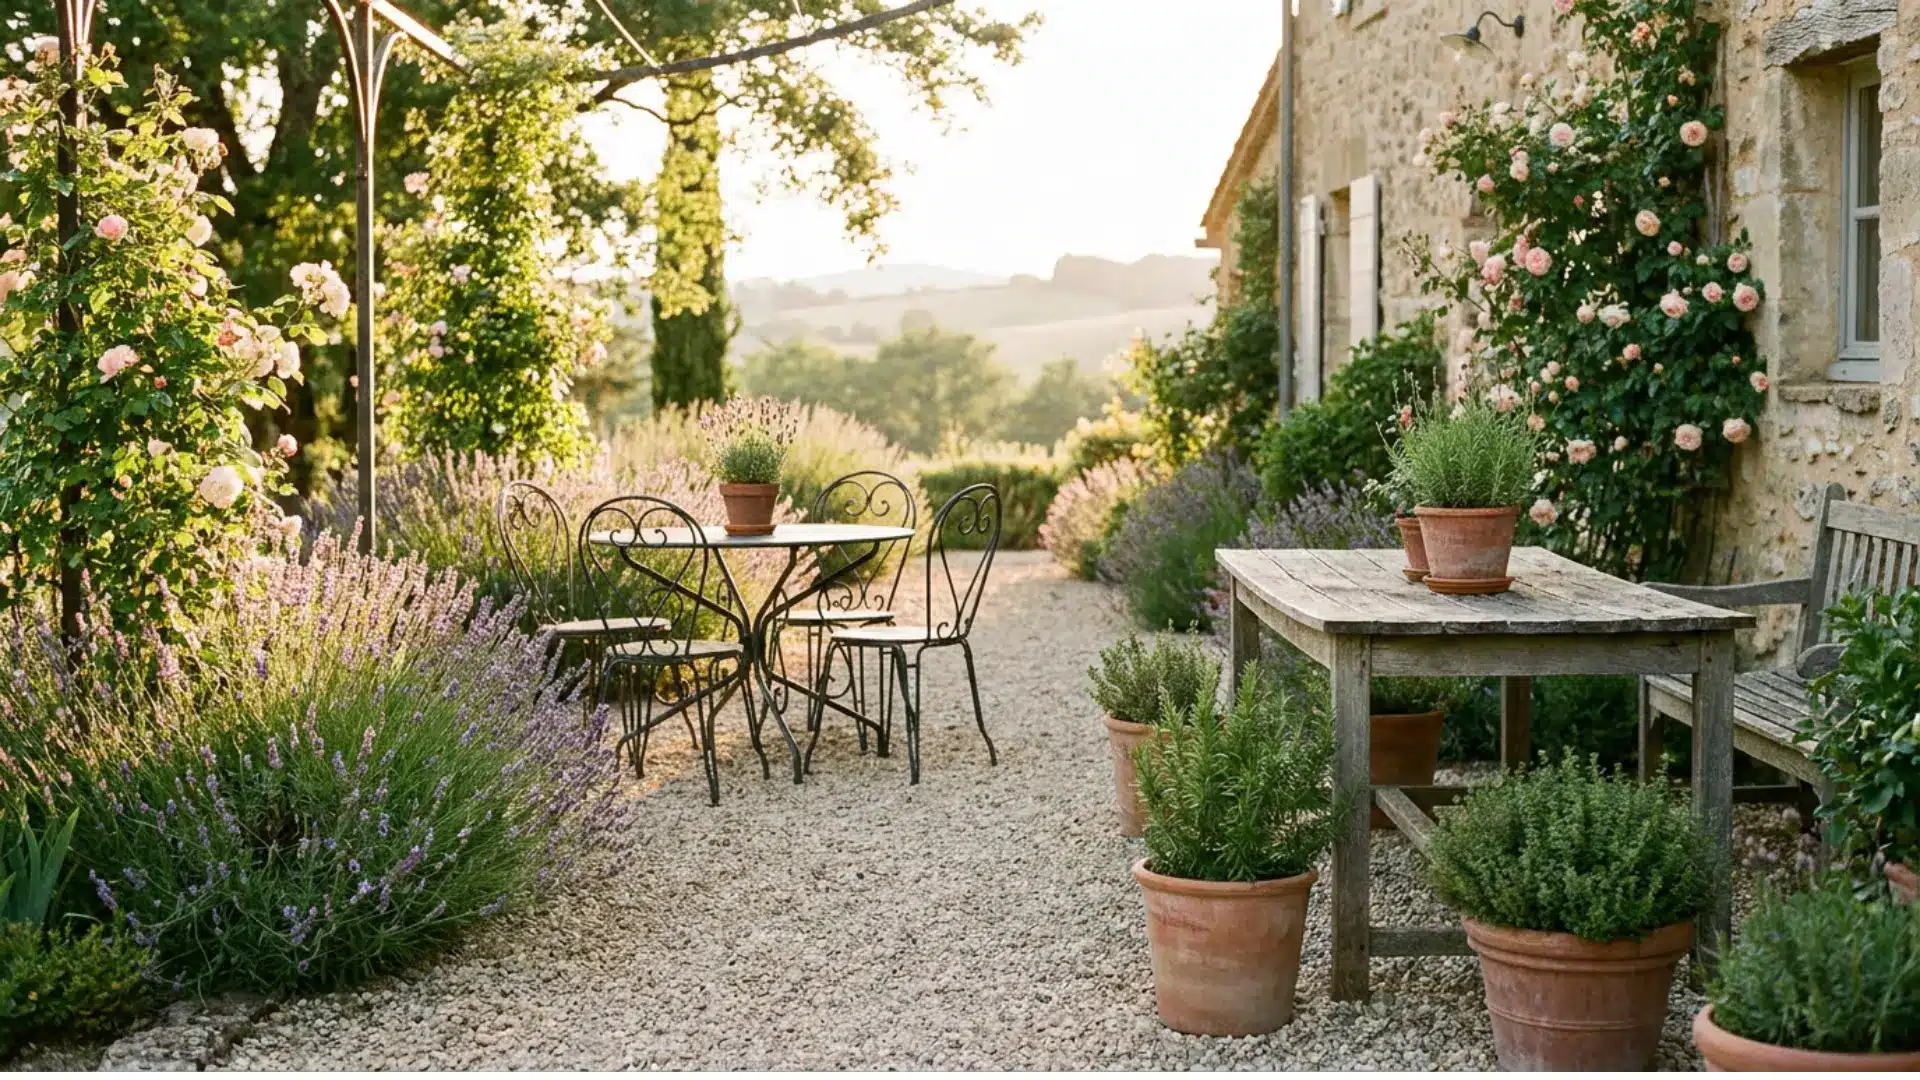
If you use crushed limestone or light-colored pea gravel with lavender, terra cotta pots, and wrought iron furniture, you can create a Provence-inspired look at home without traveling.
Lavender thrives in full sun and well-drained soil, so gravel is a good choice.
Keep the edges soft and slightly uneven, let herbs spill into the gravel, and add a weathered wooden table. This creates a look that feels both romantic and relaxed, with the gravel’s casual texture balancing out the more formal pieces.
13. Raised Garden Beds Around the Patio
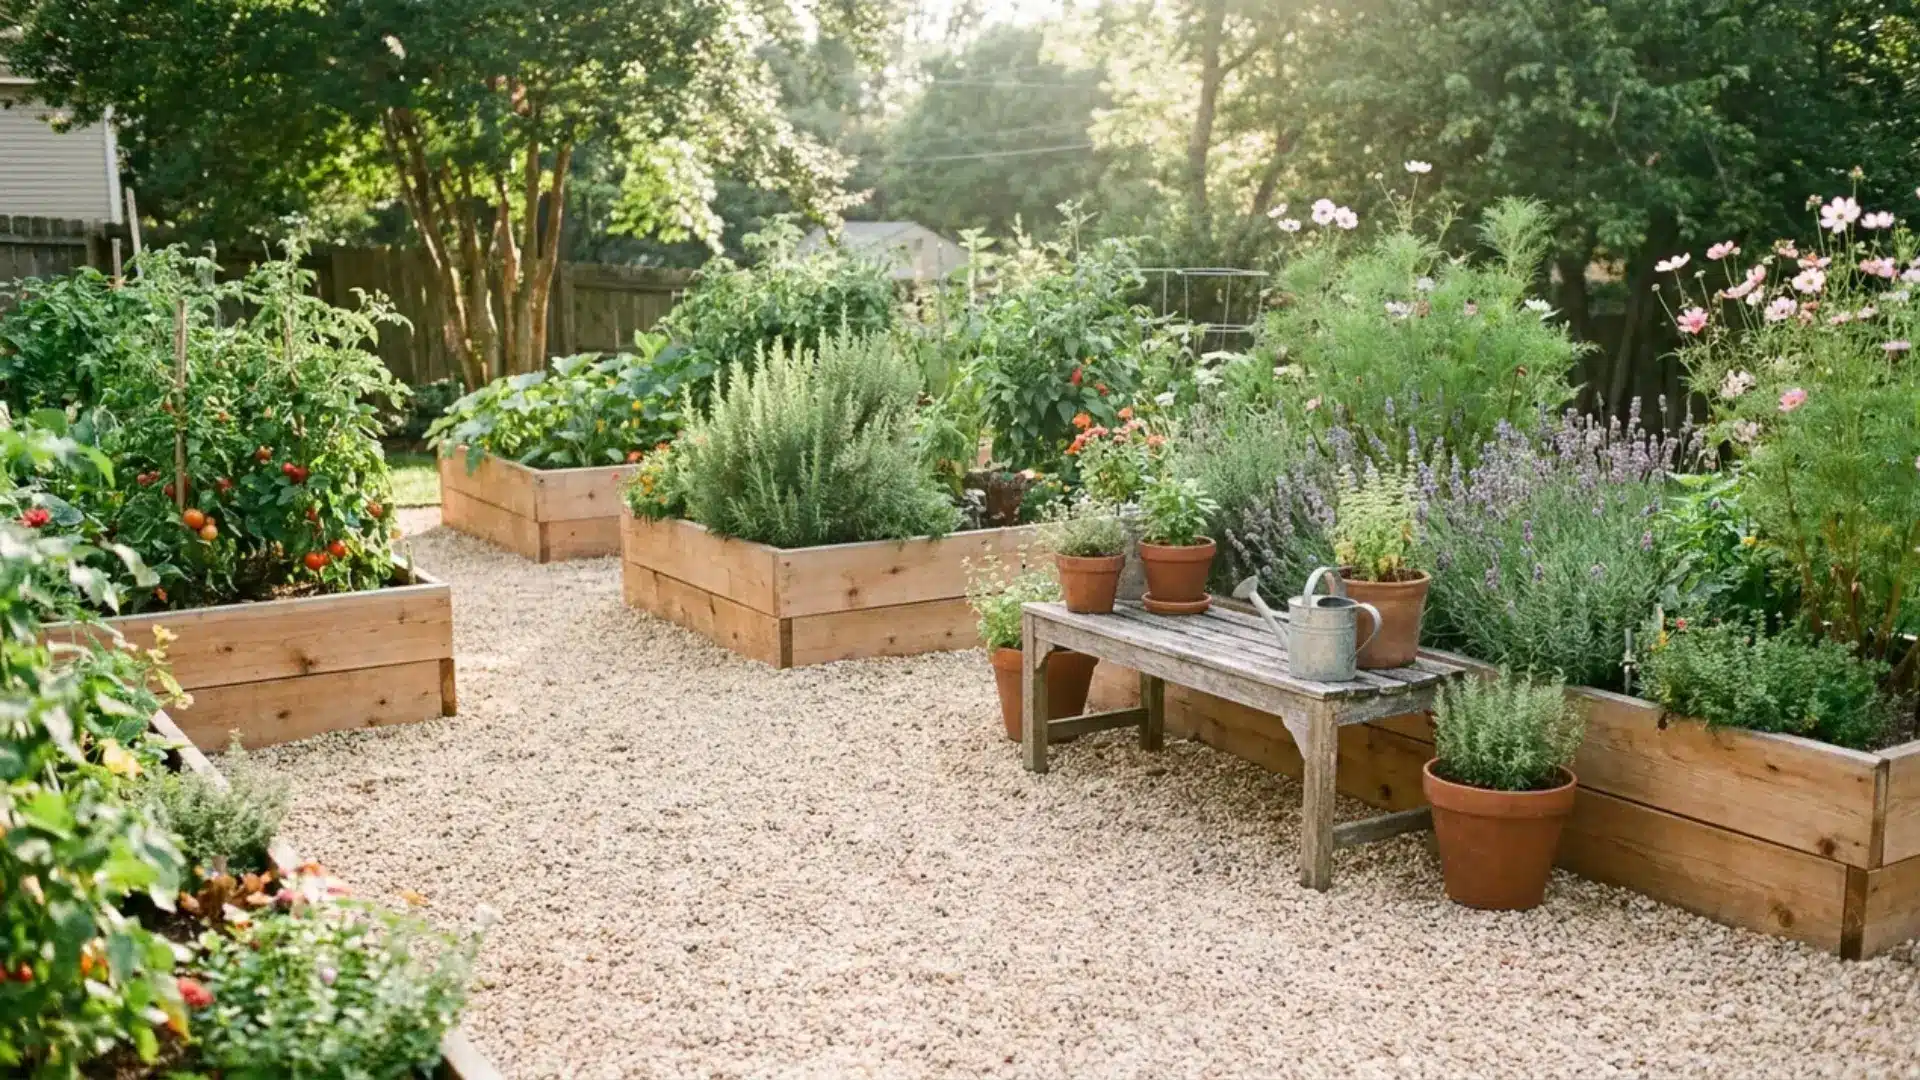
You can build raised beds directly in or around your gravel patio to combine gardening with outdoor living.
The gravel keeps weeds down between the beds and makes it easy to walk around and care for your plants. This setup gives you the usefulness of a kitchen garden along with the look of a well-designed patio.
Plus, both the beds and the patio drain well.
Making sure the soil layers in your beds are set up correctly is just as important as how you manage the gravel around them.
14. Coastal-Style Gravel Patio
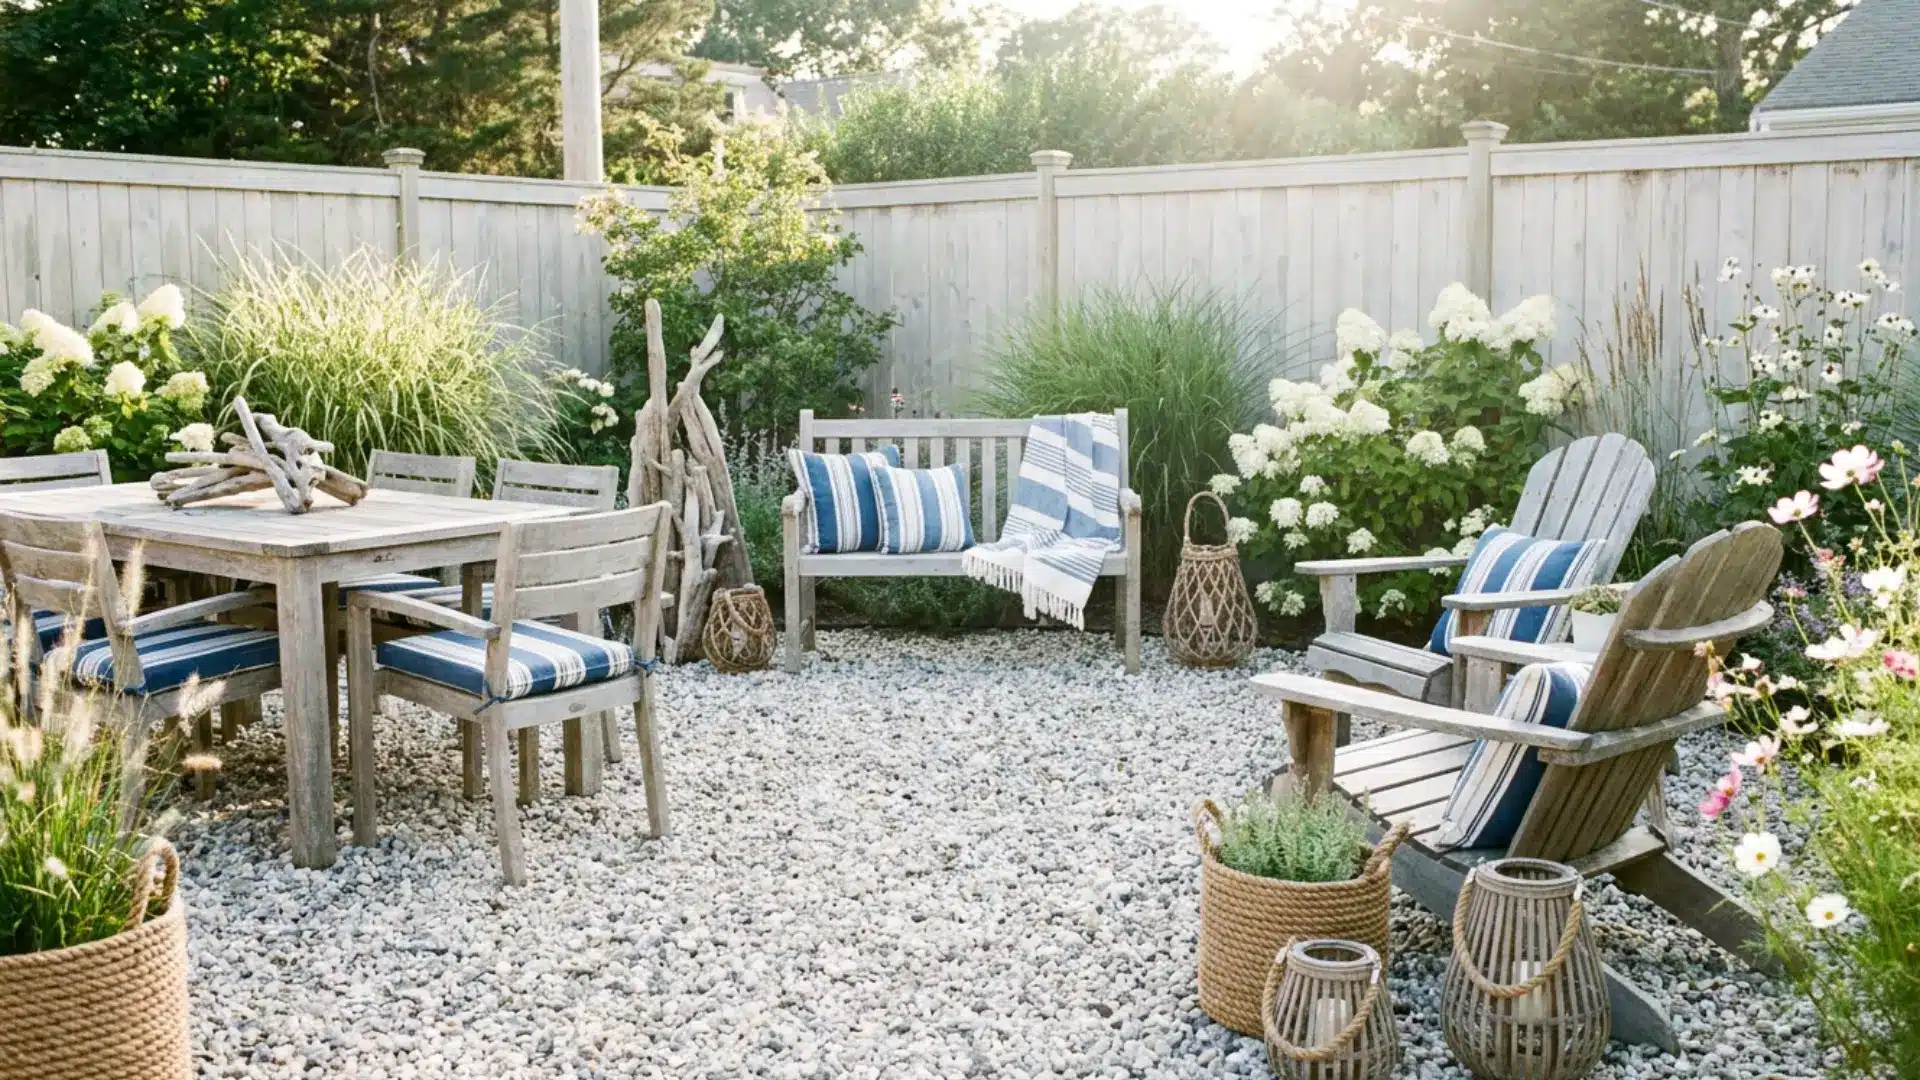
White or pale gray gravel looks like sand and reflects light nicely. Try adding weathered driftwood, blue-and-white striped cushions, and a few rope touches to your furniture.
This gravel drains quickly after summer storms and stays cooler than darker materials.
15. Gravel Patio Using Recycled Materials
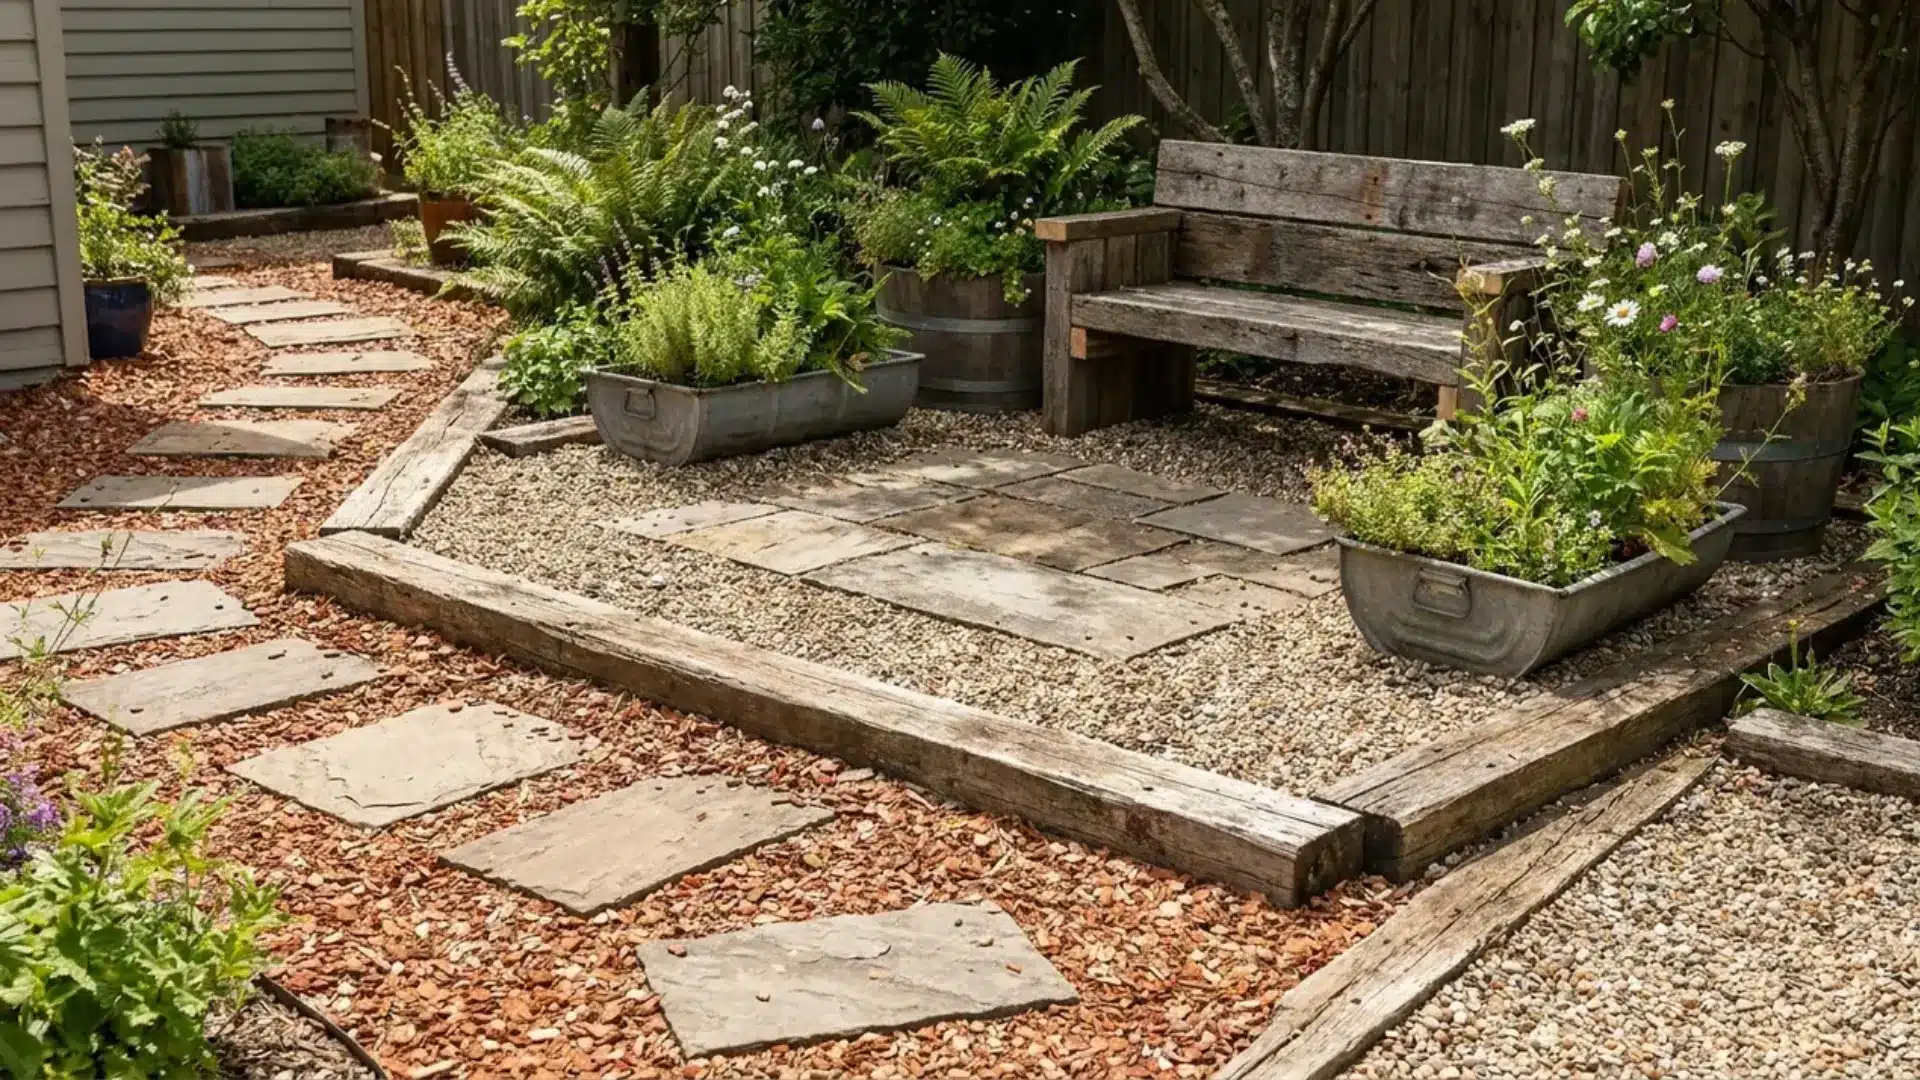
Crushed concrete or reclaimed brick chips are cheaper and help keep materials out of landfills.
Because crushed concrete can be sharp and dusty, use it as the base layer or in low-traffic areas.
Add some sparkle by mixing in tumbled recycled glass with smooth edges. Use untreated salvaged wood for edging; avoid old railroad ties, since they may be chemically treated, and turn old pavers into stepping stones.
These different textures add character and a story to your patio, something new materials often miss, and they also help you save money.
16. Built-in Perimeter Benches
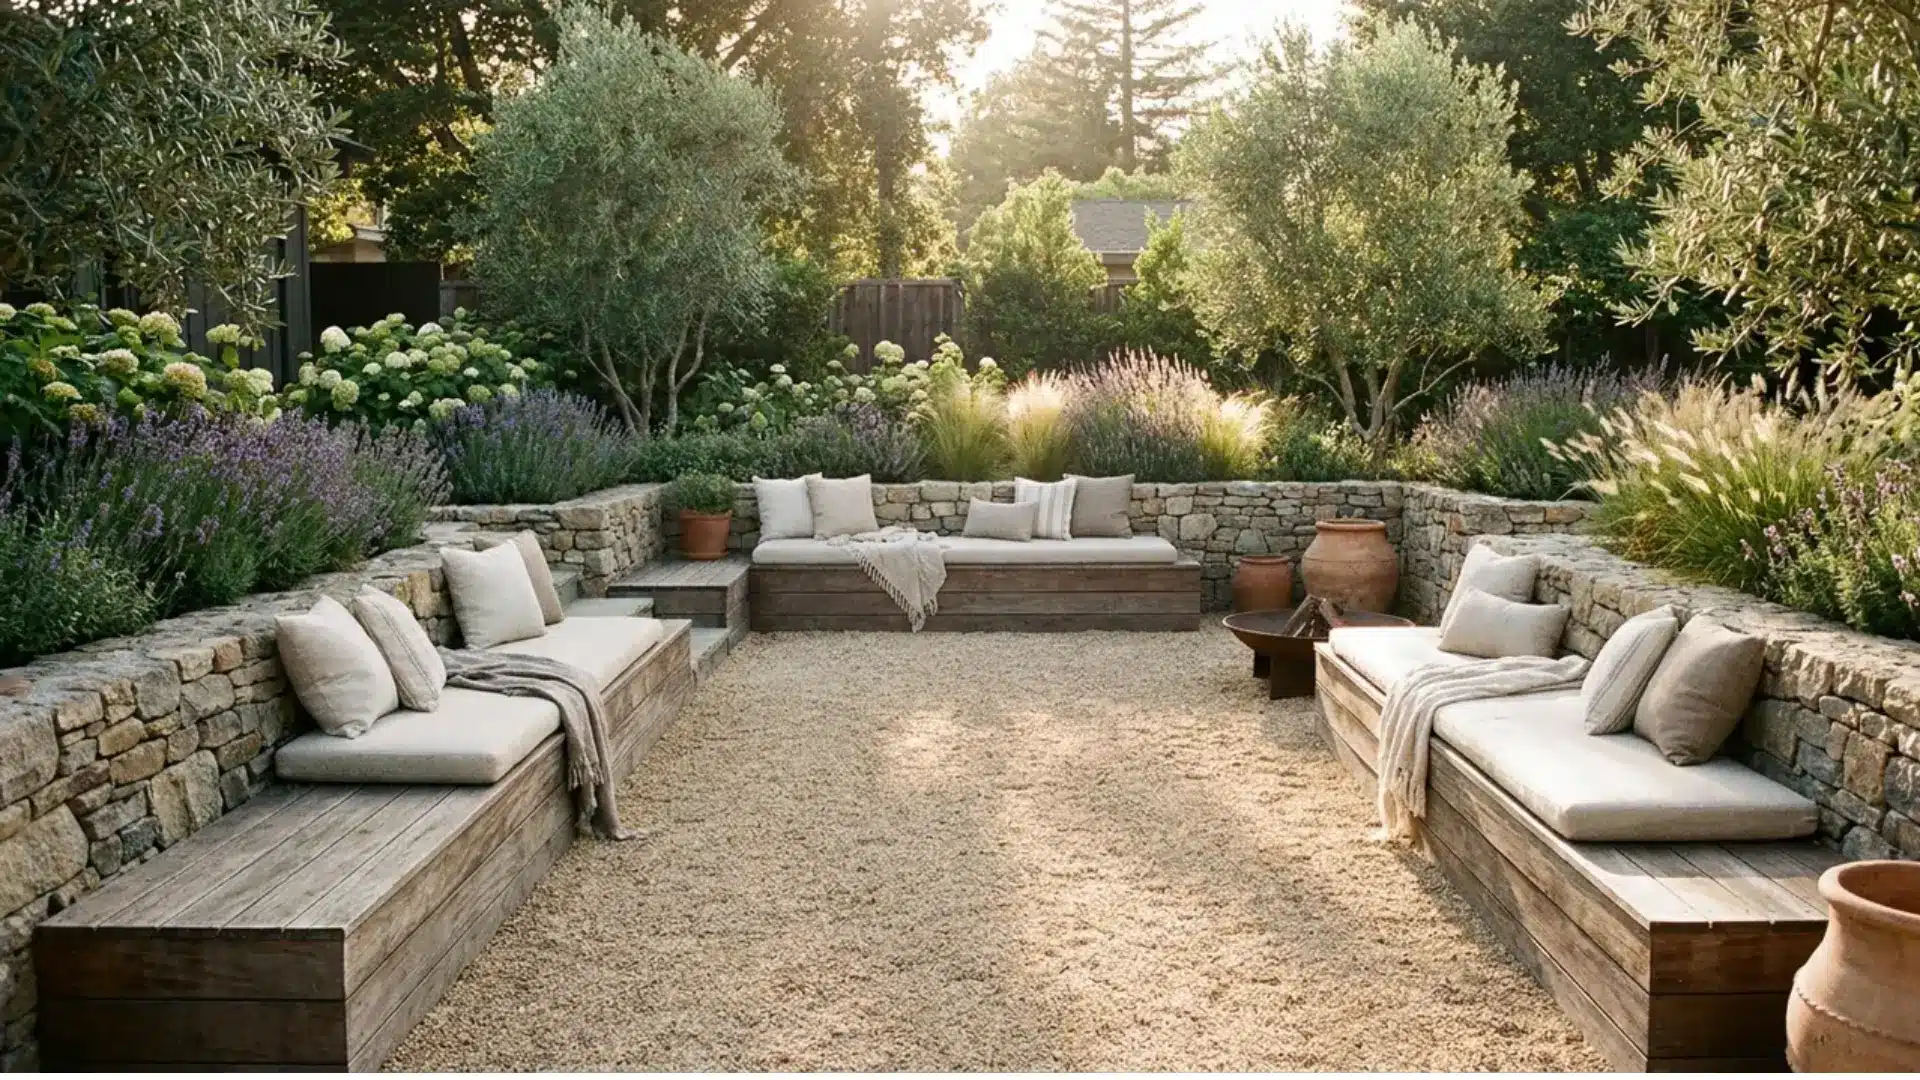
Build low stone or wood benches along the edges and cover the center with gravel to create a lasting, unified gathering spot.
Set the benches on a firm, compacted base so they stay level and steady.
Built-in benches give you more seating without crowding the space with extra furniture. The gravel in the center keeps the area open and flexible for standing, playing games, or adding more chairs when needed.
17. Gravel Patio for Sloped Yards
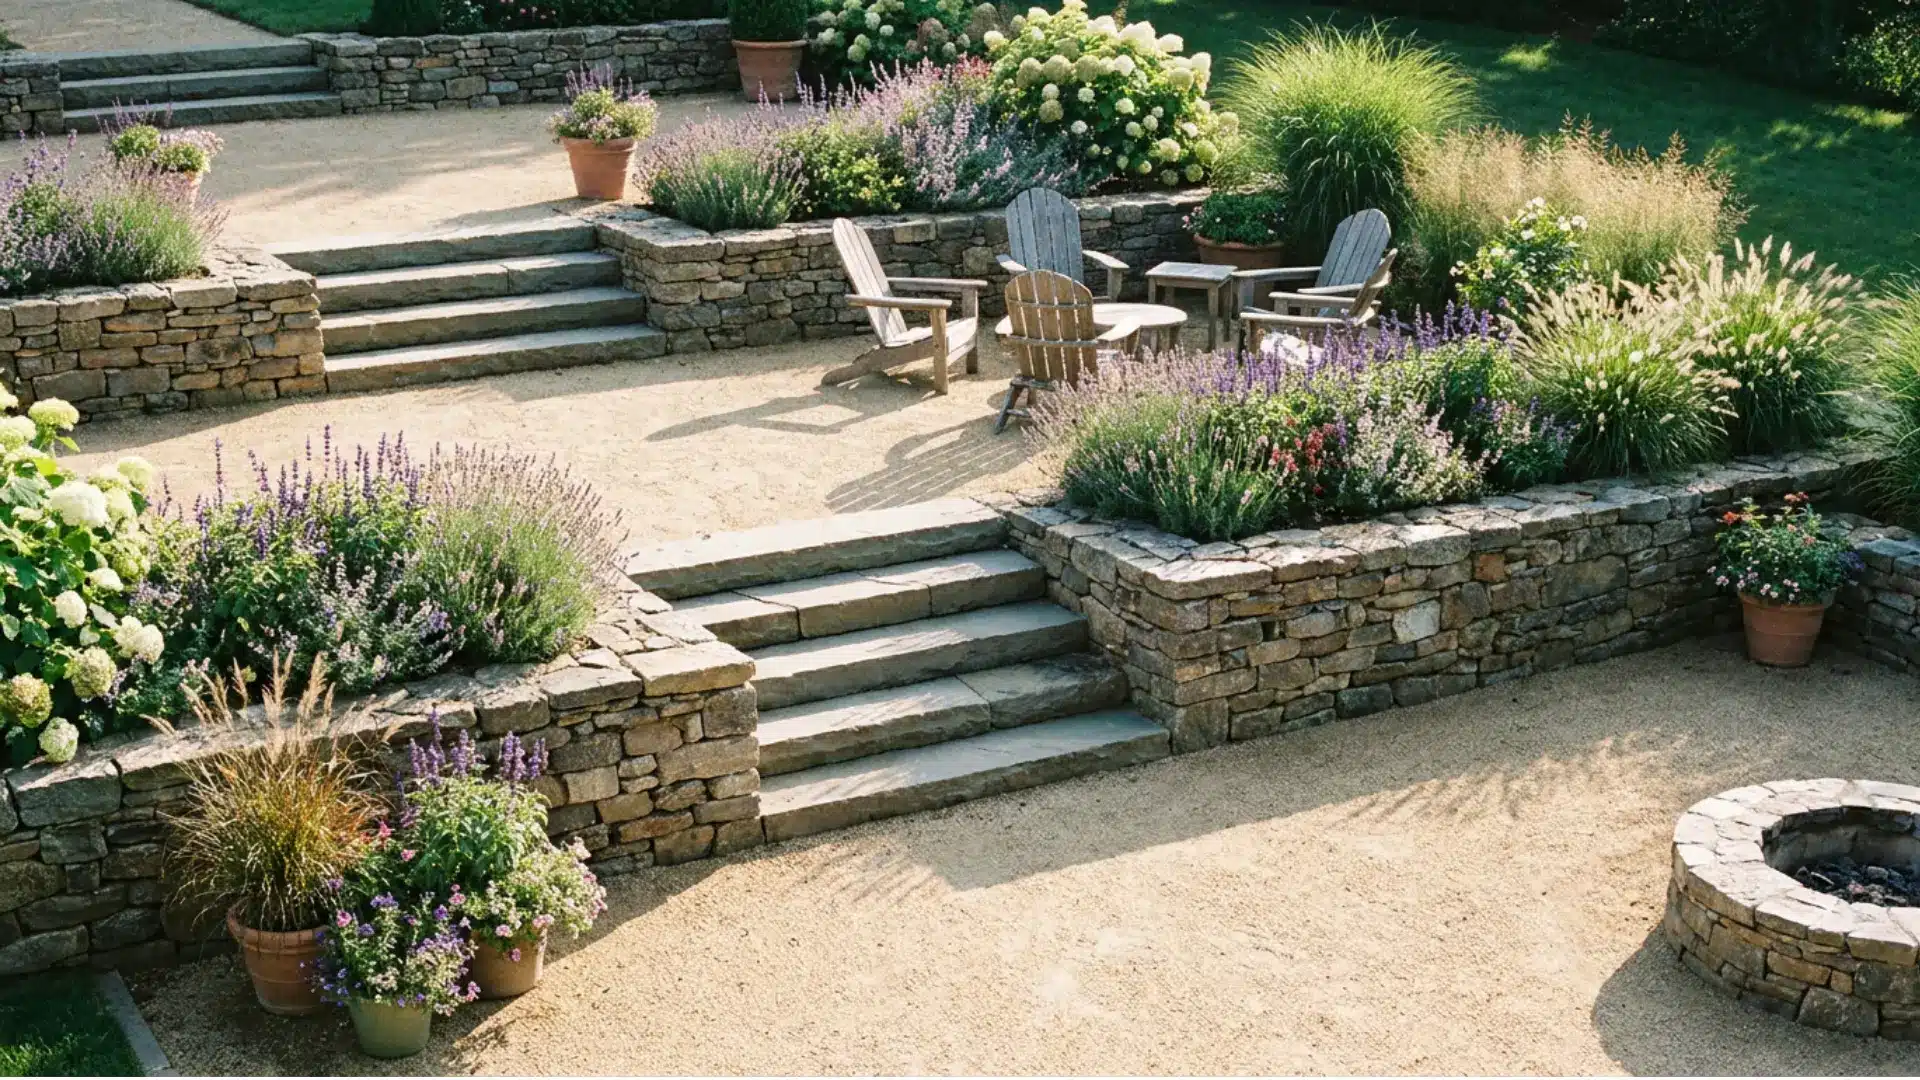
Gravel works well on gentle slopes, while pavers often require extensive grading. You can build terraced levels using stone or timber retainers, fill each one with gravel, and turn a tricky slope into a usable outdoor area.
Gravel usually drains well, but heavy rain can wash it downhill.
Using compacted crushed stone and sturdy edging can help keep it in place. For steeper slopes or tall retaining walls, you might need engineering or a permit, so check local rules and ask a professional if needed.
18. Mixed Gravel and Paver Patio
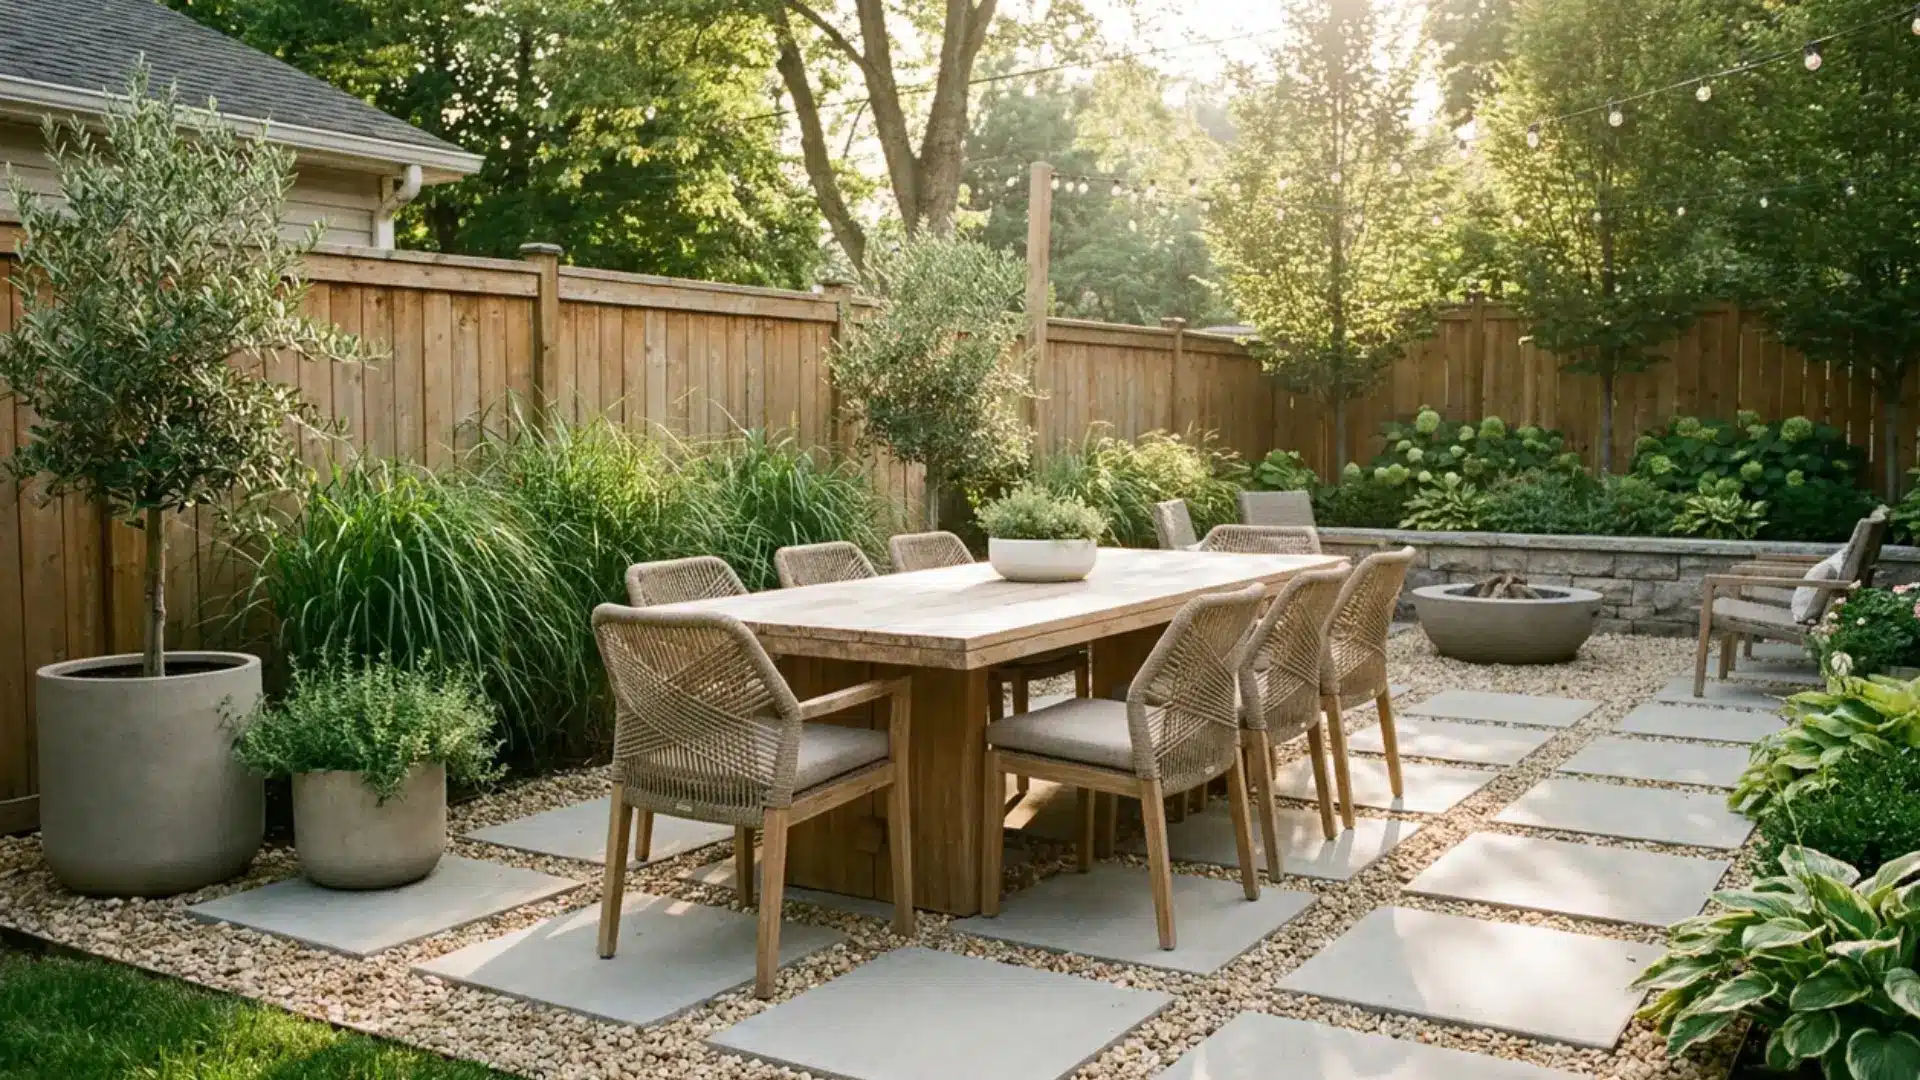
Use large pavers in a grid or stepping pattern, and fill the gaps with gravel.
This gives your space both structure and a softer look. Pavers give you stable footing and a sense of order, while gravel makes the area feel more relaxed and allows water to drain.
Mixing the two is more visually appealing than using just one, and you can adjust the mix to fit your space and budget.
19. Gravel Patio with String Lights
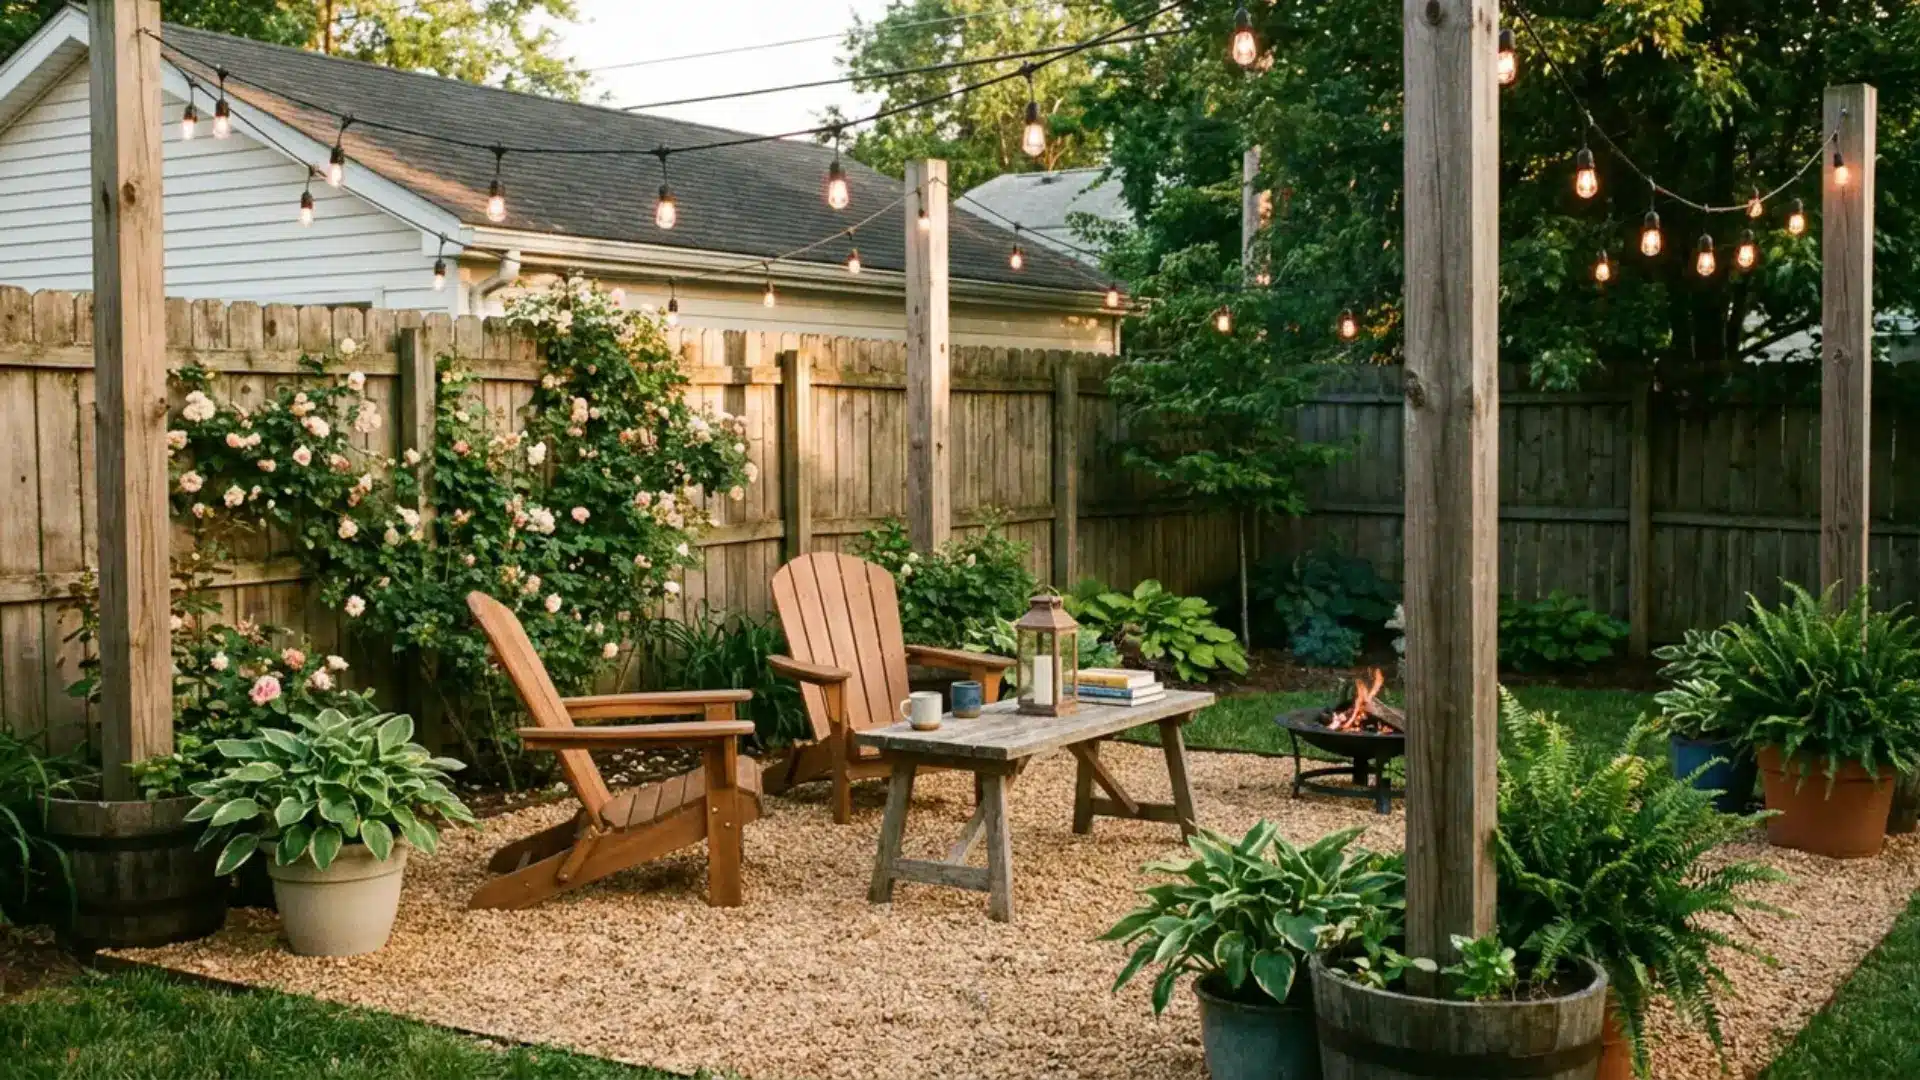
Gravel takes on a magical look at night when you hang string lights overhead.
You can stretch them from the house to a pergola, drape them across posts, or zigzag them above the area. Choose outdoor-rated lights and plug them into a weatherproof GFCI outlet with a reset button for safety, or use solar-powered ones.
The soft light highlights the texture of the gravel and creates a cozy, intimate feeling.
20. Narrow Side-Yard Gravel Patio
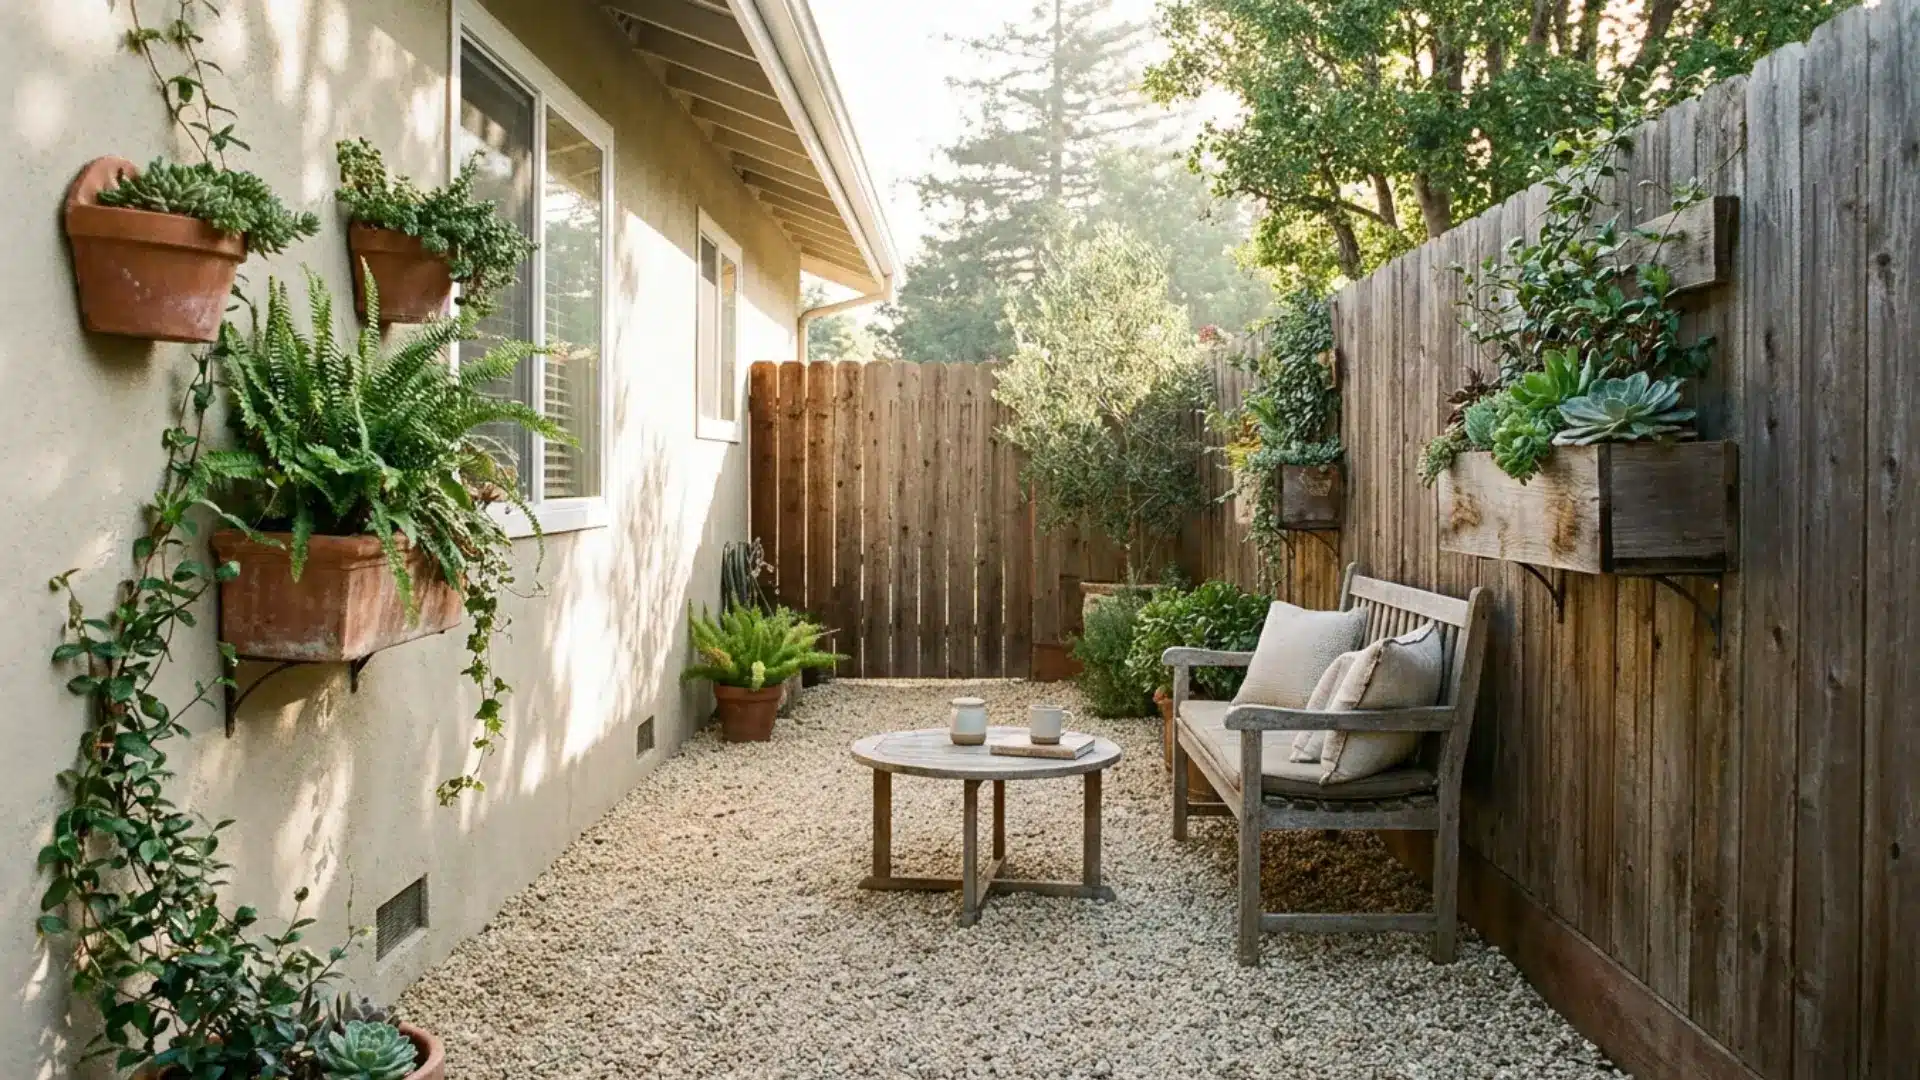
Use that often-overlooked strip between your house and the fence.
Gravel works well in these narrow spaces and is easier to install than pavers because you don’t have to cut or fit anything.
Try adding a slim bench, a few wall-mounted planters, or even a small table. This way, you create a cozy spot for morning coffee instead of letting the area fill up with weeds and dead leaves.
Make sure the ground slopes away from your house, since water often gathers in side yards.
21. Budget DIY Gravel Patio for Beginners
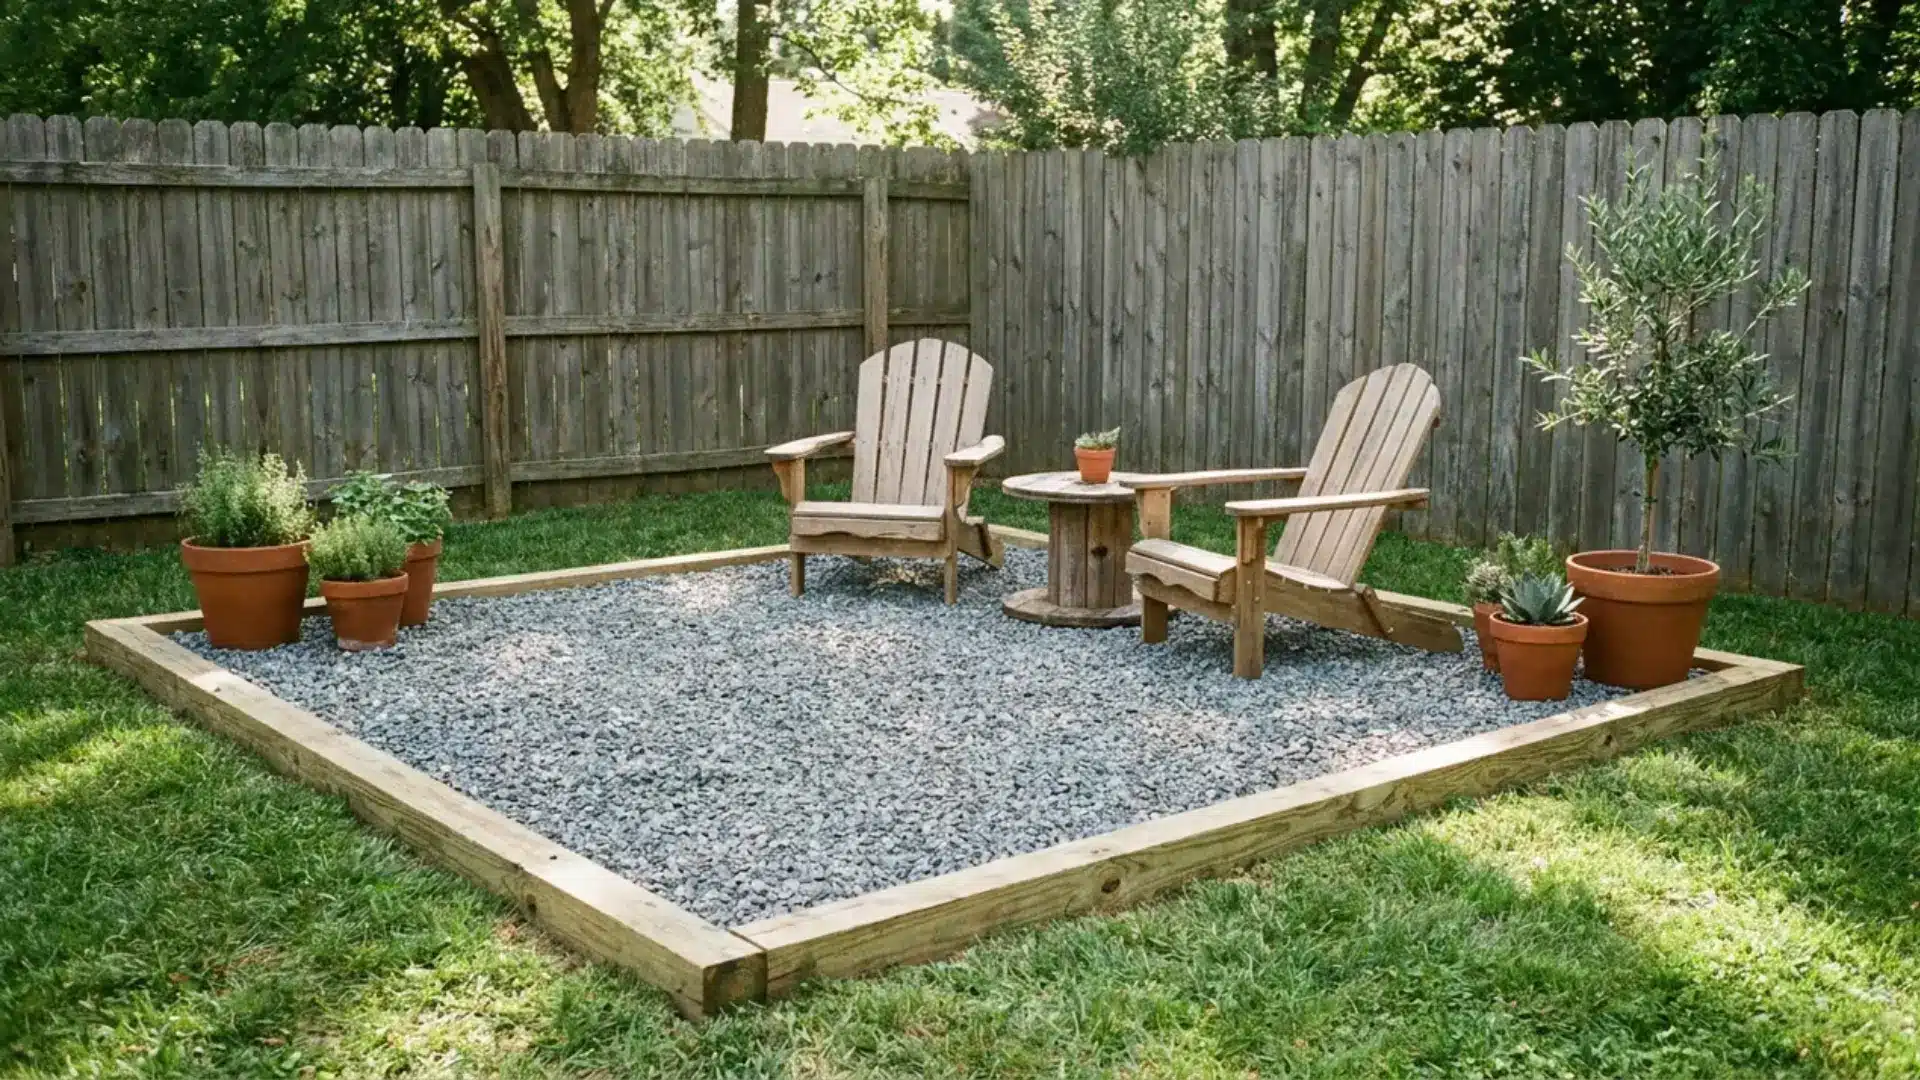
Start with a basic setup: a crushed-stone base, weed-barrier fabric, one type of surface gravel, and simple edging.
Mark out your space, lay down the fabric, add the stone, and rake it smooth.
Use one or two pieces of furniture you already have.
If you’re on a budget, make the patio smaller and use a two-inch base. Even a thin, compacted base is better than nothing. You can usually build a small patio in a weekend for a few hundred dollars, and add pavers, plants, or nicer edging later.
Types of Gravel Commonly Used for Patios
Each type has its own style and practical uses that fit different designs. Stones between three-eighths and three-quarters of an inch usually offer a good mix of comfort, drainage, and stability. Start with that size range.
|
Gravel Type |
Best For |
Texture & Look |
Things to Know |
|---|---|---|---|
|
Pea Gravel |
Casual patios, light foot traffic |
Small, smooth, rounded stones in warm tones or grays |
Comfortable underfoot, shifts easily, so it needs edging |
|
Crushed Stone |
Stable surfaces, modern designs |
Angular pieces that lock together, gray or tan |
Compacts well and stays put, rougher on bare feet |
|
Decomposed Granite |
Firm patios, pathways, desert or Mediterranean styles |
Fine particles that pack firm, rusty reds to taupes |
Packs into a firm, finished surface when watered and compacted. Stabilized versions hold up better in heavy rain |
|
River Rock |
Accent areas, decorative borders |
Larger, smooth stones in varied colors |
Beautiful but uncomfortable to walk on; use sparingly |
Color and Texture Tip: Pale gravel brightens shade and reflects heat, while dark gravel hides dirt and adds drama. I would mix textures sparingly, you do not need every stone competing for attention.
How to Build a Gravel Patio?
Once you’ve marked the boundaries and arranged your supplies, a small or medium patio can be a weekend project.
What You’ll Need:
-
Tools: Flat shovel, rake, manual tamper or rental plate compactor, wheelbarrow, level, stakes, string, and protective gloves.
-
Supplies: Crushed stone for a compacted foundation, finishing gravel, pinned weed membrane, and edging.
Step-by-Step Process:
-
Call 811 2–3 business days before digging, and arrange separate marking for private utilities, including irrigation.
-
Use stakes and string or marking paint to mark the boundary.
-
Excavate 6–7 inches, removing turf, roots, and rocks (heavy clay may need additional depth).
-
Tamp the exposed soil flat for firm support.
-
Lay weed membrane with 6-inch seam overlaps and secure it with pins.
-
Add 4 inches of crusher run (crushed stone with binding stone dust), sloping slightly away from the house.
-
Compact in 2-inch increments until walking leaves no sinking spots or footprints.
-
Install the perimeter edging before adding your finishing gravel.
-
Spread 2–3 inches of surface gravel and rake it level.
That foundation isn’t the exciting part, I know, but I would address it now rather than deal with a sinking chair leg later!
Best Edging Options for a Gravel Patio
Metal edging gives the neatest containment, plastic is usually the least expensive, and brick and stone tend to cost more to install. Whatever you choose, edging keeps gravel out of the lawn and gives the patio a clear boundary.
|
Edging Type |
Pros |
Cons |
Materials Cost |
|---|---|---|---|
|
Metal Edging |
Sleek, durable, flexible for curves, barely visible |
Can be pricey, cut edges are sharp, so wear gloves |
$1.70-4.70/ft |
|
Brick or Stone |
Permanent, adds texture, doubles as seating |
Labor-intensive, expensive upfront |
$2-10/ft |
|
Wood |
Affordable, easy to work with |
Breaks down over time, can warp |
$2.90-8/ft |
|
Plastic Edging |
Cheapest, lightweight, easy to install |
Less attractive, can shift over time |
$0.50-3.25/ft |
|
Natural Edging |
Uses rocks or logs, blends seamlessly |
Less precise, stones can shift |
Free if you reuse rocks or logs |
Prices may vary by location; these prices are for materials only, per linear foot, and exclude labor.
How Much Does a Gravel Patio Cost?
Gravel is among the cheapest patio surfaces.
Installed gravel costs about $2.35–$6.20 per square foot, compared with $4–$9 for a plain poured concrete slab and $8.70–$24 for concrete or brick pavers.
When you DIY, you pay for materials rather than installation labor, but foundation stone and edging can take a good share of that budget. So price the whole build, not just the top layer.
To calculate stone volume, multiply length × width × depth (all measurements in feet), then divide the cubic feet by 27 to get cubic yards. For a 10 × 20-foot patio, a 3-inch finishing layer takes about 50 cubic feet, or just under 2 cubic yards.
A 4-inch base adds about 67 cubic feet (2.5 cubic yards). Together, that is slightly more than 4 cubic yards of material.
Here are some ways to keep your costs low:
-
Bulk quarry or stone-yard delivery is usually cheaper than bags.
-
A smaller footprint reduces the need for foundation, landscape fabric, and edging.
-
Start with reclaimed pavers or brick fragments and a cheap plastic or natural border, then swap in metal edging later.
Settle the size before shopping. Making the patio smaller saves more than skimping on the foundation.
How to Keep Gravel Patios Weed-Free and Low Maintenance?
Landscape fabric helps, but wind still drops seeds onto the surface, so aim to stop weeds from establishing rather than expect a forever weed-free patio. Pull young weeds while their roots are shallow.
For persistent growth, use localized vinegar or a targeted herbicide, but use it carefully.
Vinegar damages foliage rather than reliably killing roots, so you may need to repeat treatment.
Protect nearby plants and follow product labels.
Clear leaves and dust before they break down into soil on top of the gravel, where blown-in seeds can root.
Check once a year for spots thinned by foot traffic or rain, and top up the surface gravel before the crushed-stone base shows through.
Gravel Patio Design Tips for Comfort and Function
With a few smart design choices, you can make a gravel patio comfortable for everyday use.
-
I prefer furniture with broad, flat feet. Pads under narrow legs can keep them from sinking into the gravel when you sit down.
-
An outdoor rug defines the seating area, gives furniture a steadier surface, and adds a softer spot underfoot.
-
Solar path lamps along the edges give warmth without wiring. Overhead café lights are another option if you want light across the sitting area.
-
The surface needs an outward fall from the building of approximately ¼ inch per foot, or 2%. Water should drain away, not collect beside the foundation.
-
I’d use compacted gravel or stepping stones along busy routes, because repeated trips between the door and chairs push loose gravel aside. A firm path keeps things tidier without asking me to rake after every visit
Wrap Up!
A gravel patio turns an unused corner into a seating area for less than concrete or pavers, and a compacted base keeps it level for years.
Start small if the budget is tight, with a bench, a few pots, and string lights on a stepping-stone or side-yard layout. Add the fire pit, pergola, or raised beds later, since each one sits on the same base.
Have you built a gravel patio already, or are you still choosing a layout?
Share what worked, what didn’t, and which idea comes next in the comments.
Frequently Asked Questions (FAQs)
Are Gravel Patios a Good Idea?
Yes, for a low-cost patio that drains well and fits a weekend build. The trade-offs are regular raking and top-ups as stones scatter, and chair legs that sink without wide feet. Loose gravel also isn’t firm enough for wheelchairs unless it’s stabilized, so add a paver path for anyone using a mobility aid.
How Long Does a Gravel Patio Actually Last?
A gravel patio can last a decade or more with a solid base and good edging. The gravel itself doesn’t wear out, but you’ll need to top it up occasionally as stones get displaced or washed away.
Is Pea Gravel Comfortable for Dogs and Bare Feet?
Pea gravel is the most comfortable pick for bare feet, and most dogs tolerate it fine. Crushed stone and river rock are rougher, and dark gravel can get hot in full sun, so choose pea gravel or decomposed granite and add shade if pets will use the space often.
Can a Gravel Patio Handle Heavy Rain without Flooding?
Usually, yes, and that’s one of gravel’s biggest advantages. Rainwater soaks through instead of pooling the way it can on concrete, as long as the patio sits on a compacted base and slopes slightly away from your house. On heavy clay or in spots that already pool, dig deeper or regrade first.
How Deep Should the Base and Gravel Layers Be?
Plan on six to seven inches of total depth. That’s about four inches of compacted crushed stone plus two to three inches of surface gravel, with extra depth on heavy clay soil.