One healthy aloe vera plant can produce tiny pups around its base, and it is hard not to wonder if those little shoots can become full plants of their own.
If you have ever hesitated because you were afraid of damaging the mother plant, it is a common doubt.
Learning how to propagate aloe vera can be done at the right time, so that those small offsets can grow into strong, independent plants.
Once you see that first fresh leaf appear, the whole process feels completely worth it.
When is the Best Time to Propagate Aloe Vera?
The best time to propagate aloe vera is during spring or early summer, when the plant is actively growing.
Warmer temperatures and longer daylight hours help newly separated pups develop roots and adjust to their new pots more easily.
You can propagate aloe vera later in summer as well, as long as the plant is healthy and growing.
If your aloe is indoors, you have more flexibility, but spring is still ideal because natural light and warmer conditions support faster, healthier growth.
Avoid propagating during cold winter months because aloe grows more slowly and may take longer to establish.
What You Need Before Propagating Aloe Vera
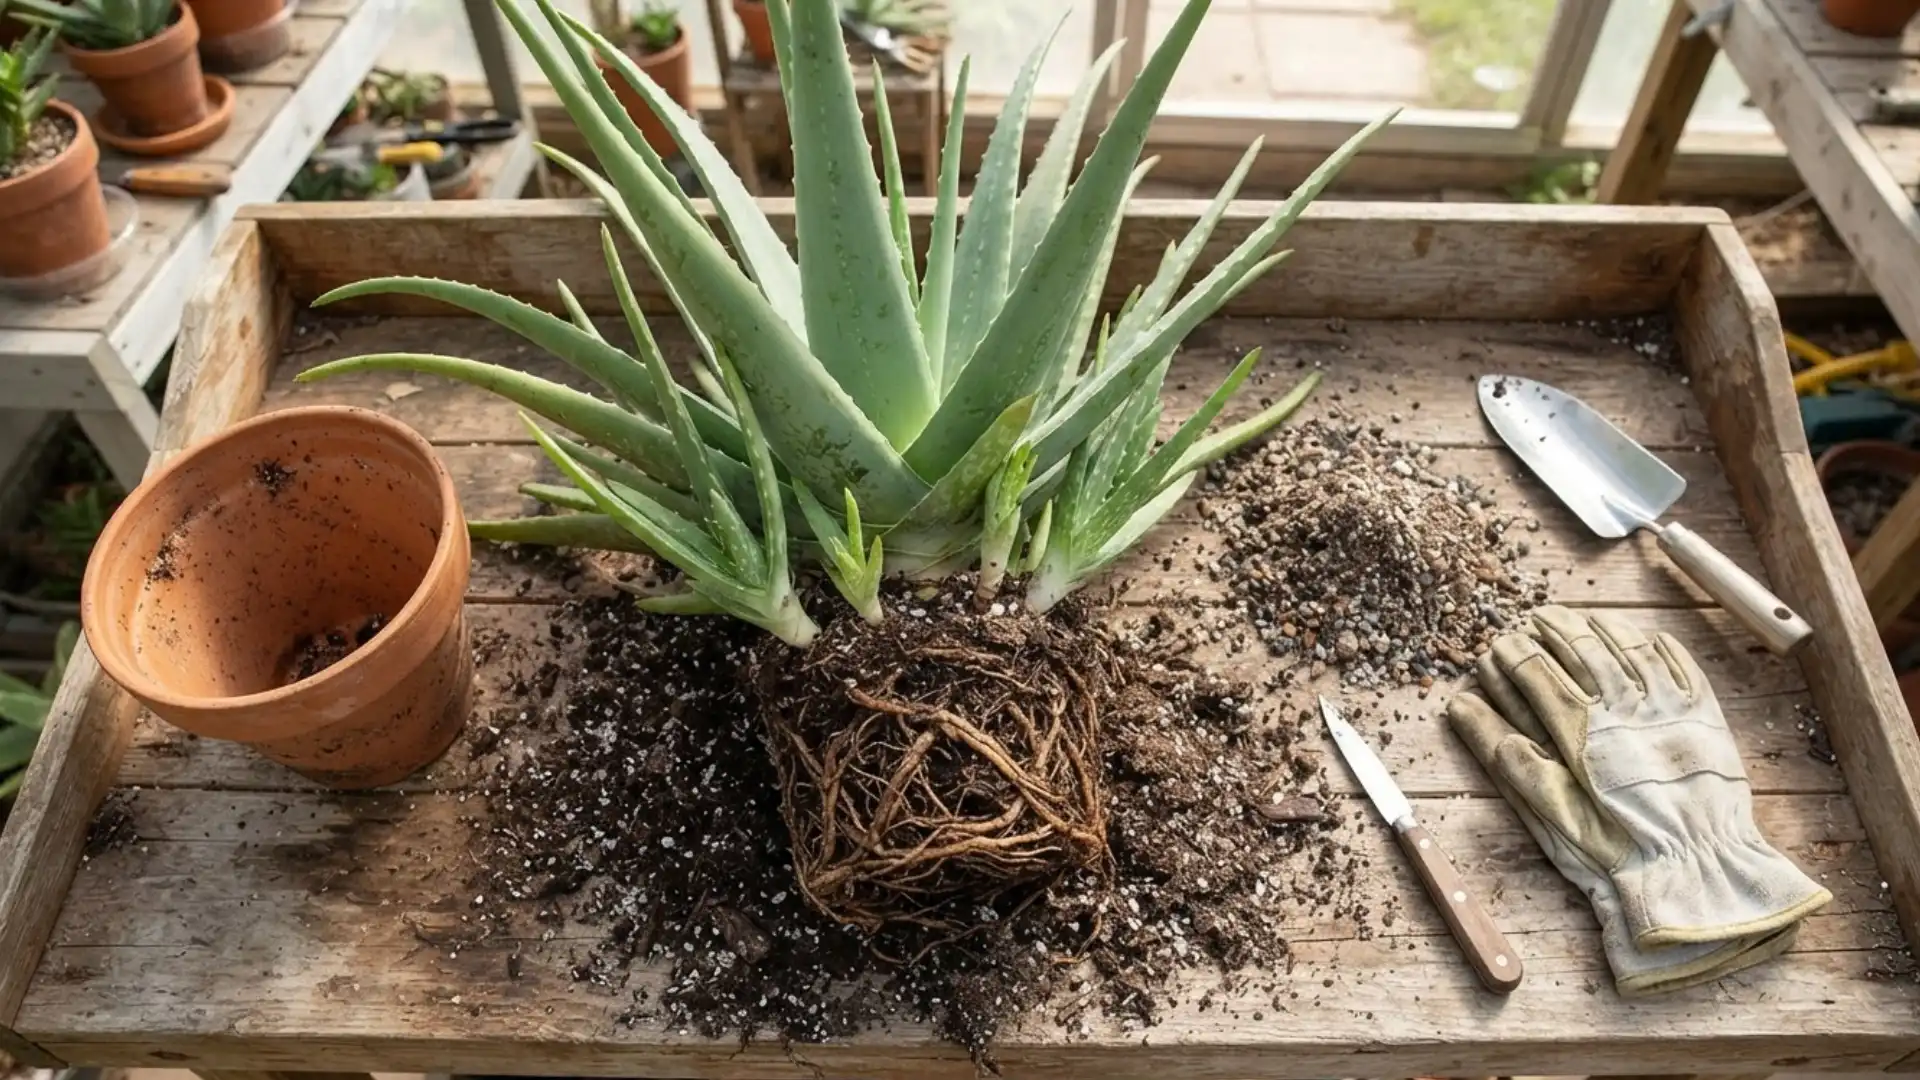
Gathering the right supplies before you start makes aloe vera propagation much easier and helps prevent unnecessary damage.
- A healthy, mature aloe vera plant with well-developed pups
- A clean, sharp knife or pruning tool
- Small pots with drainage holes
- Cactus or succulent potting mix
- Gardening gloves to protect your hands
- A clean work surface or tray
- A small trowel or spoon for handling soil
You do not need many tools, but everything should be clean, suitable for succulents, and ready before removing pups from the parent plant.
Method 1: Propagating Aloe Vera from Pups (Offsets)

Identify a ready pup: Look for offsets that are at least 2-3 inches tall with several leaves of their own; smaller pups may not have developed enough roots to survive separation.
Step-by-Step Process to Follow:
Pups are the easiest and most reliable way to propagate aloe vera.
These are the small offshoot plants that grow naturally from the base of a mature mother plant, already complete with their own root systems in many cases.
- Unpot the mother plant: Start by gently removing the entire plant from its container to expose the root system and see exactly how the pup is connected.
- Locate the connection point: Trace the pup back to where it joins the mother plant’s root or rhizome; most pups already have a few roots of their own attached.
- Separate the pup: You should always use a clean, sharp knife or shears to cut the pup away from the mother plant, keeping as much of its existing root system intact as possible.
- Let the cut callus over: Set the pup aside in a dry spot out of direct sunlight for 1-3 days, allowing the wound to dry and seal; this step prevents rot once it’s potted.
- Choose the right pot and soil: Select a small container with drainage holes and fill it with a well-draining cactus or succulent mix.
- Plant the pup: Nestle the callused pup into the soil just deep enough to hold it upright, without burying the lower leaves.
Hold off on watering for about a week to let any remaining cut surfaces fully heal, then water lightly once the soil is completely dry.
Place the newly potted pup somewhere it gets plenty of light but is not exposed to harsh, direct sun right away, which can stress the still-rooting plant.
Method 2: Propagating Aloe Vera from Leaf Cuttings

Unlike some succulents, aloe does not usually grow new plants easily from leaves. For better results, use healthy pups or offsets that already have their own roots.
Step-by-Step Process to Follow:
It is still worth trying if pups or offsets are not available; just go in with realistic expectations and patience, since success can take several weeks to confirm.
- Select a healthy leaf: You should choose a thick, mature leaf from the outer part of the plant, avoiding any that look damaged, discolored, or diseased.
- Cut cleanly at the base: Use a sterile knife to remove the leaf as close to the stem as possible, since a clean cut heals faster and lowers the risk of rot.
- Callus the cut end: Leave the leaf in a dry, shaded spot for 5-7 days until the wound forms a dry, sealed callus; skipping this step is the most common cause of failure.
- Root in soil, not water: Lay the callused end on top of (or lightly nestled into) well-draining succulent soil rather than submerging it in water, which tends to cause rot before roots form.
Watch for signs of success or failure: Mist lightly every few days and look for tiny roots or a new pup emerging at the base within 4-6 weeks; if the leaf shrivels or turns mushy instead, it has not taken.
Out of every leaf cutting I have tried, more have shriveled than rooted, which is why I only reach for this method when a plant has no pups to spare.
Propagating aloe vera from leaf cuttings is generally unreliable. Aloe leaves hold a lot of moisture, so cut pieces often rot before they can form roots.
Method 3: Propagating Aloe Vera by Division

Division works best for mature, clumping aloe vera plants that have grown into a dense cluster of multiple rosettes sharing one root system, rather than a single plant with a few separate pups.
Step-by-Step Process to Follow:
Instead of removing individual offsets one at a time, division splits the entire root ball into two or more self-sufficient sections in one go, making it an efficient way to multiply a plant.
- Unpot the full clump: Remove the entire plant from its container and gently brush or shake away loose soil to expose the root ball.
- Identify natural separation points: Look for spots where rosettes are only loosely connected by roots or rhizomes, which will divide more easily than tightly fused sections.
- Divide the root ball: Use your hands to gently tease sections apart, or a clean knife to cut through tougher connections, aiming to keep healthy roots attached to each division.
- Trim and inspect each section: Remove any mushy, dried-out, or damaged roots from every divided piece before repotting, since this reduces the risk of introducing rot.
- Repot each division separately: Plant each section in its own well-draining pot with fresh succulent soil, then hold off watering for a few days to let any cut roots settle in.
Can You Grow Aloe Vera From Seed?
Yes, growing aloe vera from seed is possible, but it is the slowest and least predictable method, which is why most home growers skip it in favor of pups.
Seeds need warm temperatures and soil that stays consistently moist but well-draining to germinate.
Also, seedlings can take a long time to reach a size worth transplanting.
Seed-grown aloe also does not always match the parent plant’s exact traits, so division or pup propagation stays the more dependable choice if you want a plant just like the one you already have.
How Long Does Aloe Vera Take to Root After Propagation?
Aloe vera usually takes about 2 to 6 weeks to develop new roots after propagation, depending on the size of the pup and growing conditions.
Pups that already have some roots attached often settle into their new pots faster than those without roots. Warm temperatures, bright indirect light, and well-draining soil can help support steady root growth.
Avoid watering too often, as wet soil can cause the base of the plant to rot before roots develop.
During the first few weeks, the plant may show little visible growth, which is normal.
You can gently check for resistance after several weeks. If the aloe feels firmly anchored in the soil and begins producing new leaves, it is usually rooting successfully.
How to Tell If Your Propagated Aloe Vera is Growing Successfully?
A successfully propagated aloe vera will slowly become more stable, firm, and active as its roots establish.
You may not notice major changes right away, so look for small signs that show the plant is adjusting well.
- Firm leaves: Healthy leaves should feel thick and firm rather than soft, mushy, or badly shriveled.
- New leaf growth: Fresh leaves growing from the center are a strong sign that the plant is settling in.
- Stable in the soil: The aloe should feel more firmly anchored when you gently touch or move it.
- Healthy leaf color: Leaves should remain mostly green without widespread yellowing, browning, or black spots.
- No soft base: The base of the plant should stay firm and dry, not soft or rotting.
- Slow but steady growth: Gradual growth over several weeks usually means the roots are developing properly.
Once a pup shows these signs and settles into steady growth, keep the aftercare routine consistent and check on the plant to avoid any common problems.
Common Aloe Vera Propagation Problems & its Solutions
Aloe vera propagation is usually simple, but young plants can struggle if they receive too much water, poor light, or unsuitable soil.
Spotting problems early can help you correct the conditions before the pup becomes badly damaged.
|
Problem |
Likely Cause |
Solution |
|---|---|---|
|
Leaves turning yellow |
Overwatering |
Let the soil dry fully before watering again. |
|
Soft or mushy base |
Root or stem rot |
Remove damaged tissue and repot in dry, well-draining soil. |
|
Leaves becoming brown |
Too much direct sunlight |
Move the plant to bright, indirect light. |
|
Pup falling over |
Weak or undeveloped roots |
Support it gently and allow more time for roots to grow. |
|
No new growth |
Low light or transplant stress |
Provide bright indirect light and avoid disturbing the plant. |
|
Leaves becoming wrinkled |
Lack of water or weak roots |
Check the soil and water lightly when completely dry. |
|
Roots rotting |
Poor drainage |
Use a pot with drainage holes and succulent soil. |
Conclusion
Learning how to propagate aloe vera does not have to feel intimidating once you know which method fits your plant.
However you choose to propagate, give your young aloe bright indirect light and time to settle. New leaves and a firmer hold in the soil are good signs that rooting is underway.
Which method are you going to try? Share how it went in the comments below,
Frequently Asked Questions
How Many Aloe Pups Can You Remove at One Time?
You can remove several mature pups at once if the parent plant is healthy. Leave small offsets attached so they can continue developing before separation.
How Deep Should You Plant an Aloe Vera Pup?
Plant the roots below the soil while keeping the base of the leaves above the surface. Burying leaves too deeply can trap moisture and encourage rot.
What Size Pot is Best for a New Aloe Pup?
Choose a small pot slightly wider than the pup’s root system. An oversized container holds extra moisture, which can increase the chance of root rot.