There’s something magical about creating your own bookcase. It’s not just about saving money (though that’s a lovely bonus), but about crafting a piece that’s uniquely yours.
Dreaming of sleek modern shelves or cozy rustic vibes? A DIY bookcase lets you design exactly what your space needs.
If you’ve been scrolling through endless inspiration but feeling stuck on where to start, you’re in the right place.
We’ll walk through everything together: the tools you’ll need, different styles to explore, and even how to create those dreamy wall-to-wall configurations.
Types of DIY Bookcases You Can Build
Your perfect bookcase already exists in your imagination. Now it’s just about choosing the right style to bring it to life. Minimalist wall mounts or grand floor-to-ceiling statements?
Let’s explore your options so you can find the one that speaks to your space and skill level.
| Bookcase Type | Best For | Difficulty Level |
|---|---|---|
| Freestanding DIY Bookcase | Renters and flexible spaces; easy to move and rearrange | Beginner-friendly |
| Wall-Mounted Bookcase | Small rooms needing floor space; modern, floating aesthetic | Intermediate |
| Built-In Bookcase | Permanent installations; maximizing awkward nooks and alcoves | Advanced |
| Floor-to-Ceiling DIY Bookshelf Wall | Statement pieces; large book collections, and display needs | Advanced |
| Ladder-Style Bookcase | Tight spaces; adding vertical interest with minimal footprint | Beginner |
| Modular Bookcase | Evolving needs; customizable configurations you can adjust over time | Beginner to Intermediate |
| Corner Bookcase | Underutilized corners; making the most of compact apartments | Intermediate |
Planning Your DIY Bookcase Project
Every stunning DIY bookcase starts with a solid plan. Before you pick up a single tool, take time to measure, visualize, and decide on the details that’ll make your project truly yours.
These planning steps will save you headaches later and ensure your bookcase fits perfectly into your home.
- Record wall width, height, and depth while accounting for ceiling height, baseboards, and trim obstacles that might interfere with your design.
- Identify wall studs for secure mounting and check load-bearing capacity, especially crucial for heavy wall-mounted or built-in units.
- Choose your aesthetic: modern minimalist with clean lines, rustic farmhouse with natural wood, industrial with metal accents, or traditional library style with decorative molding.
- Decide between freestanding units for flexibility and easy rearrangement or built-in bookshelf walls for dramatic impact and seamless integration with your architecture.
- Consider your skill level, timeline, and budget, as built-ins require more materials and commitment but deliver custom, high-end results.
With your measurements noted and style chosen, you’re ready to gather materials and start building. The clearer your vision now, the smoother your construction process will be.
Everything You’ll Need to Build Your DIY Bookcase
Gathering the right materials and tools sets you up for success before you even make the first cut. The good news? You don’t need a fully stocked workshop to create a beautiful DIY bookcase.
Here’s everything you’ll need, plus some budget-friendly alternatives for beginners.
| Item | Notes |
|---|---|
| Plywood | Affordable and sturdy for most projects |
| Solid Wood | Premium option for natural, stained finishes |
| MDF | Smooth surface for painting; avoid moisture-prone areas |
| Brackets, Anchors & Screws | Essential hardware for assembly and wall mounting |
| Back Panels (Optional) | Adds stability and a polished appearance |
| Measuring Tape & Level | Critical for accurate, straight builds |
| Drill & Driver Bits | For pre-drilling and driving screws |
| Circular or Table Saw | Makes clean, straight cuts in wood |
| Stud Finder | Locates wall studs for secure mounting |
| Sander | Smooths surfaces for finishing |
| Budget Alternatives | Hand saw, sandpaper blocks, or pre-cut wood services from hardware stores |
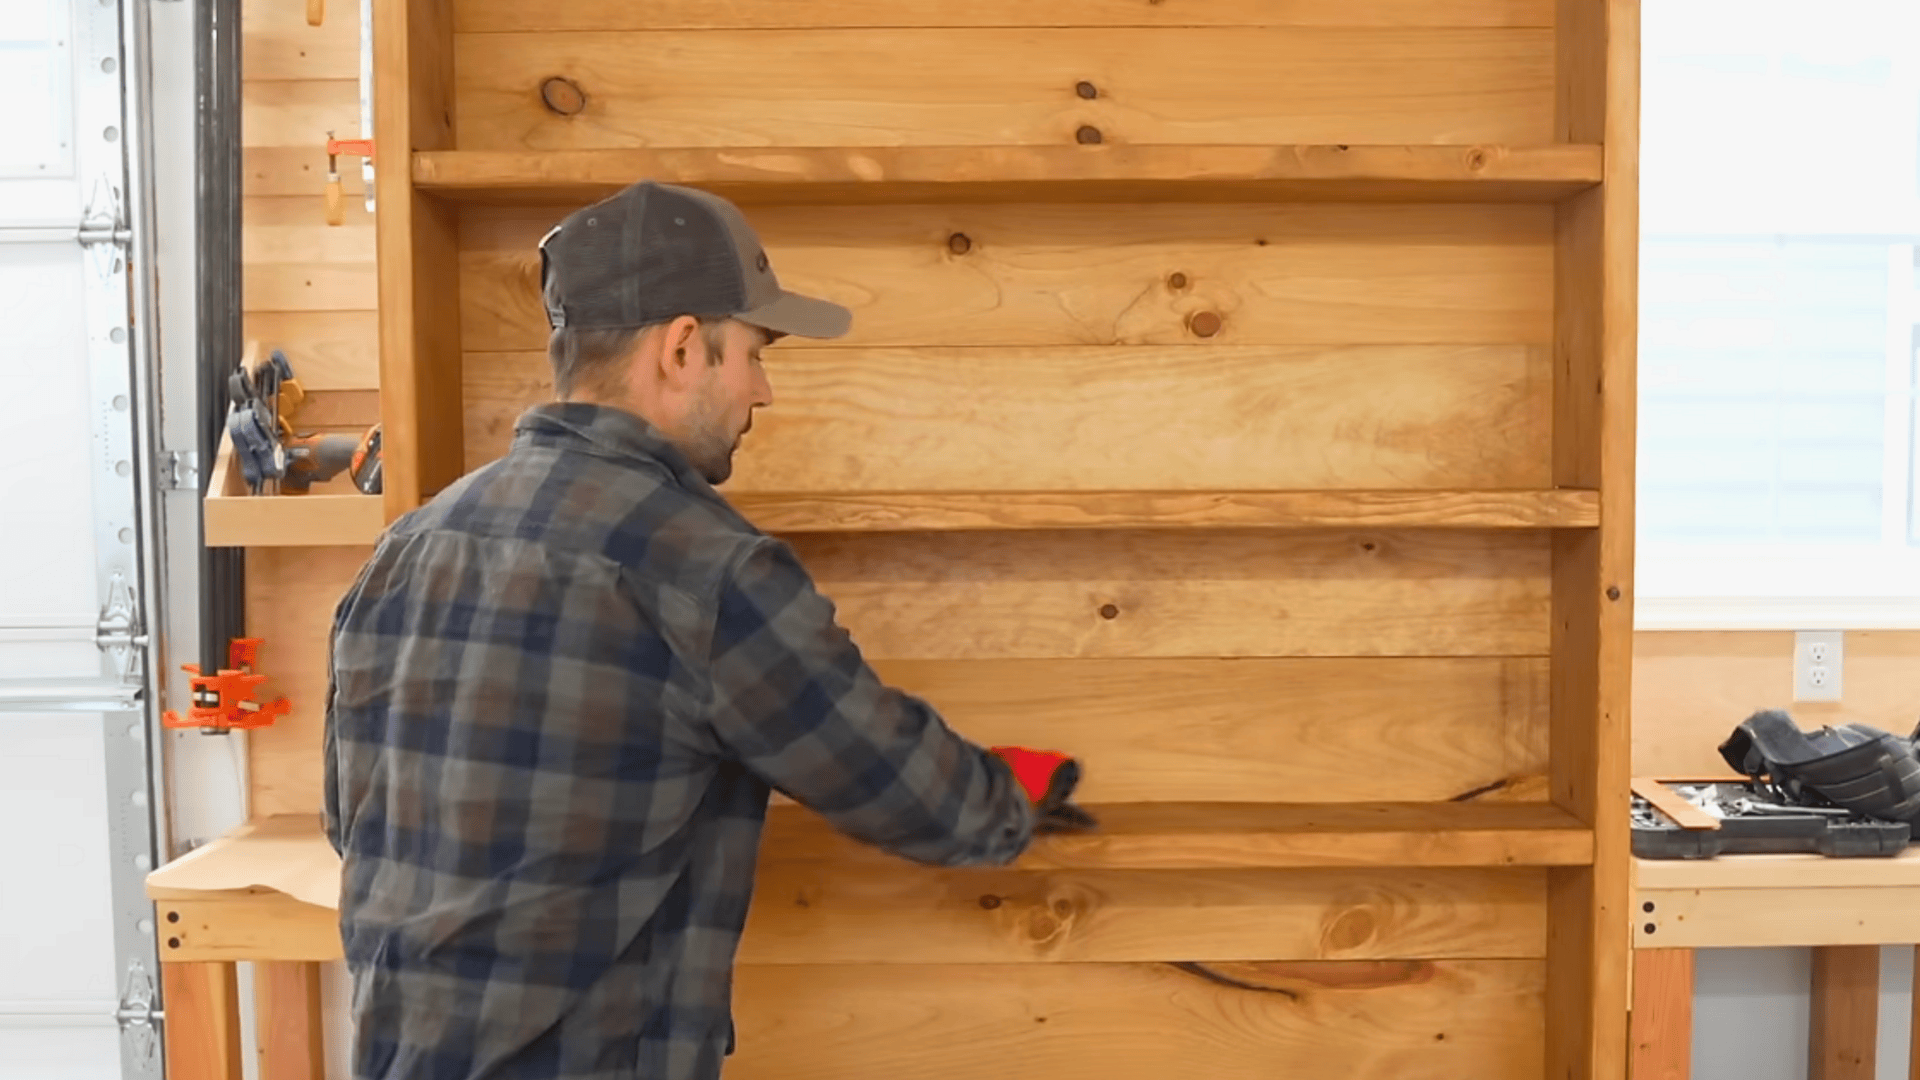
Step-by-Step: Building Your First DIY Bookcase
Ready to turn raw lumber into a stunning piece of furniture? This straightforward build uses accessible materials and beginner-friendly techniques.
Let’s walk through each phase together.
Step 1: Select and Prepare Your Materials
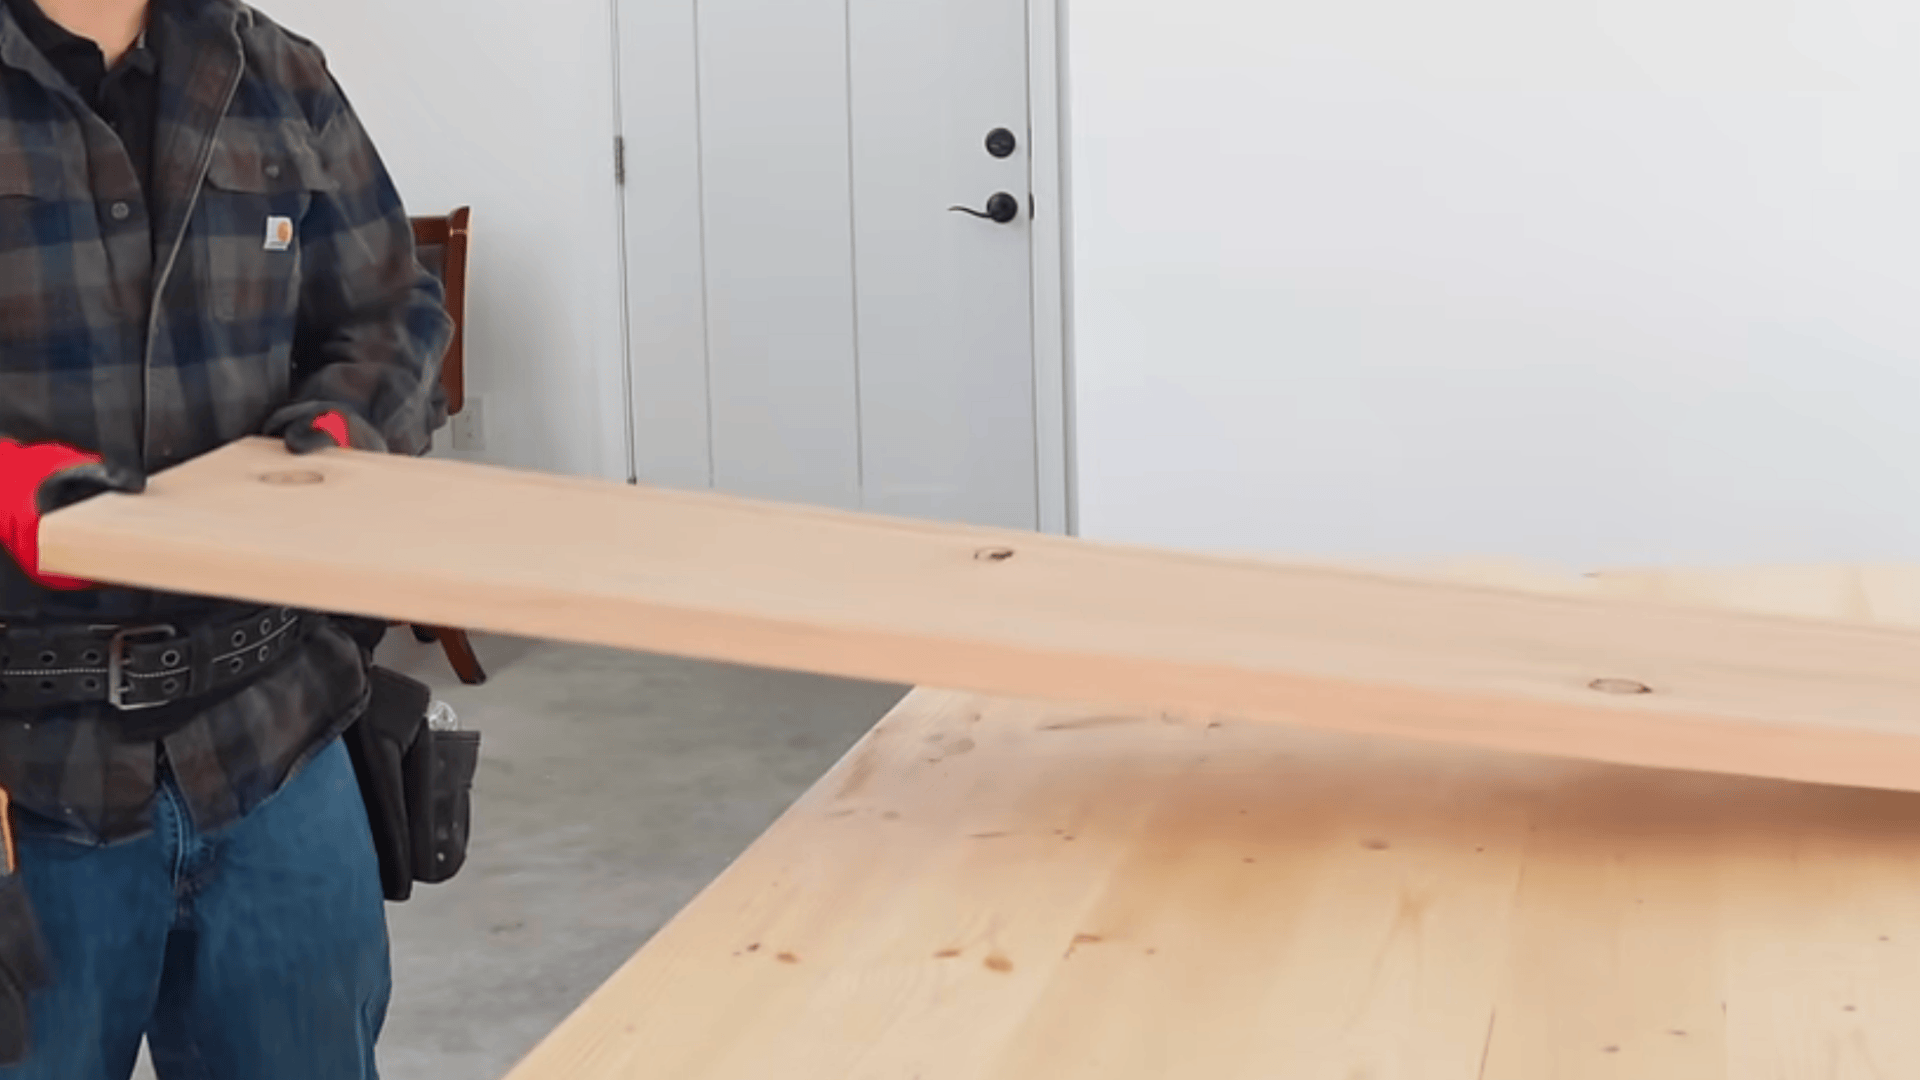
Start by choosing dimensional lumber like 2x12s for your bookcase frame. Inspect each board carefully by looking down its length to check for warping or bowing.
Select pieces that are relatively straight and free from major defects. Cut your side panels to your desired height, then sand all surfaces with 80-grit sandpaper using a palm sander.
Remove any factory markings or rough spots, and blow off all dust before moving forward. This prep work ensures smooth surfaces ready for finishing.
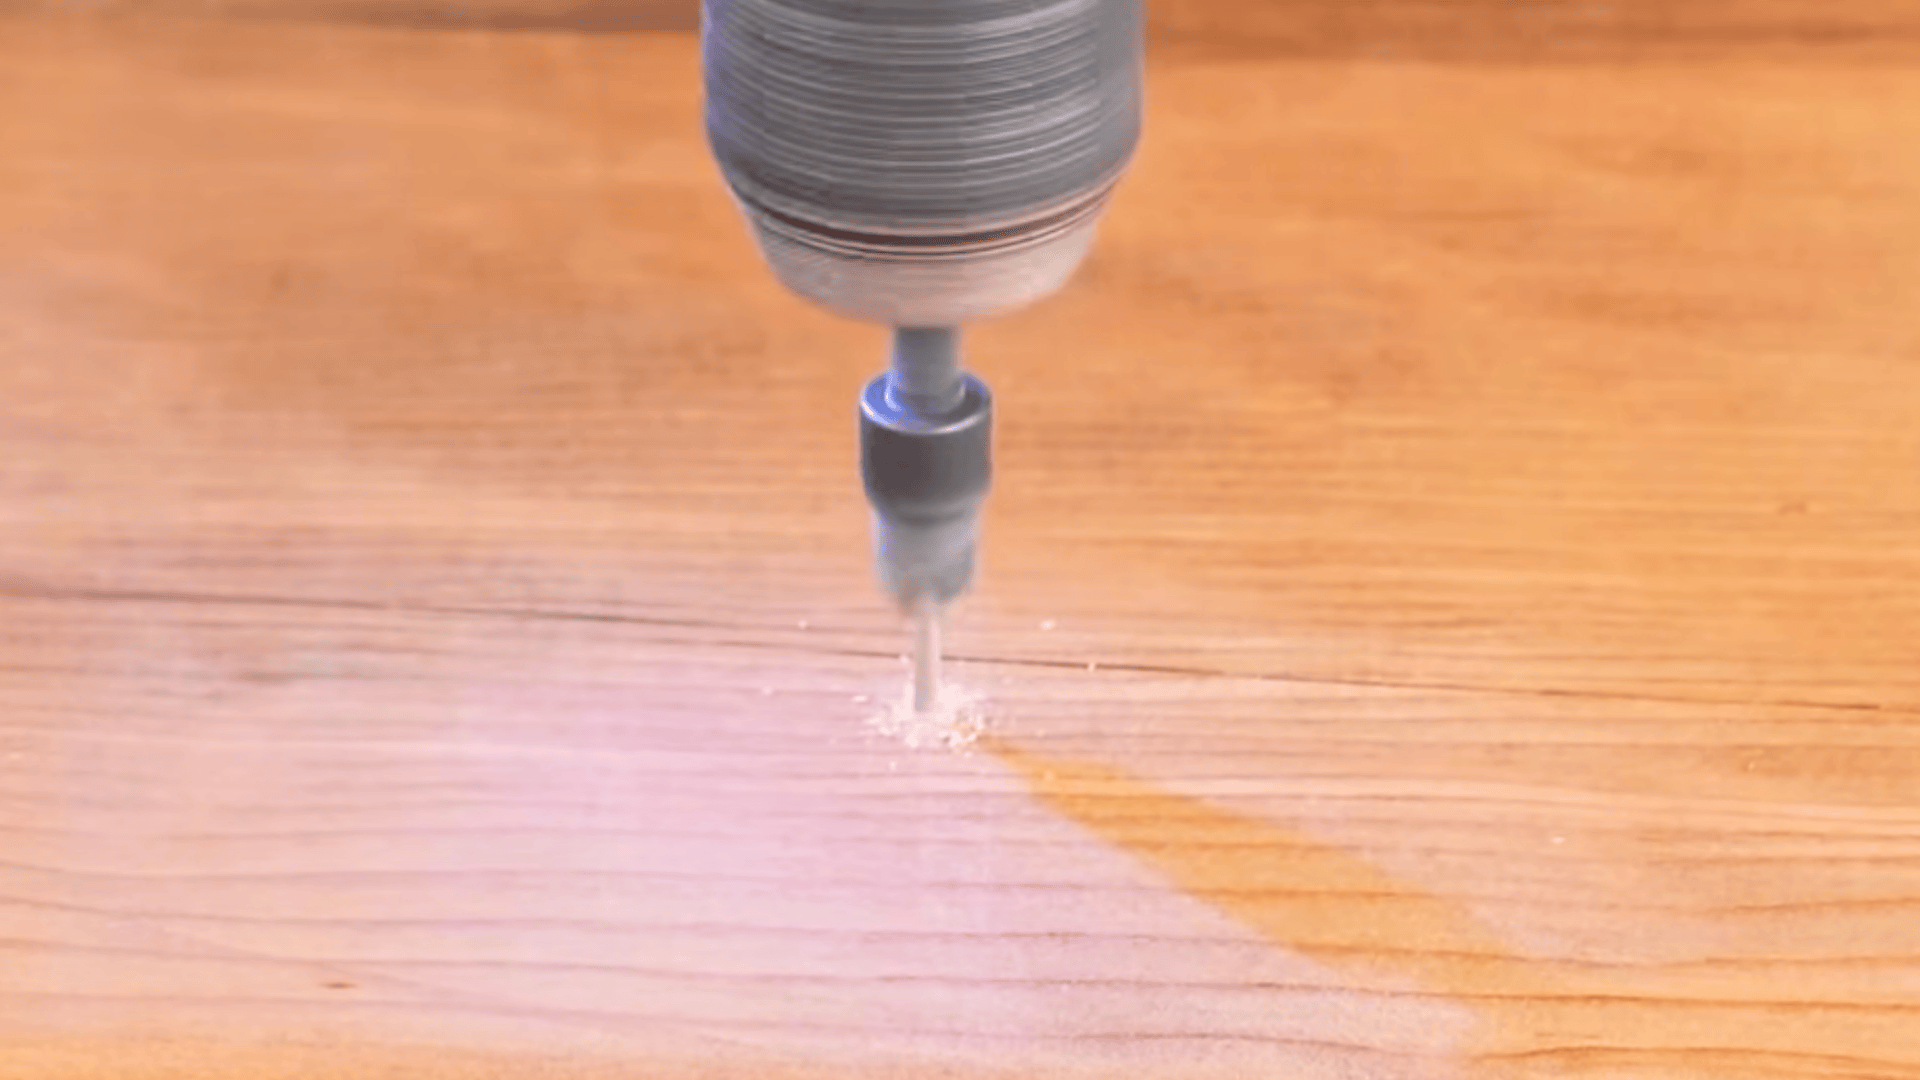
Step 2: Route Grooves for Shelves and Backing

Mark where each shelf will sit on your side panels, spacing them evenly based on your storage needs. Using a router with a straight bit, create grooves along the inside edges to hold your backing material.
Next, route out slots for each shelf using a homemade jig to ensure consistent depth and placement. Aim for quarter-inch-deep grooves that will cradle your shelves securely.
Work slowly in multiple passes rather than trying to remove too much material at once for cleaner results.
Step 3: Cut and Fit Your Shelving Boards
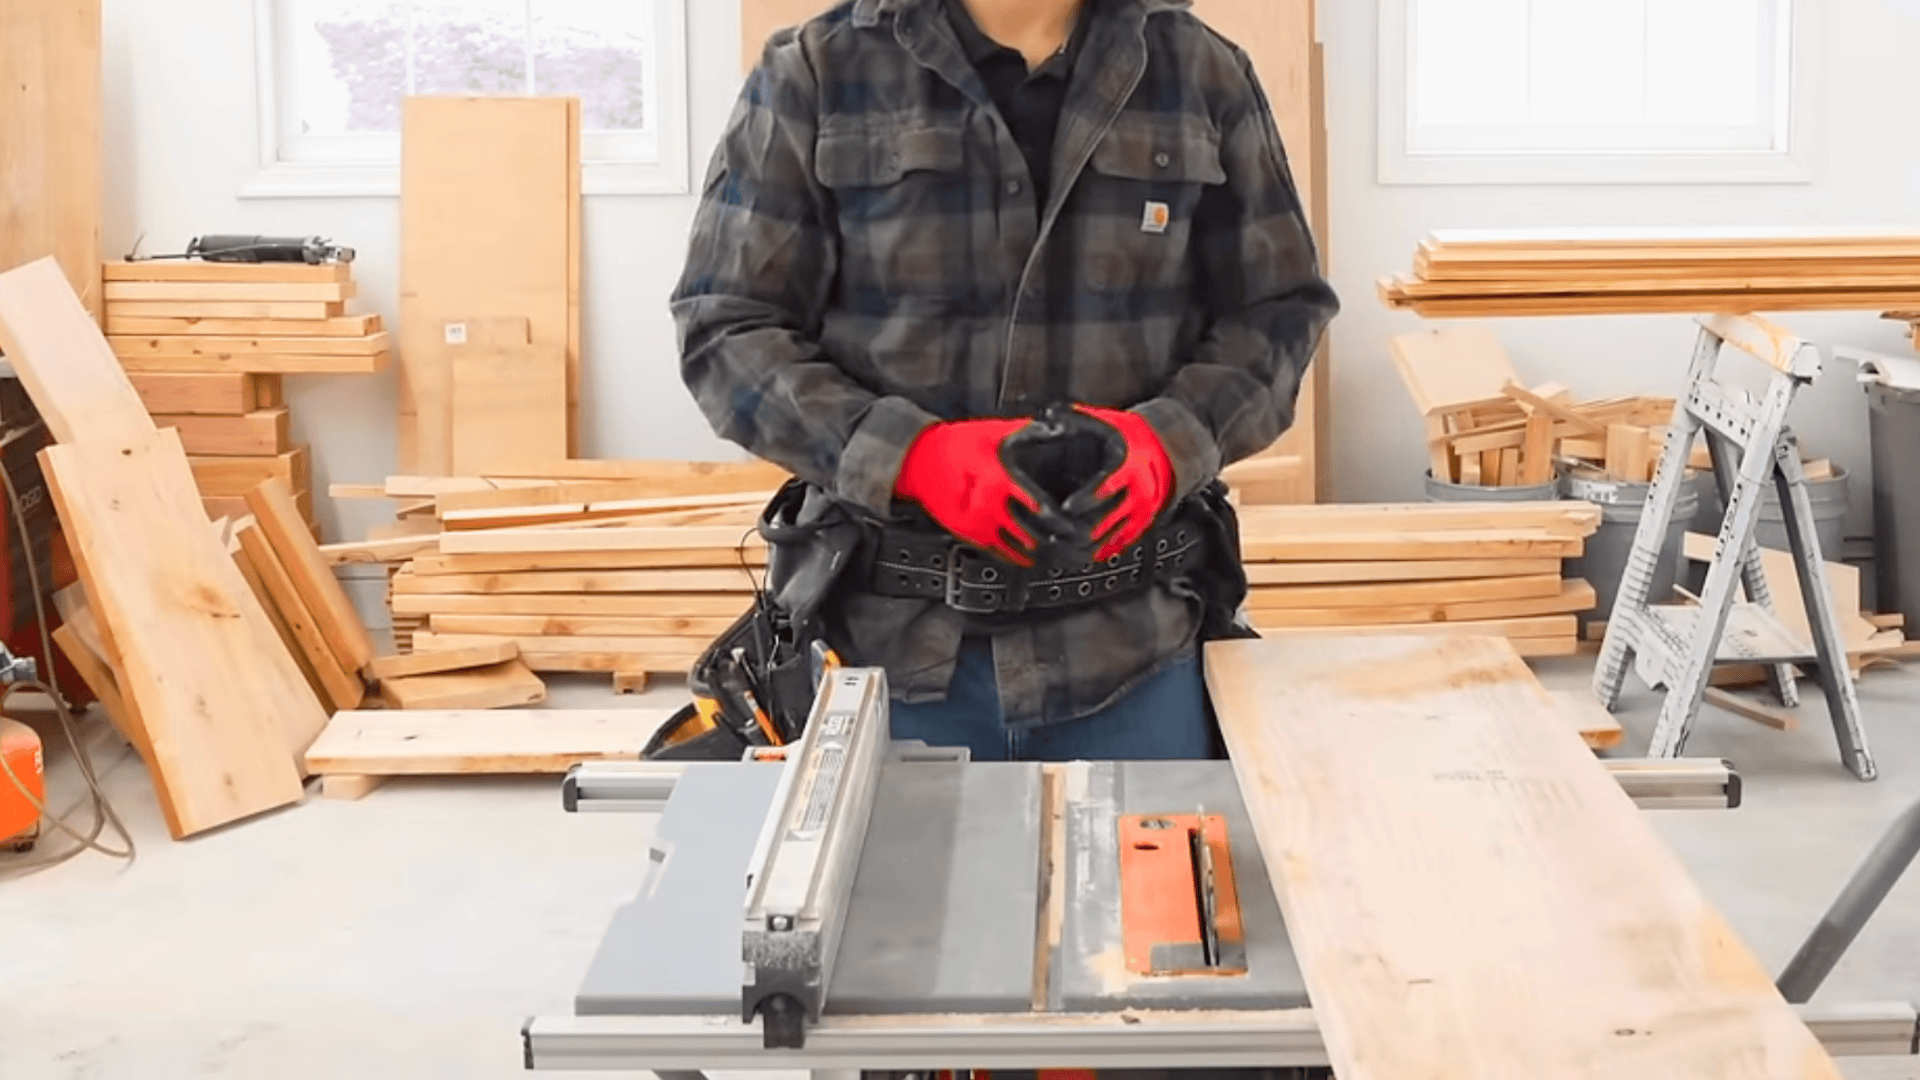
Measure and cut your shelving boards to the desired width, typically around 48 inches for a standard bookcase.
Rip these boards down to fit snugly into the routed grooves you created earlier. Choose the most attractive side of each board to face outward, hiding any knots or imperfections toward the back.
Test-fit each shelf in its corresponding slot before assembly. Sand all edges smooth and remove any splinters or rough spots that could interfere with the final fit.
Step 4: Assemble the Frame and Add Backing
Pre-drill holes for screws along each groove location to prevent splitting. Slide shelves into their grooves and secure them by driving screws through the side panels into each shelf end.
Add the top piece with a slight overhang for visual interest. Check diagonal measurements to ensure the frame is square before attaching your backing material.
Secure the backing with finish nails or screws, starting from the top and working down. This backing adds crucial stability to your entire structure.
Step 5: Finish and Secure to the Wall
Fill all visible screw holes with a mixture of wood glue and sawdust tinted with stain to match your wood. Once dry, sand smooth and apply your chosen stain using a clean rag in even strokes.
After the stain dries completely, protect your work with two coats of water-based polyurethane, lightly sanding between coats with 220-grit sandpaper.
Finally, locate wall studs and secure your bookcase through the top backing board using appropriately long screws for safety and stability.
Video Walkthrough: See How Experts Do It
For more information, check out this video tutorial by The Excellent Laborer.
How to Build a DIY Bookshelf Wall?
Creating a full DIY bookshelf wall elevates your space with that coveted built-in library aesthetic. This project requires careful planning and precise execution, but the result is a custom look that adds serious value and charm to any room.
Here’s how to make it happen.
- Step 1: Plan your wall layout by measuring the entire space and sketching how many units you’ll need, accounting for windows, outlets, and architectural features that might affect placement.
- Step 2: Use a stud finder to locate and mark all wall studs, then secure each bookcase unit directly into these studs with long screws for maximum stability and safety.
- Step 3: Align multiple units seamlessly by shimming as needed to keep everything level and flush, then secure adjacent bookcases together with screws driven through the side panels.
- Step 4: Add trim or crown molding along the top and baseboards at the bottom to create that polished, built-in appearance that blends naturally with your room’s existing architecture.
- Step 5: Apply caulk along all seams where the bookcases meet the walls and ceiling, then paint or stain to match your trim for a cohesive, custom look that feels intentional.
With patience and attention to detail, your DIY bookshelf wall will look like it was always meant to be there. The effort you put into those finishing touches is what separates a good project from a stunning one.
DIY Bookcase Design Ideas & Inspiration
Building your own bookcase means you get to choose exactly what works for your space and aesthetic. These ideas will help you find the right style and functionality that fits your home perfectly.
1. Simple Box Shelves
Ideal for: Beginners looking for their first woodworking project with minimal cuts and straightforward assembly.
Materials You’ll Need: Plywood or pine boards, wood screws, wood glue, sandpaper, stain or paint.
This classic design uses basic rectangular frames stacked or arranged side by side. Each box becomes its own compartment, creating defined spaces for books and decor.
The simple construction means fewer chances for error, and you can easily customize the size of each box to fit your collection. Stack them vertically for height or arrange horizontally for a modern credenza look.
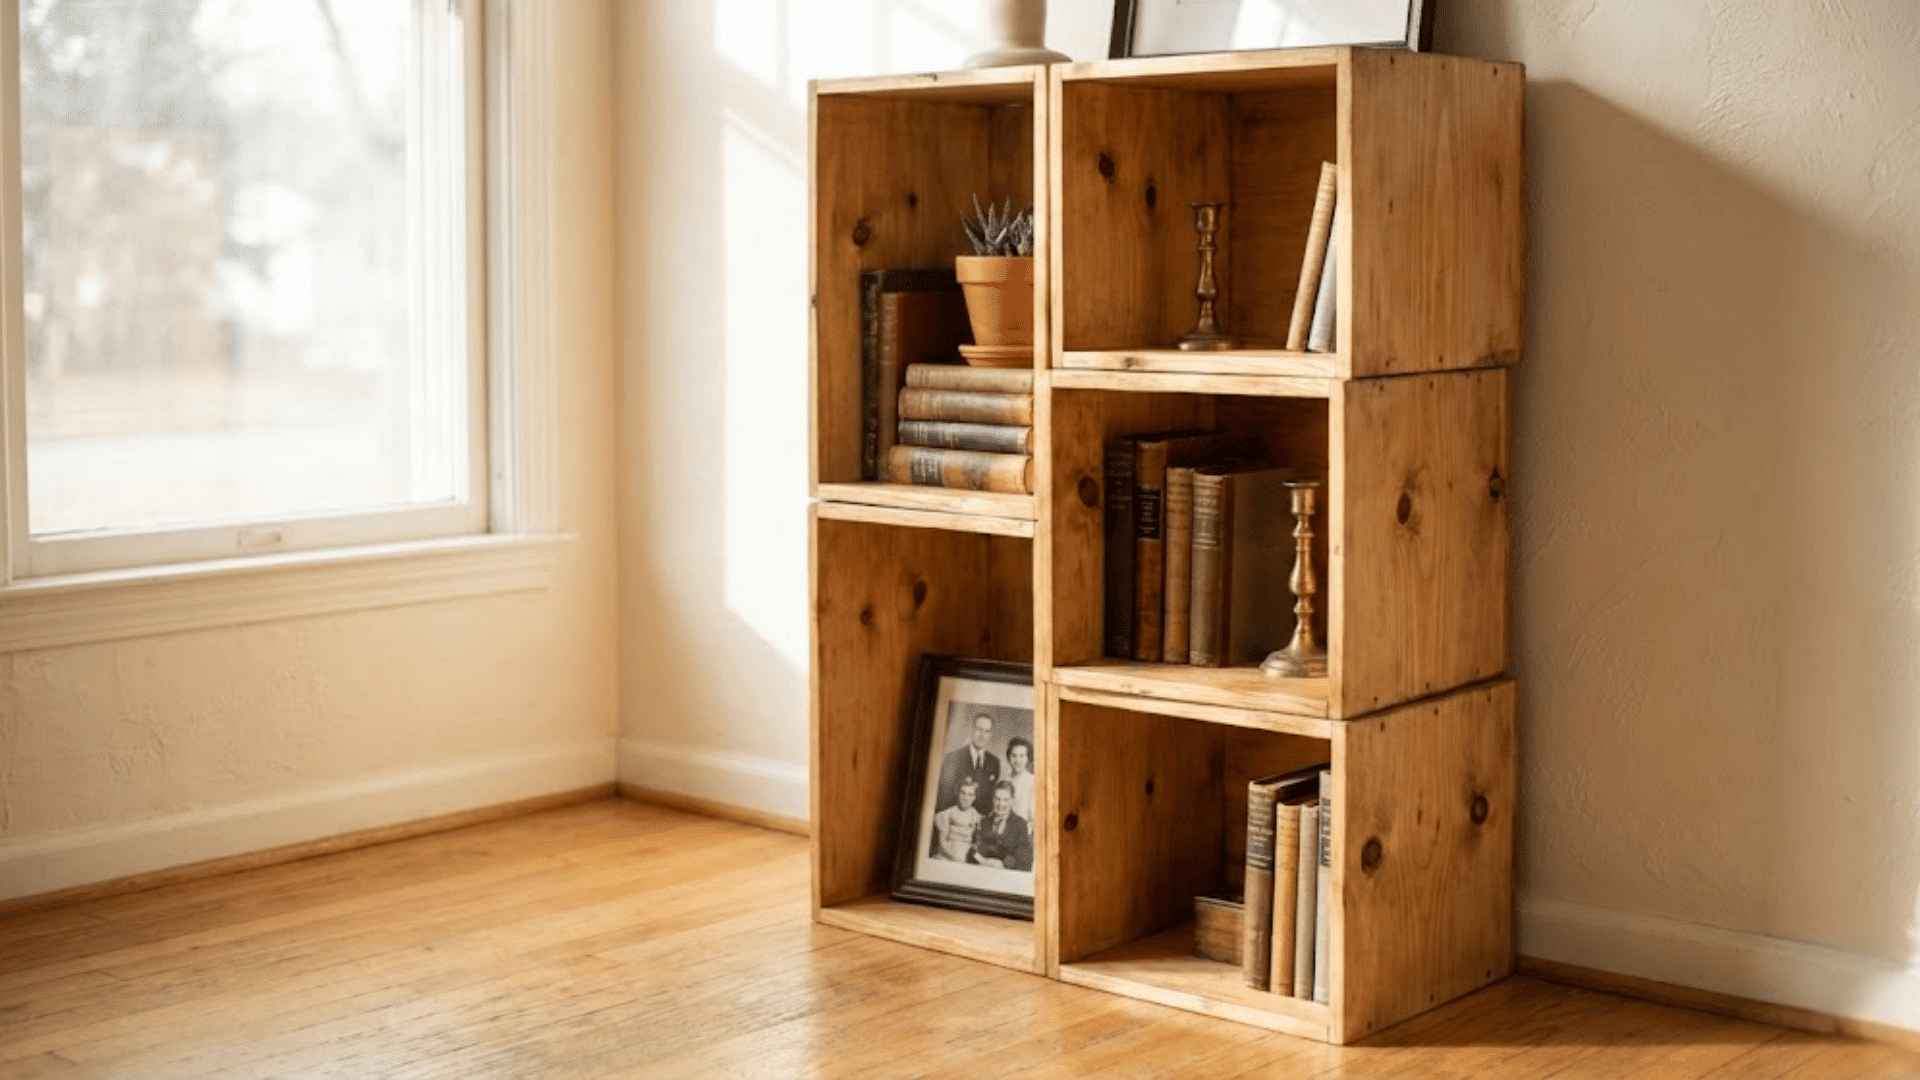
2. Crate or Cube Bookcases
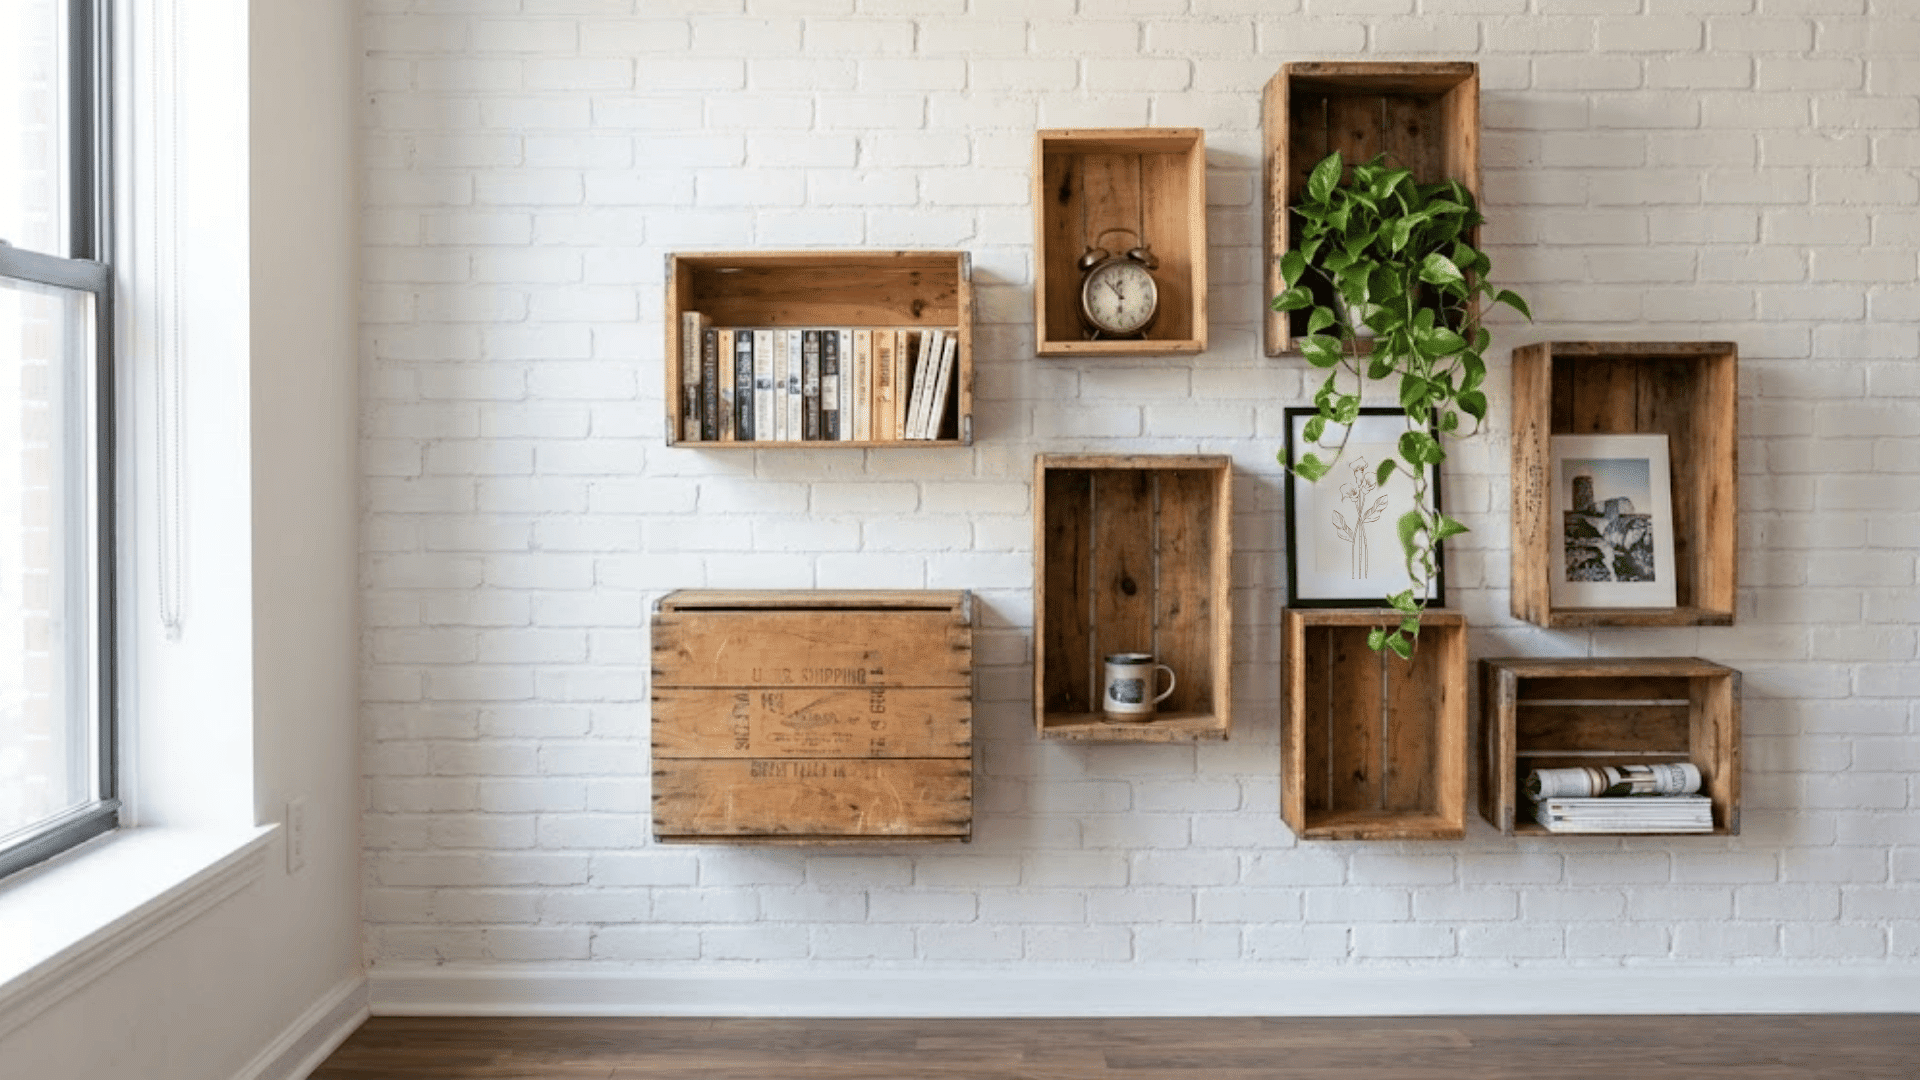
Ideal for: Renters and those seeking modular, adaptable storage that moves and adjusts to changing needs.
Materials You’ll Need: Wooden crates or cube organizers, wood glue, brackets, sandpaper, and finish of choice.
Repurpose wooden crates or build simple cubes that can be arranged in countless configurations. Mount them to the wall in asymmetrical patterns or stack them freestanding for flexible storage.
This approach lets you start small and add more cubes over time as your collection grows. The open-back design keeps things feeling light and airy while displaying your favorite items beautifully.
3. Floor-to-Ceiling Bookshelf Wall
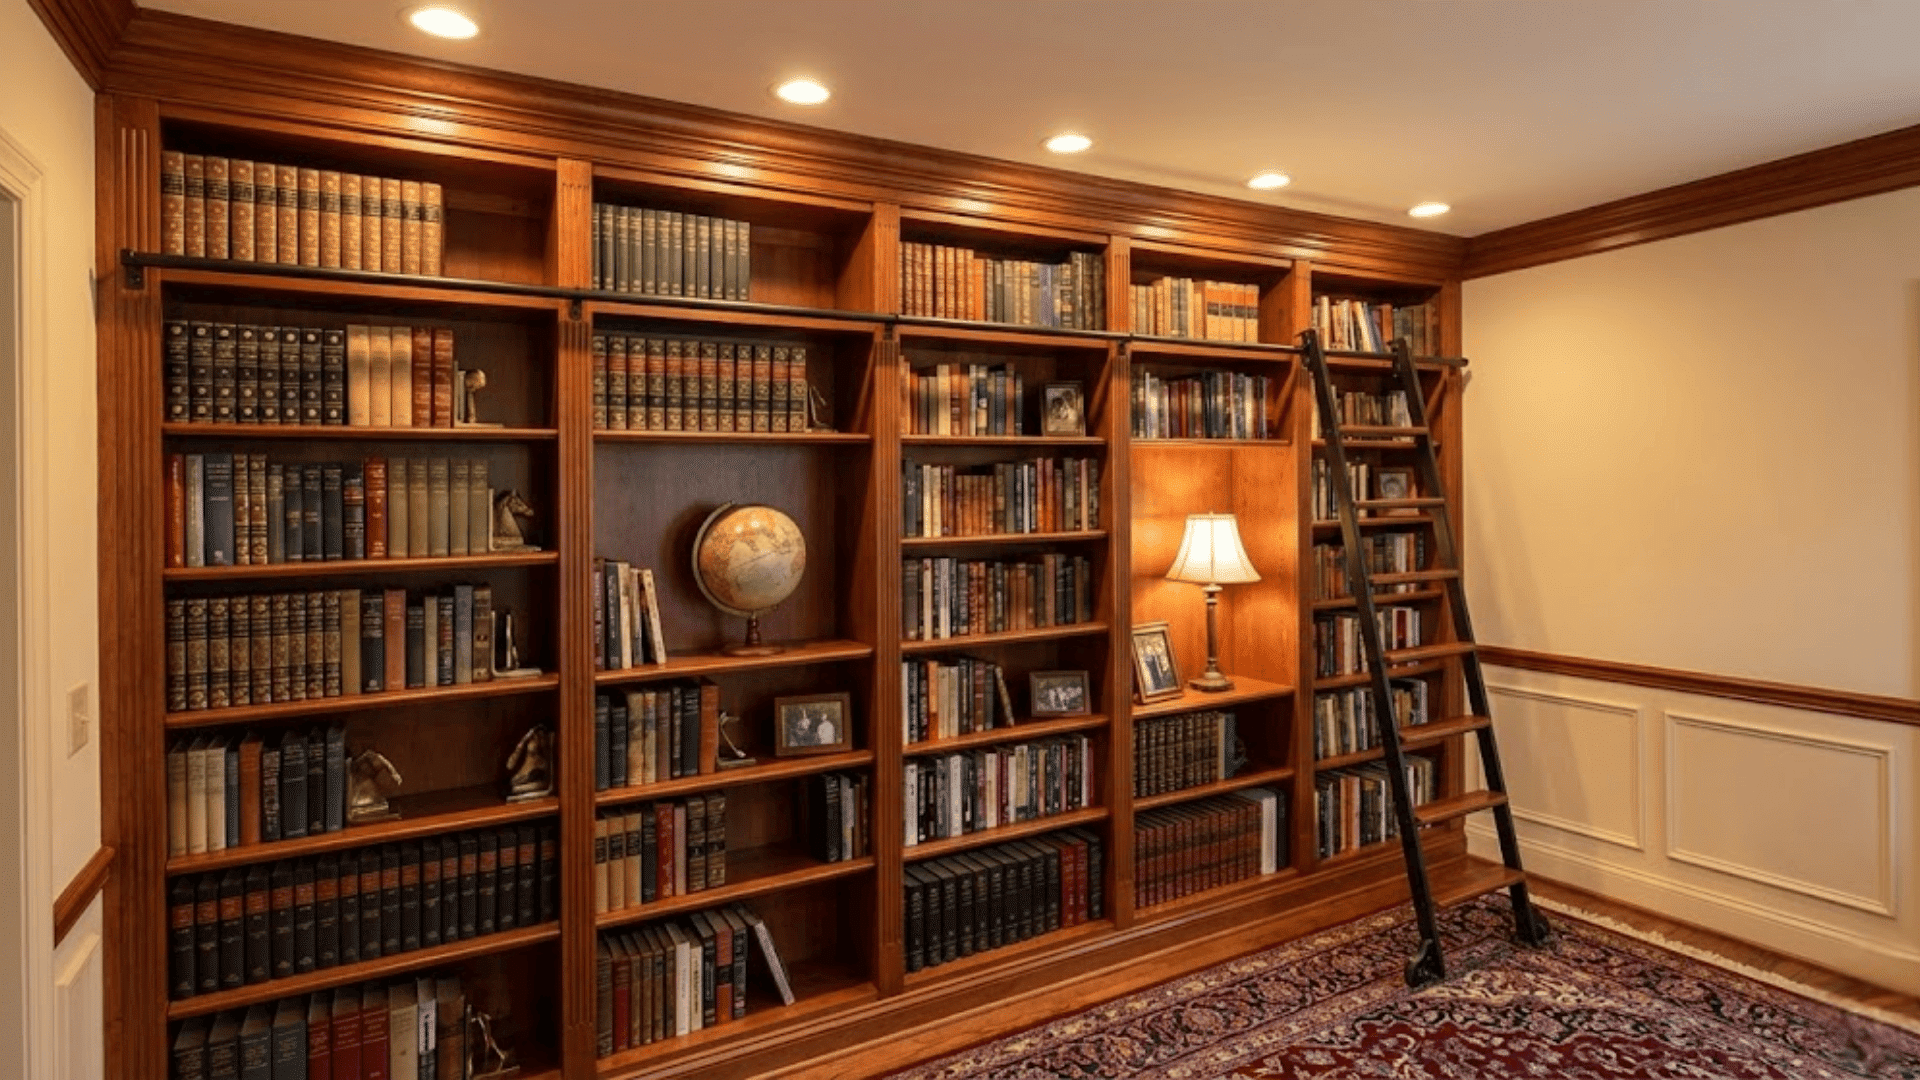
Ideal for: Book lovers with extensive collections who want to make a dramatic architectural statement in their space.
Materials You’ll Need: Dimensional lumber, backing material, trim molding, heavy-duty brackets, wood screws, stain or paint.
This showstopper design spans an entire wall from floor to ceiling, creating that coveted library atmosphere. The key is securing everything properly to the wall studs and using backing for stability.
Consider adding a rolling ladder for both function and vintage charm. This permanent installation works beautifully in home offices, living rooms, or dedicated reading nooks where books take center stage.
4. Asymmetrical Shelving
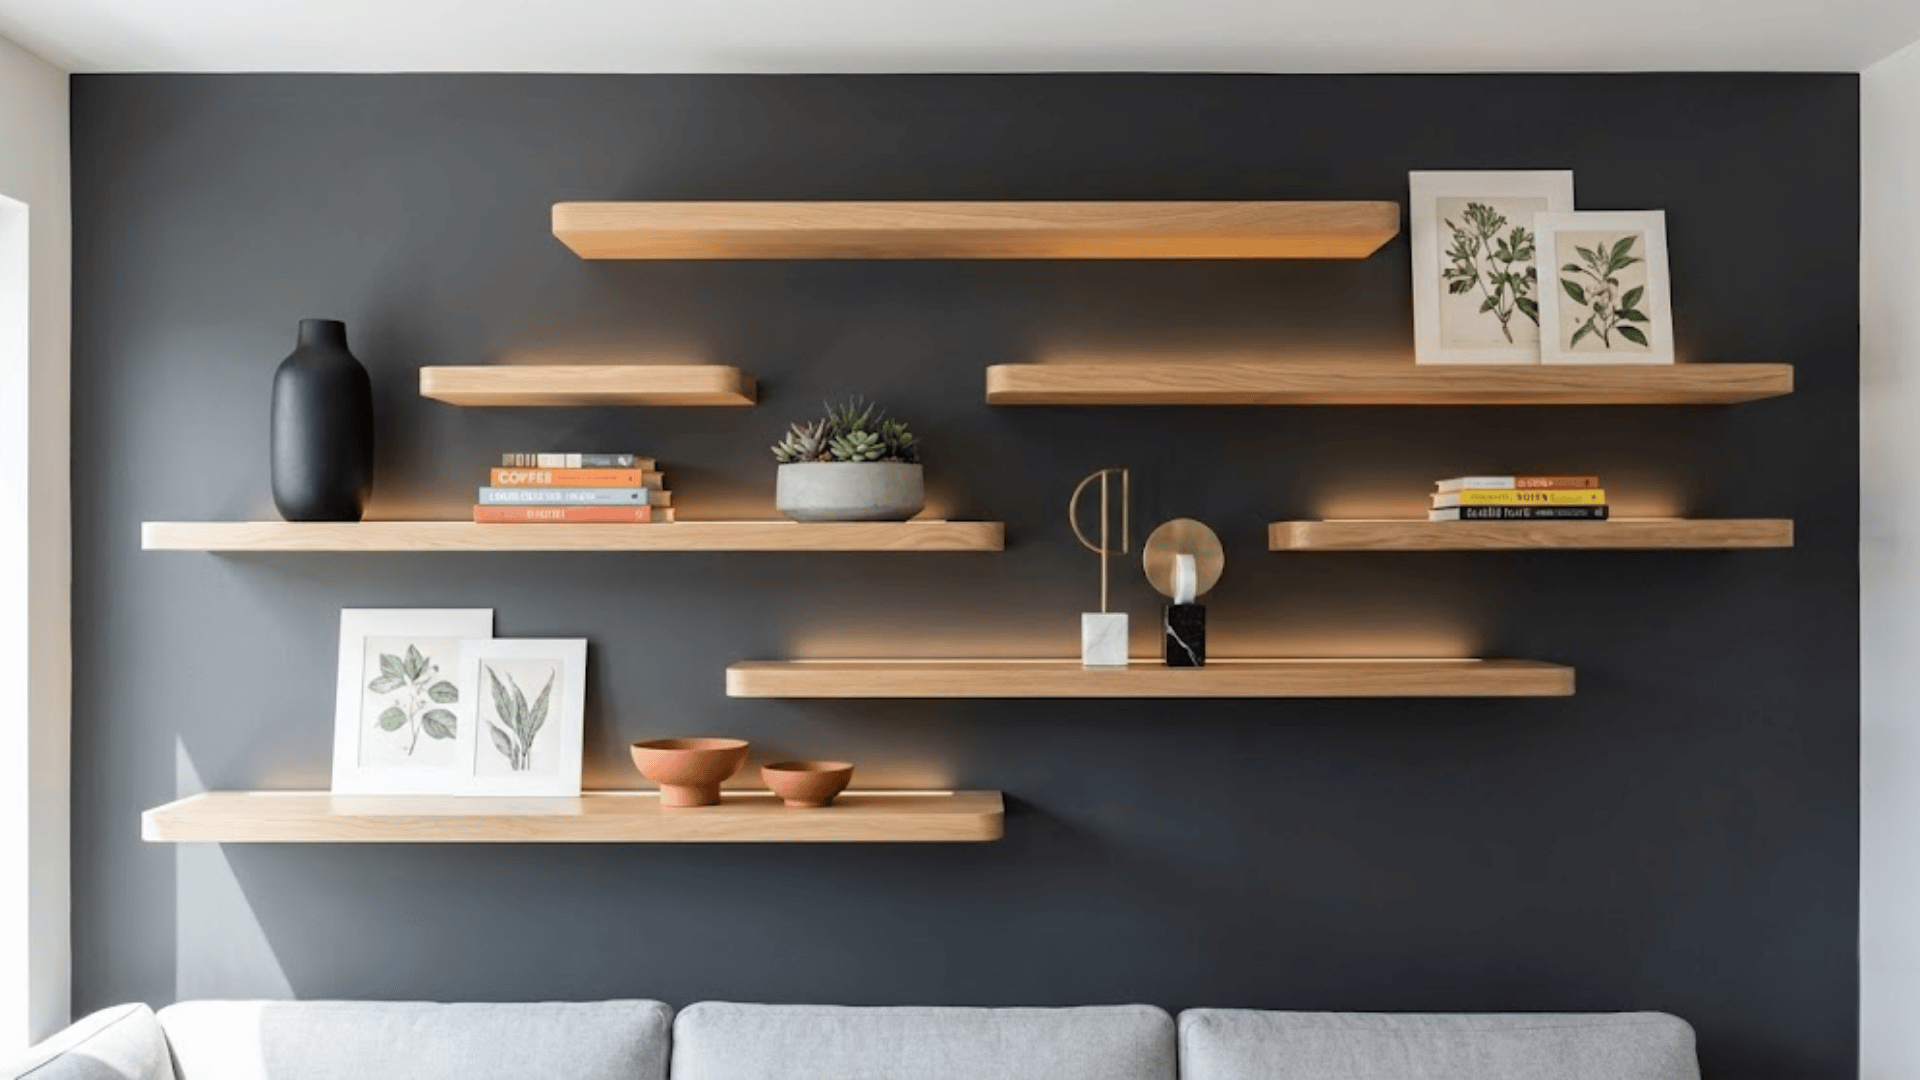
Ideal for: Modern aesthetics with curated collections and varied shelf heights create visual interest and dynamic appeal.
Materials You’ll Need: Plywood or solid wood, brackets or floating shelf hardware, wood screws, a level, and finish.
Break away from traditional horizontal rows by creating staggered shelves at different heights and depths. This contemporary approach turns storage into sculptural art while accommodating items of various sizes.
Mix short and long shelves, alternate placement, and play with negative space. The irregular layout draws the eye around the entire wall, making even modest collections feel intentional and gallery-worthy.
5. Bookcase with Desk or TV Integration
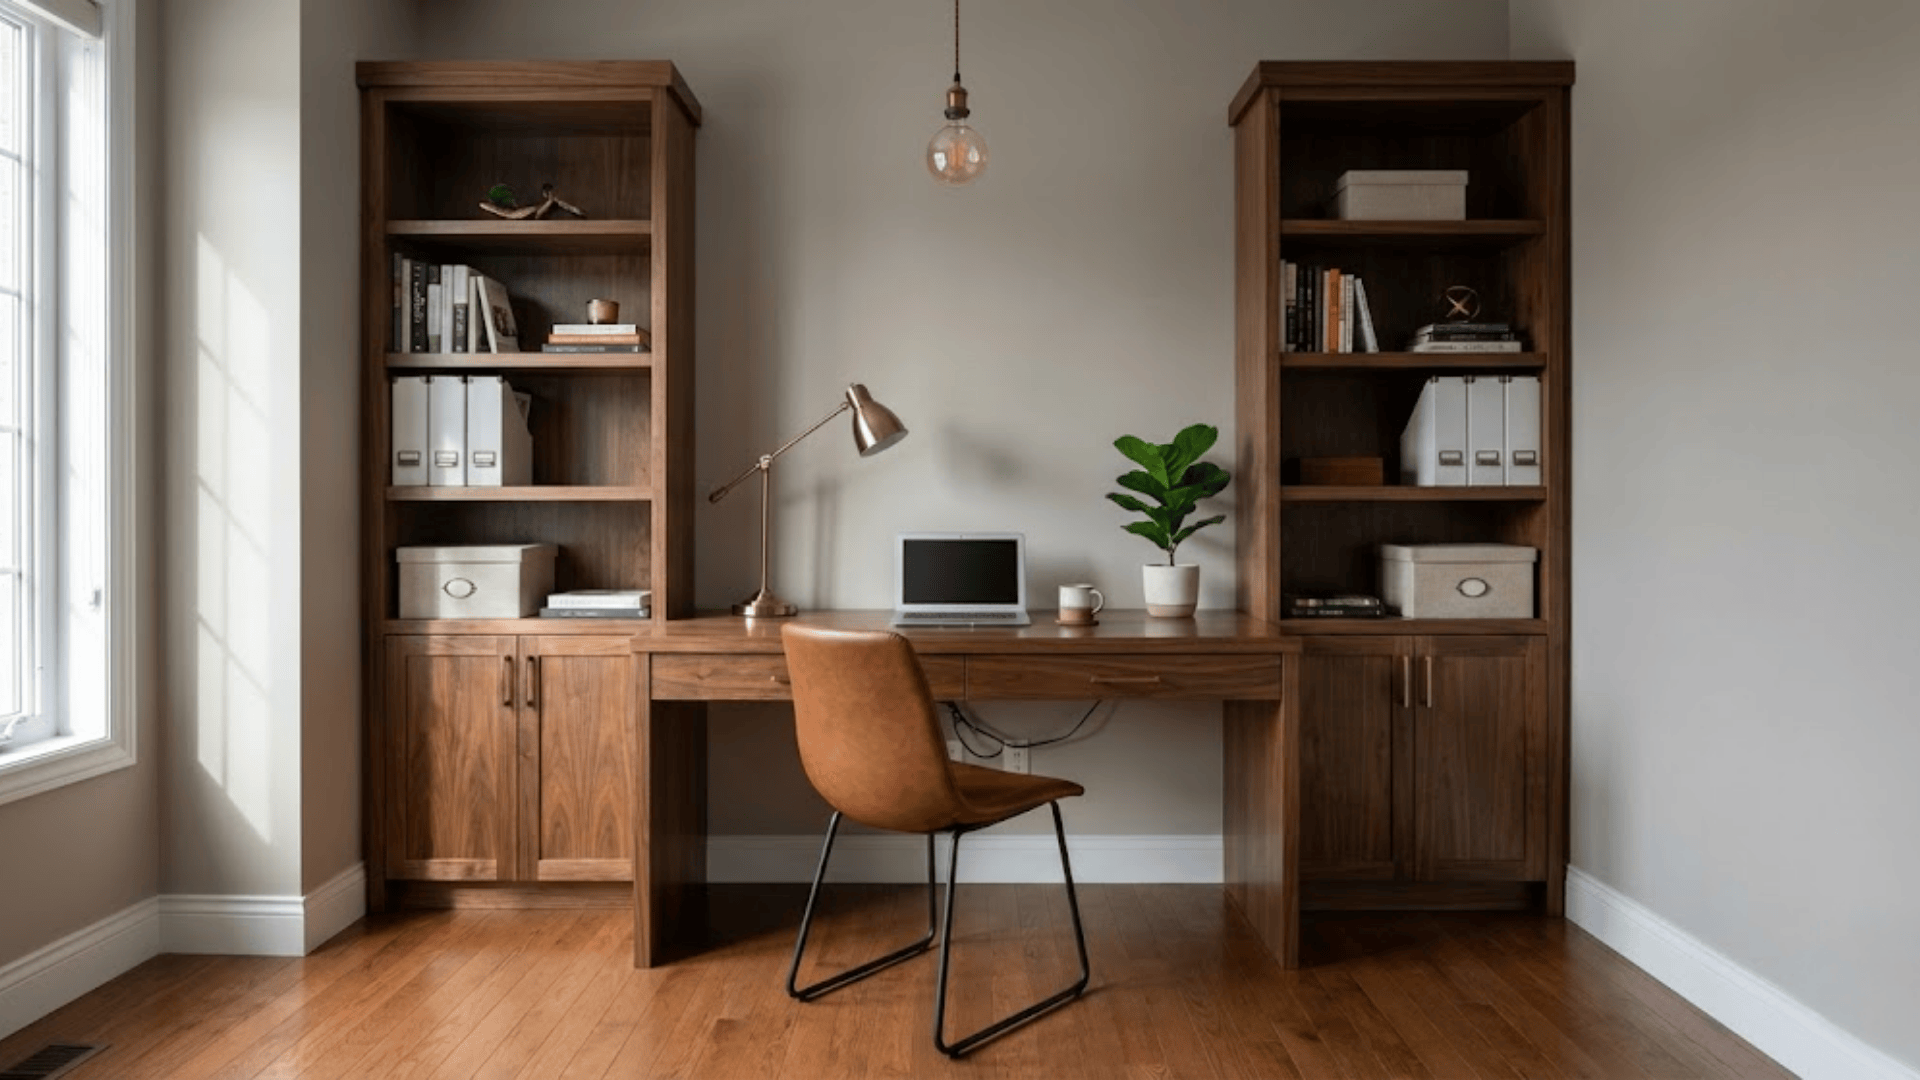
Ideal for: Home offices or media rooms needing multifunctional furniture that combines storage with workspace or entertainment.
Materials You’ll Need: Dimensional lumber, desk surface or TV mount, cable management supplies, brackets, wood screws, and finish.
Build flanking bookcases on either side of a desk area or TV niche for seamless integration. The shelving provides storage while framing your workspace or entertainment center beautifully.
Leave the middle section open at the appropriate height, ensuring proper depth for your desk or TV. This built-in look maximizes functionality while keeping everything organized and visually cohesive in one unified piece.
6. Vertical Bookcases
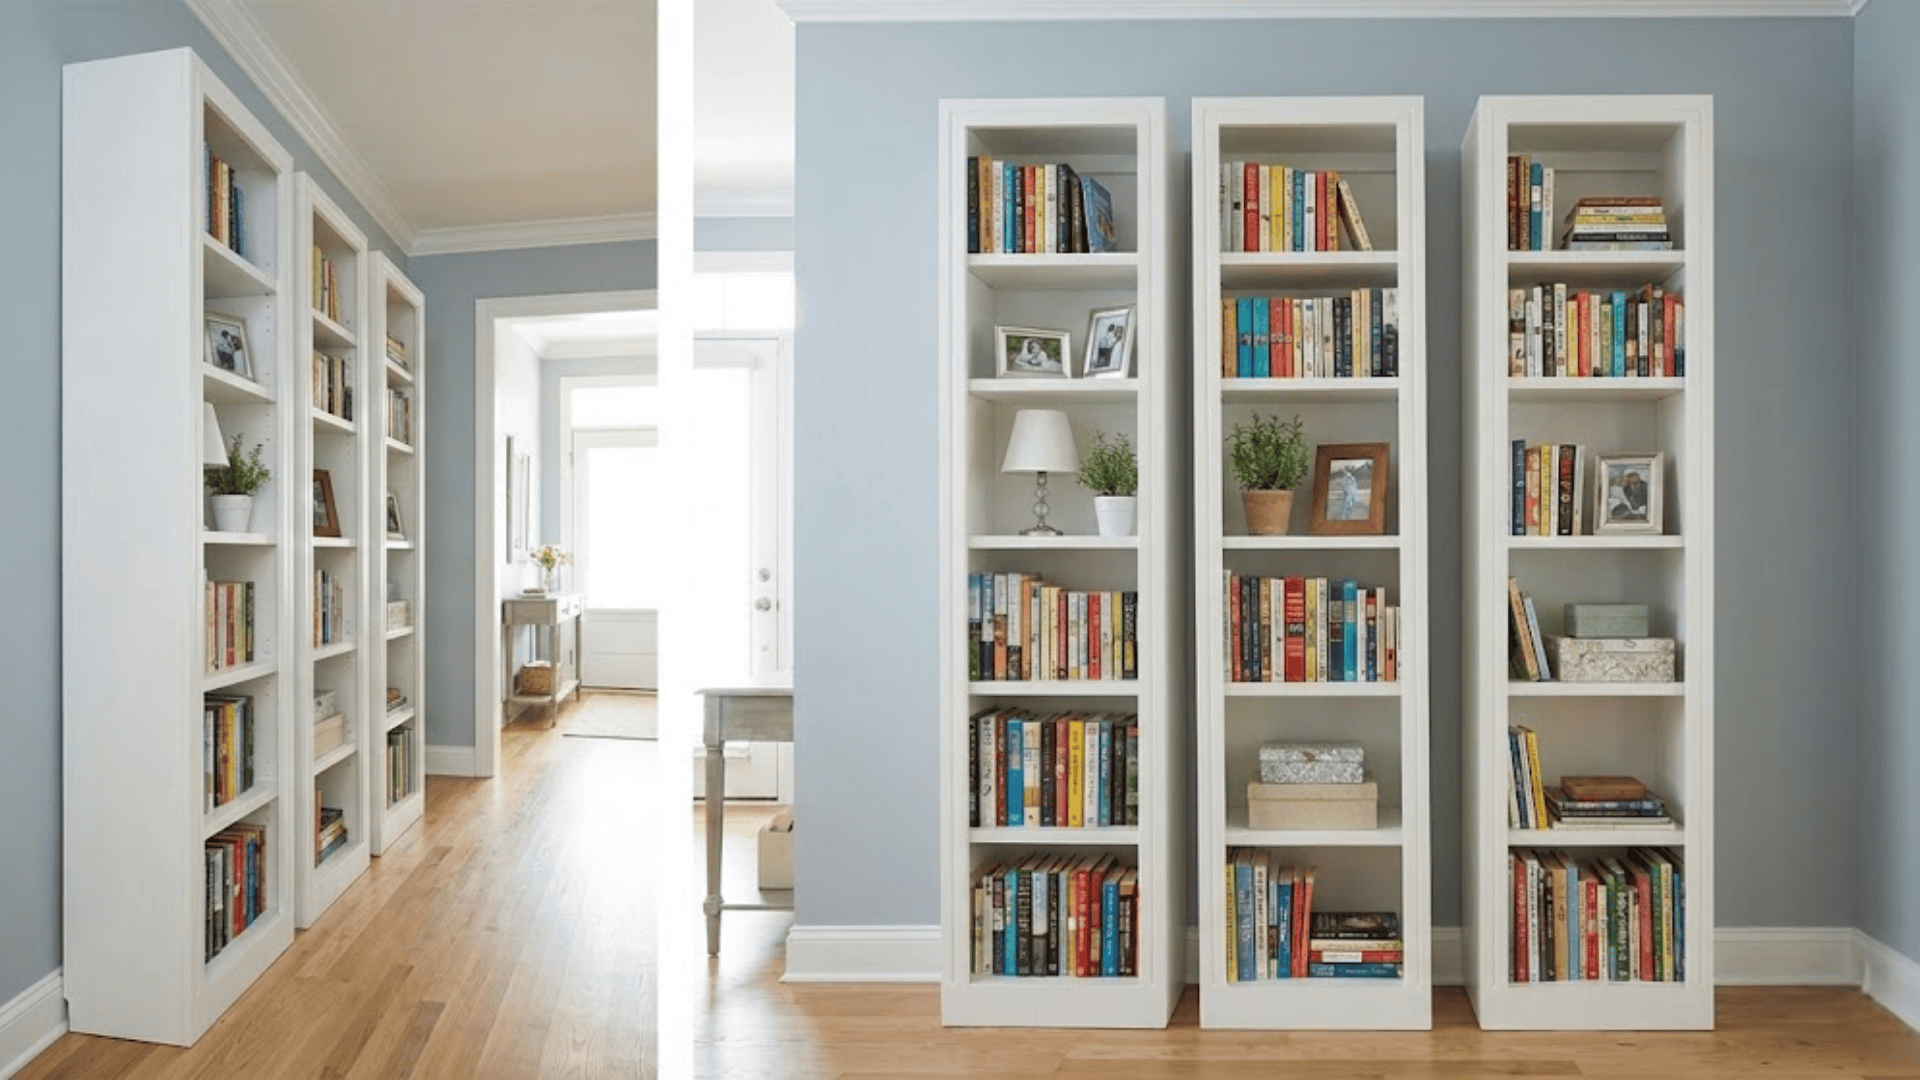
Ideal for: Small apartments and tight spaces where floor area is precious but ceiling height can be maximized.
Materials You’ll Need: Narrow boards or plywood, wall anchors, wood screws, brackets, sandpaper, and paint or stain.
Tall and slim bookcases draw the eye upward, making rooms feel larger while providing surprising storage capacity. Keep the footprint narrow, around 12 inches deep, to avoid overwhelming small spaces.
Multiple vertical units placed side by side create impact without eating up valuable floor space. This approach works especially well in hallways, between windows, or alongside doorways where width is limited.
7. Narrow or Floating Shelves
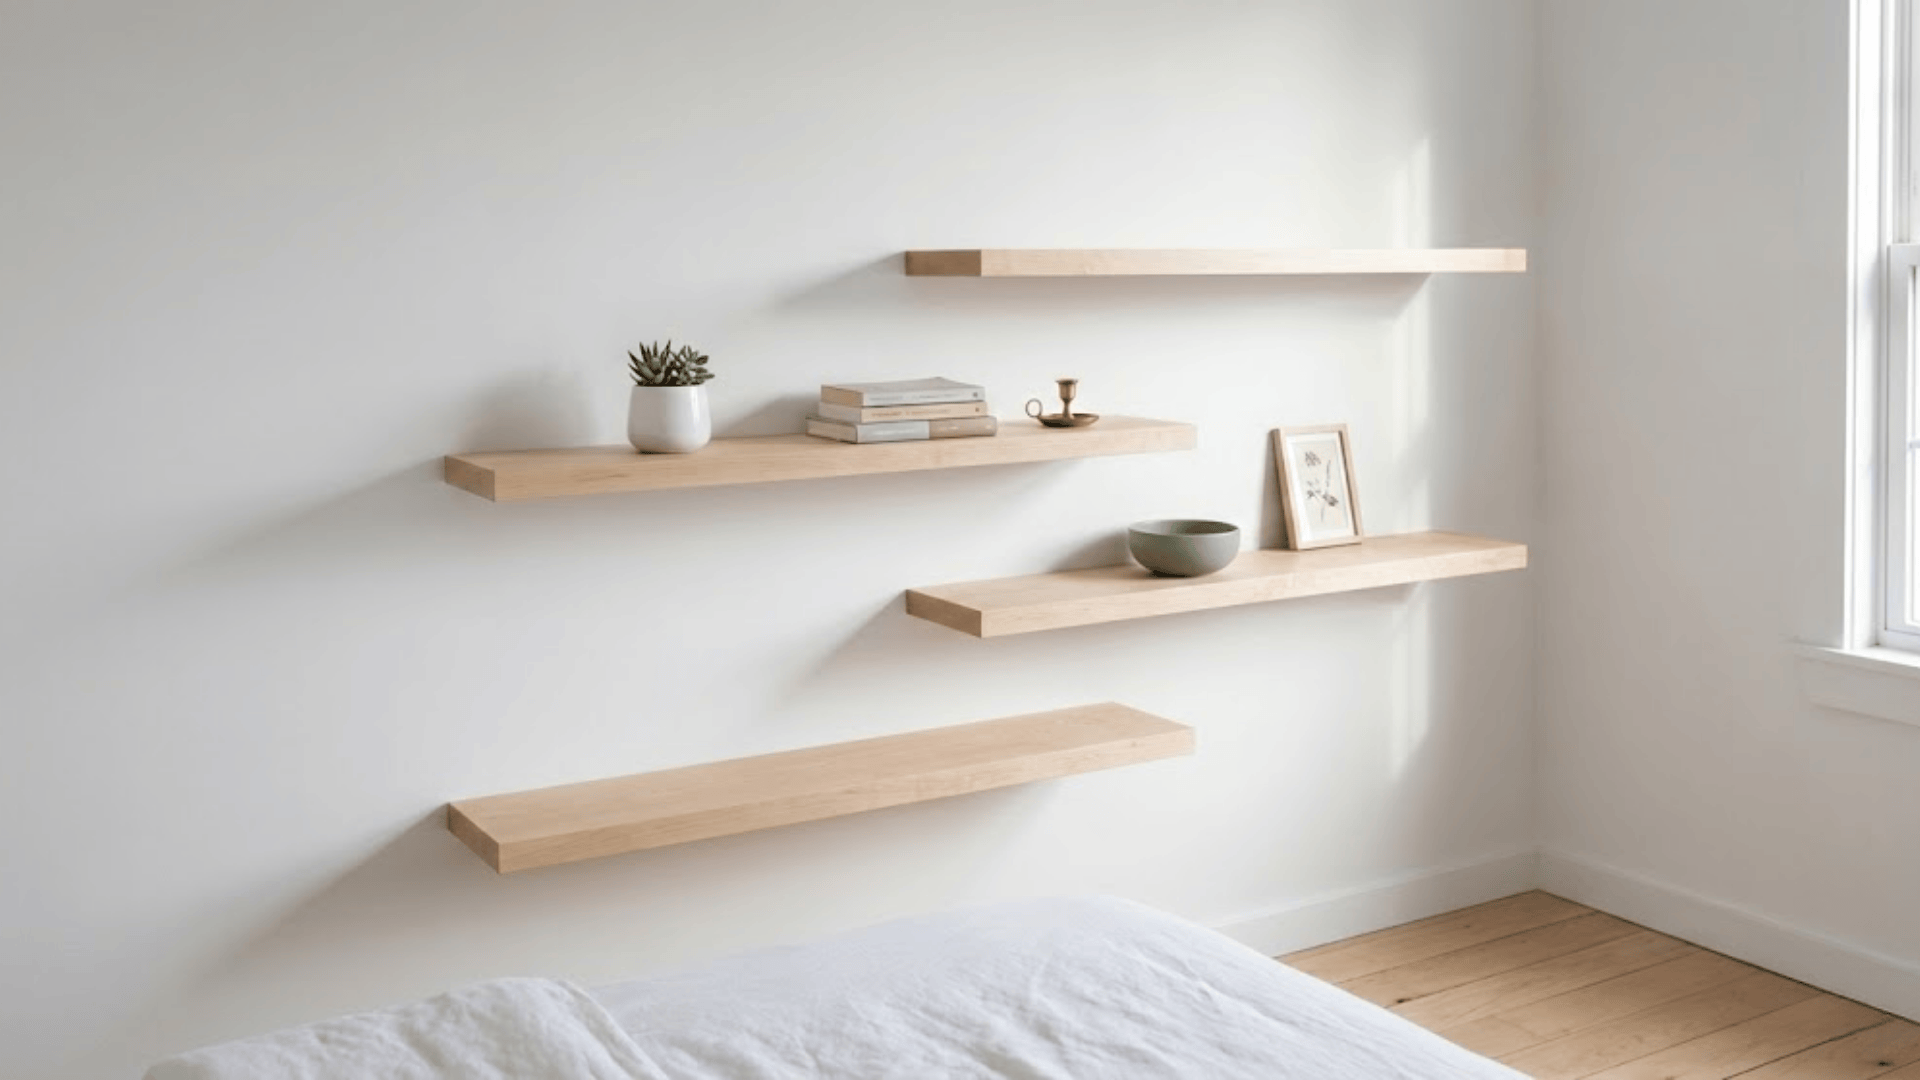
Ideal for: Minimalist spaces and renters want sleek, support-free storage that appears to hover.
Materials You’ll Need: Floating shelf brackets or rods, wood boards, wall anchors, level, wood screws, and finish.
These streamlined shelves seem to float against the wall, creating an airy, modern vibe perfect for smaller collections. Install them at varying heights to add dimension, or keep them uniformly spaced for clean lines.
The shallow depth means they won’t protrude far into the room, making them perfect for narrow hallways or above desks. Choose thicker wood for a substantial look or go ultra-thin for barely-there elegance.
8. Corner Bookshelf Walls
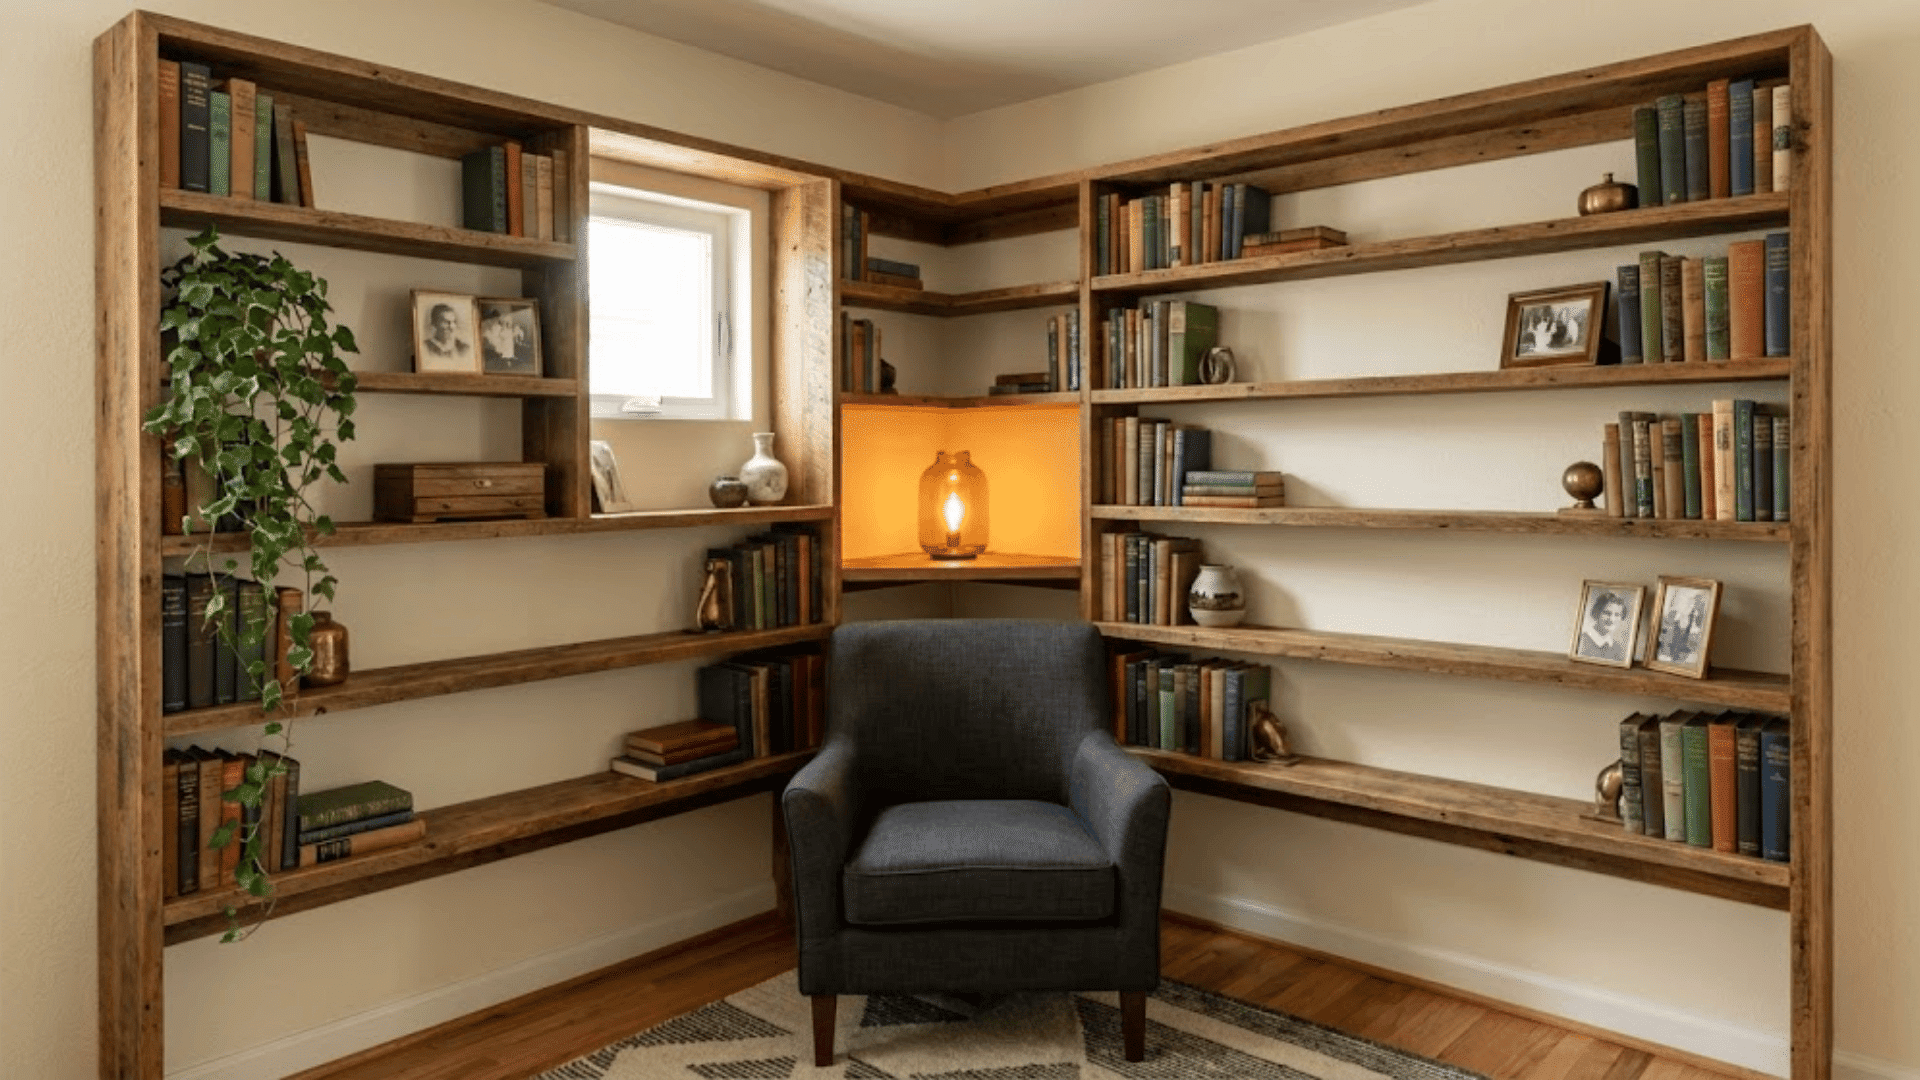
Ideal for: Unused corner spaces become functional, attractive storage displays.
Materials You’ll Need: Dimensional lumber cut at angles, corner brackets, wood screws, backing material, trim, and finish.
Corner bookcases wrap around two walls, maximizing every inch of space while softening harsh angles. Design units that meet at the corner with angled shelves, or build separate straight units that butt together.
This solution works beautifully in bedrooms, home offices, or reading nooks where corners often feel wasted. Add lighting inside for extra warmth and to highlight your collection.
Cost Breakdown: DIY vs. Store-Bought
One of the biggest perks of building your own bookcase is the money you’ll save without sacrificing quality or style.
Let’s break down the numbers so you can see exactly where your budget goes and how DIY stacks up against store-bought options.
| Bookcase Type | DIY Cost Range | Store-Bought Cost Range | Potential Savings |
|---|---|---|---|
| Simple Freestanding Bookcase | $50 – $150 | $150 – $400 | $100 – $250 |
| Wall-Mounted Bookcase | $75 – $200 | $200 – $500 | $125 – $300 |
| Floor-to-Ceiling Unit | $200 – $500 | $800 – $2,000+ | $600 – $1,500+ |
| Full DIY Bookshelf Wall | $400 – $1,200 | $2,000 – $5,000+ | $1,600 – $3,800+ |
| Corner Bookcase | $60 – $180 | $180 – $450 | $120 – $270 |
Where to Splurge:
- Quality wood or plywood for visible surfaces ensures durability and a polished appearance
- Heavy-duty brackets and wall anchors for safety, especially on wall-mounted units
- Professional-grade stain or paint for a lasting, beautiful finish
Where to Save:
- Use MDF or basic pine for parts that won’t be seen, like backing panels
- Shop sales at hardware stores or buy lumber in bulk for multiple projects
- Borrow or rent specialized tools instead of purchasing them outright
DIY Bookcase: Common Mistakes to Avoid & Safety Tips
Even the most carefully planned DIY bookcase can run into trouble if you skip crucial steps or ignore safety guidelines. Here are the most important things to watch out for to ensure your project is both beautiful and secure.
- Space shelves appropriately for your items rather than making them all identical, as cramped or overly tall shelves waste space and look awkward.
- Always anchor bookcases to wall studs using appropriate hardware, never just drywall, especially in homes with children or pets who might climb.
- Respect weight limits by using thicker shelves for heavy books and avoiding overloading, as sagging or collapsed shelves are a common DIY regret.
- Choose materials based on what you’ll store, using solid wood or thick plywood for book-heavy shelves rather than lightweight MDF that can bow.
- Wear proper safety gear, including eye protection and dust masks, when cutting or sanding, and keep power tools away from children during construction.
Taking time to get these fundamentals right means your bookcase will stay sturdy, safe, and stunning for years to come. A little extra caution during the build pays off in long-term peace of mind.
The Bottom Line
Your DIY bookcase project doesn’t have to be intimidating. With the right plan, basic tools, and a bit of patience, you can create storage that’s perfectly suited to your space and style.
The satisfaction of building something with your own hands, plus the money saved, makes this project truly rewarding.
Ready to start building? Drop a comment below sharing which style caught your eye or any questions about your upcoming project.
We’d love to hear how your DIY bookcase turns out and help troubleshoot any challenges along the way. Happy building!