There’s something undeniably charming about a barn door gliding open to reveal your favorite space.
A rustic accent in your farmhouse kitchen or a sleek statement piece in your modern loft, this sliding beauty brings that perfect blend of functionality and style to any room.
And here’s the thing: creating one yourself is more achievable than you might think.
We’ll walk you through selecting the right materials, mastering the hardware installation, and every step of bringing your vision to life.
By the end, you’ll have a custom sliding door that feels authentically yours and completes your space beautifully.
What is a Barn Door?
A barn door is a sliding door that moves along a mounted track rather than swinging open on hinges.
Originally for barns, these doors now serve as space-savers and decorative features in homes. They work well in narrow spaces like hallways, closets, or bathrooms where swinging doors are impractical.
Unlike traditional hinged doors that need clearance to open, barn doors slide parallel to the wall, making them ideal for tight spaces.
You’ll often see them separating living areas, concealing pantries, or adding character to bedrooms. Their exposed hardware and rustic appeal make them a design statement all on their own.
Why Build a DIY Barn Door Instead of Buying One?
Building your own barn door puts you in the driver’s seat when it comes to design, budget, and personalization.
Here’s why so many homeowners are choosing the DIY route:
- Save Significantly on Costs: DIY barn doors typically cost half as much as pre-made options, especially when you source reclaimed or budget-friendly materials.
- Design Exactly What You Want: Create custom dimensions that fit your space perfectly and match your aesthetic, rather than settling for standard sizes.
- Choose Your Materials and Finishes: Control every detail, whether you prefer weathered wood, sleek painted panels, or a specific stain that coordinates with your existing décor.
- Build Confidence with Accessible Skills: Most barn door projects require only basic woodworking tools and techniques that beginners can master.
Rolling up your sleeves for this project means you’ll end up with a door that’s truly one-of-a-kind and tailored to your home’s unique character.
Planning Your DIY Barn Door
Planning is where your barn door vision starts to take shape. Getting the style and measurements right upfront will save you time, materials, and headaches down the road.
| Door Style | Key Features | Best For | Skill Level |
|---|---|---|---|
| Classic X-Brace | Diagonal boards form an X pattern | Traditional farmhouse aesthetic | Intermediate |
| Z-Brace | Diagonal brace connects the horizontal boards | Rustic charm, simpler build | Beginner-friendly |
| Plank-Style | Vertical planks, minimal hardware | Clean, streamlined spaces | Beginner-friendly |
| Modern Flat | Smooth single panel, no exposed bracing | Contemporary minimalist homes | Easy |
Key Measurements to Take:
- Door Opening Size: Measure the exact width and height of your doorway, including any trim or molding.
- Overlap Requirements: Add at least 2 inches on each side of the opening for proper coverage and privacy.
- Ceiling Clearance: Ensure you have six to eight inches of space above the doorway for secure track mounting.
What You’ll Need: Materials and Tools
Gathering the right materials and tools before you start will make your barn door project flow smoothly.
Here’s everything you’ll need to bring your sliding door to life.
Materials:
- Wood boards – Pine, cedar, or reclaimed wood for rustic charm; poplar or oak for durability and a refined finish
- Plywood panels – Budget-friendly option for flat or modern doors; use ¾-inch thickness for stability
- Solid wood planks – Higher-quality choice that adds authentic texture and weight to traditional barn door styles
- Barn door hardware kit – Includes track, rollers, and mounting brackets; available in budget steel or premium black iron finishes
- Wood glue and screws – For securing boards and braces together
- Stain or paint – Choose based on your desired finish and room décor
- Polyurethane or sealant – Protects the wood and adds longevity
Tools:
- Measuring tape and level – Essential for accurate dimensions and straight installations
- Circular saw, or miter saw – For cutting wood to size
- Drill and drill bits – To create pilot holes and drive screws
- Sandpaper or orbital sander – Smooths rough edges and prepares surfaces for finishing
- Paintbrushes or rollers – For applying stain, paint, or sealant
- Stud finder – Locates wall studs for secure track mounting
- Safety glasses and gloves – Protect your eyes and hands while cutting and assembling
- Clamps – Optional but helpful for holding boards in place during assembly
- Square or speed square – Optional tool for ensuring perfectly straight cuts and angles
DIY Barn Door Build: Step-by-Step Instructions
Ready to bring your barn door to life? This straightforward process breaks down the build into manageable steps that anyone can follow.
With the right materials and a bit of patience, you’ll have a beautiful custom door sliding smoothly in no time.
Step 1: Cut Your Door Base and Planks
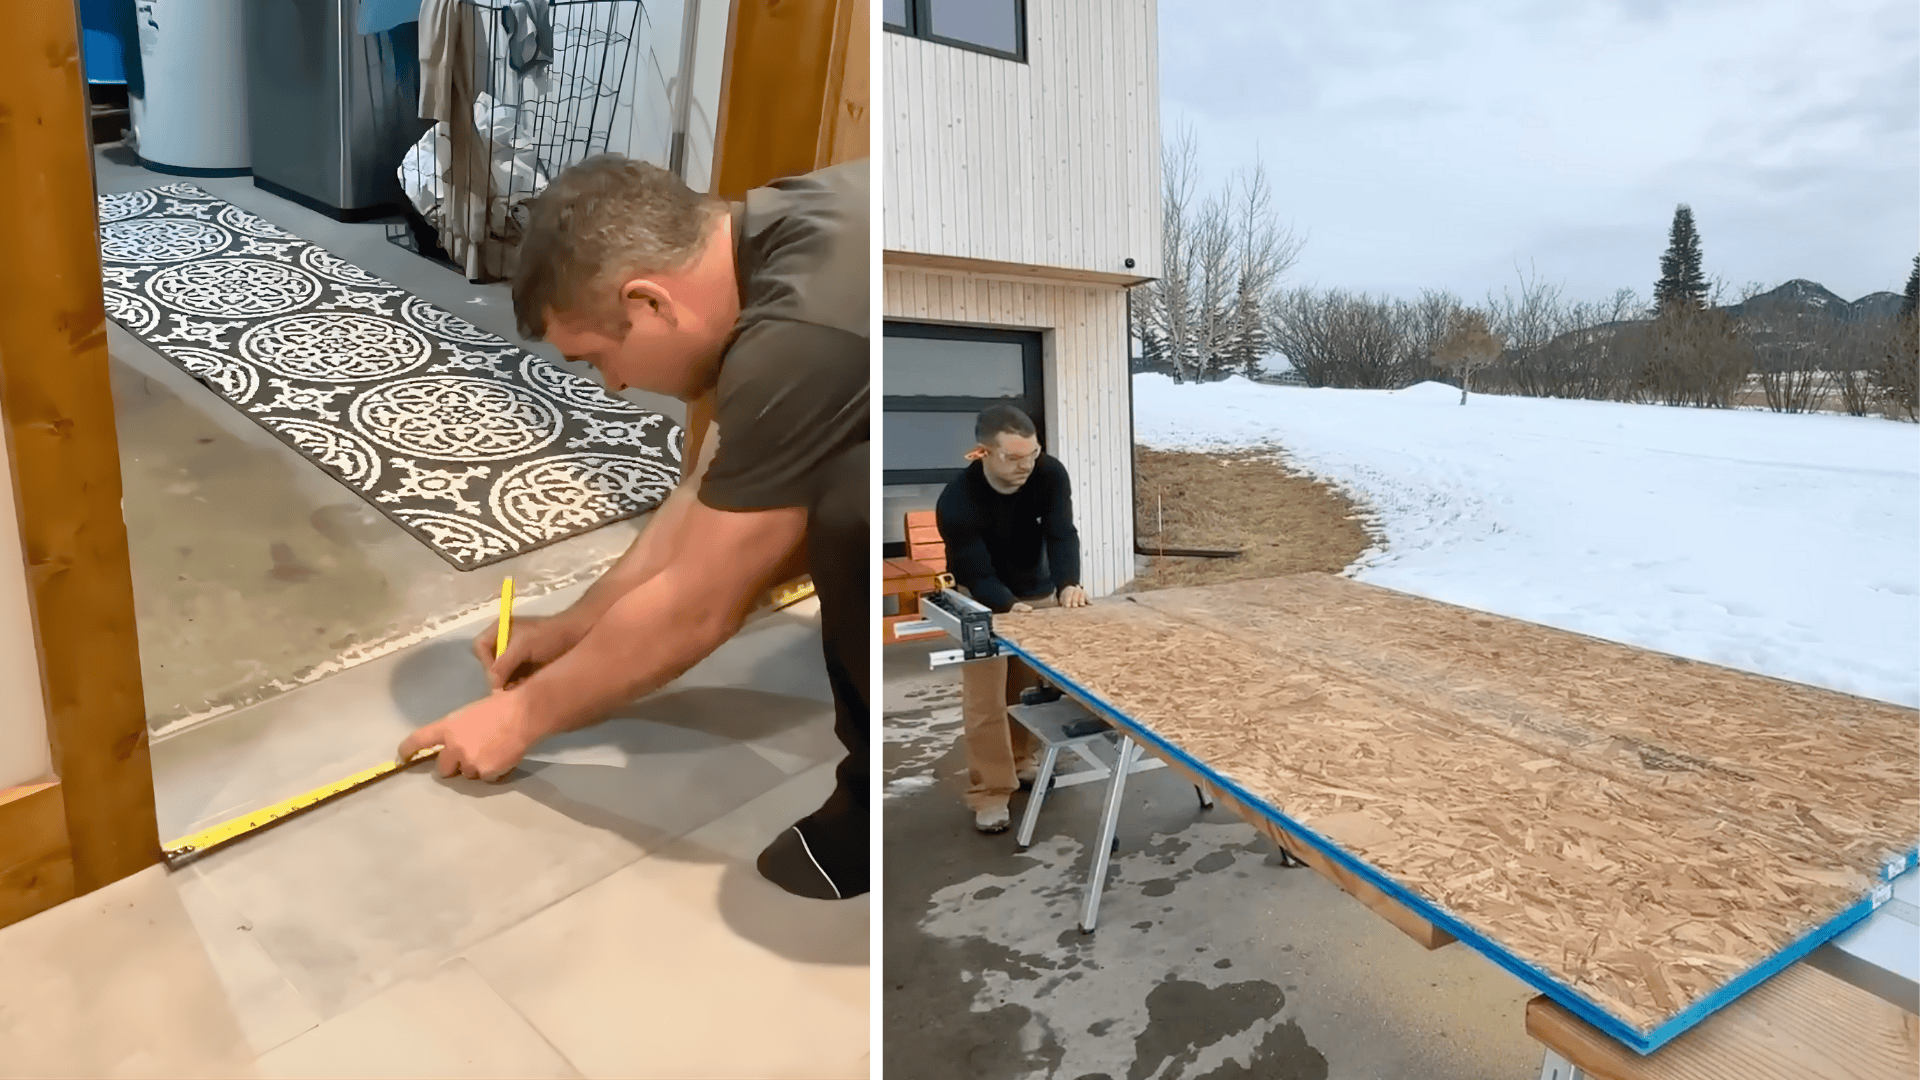
Start by measuring your doorway and cutting the OSB or plywood base to size, accounting for overlap on both sides. Cut it slightly taller than needed so you can test-fit and adjust the final height.
Next, cut your wood planks or pickets to match the width of your door base. For double doors, arrange planks with similar grain patterns so they look cohesive when closed together.
Step 2: Attach Planks to the Base
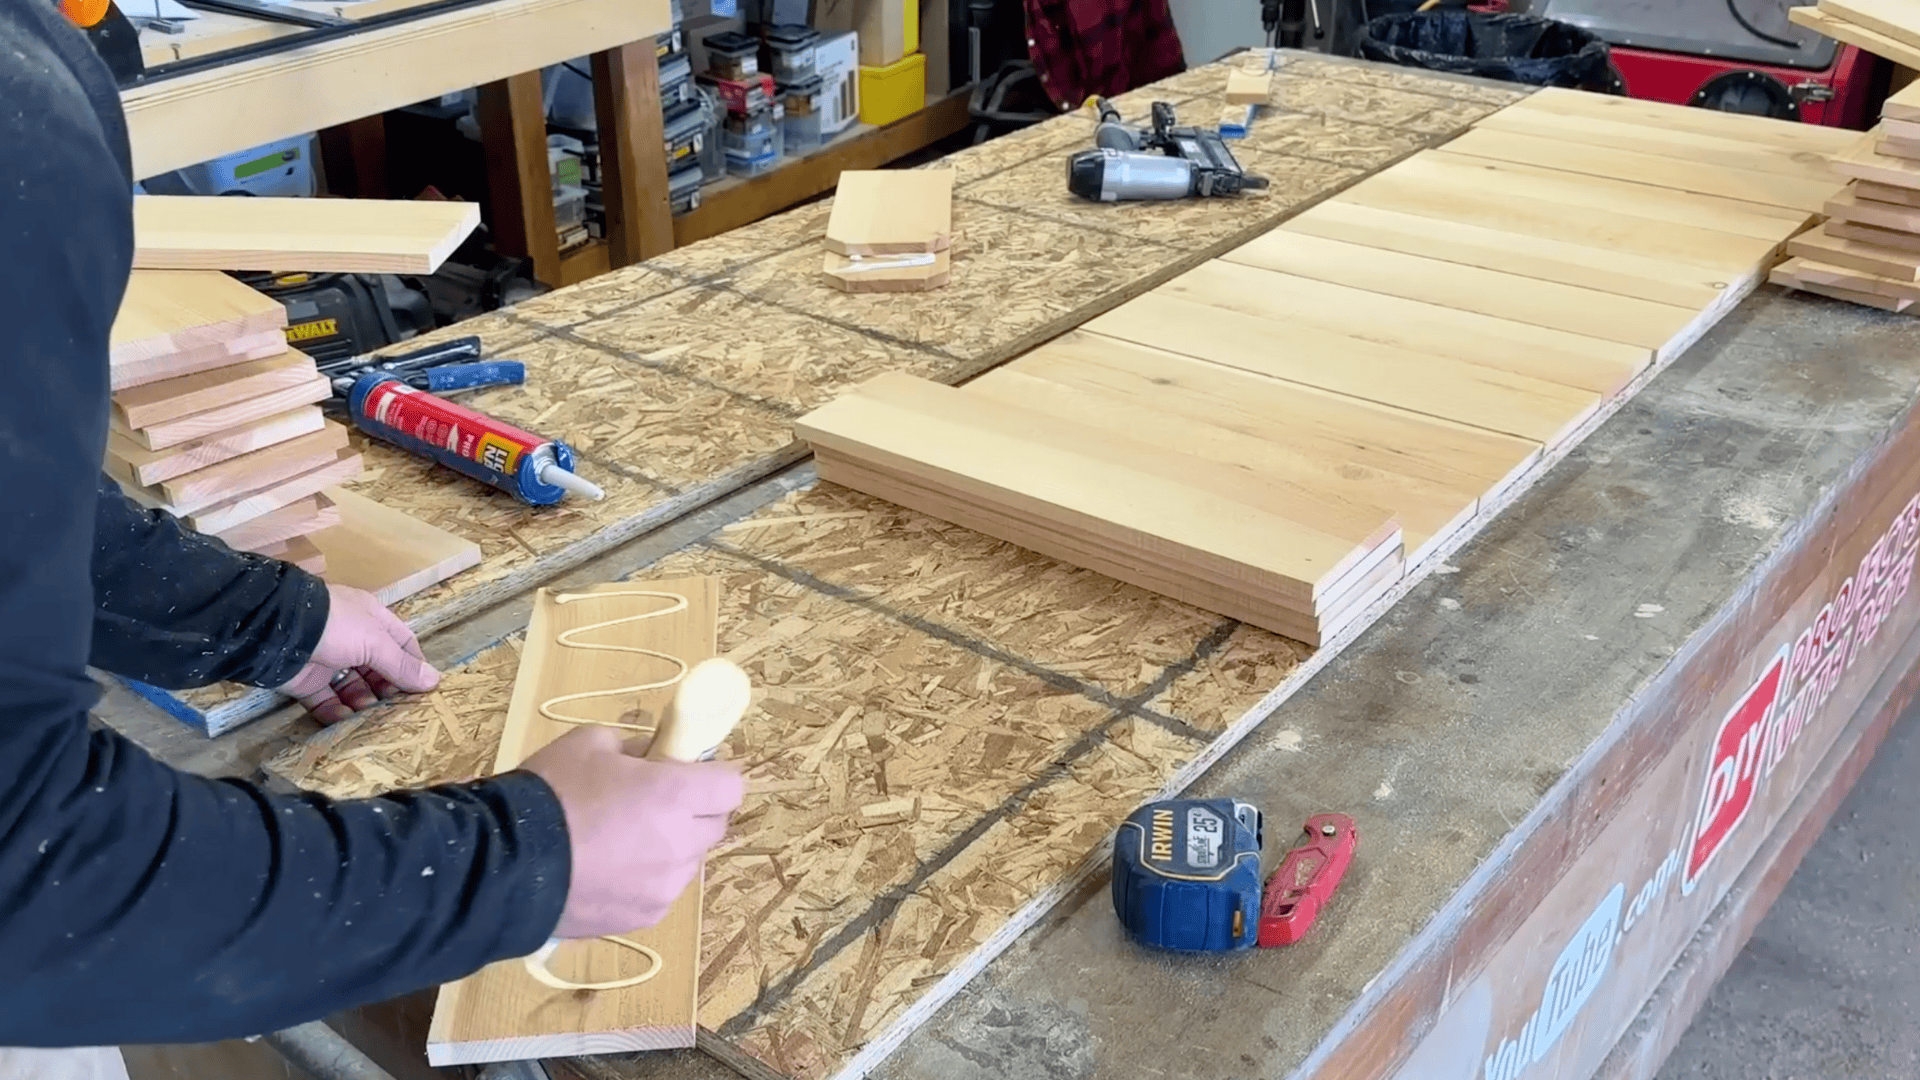
Apply wood glue or construction adhesive generously across the OSB base, then position each plank carefully. Use an 18-gauge brad nailer with 1¼-inch nails to secure the planks in place, working from top to bottom.
Keep everything squared up as you go, and add a center row of nails down the middle of each plank to prevent warping or cupping over time.
Step 3: Sand and Finish the Door
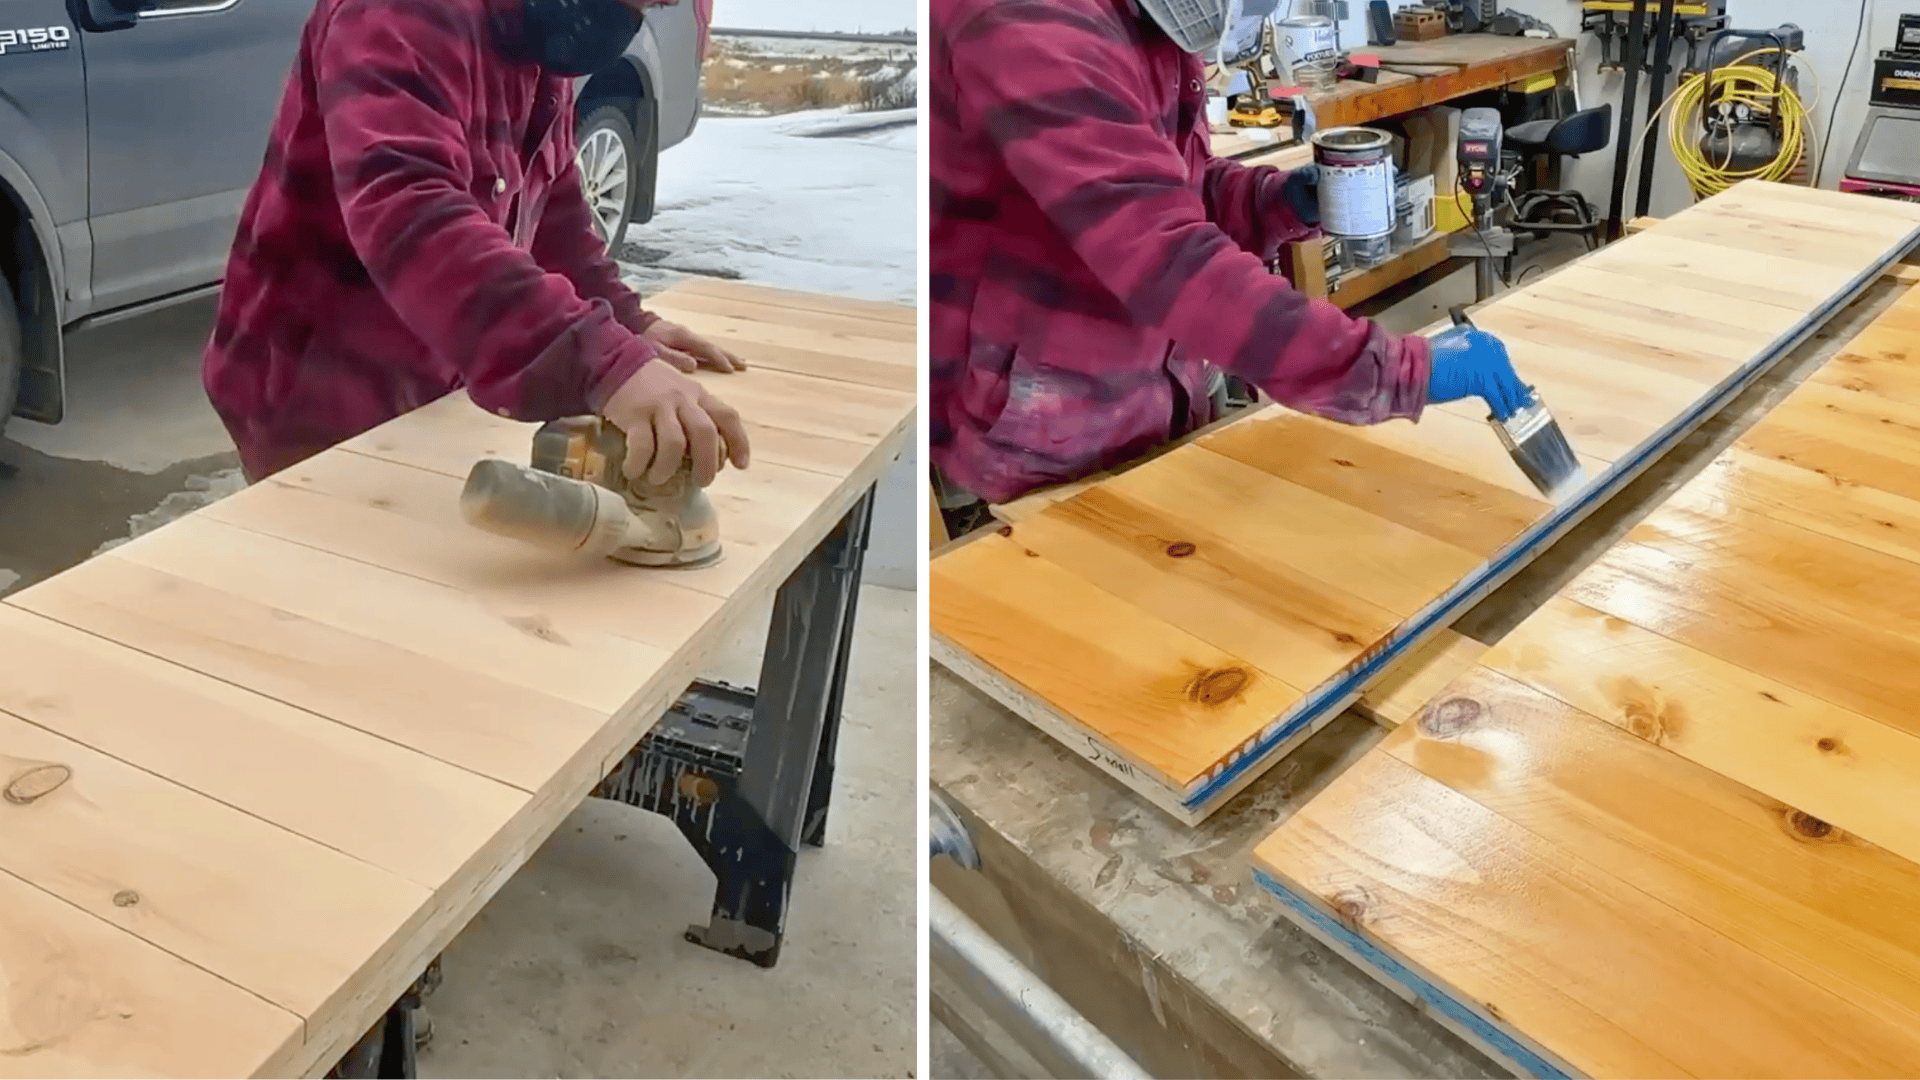
Fill any nail holes with wood filler and wipe away excess once dry. Sand the entire door with 120-grit sandpaper, then switch to 220-grit for a smooth finish and subtle edge bevel.
Clean off all sawdust thoroughly before applying your chosen finish, whether that’s oil-based polyurethane for a warm amber tone or clear sealer for natural wood. Apply 2 to 3 coats, allowing proper drying time between each.
Step 4: Add Metal Edging and Hardware
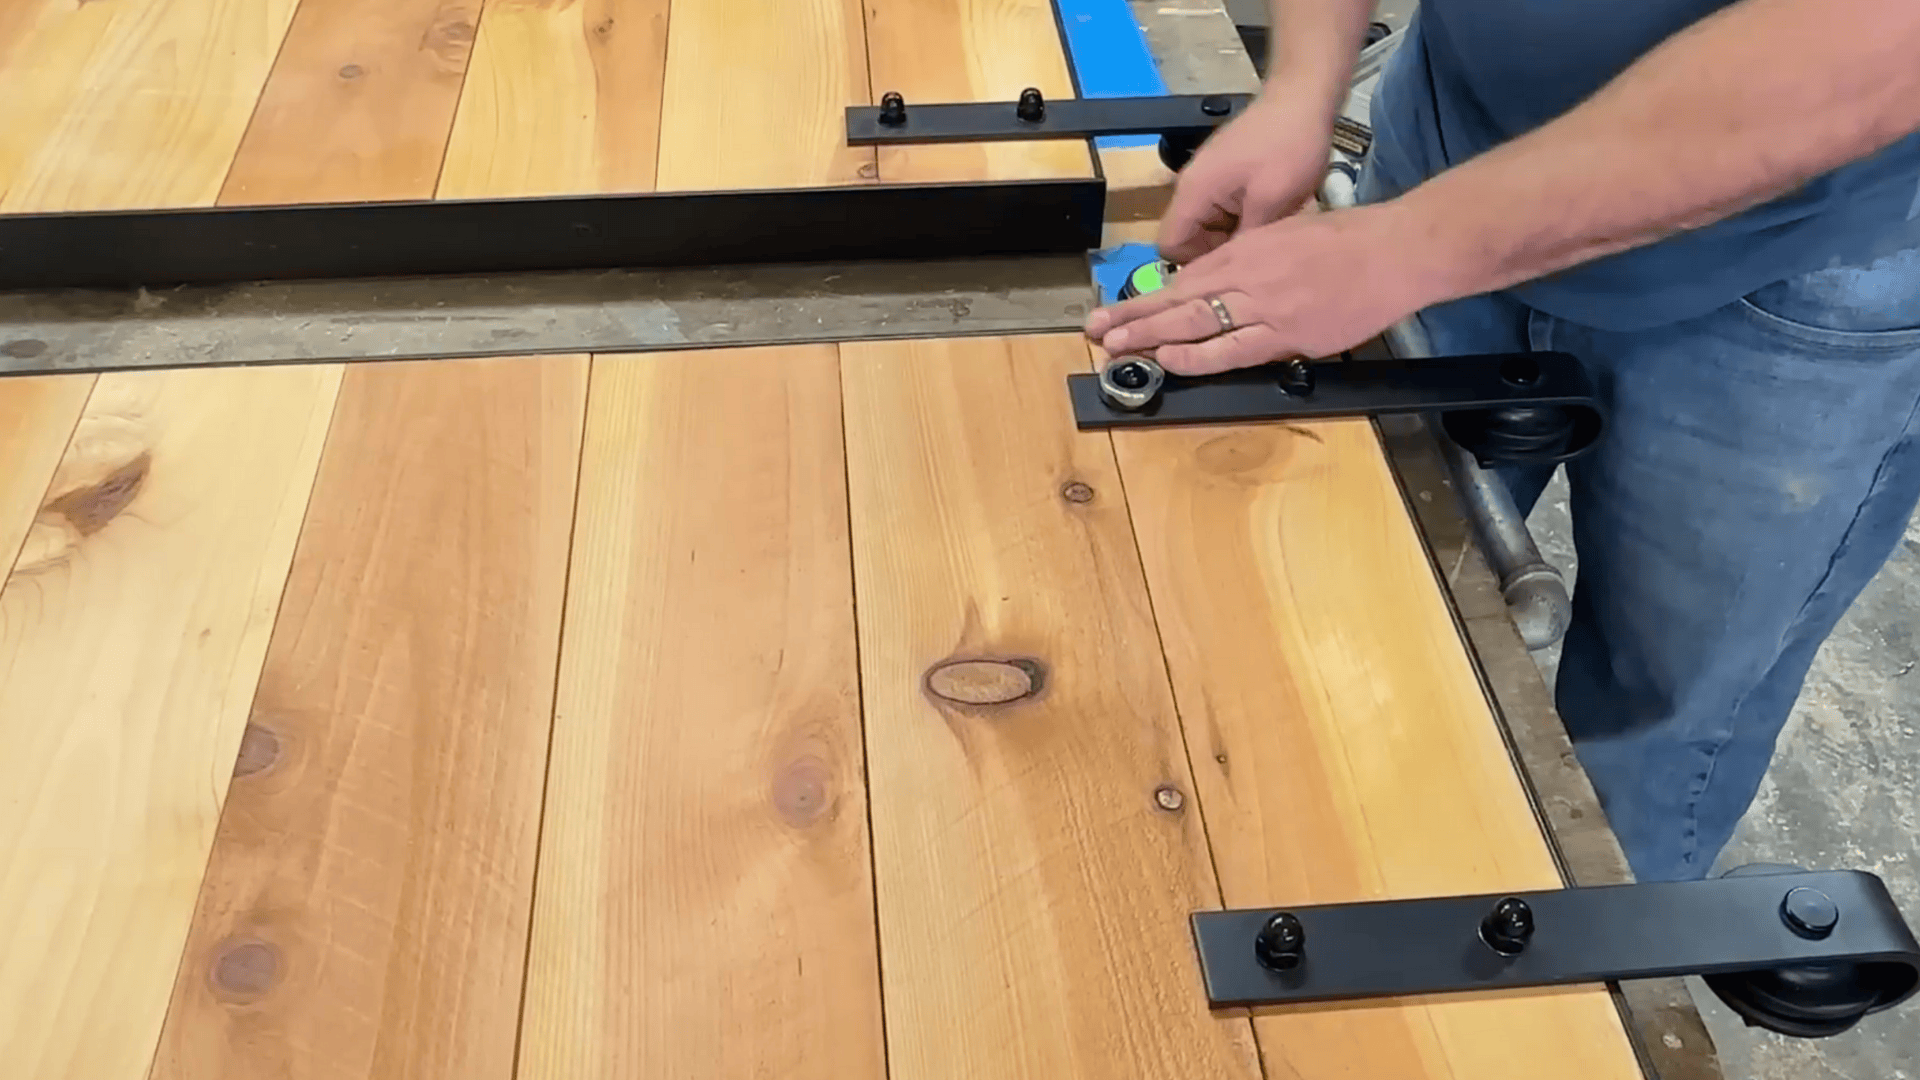
Cut metal flat bar to fit the sides, top, and bottom of your door, then drill evenly spaced holes for screws. Paint the metal pieces with black satin spray paint and let them dry completely.
Attach the edging using 1¼-inch metal screws, pre-drilling small pilot holes first. Finally, install the rolling hardware on the door, measuring two inches from each side for proper placement.
Step 5: Mount the Track and Hang Your Door
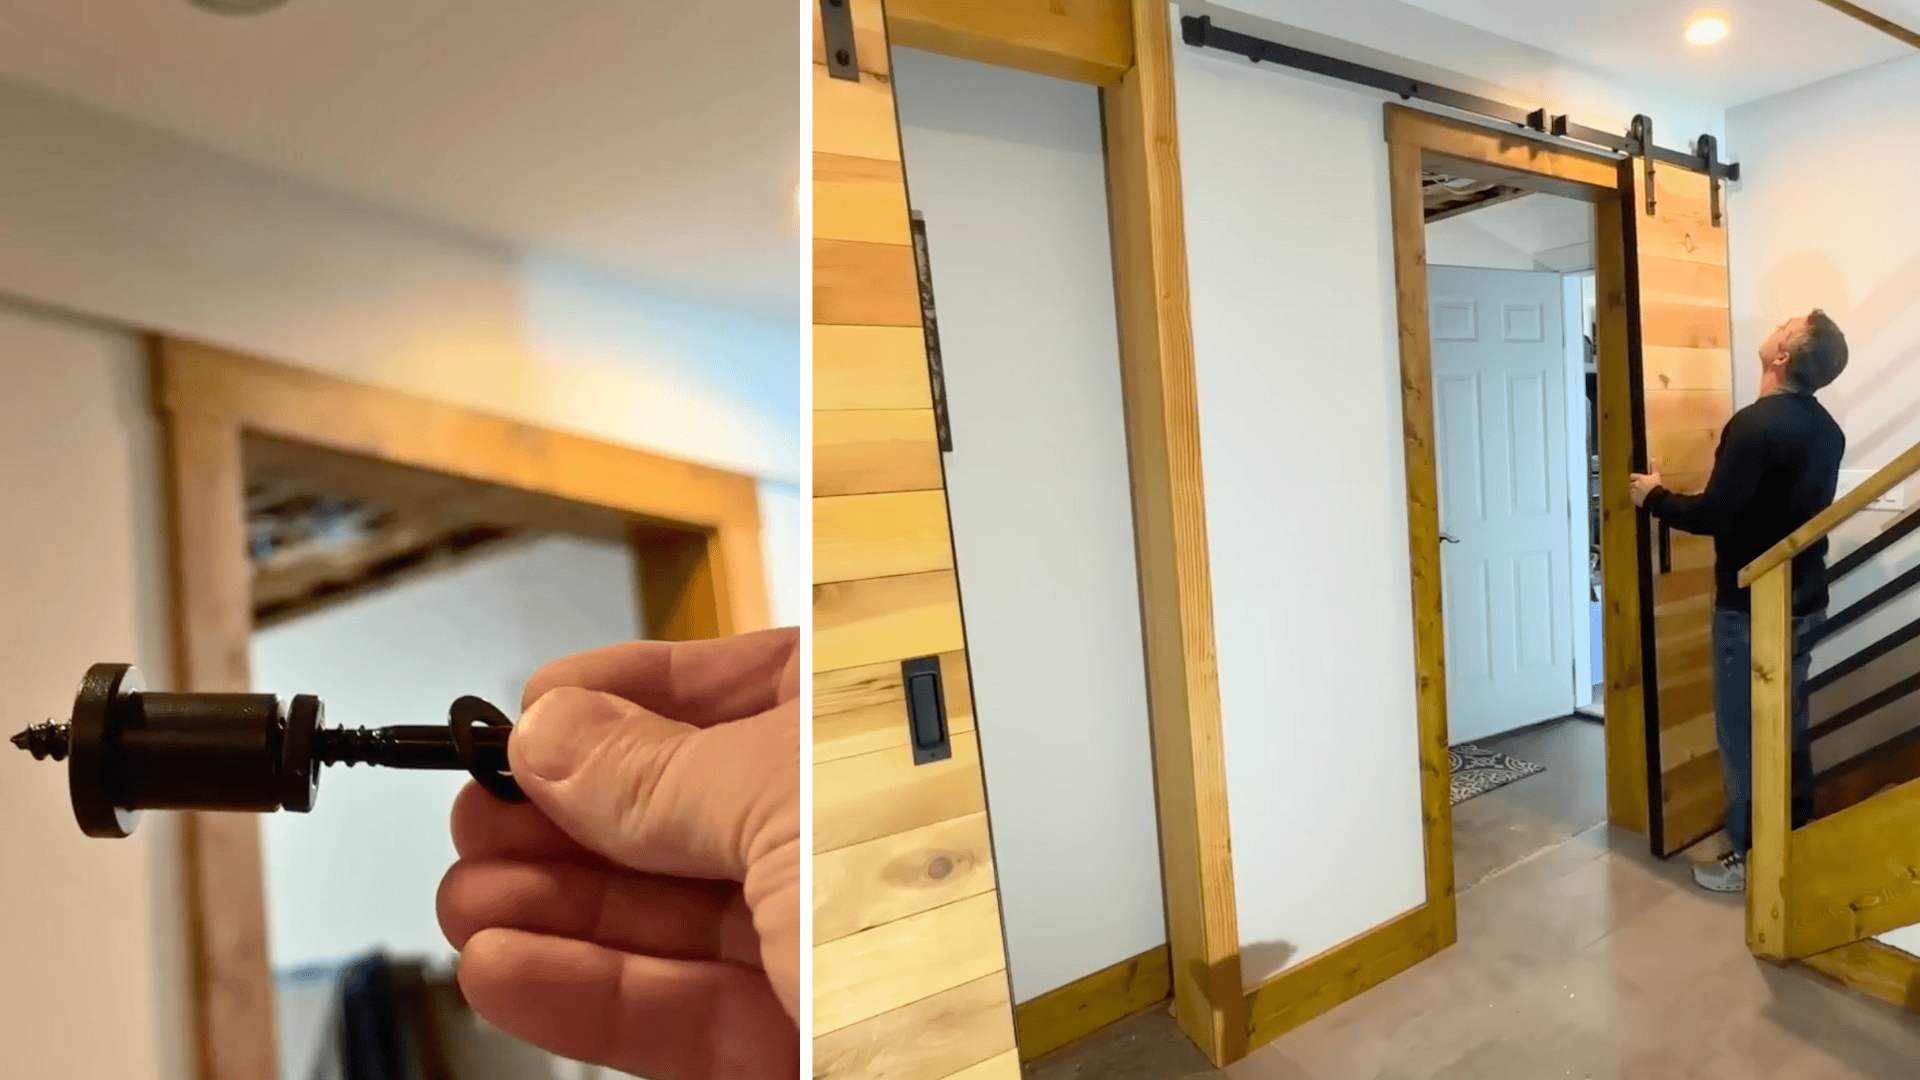
Locate wall studs and attach a backer board at the appropriate height above your doorway, following the hardware kit’s specifications. Mount the track securely to the backer board, ensuring it’s perfectly level.
Hang your door on the track, adjust the roller stops so it glides smoothly, and install the floor guide to keep the door tracking straight. Add soft-close bumpers if desired for a polished finish.
For a more detailed walkthrough of the process, check out the complete video tutorial below by DIY PETE.
DIY Barn Door Design Ideas
Your barn door should reflect your personal style and complement your home’s aesthetic.
Here are some popular design directions to spark your creativity and help you decide which look suits your space best.
| Design Style | Key Elements | Best For |
|---|---|---|
| Rustic Farmhouse | X-brace or Z-brace pattern, natural wood texture, visible knots, and grain | Country kitchens, cozy bedrooms, laundry rooms |
| Modern Minimalist | Smooth flat panels, clean lines, no exposed bracing | Contemporary living areas, offices, and bathrooms |
| Painted Finish | Solid color coverage in matte or satin sheen hides wood imperfections | Bright spaces, kids’ rooms, coordinated color schemes |
| Stained Finish | Natural grain visible with warm amber or honey tones | Traditional homes, wood-trimmed spaces |
| Glass Panel | Transparent or frosted inserts with wood or metal framing | Small rooms needing light flow, closets, and offices |
Common DIY Barn Door Mistakes to Avoid
Even experienced DIYers can run into trouble with barn door projects if they overlook key details. Sidestepping these common pitfalls will save you time, money, and frustration during your build.
- Measuring Inaccurately: Double-check door opening dimensions and account for overlap, trim, and ceiling clearance before cutting any materials.
- Choosing Inadequate Hardware: Select a track system rated for your door’s weight, and ensure bolts are long enough for your door thickness.
- Skipping Stud Locations: Always use a stud finder and mount the track directly into wall studs with a solid backer board for secure support.
- Forgetting Floor Guides: Install a floor track guide to prevent the door from swinging and keep it gliding smoothly in place.
- Rushing the Finish: Apply multiple thin coats of stain or paint with proper drying time between each layer for a professional, durable result.
Taking a methodical approach and paying attention to these details will help you avoid costly do-overs and keep your project on track.
Cost Breakdown: DIY Barn Door
Understanding the potential costs upfront helps you budget wisely and choose materials that align with your financial goals.
Here’s what you can expect to spend based on different quality levels and material choices.
| Build Type | Materials | Hardware | Estimated Total |
|---|---|---|---|
| Budget Build | Pine or plywood, basic stain or paint | Entry-level steel track kit | $150 – $250 |
| Mid-Range Build | Cedar planks, quality finish, metal edging | Mid-tier hardware with decorative elements | $300 – $500 |
| Premium Custom | Reclaimed wood or hardwood, glass panels, custom finishes | Heavy-duty black iron hardware, soft-close features | $600 – $1,000+ |
Pro Tip: Shopping at local steel suppliers for metal edging and checking salvage yards for reclaimed wood can cut costs significantly while still delivering that high-end custom look. Buying hardware kits during sales or choosing bundled packages also helps stretch your budget further.
Safety Tips for DIY Barn Door Projects
Working with heavy materials and power tools requires attention to safety at every stage. Following these precautions will help protect you, your family, and anyone else in your home during and after installation.
- Lift with Proper Technique: Use a helper when moving plywood or assembled doors, bend at the knees, and consider a dolly for transporting heavy materials
- Wear Protective Gear: Always use safety glasses when cutting or drilling, wear gloves when handling metal edging, and use ear protection with power tools
- Secure Track Mounting Properly: Mount the track into wall studs with lag bolts rated for your door’s weight, and verify the backer board is firmly attached
- Install Safety Features: Add jump pads to prevent doors from lifting off the track and consider soft-close mechanisms if you have young children or pets nearby.
Taking these safety measures seriously means you’ll complete your project without injuries and create a barn door installation that’s secure for years to come.
When to Consider Professional Help?
While most barn door projects are beginner-friendly, certain situations call for professional expertise.
If you’re dealing with load-bearing walls, need to install blocking inside closed walls, or lack confidence in your carpentry skills, hiring a pro ensures safe and proper installation.
Complex setups like bypass double doors, curved tracks, or installations requiring significant drywall work also benefit from experienced hands.
Additionally, if your walls can’t support the door’s weight or you’re uncomfortable using power tools, a professional can handle the technical aspects while you focus on design choices that match your vision.
Final Thoughts
Building a DIY barn door is one of those projects that genuinely pays off in both function and style.
You’ve got all the knowledge now to tackle measurements, choose materials, assemble your door, and mount it securely.
The satisfaction of sliding open a door you crafted with your own hands never gets old, and your guests will absolutely notice the custom touch it brings to your space.
Ready to start your own DIY barn door project? Drop a comment below sharing which design style you’re leaning toward or any questions about the process.
We’d love to hear about what you’re planning to build!