Plumbing issues don’t always have to catch you off guard. You don’t need to wait until something goes wrong and call a plumber right away. With the right tools, it’s possible to stay ahead of problems by doing simple inspections yourself.
In this guide, we’ll walk through how to handle a basic DIY plumbing check at home, what to look for, and when it makes sense to use tools like a sewer inspection camera for a closer look.
Why Regular Plumbing Checks Matter?

Small plumbing issues rarely stay small.
A minor clog can turn into a full blockage. A slow leak can damage walls or flooring before you even notice it. Regular inspections help you:
- Spot early signs of clogs or buildup
- Detect leaks before they cause damage
- Avoid emergency repair costs
- Extend the life of your plumbing system
Even a simple check every few months can save you a lot of trouble down the line.
Start With the Basics
Before using any specialized tools, begin with a simple visual and functional check around your home.
1. Check All Drains
Run water in sinks, tubs, and showers. Watch how quickly it drains.
Warning signs:
- Water draining slowly
- Gurgling sounds
- Water is backing up in nearby drains
These usually point to partial clogs or venting issues.
2. Inspect Under Sinks
Open the cabinet and look at the pipes.
What to look for:
- Moisture or water stains
- Corrosion or rust
- Loose connections
Even a small drip can become a bigger issue if ignored.
3. Look for Odors
If you notice a persistent sewer smell, don’t ignore it. It could be:
- A dry P-trap
- A cracked pipe
- A deeper issue in the sewer line
This is often where a more detailed inspection becomes necessary.
When a Deeper Inspection Makes Sense
If you’ve noticed repeated clogs, slow drains across multiple fixtures, or unexplained odors, the issue may not be inside your home—it could be in the main sewer line.
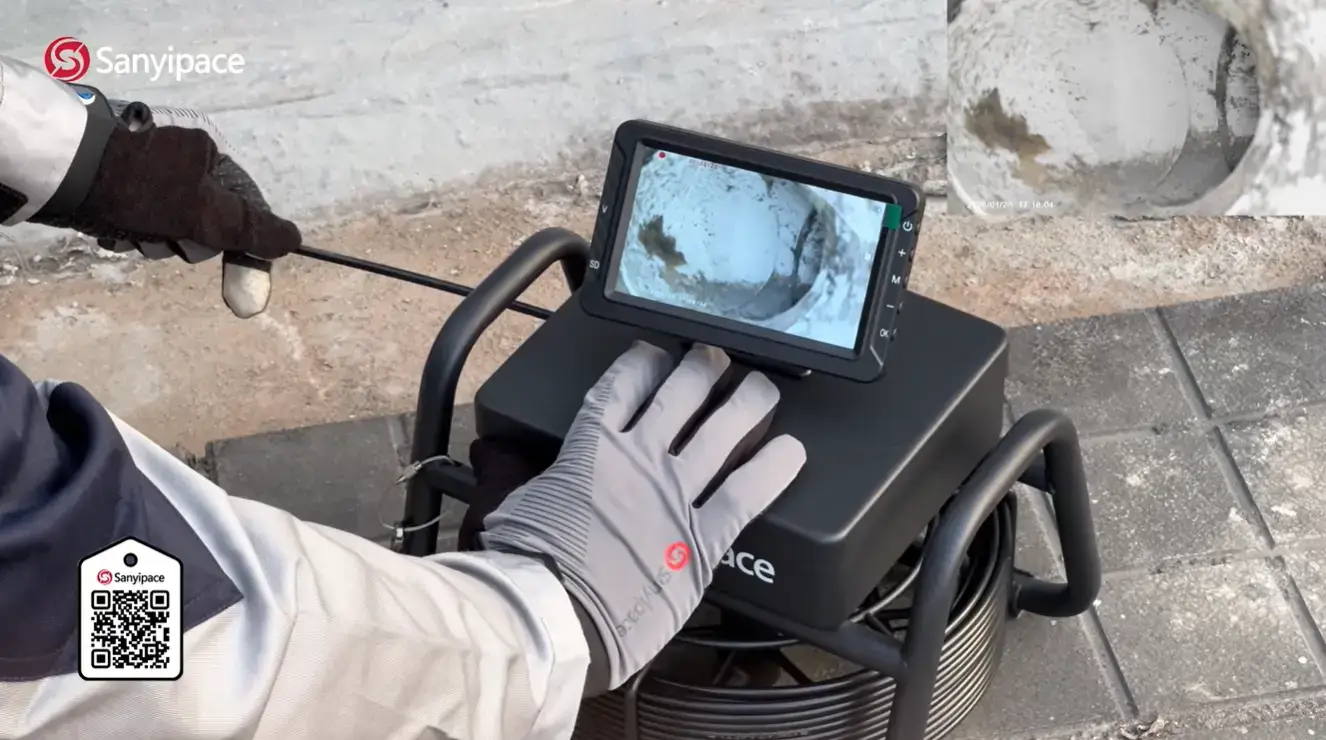
This is where tools like a sewer camera become extremely useful.
A sewer camera allows you to see inside your pipes without digging or tearing anything apart. You can identify:
- Tree root intrusion
- Pipe cracks or collapses
- Grease buildup
- Foreign objects blocking the line
For homeowners who like to handle things themselves, investing in or renting a sewer camera can be a smart move, especially if your house is older.
Recommended Sewer Camera Options for DIY to Pro Use
If you’re ready to go beyond a basic inspection and actually see what’s happening inside your pipes, investing in a quality inspection camera makes a big difference.
Sanyipace has a pretty well-rounded lineup that covers everything from casual home use to more demanding jobs. What I like is that you can start simple and scale up if needed, without switching brands.
Here are three models that make sense depending on how serious you want to get.
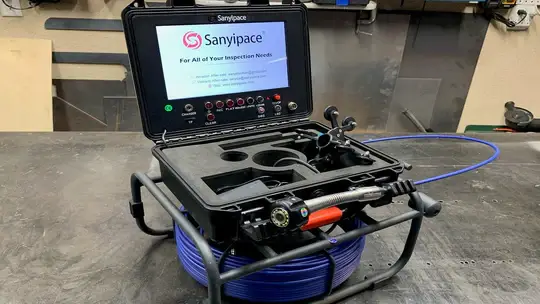
1. Budget-Friendly Pick: Sanyipace 5″ Screen Sewer Camera (S5517DC)
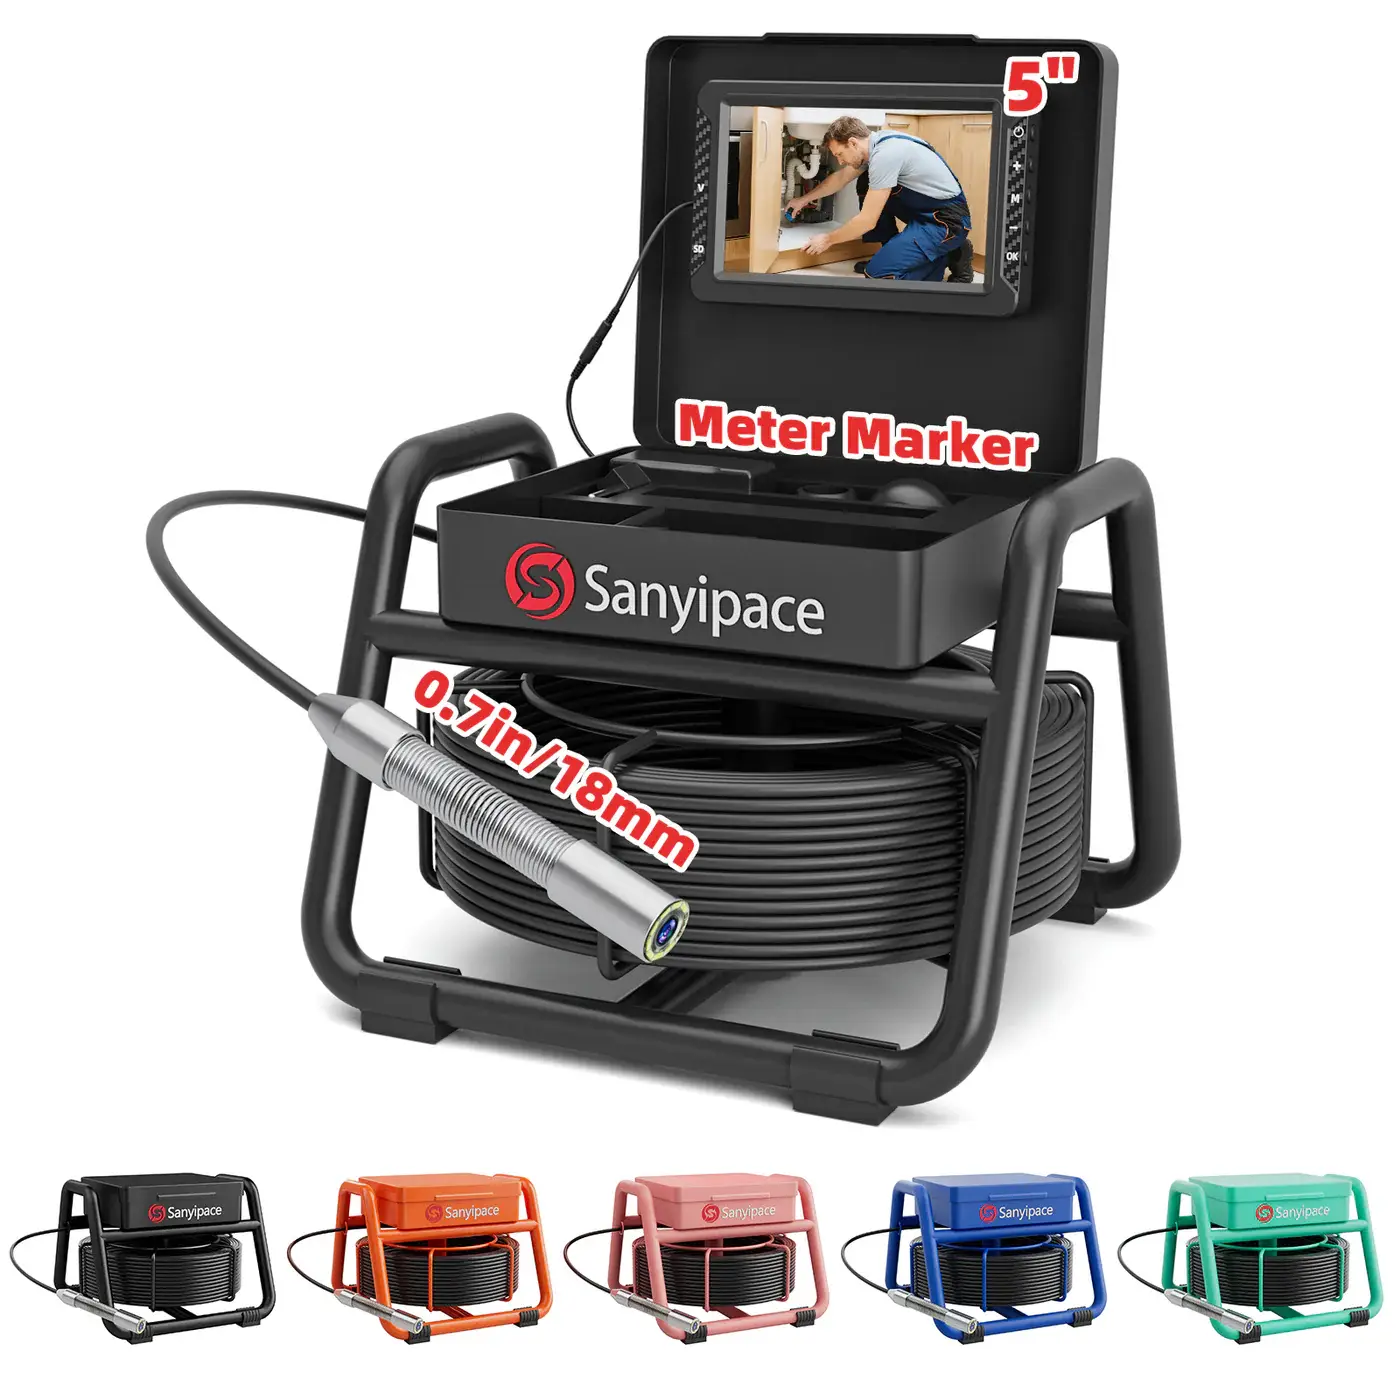
If you’re just looking for something simple to check drains around the house, the S5517DC is one of the easiest entry points.
It’s a compact DIY sewer camera that keeps things straightforward. You’re not dealing with extra features you won’t use, which makes it a good fit for beginners.
What stands out:
- 5-inch screen, simple interface
- Lightweight and easy to carry
- Quick setup, no learning curve
This is ideal for checking bathroom drains, kitchen lines, or figuring out if a clog is close by or further down.
Best for:
- First-time users
- Occasional home inspections
- Small-scale plumbing issues
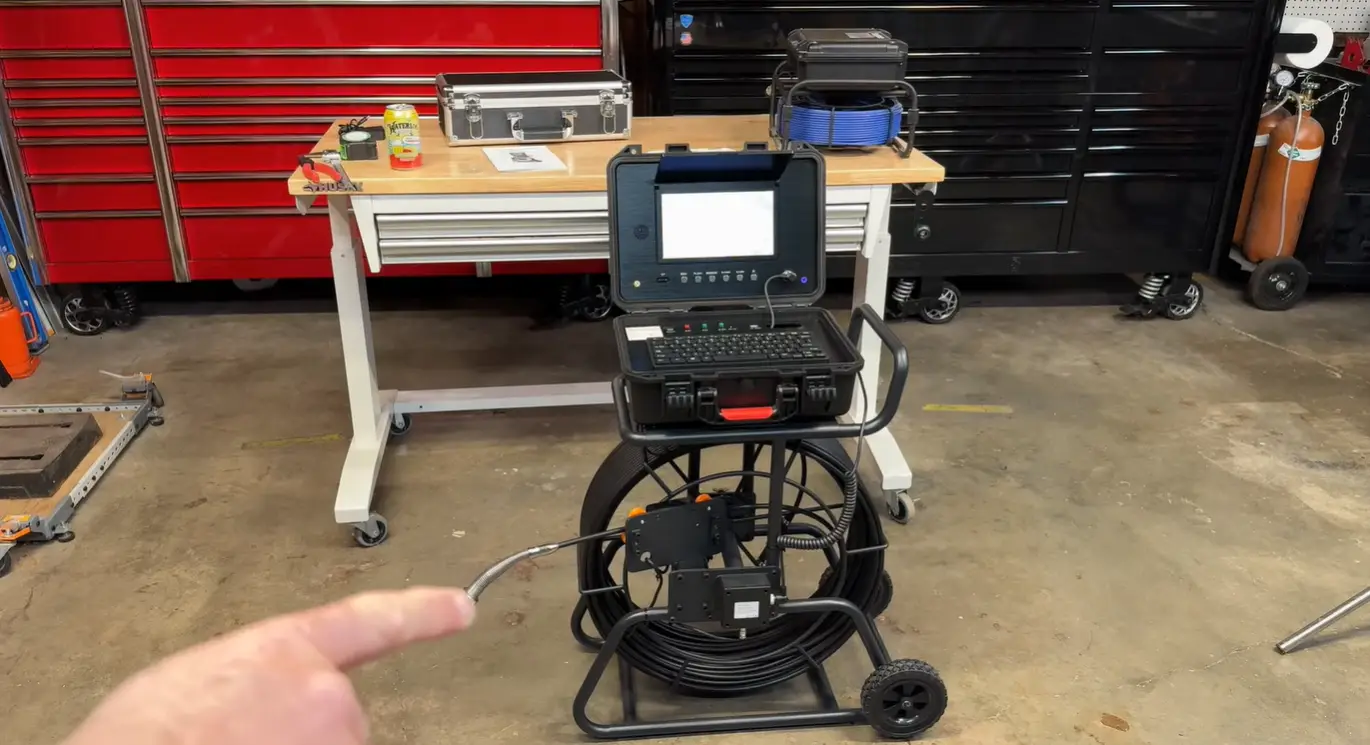
2. Mid-Range Option: Sanyipace Self-Leveling Sewer Camera (S8951DSRTM68R)
If you’ve already dealt with a few plumbing issues and want something more capable, the S8951DSRTM68R is a strong step up.
This pipeline camera adds one feature that really changes the experience: a self-leveling camera head. The image stays upright as you move through the pipe, which makes it much easier to understand what you’re looking at.
What stands out:
- Self-leveling camera for stable viewing
- Built-in meter counter
- 512Hz sonde for locating the camera underground
Once you’ve used a system like this, it’s hard to go back to a basic one. You spend less time guessing and more time actually diagnosing the issue.
Best for:
- Main sewer line inspections
- Homeowners dealing with recurring problems
- Users who want clearer, more reliable visuals
3. Advanced Pick: Sanyipace 10″ Sewer Inspection Camera With 24 LED Lights (S830ASMKT)
If you want something closer to a professional setup, the S830ASMKT is a noticeable upgrade in both visibility and overall capability.
This sewer inspection camera is built for tougher jobs and longer runs, and the lighting alone makes a big difference when you’re inspecting darker or larger pipes.
What stands out:
- 10-inch screen for a larger, clearer view
- 24 LED lights for better visibility inside pipes
- Durable cable for longer-distance inspections
- Meter counter for tracking distance
The stronger lighting and larger display make it much easier to spot things like buildup, cracks, or root intrusion without second-guessing.
Best for:
- Older homes with longer sewer lines
- Landlords or property managers
- Frequent or more detailed inspections
A Quick Buying Tip
It’s tempting to just go for the most powerful option, but that’s not always necessary.
If you’re only doing occasional checks, a basic sewer camera like the S5517DC will get the job done. If you’ve had repeat issues, moving up to a pipeline camera with features like self-leveling (like the S8951DSRTM68R) is usually worth it.
And if you want maximum clarity and fewer blind spots, stepping up to a full sewer inspection camera like the S830ASMKT makes the process a lot easier.
For most homeowners, the mid-range option tends to be the sweet spot.
How to Use a Pipe Inspection Camera
If you decide to use a camera, the process is fairly straightforward.
- Locate an access point
This is usually a cleanout pipe outside your home or in the basement. - Feed the camera into the pipe
Move slowly and steadily. - Watch the monitor carefully
Look for blockages, cracks, or anything unusual. - Note the distance
Many systems show how far the camera has traveled, which helps locate the problem area.
Take your time here. Rushing can cause you to miss important details.
What Problems Should You Look For?
When reviewing the footage, keep an eye out for:
- Tree roots entering the pipe
- Standing water (can indicate a slope issue)
- Cracks or broken sections
- Heavy buildup along pipe walls
If you spot any of these, it’s usually best to consult a professional before attempting major repairs.
When to Call a Professional
DIY inspection is great, but it has limits.
You should call a licensed plumber if:
- You find structural damage in the pipe
- The blockage can’t be cleared easily
- You’re unsure what you’re seeing on the camera
- There’s repeated backup despite cleaning
Think of DIY inspection as a way to understand the problem, not always fix it completely.
Final Thoughts
Taking a proactive approach to your home’s plumbing can save you time, money, and stress. Most issues start small, and regular checks help you catch them before they turn into emergencies.
If you’re comfortable handling basic maintenance, adding a sewer camera to your toolkit—or renting one when needed—can give you a clear view of what’s happening inside your pipes. It’s one of the most effective ways to move from guessing to actually knowing.
Start simple, stay consistent, and you’ll keep your plumbing system in much better shape over time.